
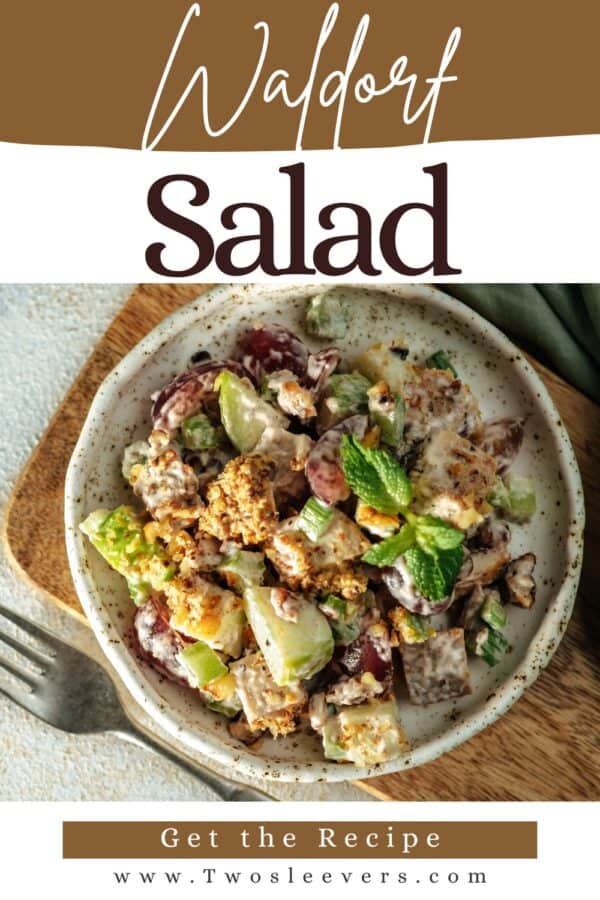
If you’re craving a crisp, creamy, and timeless salad with a perfect balance of fresh fruit, crunchy nuts, and a touch of tang, you’re going to love this Waldorf Salad. Whether served as a light lunch, a side dish for dinner, or part of a festive holiday spread, this recipe is a classic that never goes out of style.

Why You’ll Love This Spectacular Salad
- Fast. You can whip it up in under 15 minutes. No cooking required!
- Fresh. Apples, grapes, and celery come together for an ultra-refreshing bite.
- Versatile. Great for everyday meals, brunches, potlucks, or holiday dinners.
- Nutritious. Packed with fiber, vitamins, and healthy fats.
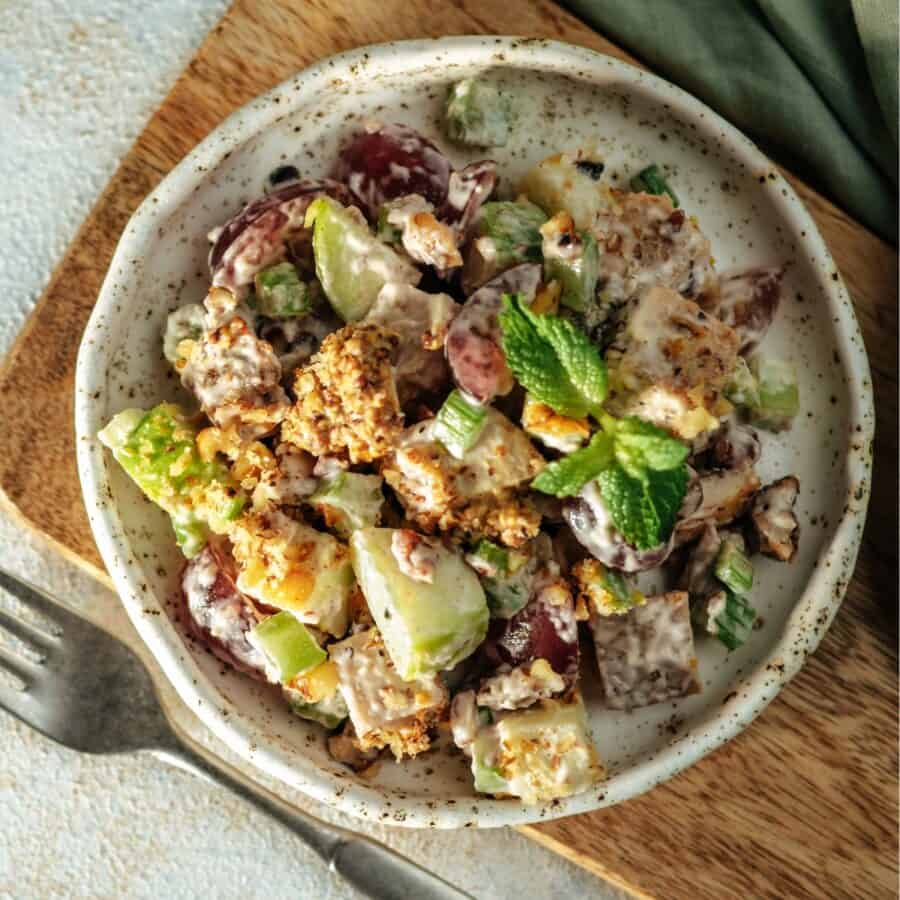
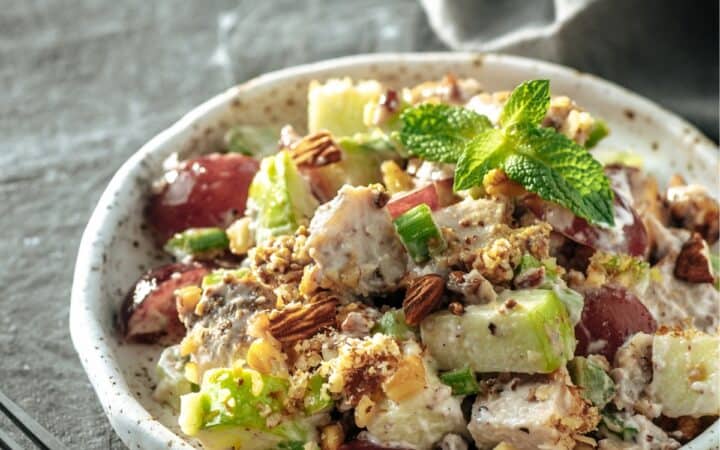
This upgraded version of the traditional Waldorf Salad is a beautiful balance of creamy dressing, tart apples, sweet grapes, crunchy walnuts, and fresh celery. It’s just as perfect for meal prep as it is for special occasions!
Why Is It Called Waldorf Salad?
The Waldorf Salad is named after the Waldorf-Astoria Hotel in New York City, where it was first created in 1896. The original version was a simple mix of apples, celery, and mayonnaise, developed by Oscar Tschirky, the hotel’s maître d’hôtel, not a chef, but a well-known hospitality figure at the time.
Over time, the recipe evolved to include grapes and walnuts, turning it into the creamy, crunchy fruit-and-nut salad we recognize today. Its name stuck as the dish became popular among the hotel’s elite guests and was eventually adopted across the U.S. and beyond. So, the salad’s name pays homage to its iconic and elegant origin.
What Does It Taste Like?
Waldorf Salad has a wonderfully refreshing and balanced flavor profile that combines sweet, tangy, and savory elements.
The crisp apples and juicy grapes lend a natural sweetness, while the celery adds a clean, slightly bitter crunch that keeps the salad light and refreshing. Toasted walnuts introduce an earthy richness and satisfying texture, making each bite interesting. The creamy dressing adds a smooth, tangy component that ties all the ingredients together without overwhelming them. A touch of lemon juice brightens the overall flavor and keeps the apples from browning, enhancing the salad’s fresh taste.
Altogether, Waldorf Salad is crisp, creamy, and subtly sweet with a hint of tang, making it a timeless and elegant dish.
Ingredients You’ll Need
- Crisp Apples - These form the heart of the salad, offering a sweet-tart flavor and juicy crunch. Keeping the skin on adds visual appeal and texture. Varieties like Honeycrisp, Fuji, or Gala hold up well in the creamy dressing and don’t turn mushy.
- Red or Green Grapes - Juicy and naturally sweet, grapes complement the apples while adding a burst of flavor in every bite. Using both red and green grapes adds a pop of color and balance in sweetness.
- Celery - Its crisp texture provides a refreshing contrast to the soft fruit. It adds an earthy, slightly peppery note that helps balance the sweetness of the apples and grapes.
- Toasted Nuts - Essential for the signature crunch, walnuts also lend a nutty richness and earthy depth that enhances the salad’s flavor complexity. Toasting intensifies their aroma and adds warmth.
- Mayonnaise - Acts as the creamy base for the dressing, binding the ingredients together. It delivers richness and a smooth mouthfeel that contrasts beautifully with the crisp produce.
- Greek Yogurt - Lightens the dressing by adding tang and cutting through the heaviness of the mayo. It introduces a slight acidity that complements the lemon and enhances the overall flavor.
- Lemon Juice - Prevents the apples from oxidizing (turning brown) while adding a bright, citrusy acidity that livens up the dish.
- Salt & Pepper - These basic seasonings enhance and unify all the flavors in the salad. A touch of salt elevates the sweetness, while black pepper adds subtle warmth.
- Optional Garnishes - Fresh parsley adds a touch of herbal brightness, lettuce cups make for an elegant presentation, and extra nuts offer more texture and flavor contrast when serving.
How To Make Waldorf Salad
- Prepare the Produce. Start by dicing the apples into small bite-sized chunks. No need to peel them unless you prefer it. Halve the grapes and slice the celery thinly. Place everything in a large mixing bowl.
- Toast the Walnuts. In a dry skillet over medium heat, toast the walnuts for 3–5 minutes, stirring often, until fragrant. Let them cool slightly, then roughly chop.
- Make the Dressing. In a small bowl, whisk together the mayonnaise, Greek yogurt, lemon juice, salt, and pepper until smooth and creamy.
- Combine. Pour the dressing over the apple mixture and toss to coat everything evenly. Add the toasted walnuts and gently fold them in to keep their crunch.
- Chill and Serve. For best flavor, chill the salad for at least 15 minutes before serving. Serve on its own, over lettuce leaves, or as a side with chicken or turkey.
Tips And Tricks
Here are a few pro tips to ensure your Waldorf Salad turns out perfectly every time:
- Use fresh, crisp apples. Softer apples will get mushy in the dressing. Stick to firmer varieties like Fuji, Gala, or Honeycrisp.
- Toast your nuts. It makes a huge difference in flavor and texture. Just a few minutes in a dry skillet can bring out their nutty richness.
- Balance the dressing. Taste the dressing before mixing. If it’s too tangy, add a bit of honey; too thick, thin it with a splash of milk.
- Prevent browning. Toss the apples in lemon juice right after chopping to keep them from turning brown.
Variations
While the classic version of Waldorf Salad is amazing on its own, these creative twists can elevate it even further:
- Add Chicken. Turn it into a full meal by adding chopped rotisserie chicken or grilled chicken breast.
- Use Pecans or Almonds. Not a walnut fan? Try toasted pecans or slivered almonds instead.
- Add Dried Fruit. Raisins, cranberries, or chopped dates add extra sweetness and chew.
- Make it Vegan. Use a plant-based mayo and coconut yogurt for a fully dairy-free and egg-free version.
- Serve It Warm. Try sautéing the apples and grapes briefly before tossing them with warm toasted walnuts and a slightly thinner dressing.
What To Enjoy With Waldorf Salad?
Waldorf Salad is a versatile dish that pairs well with a variety of main courses or can stand alone as a light lunch. Here are some delicious pairing ideas:
- Grilled Chicken or Turkey - The creamy, sweet crunch of the salad is a great contrast to savory grilled meats.
- Quiche or Frittata - Perfect for brunch!
- Soup and Salad Combo - Serve alongside butternut squash soup , tomato bisque , or chicken noodle .
- Crackers or Croissants - For a light lunch or picnic-style meal.
- Lettuce Wraps - Spoon into butter lettuce cups for a low-carb presentation.
How Long Does It Last?
Waldorf Salad is best served fresh but can be stored in an airtight container in the refrigerator for up to 3 days.
The apples may lose some crispness, but the flavor will still be delicious. If making ahead, store the dressing separately and toss just before serving.
More Simple Salad Recipes
- Cheesecake Fruit Salad
- Seven Layer Salad
- Chicken Cobb Salad
- Caesar Salad
- Big Mac Salad
Waldorf Salad Recipe | Classic Salad With A Modern Twist
Ingredients
- ▢ 2 Apples , cored and chopped
- ▢ 1 cup Red Grapes , halved
- ▢ 1 cup Green Grapes , halved
- ▢ 1 cup Celery , chopped
- ▢ 3/4 cup Walnuts , chopped
- ▢ 1/3 cup Mayonnaise
- ▢ 1/3 cup Plain Greek Yogurt
- ▢ 1 tbsp Lemon Juice
- ▢ 1/4 tsp Kosher Salt
- ▢ 1/8 tsp Ground Black Pepper
Instructions
- Prepare the Produce. Start by dicing the apples into small bite-sized chunks. No need to peel them unless you prefer it. Halve the grapes and slice the celery thinly. Place everything in a large mixing bowl.
- Toast the Walnuts. In a dry skillet over medium heat, toast the walnuts for 3–5 minutes, stirring often, until fragrant. Let them cool slightly, then roughly chop.
- Make the Dressing. In a small bowl, whisk together the mayonnaise, Greek yogurt, lemon juice, salt, and pepper until smooth and creamy.
- Combine. Pour the dressing over the apple mixture and toss to coat everything evenly. Add the toasted walnuts and gently fold them in to keep their crunch.
- Chill and Serve. For best flavor, chill the salad for at least 15 minutes before serving. Serve on its own, over lettuce leaves, or as a side with chicken or turkey.
Get support & connect with our community on Facebook!

If you already signed up, you should have received an email with a password to give you unlimited access to our FREE Printable Library. The password is case sensitive. Enter it below and get printing!
Password:

Waldorf Salad Recipe | Classic Salad With A Modern Twist
Ingredients
- 2 Apples cored and chopped
- 1 cup Red Grapes halved
- 1 cup Green Grapes halved
- 1 cup Celery chopped
- 3/4 cup Walnuts chopped
- 1/3 cup Mayonnaise
- 1/3 cup Plain Greek Yogurt
- 1 tbsp Lemon Juice
- 1/4 tsp Kosher Salt
- 1/8 tsp Ground Black Pepper
Instructions
- Prepare the Produce. Start by dicing the apples into small bite-sized chunks. No need to peel them unless you prefer it. Halve the grapes and slice the celery thinly. Place everything in a large mixing bowl.
- Toast the Walnuts. In a dry skillet over medium heat, toast the walnuts for 3–5 minutes, stirring often, until fragrant. Let them cool slightly, then roughly chop.
- Make the Dressing. In a small bowl, whisk together the mayonnaise, Greek yogurt, lemon juice, salt, and pepper until smooth and creamy.
- Combine. Pour the dressing over the apple mixture and toss to coat everything evenly. Add the toasted walnuts and gently fold them in to keep their crunch.
- Chill and Serve. For best flavor, chill the salad for at least 15 minutes before serving. Serve on its own, over lettuce leaves, or as a side with chicken or turkey.
Waldorf Salad Recipe | Classic Salad With A Modern Twist https://twosleevers.com/waldorf-salad-recipe/
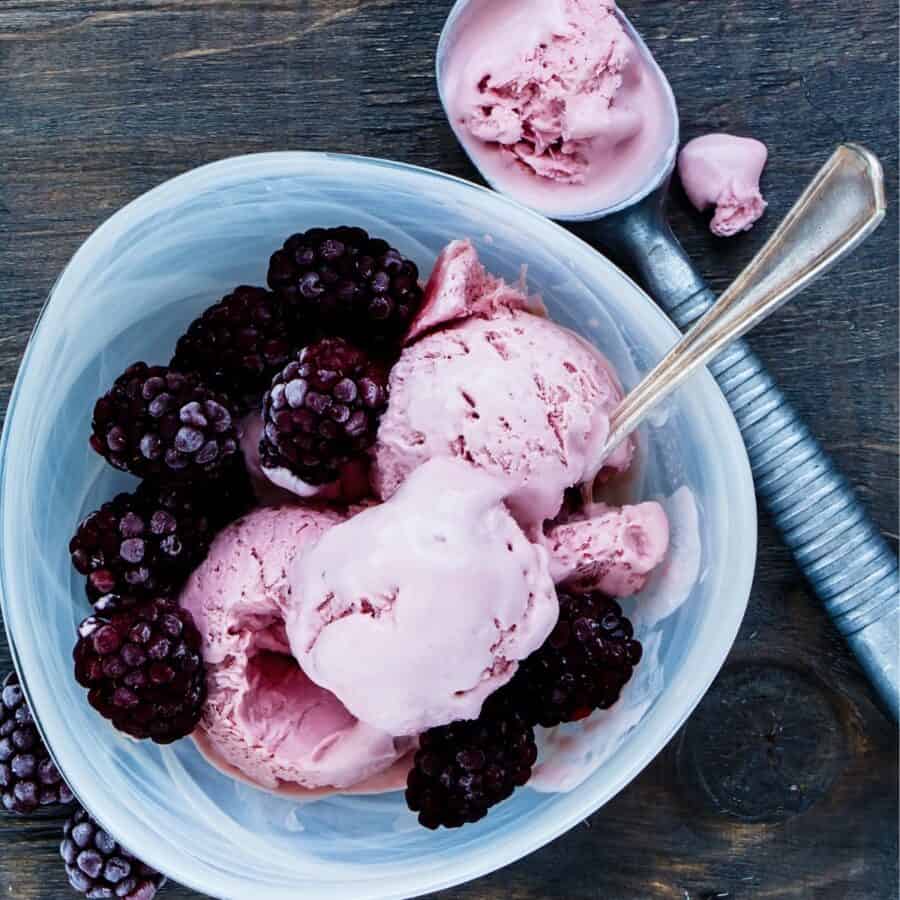
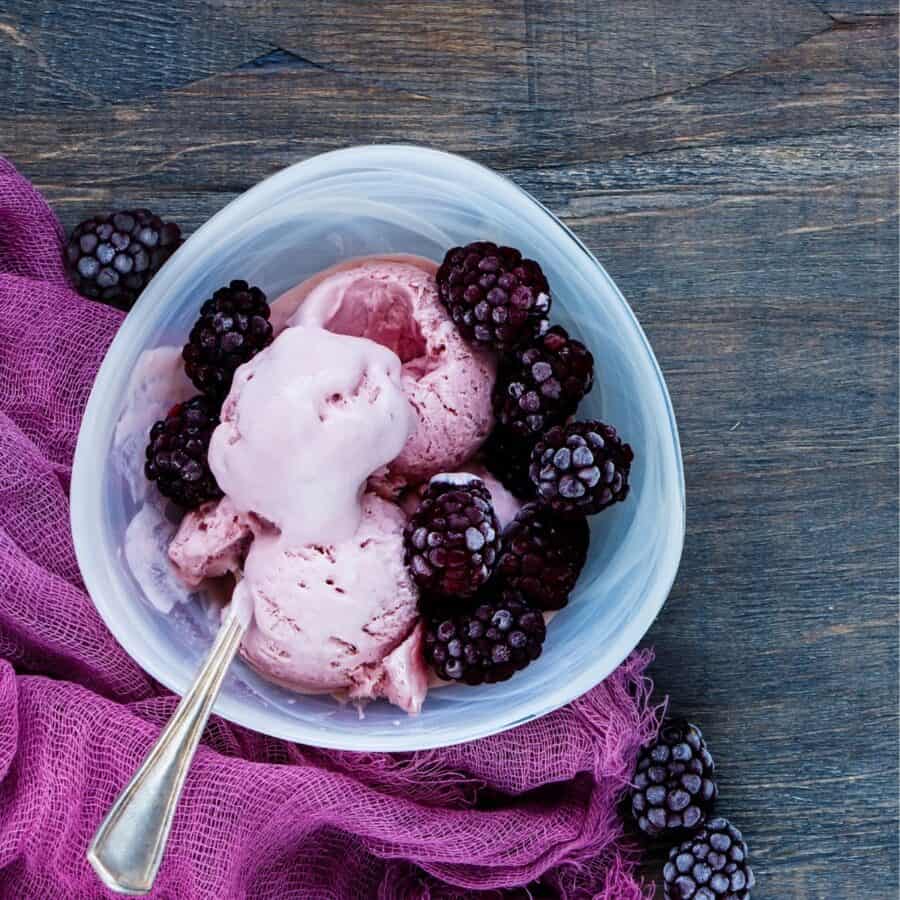
If you’re a fan of fruity, creamy frozen desserts that celebrate the flavors of summer, you’re going to love this homemade Blackberry Ice Cream! Bursting with juicy blackberries and churned to creamy perfection, this recipe is a refreshing treat that’s surprisingly simple to make.
Why You’ll Love This Incredible Ice Cream
- Seasonal & Fresh. A perfect way to use juicy summer blackberries or frozen ones year-round.
- Creamy Texture. This ice cream is ultra-smooth and scoopable, thanks to a custard base or coconut milk alternative.
- No Artificial Flavors. Made from real fruit with no dyes or fake flavorings.
- Customizable. You can churn it with or without eggs, add mix-ins like chocolate chunks, or swirl in lemon curd.
With just a handful of simple ingredients, you’ll have a homemade treat that rivals any premium store-bought pint. Serve it at your next barbecue or enjoy a scoop after a sunny afternoon walk. It’s always the right time for blackberry ice cream.
What Does Blackberry Ice Cream Taste Like?
Blackberry ice cream offers a delicious balance of tart and sweet, with the berries lending a rich magenta hue and natural complexity.
When blended with cream, sugar, and vanilla, the flavor becomes deep, fruity, and indulgent. It’s like summer in a bowl.
It’s one of those desserts that looks as good as it tastes and keeps you coming back for just one more spoonful.
Ingredients You’ll Need
- Fresh or Frozen Blackberries - These are the star of the recipe, providing vibrant color and a bold, naturally fruity flavor. Fresh summer berries deliver peak flavor, but frozen ones work just as well year-round.
- Granulated Sugar - Adds sweetness to balance the tartness of the blackberries. It also helps create a smooth texture by lowering the freezing point of the ice cream.
- Heavy Cream - Essential for creaminess, it provides fat and richness, giving the ice cream a velvety mouthfeel and scoopable consistency.
- Whole Milk - Balances the richness of the cream, making the ice cream less dense while still maintaining a luxurious texture.
- Egg Yolks - Used in custard-style ice cream, they create a thicker, creamier texture and contribute a subtle richness to the flavor.
- Vanilla Extract - Enhances and complements the blackberry flavor with a mellow, aromatic warmth.
- Lemon Juice - Brightens the flavor and adds a bit of acidity, which sharpens the berry notes and prevents the ice cream from tasting flat.
- Salt - A small but powerful addition that intensifies all the other flavors, balancing sweetness and enhancing the overall taste of the ice cream.
How To Make Blackberry Ice Cream
- Cook the Blackberries. In a saucepan, combine the blackberries, half the sugar, and lemon juice. Cook over medium heat until the berries burst and become syrupy, about 8–10 minutes. Press the mixture through a fine-mesh sieve to remove the seeds. Cool the puree completely.
- Prepare the Ice Cream Base. In a medium saucepan, whisk egg yolks (if using) with the remaining sugar until pale. Slowly add warm milk and cook over low heat, stirring constantly, until the custard thickens slightly and coats the back of a spoon. Don’t boil! Remove from heat and stir in heavy cream, vanilla, salt, and the cooled blackberry puree.
- Chill the Mixture. Cover and refrigerate for at least 4 hours or overnight. Cold base = better texture when churned.
- Churn. Pour the chilled mixture into an ice cream maker and churn according to your machine’s instructions (usually 20–25 minutes). The ice cream should thicken to a soft-serve consistency.
- Freeze. Transfer the churned ice cream to an airtight container. Press parchment or plastic wrap on the surface and freeze for 2–4 hours or until scoopable.
Tips And Tricks
Creating a creamy, fruity batch of blackberry ice cream doesn’t have to be complicated! Here are a few helpful pointers:
- Strain the Puree. Blackberry seeds can be gritty, so press the cooked berries through a fine mesh sieve for the smoothest texture.
- Use Cold Ingredients. The colder your mixture before churning, the creamier your ice cream will be.
- Freeze the Ice Cream Bowl. If using a bowl-style ice cream maker, freeze it overnight to ensure proper churning.
Variations
Blackberry ice cream is versatile! Try one of these delicious variations to put your own spin on this summer classic:
- Blackberry Swirl - Swirl in an extra ribbon of blackberry puree after churning.
- Blackberry Cheesecake - Add chunks of cream cheese or cheesecake filling for a tangy, indulgent treat.
- Dairy-Free Version - Substitute coconut milk for the dairy and skip the eggs for a rich vegan version.
- Blackberry Lemon - Add more lemon juice and zest to brighten the flavor even more.
What To Enjoy With Blackberry Ice Cream
This fruity frozen dessert pairs well with a variety of complementary flavors and textures:
- Waffle Cones or Sugar Cones - Classic and fun to serve at parties.
- Shortbread Cookies - Crumble some over the top for a buttery contrast.
- Fresh Berries - Add a handful of fresh blackberries or raspberries for a double-berry delight.
- Lemon Pound Cake - A slice of lemony cake and a scoop of blackberry ice cream is pure heaven.
- Whipped Cream - A dollop of whipped cream takes it over the top.
How Long Does It Last?
Homemade blackberry ice cream can be stored in the freezer for up to 2 weeks. For best flavor and texture, consume it within the first 5–7 days.
Be sure to press parchment paper or plastic wrap directly onto the surface before sealing the container to prevent ice crystals from forming.
More Frozen Treats
- Keto Ice Cream
- Cookies and Cream Ice Cream
- Brownie Ice Cream
- Coconut Ice Cream
- Watermelon Popsicles
- Banana Ice Cream
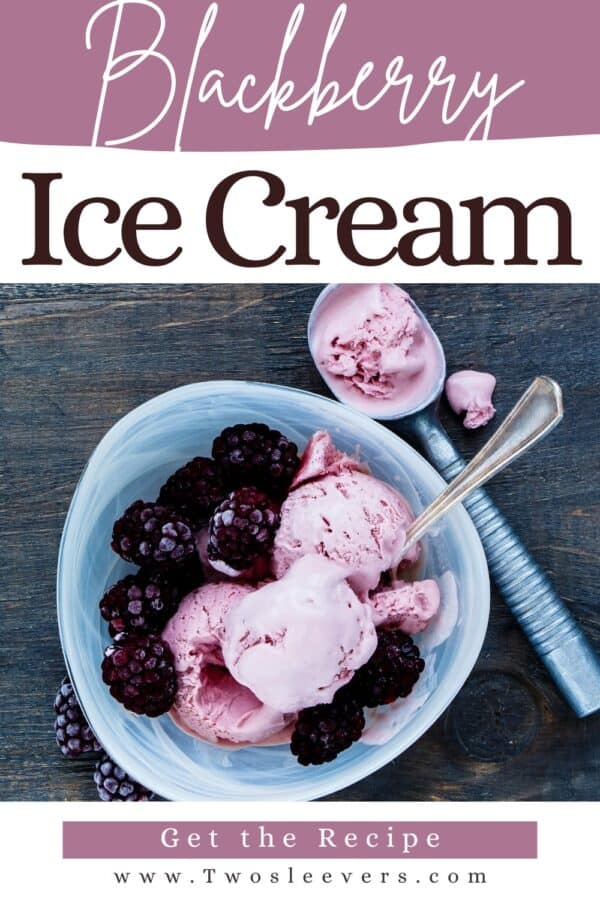

Blackberry Ice Cream Recipe | Homemade Blackbery Ice Cream
Ingredients
- ▢ 2 cups Blackberries
- ▢ 3/4 cup Granulated Sugar
- ▢ 1 1/2 cups Heavy Cream
- ▢ 1 1/2 cups Whole Milk
- ▢ 4 Egg Yolks
- ▢ 1 tsp Vanilla Extract
- ▢ 1 tbsp Lemon Juice
- ▢ 1/8 tsp Kosher Salt
Instructions
- Cook the Blackberries. In a saucepan, combine the blackberries, half the sugar, and lemon juice. Cook over medium heat until the berries burst and become syrupy, about 8–10 minutes. Press the mixture through a fine-mesh sieve to remove the seeds. Cool the puree completely.
- Prepare the Ice Cream Base. In a medium saucepan, whisk egg yolks (if using) with the remaining sugar until pale. Slowly add warm milk and cook over low heat, stirring constantly, until the custard thickens slightly and coats the back of a spoon. Don’t boil! Remove from heat and stir in heavy cream, vanilla, salt, and the cooled blackberry puree.
- Chill the Mixture. Cover and refrigerate for at least 4 hours or overnight. Cold base = better texture when churned.
- Churn. Pour the chilled mixture into an ice cream maker and churn according to your machine’s instructions (usually 20–25 minutes). The ice cream should thicken to a soft-serve consistency.
- Freeze. Transfer the churned ice cream to an airtight container. Press parchment or plastic wrap on the surface and freeze for 2–4 hours or until scoopable.
