
If you’re craving classic, fluffy pancakes but want to keep it plant-based, these Vegan Pancakes are exactly what you need! Made with simple, wholesome ingredients, they deliver the perfect balance of fluffiness and flavor without any eggs or dairy.

Why You’ll Love This Brilliant Breakfast
- Fast & Easy. Ready in under 30 minutes with minimal prep.
- Dairy & Egg-Free. Perfect for vegans or those with allergies.
- Fluffy & Tender. Achieve that soft, pillowy texture everyone loves.
- Versatile. Customize with add-ins like blueberries, chocolate chips, or nuts.
- Healthy & Delicious. Made with whole ingredients and no artificial fillers.
With just a few pantry staples and easy steps, these pancakes make a delicious breakfast that everyone will enjoy. Whether you’re cooking for family, friends, or yourself, these vegan pancakes are a guaranteed crowd-pleaser.
What Do Vegan Pancakes Taste Like?
Vegan pancakes are lightly sweet with a golden, slightly caramelized exterior that gives a hint of crispness, while the inside remains soft, tender, and fluffy.
The flavor is warm and inviting, with subtle notes from vanilla and a gentle earthiness or nuttiness if almond, oat, or soy milk is used.
When served with maple syrup, fruit, or vegan butter, the pancakes become a harmonious combination of sweet, buttery, and slightly tangy flavors, creating a satisfying breakfast or brunch experience that’s both indulgent and comforting, all without any animal products.
Are They As Good As Regular Pancakes?
Vegan pancakes have a wonderfully comforting and familiar taste, very much like traditional pancakes, but often with subtle differences depending on the plant-based ingredients used.
Ingredients You’ll Need
- All-Purpose Flour - Acts as the backbone of the pancake. It provides structure and forms the network that holds all other ingredients together. Without it, pancakes would fall apart and lack shape.
- Baking Powder - The leavening agent that makes pancakes light and fluffy. It releases carbon dioxide when it reacts with the liquid, creating air pockets in the batter that give the pancakes lift.
- Sugar - Adds sweetness to the pancakes, balancing flavors. Sugar also helps with browning, giving pancakes a nice golden color on the outside.
- Salt - Enhances and balances the flavors of the batter. Even in sweet pancakes, a pinch of salt brings out the depth of flavor and prevents the pancakes from tasting flat.
- Plant-Based Milk - Moistens the batter so it can be poured or scooped. It also adds flavor depending on the type of milk used, and its proteins contribute slightly to the pancake’s texture.
- Apple Cider Vinegar or Lemon Juice - Reacts with the baking powder to boost rise and create fluffiness. It also slightly tenderizes the batter and balances sweetness with a subtle tang.
- Vanilla Extract - Adds aromatic warmth and depth to the flavor. Even a small amount enhances the overall taste, giving pancakes a sweet, inviting aroma.
- Vegetable Oil or Melted Coconut Oil - Adds fat to the batter, keeping pancakes tender and moist. It also prevents sticking and helps create a slightly crisp exterior while keeping the inside soft.
How To Make Vegan Pancakes
- Mix Dry Ingredients. In a large bowl, whisk together flour, baking powder, sugar, and salt.
- Combine Wet Ingredients. In a separate bowl, mix plant-based milk, apple cider vinegar, vanilla extract, and oil.
- Make the Batter. Pour wet ingredients into dry and gently stir until just combined. Don’t overmix. Lumps are okay!
- Rest the Batter. Let it sit for 5 minutes to activate the baking powder.
- Cook the Pancakes. Heat a non-stick pan or griddle over medium heat. Pour batter to form pancakes about 4 inches wide. Cook until bubbles form on top, then flip and cook until golden on both sides.
- Serve Warm. Stack your pancakes high and top with maple syrup, fresh fruit, or your favorite vegan butter.

Tips And Tricks
Making perfect vegan pancakes can be easier than you think with a few helpful tips and tricks. Here’s what you need to know:
- Don’t overmix the batter . Stir just until combined; a few lumps are okay. Overmixing can make pancakes tough instead of fluffy.
- Let the batter rest . Allow it to sit for 5–10 minutes so the baking powder activates and the pancakes rise better.
- Use a non-stick pan or griddle . This prevents sticking and ensures even cooking. A light brush of oil can help if needed.
Variations
Vegan pancakes are incredibly versatile, and you can easily switch up the flavors and textures to suit your taste. Here are some delicious variations to try:
- Banana Pancakes - Mash 1 ripe banana into the batter for natural sweetness and a moist, tender texture.
- Blueberry - Fold in fresh or frozen blueberries for bursts of fruity flavor in every bite.
- Chocolate Chip Pancakes - Add vegan chocolate chips for a sweet, indulgent breakfast treat.
- Pumpkin Spice - Mix in pumpkin puree and pumpkin pie spice for a seasonal twist.
What To Eat With Vegan Pancakes
Vegan pancakes are incredibly versatile, and pairing them with complementary sides or toppings can make your meal even more delicious. Here’s a list of ideas:
- Fresh fruit like berries, sliced bananas, or peaches
- Maple syrup or agave nectar
- Vegan yogurt or nut butter
- A cup of your favorite coffee or herbal tea
How Long Do They Last?
Store leftover pancakes in an airtight container in the refrigerator for up to 3 days. Reheat gently in a skillet or toaster oven to retain their texture.
Can You Freeze Them?
Yes! Let pancakes cool completely, then layer with parchment paper and freeze in a sealed container or bag.
Reheat the pancakes from frozen in a toaster or oven until warm.
More Of Our Best Breakfast Ideas
- Sausage Rolls
- Buttermilk Waffles
- Blueberry Smoothie
- Tofu Scramble
- Chocolate Oatmeal
- Cinnamon Roll Pancakes


Vegan Pancakes | Homemade Plant Based Pancake Recipe
Ingredients
- ▢ 2 cups All Purpose Flour
- ▢ 2 tbsp Baking Powder
- ▢ 3 tbsp Granulated Sugar
- ▢ 1/2 tsp Kosher Salt
- ▢ 1 1/2 cups Almond Milk
- ▢ 1 tbsp Apple Cider Vinegar
- ▢ 1 tsp Vanilla Extract
- ▢ 3 tbsp Vegetable Oil
Instructions
- Mix Dry Ingredients. In a large bowl, whisk together flour, baking powder, sugar, and salt.
- Combine Wet Ingredients. In a separate bowl, mix plant-based milk, apple cider vinegar, vanilla extract, and oil.
- Make the Batter. Pour wet ingredients into dry and gently stir until just combined. Don’t overmix. Lumps are okay!
- Rest the Batter. Let it sit for 5 minutes to activate the baking powder.
- Cook the Pancakes. Heat a non-stick pan or griddle over medium heat. Pour batter to form pancakes about 4 inches wide. Cook until bubbles form on top, then flip and cook until golden on both sides.
- Serve Warm. Stack your pancakes high and top with maple syrup, fresh fruit, or your favorite vegan butter.
Get support & connect with our community on Facebook!

If you already signed up, you should have received an email with a password to give you unlimited access to our FREE Printable Library. The password is case sensitive. Enter it below and get printing!
Password:

Vegan Pancakes | Homemade Plant Based Pancake Recipe
Ingredients
- 2 cups All Purpose Flour
- 2 tbsp Baking Powder
- 3 tbsp Granulated Sugar
- 1/2 tsp Kosher Salt
- 1 1/2 cups Almond Milk
- 1 tbsp Apple Cider Vinegar
- 1 tsp Vanilla Extract
- 3 tbsp Vegetable Oil
Instructions
- Mix Dry Ingredients. In a large bowl, whisk together flour, baking powder, sugar, and salt.
- Combine Wet Ingredients. In a separate bowl, mix plant-based milk, apple cider vinegar, vanilla extract, and oil.
- Make the Batter. Pour wet ingredients into dry and gently stir until just combined. Don’t overmix. Lumps are okay!
- Rest the Batter. Let it sit for 5 minutes to activate the baking powder.
- Cook the Pancakes. Heat a non-stick pan or griddle over medium heat. Pour batter to form pancakes about 4 inches wide. Cook until bubbles form on top, then flip and cook until golden on both sides.
- Serve Warm. Stack your pancakes high and top with maple syrup, fresh fruit, or your favorite vegan butter.
Vegan Pancakes | Homemade Plant Based Pancake Recipe https://twosleevers.com/vegan-pancakes/
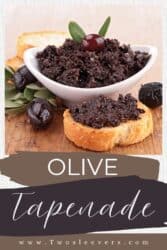
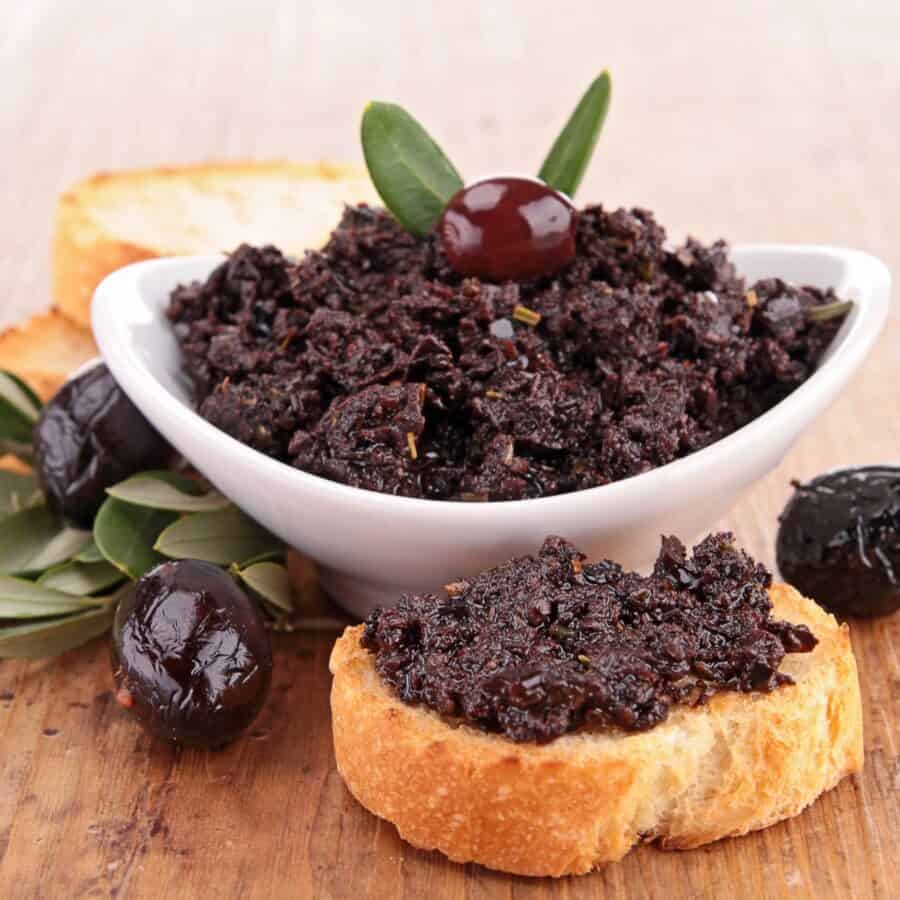
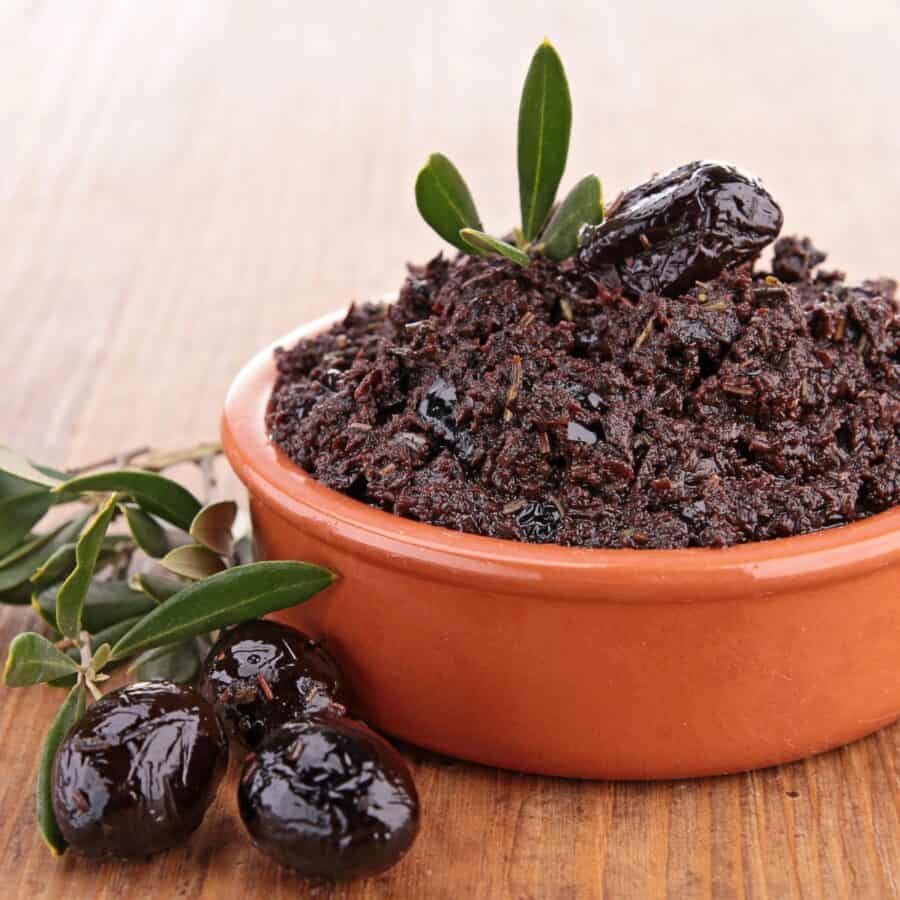
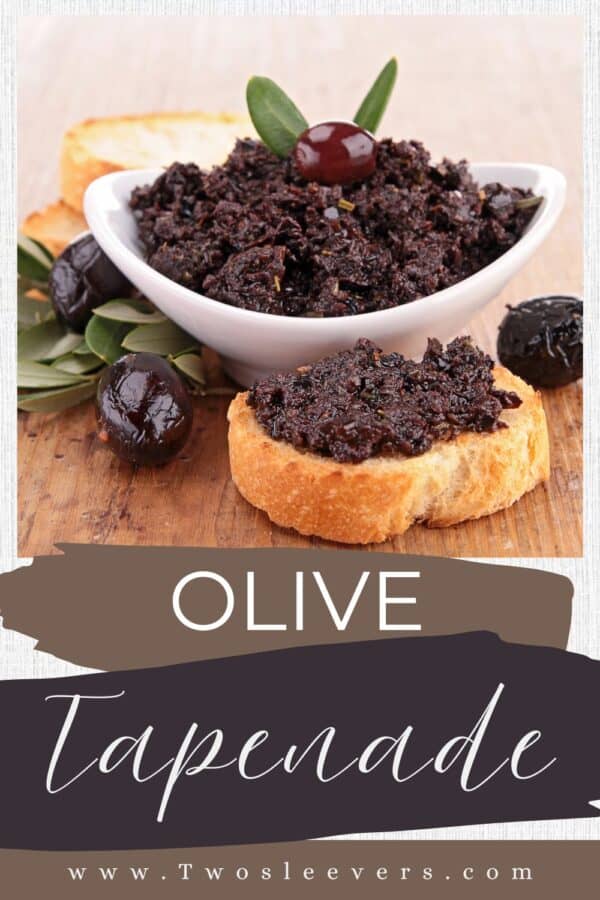
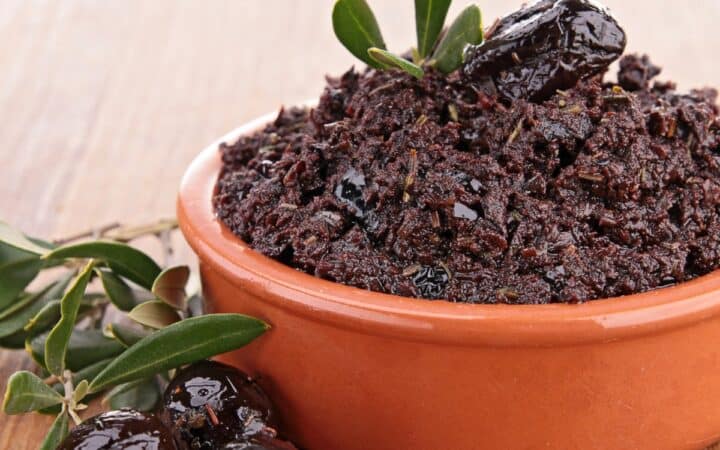
If you’re a fan of bold Mediterranean flavors, you’re going to love this Olive Tapenade! Made with briny olives, capers, garlic, and fresh herbs, this spread is vibrant, punchy, and irresistibly savory. Whether you serve it on crostini, alongside grilled meats, or as part of a cheese board, this tapenade delivers big flavor with very little effort.
Why You’ll Love This Spectacular Spread
- Fast. Ready in just 10 minutes with the help of your food processor.
- Easy. Toss the ingredients in, pulse a few times, and done!
- Versatile. Works as a dip, condiment, or sandwich spread.
- Bold. Packed with umami-rich flavor that elevates every bite.
Tapenade brings a little taste of the Mediterranean to your kitchen. It’s perfect for entertaining, meal prep, or simply jazzing up your weekday lunch. No cooking required, just blend and enjoy.
What Is Olive Tapenade?
Olive tapenade is a traditional Provençal spread made from olives, capers, and anchovies, often enhanced with garlic, lemon, and herbs. While it originated in the south of France, variations of olive spreads exist all across the Mediterranean.
It’s most commonly served as a dip or spread with bread or crackers, but it’s also incredible as a sandwich spread, pasta topping, or paired with grilled chicken or fish.
Is It Healthy?
Olive tapenade is a flavorful, nutrient-rich condiment that supports a heart-healthy diet. Just be mindful of sodium and enjoy reasonable portions.
Spread it on whole grain toast, use it as a dip for veggies, or spoon it over grilled fish or chicken for a delicious and health-conscious boost.
Ingredients You’ll Need
- Olives - The star of the tapenade, olives form the base of the spread. Using both black (like Kalamata) and green olives creates a balance of bold, earthy flavor and sharper, slightly bitter notes. Pitting them ensures a smooth blending process and a uniform texture.
- Capers - Small but mighty, capers add a briny, tangy punch that cuts through the richness of the olives. They help brighten the flavor and give the tapenade a zesty, Mediterranean kick.
- Garlic - Just one clove is enough to infuse the tapenade with a sharp, savory depth. It enhances the overall aroma and rounds out the strong olive and caper flavors.
- Fresh Parsley - This herb brings a pop of color and a clean, slightly peppery freshness. It helps balance the intensity of the olives and garlic.
- Lemon Juice - Freshly squeezed lemon juice adds acidity, which lifts and balances the salty and oily components. It makes the whole spread feel brighter and more vibrant.
- Olive Oil - Extra virgin olive oil gives the tapenade a smooth, luxurious texture while deepening its flavor. It binds all the ingredients together into a cohesive, spreadable consistency.
- Anchovy Fillets - These provide an umami-rich boost and extra depth without making the tapenade taste “fishy.” A single fillet can dramatically enhance the savory complexity.
- Red Pepper Flakes - Just a pinch adds subtle heat that balances the briny and tangy elements. It’s perfect if you want a little spicy edge.
How To Make Olive Tapenade
- Prep Your Ingredients. Pit the olives if needed, rinse the capers, peel the garlic, and chop the parsley.
- Blend the Tapenade. In a food processor, combine olives, capers, garlic, parsley, lemon juice, and anchovy (if using). Pulse a few times to start breaking it down.
- Add the Olive Oil. With the processor running, drizzle in the olive oil. Pulse until the mixture reaches your desired consistency. Try it chunky or smooth, it’s up to you!
- Taste and Adjust. Add more lemon juice, pepper flakes, or olive oil as needed. Some olives are saltier than others, so taste before adding extra salt.
- Serve or Store. Transfer to a serving bowl and garnish with extra parsley or a drizzle of oil. Store leftovers in an airtight container in the fridge for up to 1 week.
Tips And Tricks
Making olive tapenade at home is wonderfully simple, but a few smart tips and tricks can help you take this briny, savory spread from good to gourmet. Here’s how to get the best flavor and texture every time:
- Use high-quality olives. Your tapenade is only as good as your olives. Opt for briny, flavorful varieties like Kalamata or Castelvetrano, and make sure they’re pitted before blending.
- Don’t overprocess. Pulse the ingredients instead of pureeing them. Tapenade should have some texture, not be a smooth paste. Aim for a coarse, spreadable consistency.
- Taste before seasoning. Because the ingredients are naturally salty, hold off on adding any extra salt until you’ve tasted the finished blend.
Variations
While the classic olive tapenade is delicious on its own, there are plenty of fun and flavorful variations you can try to tailor it to your tastes or make use of what you have on hand. Here are some creative ways to switch it up:
- Sun-Dried Tomato - Add a handful of oil-packed sun-dried tomatoes to the mix for a sweet, tangy twist and gorgeous red hue.
- Roasted Red Pepper - Blend in a few roasted red peppers for a slightly smoky, sweeter flavor that balances the briny olives.
- Nutty - Try adding toasted pine nuts, almonds, or walnuts for a richer texture and a mild, buttery flavor.
- Spicy - Crank up the heat with a dash of red pepper flakes, a spoonful of harissa, or a chopped hot chili pepper.
What To Eat With Olive Tapenade
Olive tapenade is a true multitasker in the kitchen. Here are some of our favorite ways to use it:
- Appetizer Board - Serve it with crostini, crackers , or pita chips. Add it to charcuterie or mezze platters.
- Sandwich Spread - Smear it on focaccia, wraps, or panini for an instant flavor boost.
- Pasta Sauce - Toss it with warm pasta and a splash of pasta water for a quick, savory dish.
- Grilled Meats or Fish - Spoon tapenade over grilled chicken , steak, or salmon.
- Eggs - Use it as a topping for scrambled eggs, omelets, or avocado toast.
How Long Does It Last?
Tapenade keeps well in the fridge for up to 1 week. Store it in an airtight container and top it with a thin layer of olive oil to preserve freshness.
Can You Freeze It?
Yes! You can freeze olive tapenade for up to 2 months. Use freezer-safe containers or silicone ice cube trays to portion it out. Thaw in the refrigerator and stir before serving.
More Awesome Appetizers
- Hawaiian Meatballs
- Cream Cheese Dip
- Chicken Wontons
- Pretzel Bites
- Chili Cheese Dip
Olive Tapenade Recipe | Easy Mediterranean Olive Spread
Ingredients
- ▢ 2 cups Olives
- ▢ 2 tbsp Capers
- ▢ 1 clove Garlic
- ▢ 2 tbsp Parsley
- ▢ 2 tbsp Lemon Juice
- ▢ 1/4 cup Olive Oil
- ▢ 1 Anchovy Filet
- ▢ 1/4 tsp Red Chili Flakes , optional
Instructions
- Prep Your Ingredients. Pit the olives if needed, rinse the capers, peel the garlic, and chop the parsley.
- Blend the Tapenade. In a food processor, combine olives, capers, garlic, parsley, lemon juice, and anchovy (if using). Pulse a few times to start breaking it down.
- Add the Olive Oil. With the processor running, drizzle in the olive oil. Pulse until the mixture reaches your desired consistency. Try it chunky or smooth, it’s up to you!
- Taste and Adjust. Add more lemon juice, pepper flakes, or olive oil as needed. Some olives are saltier than others, so taste before adding extra salt.
- Serve or Store. Transfer to a serving bowl and garnish with extra parsley or a drizzle of oil. Store leftovers in an airtight container in the fridge for up to 1 week.
