
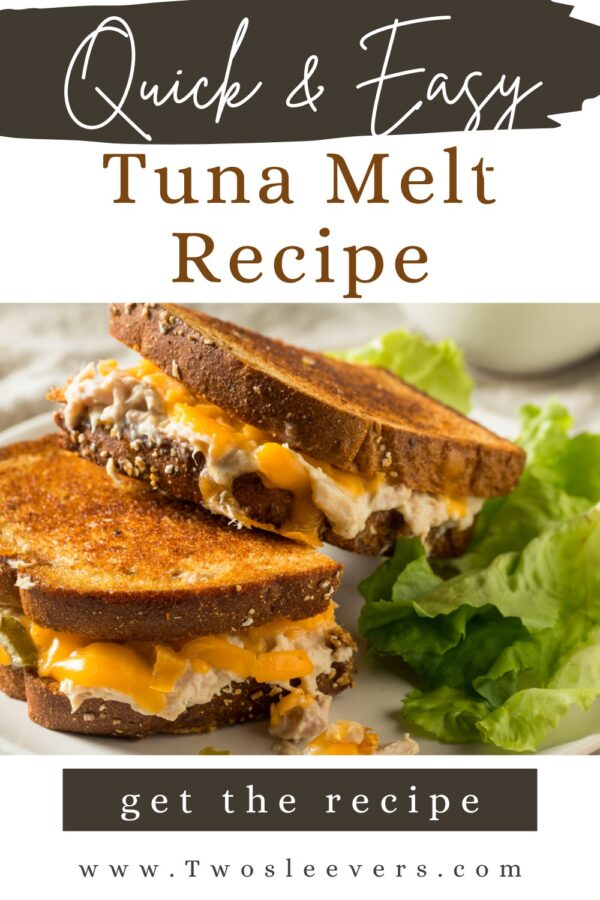
If you’re a fan of gooey melted cheese, savory tuna, and crispy bread, you’re in for a treat! Learn how to make the perfect Tuna Melt right at home with this easy recipe. With a few simple ingredients, you can make a mouthwatering meal in just 20 minutes.

Why You’ll Love This Spectacular Sandwich
- Quick & Easy . This Tuna Melt recipe is ready in under 30 minutes, making it the perfect quick weeknight dinner or satisfying lunch.
- Classic Comfort Food . The combination of savory tuna, creamy mayo, and melted cheese between two crispy slices of bread is comfort food at its finest.
- Customizable . Add your favorite ingredients to the tuna salad or choose your favorite type of bread and cheese to make this recipe your own.
- Simple Ingredients . This Tuna Melt uses everyday ingredients, so you don’t need anything fancy to make this delicious dish.
- Kid-Friendly . With its cheesy, gooey filling, this sandwich is sure to be a hit with kids and adults alike.
What Is A Tuna Melt?
A Tuna Melt is a perfect blend of savory and creamy. The tuna salad filling is rich and flavorful, with a balance of tangy mayo, crunchy celery, and mild tuna.
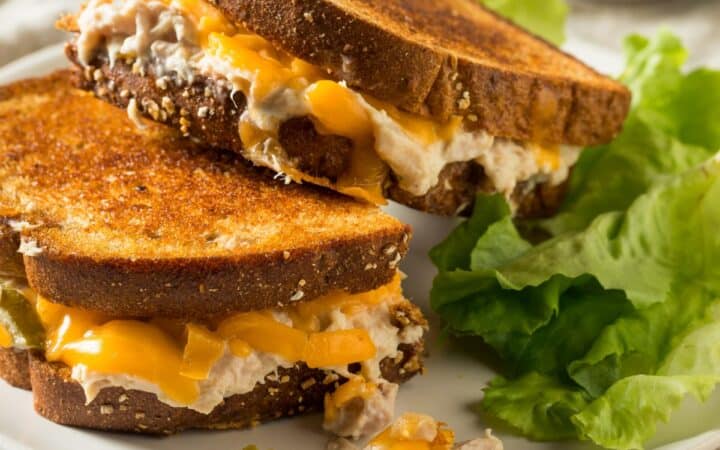
The cheese melts perfectly over the tuna mixture, adding a comforting, gooey texture. The toasted bread provides a crispy contrast to the creamy filling, making each bite irresistible.
Ingredients You’ll Need
- Canned Tuna - The base of the tuna melt. Use high-quality tuna in water or oil, depending on your preference.
- Mayonnaise - Adds creaminess and binds the tuna together. You can substitute with Greek yogurt for a lighter version.
- Dijon Mustard - Adds a tangy kick to balance out the richness of the mayo.
- Celery - Finely chopped celery gives the tuna salad a nice crunch and freshness.
- Red Onion - Adds a mild sharpness and texture to the salad.
- Cheese - Swiss cheese or cheddar is commonly used, but you can use your favorite meltable cheese.
- Bread - Choose thick slices of bread like sourdough, whole wheat, or white. A hearty bread will hold up well to the tuna and cheese.
- Butter - For toasting the bread to golden perfection.
How To Make A Tuna Melt
- Make the Tuna Salad Filling . Start by draining the canned tuna and placing it in a bowl. Flake the tuna with a fork. Add the mayonnaise, Dijon mustard, finely chopped celery, and red onion. Mix everything together until well combined. Taste and adjust with salt and pepper to your liking.
- Prepare the Bread and Cheese . Spread butter on one side of each slice of bread. Lay the bread butter-side-down on a clean surface. Place a slice of your chosen cheese on each piece of bread. Spoon a generous amount of the tuna salad mixture on top of the cheese, ensuring an even spread. Top with another slice of cheese, then place the second piece of bread on top, butter-side-up.
- Cook the Tuna Melt . Heat a non-stick skillet over medium heat. Once hot, place the assembled tuna melt sandwiches in the skillet. Cook for about 3-4 minutes on each side, or until the bread is golden brown and crispy, and the cheese is fully melted. Press down gently on the sandwiches with a spatula to help the cheese melt evenly.
- Serve and Enjoy . Once both sides are crispy and the cheese is perfectly melted, remove the sandwiches from the skillet. Let them cool for a minute before cutting them in half. Serve immediately with a side of pickles, chips, or a light salad.

Tips And Tricks
Here are some tips and tricks for making the perfect Tuna Melt:
- Use Good Bread . The bread is key to the Tuna Melt’s texture. Choose a hearty, thick bread that can hold up to the fillings without falling apart. Sourdough, rye, or whole wheat works great!
- Don’t Overfill the Sandwich . While it’s tempting to pack as much tuna salad as possible, don’t overload the sandwich. A little goes a long way to ensure the sandwich doesn’t get soggy and maintains its structure.
- Toast the Bread Well . Toasting the bread to a golden crisp is essential for the perfect texture. This gives your Tuna Melt that satisfying crunch.
Variations
A Tuna Melt is a versatile and customizable dish, allowing you to get creative with the ingredients and flavors. Here are some delicious variations to elevate your classic sandwich:
- Open-Faced - For a lighter version, make an open-faced Tuna Melt. Simply skip the top slice of bread, and top your tuna salad with cheese before broiling.
- Avocado - Add a layer of creamy avocado on top of the tuna mixture before adding the cheese. This will add a smooth texture and a burst of fresh flavor.
- With Tomatoes - Add slices of ripe tomato between the tuna and cheese for a burst of freshness and a bit of tang.
- Bacon - Crumbled crispy bacon makes a delicious addition to your tuna salad. The smoky, salty bacon pairs wonderfully with the creamy tuna.
What To Eat With A Tuna Melt
A Tuna Melt is a classic comfort food that pairs wonderfully with various sides and accompaniments. Here are some great options to consider serving with it:
- Chips - Potato chips or tortilla chips are a classic accompaniment. The crunchiness pairs perfectly with the soft tuna and melted cheese.
- Pickles - Add some tang with pickle spears or pickled vegetables . The acidity cuts through the richness of the sandwich.
- Soup - A classic side to a Tuna Melt is a warm bowl of tomato soup. The tangy, creamy soup complements the savory tuna sandwich.
- Salad - For a lighter, healthier side, serve with a fresh green salad. A simple side salad with a vinaigrette is a great way to balance the richness of the Tuna Melt.
How Long Does It Last?
Tuna Melt is best enjoyed fresh, but leftovers can be stored in an airtight container in the refrigerator for up to 2 days. Reheat in a skillet or toaster oven for the best results, ensuring the bread stays crispy.
Can You Freeze It?
You can freeze Tuna Melts, but it’s best to freeze the assembled sandwiches before grilling. Wrap the sandwiches in plastic wrap and foil, then freeze for up to 2 months.
When you’re ready to eat it, thaw the sandwich in the refrigerator overnight and grill as usual.
More Fantastic Fish Recipes
- Beer Battered Fish
- Air Fryer Tilapia
- Fish En Papillote
- Salmon Croquettes
- Instant Pot Salmon
Tuna Melt Recipe | Easy Homemade Tuna Melt
Ingredients
- ▢ 6 ounces Canned Tuna in water , drained
- ▢ 2 tbsp Mayonnaise
- ▢ 1 tsp Dijon Mustard
- ▢ 1 rib Celery , Chopped
- ▢ 2 tbsp Red Onion
- ▢ 1 tsp Kosher Salt
- ▢ 1/2 tsp Ground Black Pepper
- ▢ 4 slices White Bread
- ▢ 4 slices Cheddar Cheese
- ▢ 2 tbsp Unsalted Butter
Instructions
- Make the Tuna Salad Filling . Start by draining the canned tuna and placing it in a bowl. Flake the tuna with a fork. Add the mayonnaise, Dijon mustard, finely chopped celery, and red onion. Mix everything together until well combined. Taste and adjust with salt and pepper to your liking.
- Prepare the Bread and Cheese . Spread butter on one side of each slice of bread. Lay the bread butter-side-down on a clean surface. Place a slice of your chosen cheese on each piece of bread. Spoon a generous amount of the tuna salad mixture on top of the cheese, ensuring an even spread. Top with another slice of cheese, then place the second piece of bread on top, butter-side-up.
- Cook the Tuna Melt . Heat a non-stick skillet over medium heat. Once hot, place the assembled tuna melt sandwiches in the skillet. Cook for about 3-4 minutes on each side, or until the bread is golden brown and crispy, and the cheese is fully melted. Press down gently on the sandwiches with a spatula to help the cheese melt evenly.
- Serve and Enjoy . Once both sides are crispy and the cheese is perfectly melted, remove the sandwiches from the skillet. Let them cool for a minute before cutting them in half. Serve immediately with a side of pickles, chips, or a light salad.
Get support & connect with our community on Facebook!
Nutrition

If you already signed up, you should have received an email with a password to give you unlimited access to our FREE Printable Library. The password is case sensitive. Enter it below and get printing!
Password:

Tuna Melt Recipe | Easy Homemade Tuna Melt
Ingredients
- 6 ounces Canned Tuna in water drained
- 2 tbsp Mayonnaise
- 1 tsp Dijon Mustard
- 1 rib Celery Chopped
- 2 tbsp Red Onion
- 1 tsp Kosher Salt
- 1/2 tsp Ground Black Pepper
- 4 slices White Bread
- 4 slices Cheddar Cheese
- 2 tbsp Unsalted Butter
Instructions
- Make the Tuna Salad Filling . Start by draining the canned tuna and placing it in a bowl. Flake the tuna with a fork. Add the mayonnaise, Dijon mustard, finely chopped celery, and red onion. Mix everything together until well combined. Taste and adjust with salt and pepper to your liking.
- Prepare the Bread and Cheese . Spread butter on one side of each slice of bread. Lay the bread butter-side-down on a clean surface. Place a slice of your chosen cheese on each piece of bread. Spoon a generous amount of the tuna salad mixture on top of the cheese, ensuring an even spread. Top with another slice of cheese, then place the second piece of bread on top, butter-side-up.
- Cook the Tuna Melt . Heat a non-stick skillet over medium heat. Once hot, place the assembled tuna melt sandwiches in the skillet. Cook for about 3-4 minutes on each side, or until the bread is golden brown and crispy, and the cheese is fully melted. Press down gently on the sandwiches with a spatula to help the cheese melt evenly.
- Serve and Enjoy . Once both sides are crispy and the cheese is perfectly melted, remove the sandwiches from the skillet. Let them cool for a minute before cutting them in half. Serve immediately with a side of pickles, chips, or a light salad.
Tuna Melt Recipe | Easy Homemade Tuna Melt https://twosleevers.com/tuna-melt-recipe/

Pulled pork sliders are the ultimate comfort food that everyone will love! Whether you’re hosting a game day party, a family gathering, or simply craving something delicious, these tender, juicy pulled pork sliders are a great way to impress your guests. They’re easy to make, packed with flavor, and can be customized with your favorite toppings.

Why You’ll Love These Spectacular Sandwiches
- Tender Pulled Pork . This recipe uses slow-cooked pork that is tender, juicy, and full of flavor.
- Flavorful Homemade Sauce . The homemade BBQ sauce adds a tangy and sweet kick that complements the pork perfectly.
- Versatile Toppings . Whether you prefer creamy coleslaw, pickles, or extra barbecue sauce, these sliders are highly customizable.
- Perfect for Any Occasion . Whether you’re hosting a party or just want a quick weeknight meal, pulled pork sliders are always a hit!
With the slow cooking method, you can easily make the pork in a crockpot and have it ready to assemble when you’re ready to serve. The combination of juicy pulled pork, soft slider buns, and tangy barbecue sauce is nothing short of amazing.
Why Are They Called Sliders?
The name “slider” likely came from the way the small burgers “slid” around the grill or were easily “slid” into your mouth due to their small size and soft buns. The name also plays on the idea that these mini sandwiches are so delicious and easy to eat that they slide down easily.
Over time, the term has expanded beyond burgers to describe any small sandwich or mini bun, including ones filled with pulled pork, chicken, or other delicious ingredients.
So, whether it’s a small beef patty or tender pulled pork, these bite-sized sandwiches are known as sliders for their small, snackable size and easy-to-eat nature.
Ingredients You’ll Need
For The Pulled Pork
- Boneless Pork Shoulder (or pork butt) - Pork shoulder or butt has enough fat to keep the meat moist and flavorful when slow-cooked.
- Olive Oil - Used for searing the pork before slow cooking. It helps to brown the meat and lock in flavors.
- Onion - The onions soften and infuse the pulled pork with flavor during the slow-cooking process.
- Garlic - Brings an aromatic flavor to the pork and enhances the overall seasoning profile of the dish.
- Chicken Broth - Serves as the cooking liquid that helps tenderize the meat and adds moisture to the slow-cooked pork.
- Smoked Paprika - Gives the pork a smoky flavor and a rich, slightly earthy taste.
- Cumin - Adds a warm, slightly nutty and earthy flavor, giving the pulled pork a deeper, savory taste.
- Onion Powder - Used to intensify the savory flavor of the pork and blend seamlessly with the other spices.
- Garlic Powder - Enhances the garlic flavor and adds depth to the seasoning.
- Salt - Essential for seasoning the pork and enhancing all the flavors in the meat.
- Black Pepper - Adds a mild heat and seasoning balance to the pork.
- Thyme - Adds a subtle, herby note that works well with the savory pork.
Homemade BBQ Sauce
- Ketchup - The base of the BBQ sauce, providing sweetness and tanginess to balance the savory pork.
- Apple Cider Vinegar :-Adds tanginess and acidity to the BBQ sauce.
- Brown Sugar - Adds sweetness and helps balance the acidity of the vinegar.
- Worcestershire sauce - Adds a savory, umami-rich flavor to the BBQ sauce.
- Dijon mustard - Provides a touch of sharpness and depth to the sauce.
- Smoked Paprika - Enhances the BBQ sauce and complementing the smoky seasoning on the pork.
- Garlic Powder - Adds more savory, garlicky flavor to the sauce.
- Black Pepper - Adds a mild heat to the BBQ sauce.
- Onion powder - Deepens the savory profile of the BBQ sauce.
- Cayenne Pepper - Adds a kick of heat to the sauce.
Assembly
- Slider Buns - These are the vehicle for your pulled pork and BBQ sauce.
How To Make Pulled Pork Sliders
- Season the Pork . Start by seasoning your pork shoulder with the paprika, cumin, onion powder, garlic powder, salt, pepper, and thyme. Rub the spices into the meat to ensure it’s evenly coated.
- Sear the Pork . Heat olive oil in a large skillet over medium-high heat. Once the oil is hot, sear the pork on all sides for about 3-4 minutes per side until it’s golden brown. This step will add extra flavor to the pork.
- Slow Cook the Pork . Transfer the seared pork shoulder to a crockpot. Add the sliced onions, minced garlic, and chicken broth. Cover and cook on low for 6-8 hours, or on high for 4-5 hours, until the pork is tender and easily pulls apart with a fork.
- Make the BBQ Sauce . While the pork is cooking, combine all of the BBQ sauce ingredients in a small saucepan over medium heat. Stir occasionally until the sauce is heated through and the sugar has dissolved, about 5 minutes. Taste and adjust the seasoning if necessary.
- Shred the Pork . Once the pork is tender, remove it from the crockpot and place it on a cutting board. Use two forks to shred the meat, discarding any large pieces of fat. Return the shredded pork to the crockpot and mix it with the juices and onions.
- Assemble the Sliders . Split the slider buns and lightly toast them if desired. Spoon the pulled pork onto the bottom half of each bun. Top with a spoonful of the homemade BBQ sauce, and add any additional toppings you like, such as pickles or coleslaw. Place the top half of the bun on and serve immediately.

Tips And Tricks
Making pulled pork sliders is a delicious and satisfying way to enjoy tender, flavorful pulled pork in a convenient, bite-sized form. Here are some tips and tricks to help you make them great:
- Use a Bone-In Pork Shoulder . While a boneless pork shoulder works fine, a bone-in one will yield even more flavorful and juicy pulled pork.
- Adjust BBQ Sauce to Taste . Some prefer their sauce sweeter, while others prefer it tangier or spicier. Don’t be afraid to tweak the homemade BBQ sauce by adding more sugar for sweetness or more vinegar for a tangy kick.
- Use a Crockpot Liner . For easy cleanup, consider using a slow-cooker liner. It helps keep the mess to a minimum.
- Slow-Cooked Flavor . The longer you slow cook the pork, the more flavorful and tender it becomes. If you have time, cook it on low for 8 hours for the best results.
- Make Extra BBQ Sauce . If you’re hosting a party, make extra BBQ sauce to serve on the side. Some guests love to pile on extra sauce!
Variations
If you want to get creative with your pulled pork sliders, here are some variations you can try:
- Spicy - Add a bit of heat to the BBQ sauce by mixing in some chopped jalapeños or a dash of cayenne pepper.
- Cuban-Style - Instead of regular slider buns, use Cuban bread. Top with Swiss cheese, pickles, and mustard for a Cuban twist.
- Caribbean Jerk - Season the pork with jerk seasoning before cooking and serve with mango salsa for a tropical vibe.
- Smoky - If you have a smoker, smoke the pork shoulder before slow cooking it for an extra smoky flavor.
What To Eat With Pulled Pork Sliders
Pulled pork sliders are hearty and flavorful on their own, but they also pair perfectly with a variety of sides. Here are a few ideas:
- Coleslaw - A classic topping for pulled pork sliders. The creamy, tangy slaw complements the smoky flavors of the meat perfectly.
- French Fries - Serve with crispy French fries or sweet potato fries for a deliciously satisfying meal.
- Potato Salad - A creamy, tangy potato salad is another great option that pairs beautifully with sliders.
- Grilled Vegetables - Serve the sliders with grilled corn, peppers, or zucchini for a fresh, light side dish.
- Pickles - Add a tangy, crunchy element to balance the richness of the pork with pickles or pickle spears.
How Long Do They Last?
Pulled pork sliders are best enjoyed fresh, but if you have leftovers, you can store them in an airtight container in the refrigerator for up to 3 days.
The pork will continue to soak up the flavors of the BBQ sauce, making it even tastier on the second day!
Can You Freeze Them?
Yes, you can freeze the pulled pork! Simply place the shredded pork in an airtight container or freezer bag, and it will last up to 3 months in the freezer.
To reheat, defrost the leftover pork in the refrigerator overnight and reheat on the stovetop with a little bit of added BBQ sauce to keep it moist.
More Perfect Pork Recipes
- Pork Kabobs
- Mexican Pork Stew
- Pork Katsu
- Pork Wontons
- Pulled Pork Nachos


Pulled Pork Sliders | Mini Pulled Pork Slider Recipe
Ingredients
- ▢ 3 pounds Boneless Pork Shoulder
- ▢ 2 tbsp Olive Oil
- ▢ 1 Onion , chopped
- ▢ 4 cloves Garlic , minced
- ▢ 1 cup Chicken Broth
- ▢ 1 tbsp Smoked Paprika
- ▢ 1 tsp Cumin
- ▢ 1 tsp Onion Powder
- ▢ 1 tsp Garlic Powder
- ▢ 1 1/2 tsp Kosher Salt
- ▢ 1/2 tsp Ground Black Pepper
- ▢ 1 tsp Thyme
- ▢ 12 Slider Buns
For The BBQ Sauce
- ▢ 1 cup Ketchup
- ▢ 1/4 cup Apple Cider Vinegar
- ▢ 1/4 cup Brown Sugar
- ▢ 2 tbsp Worcestershire Sauce
- ▢ 2 tbsp Dijon Mustard
- ▢ 1 tbsp Smoked Paprika
- ▢ 1 tsp Garlic Powder
- ▢ 1 tsp Ground Black Pepper
- ▢ 1 tsp Onion Powder
- ▢ 1/2 tsp Cayenne Pepper
Instructions
- Season the Pork . Start by seasoning your pork shoulder with the paprika, cumin, onion powder, garlic powder, salt, pepper, and thyme. Rub the spices into the meat to ensure it’s evenly coated.
- Sear the Pork . Heat olive oil in a large skillet over medium-high heat. Once the oil is hot, sear the pork on all sides for about 3-4 minutes per side until it’s golden brown. This step will add extra flavor to the pork.
- Slow Cook the Pork . Transfer the seared pork shoulder to a crockpot. Add the sliced onions, minced garlic, and chicken broth. Cover and cook on low for 6-8 hours, or on high for 4-5 hours, until the pork is tender and easily pulls apart with a fork.
- Make the BBQ Sauce . While the pork is cooking, combine all of the BBQ sauce ingredients in a small saucepan over medium heat. Stir occasionally until the sauce is heated through and the sugar has dissolved, about 5 minutes. Taste and adjust the seasoning if necessary.
- Shred the Pork . Once the pork is tender, remove it from the crockpot and place it on a cutting board. Use two forks to shred the meat, discarding any large pieces of fat. Return the shredded pork to the crockpot and mix it with the juices and onions.
- Assemble the Sliders . Split the slider buns and lightly toast them if desired. Spoon the pulled pork onto the bottom half of each bun. Top with a spoonful of the homemade BBQ sauce, and add any additional toppings you like, such as pickles or coleslaw. Place the top half of the bun on and serve immediately.
