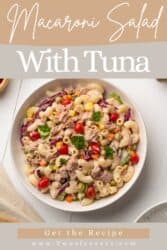
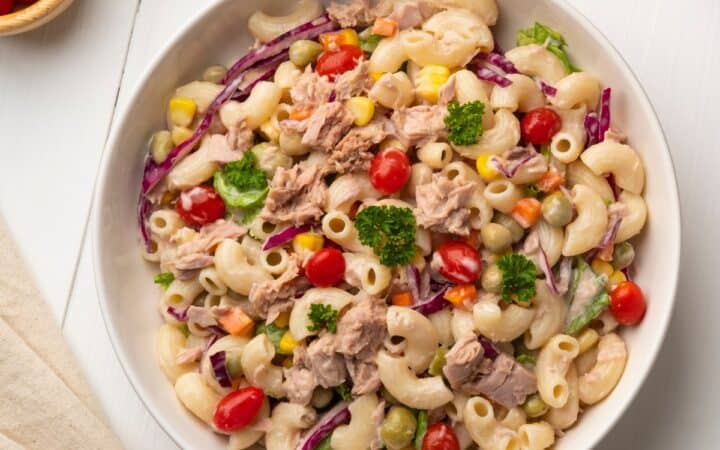
Indulge in the perfect blend of convenience and flavor with our Instant Pot Tuna Macaroni Salad recipe. If you’re a fan of delightful meals that come together in a flash, this recipe is your new go-to.
Why You’ll Love This Macaroni Salad Recipe
- Quick and Convenient. Ready in a flash thanks to the Instant Pot’s efficiency.
- Simple. Prepare a flavorful dressing, toss with macaroni and tuna, and you’re good to go!
- Balanced and Nutritious. Packed with protein from tuna and the goodness of veggies.
- Versatile. Enjoy it as a main course, side dish, or even pack it for picnics and gatherings.
The Instant Pot, your ultimate kitchen companion, is here to help you craft a mouthwatering tuna macaroni salad that’s both a time-saver and a taste sensation.
So, when you’re seeking a delightful culinary experience that combines comfort and convenience, let the Instant Pot work its magic with this scrumptious tuna macaroni salad.
Why Is Tuna Macaroni Salad Popular?
Tuna macaroni salad is a timeless favorite that offers a medley of flavors and textures, making it a beloved choice for gatherings and everyday meals alike.
The harmonious blend of tender pasta, flaky tuna, crunchy veggies, and a creamy dressing continues to win hearts and palates across generations.
Does Tuna Macaroni Salad Taste Fishy?
Tuna macaroni salad strikes a perfect balance of flavors, ensuring that the tuna’s taste doesn’t overpower the dish.
The combination of mayonnaise, mustard, and seasonings in the dressing enhances the tuna’s natural flavor while allowing other ingredients to shine.
Ingredients You’ll Need
- 2 Cups Macaroni Pasta - The base ingredient that provides substance and texture to the salad, creating a hearty and satisfying dish.
- 10 Ounces Canned Tuna - Adds protein and a savory oceanic flavor to the salad, making it a fulfilling and flavorful component.
- 1 Cup Mayonnaise - Forms the creamy base of the dressing, contributing a rich and velvety texture that coats the ingredients for a luscious mouthfeel.
- 1 tsp Dijon Mustard - Adds a tangy and slightly pungent element to the dressing, enhancing the overall flavor profile and providing a subtle kick.
- 1/2 Cup Red Cabbage - Adds a vibrant color to the salad, contributing both taste and visual appeal.
- 1 Cup Grape Tomatoes - These add bursts of juicy sweetness and a slight tang, brightening up the salad both in flavor and appearance. They also provide a refreshing contrast to the creamy dressing and tuna.
- 1/2 Cup Corn and Peas - Corn and peas add natural sweetness, color, and a crisp-tender texture, giving the salad a playful pop in every bite while balancing the savory elements of tuna and pasta.
- 1/4 Cup Celery - Offers a refreshing crunch and a delicate earthy flavor, complementing the creaminess of the dressing and the tender pasta.
- 1/4 Cup Dill Pickle Relish - Injects a burst of tanginess and a hint of brininess to the salad, elevating the taste and providing a delightful contrast.
- 2 TBSP Fresh Dill - Infuses a fresh and aromatic herbal note into the salad, enhancing the overall flavor complexity with its bright and lively essence.
- Lemon Juice from 1 Lemon - Provides a zesty and slightly tart citrus flavor that balances the richness of the dressing and tuna, adding a refreshing element.
- Salt and Pepper to taste - Essential seasonings that enhance the overall taste, helping to bring out the flavors of the ingredients and create a well-rounded dish.
How To Make Instant Pot Tuna Macaroni Salad
- Cook the Macaroni . Add the macaroni pasta and water to the Instant Pot. Cook on high pressure for about 4 minutes, then quickly release the pressure and drain the pasta.
- Prepare the Dressing . In a bowl, whisk together mayonnaise, Dijon mustard, lemon juice, salt, and pepper to create the dressing.
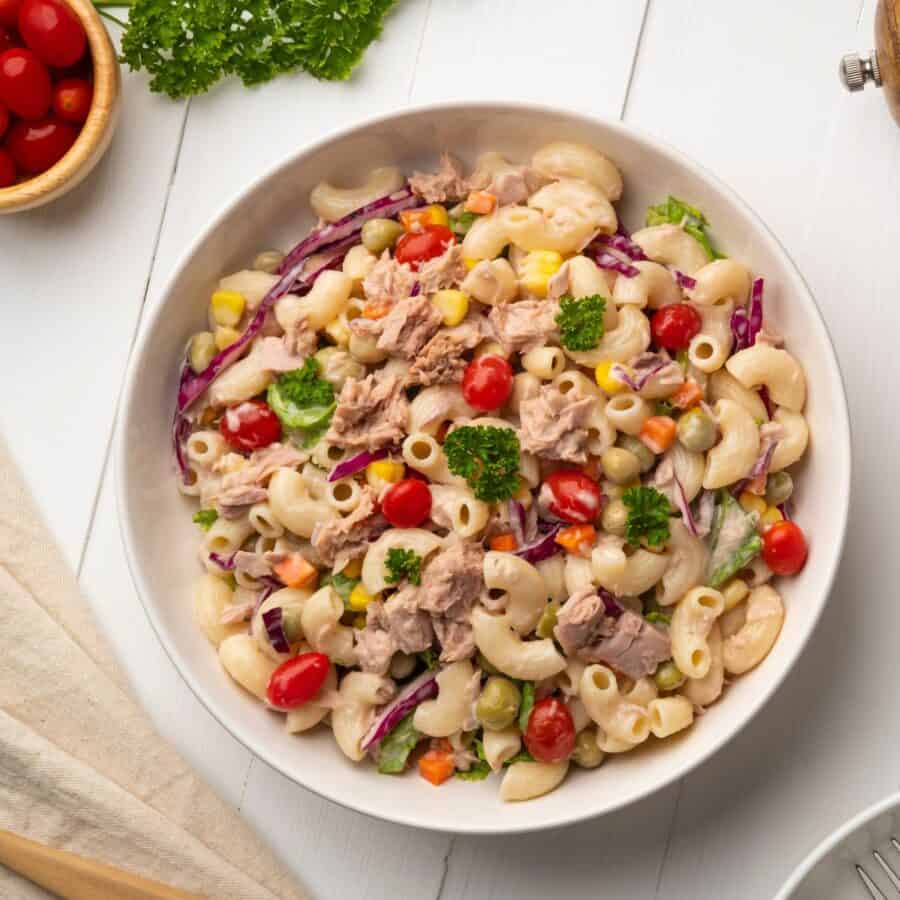
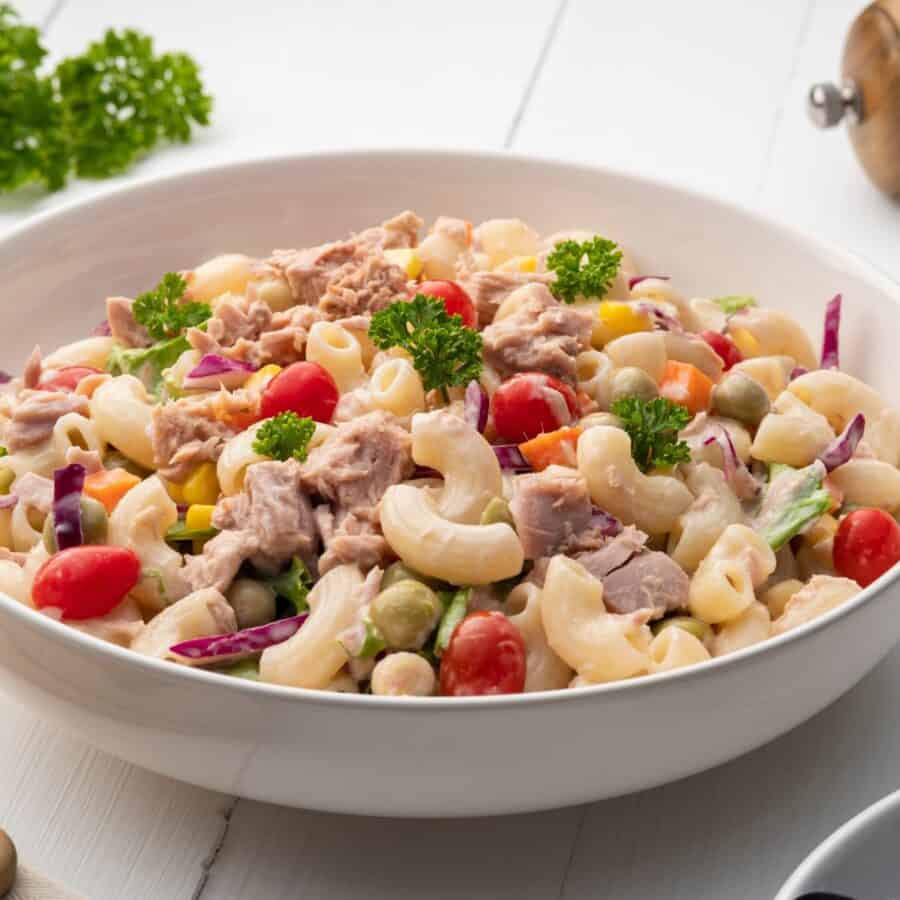
- Combine Ingredients . In a large mixing bowl, combine the cooked macaroni, drained tuna, chopped red cabbage, chopped celery, grape tomatoes, corn kernels, peas, dill pickle relish, and fresh dill.
- Toss and Dress . Gently toss the ingredients to combine. Pour the dressing over the macaroni mixture and stir until everything is well-coated and the flavors meld.
- Chill and Serve . Refrigerate the salad for about 30 minutes before serving, allowing the flavors to meld further. Garnish with additional fresh dill before serving.
Tips And Tricks
Creating a mouthwatering Instant Pot Tuna Macaroni Salad is all about nailing the balance of flavors and textures. To ensure your dish turns out irresistibly delicious, here are some expert tips and tricks:
- Ensure Al Dente Pasta. Cooking the pasta slightly less than fully done (al dente) ensures it won’t become too soft when mixed with other ingredients.
- Adjust Seasonings . Taste the salad before chilling and adjust the seasonings to your preference. Feel free to add a touch more lemon juice or seasoning if desired.
- Add Variety. Enhance the salad’s texture and flavor by incorporating ingredients like diced bell peppers, shredded carrots, or peas.
Variations
Customize your tuna macaroni salad with these creative variations to suit different taste preferences:
- Greek Inspired - Add diced cucumbers, Kalamata olives, crumbled feta cheese, and a sprinkle of oregano for a Mediterranean twist.
- Curry Delight - Mix in a pinch of curry powder and chopped mango for a fusion of flavors that’s both refreshing and exotic.
- Avocado Creaminess - Dice ripe avocados and fold them gently into the salad for a creamy and nutritious upgrade.
What To Serve With Tuna Macaroni Salad
Tuna macaroni salad offers a satisfying and versatile meal base that pairs seamlessly with various accompaniments:
- Fresh Greens - Serve the salad on a bed of mixed greens for added freshness and crunch.
- Crusty Bread - Enjoy the salad alongside a slice of artisanal bread or a warm dinner roll for a well-rounded meal.
- Fruit Medley - Complement the flavors with a side of mixed fruit salad featuring berries, citrus segments, and melon cubes.
How Long Does It Last?
If you find yourself with leftovers or want to prepare the salad ahead of time, no worries – it stores well.
Tuna macaroni salad can be refrigerated for up to 3 days in an airtight container, maintaining its taste and texture.
Can You Freeze It?
While the salad can be frozen, it’s important to note that the texture of mayonnaise-based dressings may change upon thawing.
If you choose to freeze it, store the salad without the dressing, then add the dressing after thawing and mix thoroughly.
More Easy Instant Pot Recipes
- Instant Pot Butter Chicken
- Keto Taco Soup
- Instant Pot Chicken Biryani
- Arroz Con Pollo
- Instant Pot Brisket
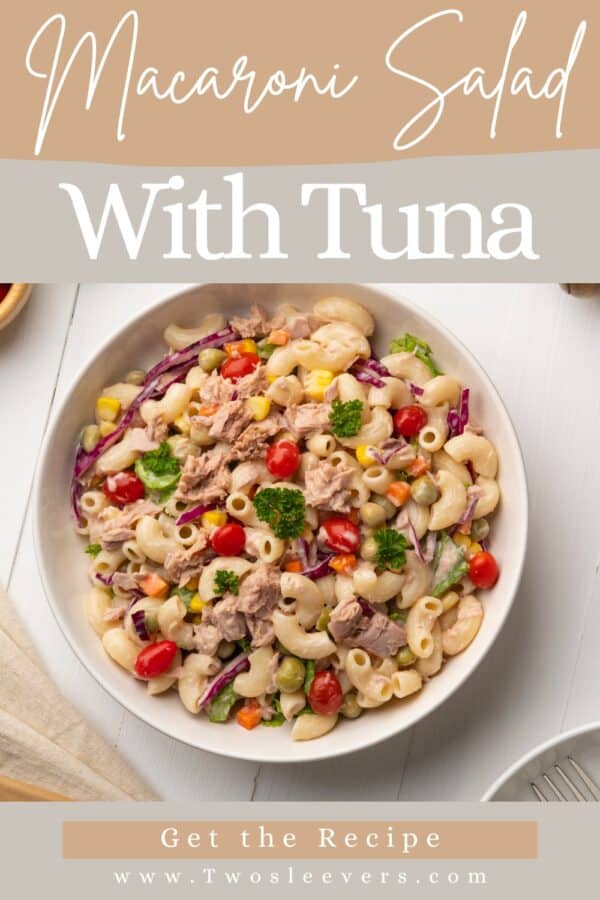
If this Instant Pot Tuna Macaroni Salad recipe has your taste buds tingling, share the joy with friends and family on your favorite social media platforms. Don’t forget to save the recipe on Pinterest for your next delicious creation!
Tuna Macaroni Salad Recipe | Instant Pot Macaroni Salad
Ingredients
- ▢ 2 cups Macaroni Pasta
- ▢ 10 ounces Canned Tuna , drained
- ▢ 1 cup Mayonnaise
- ▢ 1 tsp Dijon Mustard
- ▢ 1/2 cup Red Cabbage , shredded
- ▢ 1 cup Grape Tomatoes
- ▢ 1/4 cup Corn
- ▢ 1/4 cup Peas
- ▢ 1/4 cup Celery , chopped
- ▢ 1/4 cup Dill Relish
- ▢ 2 tbsp Dill Pickles , chopped
- ▢ 1 Lemon Juice
- ▢ Kosher Salt , to taste
- ▢ Ground Black Pepper , to taste
Instructions
- Cook the Macaroni . Add the macaroni pasta and water to the Instant Pot. Cook on high pressure for about 4 minutes, then quickly release the pressure and drain the pasta.
- Prepare the t . In a bowl, whisk together mayonnaise, Dijon mustard, lemon juice, salt, and pepper to create the dressing.bsp
- Combine Ingredients . In a large mixing bowl, combine the cooked macaroni, drained tuna, chopped red cabbage, chopped celery, grape tomatoes, corn, peas, dill pickle relish, and fresh dill.
- Toss and Dress . Gently toss the ingredients to combine. Pour the dressing over the macaroni mixture and stir until everything is well-coated and the flavors meld.
- Chill and Serve . Refrigerate the salad for about 30 minutes before serving, allowing the flavors to meld further. Garnish with additional fresh dill before serving.
Get support & connect with our community on Facebook!
Don’t forget to check out my otherBest-selling Instant Pot Cookbooks!
Indian Instant Pot , Keto Instant Pot, Instant Pot Fast and Easy , Healthy Instant Pot & Vegetarian Instant Pot .

Indulge in the perfect blend of convenience and flavor with our Instant Pot Tuna Macaroni Salad recipe. If you’re a fan of delightful meals that come together in a flash, this recipe is your new go-to.
Why You’ll Love This Macaroni Salad Recipe
- Quick and Convenient. Ready in a flash thanks to the Instant Pot’s efficiency.
- Simple. Prepare a flavorful dressing, toss with macaroni and tuna, and you’re good to go!
- Balanced and Nutritious. Packed with protein from tuna and the goodness of veggies.
- Versatile. Enjoy it as a main course, side dish, or even pack it for picnics and gatherings.
The Instant Pot, your ultimate kitchen companion, is here to help you craft a mouthwatering tuna macaroni salad that’s both a time-saver and a taste sensation.
So, when you’re seeking a delightful culinary experience that combines comfort and convenience, let the Instant Pot work its magic with this scrumptious tuna macaroni salad.
Why Is Tuna Macaroni Salad Popular?
Tuna macaroni salad is a timeless favorite that offers a medley of flavors and textures, making it a beloved choice for gatherings and everyday meals alike.
The harmonious blend of tender pasta, flaky tuna, crunchy veggies, and a creamy dressing continues to win hearts and palates across generations.
Does Tuna Macaroni Salad Taste Fishy?
Tuna macaroni salad strikes a perfect balance of flavors, ensuring that the tuna’s taste doesn’t overpower the dish.
The combination of mayonnaise, mustard, and seasonings in the dressing enhances the tuna’s natural flavor while allowing other ingredients to shine.
Ingredients You’ll Need
- 2 Cups Macaroni Pasta - The base ingredient that provides substance and texture to the salad, creating a hearty and satisfying dish.
- 10 Ounces Canned Tuna - Adds protein and a savory oceanic flavor to the salad, making it a fulfilling and flavorful component.
- 1 Cup Mayonnaise - Forms the creamy base of the dressing, contributing a rich and velvety texture that coats the ingredients for a luscious mouthfeel.
- 1 tsp Dijon Mustard - Adds a tangy and slightly pungent element to the dressing, enhancing the overall flavor profile and providing a subtle kick.
- 1/2 Cup Red Cabbage - Adds a vibrant color to the salad, contributing both taste and visual appeal.
- 1 Cup Grape Tomatoes - These add bursts of juicy sweetness and a slight tang, brightening up the salad both in flavor and appearance. They also provide a refreshing contrast to the creamy dressing and tuna.
- 1/2 Cup Corn and Peas - Corn and peas add natural sweetness, color, and a crisp-tender texture, giving the salad a playful pop in every bite while balancing the savory elements of tuna and pasta.
- 1/4 Cup Celery - Offers a refreshing crunch and a delicate earthy flavor, complementing the creaminess of the dressing and the tender pasta.
- 1/4 Cup Dill Pickle Relish - Injects a burst of tanginess and a hint of brininess to the salad, elevating the taste and providing a delightful contrast.
- 2 TBSP Fresh Dill - Infuses a fresh and aromatic herbal note into the salad, enhancing the overall flavor complexity with its bright and lively essence.
- Lemon Juice from 1 Lemon - Provides a zesty and slightly tart citrus flavor that balances the richness of the dressing and tuna, adding a refreshing element.
- Salt and Pepper to taste - Essential seasonings that enhance the overall taste, helping to bring out the flavors of the ingredients and create a well-rounded dish.
How To Make Instant Pot Tuna Macaroni Salad
- Cook the Macaroni . Add the macaroni pasta and water to the Instant Pot. Cook on high pressure for about 4 minutes, then quickly release the pressure and drain the pasta.
- Prepare the Dressing . In a bowl, whisk together mayonnaise, Dijon mustard, lemon juice, salt, and pepper to create the dressing.
- Combine Ingredients . In a large mixing bowl, combine the cooked macaroni, drained tuna, chopped red cabbage, chopped celery, grape tomatoes, corn kernels, peas, dill pickle relish, and fresh dill.
- Toss and Dress . Gently toss the ingredients to combine. Pour the dressing over the macaroni mixture and stir until everything is well-coated and the flavors meld.
- Chill and Serve . Refrigerate the salad for about 30 minutes before serving, allowing the flavors to meld further. Garnish with additional fresh dill before serving.
Tips And Tricks
Creating a mouthwatering Instant Pot Tuna Macaroni Salad is all about nailing the balance of flavors and textures. To ensure your dish turns out irresistibly delicious, here are some expert tips and tricks:
- Ensure Al Dente Pasta. Cooking the pasta slightly less than fully done (al dente) ensures it won’t become too soft when mixed with other ingredients.
- Adjust Seasonings . Taste the salad before chilling and adjust the seasonings to your preference. Feel free to add a touch more lemon juice or seasoning if desired.
- Add Variety. Enhance the salad’s texture and flavor by incorporating ingredients like diced bell peppers, shredded carrots, or peas.
Variations
Customize your tuna macaroni salad with these creative variations to suit different taste preferences:
- Greek Inspired - Add diced cucumbers, Kalamata olives, crumbled feta cheese, and a sprinkle of oregano for a Mediterranean twist.
- Curry Delight - Mix in a pinch of curry powder and chopped mango for a fusion of flavors that’s both refreshing and exotic.
- Avocado Creaminess - Dice ripe avocados and fold them gently into the salad for a creamy and nutritious upgrade.
What To Serve With Tuna Macaroni Salad
Tuna macaroni salad offers a satisfying and versatile meal base that pairs seamlessly with various accompaniments:
- Fresh Greens - Serve the salad on a bed of mixed greens for added freshness and crunch.
- Crusty Bread - Enjoy the salad alongside a slice of artisanal bread or a warm dinner roll for a well-rounded meal.
- Fruit Medley - Complement the flavors with a side of mixed fruit salad featuring berries, citrus segments, and melon cubes.
How Long Does It Last?
If you find yourself with leftovers or want to prepare the salad ahead of time, no worries – it stores well.
Tuna macaroni salad can be refrigerated for up to 3 days in an airtight container, maintaining its taste and texture.
Can You Freeze It?
While the salad can be frozen, it’s important to note that the texture of mayonnaise-based dressings may change upon thawing.
If you choose to freeze it, store the salad without the dressing, then add the dressing after thawing and mix thoroughly.
More Easy Instant Pot Recipes
- Instant Pot Butter Chicken
- Keto Taco Soup
- Instant Pot Chicken Biryani
- Arroz Con Pollo
- Instant Pot Brisket
If this Instant Pot Tuna Macaroni Salad recipe has your taste buds tingling, share the joy with friends and family on your favorite social media platforms. Don’t forget to save the recipe on Pinterest for your next delicious creation!
Tuna Macaroni Salad Recipe | Instant Pot Macaroni Salad
Ingredients
- ▢ 2 cups Macaroni Pasta
- ▢ 10 ounces Canned Tuna , drained
- ▢ 1 cup Mayonnaise
- ▢ 1 tsp Dijon Mustard
- ▢ 1/2 cup Red Cabbage , shredded
- ▢ 1 cup Grape Tomatoes
- ▢ 1/4 cup Corn
- ▢ 1/4 cup Peas
- ▢ 1/4 cup Celery , chopped
- ▢ 1/4 cup Dill Relish
- ▢ 2 tbsp Dill Pickles , chopped
- ▢ 1 Lemon Juice
- ▢ Kosher Salt , to taste
- ▢ Ground Black Pepper , to taste
Instructions
- Cook the Macaroni . Add the macaroni pasta and water to the Instant Pot. Cook on high pressure for about 4 minutes, then quickly release the pressure and drain the pasta.
- Prepare the t . In a bowl, whisk together mayonnaise, Dijon mustard, lemon juice, salt, and pepper to create the dressing.bsp
- Combine Ingredients . In a large mixing bowl, combine the cooked macaroni, drained tuna, chopped red cabbage, chopped celery, grape tomatoes, corn, peas, dill pickle relish, and fresh dill.
- Toss and Dress . Gently toss the ingredients to combine. Pour the dressing over the macaroni mixture and stir until everything is well-coated and the flavors meld.
- Chill and Serve . Refrigerate the salad for about 30 minutes before serving, allowing the flavors to meld further. Garnish with additional fresh dill before serving.
Get support & connect with our community on Facebook!
Don’t forget to check out my otherBest-selling Instant Pot Cookbooks!
Indian Instant Pot , Keto Instant Pot, Instant Pot Fast and Easy , Healthy Instant Pot & Vegetarian Instant Pot .

If you already signed up, you should have received an email with a password to give you unlimited access to our FREE Printable Library. The password is case sensitive. Enter it below and get printing!
Password:

Tuna Macaroni Salad Recipe | Instant Pot Macaroni Salad
Ingredients
- 2 cups Macaroni Pasta
- 10 ounces Canned Tuna drained
- 1 cup Mayonnaise
- 1 tsp Dijon Mustard
- 1/2 cup Red Cabbage shredded
- 1 cup Grape Tomatoes
- 1/4 cup Corn
- 1/4 cup Peas
- 1/4 cup Celery chopped
- 1/4 cup Dill Relish
- 2 tbsp Dill Pickles chopped
- 1 Lemon Juice
- Kosher Salt to taste
- Ground Black Pepper to taste
Instructions
- Cook the Macaroni . Add the macaroni pasta and water to the Instant Pot. Cook on high pressure for about 4 minutes, then quickly release the pressure and drain the pasta.
- Prepare the t . In a bowl, whisk together mayonnaise, Dijon mustard, lemon juice, salt, and pepper to create the dressing.bsp
- Combine Ingredients . In a large mixing bowl, combine the cooked macaroni, drained tuna, chopped red cabbage, chopped celery, grape tomatoes, corn, peas, dill pickle relish, and fresh dill.
- Toss and Dress . Gently toss the ingredients to combine. Pour the dressing over the macaroni mixture and stir until everything is well-coated and the flavors meld.
- Chill and Serve . Refrigerate the salad for about 30 minutes before serving, allowing the flavors to meld further. Garnish with additional fresh dill before serving.
Tuna Macaroni Salad Recipe | Instant Pot Macaroni Salad https://twosleevers.com/tuna-macaroni-salad-recipe/
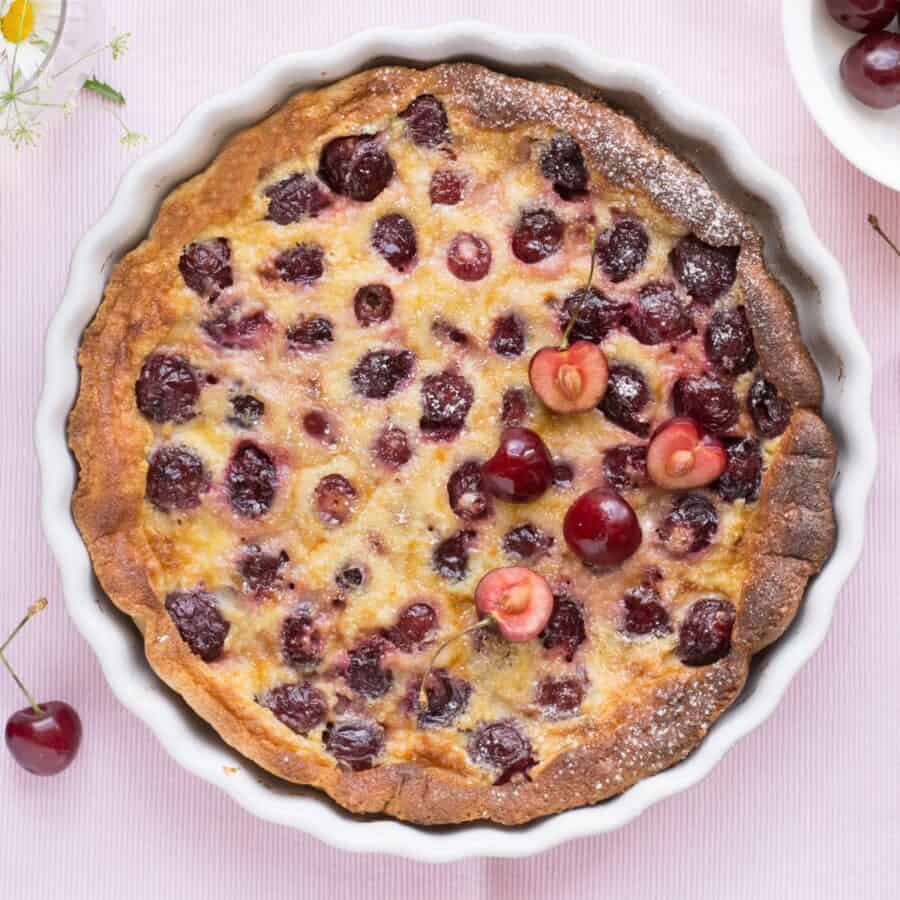
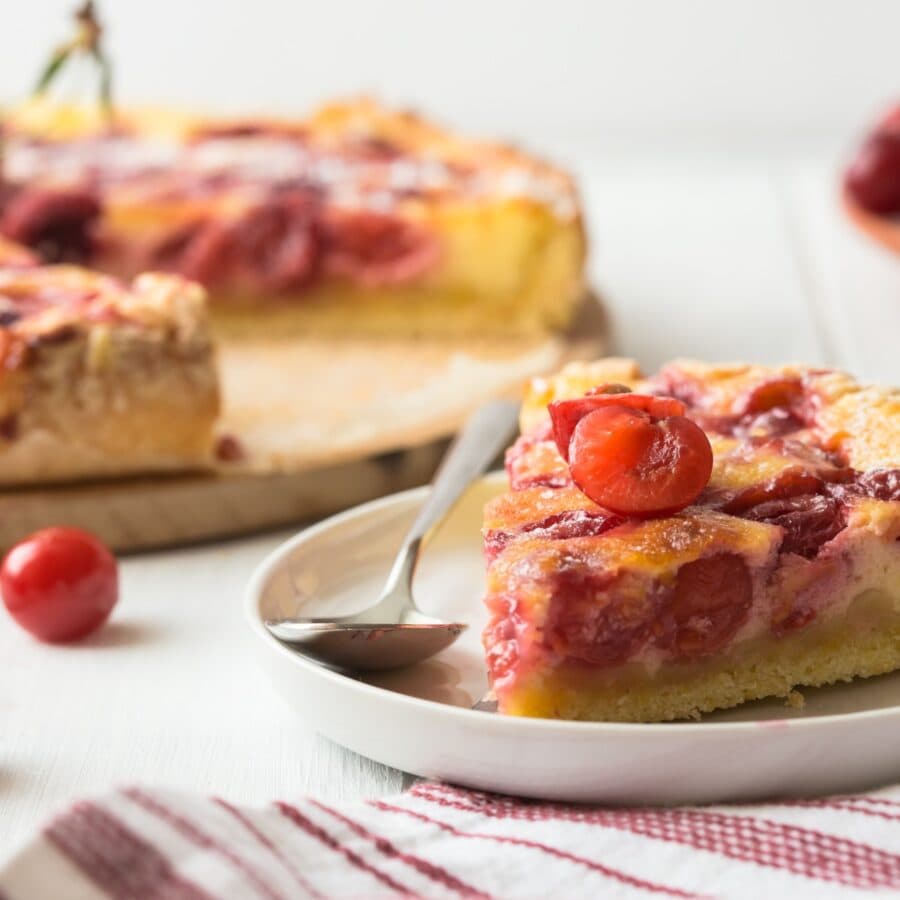
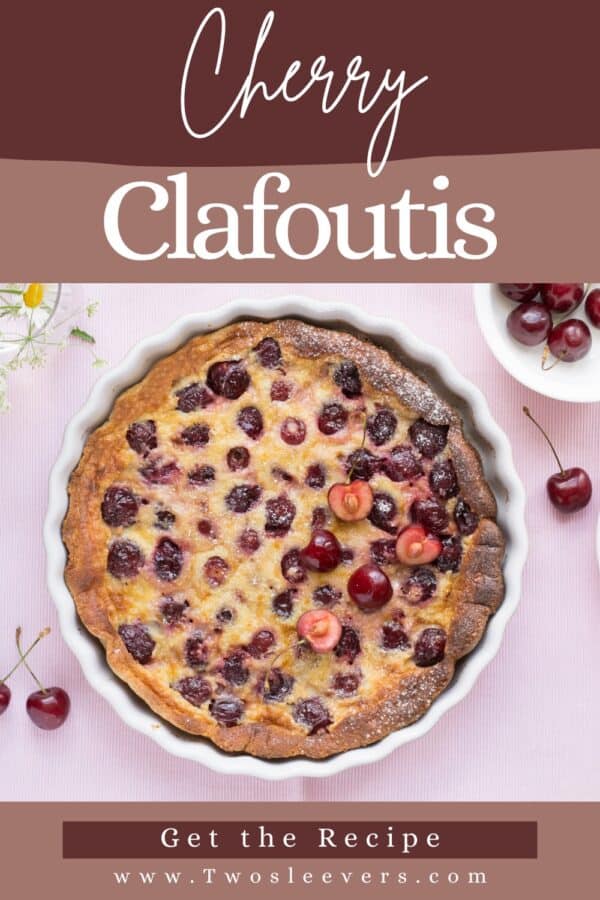
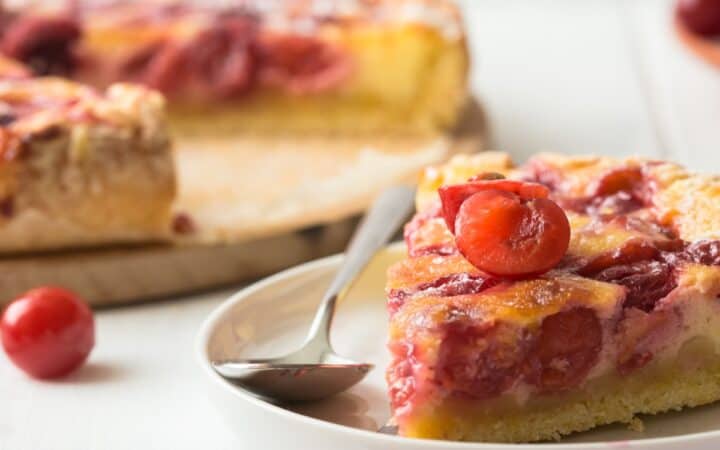
Clafoutis is a classic French baked custard dessert made with cherries baked in a simple batter of eggs, milk, flour, sugar, vanilla, and butter. It’s traditional and works well for an easy-yet-elegant dessert for brunch or dinner parties (especially during cherry season). Unlike many fussy French desserts, this version is mix-pour-bake simple, uses a single pie dish, and delivers that signature custardy “pancake-meets-flan” texture with juicy cherries every time.
Why You’ll This Fantastic French Dessert
- Effortless elegance. Just mix, pour, and bake. No rolling or shaping required!
- Crowd pleaser. Velvety custard meets fruit in a comforting yet sophisticated dish.
- Seasonal star. Cherry season shines, but this recipe adapts beautifully with other berries or stone fruit.
- One-dish win. Minimal cleanup and maximum impact. It’s ideal for unpredictable summer guests.
What Does A Clafoutis Taste Like?
Classic Cherry Clafoutis offers a gentle balance of sweet and tart flavors wrapped in a creamy, flan-like custard. The cherries burst with bright juiciness while the pastry base tastes of vanilla and egg.
It’s a dreamy cross between a pancake, custard, and a fruit soufflé. A light dusting of powdered sugar brings a subtle sweetness and pretty presentation.
Ingredients You’ll Need
- 3/4 cup all-purpose flour - Provides the structure for the custard base. The flour slightly thickens the batter, giving the clafoutis its signature texture — soft and custardy yet firm enough to hold the cherries in place.
- 1/2 cup granulated sugar - Sweetens the batter and enhances the natural flavor of the cherries. As the clafoutis bakes, the sugar helps caramelize the edges, creating a light golden crust and subtle sweetness throughout.
- 1/8 teaspoon salt - A small but important addition that balances the sweetness and enhances the flavor of both the custard and the cherries. It ensures the dessert tastes complex rather than one-note.
- 3 eggs - The foundation of the custard. Eggs bind the ingredients together and provide the smooth, creamy texture that defines clafoutis. When baked, they give the dessert its delicate, flan-like consistency.
- 1 1/2 cups milk - Adds richness and moisture, turning the batter into a silky custard. Whole milk works best, but you can substitute part of it with cream for an even more luxurious texture.
- 1 teaspoon vanilla - Infuses the custard with warm, aromatic flavor that complements the cherries beautifully. It adds depth and a subtle sweetness that rounds out the dessert’s overall taste.
- 1 1/2 cups cherries - The star ingredient. Cherries add bursts of juicy, sweet-tart flavor that contrast perfectly with the creamy custard. Pitting and halving them ensures even distribution and easy slicing once baked.
- 2 tablespoons unsalted butter - Adds richness and a hint of buttery flavor to the batter while keeping the clafoutis moist. It also helps prevent sticking if brushed onto the baking dish before pouring in the batter.
- Powdered sugar - The finishing touch. Lightly dusted over the baked clafoutis, it adds elegance and a touch of extra sweetness while highlighting the dessert’s rustic charm.
How To Make A Cherry Clafoutis
- Prep the pan & cherries. Preheat to 350°F. Generously butter a shallow 9″ pie dish. Arrange cherries evenly on the bottom.
- Whisk the batter. In a bowl, whisk together ¾ cup flour, ½ cup sugar, and a pinch of salt. Add 3 large eggs and whisk until smooth. Slowly pour in 1¼ cups milk and 1 tsp vanilla, whisking until silky.
- Bake to perfection. Gently pour batter over melted butter and prepared cherries in a pie pan. Bake at 350°F for 40–45 minutes until puffed, lightly golden, and center set.
- Cool & serve. Let rest 10 minutes; it will deflate into a rustic soufflé. Dust with powdered sugar before slicing.
Tips And Tricks
Making a cherry clafoutis is delightfully simple, but a few smart tips can help elevate this rustic French dessert to bakery-level perfection:
- Use fresh cherries if possible. They offer better texture and flavor than frozen, especially in peak season. If using frozen, thaw and pat dry to prevent a watery batter.
- Don’t skip greasing the pan. Generously butter your baking dish to ensure the clafoutis doesn’t stick and gains a beautiful golden crust.
- Let the batter rest. Allow the batter to sit for 15–30 minutes before pouring it over the cherries. This helps hydrate the flour and results in a smoother, more cohesive custard.
- Preheat the baking dish. For a slightly firmer base, warm your greased baking dish in the oven before adding the cherries and batter.
Variations
While the classic cherry clafoutis is beloved for its simple elegance, there are plenty of creative variations you can try to suit different tastes and seasonal fruits:
- Berry Blend- Swap cherries for berries. Try it with raspberries, blueberries, or strawberries.
- Stone Fruit- Sliced peaches or plums in summer add warmth.
- Citrus- Stir in 2 tsp grated lemon zest for a bright zing.
- Gluten-Free Version - Use ¾ cup almond flour + 2 Tbsp arrowroot powder in place of flour.
What To Enjoy With Clafoutis
Clafoutis is a versatile dessert that pairs beautifully with a variety of accompaniments, whether you’re serving it for brunch, a light dessert, or a cozy evening treat. Here are some delicious ideas for what to enjoy with it:
- Whipped Cream - A dollop of lightly sweetened whipped cream adds a fluffy contrast to the custardy texture.
- Vanilla Ice Cream - The cool, creamy richness of vanilla ice cream pairs perfectly with warm clafoutis right out of the oven.
- Crème Fraîche or Yogurt - For a tangy balance, serve clafoutis with a spoonful of crème fraîche or Greek yogurt.
How Long Does It Last?
Stored in the fridge, Cherry Clafoutis keeps well (in an airtight container) for up to 3 days. The flavor deepens and the texture becomes more custard-like over time. It’s delicious served cold or room temp.
Can You Freeze It?
Yes! To freeze, cool completely, wrap tightly (foil + plastic wrap), and freeze. Thaw the leftovers overnight in the fridge. Reheat slices in a 300°F oven for 10 minutes or until warm.
This sweet treat is great for make-ahead entertaining.
Clafoutis is a traditional French baked custard dessert where fruit is nestled in a simple egg-and-milk batter and baked until puffed and set, creating a texture that’s like pancake-meets-flan (custardy in the center with lightly browned edges). A classic cherry clafoutis is rustic and “mix-pour-bake” easy, typically made in a pie dish and served warm or at room temperature with a dusting of powdered sugar, whipped cream, or crème fraîche.
A cherry clafoutis turns watery most often because the fruit released too much juice. This is common with frozen cherries (especially if thawed) or very ripe fresh cherries, or because it was underbaked, so the custard didn’t fully set. To prevent a watery French baked custard, pat cherries dry, avoid dumping in extra cherry juice, and if using frozen fruit, either use it straight from frozen and blot off frost or thaw and drain thoroughly. Some bakers also toss the fruit with a teaspoon of flour or almond flour to help absorb moisture. Bake until the edges are set, and the center has only a slight jiggle, then let it cool 10–15 minutes. Clafoutis continues to set as it rests, and cutting too soon can make it seem runny.
The main difference is texture and method. Clafoutis is a French baked custard dessert where fruit (usually cherries) is baked right in a thin batter that includes a little flour, so it comes out like pancake-meets-flan. It’s custardy but with a lightly cakey structure and often a puffed edge. Flan is a smoother, fully egg-custard dessert (usually no flour) baked in a water bath and typically topped with caramel, so it’s more silky and uniform rather than rustic and fruit-studded. In short: cherry clafoutis = baked custard + fruit + a touch of batter. Flan = pure custard, set and creamy, often caramel-coated.
More Delicious Desserts
- Cannoli Pie
- Strawberry Crumble
- Lemon Squares
- Rum Balls
- Mini Cheesecakes
Clafoutis Recipe | French Cherry Clafoutis
Ingredients
- ▢ 3/4 cup All Purpose Flour
- ▢ 1/2 cup Granulated Sugar
- ▢ 1/8 tsp Kosher Salt
- ▢ 3 Eggs
- ▢ 1 1/2 cups Milk
- ▢ 1 tsp Vanilla
- ▢ 1 1/2 cups Cherries , Pitted and halved
- ▢ 2 tbsp Unsalted Butter , melted
- ▢ Powdered Sugar , for dusting
Instructions
- Prep the pan & cherries. Preheat to 350°F. Generously butter a shallow 9″ pie dish. Arrange cherries evenly on the bottom.
- Whisk the batter. In a bowl, whisk together ¾ cup flour, ½ cup sugar, and a pinch of salt. Add 3 large eggs and whisk until smooth. Slowly pour in 1¼ cups milk and 1 tsp vanilla, whisking until silky.
- Bake to perfection. Gently pour batter over melted butter and prepared cherries in a pie pan. Bake at 350°F for 40–45 minutes until puffed, lightly golden, and center set.
- Cool & serve. Let rest 10 minutes; it will deflate into a rustic soufflé. Dust with powdered sugar before slicing.
