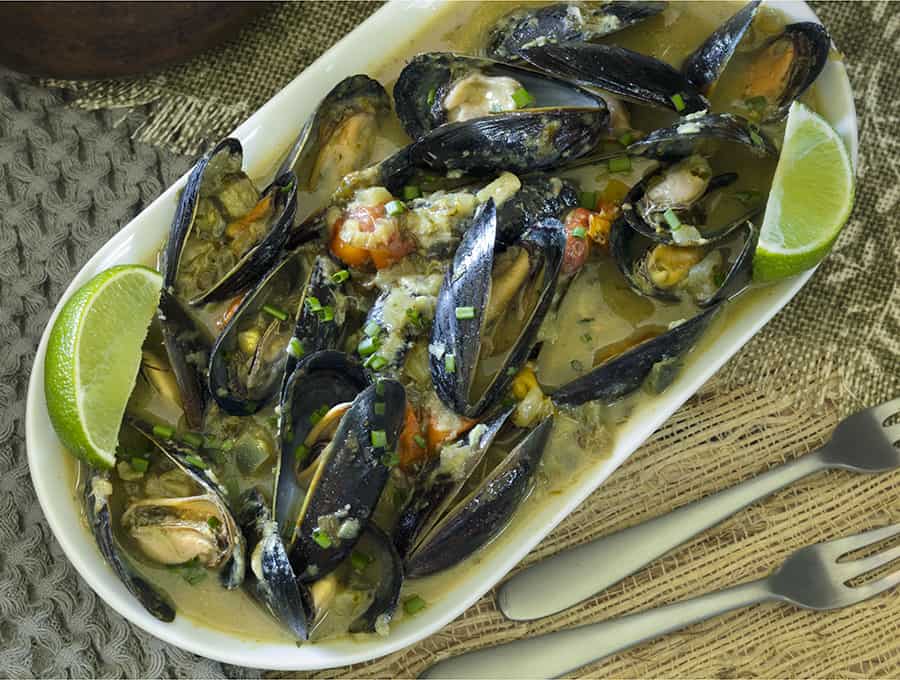
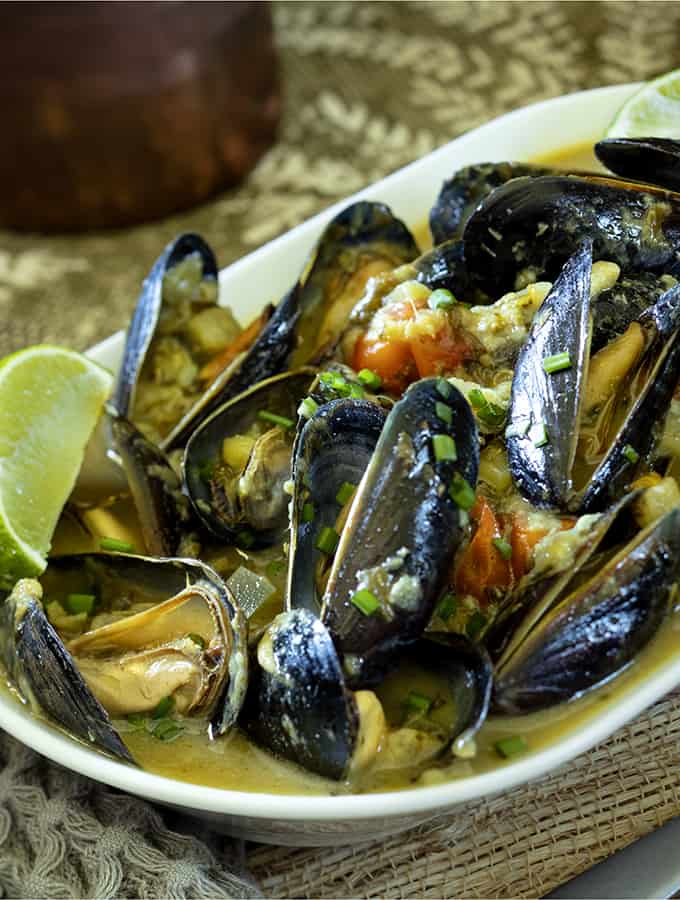
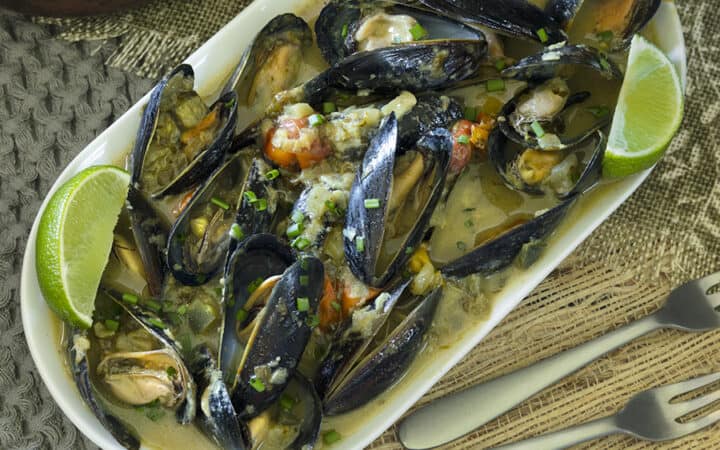
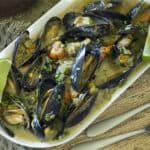
This Thai Green Curry Mussels recipe is the perfect Thai seafood dish you’ll wish you had tried earlier. It’s savory, sweet, low carb, and done in just 30 minutes.
What Makes This Thai-style Mussel Recipe So Great
- Mussels. I realize that mussels are not typically what we expect in Thai curries, but why not? It does make for slightly messy eating, but it also makes for very good eating. And for good food that’s ready in less than 30 minutes ? I’ll deal with the messy.
- Curry. This Thai curry recipe is perfectly savory and sweet all at the same time. It’s creamy, delicious and I just want to smother just about everything I eat in it!
- Quick. Nothing makes me happier than a delicious dinner option that I can make super quick with minimal effort. Seriously, who doesn’t love a wonderfully tasty meal that you don’t have to work hard for? Nobody, that’s who.
What Is The Best Way To Cook Mussels?
If you’re wondering how to cook mussels , just know mussels cook very quickly, so be careful not to overcook them. Honestly just cooking them on the stovetop , as I do here in this mussels recipe , is the best option since it’s so quick.
Is It Healthy To Eat Mussels?
Mussels are surprisingly good for you. They are high in protein , low in calories and carbs , and are also an excellent source of Omega-3 fats !
How To Clean Mussels
- Scrub. First, you will want to use a scrub brush and scrub them on the outside to get rid of their, " beards ."
- Soak. Secondly, you will need to soak them in water. Allow them to “drink” the water, and spit out any sand. You may need to change the water a couple of times until the water is clear. Do this before cooking your mussels recipe.
Ingredients You’ll Need
- 1 tablespoon Coconut Oil - Acts as the cooking fat to sauté the aromatics and curry paste, adding a subtle coconut aroma that enhances the overall flavor of the dish.
- 2 tablespoons Green Curry Paste - This is the flavor base of the dish, bringing vibrant, spicy, and aromatic Thai flavors from ingredients like green chilies, lemongrass, and kaffir lime. It gives the curry its signature color and heat.
- 1 tablespoon Minced Garlic - Adds a deep, savory flavor and aroma that balances the heat and brightness of the curry paste.
- 1 tablespoon Minced Ginger - Provides a warm, slightly sweet, and zesty note that enhances the Thai flavor profile and complements the seafood.
- 1/2 cup Cherry Tomatoes - These burst during cooking, adding natural sweetness and acidity that brighten the creamy coconut broth.
- 1 cup Eggplant - Adds body and a tender texture to the curry while soaking up the flavorful sauce, making the dish heartier.
- 1 can Full-Fat Coconut Milk - Forms the rich, creamy base of the curry, balancing the spiciness of the green curry paste and giving the dish its luxurious texture.
- 2 teaspoons Soy Sauce - Adds umami depth and saltiness, enhancing the overall flavor while complementing the fish sauce.
- 2 teaspoons Fish Sauce - Brings a distinctly savory, briny taste that enhances the seafood flavors and gives the curry authentic Thai depth.
- 1 teaspoon Swerve - A sugar-free sweetener that balances the heat and saltiness of the curry, maintaining harmony in the flavor profile without adding sugar.
- 1/4 cup Basil - Fresh basil infuses the dish with a bright, fragrant herbal finish that perfectly complements the spicy, creamy curry sauce.
- 1 pound Mussels - The star of the dish, mussels add a sweet, briny seafood flavor. As they steam open in the curry sauce, they absorb the rich Thai flavors for a perfectly balanced bite.
How To Make This Thai Mussels Recipe
- Sauté. Heat 10-inch sauté pan with a lid. Add coconut oil and the green curry paste and sauté for 1 minute.
- Mix. Add ginger, garlic, tomatoes and eggplant and mix well.
- Pour. Pour in coconut milk, soy sauce, fish sauce, and Swerve . Cover the saucepan with a lid and cook for 10 minutes until the eggplant is cooked through.
- Add mussels. Add in mussels and place the lid back on. Cook until the mussels have opened, about 3-5 minutes. Discard any mussels that have not opened.
- Serve. Sprinkle with additional chopped basil and serve.
Tips And Tricks
Making Thai Green Curry Mussels is all about balancing heat, creaminess, and freshness. Here are some tips and tricks to help you perfect this flavorful dish:
- Scrub and clean the mussels. Clean the mussels thoroughly and discard any that are cracked or don’t close when tapped. These are not safe to eat.
- Use full-fat coconut milk. This ensures a rich, velvety sauce that holds up to the curry’s spice and doesn’t curdle during simmering.
- Sauté the curry paste first. Frying the green curry paste in coconut oil before adding liquid helps release its aromatic oils and deepens the flavor.
- Don’t overcook the mussels. Once the mussels open, they’re done, usually in 3–5 minutes. Overcooking makes them tough and chewy.
Variations
Here are some variations for making Thai Green Curry Mussels that add creative twists to the classic dish:
- Red Curry Mussels - Substitute green curry paste with red curry paste for a deeper, slightly sweeter flavor with more chili warmth.
- Vegetable-Packed Curry - Stir in bell peppers, snap peas, or zucchini along with the eggplant for extra color, crunch, and nutrition.
- Creamy Lemongrass Mussels - Add a few crushed lemongrass stalks while simmering for a citrusy, aromatic twist.
What To Eat With This Mussels Recipe
Thai Green Curry Mussels pair beautifully with a variety of sides that soak up the rich, aromatic sauce and balance the bold flavors. Here are some delicious options to eat with them:
- Jasmine Rice - The most classic pairing. Fluffy rice absorbs the spicy coconut curry sauce perfectly.
- Coconut Rice - Adds an extra layer of creaminess and sweetness that complements the heat of the curry.
- Crusty Bread or Garlic Naan - Ideal for mopping up every last drop of the flavorful broth.
How Long Do They Last?
Thai Green Curry Mussels are best enjoyed fresh, but if you have leftovers, they can be stored safely in the refrigerator for up to 2 days. Allow the mussels and sauce to cool completely before transferring them to an airtight container.
When reheating, warm the curry gently over low heat until just hot. Avoid boiling, as this can make the mussels tough and rubbery.
Can You Freeze Them?
Freezing Thai Green Curry Mussels is not recommended because both the mussels and the coconut milk sauce tend to lose their texture and flavor after thawing.
Cooked mussels can become rubbery, and the coconut milk may separate, resulting in a grainy sauce.
MoreThai Recipes
- Thai Cashew Chicken - An easy one-pan cashew chicken stir fry.
- Air Fryer Thai Peanut Chicken - An easy yet delicious dish that mixes things up a bit.
- Bang Bang Shrimp - Sweet, spicy and tangy shrimp perfection.
- Air Fried Beef Satay - A super-fast, authentic recipe that requires very little hands-on time.
- Air Fryer Cornish Game Hens Thai Gai Yang - A simple cornish game hen dish you’ll want to make again and again.
- Spicy Basil Beef - A healthy, fast dinner option that’s oh so delicious.
- Thai Green Curry - A perfect, authentic Thai curry with chicken and vegetables.
- Instant Pot Thai Coconut Pandan Custard - A delicious keto treat you can make in your pressure cooker.
If you love mussels, you’re going to LOVE these Thai Green Curry Mussels . They’re easy to make, but the flavor is out of this world! Pin this recipe on Pinterest or share it on Facebook to save it.
Thai Green Curry Mussels | Easy Mussels Recipe
Equipment
- 10-Inch Saute Pan
Ingredients
- ▢ 1 tablespoon Coconut Oil
- ▢ 2 tablespoons Green Curry Paste
- ▢ 1 tablespoon Minced Garlic
- ▢ 1 tablespoon Minced Ginger
- ▢ 1/2 cup Cherry Tomatoes
- ▢ 1 cup Eggplant , chopped
- ▢ 1 can Full-Fat Coconut Milk
- ▢ 2 teaspoons Soy Sauce
- ▢ 2 teaspoons Fish Sauce
- ▢ 1 teaspoon Swerve
- ▢ 1/4 cup Basil , chopped
- ▢ 1 pound Mussels
- ▢ Additional basil for garnishing
Instructions
- Heat 10-inch sauté pan with a lid. Add coconut oil and the green curry paste and sauté for 1 minute.
- Add ginger, garlic, tomatoes and eggplant and mix well.
- Pour in coconut milk, soy sauce, fish sauce, and Swerve . Cover the saucepan with a lid and cook for 10 minutes until the eggplant is cooked through.
- Add in mussels and place the lid back on. Cook until the mussels have opened, about 3-5 minutes. Discard any mussels that have not opened.
- Sprinkle with additional chopped basil and serve.
How To Clean Mussels
- Scrub. First, you will want to use a scrub brush and scrub them on the outside to get rid of their, " beards ."
- Soak. Secondly, you will need to soak them in water. Allow them to “drink” the water, and spit out any sand. You may need to change the water a couple of times until the water is clear.
Get support & connect with our community on Facebook!
Nutrition

If you already signed up, you should have received an email with a password to give you unlimited access to our FREE Printable Library. The password is case sensitive. Enter it below and get printing!
Password:
Thai Green Curry Mussels | Easy Mussels Recipe
Ingredients
- 1 tablespoon Coconut Oil
- 2 tablespoons Green Curry Paste
- 1 tablespoon Minced Garlic
- 1 tablespoon Minced Ginger
- 1/2 cup Cherry Tomatoes
- 1 cup Eggplant chopped
- 1 can Full-Fat Coconut Milk
- 2 teaspoons Soy Sauce
- 2 teaspoons Fish Sauce
- 1 teaspoon Swerve
- 1/4 cup Basil chopped
- 1 pound Mussels
- Additional basil for garnishing
Instructions
- Heat 10-inch sauté pan with a lid. Add coconut oil and the green curry paste and sauté for 1 minute.
- Add ginger, garlic, tomatoes and eggplant and mix well.
- Pour in coconut milk, soy sauce, fish sauce, and Swerve . Cover the saucepan with a lid and cook for 10 minutes until the eggplant is cooked through.
- Add in mussels and place the lid back on. Cook until the mussels have opened, about 3-5 minutes. Discard any mussels that have not opened.
- Sprinkle with additional chopped basil and serve.
How To Clean Mussels
- Scrub. First, you will want to use a scrub brush and scrub them on the outside to get rid of their, " beards ."
- Soak. Secondly, you will need to soak them in water. Allow them to “drink” the water, and spit out any sand. You may need to change the water a couple of times until the water is clear.
Thai Green Curry Mussels | Easy Mussels Recipe https://twosleevers.com/thai-green-curry-mussels-recipe/
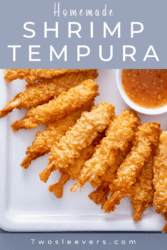
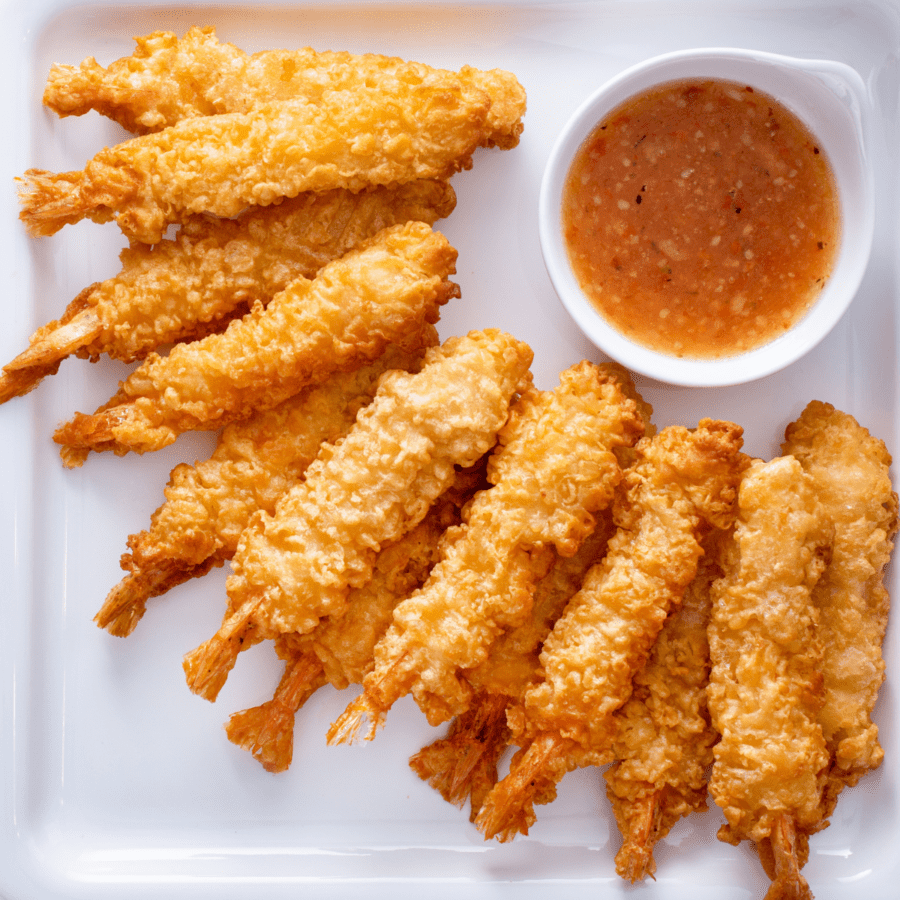
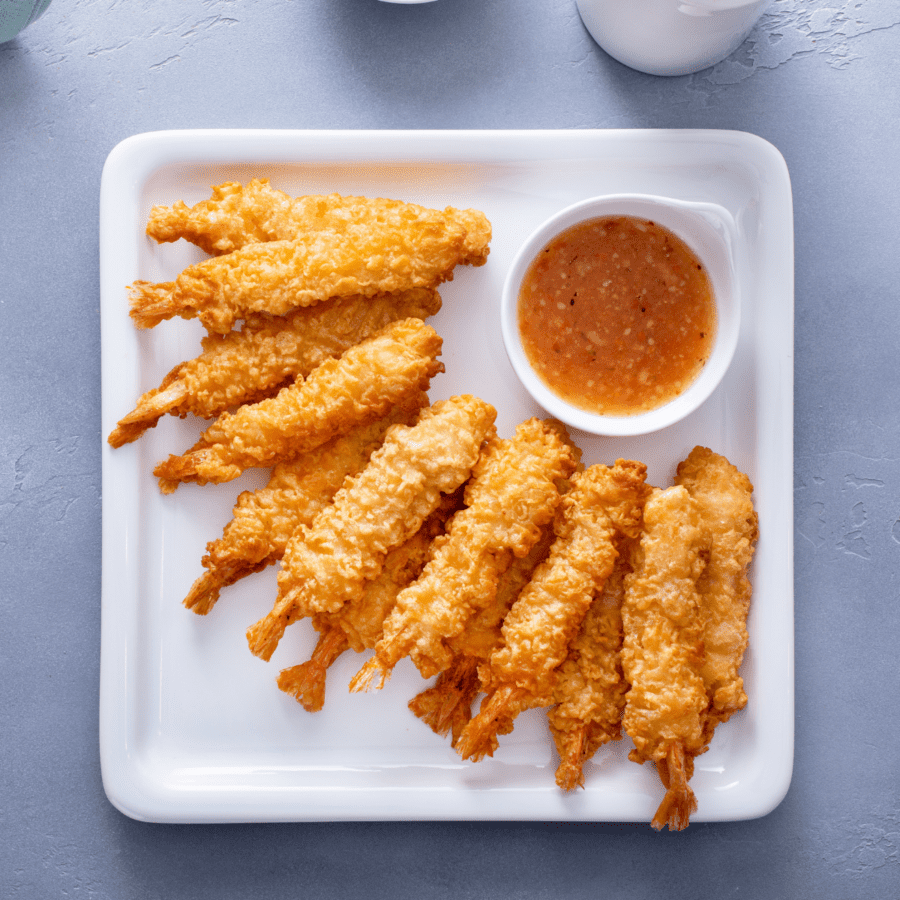
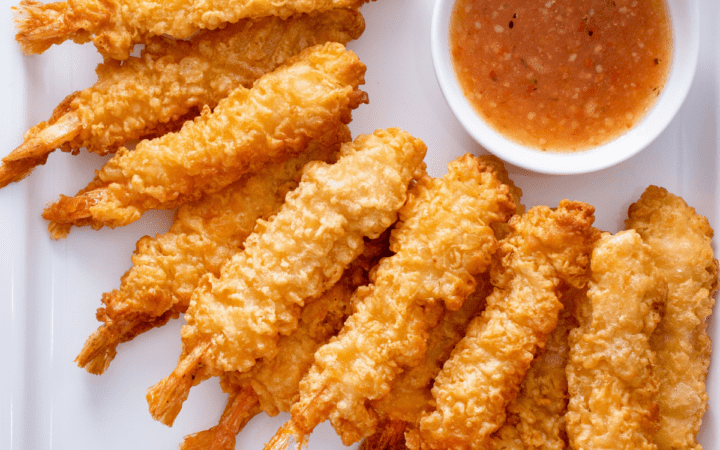
Shrimp Tempura is a Japanese fried seafood appetizer made with large shrimp, all-purpose flour, cornstarch, baking powder, ice-cold water, and vegetable oil for frying. It’s quick and works well for a party appetizer or sushi night at home when you want crispy tempura without a lot of prep. Unlike restaurant tempura or heavier battered fried shrimp, this version uses a simple cold-water batter with cornstarch and baking powder to stay light, airy, and crisp.
Why You’ll Love Making This Fried Shrimp
- Fast. Using shrimp that are prepared and ready to be breaded and fried makes this a simple meal or appetizer that is ready in under 30 minutes .
- Easy. Just a few simple steps to follow for an incredibly simple bite you’re sure to enjoy.
- Budget-friendly. Skip the takeout or expensive Japanese restaurants and make these tasty little fried shrimp at home.
- Delicious. Guaranteed to taste just as good as your favorite restaurant.
Making tempura shrimp at home is simple and easy. With just a few ingredients and a little bit of practice, you can make a tasty and crispy dish that is sure to impress your friends and family.
What Does Shrimp Tempura Mean?
The word “tempura” refers to the cooking technique used to prepare the dish, which involves coating the shrimp (in the case of this recipe) in a batter made of flour, water, and eggs, and then frying it in hot oil until it is crispy and golden brown.
Is Tempura Shrimp The Same As Fried Shrimp?
Tempura shrimp and fried shrimp are similar in that both involve coating shrimp in batter and frying them. However, there are some differences between the two dishes.
Tempura Shrimp. The batter used in tempura shrimp is typically thinner and less greasy than the batter used in traditional fried shrimp. This results in a lighter and more delicate texture for the shrimp, with a crispy and crunchy exterior and a tender and juicy interior.
Fried Shrimp. Fried shrimp is a more general term that can refer to shrimp that have been coated in a variety of different batters or coatings, such as bread crumbs or cornmeal, and then deep-fried.
What Kind Of Shrimp Is Used For Tempura?
When making tempura shrimp, it’s best to use large-sized shrimp that have been peeled and deveined.
It’s important to use large-sized shrimp for tempura because they hold their shape better during the cooking process, and their meat stays tender and juicy. Using smaller-sized shrimp can result in overcooking and a rubbery texture.
Ingredients You’ll Need
- 1 pound large shrimp - The star of the dish. Large shrimp provide a sweet, tender, and juicy base that holds up well to frying. They’re peeled, deveined, and often butterflied to create a flatter surface for the batter to cling to.
- 1 cup all-purpose flour - The primary dry ingredient in the batter. It gives structure, crispiness, and a light coating around the shrimp when fried.
- 1/4 cup cornstarch - Helps lighten the batter by reducing gluten formation from the flour. It makes the tempura coating crispier and less dense.
- 2 tablespoons baking powder - A leavening agent that creates tiny bubbles in the batter, ensuring the fried coating is airy, puffy, and delicate instead of heavy.
- 1/2 cup cold water - Essential for the tempura’s light texture. Ice-cold water prevents the flour from over-absorbing liquid and keeps the batter from developing too much gluten, resulting in a thin, crisp shell.
- 1 teaspoon salt - Adds seasoning to the batter, enhancing the natural sweetness of the shrimp and balancing flavors.
- 1/4 teaspoon ground black pepper - Provides a subtle savory note and mild spice, rounding out the flavor of the batter.
- Vegetable oil - A neutral oil with a high smoke point that allows the tempura to fry evenly and develop a golden, crisp exterior without overpowering the shrimp’s flavor.
How To Make Tempura Shrimp
- Prepare the Shrimp. Rinse the shrimp under cold water and pat them dry with paper towels.
- Make the Batter. In a large mixing bowl, whisk together the flour, cornstarch, baking powder, and salt until well combined. Gradually pour in the ice water, whisking continuously, until the batter is smooth and has a slightly runny consistency. Make sure not to overmix the batter as this can result in a dense and heavy coating.
- Heat the Oil. Heat vegetable oil in a large pot or deep fryer until it reaches 375F. It’s important to use a deep pot or fryer to avoid splattering hot oil. You can check the temperature of the oil using a candy thermometer or by dropping a small piece of batter into the oil. If it sizzles and turns golden brown in a few seconds, the oil is ready.
- Coat the Shrimp. Place each shrimp on a skewer lengthwise. Dip each shrimp into the batter, making sure it is coated evenly. Shake off any excess batter and carefully place the shrimp in the hot oil. Fry the shrimp in batches for 2-3 minutes or until they are golden brown and crispy. Use a slotted spoon or tongs to remove the shrimp from the oil and transfer them to a plate lined with paper towels to drain excess oil.
- Serve and Enjoy! Remove the shrimp from the skewers and serve with your favorite dipping sauce.
Tips And Tricks
Making perfect shrimp tempura at home can seem intimidating, but a few simple tips and tricks will help you achieve that light, crispy, restaurant-quality texture every time. Here’s what you need to know:
- Use Very Cold Ingredients . Keep your batter ingredients, especially the water, ice-cold. Cold batter slows gluten formation in the flour, which prevents the coating from becoming heavy and dense.
- Do Not Overmix the Batter . When combining the flour and cold water, mix just until incorporated. Lumps are okay; overmixing develops gluten, leading to a chewy, dense coating instead of a light, airy crunch.
- Dry the Shrimp Thoroughly . Pat the shrimp completely dry before dipping in batter. Excess moisture causes the oil to splatter and prevents the batter from adhering properly.
Variations
While the traditional recipe is simply shrimp battered in tempura batter and fried, there are many variations you can try to add variety to this delicious dish. Here are some ideas to help switch it up:
- Make them spicy. Add some heat to your tempura shrimp by mixing some chili flakes or cayenne pepper into the tempura batter.
- Add some sweetness . Add some tropical flavor to your tempura shrimp by adding shredded coconut to the batter.
- Add a taste of teriyaki. Drizzle some teriyaki sauce over the fried tempura shrimp for a savory and sweet flavor.
What To Serve With Them
Tempura shrimp is a delicious dish that can be served as an appetizer or a main course. Here are some sides to serve alongside them to make it a complete meal:
- Rice - A bowl of steamed white rice is a classic accompaniment.
- Miso Soup - A warm bowl of miso soup can balance out the fried texture of the shrimp.
- Noodles - Cold soba or udon noodles can be served with a dipping sauce alongside the tempura shrimp.
- Pickled Vegetables - Pickled vegetables like daikon or cucumber can provide a refreshing contrast.
- Dipping Sauce - A light dipping sauce, such as soy sauce mixed with grated ginger, can enhance the flavor.
How Long Do They Last?
Tempura shrimp can last for up to 3-4 days in the refrigerator when stored properly. It’s important to remember that the texture of the batter may become less crispy over time.
Can You Freeze Them?
Yes, you can freeze tempura shrimp for up to 2-3 months.
To freeze, allow the shrimp to cool to room temperature and then place them in an airtight container or freezer bag. You can also wrap them individually in plastic wrap before placing them in the container to prevent them from sticking together.
When you’re ready to eat them, thaw them overnight in the refrigerator, and then reheat them in the oven or air fryer to crisp up the batter.
Shrimp tempura is usually not crispy because the oil temperature was too low or dropped from frying too many pieces at once, which makes the tempura batter absorb oil and turn soggy. Overmixing the ice cold tempura batter can also develop gluten and create a heavier coating, and batter that is too thick will fry up bready instead of light and airy. For crispier ebi tempura, keep the batter very cold, mix just until combined, dredge lightly, fry in small batches at a steady hot oil temperature, and drain on a rack instead of paper towels to prevent steaming.
Yes, you can use sparkling water in tempura batter, and it can help make shrimp tempura lighter because the carbonation adds airiness and the cold liquid slows gluten development. Use very cold sparkling water, mix the tempura batter just until combined, and keep it chilled between batches to maintain a crisp tempura coating. You still need the right hot oil temperature and small batch frying for ebi tempura that stays crispy.
To keep tempura batter cold for crispy shrimp tempura, use ice cold water or sparkling water and chill your mixing bowl and whisk ahead of time. Set the batter bowl inside a larger bowl of ice while you fry, and only mix small batches so it does not warm up while sitting. Avoid overmixing and do not let the batter rest at room temperature, since a colder tempura batter helps create a light, airy coating for ebi tempura.
More Savory Shrimp Recipes
- Air Fryer Shrimp Fried Rice
- Shrimp Risotto
- Bang Bang Shrimp
- Shrimp Fajitas
- Air Fryer Keto Shrimp Scampi

Shrimp Tempura | Easy Tempura Shrimp Recipe
Ingredients
- ▢ 1 pound large shrimp
- ▢ 1 cup All-Purpose Flour
- ▢ 1/4 cup Cornstarch
- ▢ 2 tbsp Baking Powder
- ▢ 1/2 cups Cold Water
- ▢ 1 tsp Kosher Salt
- ▢ 1/4 tsp Ground Black Pepper
- ▢ Vegetable Oil , For Frying
Instructions
- Rinse the shrimp under cold water and pat them dry with paper towels.
- In a large mixing bowl, whisk together the flour, cornstarch, baking powder, and salt until well combined. Gradually pour in the ice water, whisking continuously, until the batter is smooth and has a slightly runny consistency.
- Heat vegetable oil in a large pot or deep fryer until it reaches 375F.
- Place each shrimp on a skewer lengthwise. Dip each shrimp into the batter, making sure it is coated evenly. Shake off any excess batter and carefully place the shrimp in the hot oil. Fry the shrimp in batches for 2-3 minutes or until they are golden brown and crispy. Use a slotted spoon or tongs to remove the shrimp from the oil and transfer them to a plate lined with paper towels to drain excess oil.
- Remove the shrimp from the skewers and serve with your favorite dipping sauce.
