
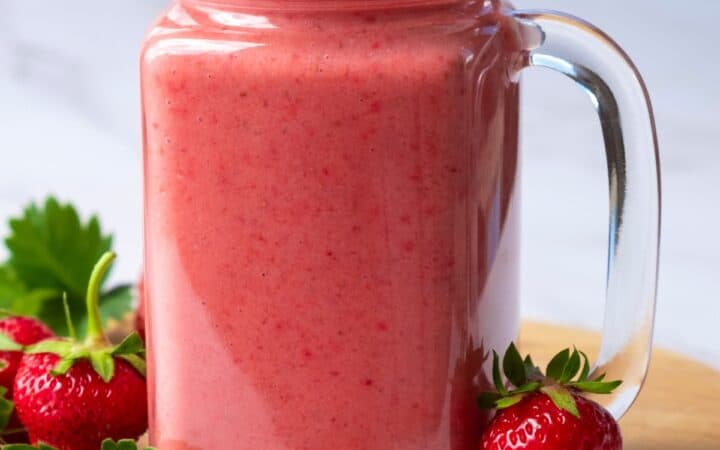
If you love a refreshing and naturally sweet smoothie, this Strawberry Smoothie recipe is just what you need. Made with fresh or frozen strawberries, creamy yogurt, and a hint of vanilla, this smoothie is perfect for breakfast, post-workout fuel, or a midday snack. It is easy to customize, naturally sweetened, and takes only five minutes to prepare.

Why You’ll Love This Delicious Drink
- Quick & Easy . Ready in just five minutes with minimal ingredients.
- Healthy . Packed with fiber, protein, and vitamins.
- Customizable . Can be made dairy-free, protein-packed, or extra thick.
- Kid-Friendly . A naturally sweet treat that kids love.
A homemade strawberry smoothie is the perfect way to start your day or refresh yourself in the afternoon. It is smooth, creamy, and bursting with strawberry flavor.
What Does A Strawberry Smoothie Taste Like?
A strawberry smoothie has a refreshing, naturally sweet, and slightly tangy taste with a smooth, creamy texture. The ripe strawberries bring a burst of fresh, fruity flavor, while the banana adds a mild sweetness and enhances the creaminess. Greek yogurt provides a subtle tang and extra richness, balancing the flavors perfectly.
If honey or maple syrup is added, it enhances the sweetness without overpowering the natural fruit flavors. The result is a deliciously smooth, well-balanced drink that is both refreshing and satisfying.
Is It Healthy?
Yes, strawberry smoothies are a nutritious and delicious option. Strawberries are rich in antioxidants, vitamin C, and fiber, making them great for boosting immunity and digestion.
When combined with Greek yogurt or a dairy-free alternative, this smoothie provides protein to keep you full longer. You can also control the sweetness by using natural sweeteners like honey or skipping added sugars altogether.
What Liquids Blend Best In A Strawberry Smoothie?
The best liquids for blending strawberry smoothies depend on the flavor and texture you want, but some stand out for their smooth consistency and balance of sweetness and creaminess.
Milk (dairy or non-dairy, like almond, oat, or soy milk) creates a rich, creamy smoothie that enhances the natural sweetness of strawberries. Yogurt or buttermilk adds tang and thickness for a more dessert-like taste.
If you prefer something lighter, fruit juice such as orange or apple juice gives a bright, refreshing flavor.
For a low-calorie option, coconut water or plain water blends well too, offering hydration while letting the strawberry flavor shine.
What Do You Put In A Strawberry Smoothie?
- 1 1/2 Cups Strawberries - The main ingredient, providing a naturally sweet and slightly tangy flavor while adding vibrant color.
- 1 Banana - Acts as a natural sweetener and gives the smoothie a creamy texture.
- 1/2 Cup Greek Yogurt - Adds protein and thickness, balancing out the tartness of the berries.
- 3/4 Cup Milk (or Non-Dairy Alternative) - Helps achieve the perfect consistency, making the smoothie blend smoothly.
- 1 TBSP Honey or Maple Syrup (Optional) - Adds extra sweetness if needed, especially if using unsweetened yogurt or tart strawberries.
- 1/2 tsp Vanilla Extract - Enhances the overall flavor, giving the smoothie a subtle depth and warmth.
- 1/2 Cup Ice Cubes (Optional) - Creates a colder, thicker, and more refreshing smoothie, especially when using fresh fruit instead of frozen.
How To Make A Strawberry Smoothie
- Prepare Your Ingredients . If using fresh strawberries, remove the stems and wash them thoroughly. Slice the banana for easier blending. Measure all ingredients and set them aside.
- Blend Until Smooth . In a high-speed blender, add the strawberries, banana, Greek yogurt, milk, vanilla extract, and honey (if using). Blend on high speed for 30–60 seconds or until the smoothie is completely smooth and creamy. If you prefer a thicker smoothie, add a few ice cubes and blend again.
- Serve Immediately . Pour into a glass and enjoy immediately. Garnish with fresh strawberry slices or a drizzle of honey for extra sweetness.

Tips And Tricks
A strawberry smoothie is simple to make, but a few tips can take it from good to great. Follow these tricks to achieve the best flavor, texture, and consistency every time.
- Use Frozen Strawberries - Frozen berries create a thick and icy smoothie without needing extra ice.
- Adjust Sweetness - If your strawberries are naturally sweet, you may not need honey or maple syrup. Taste and adjust accordingly.
- Blend in Stages - Start with the liquid and soft ingredients at the bottom, followed by frozen fruit, for smoother blending.
- Make It Creamier - Use frozen banana instead of fresh for an extra thick and creamy texture.
- Boost Nutrition - Add a scoop of protein powder, chia seeds, or spinach for extra nutrients.
Variations
A strawberry smoothie is incredibly versatile and can be customized to suit different tastes and dietary needs. Here are some creative variations to try:
- Strawberry Banana - Keep it classic with just strawberries, banana, and yogurt.
- Strawberry Mango - Swap the banana for mango for a tropical twist.
- Protein Smoothie - Add a scoop of vanilla or unflavored protein powder for extra protein.
- Oat Smoothie - Blend in rolled oats for a fiber-rich, breakfast-friendly smoothie.
- Strawberry Chocolate - Add a teaspoon of cocoa powder for a chocolate-covered strawberry taste.
What To Enjoy With A Strawberry Smoothie
A strawberry smoothie is a refreshing and versatile drink that pairs well with a variety of foods. Here are some delicious options to enjoy with it:
- Granola or Oats - A crunchy topping or side for a balanced breakfast.
- Egg Muffins - A high-protein option for a satisfying meal.
- Toast with Peanut Butter - A delicious combination of carbs, protein, and healthy fats.
- Yogurt Parfait - Layer your smoothie in a bowl with yogurt , granola, and fresh fruit.
- Chia Pudding - A nutrient-dense, fiber-rich side dish.
How Long Does It Last?
A strawberry smoothie is best enjoyed fresh for the optimal flavor, texture, and nutrient content. However, if you need to store it, a homemade strawberry smoothie can last in the refrigerator for up to 24 hours in an airtight container.
Over time, the ingredients may begin to separate, but a quick stir or shake will help bring it back to a smooth consistency.
Can You Freeze It?
Yes, strawberry smoothies freeze well. To freeze, pour the smoothie into an airtight container or an ice cube tray for up to 2 months.
When ready to drink, thaw the smoothie overnight in the fridge or blend frozen smoothie cubes with a little milk for a quick refresh.
More Spectacular Strawberry Recipes
- Strawberry Mousse
- Strawberry Brownies
- Deviled Strawberries
- Strawberry Pretzel Salad
- Strawberry Danish
- Strawberry Soup

Strawberry Smoothie Recipe | Easy Strawberry Smoothies
Ingredients
- ▢ 1 1/2 cups Strawberries
- ▢ 1 Banana
- ▢ 1/2 cup Greek Yogurt
- ▢ 3/4 cup Milk
- ▢ 1 tbsp Honey
- ▢ 1/2 tsp Vanilla Extract
- ▢ 1/2 cup Ice Cubes
Instructions
- Prepare Your Ingredients . If using fresh strawberries, remove the stems and wash them thoroughly. Slice the banana for easier blending. Measure all ingredients and set them aside.
- Blend Until Smooth . In a high-speed blender, add the strawberries, banana, Greek yogurt, milk, vanilla extract, and honey (if using). Blend on high speed for 30–60 seconds or until the smoothie is completely smooth and creamy. If you prefer a thicker smoothie, add a few ice cubes and blend again.
- Serve Immediately . Pour into a glass and enjoy immediately. Garnish with fresh strawberry slices or a drizzle of honey for extra sweetness.
Get support & connect with our community on Facebook!
Nutrition

If you already signed up, you should have received an email with a password to give you unlimited access to our FREE Printable Library. The password is case sensitive. Enter it below and get printing!
Password:
Strawberry Smoothie Recipe | Easy Strawberry Smoothies
Ingredients
- 1 1/2 cups Strawberries
- 1 Banana
- 1/2 cup Greek Yogurt
- 3/4 cup Milk
- 1 tbsp Honey
- 1/2 tsp Vanilla Extract
- 1/2 cup Ice Cubes
Instructions
- Prepare Your Ingredients . If using fresh strawberries, remove the stems and wash them thoroughly. Slice the banana for easier blending. Measure all ingredients and set them aside.
- Blend Until Smooth . In a high-speed blender, add the strawberries, banana, Greek yogurt, milk, vanilla extract, and honey (if using). Blend on high speed for 30–60 seconds or until the smoothie is completely smooth and creamy. If you prefer a thicker smoothie, add a few ice cubes and blend again.
- Serve Immediately . Pour into a glass and enjoy immediately. Garnish with fresh strawberry slices or a drizzle of honey for extra sweetness.
Strawberry Smoothie Recipe | Easy Strawberry Smoothies https://twosleevers.com/strawberry-smoothie-recipe/

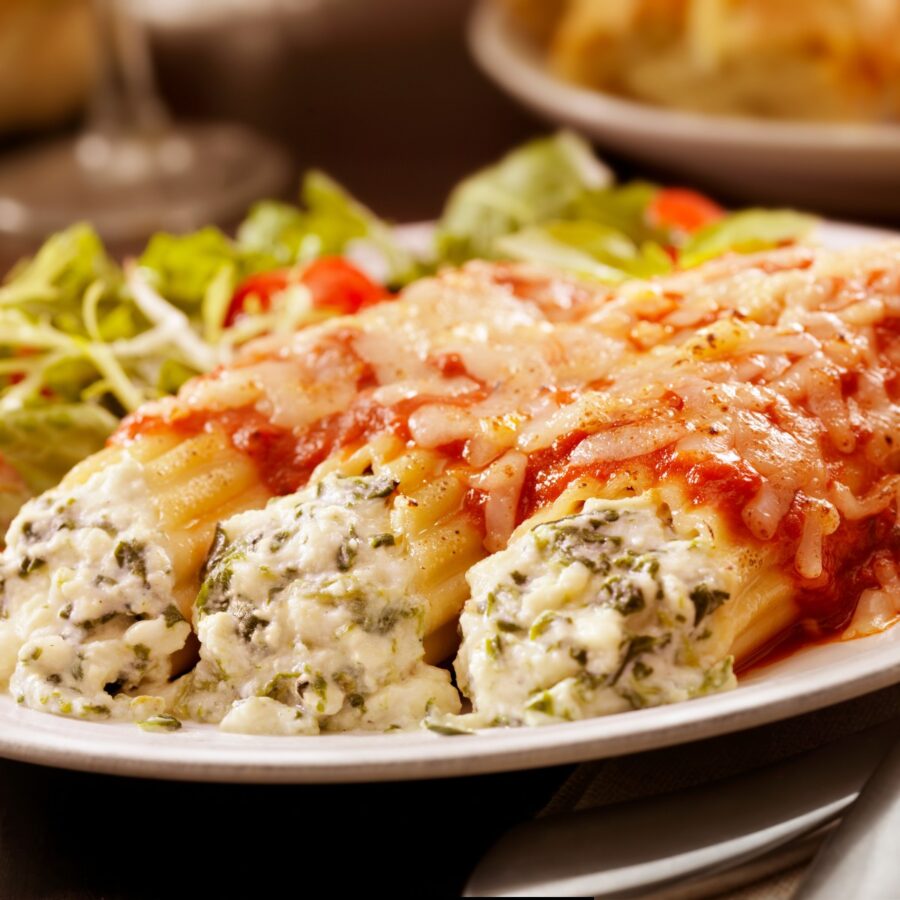
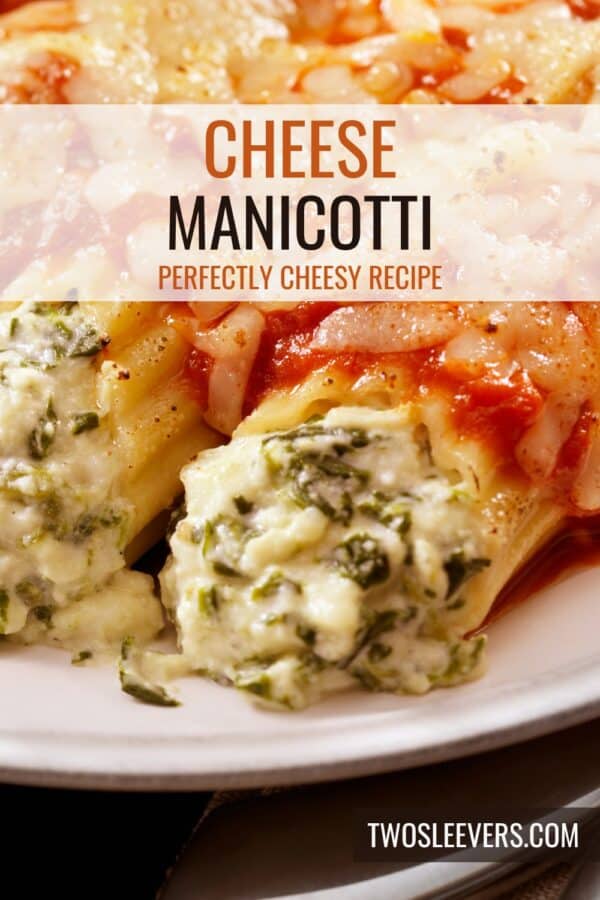
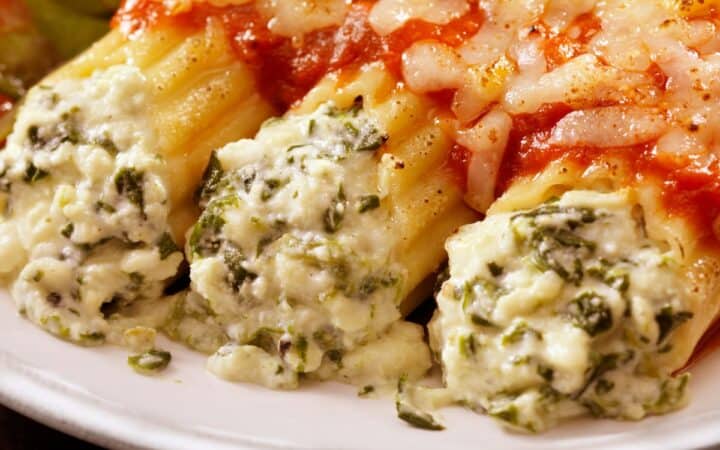
If you love creamy, cheesy, and comforting Italian dishes, then this Cheese Manicotti is for you! Tender pasta shells are stuffed with a rich ricotta and mozzarella filling, covered in savory marinara sauce, and baked until golden and bubbly. This easy baked manicotti recipe is perfect for weeknight dinners, special occasions, or meal prep. Serve it with a side of garlic bread and a fresh salad, and you’ve got a restaurant-quality meal at home!
Why You’ll Love This Perfect Pasta Dish
- Easy to Make . With simple ingredients and a foolproof method , this main course is perfect for both beginner and seasoned cooks.
- Super Cheesy . Loaded with ricotta, mozzarella, and Parmesan , it’s a cheese lover’s dream!
- Make-Ahead Friendly . Perfect for meal prep or freezer-friendly for a stress-free dinner.
- Classic Italian Comfort Food . A warm, baked dish that’s always a family favorite!
This Cheese Manicotti is rich, creamy, and packed with flavor. Whether you’re making it for a weeknight dinner or a special gathering, it’s guaranteed to impress!
What Does Manicotti Taste Like?
Manicotti is a classic Italian pasta dish featuring large, tube-shaped pasta shells stuffed with a cheese or meat filling, covered in marinara sauce, and baked until bubbly. The name “manicotti” translates to “little sleeves” in Italian, referring to the hollow pasta shells that hold the filling.
This cheese-filled version is a meatless classic that’s perfect for vegetarians or anyone who loves an ultra-cheesy, comforting dish!
Ingredients You’ll Need
For The Filling
- Ricotta Cheese – The creamy, rich base of the filling, providing a smooth texture and mild, slightly sweet flavor that balances the tanginess of the marinara sauce.
- Spinach - Adds flavor, texture, and nutritional value to the dish.
- Shredded Mozzarella Cheese – Gives the filling extra gooeyness and ensures a melty, stretchy texture when baked. It also enhances the top layer, creating a golden, bubbly finish.
- Grated Parmesan Cheese – Adds a nutty, salty depth to the cheese mixture, intensifying the overall flavor and balancing the richness of the ricotta.
- Egg – Acts as a binding agent, helping hold the cheese mixture together and giving it structure so it doesn’t ooze out when baked.
- Garlic Powder – Enhances the filling with a savory depth and a hint of garlicky goodness, complementing the cheese and tomato flavors.
- Italian Seasoning – A fragrant blend of basil, oregano, and thyme, bringing authentic Italian flavor to the cheese filling.
- Salt – Enhances the flavors of the cheeses, making the filling more flavorful and well-balanced.
- Black Pepper – Adds a gentle warmth and slight spiciness, rounding out the flavors of the cheese mixture.
Assembly
- Manicotti Shells – Large, tube-shaped pasta shells that hold the cheese filling. Cooking them al dente ensures they maintain their shape and don’t become too soft when baked.
- Marinara Sauce – A rich, tomato-based sauce that coats the manicotti, infusing the dish with savory, slightly tangy flavors. It also keeps the pasta moist during baking.
- Shredded Mozzarella Cheese (for topping) – Sprinkled on top to create a bubbly, golden layer that makes the dish extra cheesy and indulgent.
- Fresh Basil or Parsley – Adds a pop of freshness and color, balancing the richness of the dish with a light, herby finish.
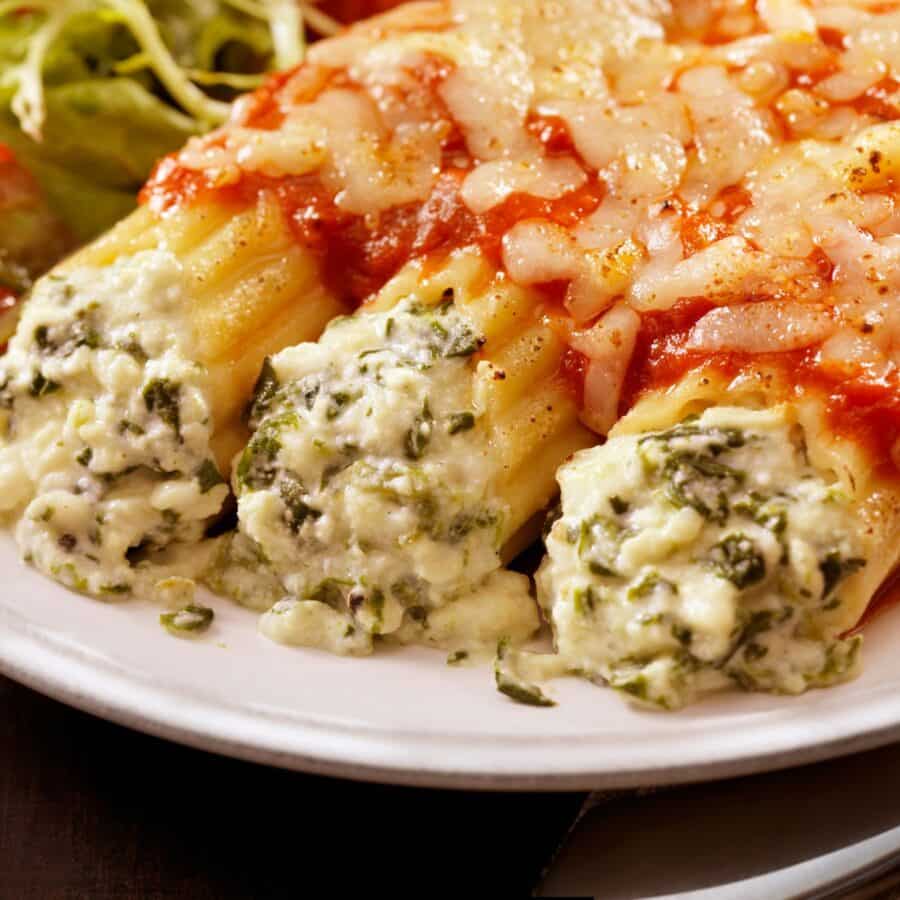
The ricotta, mozzarella, and Parmesan form a rich, cheesy filling, perfectly complemented by aromatic seasonings. The manicotti shells hold the filling while being enveloped in marinara sauce and baked with extra mozzarella, resulting in a gooey, cheesy, and flavorful Italian dish. Garnishing with fresh basil or parsley adds the final touch, making each bite deliciously balanced!
How To Make Cheese Manicotti
- Cook the Manicotti Shells . Bring a large pot of salted water to a boil. Cook the manicotti 1-2 minutes less than the package instructions (they will finish cooking in the oven). Drain and rinse with cold water to prevent sticking.
- Make the Cheese Filling . In a large mixing bowl, combine ricotta, mozzarella, Parmesan, egg, garlic powder, Italian seasoning, salt, and black pepper. Mix until smooth and well combined.
- Fill the Manicotti Shells . Transfer the cheese mixture to a large piping bag or zip-top bag. Cut the tip and carefully pipe the filling into each manicotti shell. Alternatively, use a spoon to stuff the shells gently.
- Assemble the Dish . Preheat the oven to 375°F. Spread 1 cup of marinara sauce evenly across the bottom of a 9x13-inch baking dish. Arrange the filled manicotti shells in a single layer on top of the sauce. Pour the remaining 1 cup of marinara sauce over the shells. Sprinkle with ½ cup of shredded mozzarella cheese.
- Bake to Perfection . Cover the dish with foil and bake for 25 minutes. Remove the foil and bake for another 10 minutes, or until the cheese is bubbly and slightly golden.
- Garnish and Serve . Let the manicotti cool for 5 minutes before serving. Garnish with fresh basil or parsley for added freshness. Serve with garlic bread and a crisp green salad for a complete meal!
Tips And Tricks
Want to make perfectly cheesy, flavorful, and delicious Cheese Manicotti every time? Follow these expert tips to ensure your manicotti turns out just right:
- Cook the pasta slightly underdone . It will continue cooking in the oven, preventing mushy pasta.
- Use a piping bag for easy filling . A zip-top bag works too; just snip the corner!
- Don’t overfill the shells . Leave a little room so the cheese doesn’t ooze out while baking.
- Cover while baking . Keeps the pasta moist and prevents the cheese from over-browning.
- Let it rest before serving . This allows the cheese to set for easier slicing.
Variations
Looking to add a twist to your classic Cheese Manicotti? Whether you want to incorporate more veggies, extra protein, or different sauces, these creative variations will take your baked manicotti to the next level:
- Spinach and Cheese - Add 1 cup of sautéed spinach to the cheese mixture for a nutritious boost.
- Meat Lover’s - Mix in cooked ground beef or Italian sausage to the cheese filling.
- Alfredo - Swap marinara for creamy Alfredo sauce for a rich, indulgent twist.
- Mushroom and Ricotta - Stir in sautéed mushrooms for extra umami flavor.
- Gluten-Free - Use gluten-free pasta shells for a celiac-friendly option.
What To Eat With Manicotti
Manicotti is a rich, cheesy, and comforting Italian dish that pairs beautifully with a variety of sides, salads, breads, and beverages. Whether you’re serving it for a cozy family dinner or a special occasion, here are the best accompaniments to complete your meal:
- Garlic Bread – A crispy, buttery side that’s perfect for soaking up the sauce.
- Caesar Salad – A fresh and crunchy contrast to the rich, cheesy pasta.
- Roasted Vegetables – Serve with roasted zucchini, asparagus, or bell peppers.
- Red Wine – A glass of Chianti or Merlot pairs beautifully with this Italian dish.
How Long Does It Last?
Cheese Manicotti can be stored in the refrigerator for up to 4 days when kept in an airtight container. To maintain the best texture, let it cool completely before storing it to prevent excess moisture buildup.
When reheating, bake at 350°F for 15-20 minutes, covered with foil to keep it from drying out.
Can You Freeze It?
If you want to store it for longer, unbaked manicotti can be frozen for up to 2 months. To freeze, assemble the dish but do not bake—cover tightly with foil and freeze.
When ready to bake, cook directly from frozen at 375°F for 45-50 minutes, removing the foil for the last 10 minutes for a bubbly, golden top.
Budget Friendly Meals
- Spinach Artichoke Pasta
- Baked Feta Pasta
- Vegetable Lasagna
- Tuna Wraps
- Ground Beef Casserole
Manicotti Recipe | Easy Cheese Manicotti Bake
Ingredients
For The Filling
- ▢ 15 ounces Ricotta Cheese
- ▢ 1 cup Mozzarella Cheese , shredded
- ▢ 1/2 cup Parmesan Cheese
- ▢ 1 Egg
- ▢ 1 cup Baby Spinach
- ▢ 1/2 tsp Garlic Powder
- ▢ 1 tsp Italian Seasoning
- ▢ 1/2 tsp Kosher Salt
- ▢ 1/4 tsp Ground Black Pepper
To Assemble
- ▢ 12 Manicotti Shells
- ▢ 2 cups Marinara Sauce
- ▢ 1 cup Mozzrella Cheese , shredded
- ▢ Basil , for garnish
Instructions
- Cook the Manicotti Shells . Bring a large pot of salted water to a boil. Cook the manicotti 1-2 minutes less than the package instructions (they will finish cooking in the oven). Drain and rinse with cold water to prevent sticking.
- Make the Cheese Filling . In a large mixing bowl, combine ricotta, mozzarella, Parmesan, egg, garlic powder, Italian seasoning, salt, and black pepper. Mix until smooth and well combined.
- Fill the Manicotti Shells . Transfer the cheese mixture to a large piping bag or zip-top bag. Cut the tip and carefully pipe the filling into each manicotti shell. Alternatively, use a spoon to stuff the shells gently.
- Assemble the Dish . Preheat the oven to 375°F. Spread 1 cup of marinara sauce evenly across the bottom of a 9x13-inch baking dish. Arrange the filled manicotti shells in a single layer on top of the sauce. Pour the remaining 1 cup of marinara sauce over the shells. Sprinkle with ½ cup of shredded mozzarella cheese.
- Bake to Perfection . Cover the dish with foil and bake for 25 minutes. Remove the foil and bake for another 10 minutes, or until the cheese is bubbly and slightly golden.
- Garnish and Serve . Let the manicotti cool for 5 minutes before serving. Garnish with fresh basil or parsley for added freshness. Serve with garlic bread and a crisp green salad for a complete meal!
