
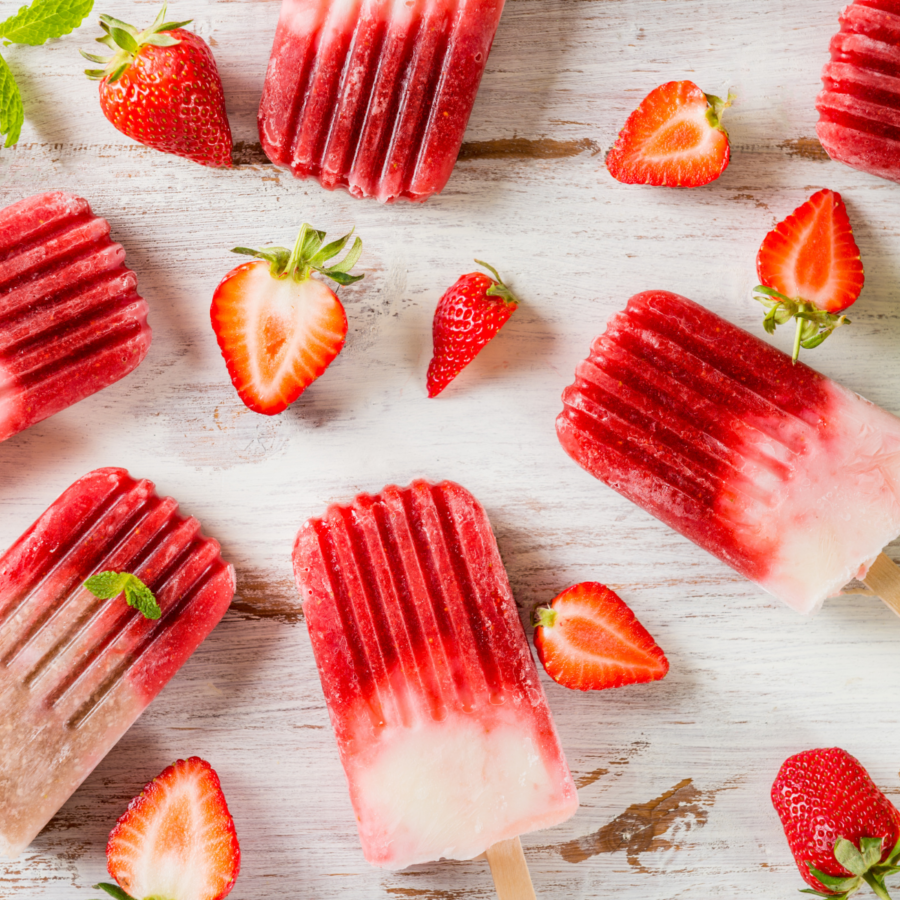
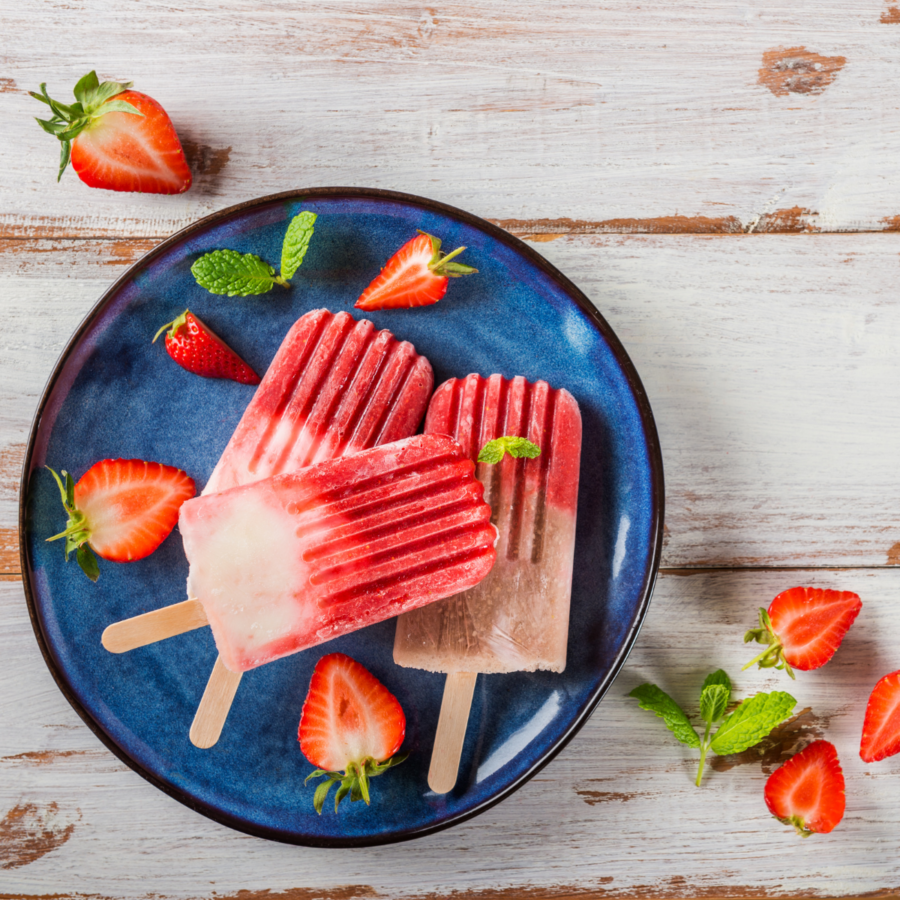
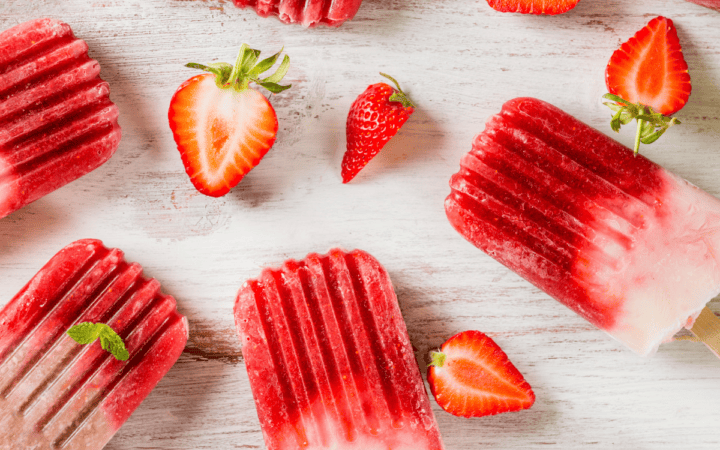
Indulge in these refreshing and fruity Strawberry Popsicles, perfect for beating the summer heat! This recipe transforms fresh strawberries into a delightful frozen treat that’s incredibly easy to make.
Why You’ll Love This Tasty Treat
- Quick. Ready in just 10 minutes of preparation.
- Effortless. Minimal ingredients and steps for a fuss-free dessert.
- Naturally Sweet. The fresh strawberries provide a natural sweetness, making it a healthier option.
- Customizable. Easy to adapt with different fruits and flavors.
Dive into this simple yet delicious method to enjoy a burst of strawberry flavor in every bite.
What Do Strawberry Popsicles Taste Like?
When you bite into a strawberry popsicle, you experience a cool, icy texture that melts in your mouth, releasing the fresh, vibrant taste of strawberries. The slight tartness from the lemon juice enhances the strawberry flavor, making each bite a perfect balance of sweet and tangy.
How To Get Popsicles Out Of The Mold
Getting popsicles out of their molds can be a bit tricky, but with the right approach, you can remove them easily without breaking or damaging them. Here’s a detailed guide to help you successfully remove your popsicles from the mold:
- Ensure Full Freezing . Make sure your popsicles are fully frozen. This typically takes about 4-6 hours, but for the best results, leave them in the freezer overnight.
- Warm Water Method . Fill a bowl or your sink with warm water. The water should be deep enough to cover the mold up to just below the top edge, avoiding getting water inside the mold itself.
- Dip the Mold. Submerge the popsicle mold in the warm water for about 20-30 seconds. Gently Wiggle the Sticks. After dipping, take the mold out of the water. Gently wiggle the popsicle sticks to see if the popsicles start to loosen.
- Pull Out Popsicles. Once the popsicles start to loosen, gently pull the sticks to slide the popsicles out of the mold.
What Are Strawberry Pops Made Of?
- Fresh Strawberries - The star of the show, providing that sweet and tangy flavor.
- Sugar - Adds a touch of sweetness, adjustable to your taste.
- Lemon Juice - Enhances the strawberry flavor and adds a slight tang.
- Water - Helps blend the mixture smoothly.
How To Make Strawberry Popsicles
- Prep the Strawberries . Start by washing and hulling the fresh strawberries. Cut them into halves for easier blending.
- Blend the Mixture . In a blender, combine the strawberries, sugar, lemon juice, and water. Blend until smooth. If you prefer a chunkier texture, blend for a shorter time.
- Pour into Molds. Pour the strawberry mixture into popsicle molds, leaving a small gap at the top for expansion. Insert the popsicle sticks.
- Freeze. Place the molds in the freezer for at least 4-6 hours or until fully frozen.
- Enjoy. Once frozen, remove the popsicles from the molds and enjoy your refreshing treat!
Tips And Tricks
Making delicious and refreshing strawberry popsicles at home is easy and fun. Here are some tips and tricks to help you create the perfect popsicles every time:
- Choose Fresh, Ripe Strawberries . Use the freshest, ripest strawberries you can find. Ripe strawberries are naturally sweeter and have a more intense flavor. Thoroughly wash the strawberries and remove the hulls before blending.
- Sweeten to Taste . Depending on the sweetness of your strawberries, you may need to add some sweetener. Consider using natural sweeteners like honey, agave syrup, or maple syrup for a healthier option.
- Blend Until Smooth . Blend the strawberries until smooth for a uniform texture. If you prefer a chunkier popsicle, you can pulse the blender a few times to leave small strawberry pieces.
Variations
Strawberry popsicles are a classic, but there are many ways to add exciting twists to this beloved treat. Here are some delicious variations to inspire your next batch:
- Strawberry Banana- Blend fresh strawberries with ripe bananas. The bananas add natural sweetness and creaminess.
- Strawberry Lemonade- Combine strawberries with freshly squeezed lemon juice and a bit of sugar or honey.
- Strawberry Yogurt- Mix strawberries with Greek yogurt or regular yogurt for a creamy, tangy popsicle.
What To Enjoy With Strawberry Popsicles
Strawberry popsicles are perfect on their own but can be paired with various treats:
- Fruit Salad - Serve alongside a fresh fruit salad for a light and healthy dessert.
- Chocolate Dip - Dip the tips in melted dark chocolate and let it harden for a decadent touch.
- Lemonade - Enjoy with a glass of iced lemonade for a refreshing summer combo.
How Long Do They Last?
Store the popsicles in an airtight container in the freezer for up to 2 weeks. They are best enjoyed within the first few days for optimal freshness.
These popsicles are perfect for making ahead of time. Prepare a batch and keep them in the freezer for whenever you need a quick and refreshing treat.
More Delicious Desserts
- Banana Pudding Cake
- Watermelon Popsicles
- Peach Galette
- Gluten Free Chocolate Cake
- Keto Cheesecake Brownies
- Strawberry Mousse
- Peach Crisp

Strawberry Popsicles Recipe | Popsicles With Fresh Strawberries
Ingredients
- ▢ 2 cups Strawberries
- ▢ 1/4 cup Granulated Sugar
- ▢ 2 tbsp Lemon Juice
- ▢ 1/2 cup Water
Instructions
- Prep the Strawberries . Start by washing and hulling the fresh strawberries. Cut them into halves for easier blending.
- Blend the Mixture . In a blender, combine the strawberries, sugar, lemon juice, and water. Blend until smooth. If you prefer a chunkier texture, blend for a shorter time.
- Pour into Molds. Pour the strawberry mixture into popsicle molds, leaving a small gap at the top for expansion. Insert the popsicle sticks.
- Freeze. Place the molds in the freezer for at least 4-6 hours or until fully frozen.
- Enjoy. Once frozen, remove the popsicles from the molds and enjoy your refreshing treat!
Get support & connect with our community on Facebook!
Nutrition

If you already signed up, you should have received an email with a password to give you unlimited access to our FREE Printable Library. The password is case sensitive. Enter it below and get printing!
Password:

Strawberry Popsicles Recipe | Popsicles With Fresh Strawberries
Ingredients
- 2 cups Strawberries
- 1/4 cup Granulated Sugar
- 2 tbsp Lemon Juice
- 1/2 cup Water
Instructions
- Prep the Strawberries . Start by washing and hulling the fresh strawberries. Cut them into halves for easier blending.
- Blend the Mixture . In a blender, combine the strawberries, sugar, lemon juice, and water. Blend until smooth. If you prefer a chunkier texture, blend for a shorter time.
- Pour into Molds. Pour the strawberry mixture into popsicle molds, leaving a small gap at the top for expansion. Insert the popsicle sticks.
- Freeze. Place the molds in the freezer for at least 4-6 hours or until fully frozen.
- Enjoy. Once frozen, remove the popsicles from the molds and enjoy your refreshing treat!
Strawberry Popsicles Recipe | Popsicles With Fresh Strawberries https://twosleevers.com/strawberry-popsicles-recipe/

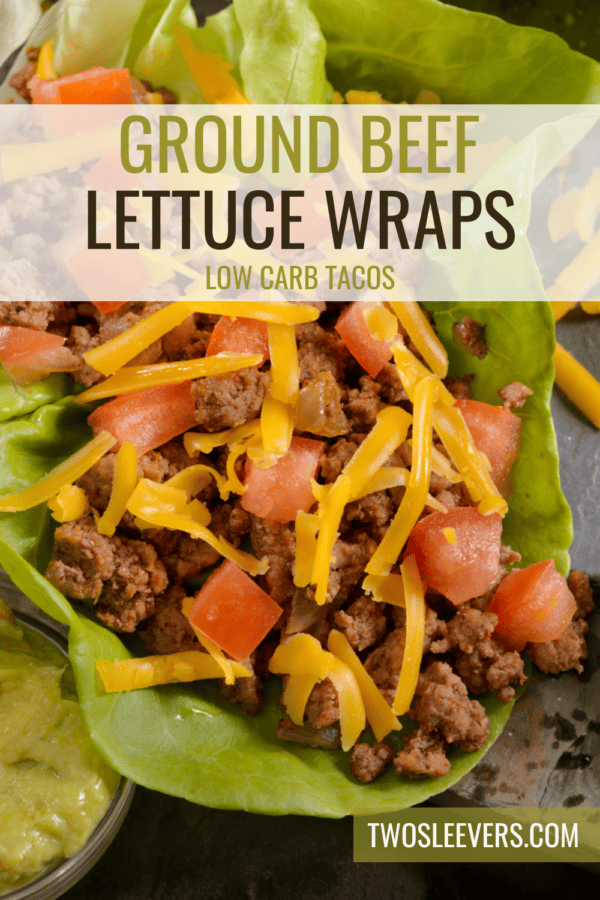
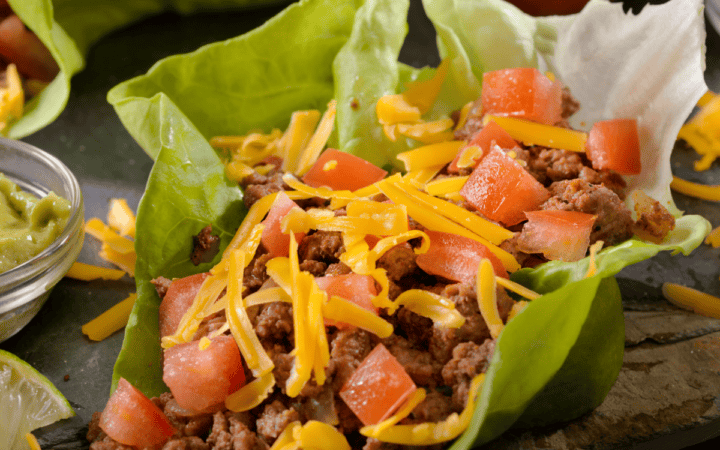
Spice up your dinner routine with these delicious Mexican Ground Beef Lettuce Wraps! This recipe transforms simple ingredients into a mouth-watering dish with just the right kick of spice and a perfect crunch. Dive into the ultimate combination of ease and flavor with this foolproof method.

Why You’ll Love This Low Carb Meal
- Quick. A main course that is ready in just 30 minutes from start to finish.
- Effortless. Minimal preparation for a no-fuss cooking experience on your stovetop .
- Incredibly Tasty. The spicy ground beef filling combined with fresh, crisp lettuce is a match made in heaven.
With the magic of Mexican spices and flavors, you’ll achieve that desirable taste without the need for complicated techniques, making it a healthier option that doesn’t sacrifice taste.
Are Lettuce Wraps Healthy?
Yes, lettuce wraps are generally considered a healthy meal option. Here are some reasons why lettuce wraps can be a nutritious choice:
- Low in Carbohydrates - Using lettuce leaves instead of bread or tortillas significantly reduces the carbohydrate content, making lettuce wraps a great option for those following low-carb or keto diets.
- High in Protein - Whether you use ground beef, chicken, turkey, tofu, or beans, the filling provides a good source of protein, which is essential for muscle repair, growth, and overall health.
- Low in Calories - Compared to traditional wraps or sandwiches, lettuce wraps are lower in calories, making them a suitable choice for those looking to manage their weight.
What Kind Of Lettuce Is Used For Lettuce Wraps?
Each type of lettuce can bring its own unique texture and flavor to lettuce wraps, allowing for customization based on personal preference and the type of filling used.
Butter lettuce is often preferred for its perfect balance of tenderness and strength, making it the most popular choice for lettuce wraps.
Ingredients You’ll Need
- Ground Beef - Provides the main protein base.
- Olive Oil - Sautéing and adding richness.
- Onion and Garlic - Enhancing savory and aromatic qualities.
- Tomato Paste - Thickening and adding umami.
- Chili Powder, Cumin, Paprika, Oregano - Contributing to the spicy, earthy, and complex flavor profile.
- Salt and Black Pepper - Seasoning and enhancing overall taste.
- Water - Creating a saucy consistency.
- Butter Lettuce Leaves - Serving as the fresh, crisp base.
- Avocado, Tomatoes, Red Onion - Adding creaminess, juiciness, and crunch.
- Cilantro and Lime Wedges - Providing freshness and a zesty finish.
How To Make Ground Beef Lettuce Wraps
- Prepare the Filling. In a large skillet, heat the olive oil over medium heat. Add the chopped onion and minced garlic, and sauté until the onion is translucent and fragrant.
- Cook the Beef. Add the ground beef to the skillet, breaking it up with a spatula. Cook until the beef is browned and cooked through. Drain any excess fat if necessary.
- Add Seasonings. Stir in the tomato paste, chili powder, cumin, paprika, oregano, salt, and black pepper. Add water to the skillet and mix well. Let it simmer for about 5 minutes until the flavors meld together and the mixture thickens slightly.
- Prepare the Vegetables. While the beef is cooking, wash and separate the butter lettuce leaves. Dice the avocado, halve the cherry tomatoes, and thinly slice the red onion.
- Assemble the Wraps. To serve, place a spoonful of the spicy ground beef mixture in the center of a lettuce leaf. Top with diced avocado, cherry tomatoes, and sliced red onion. Sprinkle with chopped cilantro.
- Garnish and Serve. Serve immediately with lime wedges on the side for an extra burst of flavor.

Tips And Tricks
Making delicious Mexican Ground Beef Lettuce Wraps involves more than just the right ingredients; it’s about technique and a few kitchen tricks to ensure they turn out flavorful and satisfying. Here’s a comprehensive guide to perfecting them:
- Use Fresh Ingredients. Fresh vegetables and herbs make a significant difference in flavor and texture.
- Season Well. Make sure to taste the filling and adjust the seasonings as needed. A well-seasoned filling is key to delicious wraps.
- Crisp Lettuce. Use fresh, crisp lettuce leaves for the best texture. Butter lettuce is ideal due to its tender yet sturdy leaves.
Variations
Mexican Ground Beef Lettuce Wraps are a versatile dish that can be adapted to suit a variety of tastes and dietary needs. Here are some creative variations on the classic:
- Vegetarian-. Substitute the beef with black beans or a mix of beans and corn for a vegetarian version.
- Chicken- Use ground chicken or turkey instead of beef for a lighter option.
- Extra Spicy- Add diced jalapeños or a splash of hot sauce to the beef mixture for an extra kick.
What Goes Well With Lettuce Wraps
Mexican Ground Beef Lettuce Wraps pair wonderfully with various sides and accompaniments. Here are some great options:
- Mexican Rice - A classic side that complements the bold flavors of the wraps.
- Guacamole - Adds a creamy, rich element that pairs well with the spicy beef.
- Pico de Gallo - Adds a fresh, tangy contrast to the savory meat filling.
- Black Beans - A simple, protein-packed side that enhances the meal.
How Long Do They Last?
Store any leftover filling in an airtight container in the refrigerator for up to 3 days. Reheat in the microwave or on the stovetop before serving.
Can You Freeze Them?
Yes! Freeze the cooked and cooled filling in an airtight container or freezer bag for up to 3 months. Thaw in the refrigerator overnight and reheat before serving.
More Of OurBest Taco Recipes
- Taco Casserole
- Breakfast Tacos
- Korean Beef Tacos
- Chorizo Tacos
- Potato Tacos
Ground Beef Lettuce Wraps | Low Carb Tacos
Ingredients
- ▢ 1 pound Ground Beef
- ▢ 8 Butter Lettuce Leaves
- ▢ 1 tbsp Olive Oil
- ▢ 2 tbsp Tomato Paste
- ▢ 2 tbsp Water
- ▢ 1/4 tsp Chili Powder
- ▢ 1/2 tsp Cumin
- ▢ 1/2 tsp Paprika
- ▢ 1/4 tsp Oregano
- ▢ 1/2 tsp Kosher Salt
- ▢ 1/4 tsp Ground Black Pepper
- ▢ 1 Avocado , sliced
- ▢ 1 cup Red Onion , diced
- ▢ 1 cup Tomato , diced
- ▢ Lime wedges , for garnish
- ▢ Cilantro , for garnish
Instructions
- Prepare the Filling. In a large skillet, heat the olive oil over medium heat. Add the chopped onion and minced garlic, and sauté until the onion is translucent and fragrant.
- Cook the Beef. Add the ground beef to the skillet, breaking it up with a spatula. Cook until the beef is browned and cooked through. Drain any excess fat if necessary.
- Add Seasonings. Stir in the tomato paste, chili powder, cumin, paprika, oregano, salt, and black pepper. Add water to the skillet and mix well. Let it simmer for about 5 minutes until the flavors meld together and the mixture thickens slightly.
- Prepare the Vegetables. While the beef is cooking, wash and separate the butter lettuce leaves. Dice the avocado, halve the cherry tomatoes, and thinly slice the red onion.
- Assemble the Wraps. To serve, place a spoonful of the spicy ground beef mixture in the center of a lettuce leaf. Top with diced avocado, cherry tomatoes, and sliced red onion. Sprinkle with chopped cilantro.
- Garnish and Serve. Serve immediately with lime wedges on the side for an extra burst of flavor.
Get support & connect with our community on Facebook!
Nutrition
Don’t forget to check out my other Ketocookbooks.
Keto Instant Pot, Keto Fat Bombs, Sweets, & Treats , and Easy keto in 30 minutes.

