
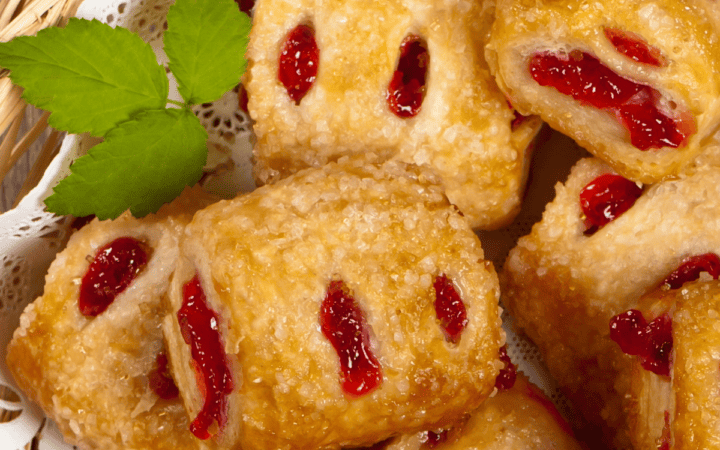
Indulge in the delightful sweetness of our Strawberry Danish recipe! This easy-to-follow recipe brings together the freshness of strawberries and the flakiness of pastry, creating a lovely treat that’s perfect for any occasion.

Why You’ll Love This Sweet Treat
- Quick . Ready in just under an hour from start to finish, satisfying your craving in no time.
- Effortless . Minimal ingredients and simple steps ensure a stress-free baking experience.
- Incredibly Flavorful . The combination of ripe strawberries and buttery pastry creates a symphony of flavors that will tantalize your taste buds.
Experience the joy of baking with our Strawberry Danish recipe. Whether enjoyed for breakfast, brunch, or dessert, these delightful pastries are sure to brighten your day with every bite.
Why Are They Called Danishes?
While the exact reason for the name “Danish” may not be fully documented, it likely stems from the pastry’s Danish origin and the association with Danish bakers who played a significant role in its creation and development.
What Are Danishes Made Of?
Here’s a breakdown of how each ingredient is used in making a strawberry Danish:
Dough
- All-purpose flour - Forms the base of the dough, providing structure and texture.
- Granulated sugar - Adds sweetness to the dough and helps with browning during baking.
- Salt - Enhances the flavor of the dough and balances the sweetness.
- Unsalted butter - Incorporates richness and flakiness into the dough when combined with flour.
- Cold water - Binds the ingredients together to form a cohesive dough.
Filling
- Fresh strawberries - Serve as the star ingredient, providing sweet and juicy flavor as well as texture.
- Granulated sugar - Sweetens the strawberries and helps draw out their natural juices.
- Cornstarch - Acts as a thickening agent to bind the strawberry juices and prevent the filling from becoming too runny.
- Lemon juice - Adds a touch of acidity to brighten the flavor of the strawberries and balance the sweetness.
- Vanilla extract - Enhances the overall flavor profile of the filling with its warm and aromatic notes.
- Powdered sugar - For sprinkling and garnish.
Together, these ingredients create a delicious and irresistible pastry with a flaky crust and a juicy strawberry filling—a perfect treat for any occasion!
How To Make A Strawberry Danish
- Prepare the Dough . In a large mixing bowl, combine the flour, sugar, and salt. Cut in the chilled butter using a pastry cutter or fork until the mixture resembles coarse crumbs. Gradually add the cold water, stirring until a dough forms. Shape the dough into a ball, wrap it in plastic wrap, and refrigerate for at least 30 minutes.
- Make the Filling . In a saucepan, combine the diced strawberries, sugar, cornstarch, lemon juice, and vanilla extract. Cook over medium heat, stirring frequently, until the mixture thickens. Remove from heat and let it cool.
- Roll Out the Dough . Preheat your oven to 375°F and line a baking sheet with parchment paper. On a lightly floured surface, roll out the chilled dough into a large rectangle, about 1/4 inch thick.
- Assemble the Danish . Spread the cooled strawberry filling evenly over the rolled-out dough, leaving a border around the edges.
- Seal the Pastry . Fold the pastry over and securely seal the edges using your fingertips or a fork. Cut small slits in the top of the pastry to allow them to vent while baking.
- Bake and Garnish . Transfer the assembled pastry to the prepared baking sheet. Bake in the preheated oven for 25-30 minutes, or until golden brown. Once the pastry is done baking, remove it from the oven and sprinkle with powdered sugar over the top while it’s still warm.
- Serve and Enjoy . Allow the Strawberry Danish to cool slightly before slicing.

Tips And Tricks
Here are some tips and tricks to help you make delicious strawberry Danishes:
- Use Cold Ingredients . Keep your butter and water cold when making the dough. Cold ingredients help create a flaky pastry by preventing the butter from melting too quickly and blending seamlessly with the flour.
- Don’t Overwork the Dough . Mix the dough until it just comes together. Overworking the dough can lead to tough pastries. It’s okay if there are some visible bits of butter in the dough; these will help create flaky layers when baked.
- Adjust Sweetness . Taste your strawberry filling before assembling the Danishes and adjust the sweetness if needed. Depending on the sweetness of your strawberries, you may need to add more or less sugar.
Variations
Here are some delightful variations you can try to add a twist to your classic strawberry Danish recipe:
- Cream Cheese Filling - Add a layer of sweetened cream cheese beneath the strawberries for a creamy and tangy contrast to the fruitiness.
- Almond Crumble - Sprinkle an almond crumble on top of the strawberries before baking. Mix almond flour, sugar, and sliced almonds for a nutty crunch.
- Lemon Glaze -Instead of a traditional vanilla glaze, try a lemon glaze for a bright and citrusy flavor that complements the strawberries.
What To Enjoy With A Strawberry Danish
A delightful Strawberry Danish pairs wonderfully with a variety of accompaniments, complementing its sweet and fruity flavors. Here are some delicious options to enjoy alongside your pastry:
- Coffee or Tea - Start your morning or afternoon with a hot cup of coffee or tea. The rich flavors of coffee or the comforting warmth of tea complement the sweetness of the Danish.
- Whipped Cream - Serve a dollop of whipped cream alongside the Danish for an extra touch of indulgence. The creamy texture adds a luxurious element to each bite.
- Vanilla Ice Cream - For a decadent treat, pair the warm Strawberry Danish with a scoop of vanilla ice cream. The contrast of temperatures and textures creates a delightful dessert experience.
How Long Do Fruit Danishes Last?
Store any leftover Danish pastries in an airtight container at room temperature for up to 2 days.
Can You Freeze Them?
To freeze, wrap the cooled strawberry pastries individually in plastic wrap and place them in a freezer-safe bag or container. They can be stored in the freezer for up to 1 month. Thaw overnight in the refrigerator before reheating.
More Delicious Desserts
- No Bake Peanut Butter Bars
- Gluten Free Chocolate Cake
- Banana Pudding Cake
- Peach Cobbler Dump Cake
- Sugar Free Jello Mousse

Strawberry Danish Recipe | Easy and Delicious Strawberry Danish
Ingredients
For The Dough
- ▢ 1 1/2 cups All Purpose Flour
- ▢ 2 tbsp Granulated Sugar
- ▢ 1/4 tsp Kosher Salt
- ▢ 1/2 cup Unsalted Butter
- ▢ 1/4 cup Cold Water
For The Filling
- ▢ 1 1/2 cups Fresh Strawberries , diced
- ▢ 2 tbsp Cornstarch
- ▢ 1 tbsp Lemon Juice
- ▢ 1/2 tsp Vanilla Extract
- ▢ Powdered Sugar , for garnish
Instructions
- Prepare the Dough . In a large mixing bowl, combine the flour, sugar, and salt. Cut in the chilled butter using a pastry cutter or fork until the mixture resembles coarse crumbs. Gradually add the cold water, stirring until a dough forms. Shape the dough into a ball, wrap it in plastic wrap, and refrigerate for at least 30 minutes.
- Make the Filling . In a saucepan, combine the diced strawberries, sugar, cornstarch, lemon juice, and vanilla extract. Cook over medium heat, stirring frequently, until the mixture thickens. Remove from heat and let it cool.
- Roll Out the Dough . Preheat your oven to 375°F and line a baking sheet with parchment paper. On a lightly floured surface, roll out the chilled dough into a large rectangle, about 1/4 inch thick.
- Assemble the Danish . Spread the cooled strawberry filling evenly over the rolled-out dough, leaving a border around the edges.
- Seal the Pastry . Fold the pastry over and securely seal the edges using your fingertips or a fork. Cut small slits in the top of the pastry to allow them to vent while baking.
- Bake and Garnish . Transfer the assembled pastry to the prepared baking sheet. Bake in the preheated oven for 25-30 minutes, or until golden brown. Once the pastry is done baking, remove it from the oven and sprinkle with powdered sugar over the top while it’s still warm.
- Serve and Enjoy . Allow the Strawberry Danish to cool slightly before slicing.
Get support & connect with our community on Facebook!
Nutrition

If you already signed up, you should have received an email with a password to give you unlimited access to our FREE Printable Library. The password is case sensitive. Enter it below and get printing!
Password:

Strawberry Danish Recipe | Easy and Delicious Strawberry Danish
Ingredients
For The Dough
- 1 1/2 cups All Purpose Flour
- 2 tbsp Granulated Sugar
- 1/4 tsp Kosher Salt
- 1/2 cup Unsalted Butter
- 1/4 cup Cold Water
For The Filling
- 1 1/2 cups Fresh Strawberries diced
- 2 tbsp Cornstarch
- 1 tbsp Lemon Juice
- 1/2 tsp Vanilla Extract
- Powdered Sugar for garnish
Instructions
- Prepare the Dough . In a large mixing bowl, combine the flour, sugar, and salt. Cut in the chilled butter using a pastry cutter or fork until the mixture resembles coarse crumbs. Gradually add the cold water, stirring until a dough forms. Shape the dough into a ball, wrap it in plastic wrap, and refrigerate for at least 30 minutes.
- Make the Filling . In a saucepan, combine the diced strawberries, sugar, cornstarch, lemon juice, and vanilla extract. Cook over medium heat, stirring frequently, until the mixture thickens. Remove from heat and let it cool.
- Roll Out the Dough . Preheat your oven to 375°F and line a baking sheet with parchment paper. On a lightly floured surface, roll out the chilled dough into a large rectangle, about 1/4 inch thick.
- Assemble the Danish . Spread the cooled strawberry filling evenly over the rolled-out dough, leaving a border around the edges.
- Seal the Pastry . Fold the pastry over and securely seal the edges using your fingertips or a fork. Cut small slits in the top of the pastry to allow them to vent while baking.
- Bake and Garnish . Transfer the assembled pastry to the prepared baking sheet. Bake in the preheated oven for 25-30 minutes, or until golden brown. Once the pastry is done baking, remove it from the oven and sprinkle with powdered sugar over the top while it’s still warm.
- Serve and Enjoy . Allow the Strawberry Danish to cool slightly before slicing.
Strawberry Danish Recipe | Easy and Delicious Strawberry Danish https://twosleevers.com/strawberry-danish-recipe/
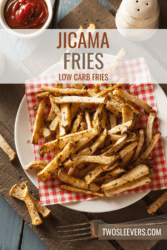
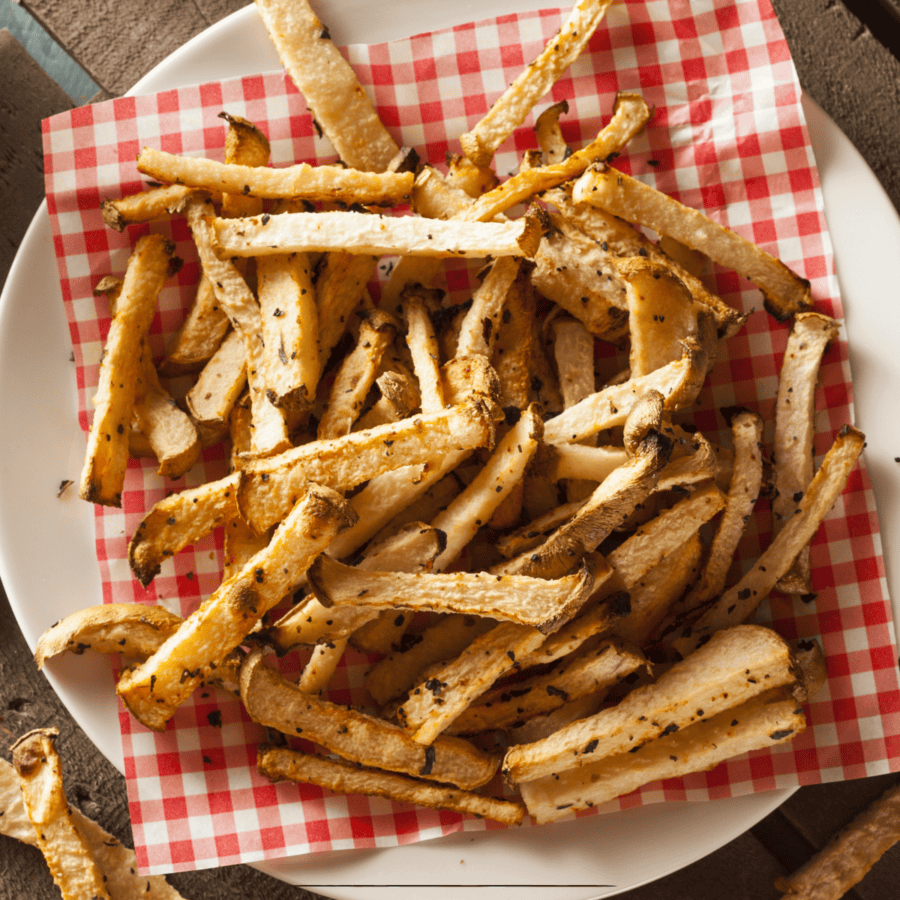
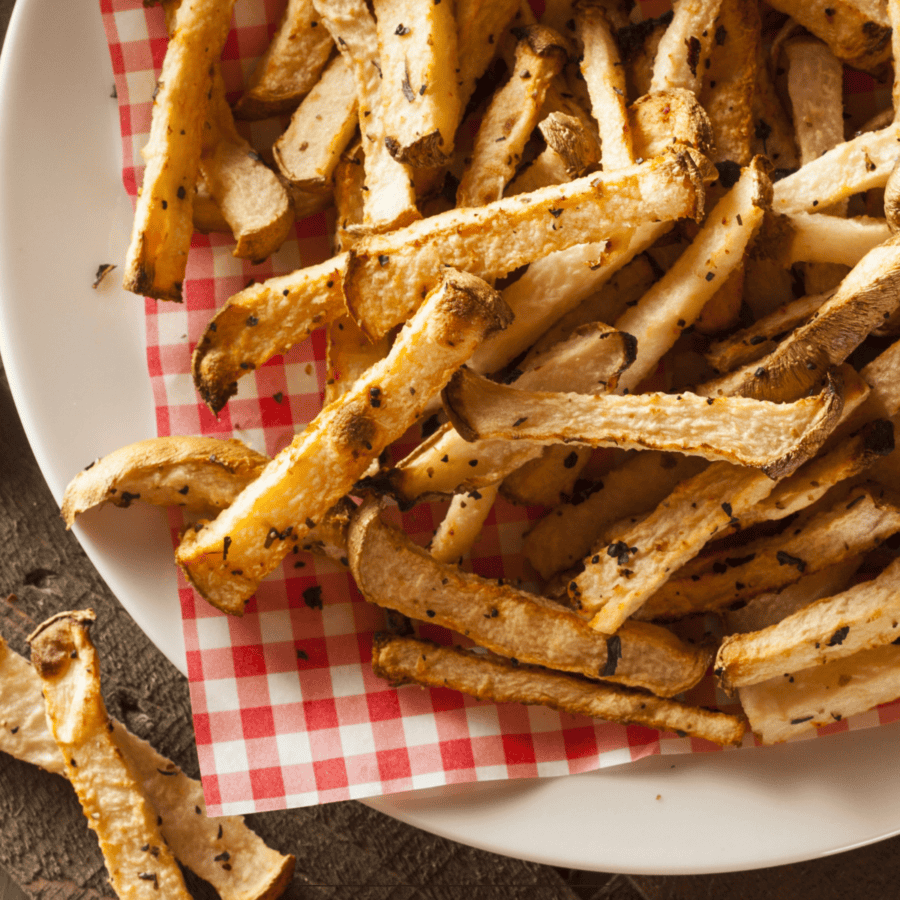
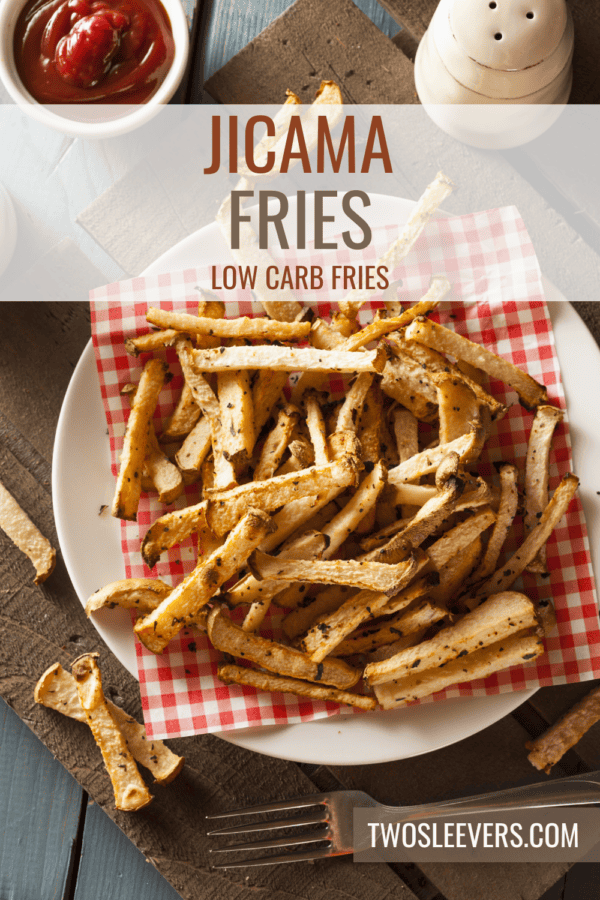
Are you looking for a healthier alternative to traditional French fries? These Air Fryer Jicama Fries are not only delicious but also a lighter option that will satisfy your cravings without the guilt.
Why You’ll Love This Low Carb Side Dish
- Healthier Choice . Jicama is low in calories but high in fiber and water, making it a great choice for anyone looking to maintain a healthy diet.
- Crispy and Flavorful . With the right seasonings and the magic of the air fryer, these fries get wonderfully crispy on the outside while remaining tender on the inside.
- Quick and Easy . Ready in just minutes, these fries are perfect for busy evenings or as a quick snack.
- Versatile . They pair beautifully with a variety of dips and seasonings, making them customizable for any taste preference.
Let’s dive into the world of jicama—an underrated root vegetable that transforms into a delightful snack in your air fryer.
What Does Jicama Taste Like When Cooked?
When cooked, jicama maintains a mild, slightly sweet and nutty flavor, similar to a cross between a potato and an apple.
Its texture, however, is what makes jicama stand out. Unlike potatoes that become soft and fluffy when cooked, jicama retains a crisp, juicy crunch, akin to water chestnuts.
Are Jicama Fries Good For You?
Yes, jicama fries are quite good for you! Jicama, also known as Mexican yam bean or Mexican turnip, is a root vegetable that offers numerous health benefits, making its fries a healthier alternative to traditional potato fries. Here are some reasons why jicama fries are a nutritious choice:
- Low in Calories . Jicama is low in calories, making it a great option for those looking to manage their weight without feeling deprived.
- High in Fiber . Jicama is rich in dietary fiber, which is beneficial for digestive health. Fiber helps to keep the digestive system running smoothly, aids in maintaining a healthy weight, and can help lower cholesterol levels.
- Rich in Vitamins and Minerals . It contains essential nutrients including vitamin C, potassium, and magnesium. Vitamin C is an antioxidant that helps protect the body against free radicals, potassium is crucial for proper heart function and muscle contractions, and magnesium plays a role in over 300 enzymatic reactions in the body, including energy production.
- Low in Carbohydrates . Jicama has a low carbohydrate content, which makes it a suitable option for those on low-carb or ketogenic diets.
What Are Jicama Fries Made Of?
- Jicama - Peeled and cut into fries.
- Olive Oil - For a light coating that helps the seasonings stick and gets the fries crispy.
- Paprika - Adds a lovely warmth and color.
- Garlic Powder - For a hit of savory flavor.
- Salt and Pepper - Essential for bringing out the natural flavors of the jicama.
How To Make Jicama Fries
- Prep the Jicama . Peel the jicama and slice it into thin strips resembling fries.
- Season . Toss the jicama fries with olive oil, paprika, garlic powder, salt, and pepper until well coated.
- Air Fry . Arrange the fries in a single layer in the air fryer basket. Set the air fryer to 400°F and cook for about 18-20 minutes, shaking the basket halfway through cooking.
- Serve . Remove the fries from the air fryer and serve hot with your favorite low carb dipping sauce.
Tips And Tricks
Making jicama fries in an air fryer is a fantastic way to enjoy a crunchy, healthier alternative to traditional potato fries. Here are some tips and tricks to ensure they turn out perfectly every time:
- Peel Properly . Jicama has a thick, fibrous skin that should be completely removed before cooking. Use a sharp knife or a sturdy vegetable peeler.
- Consistent Size . Cut the jicama into even sticks to ensure uniform cooking. Aim for a size similar to traditional French fries for the best texture.
- Dry Thoroughly . After cutting, pat the jicama sticks dry with paper towels. Removing excess moisture helps them crisp up in the air fryer.
Variations
Jicama fries are versatile and can be adapted with various seasonings and toppings to suit different flavors and cuisines. Here are some creative variations to try:
- Spicy Cajun -Season the jicama fries with a Cajun spice blend before air frying. Serve with a remoulade sauce or a spicy mayo for dipping.
- Garlic Parmesan - Toss the fries with olive oil and minced garlic before cooking. After they’re air-fried, sprinkle grated Parmesan cheese and chopped parsley over the warm fries.
- Smoky Chipotle - Mix ground chipotle pepper or chipotle powder with sea salt and a bit of lime zest for a smoky, tangy flavor. Serve with a lime wedge to squeeze over the top.
What To Eat Jicama Fries With
Jicama fries are incredibly versatile and can be paired with a variety of dishes to create a balanced and delicious meal. Here are some tasty options to consider when serving them:
- Burgers and Sandwiches - Pair jicama fries with your favorite burger or sandwich. Whether you opt for a classic beef burger, a grilled chicken sandwich, or a veggie burger, the crisp texture of jicama fries complements these main dishes perfectly.
- Grilled Meats - Serve them alongside grilled meats such as steak , pork chops , or chicken breasts. The mild flavor of jicama goes well with the smoky taste of grilled foods.
- Dipping Sauces - Enjoy jicama fries with a variety of dipping sauces. Popular options include ketchup, aioli, ranch dressing , or a spicy mayo . For a healthier dip, try Greek yogurt mixed with herbs and spices.
How Long Do They Last?
Air Fryer Jicama Fries are best enjoyed fresh but can be stored in the refrigerator for up to 3 days. Reheat in the air fryer to restore their crispy texture.
Can You Freeze Them?
It’s best not to freeze raw or cooked jicama fries as their high water content can lead to a mushy texture upon thawing.
More Low Carb Sides
- Keto Broccoli Salad
- Roasted Zucchini
- Keto Mac and Cheese
- Instant Pot Green Beans and Bacon
- Air Fryer Asparagus

Jicama Fries Recipe | Air Fryer Keto Fries
Ingredients
- ▢ 1 Jicama , peeled and cut into fries
- ▢ 2 tbsp Olive Oil
- ▢ 1 tsp Paprika
- ▢ 1/2 tsp Garlic Powder
- ▢ 1/2 tsp Kosher Salt
- ▢ 1/4 tsp Black Pepper
Instructions
- Prep the Jicama . Peel the jicama and slice it into thin strips resembling fries.
- Season . Toss the jicama fries with olive oil, paprika, garlic powder, salt, and pepper until well coated.
- Air Fry . Arrange the fries in a single layer in the air fryer basket. Set the air fryer to 400°F and cook for about 18-20 minutes, shaking the basket halfway through cooking.
- Serve . Remove the fries from the air fryer and serve hot with your favorite low carb dipping sauce.
Get support & connect with our community on Facebook!
Nutrition
And don’t forget to check out my air fryer cookbooks! Every day easy air fryer , and Air Fryer Revolution .

