
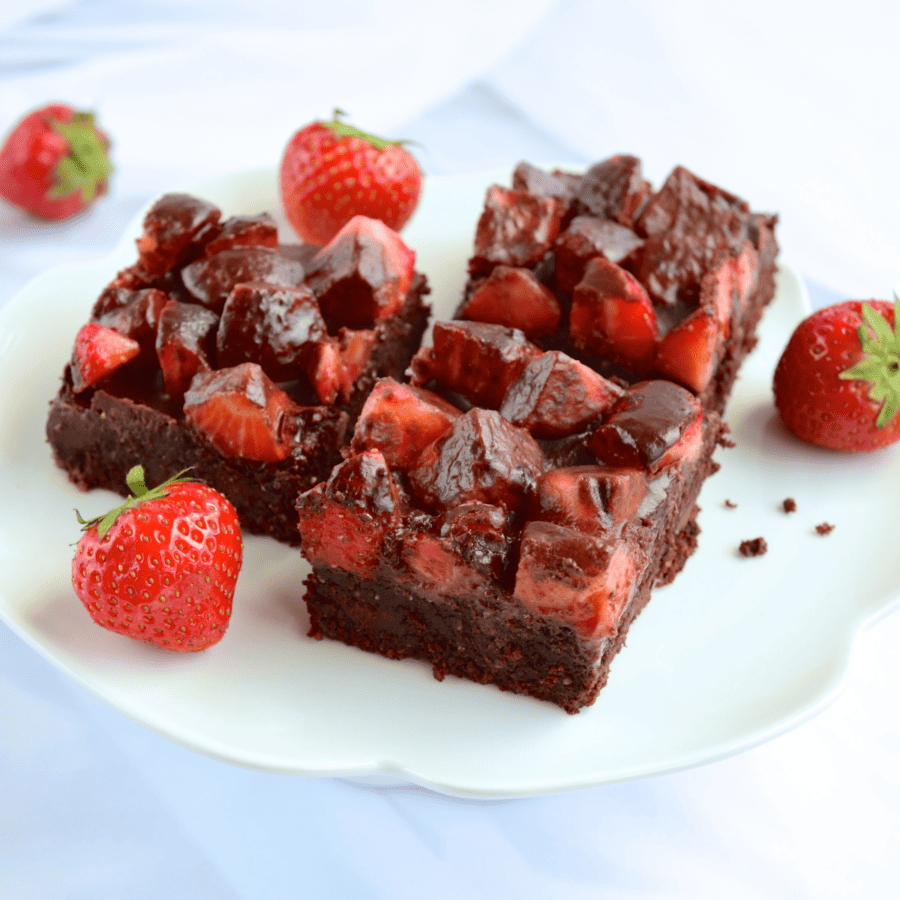
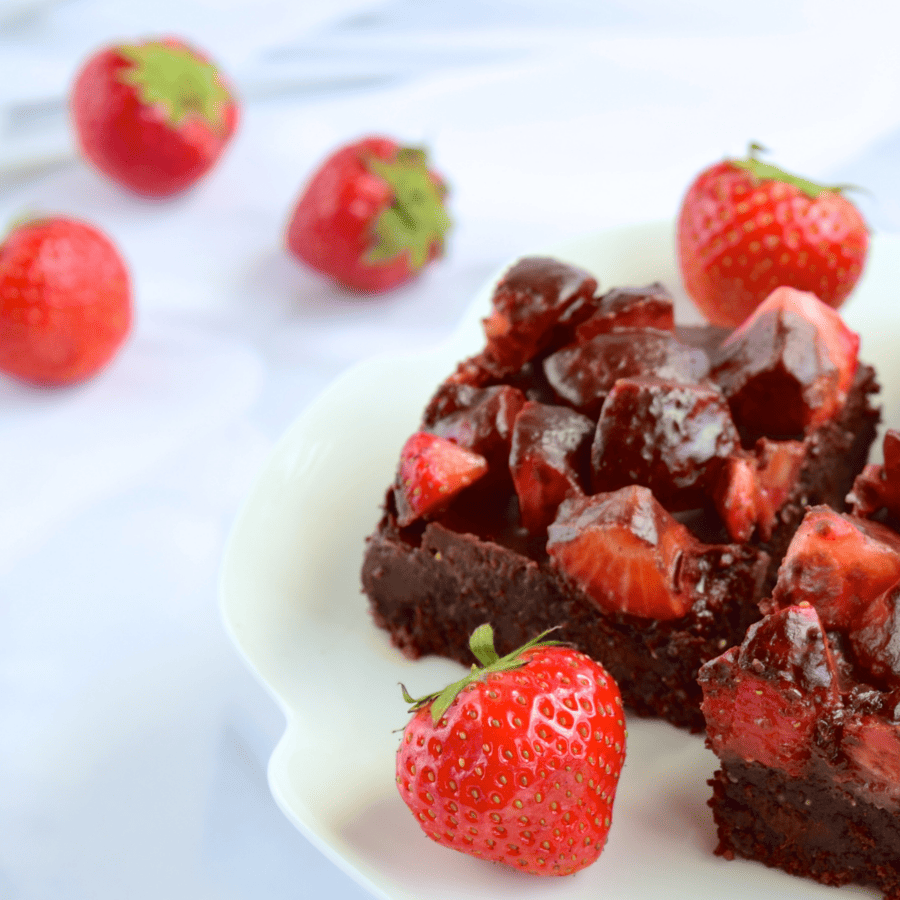
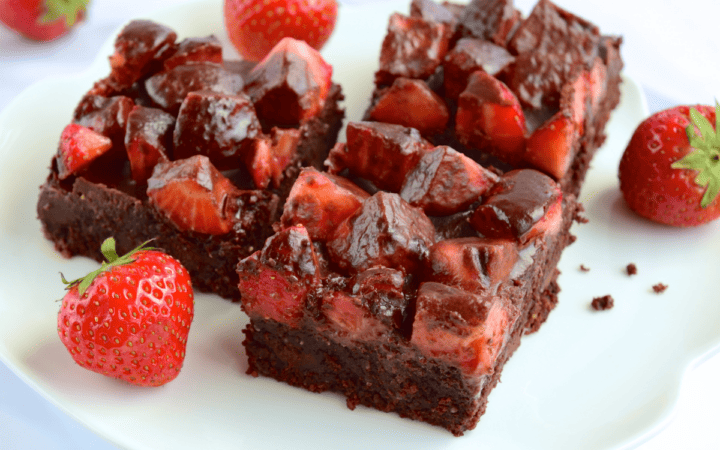
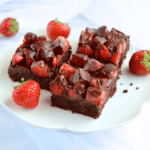
With this scrumptious recipe for low carb strawberry brownies, you can indulge in the lusciousness of this classic treat without compromising your low-carb lifestyle. Bursting with juicy strawberries and rich chocolatey goodness, these guilt-free brownies are the perfect way to satisfy your sweet cravings.
Why You’ll Love This Low Carb Dessert
- Fast. Ready in under an hour for a quick solution when you’re craving something sweet.
- Easy. Mix together the brownie batter, bake, and spread on a delicious homemade low carb chocolate strawberry frosting to finish.
- Low Carb . Only 8 net carbs per serving!
- Gluten Free . Since this recipe doesn’t require any flour at all, it is a simple solution for a gluten-free dessert .
These delightful treats are rich, fudgy, and packed with the delightful sweetness of fresh strawberries. Best of all, they are low in carbs, making them the perfect guilt-free indulgence.
How Do You Keep Brownies Soft And Moist?
Keeping brownies soft and moist involves a few key techniques during the baking and storage process. Here are some tips to ensure your brownies stay deliciously tender and fudgy:
- Don’t Overbake : The most crucial factor in keeping brownies soft and moist is to avoid overbaking them. Brownies continue to cook slightly even after you take them out of the oven. Therefore, when a toothpick inserted into the center of the brownies comes out with a few moist crumbs clinging to it, it’s time to remove them from the oven. Overbaking can result in dry and crumbly brownies.
- Proper Mixing Technique : When combining the wet and dry ingredients, be careful not to overmix the batter. Overmixing can lead to a tougher texture. Mix until the ingredients are just combined, and no streaks of dry flour remain.
- Proper Storage : To keep brownies soft and moist after baking, store them properly. Allow the brownies to cool completely, then wrap them tightly in plastic wrap or aluminum foil to prevent them from drying out. Alternatively, store them in an airtight container.
Ingredients You’ll Need
Six ingredients are all you’ll need for this keto-friendly treat. Here are the items you’ll need to grab before you get started:
For The Brownies
- Sugar-Free Chocolate Chips
- Butter
- Eggs
- Truvia
- Vanilla Extract
For The Strawberry Chocolate Topping
- Strawberries
- Heavy Whipping Cream
- Butter
- Sugar-Free Chocolate Chips
How To Make Strawberry Brownies
Preparing these irresistible low carb brownies is so easy! All you need to do is prepare the brownie batter like usual, create a delicious low carb chocolate frosting, fold in the strawberries, and enjoy!
By following the steps below, you’ll have a dessert that turns out perfectly tasty every time.
Prepare The Brownies
- Melt the chocolate. In a microwave-safe bowl, melt butter and chocolate for about 1 minute. Remove and stir well.
- Mix the wet ingredients. In a separate bowl, add eggs, sweetener, and vanilla and blend until light and frothy.
- Create the brownie batter . Pour the melted butter and chocolate into the bowl of eggs, sweetener, and vanilla, and beat again until it is well incorporated.
- Bake the Strawberry Brownies . Pour the mixture into a cake pan and bake at 350F for 30-35 minutes until a knife inserted in the center emerges clean.
Top With Strawberry Chocolate Frosting
- Place the low carb chocolate chips in a bowl.
- Heat the heavy cream and butter in a microwave-safe bowl for 1 minute.
- Pour the heated cream onto the chocolate chips and allow it to begin melting the chocolate. Stir from time to time until the chocolate has melted and you have a smooth mixture.
- Allow the ganache to cool for 20-30 minutes and then whip the frosting until it is light and fluffy.
- Chop up the strawberries and carefully fold them into the frosting before spreading it on top of the cooled brownies.
Tips And Tricks
Making strawberry brownies can be a delightful and unique baking adventure. Here are some tips and tricks to ensure your strawberry brownies turn out perfect:
- Prevent Excess Moisture : Strawberries contain a lot of moisture, which can affect the texture of the brownies. To prevent excess moisture, dice the strawberries into small pieces and pat them dry with paper towels before adding them to the frosting.
- Adjust Sweetness : The sweetness of strawberries can vary, so adjust the amount of sweetener in the recipe to balance the flavors.
- Avoid Overbaking : Bake the brownies just until a toothpick inserted into the center comes out with a few moist crumbs. Overbaking can lead to dry and crumbly brownies.
Variations
Strawberry brownies offer a versatile canvas for experimenting with various flavors and ingredients. Here are some delicious variations to try:
- Strawberry Cheesecake Brownies - Swirl a layer of cream cheese filling into the brownie batter for a luscious strawberry cheesecake flavor.
- Nutty Strawberry Brownies - Fold chopped nuts, such as pecans or walnuts, into the brownie batter to add a crunchy texture and nutty flavor that pairs well with the strawberries.
- Raspberry Brownies - Substitute raspberries for strawberries to create raspberry brownies with a slightly tart and tangy flavor.
Do You Leave Brownies To Cool In The Tin?
Yes, it is recommended to leave brownies to cool in the tin for a short period before removing them. Allowing the brownies to cool in the tin helps them set properly and makes it easier to cut them into neat squares without falling apart.
Do You Cut Brownies Before Frosting?
If you’re using a soft and spreadable frosting, like the one used in this recipe, it’s often easier and neater to frost the entire pan of brownies before cutting them into individual servings. This way, you can achieve a smooth and even layer of frosting on top of the brownies.
What To Serve With Them
Serve these delightful low carb strawberry brownies with a dollop of whipped cream or a scoop of keto ice cream for an extra special treat.
Enjoy the joy of savoring a classic dessert while staying true to your low-carb lifestyle.
How Long Do They Last?
The shelf life of strawberry brownies depends on how they are stored and how many sweets lovers you have in your home!
Generally, homemade strawberry brownies can last for a few days to a week.
Can You Freeze Them?
Yes, you can freeze strawberry brownies to extend their shelf life and enjoy them at a later time. Freezing strawberry brownies is a great way to preserve their freshness and flavor, especially if you have a large batch.
After baking the strawberry brownies, allow them to cool completely at room temperature. Place the remaining batch of cooled strawberry brownies in an airtight container and put them in the freezer.
Properly frozen strawberry brownies can last for up to 2 to 3 months in the freezer.
More Of Our Best Brownie Recipes
- Lemon Brownies
- Peanut Butter Brownies
- S’mores Brownies
- Red Velvet Brownies
- Lunch Lady Brownies

Strawberry Brownies Recipe | Low Carb Brownies And Strawberries
Ingredients
For The Brownies
- ▢ 1/2 cup sugar free chocolate chips
- ▢ 1/2 cup butter
- ▢ 3 eggs
- ▢ 1/4 cup truvia
- ▢ 1 tsp vanilla
For The Frosting
- ▢ 3/4 cup heavy cream
- ▢ 1 tbsp butter
- ▢ 1 cup sugar free chocolate chips
- ▢ 1 cup Fresh Strawberries
Instructions
For The Brownies
- Melt the chocolate. In a microwave-safe bowl, melt butter and chocolate for about 1 minute. Remove and stir well.
- Mix the wet ingredients. In a separate bowl, add eggs, sweetener, and vanilla and blend until light and frothy.
- Create the brownie batter . Pour the melted butter and chocolate into the bowl of eggs, sweetener, and vanilla, and beat again until it is well incorporated.
- Bake the Strawberry Brownies . Pour the mixture into a cake pan and bake at 350F for 30-35 minutes until a knife inserted in the center emerges clean.
For The Frosting
- Place the low carb chocolate chips in a bowl.
- Heat the heavy cream and butter in a microwave-safe bowl for 1 minute.
- Pour the heated cream onto the chocolate chips and allow it to begin melting the chocolate. Stir from time to time until the chocolate has melted and you have a smooth mixture.
- Allow the ganache to cool for 20-30 minutes and then whip the frosting until it is light and fluffy.
- Chop up the strawberries and carefully fold them into the frosting before spreading it on top of the cooled brownies.
Get support & connect with our community on Facebook!
Nutrition
Don’t forget to check out my other Ketocookbooks.
Keto Instant Pot, Keto Fat Bombs, Sweets, & Treats , and Easy keto in 30 minutes.


If you already signed up, you should have received an email with a password to give you unlimited access to our FREE Printable Library. The password is case sensitive. Enter it below and get printing!
Password:
Strawberry Brownies Recipe | Low Carb Brownies And Strawberries
Ingredients
For The Brownies
- 1/2 cup sugar free chocolate chips
- 1/2 cup butter
- 3 eggs
- 1/4 cup truvia
- 1 tsp vanilla
For The Frosting
- 3/4 cup heavy cream
- 1 tbsp butter
- 1 cup sugar free chocolate chips
- 1 cup Fresh Strawberries
Instructions
For The Brownies
- Melt the chocolate. In a microwave-safe bowl, melt butter and chocolate for about 1 minute. Remove and stir well.
- Mix the wet ingredients. In a separate bowl, add eggs, sweetener, and vanilla and blend until light and frothy.
- Create the brownie batter . Pour the melted butter and chocolate into the bowl of eggs, sweetener, and vanilla, and beat again until it is well incorporated.
- Bake the Strawberry Brownies . Pour the mixture into a cake pan and bake at 350F for 30-35 minutes until a knife inserted in the center emerges clean.
For The Frosting
- Place the low carb chocolate chips in a bowl.
- Heat the heavy cream and butter in a microwave-safe bowl for 1 minute.
- Pour the heated cream onto the chocolate chips and allow it to begin melting the chocolate. Stir from time to time until the chocolate has melted and you have a smooth mixture.
- Allow the ganache to cool for 20-30 minutes and then whip the frosting until it is light and fluffy.
- Chop up the strawberries and carefully fold them into the frosting before spreading it on top of the cooled brownies.
Strawberry Brownies Recipe | Low Carb Brownies And Strawberries https://twosleevers.com/strawberry-brownies-recipe/
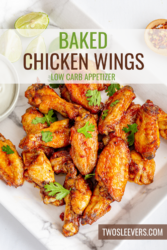
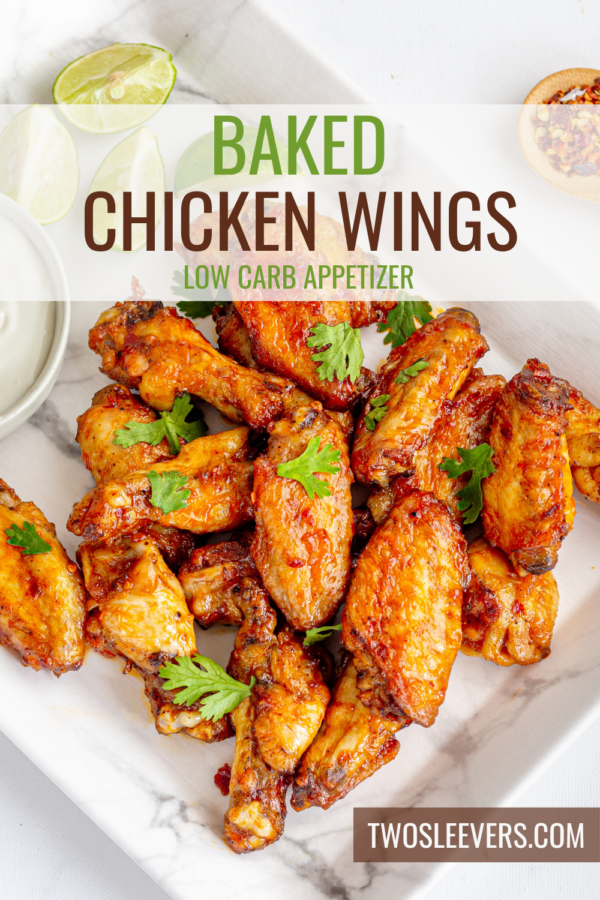
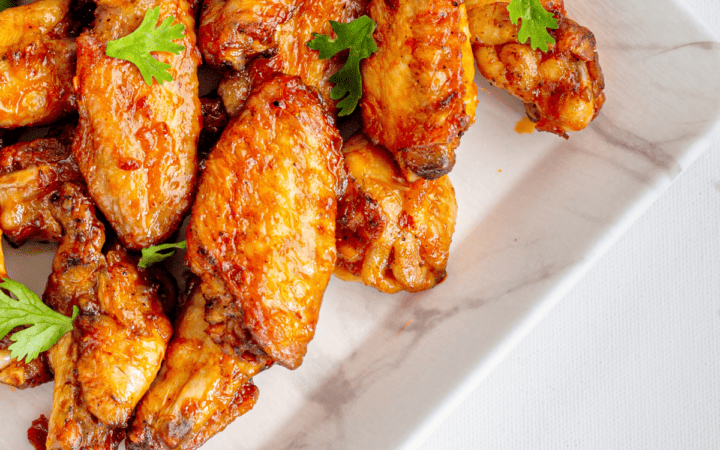
When it comes to finger-licking appetizers, it’s hard to beat the irresistible appeal of crispy chicken wings. While deep frying has traditionally been the go-to method for achieving that crispy exterior, we’re here to unveil a game-changing secret: you can achieve the same, if not better, results with oven baked chicken wings!
Why These Wings Are Irresistible
- Easy. Prepare your chicken wings, bake, and enjoy them perfectly seasoned or with with your favorite sauce.
- Low Carb . Only 7 net carbs per serving make these a great option for anyone living a low carb lifestyle.
- Gluten-Free . Skipping the flour and using baking powder to make these chicken wings crispy makes them a tasty choice for people with gluten allergies.
- Versatile. Toss them in your favorite sauce or dip them in your favorite condiment to customize them for an appetizer or main course that fits your personal preferences.
By following these simple steps and embracing a little patience, you can enjoy finger-licking goodness without the mess and hassle of deep frying.
Next time you’re planning a gathering or craving a satisfying snack, remember this foolproof method for creating the crispiest oven baked chicken wings that will leave your taste buds singing and your guests begging for the recipe.
What Temperature Should You Bake Chicken Wings?
To achieve crispy oven-baked chicken wings, it’s recommended to bake them at a higher temperature. A temperature range of 400°F to 425°F is ideal for baking chicken wings.
This higher temperature helps to render the fat from the skin, allowing it to become crispy and golden brown, while also cooking the meat inside to perfection.
Ingredients You’ll Need
- Chicken Wings
- Salt and Pepper
- Baking Powder
- Paprika
- Garlic Powder
- Onion Powder
How To Make Baked Chicken Wings
- Dry the Wings. Start by drying the chicken wings thoroughly using paper towels. Moisture is the enemy of crispiness, so make sure the wings are as dry as possible before proceeding.
- Prepare the Seasoning. In a bowl, combine baking powder, salt, pepper, and any optional spices or seasonings you prefer. The baking powder will work its magic, helping to draw moisture out of the skin and promoting a crispy texture.
- Coat and Chill. Toss the dry chicken wings in the baking powder mixture, ensuring they are evenly coated. Place the coated wings on a wire rack set on a baking sheet. The wire rack allows for even air circulation around the wings, which helps them become crispy all over. Let the wings rest in the refrigerator, uncovered, for at least an hour. This step further dries out the skin and enhances crispiness.
- Preheat and Bake . Preheat your oven to 425°F. Place the baking sheet with the wire rack and wings into the preheated oven. Bake for 30-40 minutes, flipping the wings halfway through to ensure even cooking and browning.
- Finishing Touches. Once the wings are beautifully golden and crispy, remove them from the oven. Let the wings rest for a few minutes before serving. This allows the juices to redistribute, ensuring tender and juicy meat.
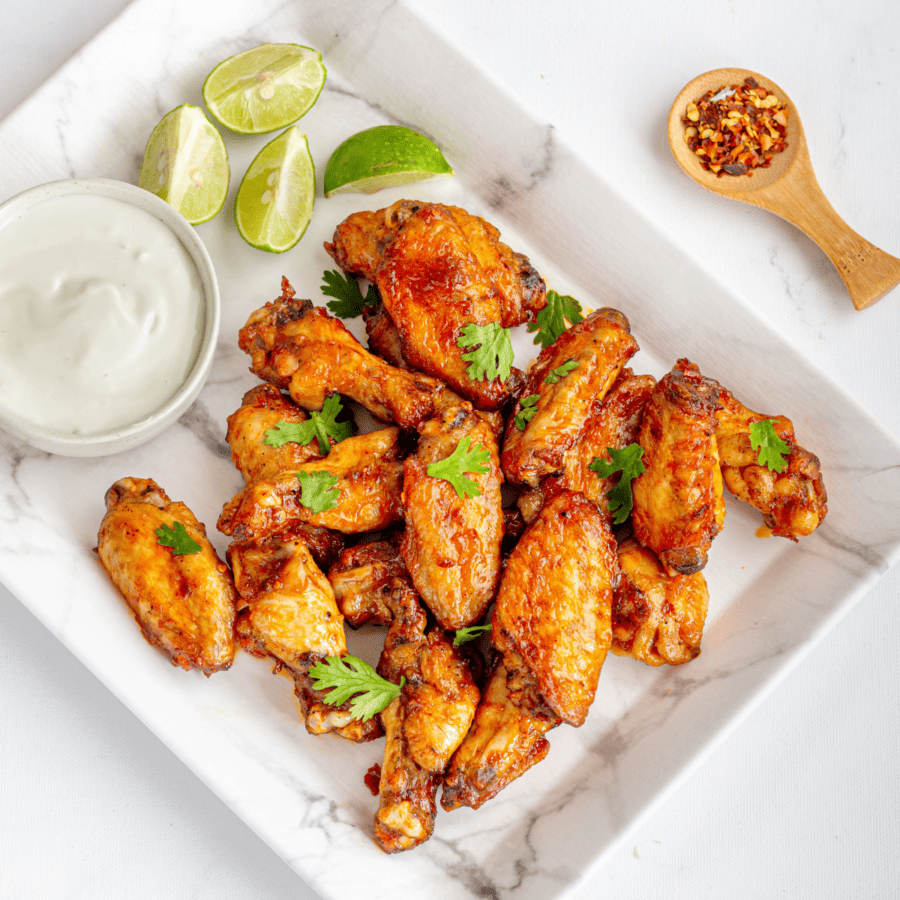
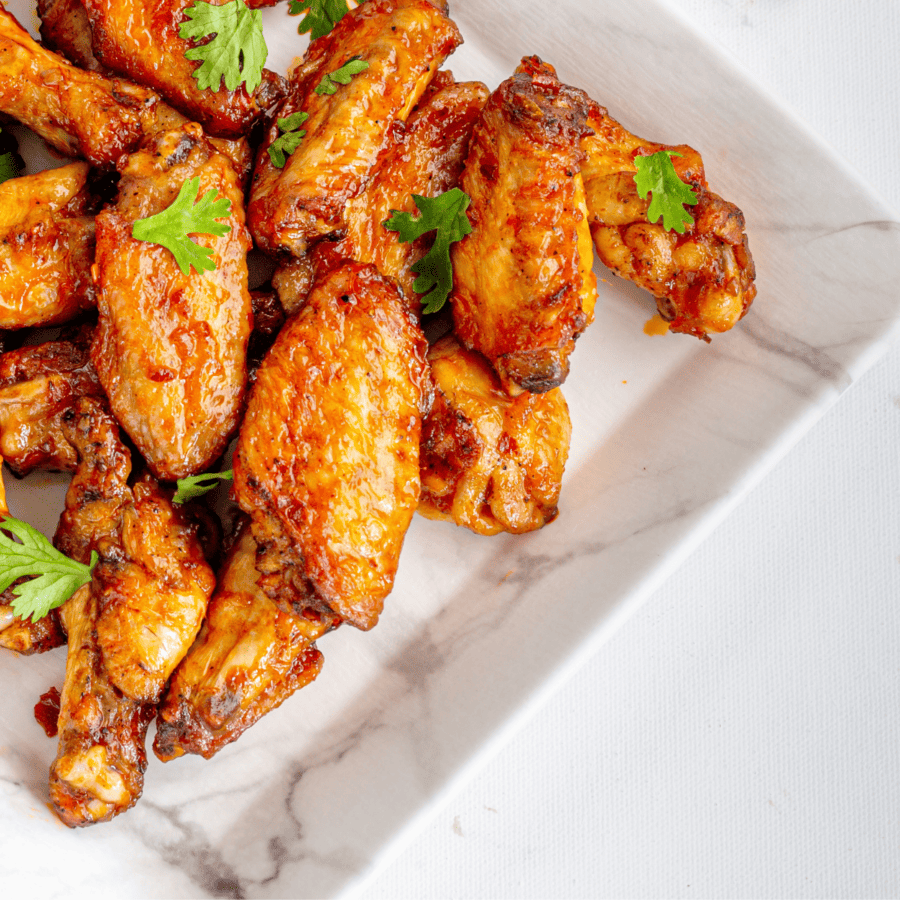
- Serve and Enjoy! Arrange the crispy oven-baked chicken wings on a serving platter. Pair them with your favorite dipping sauces and enjoy the delightful combination of flavors and textures.
Tips And Tricks
Absolutely, achieving the perfect crispy oven baked chicken wings requires attention to detail and a few tricks up your sleeve. Here are some valuable tips and tricks to ensure your chicken wings turn out irresistibly crispy:
- Dry the Wings Thoroughly . Moisture is the enemy of crispiness. Use paper towels to pat the chicken wings completely dry before seasoning or coating them. Removing excess moisture from the skin is crucial for achieving a crispy texture.
- Spacing Matters . Avoid overcrowding the baking sheet. Give the wings some space to ensure they cook evenly and develop that desired crispy exterior. If needed, use multiple baking sheets or batches.
- Baking Powder Magic . Toss the dry wings with a mixture of baking powder, salt, and any desired spices. Baking powder helps to draw out moisture from the skin, resulting in crispiness. Be sure to use baking powder, not baking soda, as baking soda can leave an undesirable taste.
Variations
There’s a world of creativity when it comes to flavor variations for crispy baked chicken wings. Here are some delicious and inventive ideas to take your wing game to the next level:
- Classic Buffalo Wings - Toss your crispy wings in a classic buffalo sauce made from melted butter and hot sauce. Serve with celery sticks and blue cheese or ranch dressing.
- Honey Sriracha Wings - Combine honey and sriracha for a sweet and spicy glaze. Add a touch of soy sauce and garlic for extra depth of flavor.
- Lemon Pepper Wings - Toss the wings in a mixture of lemon zest, black pepper, and a bit of salt for a zesty and aromatic twist.
- Teriyaki Wings - Coat the wings in a homemade teriyaki sauce made from soy sauce, ginger, garlic, and brown sugar. Garnish with sesame seeds and green onions.
- Garlic Parmesan Wings - Toss the wings with melted butter, minced garlic, and grated Parmesan cheese for a rich and savory flavor.
What To Serve With Oven Baked Wings
Chicken Wings are a versatile and crowd-pleasing dish that pairs well with a variety of sides and accompaniments. Here are some delicious options to consider when deciding what to serve with your crispy wings:
- Celery and Carrot Sticks - A classic choice! The cool and crunchy texture of fresh celery and carrot sticks provides a refreshing contrast to the hot and crispy wings. Serve with a side of ranch or blue cheese dressing for dipping.
- Coleslaw - Creamy coleslaw complements the savory flavors of wings and provides a satisfying crunch. Opt for a traditional cabbage-based coleslaw or try a tangy vinegar-based version.
- Potato Wedges - Create a hearty meal by serving wings alongside baked potato wedges or oven-baked French fries. Season the potatoes with your favorite spices for added flavor.
How Long Do They Last?
Cooked chicken wings can be stored in an airtight container in the refrigerator. They can generally last for 3 to 4 days in the fridge. It’s important to refrigerate any leftovers quickly for food safety reasons.
Can You Freeze Them?
If you want to extend their shelf life further, you can freeze oven baked chicken wings. Allow the wings to cool completely before freezing and place them in a freezer-safe container or airtight bag.
Properly frozen chicken wings can last in the freezer for about 2 to 3 months.
More Of OurBest Wing Recipes
- Korean Chicken Wings
- Breaded Chicken Wings
- Cauliflower Buffalo Wings
- Mango Habanero Wings
- Hot Honey Wings
- Sticky Chicken Wings
- Garlic Parmesan Wings
- Lemon Pepper Wings
Baked Chicken Wings | Crispy Chicken Wings Recipe
Ingredients
- ▢ 2 pounds Chicken Wings
- ▢ 1/4 cup Baking Powder
- ▢ 1 tsp Salt
- ▢ 1/2 tsp Black Pepper
- ▢ 1/2 tsp Paprika
- ▢ 1/2 tsp Garlic Powder
- ▢ 1/2 tsp Onion Powder
Instructions
- Dry the Wings. Start by drying the chicken wings thoroughly using paper towels. Moisture is the enemy of crispiness, so make sure the wings are as dry as possible before proceeding.
- Prepare the Seasoning. In a bowl, combine baking powder, salt, pepper, and any optional spices or seasonings you prefer. The baking powder will work its magic, helping to draw moisture out of the skin and promoting a crispy texture.
- Coat and Chill. Toss the dry chicken wings in the baking powder mixture, ensuring they are evenly coated. Place the coated wings on a wire rack set on a baking sheet. The wire rack allows for even air circulation around the wings, which helps them become crispy all over. Let the wings rest in the refrigerator, uncovered, for at least an hour. This step further dries out the skin and enhances crispiness.
- Preheat and Bake . Preheat your oven to 425°F. Place the baking sheet with the wire rack and wings into the preheated oven. Bake for 30-40 minutes, flipping the wings halfway through to ensure even cooking and browning.
- Finishing Touches. Once the wings are beautifully golden and crispy, remove them from the oven. Let the wings rest for a few minutes before serving. This allows the juices to redistribute, ensuring tender and juicy meat.
- Serve and Enjoy! Arrange the crispy oven-baked chicken wings on a serving platter. Pair them with your favorite dipping sauces and enjoy the delightful combination of flavors and textures.
Get support & connect with our community on Facebook!
Nutrition
And don’t forget to check out my air fryer cookbooks! Every day easy air fryer , and Air Fryer Revolution .

