
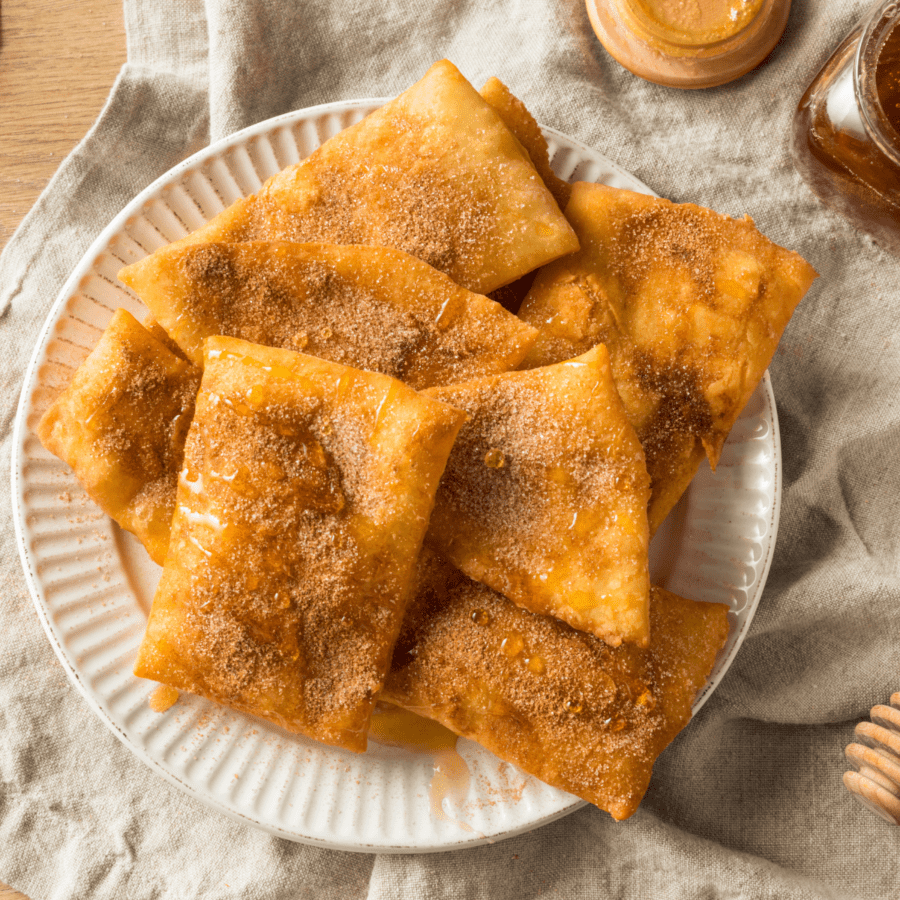
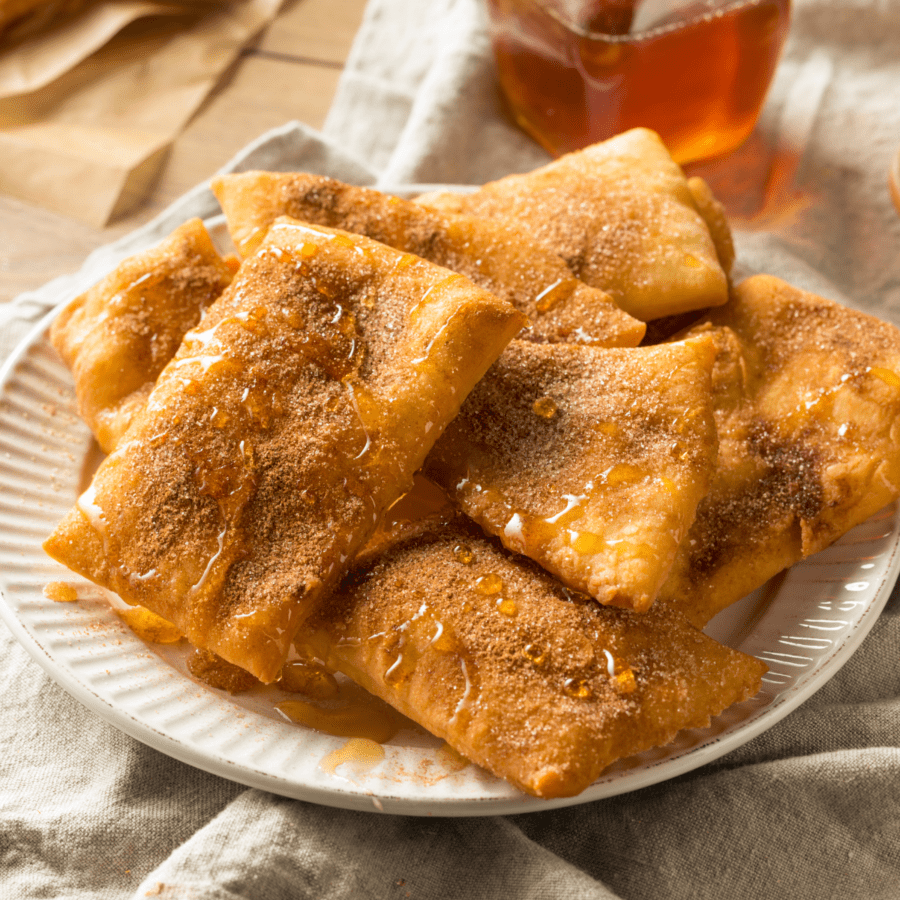
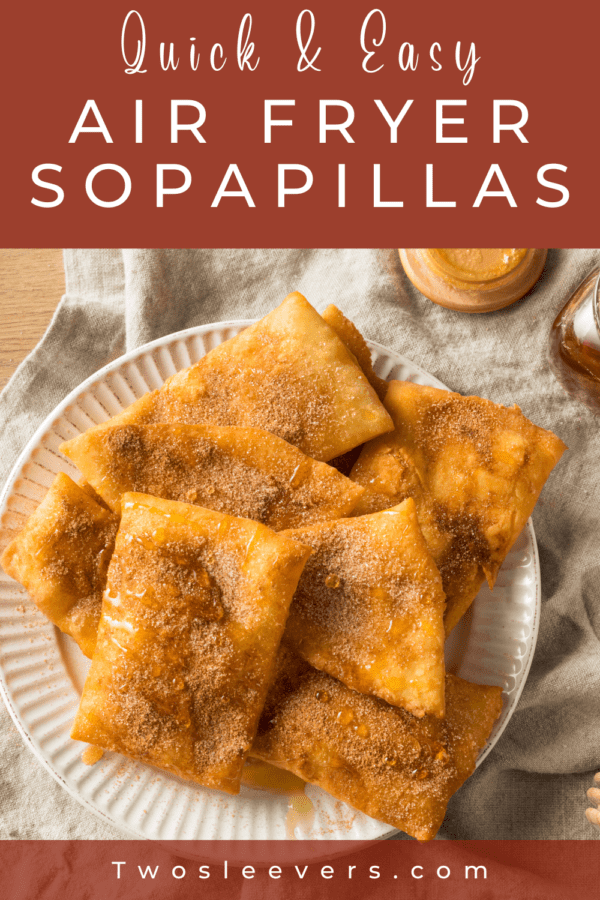
Sopapillas are a delicious, traditional Mexican dessert that is typically deep-fried and served with honey or cinnamon sugar. But did you know that you can also make them in an air fryer? This recipe will show you how to make a healthier, yet equally delicious version of this popular treat.
Why You’ll Love This Sweet Treat
- Fast. A fresh, homemade dough treat that’s ready in under 30 minutes with the help of your air fryer.
- Easy. Just mix together the dough, toss it in the air fryer, cover with cinnamon sugar and honey, and enjoy.
- Delicious. Packed with traditional cinnamon sugar flavor that’s accentuated by the sweet flavors of honey.
These air fryer sopapillas are a tasty and healthier alternative to the traditional deep-fried version. They are crispy on the outside and fluffy on the inside, and the cinnamon sugar topping adds the perfect amount of sweetness. Give this recipe a try and see how easy and delicious it is to make sopapillas in an air fryer.
Why Don’t My Sopapillas Puff Up?
There can be several reasons why your sopapillas are not puffing up:
- Not enough leavening - Sopapillas rely on baking powder or yeast to create puffiness. If you don’t use enough leavening or use old levener, your sopapillas will not puff up as much as they should.
- The dough is too dry - If the dough is too dry, it won’t puff up as well when it’s fried. Make sure to add enough liquid (milk, water, etc.) to the dough to make it the right consistency.
- Not rolling the dough thin enough - The dough should be rolled out as thin as possible, this will allow it to puff up more when it’s air fried.
Also, remember that homemade sopapillas may not puff up as perfectly as the ones you get at a restaurant or a bakery, but that doesn’t mean they will be less delicious.
What Is The Difference Between Sopapillas And Churros?
Sopapillas are a traditional Mexican and Tex-Mex dessert that is made from a light and fluffy dough that is deep-fried. They are typically served warm and drizzled with honey or sprinkled with cinnamon sugar.
Churros, on the other hand, are a traditional Spanish and Latin American dessert that is made from a denser dough that is also deep-fried. They are typically served warm and are often dusted with cinnamon sugar or served with a chocolate dipping sauce.
Churros are often shaped into long, thin strips, while Sopapillas are typically smaller and puffier.
Ingredients You’ll Need
You won’t belive how few ingredients you’ll need to get a completely homemade sweet treat that your whole family will rave about. Here’s what you’ll need to grab before you get started:
For The Pastry
- 1 1/2 cups All-Purpose Flour - This forms the base of the dough, providing structure and a soft, chewy texture once cooked.
- 1 teaspoon Baking Powder - Acts as a leavening agent to help the sopapillas puff up and become light and airy inside.
- 1/2 teaspoon Salt - Balances the sweetness and enhances the overall flavor of the dough.
- 1 tablespoon Vegetable Oil - Adds tenderness and helps the dough fry evenly in the air fryer without becoming too dry.
- 1/2 cup Warm Water - Hydrates the flour and helps bind all the ingredients together to form a smooth, pliable dough.
For The Topping
- 1/4 cup Sugar or Other Sweetener Equivalent - Provides sweetness and the classic sugary coating that makes sopapillas irresistible.
- 1 tablespoon Ground Cinnamon - Adds warm, aromatic spice that pairs perfectly with the sugar for that signature cinnamon-sugar flavor.
- Nonstick Spray - Helps the dough crisp up in the air fryer and ensures the sopapillas don’t stick to the basket. It also allows the cinnamon sugar to adhere evenly after cooking.
How To Make Sopapillas In The Air Fryer
- In a medium bowl, combine the flour, baking powder, and salt. Stir in the melted butter and warm water until a dough forms.
- Knead the dough for about 2 minutes, then cover and let it rest for 15 minutes.
- Preheat your air fryer to 375 degrees F.
- On a lightly floured surface, roll out the dough to about 1/4 inch thickness.
- Use a knife to cut the dough.
- Place the sopapillas in the air fryer basket, making sure to not overcrowd them.
- Cook for about 5-7 minutes, or until golden brown and crispy.
- Remove the sopapillas from the air fryer and let them cool slightly.
- In a small bowl, combine the sugar and cinnamon. Brush the sopapillas with butter and sprinkle with the cinnamon sugar mixture.
- Serve warm and enjoy!
Variations
- Make them chocolatey. Instead of drizzling with honey, drizzle these with melted chocolate for a bite that is similar to a churro.
- Add a savory bite. Use an unseasoned sopapilla (no topping) as a fluffy bread alongside Mexican Pulled Pork for a bite that can’t be beat.
- Make sopapilla cheesecake bars. Whip up some of my Keto Cream Cheese Frosting and spread it on top after you air fry for a quick sopapilla cheesecake.
How Long Do They Last?
Sopapillas are best enjoyed fresh, as they tend to lose their crispiness and texture over time. The shelf life of sopapillas will depend on how they are stored.
If you store sopapillas in an airtight container at room temperature, they will last for about 2-3 days. They will still be edible, but they may not be as crispy and fluffy as when they were first made.
If you want to extend the shelf life of your sopapillas, you can store them in the refrigerator. In an airtight container, they can last for up to a week.
How Do You Reheat Sopapillas In The Air Fryer?
To reheat sopapillas in the air fryer, you can follow these simple steps:
- Preheat the air fryer to 350 degrees F.
- Place the sopapillas in the air fryer basket, making sure not to overcrowd them.
- Cook for about 2-3 minutes, or until they are heated through and crispy again.
- Remove the sopapillas from the air fryer and let them cool slightly before serving.
- If desired, you can brush them with butter and sprinkle with a little cinnamon sugar mixture before serving to give them that freshly made taste.
It’s important to note that the cook time may vary depending on the thickness of the sopapillas and the power of your air fryer. Start with 2-3 minutes and check on them frequently.
Reheating sopapillas in the air fryer is a quick and easy way to get that freshly fried taste without the added oil and fat. Plus, it’s a great way to enjoy leftovers or even to make them in advance.
Can You Freeze Them?
You can also freeze sopapillas for longer storage. Place them in an airtight container or freezer bag, and they will last for about 3 months in the freezer.
To reheat frozen sopapillas, place them in the air fryer at 350°F for 2-3 minutes, or until they are heated through and crispy again.
What To Serve With Them?
Sopapillas are versatile desserts that can be enjoyed in a variety of ways. Here are some popular ways to serve them:
- Drizzle honey - The traditional way to enjoy them is with a drizzle of honey. The sweetness of the honey complements the crispy and fluffy texture of the sopapillas perfectly.
- Sprinkle cinnamon sugar - Another popular way to serve them is with a sprinkle of cinnamon sugar. The combination of sweet and spicy adds a delicious flavor to the sopapillas.
- With ice cream - These are also delicious when served with a scoop of vanilla or cinnamon ice cream. The ice cream adds a creamy and cool contrast to the warm sopapillas.
- Enjoy a cup of coffee or hot chocolate - Sopapillas can also be enjoyed with a warm drink like coffee or hot chocolate. The warm drink will complement the sopapillas and make for a perfect dessert.
Ultimately, the way you serve them will depend on your personal preferences and the occasion. Feel free to experiment and try different toppings and pairings to find the perfect combination for you.
More Easy Air Fryer Recipes
- Air Fryer Baked Potatoes
- Kofta Kabab
- Air Fryer Turkey Burgers

Sopapillas | Keto Air Fryer Sopapillas
Ingredients
For The Dough
- ▢ 1 1/2 cup All-Purpose Flour
- ▢ 1 tsp Baking Powder
- ▢ 1/2 tsp salt
- ▢ 1 tbsp vegetable Oil
- ▢ 1/2 cup Water , warm
For The Cinnamon Sugar Coating
- ▢ 1/4 cup Sugar Or Other Sweetener Equivalent
- ▢ 1 tbsp Ground Cinnamon
- ▢ Nonstick Spray
Instructions
- In a medium bowl, combine the flour, baking powder, and salt. Stir in the melted butter and warm water until a dough forms.
- Knead the dough for about 2 minutes, then cover and let it rest for 15 minutes.
- Preheat your air fryer to 375 degrees F.
- On a lightly floured surface, roll out the dough to about 1/4 inch thickness.
- Use a knife to cut the dough into 4-6 pieces.
- Place the sopapillas in the air fryer basket, making sure to not overcrowd them. Spray generously with nonstick spray.
- Cook for about 5-7 minutes, or until golden brown and crispy. Flip halfway through the cooking time and spray with additional cooking oil spray.
- Remove the sopapillas from the air fryer and let them cool slightly.
- In a small bowl, combine the sugar and cinnamon. Brush the sopapillas with butter and sprinkle with the cinnamon sugar mixture.
- Serve warm and enjoy!
Get support & connect with our community on Facebook!
Nutrition
And don’t forget to check out my air fryer cookbooks! Every day easy air fryer , and Air Fryer Revolution .


If you already signed up, you should have received an email with a password to give you unlimited access to our FREE Printable Library. The password is case sensitive. Enter it below and get printing!
Password:

Sopapillas | Keto Air Fryer Sopapillas
Ingredients
For The Dough
- 1 1/2 cup All-Purpose Flour
- 1 tsp Baking Powder
- 1/2 tsp salt
- 1 tbsp vegetable Oil
- 1/2 cup Water warm
For The Cinnamon Sugar Coating
- 1/4 cup Sugar Or Other Sweetener Equivalent
- 1 tbsp Ground Cinnamon
- Nonstick Spray
Instructions
- In a medium bowl, combine the flour, baking powder, and salt. Stir in the melted butter and warm water until a dough forms.
- Knead the dough for about 2 minutes, then cover and let it rest for 15 minutes.
- Preheat your air fryer to 375 degrees F.
- On a lightly floured surface, roll out the dough to about 1/4 inch thickness.
- Use a knife to cut the dough into 4-6 pieces.
- Place the sopapillas in the air fryer basket, making sure to not overcrowd them. Spray generously with nonstick spray.
- Cook for about 5-7 minutes, or until golden brown and crispy. Flip halfway through the cooking time and spray with additional cooking oil spray.
- Remove the sopapillas from the air fryer and let them cool slightly.
- In a small bowl, combine the sugar and cinnamon. Brush the sopapillas with butter and sprinkle with the cinnamon sugar mixture.
- Serve warm and enjoy!
Sopapillas | Keto Air Fryer Sopapillas https://twosleevers.com/sopapillas/

A cheeseburger casserole is a delicious and easy-to-make dish that combines all the flavors of a classic cheeseburger in a comforting, baked form. Perfect for busy weeknights or a fun family dinner, this casserole is sure to please everyone at the table.

Why You’ll Love This Keto-Friendly Casserole
- Easy. Brown the ground beef, mix in the rest of the ingredients, top with cheese, and bake! A recipe that can’t get much more simple.
- Low Carb . This keto casserole has a keto-friendly 8 net carbs per serving.
- High Protein . Loaded with ground beef and cheese, this is a great way to help meet your daily protein macros.
- High Fat . Worried about getting enough fat in to keep your hunger at bay? This cheeseburger casserole is just the dish you’ve been looking for!
This low-carb cheeseburger casserole is the perfect way to enjoy all the flavors of a classic cheeseburger without the added carbs. It’s a great option for anyone who is following a low-carb or ketogenic diet and it’s sure to become a regular in your meal rotation.
What Does Cheeseburger Casserole Taste Like?
Keto cheeseburger casserole tastes like a warm, comforting, deconstructed cheeseburger baked into a creamy, cheesy dish.
It has the savory richness of seasoned ground beef, the sweetness of sautéed onions, and the tangy notes of mustard and tomato sauce, all wrapped in a velvety layer of melted cheddar. The cream cheese adds a subtle creaminess that ties everything together, making each bite taste like a burger without the bun.
It’s hearty, satisfying, and full of classic cheeseburger flavor with a cozy, casserole-style twist.
Ingredients You’ll Need
- 1 pound ground beef - The star of the dish and the main protein source. It provides the classic, savory “cheeseburger” flavor and hearty base of the casserole.
- 1/2 cup onions - Onions add sweetness, depth, and aromatic flavor as they cook down with the beef. They help build that classic burger-like taste without adding many carbs.
- 1 tablespoon minced garlic - Garlic brings savory richness and enhances the overall flavor profile, giving the casserole a deeper, more complex taste.
- 1 cup tomato sauce - Tomato sauce adds moisture and a mild acidity that mimics the tang of ketchup in a cheeseburger. It binds the filling together and keeps the casserole from drying out.
- 1 tablespoon prepared mustard - Mustard adds classic cheeseburger tanginess and sharpness. It brightens the dish and balances the richness of the meat and cheese.
- 1 tablespoon Worcestershire sauce - This adds umami depth and savory complexity, enhancing the beefy flavor and creating a richer, more robust filling.
- 1/2 teaspoon salt - Salt seasons the beef and balances the flavors, ensuring the casserole is savory and well-rounded.
- 1/4 teaspoon ground black pepper - Pepper adds mild heat and a touch of sharpness that complements the beef and enhances the overall seasoning.
- 2 ounces cream cheese - Cream cheese melts into the meat mixture to create a creamy, cohesive base. It adds richness while helping the casserole thicken slightly without flour, keeping it low carb.
- 2 cups shredded sharp cheddar cheese - Cheddar is essential for delivering that bold, classic cheeseburger flavor. Half is usually mixed into the beef for creaminess, while the rest melts on top to create a gooey, golden crust.
How To Make Cheeseburger Casserole
- Preheat the oven. Turn the temperature of your oven to 375F so it is ready to start melting those cheeses as soon as you assemble the casserole.
- Cook the ground beef. In a large skillet, saute the ground beef over medium-high heat until browned. Drain any excess fat.
- Add in the aromatics. Pour in the chopped onion and minced garlic and cook until the vegetables are soft (about 5 minutes).
- Stir in the flavor. Add in the tomato sauce, mustard, Worcestershire sauce, salt, and pepper, and mix until combined.
- Make it cheesy. Mix the softened cream cheese and shredded cheddar cheese into the ground beef.
- Prep your pan. Pour the beef and cheese mixture into an 8x8 inch casserole dish.
- Bake until bubbly. Place the casserole dish in the oven for 5-10 minutes, or until the cheese is melted.
- Eat up. Serve hot and enjoy!

Tips And Tricks
Making a great low carb cheeseburger casserole is all about building bold flavor and getting the perfect creamy, cheesy texture. These tips will help you nail it every time:
- Drain the beef well to prevent excess grease from making the casserole watery.
- Sauté the onions until soft and golden for maximum sweetness and depth.
- Use sharp cheddar instead of mild. The stronger flavor makes the dish taste more “cheeseburger-like.”
- Cube the cream cheese so it melts faster and mixes in smoothly without clumping.
Variations
If you want to change up the flavor of your low carb cheeseburger casserole or tailor it to your cravings, these variations offer simple ways to make the dish even more exciting:
- Make it a true cheeseburger. If you’ve gone grocery shopping lately, you’ve likely grabbed a package or two of keto hamburger buns. Scoop a hearty portion of this cheeseburger casserole onto the bun for a delicious cheeseburger sloppy joe hybrid.
- Switch up the leftovers. If you have leftovers and want to make them into something that tastes a little different, warm the leftovers and serve them over a leafy salad and drizzle my Big Mac Sauce over the top for a quick take on my Big Mac Salad recipe .
- Use it for dipping. This keto casserole doubles as a great appetizer or dip! Use your favorite low carb chips or some pork rinds to add a crispy crunch to your next party bite.
- Add in pasta. Ok, I know this one isn’t a keto-friendly variation, but sometimes you have to cook for people that don’t eat with people that have similar dietary goals as you do. To make this a Cheeseburger Mac casserole, cook some pasta until al dente, stir in with the hamburger mixture before pouring it into the skillet, top with cheese, and bake until the cheese is melted and bubbly.
What Is A Good Side For Cheeseburger Casserole?
My favorite way to add some extra veggies and freshness to this Keto Cheeseburger Casserole is to serve all of my favorite cheeseburger accompaniments along with it! I know all of the flavors (like mustard, ketchup, and cheese) are already baked into the ground beef, but you don’t have to stop there!
Here are a few of my favorite things to serve on the side:
- Lettuce
- Sliced Tomato
- Pickles
And if you’re feeling a little extra indulgent and want to add even more creaminess to the casserole, you can even squirt a little full-fat mayo on top!
How Long Does It Last?
A cheeseburger casserole can last for up to 4 days in the refrigerator if stored properly. To properly store the casserole, cover it with plastic wrap or aluminum foil and place it in an airtight container.
When you’re ready to reheat the cheeseburger casserole, just pop it back in the oven, microwave, or air fryer until warmed through.
Can You Freeze It?
More Tasty Ground Beef Recipes
If you’re a family that tends to eat a lot of red meat, or appreciates the convenience of cooking with ground beef, you can often find yourself stuck in a rut.
Check out one of the recipes below for a great twist on your traditional meal plan!
- Skillet Lasagna
- Ethiopian Beef Stew
- Stuffed Poblano Peppers


Cheeseburger Casserole | Keto Cheeseburger Casserole Recipe
Ingredients
- ▢ 1 pound ground beef
- ▢ 1/2 cup onions, chopped
- ▢ 1 tbsp Minced Garlic
- ▢ 1 cup tomato sauce
- ▢ 1 tbsp Prepared Mustard
- ▢ 1 tbsp worchestershire sauce
- ▢ 1/2 tsp Kosher Salt
- ▢ 1/4 tsp Ground Black Pepper
- ▢ 2 ounces Cream Cheese
- ▢ 2 cups shredded sharp cheddar cheese
Instructions
- Turn the temperature of your oven to 375F so it is ready to start melting those cheeses as soon as you assemble the casserole.
- In a large skillet, saute the ground beef over medium-high heat until browned. Drain any excess fat.
- Pour in the chopped onion and minced garlic and cook until the vegetables are soft (about 5 minutes).
- Add in the tomato sauce, mustard, Worcestershire sauce, salt, and pepper, and mix until combined.
- Mix the softened cream cheese and half of the shredded cheddar cheese into the ground beef.
- Pour the beef and cheese mixture into an 8x8 inch casserole dish.
- Place the casserole dish in the oven for 5-10 minutes or until the cheese is melted.
Get support & connect with our community on Facebook!
Nutrition
Don’t forget to check out my other Ketocookbooks.
Keto Instant Pot, Keto Fat Bombs, Sweets, & Treats , and Easy keto in 30 minutes.

