If you’re craving a hearty, comforting soup with bold flavors, you’re in for a treat! This Instant Pot Shrimp and Corn Soup is a quick and easy recipe that combines tender shrimp, sweet corn, and a creamy broth to create a satisfying meal. With the magic of the Instant Pot, you can have this soup ready in no time, perfect for weeknight dinners or meal prep.

Why You’ll Love This Spectacular Soup
- Quick & Easy . Ready in under 30 minutes thanks to the Instant Pot.
- One-Pot Meal . Minimal cleanup because everything cooks in the Instant Pot.
- Flavorful . The combination of sweet corn, juicy shrimp, and a rich broth makes every bite delicious.
- Healthy . Packed with protein from shrimp and fiber from the corn, making it a nutritious option.
- Comforting . Creamy, warm, and perfect for cozying up on cooler days.
This Shrimp and Corn Soup delivers big on flavor while keeping things simple. The best part? It’s an all-in-one meal that doesn’t require you to stand over the stove for hours. With the Instant Pot doing all the heavy lifting, you can relax and enjoy!
What Does Shrimp And Corn Soup Taste Like?
Shrimp and corn soup has a rich, creamy, and slightly sweet flavor profile. The sweetness of the corn pairs beautifully with the briny, delicate taste of the shrimp, creating a balanced and comforting dish.
The broth, made with cream, adds a luscious, velvety texture, while garlic, onions, and herbs like thyme or parsley enhance the savory depth.
Is Shrimp And Corn Soup Healthy?
Absolutely! This Instant Pot Shrimp and Corn Soup is not only delicious but also nutritious. Shrimp is a great source of lean protein, omega-3 fatty acids, and essential vitamins and minerals. Corn adds fiber and a touch of natural sweetness to balance the savory flavors.
You can keep this soup on the lighter side by using low-fat milk or a dairy-free alternative if preferred.
Ingredients You’ll Need
- Shrimp - Peeled and deveined. Fresh or frozen shrimp works great, just be sure to thaw them first if using frozen.
- Corn - Fresh, canned, or frozen corn kernels add natural sweetness.
- Carrots - Diced for a pop of color and sweetness.
- Onion & Garlic - Aromatics that build the flavor base.
- Potatoes - Russet or Yukon Gold potatoes add creaminess and thickness to the soup.
- Chicken or Vegetable Broth - The base of the soup, providing depth of flavor.
- Heavy Cream or Half-and-Half - For a rich and creamy texture.
- Butter - Adds a touch of richness to the soup.
- Paprika & Thyme - Adds warmth and earthiness.
- Salt & Pepper - For seasoning.
How To Make Shrimp And Corn Soup
- Sauté Aromatics . Set your Instant Pot to the “Sauté” function. Add butter and let it melt. Sauté the onions and garlic until soft and fragrant, about 2-3 minutes.
- Add Ingredients . Add in your corn, potatoes, paprika, thyme, salt, and pepper. Stir everything together to coat the veggies in the seasonings. Pour in the broth and give it a good stir.
- Pressure Cook . Cancel the “Sauté” function and secure the Instant Pot lid. Set it to “Pressure Cook” (or Manual) on high for 8 minutes. Once the cooking time is complete, do a quick release to let out the steam.
- Add Shrimp & Cream . Open the lid and stir in the shrimp and heavy cream (or half-and-half). Set the Instant Pot back to “Sauté” and cook for another 5 minutes, or until the shrimp are fully cooked and pink.
- Serve . Ladle the creamy shrimp and corn soup into bowls and garnish with fresh parsley or green onions for a pop of color and added flavor. Enjoy with a side of crusty bread or a fresh salad.

Tips And Tricks
Here are a few tips to ensure your Instant Pot Shrimp and Corn Soup turns out perfect every time:
- Use Fresh or Frozen Shrimp . Either works well, but make sure to thaw frozen shrimp completely before adding them to the soup.
- Sauté First . Sautéing the onions and garlic in butter builds a deep, flavorful base for the soup.
- Don’t Overcook the Shrimp . Shrimp cook quickly, so keep an eye on them to avoid overcooking. They should be pink and opaque when done.
- Thicken the Soup . If you prefer a thicker soup, you can mash some of the potatoes after the pressure cooking step to give the soup a creamier texture.
Variations
Looking to mix things up? Try these variations for your Shrimp and Corn Soup:
- Spicy- Add a pinch of cayenne pepper or diced jalapeños to the soup for a spicy kick.
- Lighter Version - Substitute the heavy cream with coconut milk or almond milk for a dairy-free, lighter option.
- Add Bacon - Stir in some crispy bacon pieces at the end for a smoky, savory twist.
- Cajun Style - Add a teaspoon of Cajun seasoning for a zesty, Southern-inspired flavor.
What To Eat With Shrimp And Corn Soup
This Instant Pot Shrimp and Corn Soup is hearty on its own, but if you’re looking to round out the meal, here are a few serving ideas:
- Bread - Perfect for dipping and soaking up the creamy broth.
- Salad - A light mixed green or Caesar salad complements the richness of the soup.
- Vegetables - Serve with a side of grilled veggies for a balanced and healthy meal.
- Rice or Quinoa - Add a scoop of cooked rice or quinoa for extra texture and to make the soup more filling.
How Long Does It Last?
This soup stores well in the refrigerator for up to 3 days. Make sure to store it in an airtight container. When reheating, warm it gently on the stovetop or in the microwave to prevent overcooking the shrimp.
Can You Freeze It?
While the soup can be frozen, the texture of the cream may change slightly upon thawing. If you plan to freeze it, I recommend omitting the cream and adding it after you reheat the soup for the best results.
To freeze, let the soup cool completely and store it in freezer-safe containers. It can be frozen for up to 2 months. Thaw in the fridge overnight and reheat on the stovetop.
More Simple Shrimp Recipes
- Keto Shrimp Scampi
- Shrimp Risotto
- Shrimp Tempura
- Bang Bang Shrimp
- Shrimp Fajitas
- Salt And Pepper Shrimp
- Air Fryer Coconut Shrimp


Shrimp And Corn Soup Recipe | Instant Pot Shrimp And Corn Soup
Ingredients
- ▢ 1 pound Shrimp , peeled and deveined
- ▢ 2 cups Corn Kernels
- ▢ 2 Carrots , diced
- ▢ 1 Onion , diced
- ▢ 3 cloves Garlic , minced
- ▢ 2 Potatoes , diced
- ▢ 4 cups Chicken Broth
- ▢ 1 cup Heavy Cream
- ▢ 2 tbsp Butter
- ▢ 1 tsp Paprika
- ▢ 1/2 tsp Dried Thyme
- ▢ Kosher Salt , to taste
- ▢ Ground Black Pepper , to taste
Instructions
- Sauté Aromatics . Set your Instant Pot to the “Sauté” function. Add butter and let it melt. Sauté the onions and garlic until soft and fragrant, about 2-3 minutes.
- Add Ingredients . Add in your corn, potatoes, paprika, thyme, salt, and pepper. Stir everything together to coat the veggies in the seasonings. Pour in the broth and give it a good stir.
- Pressure Cook . Cancel the “Sauté” function and secure the Instant Pot lid. Set it to “Pressure Cook” (or Manual) on high for 8 minutes. Once the cooking time is complete, do a quick release to let out the steam.
- Add Shrimp & Cream . Open the lid and stir in the shrimp and heavy cream (or half-and-half). Set the Instant Pot back to “Sauté” and cook for another 5 minutes, or until the shrimp are fully cooked and pink.
- Serve . Ladle the creamy shrimp and corn soup into bowls and garnish with fresh parsley or green onions for a pop of color and added flavor. Enjoy with a side of crusty bread or a fresh salad.
Get support & connect with our community on Facebook!
Nutrition
Don’t forget to check out my otherBest-selling Instant Pot Cookbooks!
Indian Instant Pot , Keto Instant Pot, Instant Pot Fast and Easy , Healthy Instant Pot & Vegetarian Instant Pot .


If you already signed up, you should have received an email with a password to give you unlimited access to our FREE Printable Library. The password is case sensitive. Enter it below and get printing!
Password:

Shrimp And Corn Soup Recipe | Instant Pot Shrimp And Corn Soup
Ingredients
- 1 pound Shrimp peeled and deveined
- 2 cups Corn Kernels
- 2 Carrots diced
- 1 Onion diced
- 3 cloves Garlic minced
- 2 Potatoes diced
- 4 cups Chicken Broth
- 1 cup Heavy Cream
- 2 tbsp Butter
- 1 tsp Paprika
- 1/2 tsp Dried Thyme
- Kosher Salt to taste
- Ground Black Pepper to taste
Instructions
- Sauté Aromatics . Set your Instant Pot to the “Sauté” function. Add butter and let it melt. Sauté the onions and garlic until soft and fragrant, about 2-3 minutes.
- Add Ingredients . Add in your corn, potatoes, paprika, thyme, salt, and pepper. Stir everything together to coat the veggies in the seasonings. Pour in the broth and give it a good stir.
- Pressure Cook . Cancel the “Sauté” function and secure the Instant Pot lid. Set it to “Pressure Cook” (or Manual) on high for 8 minutes. Once the cooking time is complete, do a quick release to let out the steam.
- Add Shrimp & Cream . Open the lid and stir in the shrimp and heavy cream (or half-and-half). Set the Instant Pot back to “Sauté” and cook for another 5 minutes, or until the shrimp are fully cooked and pink.
- Serve . Ladle the creamy shrimp and corn soup into bowls and garnish with fresh parsley or green onions for a pop of color and added flavor. Enjoy with a side of crusty bread or a fresh salad.
Shrimp And Corn Soup Recipe | Instant Pot Shrimp And Corn Soup https://twosleevers.com/shrimp-and-corn-soup-recipe/

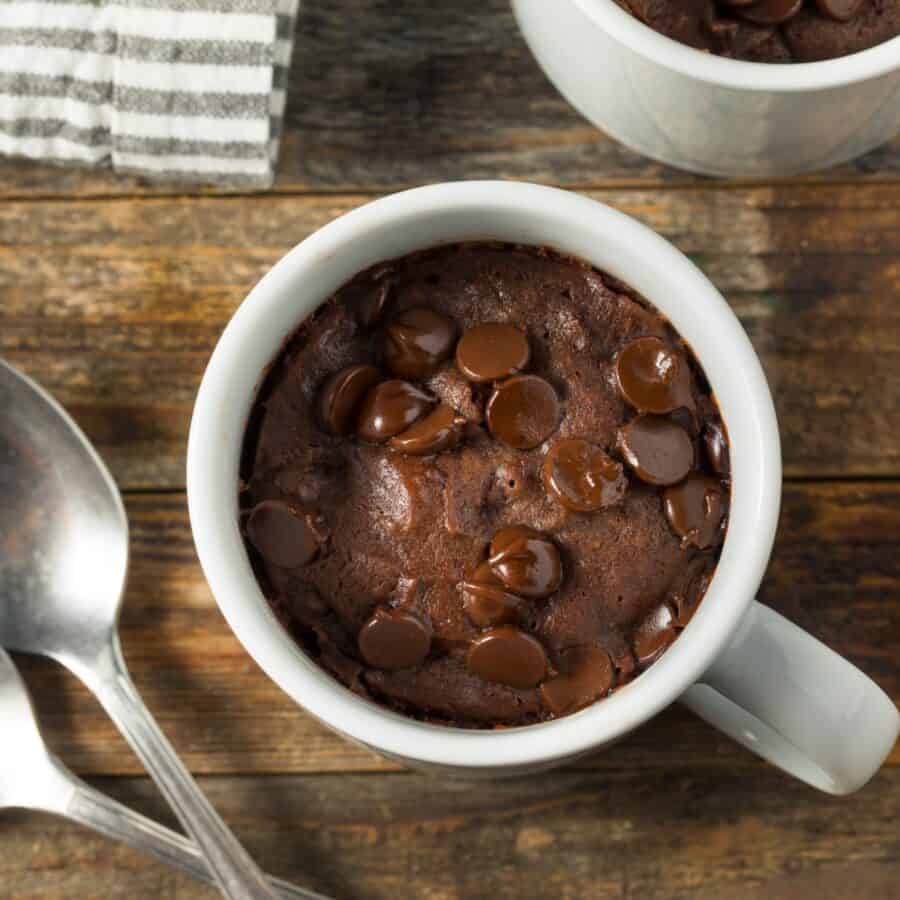
Brownie in a mug is a single-serving microwave brownie dessert made with cocoa powder, all-purpose flour, sugar, milk, oil, baking powder, and vanilla extract. It’s quick and works well for a late-night chocolate craving or an easy “dessert for one” when you don’t want to turn on the oven. Unlike traditional baked brownies that need a pan and oven time, this version mixes right in one mug and cooks in about a minute for a warm, fudgy center you can customize with toppings.
Why You’ll Love This Delicious Dessert
- Fast . Ready in under 5 minutes from start to finish!
- Easy . Just a handful of pantry staples needed.
- Satisfying . Delivers that rich, fudgy brownie flavor in a fraction of the time.
- Customizable . Add toppings like whipped cream, ice cream, or extra chocolate chips!
With minimal effort and no need to turn on the oven, you’ll satisfy your chocolate cravings in no time. Whether you’re enjoying it as a quick dessert after dinner or a late-night snack, this brownie is sure to become your new go-to treat.
Is A Brownie In A Mug As Good As A Regular Brownie?
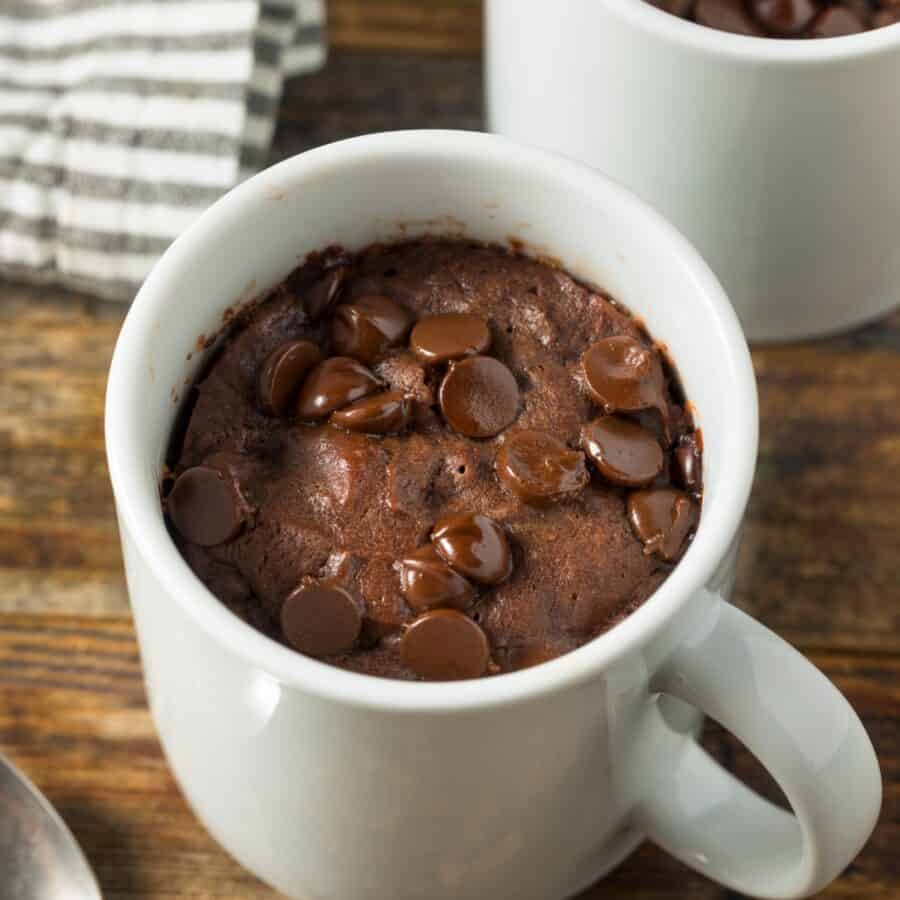
Yes, a Brownie in a Mug is every chocolate lover’s dream come true. It’s warm, gooey, and rich in flavor, with the perfect fudgy texture you expect from a traditional brownie.
The best part? You only need one mug, a microwave, and a few basic ingredients to make it. No need for fancy equipment or long baking times!
Ingredients You’ll Need
- 1/4 cup All-Purpose Flour - Provides the structure and body of the brownie, helping it hold its shape while still staying soft.
- 2 tbsp Cocoa Powder - The main source of chocolate flavor, giving the brownie its rich, fudgy taste.
- 2 tbsp Sugar - Sweetens the brownie and balances the bitterness of the cocoa.
- 1/4 tsp Baking Powder - Acts as a leavening agent, giving the brownie a little lift so it isn’t too dense.
- Pinch of Salt - Enhances the flavors, especially the chocolate, and balances the sweetness.
- 1/4 cup Milk - Provides moisture to the batter, ensuring the brownie has a soft, cake-like texture instead of being dry.
- 2 tbsp Vegetable Oil - Adds richness and keeps the brownie moist and tender. Unlike butter, it creates a softer crumb.
- 1/4 tsp Vanilla Extract - Adds warmth and depth of flavor, complementing the cocoa and sugar.
How To Make A Brownie In A Mug
- Mix the Dry Ingredients . In a microwave-safe mug, whisk together 1/4 cup flour, 2 tbsp cocoa powder, 2 tbsp sugar, 1/4 tsp baking powder, and a pinch of salt.
- Add Wet Ingredients . Stir in 1/4 cup milk, 2 tbsp vegetable oil, and 1/4 tsp vanilla extract until smooth. Be sure to mix all the ingredients thoroughly, scraping the bottom and sides of the mug.
- Microwave . Place the mug in the microwave and cook on high for 1 minute to 1 minute 15 seconds. The brownie should rise and be set on top but still moist in the center.
- Add Toppings . For an extra treat, sprinkle chocolate chips on top or add a scoop of vanilla ice cream. Enjoy your brownie straight out of the mug while it’s still warm!
Tips And Tricks
Making a Brownie in a Mug is super simple, but a few tricks can help you get the best results every time:
- Don’t overcook . Microwave times vary, so start with 1 minute and check the brownie. It’s better to undercook slightly to maintain that gooey, fudgy texture.
- Mix thoroughly . Be sure to mix the batter well to avoid any pockets of dry ingredients.
- Use a large mug . Make sure your mug is big enough (at least 12 oz) to prevent the batter from overflowing as it rises.
Variations
If you want to switch things up, here are a few fun and delicious variations you can try:
- Peanut Butter - Swirl a spoonful of peanut butter into the batter before microwaving for a nutty twist.
- Mint Chocolate - Add a drop of peppermint extract and some crushed peppermint candies for a refreshing, minty flavor.
- Nutty Brownie - Stir in chopped nuts like walnuts or pecans for added texture and flavor.
- S’mores Brownie - Top with mini marshmallows and graham cracker crumbs after microwaving for a gooey, campfire-inspired treat.
What To Enjoy With A Brownie In A Mug
While this Brownie in a Mug is delicious on its own, you can take it to the next level by pairing it with:
- Vanilla Ice Cream - The warm brownie and cold ice cream combination is irresistible!
- Whipped Cream - Add a dollop for an extra creamy finish.
- Fresh Berries - A handful of strawberries or raspberries adds a fresh, fruity contrast to the rich brownie.
How Long Do They Last?
While this brownie is best enjoyed fresh and warm from the microwave, you can store any leftovers (if there are any!) for up to 1 day at room temperature.
However, it’s so quick to make that we recommend whipping up a fresh one each time you crave a brownie!
Can You Freeze Them?
Mug brownies are designed to be quick and easy, so they’re not typically frozen. If you do have leftovers or want to prepare a batch ahead of time, you can freeze the mixed, uncooked batter in a freezer-safe container.
When you’re ready, microwave straight from frozen, adding 30-45 seconds to the cooking time.
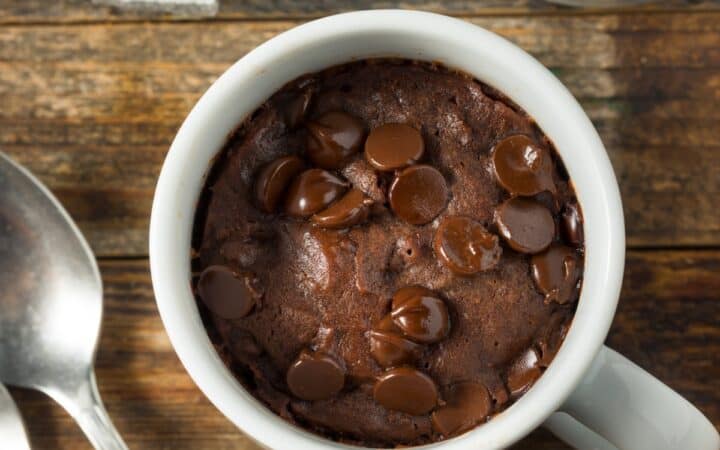
For the best mug size for a brownie in a mug, use a microwave-safe 12–16 oz mug. It gives enough headspace to prevent a mug brownie overflow while still cooking evenly into a fudgy mug brownie with a gooey center. Avoid small 8–10 oz mugs because the batter can rise quickly and spill, especially with baking powder or vigorous mixing. As a rule, don’t fill the mug more than halfway, and if your microwave runs hot, cook in 30-second bursts so the edges don’t overcook while the center sets.
A mug brownie turns rubbery almost always because it’s overcooked. Microwaves cook fast, and even an extra 10–15 seconds can push a microwave brownie in a mug from fudgy to chewy and tough (plus it keeps cooking from residual heat). It can also happen if you used a too-small mug (causing uneven cooking), overmixed the batter, or added too much flour relative to moisture.
A brownie in a mug usually turns dry because it’s overcooked (microwave wattage varies a lot), or because the batter has too many dry ingredients. Using a smaller mug can also make a microwave mug brownie cook unevenly, so the edges dry out before the center sets. For a more fudgy mug brownie, use a 12–16 oz microwave-safe mug, measure dry ingredients carefully, add a splash more milk or a teaspoon of oil if the batter looks thick, and microwave in 30-second bursts, stopping when the center is still a little soft. Resting for a minute gives you a gooey middle without drying it out.
For a fudgy brownie in a mug, use a 12–16 oz mug, mix just until combined, and microwave in 30-second bursts based on your wattage, stopping when the edges look set but the center is still slightly glossy. Letting it rest for 1 minute finishes the cooking without turning it rubbery.
More Of Our Best Brownie Recipes
- Edible Brownie Batter
- Brownie Mix Cookies
- Brownie Ice Cream
- Lunch Lady Brownies
- Air Fryer Brownies
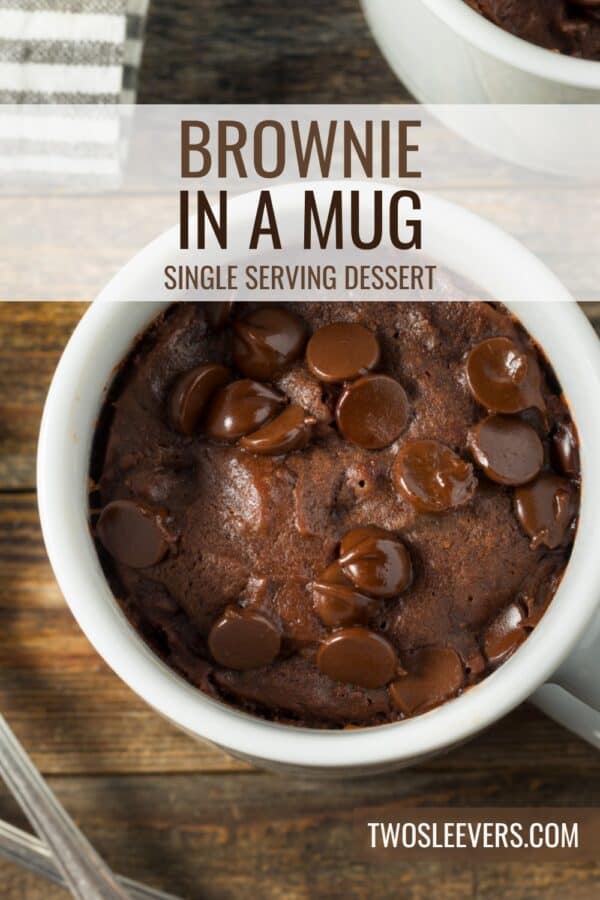
Brownie In A Mug | Microwave Mug Brownie Recipe
Ingredients
- ▢ 1/4 cup All Purpose Flour
- ▢ 2 tbsp Cocoa Powder
- ▢ 2 tbsp Sugar
- ▢ 1/4 tsp Baking Powder
- ▢ Salt , a pinch to taste
- ▢ 1/4 cup Milk
- ▢ 2 tbsp Vegetable Oil
- ▢ 1/4 tsp Vanilla Extract
Instructions
- Mix the Dry Ingredients . In a microwave-safe mug, whisk together 1/4 cup flour, 2 tbsp cocoa powder, 2 tbsp sugar, 1/4 tsp baking powder, and a pinch of salt.
- Add Wet Ingredients . Stir in 1/4 cup milk, 2 tbsp vegetable oil, and 1/4 tsp vanilla extract until smooth. Be sure to mix all the ingredients thoroughly, scraping the bottom and sides of the mug.
- Microwave . Place the mug in the microwave and cook on high for 1 minute to 1 minute 15 seconds. The brownie should rise and be set on top but still moist in the center.
- Add Toppings . For an extra treat, sprinkle chocolate chips on top or add a scoop of vanilla ice cream. Enjoy your brownie straight out of the mug while it’s still warm!
