
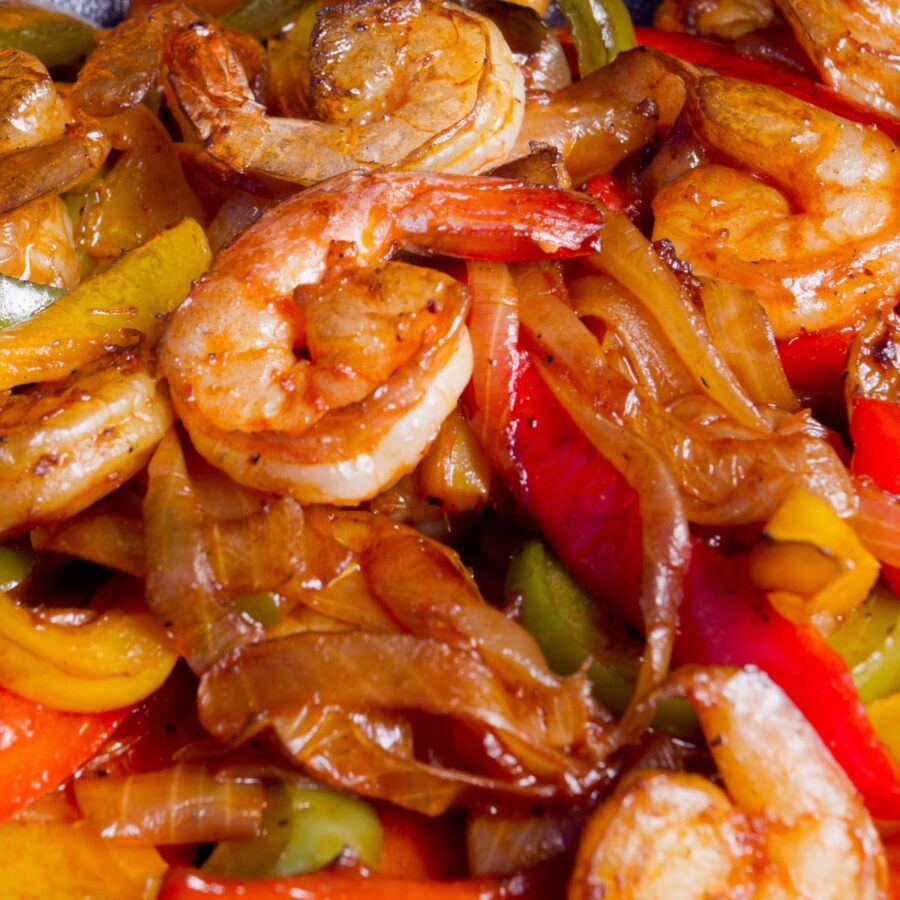
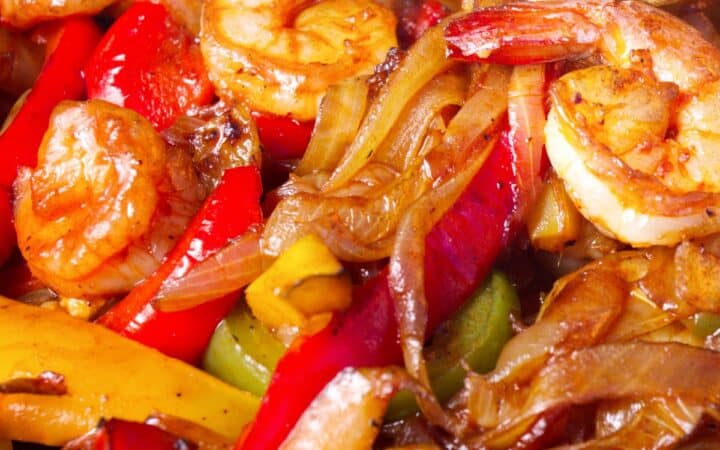
If you’re looking for a quick, healthy, and flavor-packed dinner, look no further! These Sheet Pan Shrimp Fajitas are ready in under 30 minutes and bursting with bold, zesty flavors. Whether you’re hosting a taco night or feeding your family, this one-pan meal will be an instant hit!
Why You’ll Love This Superb Seafood Recipe
- Fast . Prep and cook in just 30 minutes.
- Easy Clean-Up . One pan means minimal dishes!
- Healthy . Packed with protein, fiber, and vibrant veggies.
- Customizable . Add your favorite toppings or adjust the spice level to suit your taste.
Sheet pan shrimp fajitas deliver all the goodness of restaurant-quality fajitas with a fraction of the effort. No sizzling skillet needed—your oven does all the heavy lifting!
What Do Sheet Pan Shrimp Fajitas Taste Like?
Sheet pan shrimp fajitas are a crowd-pleaser. The shrimp cook up tender and juicy, while the veggies become perfectly roasted and caramelized.
The bold spices and zesty lime juice tie everything together, creating a meal that’s simple yet packed with flavor.
Are Sheet Pan Shrimp Fajitas Healthy?
Yes, Sheet Pan Shrimp Fajitas are a healthy meal option! By combining wholesome ingredients with simple cooking methods, these fajitas are a balanced and nutritious choice for lunch or dinner.
Ingredients You’ll Need
- Shrimp - Peeled and deveined. Shrimp cook quickly and absorb the fajita seasoning beautifully.
- Bell Peppers - A mix of red, yellow, and green for color. These sweet peppers roast to perfection.
- Onion - Adds a caramelized sweetness.
- Olive Oil - Helps the spices adhere and veggies roast evenly.
- Fajita Seasoning - A blend of chili powder, cumin, paprika, garlic powder, and onion powder.
- Salt & Pepper - Essential for balancing flavors.
- Lime Juice - Adds a zesty brightness.
- Flour Tortillas - Warm and soft for wrapping the fajita filling.
- Cilantro - Freshly chopped, for garnish.
- Optional Toppings - Sour cream, guacamole, shredded cheese, or salsa.
How To Make Sheet Pan Shrimp Fajitas
- Prep Your Ingredients . Preheat your oven to 425°F. Slice the bell peppers and onion into thin strips. Pat the shrimp dry with paper towels to ensure they roast rather than steam.
- Season Everything . In a large mixing bowl, combine the shrimp, peppers, and onion. Drizzle with olive oil and sprinkle the fajita seasoning, salt, and pepper. Toss until everything is evenly coated.
- Arrange on the Sheet Pan . Spread the shrimp and veggies in a single layer on a large sheet pan. This ensures even cooking and prevents overcrowding.
- Roast . Bake in the preheated oven for 10-12 minutes, flipping the shrimp and veggies halfway through. The shrimp should be pink and opaque, and the veggies tender with slightly charred edges.
- Add the Finishing Touch . Remove the pan from the oven and immediately drizzle lime juice over the shrimp and veggies. Toss gently to coat.
- Serve and Enjoy . Serve warm with tortillas and your favorite toppings. Garnish with fresh cilantro for a burst of flavor.

Tips And Tricks
By following these tips, your sheet pan shrimp fajitas will turn out vibrant, flavorful, and perfectly cooked every time:
- Don’t Overcook the Shrimp . Shrimp cook quickly; watch closely to avoid rubbery texture.
- Use Fresh Lime Juice . For the best zesty flavor, squeeze fresh limes rather than bottled juice.
- Customize the Veggies . Add mushrooms, zucchini, or cherry tomatoes for more variety.
- Make It Spicy . Add a pinch of cayenne pepper or crushed red pepper flakes to the seasoning.
- Prep Ahead . Slice the veggies and mix the seasoning ahead of time for an even faster meal.
Variations
These variations make sheet pan shrimp fajitas endlessly customizable, allowing you to tailor them to your taste preferences or dietary needs;
- Chicken Fajitas - Swap the shrimp for thinly sliced chicken breast or thighs. Adjust cooking time to 15-20 minutes.
- Vegan - Replace shrimp with tofu or chickpeas and load up on veggies.
- Cheesy- Sprinkle shredded cheese over the fajitas during the last 2 minutes of roasting.
- Low Carb Option - Serve with lettuce wraps instead of tortillas.
What To Eat With Sheet Pan Shrimp Fajitas
- Rice - Serve with cilantro lime rice or Spanish rice for a hearty meal.
- Beans - Black beans or refried beans make a great side.
- Salad - A crisp green salad with avocado dressing complements the fajitas perfectly.
- Chips & Salsa - For a fun, casual appetizer, serve with tortilla chips and fresh salsa or guacamole.
How Long Do They Last?
Sheet pan shrimp fajitas are best enjoyed fresh, but they can be stored for later consumption. If properly stored in an airtight container, they can last for up to 3 days in the refrigerator.
When reheating, use a skillet or oven to warm them through without overcooking, which can make the shrimp rubbery.
Can You Freeze Them?
Unfortunately, freezing is not recommended for this dish, as the shrimp and vegetables may lose their texture and become mushy upon thawing.
To keep your leftovers tasting their best, consume them within a couple of days, and avoid reheating multiple times to preserve the flavor and freshness.
More Simple Seafood Recipes
- Shrimp Tacos
- Keto Shrimp Scampi
- Brazilian Moqueca
- Thai Green Curry Mussels
- Instant Pot Jambalaya
- Coconut Shrimp
- Bang Bang Shrimp
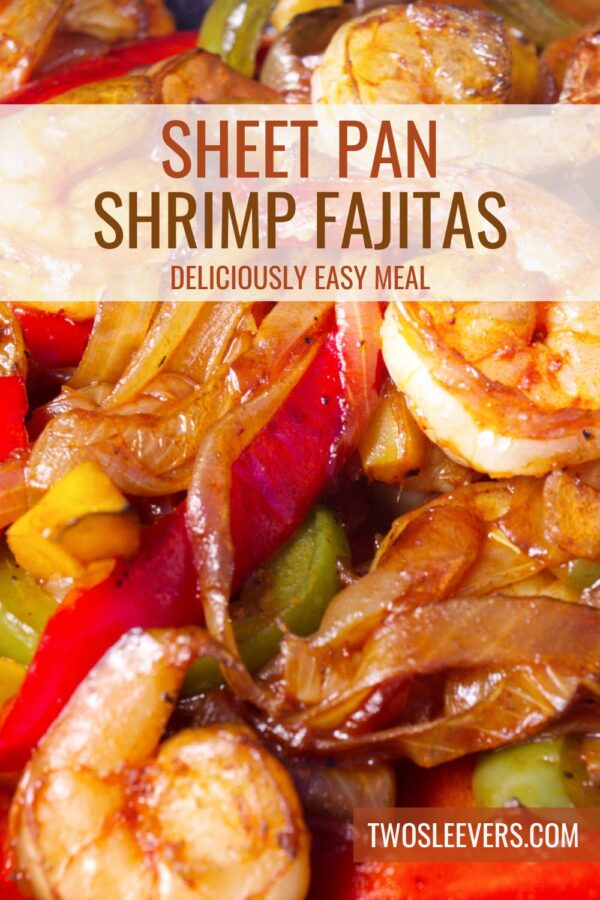
Sheet Pan Shrimp Fajitas | Easy Seafood Fajita Recipe
Ingredients
- ▢ 1 pound Shrimp , peeled and deveined
- ▢ 3 Bell Peppers , sliced
- ▢ 1 Onion , sliced
- ▢ 2 tbsp Olive Oil
- ▢ 2 tbsp Fajita Seasoning
- ▢ 1 tsp Kosher Salt
- ▢ 1/2 tsp Ground Black Pepper
- ▢ 1 Lime , juiced
- ▢ 8 Small Tortilla Shells , fajita size
- ▢ Fresh Cilantro , for garnish
Instructions
- Prep Your Ingredients . Preheat your oven to 425°F. Slice the bell peppers and onion into thin strips. Pat the shrimp dry with paper towels to ensure they roast rather than steam.
- Season Everything . In a large mixing bowl, combine the shrimp, peppers, and onion. Drizzle with olive oil and sprinkle the fajita seasoning, salt, and pepper. Toss until everything is evenly coated.
- Arrange on the Sheet Pan . Spread the shrimp and veggies in a single layer on a large sheet pan. This ensures even cooking and prevents overcrowding.
- Roast . Bake in the preheated oven for 10-12 minutes, flipping the shrimp and veggies halfway through. The shrimp should be pink and opaque, and the veggies tender with slightly charred edges.
- Add the Finishing Touch . Remove the pan from the oven and immediately drizzle lime juice over the shrimp and veggies. Toss gently to coat.
- Serve and Enjoy . Serve warm with tortillas and your favorite toppings. Garnish with fresh cilantro for a burst of flavor.
Get support & connect with our community on Facebook!
Nutrition

If you already signed up, you should have received an email with a password to give you unlimited access to our FREE Printable Library. The password is case sensitive. Enter it below and get printing!
Password:

Sheet Pan Shrimp Fajitas | Easy Seafood Fajita Recipe
Ingredients
- 1 pound Shrimp peeled and deveined
- 3 Bell Peppers sliced
- 1 Onion sliced
- 2 tbsp Olive Oil
- 2 tbsp Fajita Seasoning
- 1 tsp Kosher Salt
- 1/2 tsp Ground Black Pepper
- 1 Lime juiced
- 8 Small Tortilla Shells fajita size
- Fresh Cilantro for garnish
Instructions
- Prep Your Ingredients . Preheat your oven to 425°F. Slice the bell peppers and onion into thin strips. Pat the shrimp dry with paper towels to ensure they roast rather than steam.
- Season Everything . In a large mixing bowl, combine the shrimp, peppers, and onion. Drizzle with olive oil and sprinkle the fajita seasoning, salt, and pepper. Toss until everything is evenly coated.
- Arrange on the Sheet Pan . Spread the shrimp and veggies in a single layer on a large sheet pan. This ensures even cooking and prevents overcrowding.
- Roast . Bake in the preheated oven for 10-12 minutes, flipping the shrimp and veggies halfway through. The shrimp should be pink and opaque, and the veggies tender with slightly charred edges.
- Add the Finishing Touch . Remove the pan from the oven and immediately drizzle lime juice over the shrimp and veggies. Toss gently to coat.
- Serve and Enjoy . Serve warm with tortillas and your favorite toppings. Garnish with fresh cilantro for a burst of flavor.
Sheet Pan Shrimp Fajitas | Easy Seafood Fajita Recipe https://twosleevers.com/sheet-pan-shrimp-fajitas/
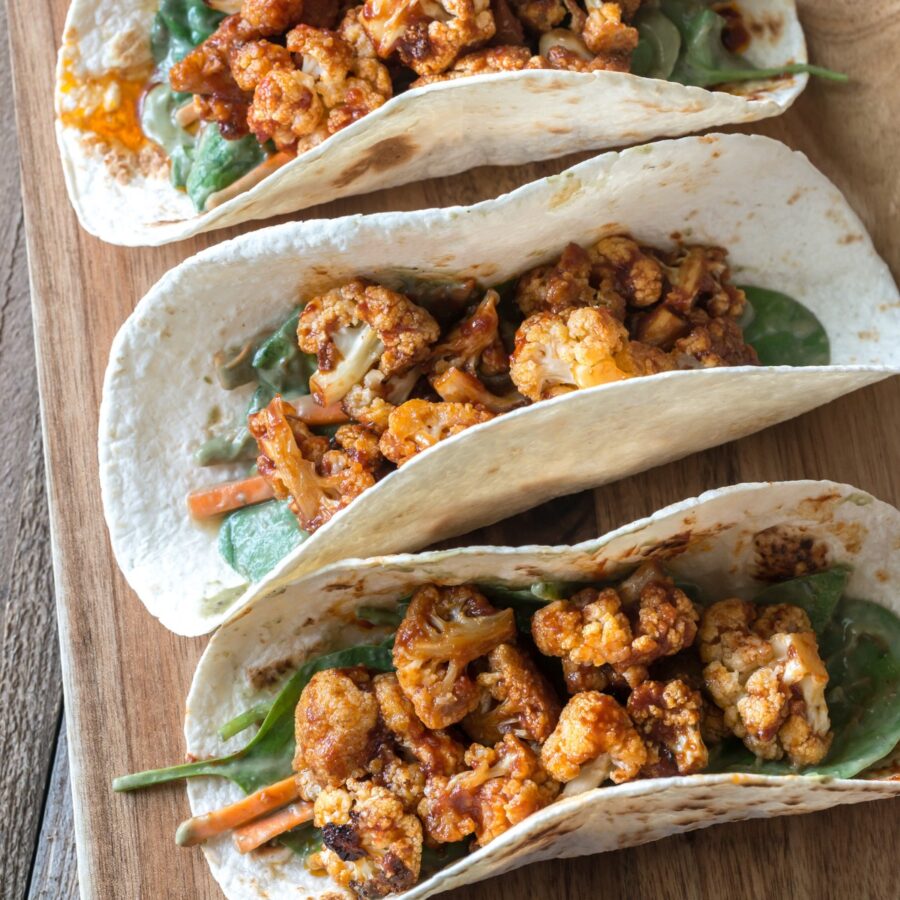
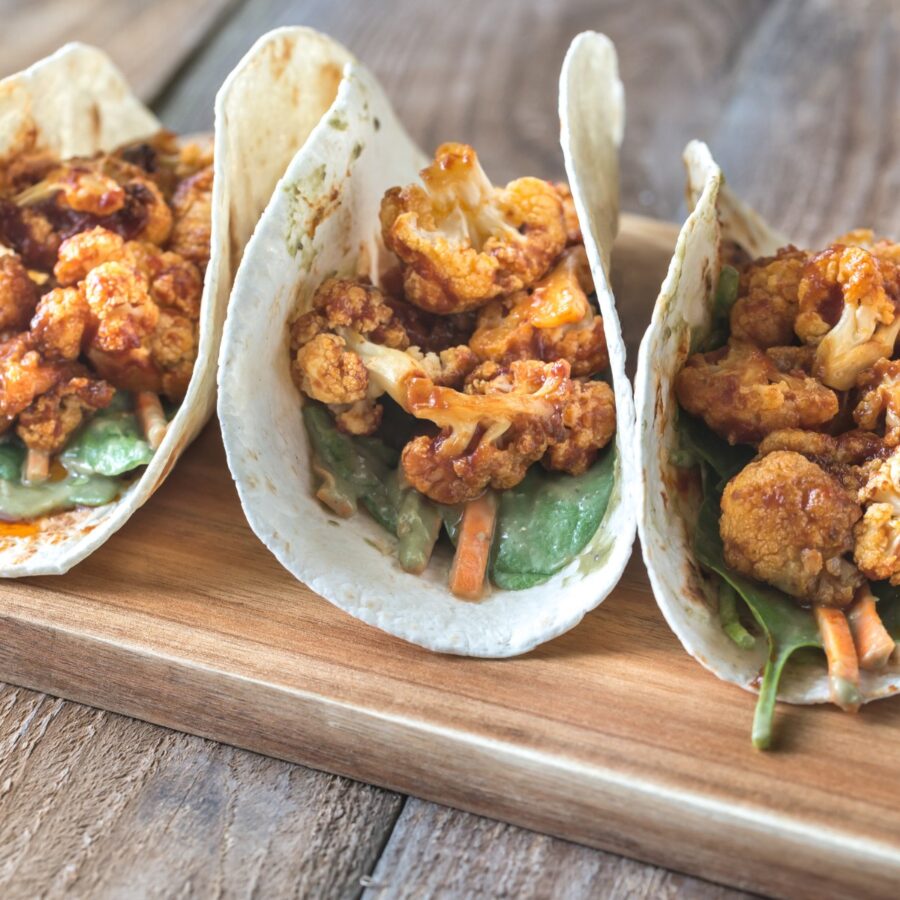
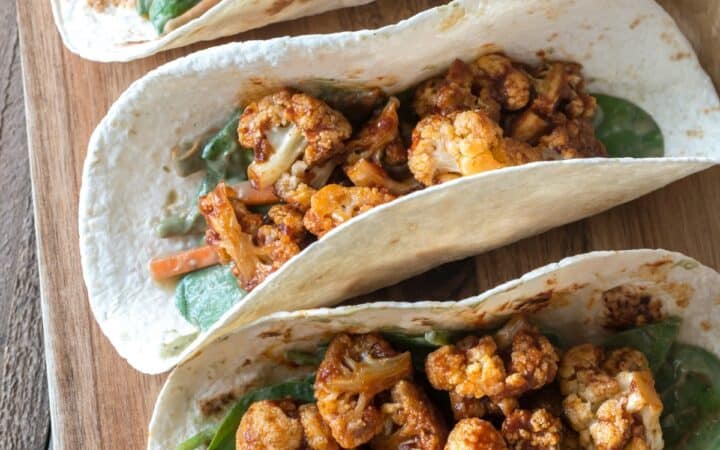
If you love bold flavors, healthy ingredients, and tacos, these Roasted Cauliflower Tacos are about to become your new favorite dish! Packed with crispy, spiced cauliflower, fresh toppings, and a zesty sauce, these tacos are a delicious way to enjoy a plant-based meal that doesn’t skimp on flavor.
Why You’ll Love These Tasty Tacos
- Quick and Easy. Ready in under 30 minutes, making them the perfect main course for busy weeknights.
- Healthy and Satisfying. Packed with fiber, vitamins, and flavor without feeling heavy.
- Customizable. Add your favorite toppings and sauces to make them your own.
- Plant-Based. A vegetarian taco option that even carnivores will love.
Whether it’s Taco Tuesday or just a day you’re craving something fresh and flavorful, these roasted cauliflower tacos are sure to hit the spot.
What Do Cauliflower Tacos Taste Like?
Roasted cauliflower tacos are a fantastic combination of crispy, spiced veggies, and fresh, vibrant toppings.
The cauliflower is seasoned with a blend of smoky and spicy spices, then roasted until golden and caramelized. Pair that with soft tortillas, creamy avocado, and tangy lime crema, and you’ve got a taco that’s as satisfying as it is healthy.
Are Cauliflower Tacos Healthy?
Cauliflower tacos are not only delicious but also highly nutritious. They’re versatile, customizable, and can easily fit into a variety of diets, including vegan, vegetarian, gluten-free, and low-calorie plans.
With their combination of roasted vegetables, fresh toppings, and flavorful sauces, cauliflower tacos are a satisfying, health-conscious choice for any meal!
Ingredients You’ll Need
For The Roasted Cauliflower
- Cauliflower Florets - The star of the dish, cut into bite-sized pieces.
- Olive Oil - Helps the spices adhere and promotes crispiness.
- Chili Powder - Adds a smoky, spicy flavor.
- Cumin - For earthy depth.
- Paprika - Enhances the smoky flavor with a mild sweetness.
- Garlic Powder - Infuses the cauliflower with aromatic flavor.
- Salt and Pepper - Essential for seasoning.
For The Tacos
- Small Tortillas - Corn or flour tortillas work well. Warm them before serving for the best texture.
- Spinach - Provides a crunchy, colorful topping.
- Shredded Carrots - Brightens up the tacos with natural sweetness.
- Lime Wedges - A squeeze of lime adds a zesty kick.
Toppings
- Lime Crema - A creamy sauce made with sour cream, lime juice, chipotle chile in adobo, and a touch of salt.
- Hot Sauce - If you like extra heat.
How To Make Cauliflower Tacos
- Prep the Cauliflower . Preheat your oven to 425°F. Line a baking sheet with parchment paper. In a large mixing bowl, combine the cauliflower florets with olive oil, smoked paprika, cumin, chili powder, garlic powder, salt, and pepper. Toss until the cauliflower is evenly coated.
- Roast the Cauliflower . Spread the seasoned cauliflower in a single layer on the prepared baking sheet. Roast for 25–30 minutes, flipping halfway through, until the edges are golden and crispy.
- Make the Crema . In a small bowl, whisk together the sour cream, lime juice, and chipotle in adobo sauce. Adjust seasoning to taste. Refrigerate until ready to serve.
- Warm the Tortillas . Heat the tortillas in a dry skillet over medium heat for about 30 seconds per side or until lightly charred. Wrap them in a clean kitchen towel to keep warm.
- Assemble the Tacos . Fill each tortilla with roasted cauliflower. Top with baby spinach, shredded carrots, and a drizzle of crema. Garnish with hot sauce and serve with lime wedges.
Tips And Tricks
Cauliflower tacos are a versatile, healthy, and flavorful dish that can be customized to suit any taste. To ensure your tacos turn out perfectly every time, follow these tips and tricks:
- Cut Cauliflower Evenly . Ensure your florets are uniform in size for even roasting.
- Don’t Skip the High Heat . Roasting at 425°F helps caramelize the cauliflower, adding smoky flavor and crisp edges.
- Warm the Tortillas . Heating tortillas enhances their flavor and texture, making your tacos feel extra special.
- Make Ahead . Roast the cauliflower and prep the toppings ahead of time for a quick assembly at mealtime.
- Customize the Heat . Add more or less chipotle in adobo to the crema based on your spice tolerance.
Variations
Cauliflower tacos are a blank canvas for creativity, and there are endless ways to adapt them to suit different tastes, cuisines, and dietary needs. Here are some delicious variations to try:
- Buffalo- Toss the roasted cauliflower in buffalo sauce before serving for a tangy, spicy twist.
- Asian-Inspired- Replace the spices with soy sauce, sesame oil, and ginger. Top with sesame seeds and scallions.
- Crispy- Dip the florets in a tempura batter before frying for a crispy variation.
- Vegan - Use a vegan yogurt or cashew cream for the crema, and skip the honey.
- Loaded Tacos - Add black beans, corn salsa, or shredded cheese for a heartier meal.
What To Eat With Cauliflower Tacos
Cauliflower tacos are versatile, flavorful, and perfect for pairing with a variety of sides and accompaniments. Whether you’re planning a light meal or a full feast, here are some delicious options to serve alongside them:
- Mexican Rice - A flavorful, hearty side dish.
- Refried Beans - Creamy and rich, they pair beautifully with the tacos.
- Chips and Guacamole - A classic appetizer to round out the meal.
- Elote - Sweet, smoky, and cheesy corn is a perfect complement.
- Margaritas - A classic cocktail to wash down the spice.
- Cuban Beans And Rice - Get flavorful black beans and rice all in one dish.
- Chile Relleno - A way to work more flavor and veggies into your meal.
How Long Do They Last?
Roasted cauliflower tacos are best enjoyed fresh, but they can be stored and reheated for later enjoyment.
The roasted cauliflower can be stored in an airtight container in the refrigerator for up to 3 days, maintaining its flavor and tenderness. However, note that the cauliflower may lose some of its crisp edges during storage.
To reheat, place the cauliflower on a baking sheet and warm it in the oven at 350°F for about 5–7 minutes to restore some of its original texture.
Can You Freeze Them?
For best results, assemble the tacos just before serving to maintain their texture and flavor. These tacos are not ideal for freezing, as the cauliflower’s texture changes significantly after thawing.
More Of OurBest Taco Recipes
- Baked Chicken Tacos
- Tacos de Alambre
- Shrimp Tacos
- Korean Beef Tacos
- Chorizo Tacos
- Potato Tacos
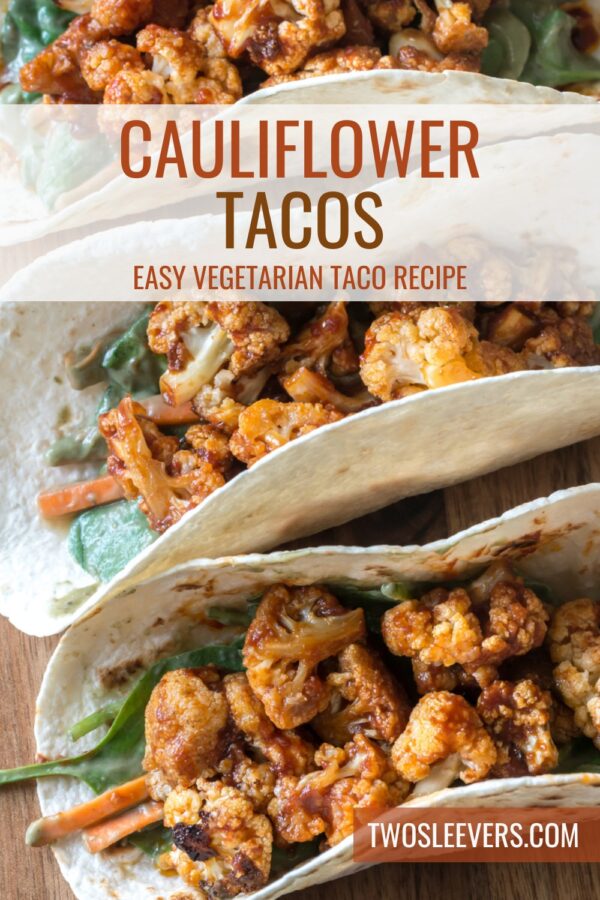
Cauliflower Tacos | Roasted Cauliflower Taco Recipe
Ingredients
For The Cauliflower
- ▢ 4 cups Cauliflower Florets
- ▢ 2 tbsp Olive Oil
- ▢ 1 tsp Chili Powder
- ▢ 1 tsp Cumin
- ▢ 1 tsp Paprika
- ▢ 1/2 tsp Garlic Powder
- ▢ 1/2 tsp Kosher Salt
- ▢ 1/4 tsp Ground Black Pepper
For The Tacos
- ▢ 8 Flour Tortillas
- ▢ 1 tbsp Lime Juice
- ▢ 1 cup Spinach Leaves
- ▢ 1/2 cup Shredded Carrots
- ▢ Lime Wedges
- ▢ Hot Sauce , to taste
For The Lime Crema
- ▢ 1/2 tsp Chipotle Peppers in Adobo Sauce , just the sauce
- ▢ 1/2 cup Sour Cream
- ▢ 1 tsp Lime Juice
Instructions
- Prep the Cauliflower . Preheat your oven to 425°F. Line a baking sheet with parchment paper. In a large mixing bowl, combine the cauliflower florets with olive oil, smoked paprika, cumin, chili powder, garlic powder, salt, and pepper. Toss until the cauliflower is evenly coated.
- Roast the Cauliflower . Spread the seasoned cauliflower in a single layer on the prepared baking sheet. Roast for 25–30 minutes, flipping halfway through, until the edges are golden and crispy.
- Make the Crema . In a small bowl, whisk together the sour cream, lime juice, and chipotle in adobo sauce. Adjust seasoning to taste. Refrigerate until ready to serve.
- Warm the Tortillas . Heat the tortillas in a dry skillet over medium heat for about 30 seconds per side or until lightly charred. Wrap them in a clean kitchen towel to keep warm.
- Assemble the Tacos . Fill each tortilla with roasted cauliflower. Top with baby spinach, shredded carrots, and a drizzle of crema. Garnish with hot sauce and serve with lime wedges.
