
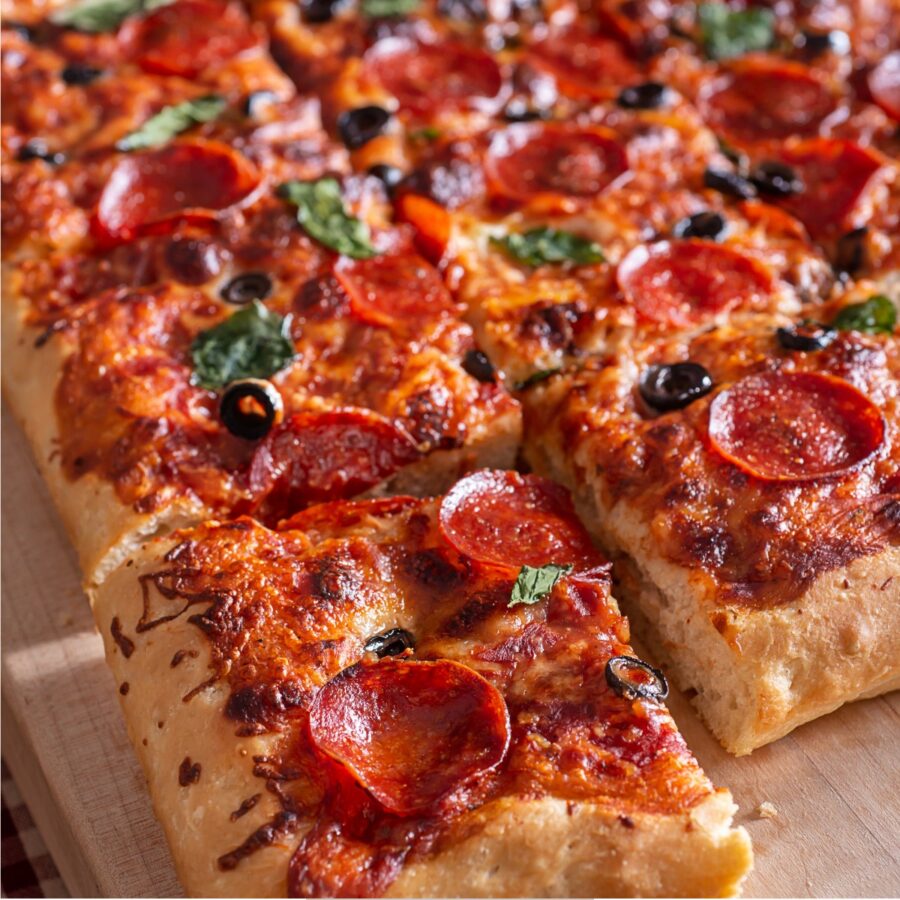
If you’re a pizza lover who enjoys a quick and easy way to make a crowd-pleasing meal, you’ve got to try sheet pan pizza! This recipe allows you to enjoy the classic flavors of pizza without the hassle of stretching dough into a perfect circle.

Why You’ll Love This Perfect Pizza
- Quick and Easy . You can have this pizza on the table in less than 30 minutes, making it ideal for a weeknight dinner.
- Customizable . Whether you’re a fan of classic cheese or love adding all the toppings, this recipe is highly adaptable to suit your tastes.
- Perfect for a Crowd . This recipe is designed for a sheet pan, which means you can serve up to 8 slices. It’s perfect for sharing!
- No Mess, No Fuss . Forget about making pizza dough from scratch or dealing with pizza stones. With sheet pan pizza, it’s as simple as rolling out the dough and baking.
Sheet pan pizza delivers all the deliciousness you crave with less effort, making it perfect for busy weeknights, casual gatherings, or family meals.
What Does Sheet Pan Pizza Taste Like?
Sheet pan pizza has all the wonderful qualities of traditional pizza. It has crispy crust, savory sauce, melted cheese, and your choice of toppings, but it’s made on a baking sheet for an easier and quicker process.
The sheet pan method guarantees even cooking, with a perfectly crispy crust around the edges and a tender interior.
Ingredients You’ll Need
- Pizza Dough - You can either use store-bought dough for convenience or make your own homemade dough if you have the time.
- Olive Oil - Used to coat the pan and give the crust a golden, crispy finish.
- Tomato Sauce - The base of your pizza; you can use store-bought marinara sauce or make a quick homemade pizza sauce.
- Shredded Mozzarella Cheese - Mozzarella is a classic choice for pizza, and its melty, gooey texture is perfect for sheet pan pizza.
- Toppings - This is where the fun begins! You can add your favorite pizza toppings like pepperoni, sausage, mushrooms, onions, bell peppers, olives, and more.
- Dried Oregano and Basil - For added flavor and to bring the pizza to life with classic Italian herbs.
- Parmesan Cheese - For a little extra richness and sharpness on top of the pizza.
How To Make Sheet Pan Pizza
- Preheat the Oven and Prepare the Pan . Preheat your oven to 475°F. While the oven heats up, lightly coat a sheet pan with olive oil. The oil will help create a crispy, golden crust as it bakes.
- Roll Out the Dough . Take your pizza dough and roll it out on a lightly floured surface to fit the dimensions of the sheet pan. If you’re using store-bought dough, this should be relatively easy. If you’re making your own dough, make sure it’s rolled out to about 1/4 inch thickness.
- Assemble the Pizza . Once your dough is spread out on the pan, gently transfer it to the prepared sheet pan. Use your hands to gently press the dough to fit the pan. Now, spread a thin layer of tomato sauce over the dough, leaving a small border along the edges for the crust. Next, sprinkle a generous amount of shredded mozzarella cheese over the sauce.
- Add Toppings . Add your favorite pizza toppings. Whether you like traditional pepperoni, sautéed mushrooms, fresh vegetables, or a combination, pile them onto the pizza. Make sure to distribute the toppings evenly for a balanced bite in every slice.
- Bake the Pizza . Place the pizza in the preheated oven and bake for 12-15 minutes, or until the crust is golden brown and the cheese is melted and bubbling. If you want a super crispy crust, you can broil the pizza for the last 2 minutes of cooking time.
- Add Final Touches . Once the pizza is out of the oven, sprinkle a pinch of dried oregano and basil over the top for that perfect Italian herb flavor. You can also add a bit of Parmesan cheese for an extra layer of flavor. Let the pizza cool for a few minutes before slicing it into 8 pieces. Serve it hot and enjoy!
Tips And Tricks
Sheet pan pizza is a fantastic way to enjoy pizza at home without the need for a pizza stone or complicated techniques. While it’s simple to make, there are a few tips and tricks that will ensure your pizza turns out perfectly every time:
- Use High-Quality Ingredients . The key to great pizza lies in the quality of the ingredients. Opt for fresh mozzarella, homemade pizza sauce, and premium toppings for the best flavor.
- Don’t Overload the Pizza . While it can be tempting to pile on tons of toppings, less is more. Too many toppings can make the pizza soggy, so keep it simple and balanced.
- Roll the Dough Thin for a Crispy Crust . For a crispy crust, make sure to roll your dough out thinly. A thick dough may result in a doughy, less crispy pizza.
Variations
Sheet pan pizza is incredibly versatile and can be customized to fit any flavor profile or dietary preference. Whether you’re a fan of classic toppings or enjoy experimenting with unique ingredients, there’s a sheet pan pizza variation for everyone:
- Vegetarian - Top your pizza with fresh vegetables like bell peppers, onions, mushrooms, spinach, and olives for a light, plant-based version of this dish.
- BBQ Chicken - Swap the tomato sauce for BBQ sauce, and top with cooked chicken, red onions, and cilantro for a tangy and smoky flavor.
- Meat Lovers - If you’re craving meat, go all out with a combination of pepperoni, sausage, bacon, and ground beef.
- White Pizza - Skip the tomato sauce and top the pizza with ricotta cheese, spinach, garlic, and mozzarella for a creamy and cheesy white pizza experience.
What To Eat With Sheet Pan Pizza
While sheet pan pizza is a meal on its own, here are some delicious sides to serve alongside it:
- Garlic Bread - Serve crispy garlic bread for extra flavor and texture.
- Salad - A light, refreshing salad with fresh greens, tomatoes, and a tangy vinaigrette balances the richness of the pizza.
- Roasted Vegetables - A side of roasted vegetables, such as broccoli or cauliflower, makes for a healthy and satisfying accompaniment.
- Dipping Sauces - Serve ranch , marinara , or garlic dipping sauce on the side for extra flavor.
How Long Does It Last?
You can store any leftover pizza in an airtight container in the fridge for up to 3 days. Reheat it in the oven or a toaster oven for a crispy crust, or in the microwave for a quick and easy option.
Can You Freeze It?
Yes, you can freeze sheet pan pizza! Simply let the pizza cool completely, slice it into portions, and wrap each slice tightly in plastic wrap or aluminum foil. Store the slices in a freezer-safe bag or container for up to 2-3 months.
To reheat, simply bake the frozen slices at 375°F for 10-15 minutes or until heated through.
Best Pizza Recipes
- Tarte Flambee
- Pizza Pinwheels
- Tortilla Pizza
- Breakfast Pizza
- Keto Pizza Crust


Sheet Pan Pizza Recipe | Family-Friendly Meal
Ingredients
- ▢ 16 ounces Refrigerated Pizza Dough
- ▢ 2 tbsp Olive Oil
- ▢ 1 cup Pizza Sauce
- ▢ 2 cups mozzarella cheese, , shredded
- ▢ 1/4 cup Pepperoni
- ▢ 1/4 cup Black Olives
- ▢ 1 tsp Dried Oregano
- ▢ 1 tsp Dried Basil
- ▢ 1/4 cup Parmesan Cheese
- ▢ 1/4 tsp Kosher Salt
- ▢ 1/4 tsp Ground Black pepper
Instructions
- Preheat the Oven and Prepare the Pan . Preheat your oven to 475°F. While the oven heats up, lightly coat a sheet pan with olive oil. The oil will help create a crispy, golden crust as it bakes.
- Roll Out the Dough . Take your pizza dough and roll it out on a lightly floured surface to fit the dimensions of the sheet pan. If you’re using store-bought dough, this should be relatively easy. If you’re making your own dough, make sure it’s rolled out to about 1/4 inch thickness.
- Assemble the Pizza . Once your dough is spread out on the pan, gently transfer it to the prepared sheet pan. Use your hands to gently press the dough to fit the pan. Now, spread a thin layer of tomato sauce over the dough, leaving a small border along the edges for the crust. Next, sprinkle a generous amount of shredded mozzarella cheese over the sauce.
- Add Toppings . Add your favorite pizza toppings. Whether you like traditional pepperoni, sautéed mushrooms, fresh vegetables, or a combination, pile them onto the pizza. Make sure to distribute the toppings evenly for a balanced bite in every slice.
- Bake the Pizza . Place the pizza in the preheated oven and bake for 12-15 minutes, or until the crust is golden brown and the cheese is melted and bubbling. If you want a super crispy crust, you can broil the pizza for the last 2 minutes of cooking time.
- Add Final Touches . Once the pizza is out of the oven, sprinkle a pinch of dried oregano and basil over the top for that perfect Italian herb flavor. You can also add a bit of Parmesan cheese for an extra layer of flavor. Let the pizza cool for a few minutes before slicing it into 8 pieces. Serve it hot and enjoy!
Get support & connect with our community on Facebook!
Nutrition

If you already signed up, you should have received an email with a password to give you unlimited access to our FREE Printable Library. The password is case sensitive. Enter it below and get printing!
Password:

Sheet Pan Pizza Recipe | Family-Friendly Meal
Ingredients
- 16 ounces Refrigerated Pizza Dough
- 2 tbsp Olive Oil
- 1 cup Pizza Sauce
- 2 cups mozzarella cheese, shredded
- 1/4 cup Pepperoni
- 1/4 cup Black Olives
- 1 tsp Dried Oregano
- 1 tsp Dried Basil
- 1/4 cup Parmesan Cheese
- 1/4 tsp Kosher Salt
- 1/4 tsp Ground Black pepper
Instructions
- Preheat the Oven and Prepare the Pan . Preheat your oven to 475°F. While the oven heats up, lightly coat a sheet pan with olive oil. The oil will help create a crispy, golden crust as it bakes.
- Roll Out the Dough . Take your pizza dough and roll it out on a lightly floured surface to fit the dimensions of the sheet pan. If you’re using store-bought dough, this should be relatively easy. If you’re making your own dough, make sure it’s rolled out to about 1/4 inch thickness.
- Assemble the Pizza . Once your dough is spread out on the pan, gently transfer it to the prepared sheet pan. Use your hands to gently press the dough to fit the pan. Now, spread a thin layer of tomato sauce over the dough, leaving a small border along the edges for the crust. Next, sprinkle a generous amount of shredded mozzarella cheese over the sauce.
- Add Toppings . Add your favorite pizza toppings. Whether you like traditional pepperoni, sautéed mushrooms, fresh vegetables, or a combination, pile them onto the pizza. Make sure to distribute the toppings evenly for a balanced bite in every slice.
- Bake the Pizza . Place the pizza in the preheated oven and bake for 12-15 minutes, or until the crust is golden brown and the cheese is melted and bubbling. If you want a super crispy crust, you can broil the pizza for the last 2 minutes of cooking time.
- Add Final Touches . Once the pizza is out of the oven, sprinkle a pinch of dried oregano and basil over the top for that perfect Italian herb flavor. You can also add a bit of Parmesan cheese for an extra layer of flavor. Let the pizza cool for a few minutes before slicing it into 8 pieces. Serve it hot and enjoy!
Sheet Pan Pizza Recipe | Family-Friendly Meal https://twosleevers.com/sheet-pan-pizza-recipe/

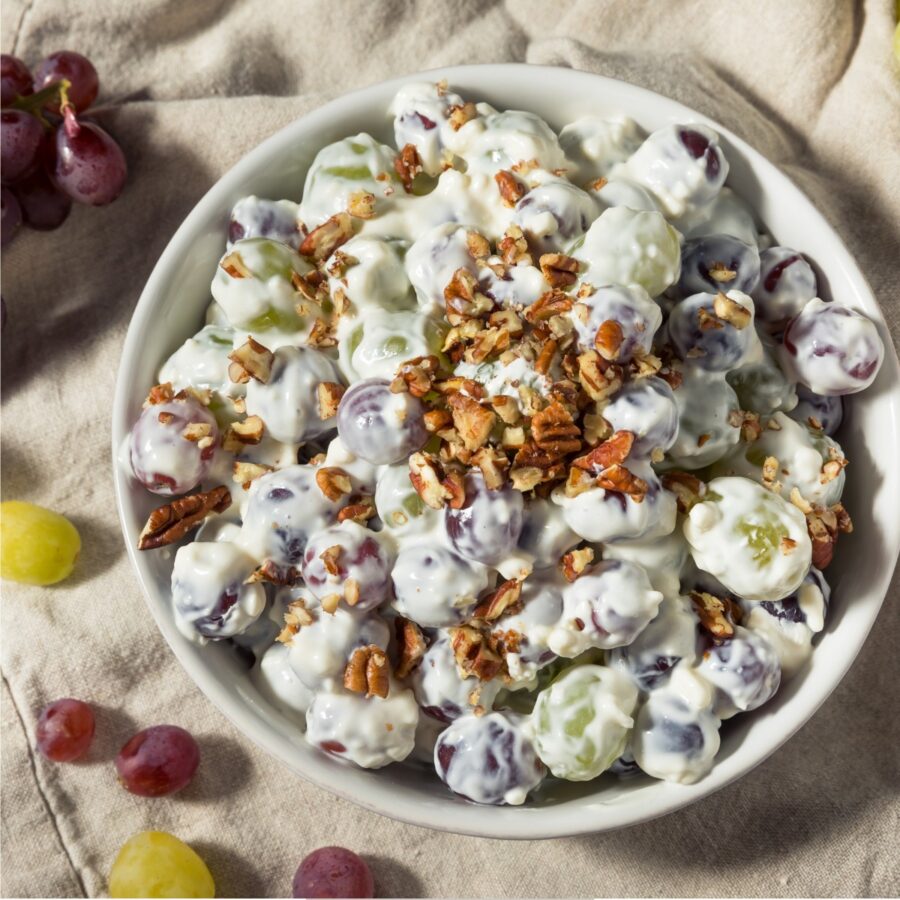
Looking for a sweet, refreshing side dish that’s always a crowd favorite? This Creamy Grape Salad is the perfect blend of juicy grapes, tangy Greek yogurt, rich cream cheese, and a touch of sweetness, all topped with a crunchy brown sugar and pecan topping. It’s a no-bake recipe that comes together in minutes, making it ideal for potlucks.
Why You’ll Love This Spectacular Side
- Quick and Easy . This salad comes together in just 10 minutes with no cooking required, making it the perfect last-minute dish to bring to a gathering or to enjoy at home.
- Sweet and Savory . The combination of fresh grapes, cream cheese, and a light dressing gives this salad a refreshing yet indulgent taste.
- Customizable . You can easily modify this recipe by adding different fruits, nuts, or even sweeteners based on your preference.
- Perfect for Any Occasion . Whether it’s a family dinner, picnic, BBQ, or holiday celebration, this grape salad fits right in as a side dish or dessert.
This easy-to-make salad is a crowd-pleaser for any occasion, from potlucks to family gatherings or even as a light dessert to end a meal. With its creamy, sweet, and tangy profile, it’s guaranteed to leave everyone coming back for more!
What Does Grape Salad Taste Like?
Creamy Grape Salad is a delightful mix of flavors and textures. The grapes are juicy and burst with sweetness, while the creamy dressing adds a rich and smooth texture.
The combination of cream cheese, Greek yogurt, and a touch of vanilla gives the salad a luscious base that balances the tartness of the grapes.
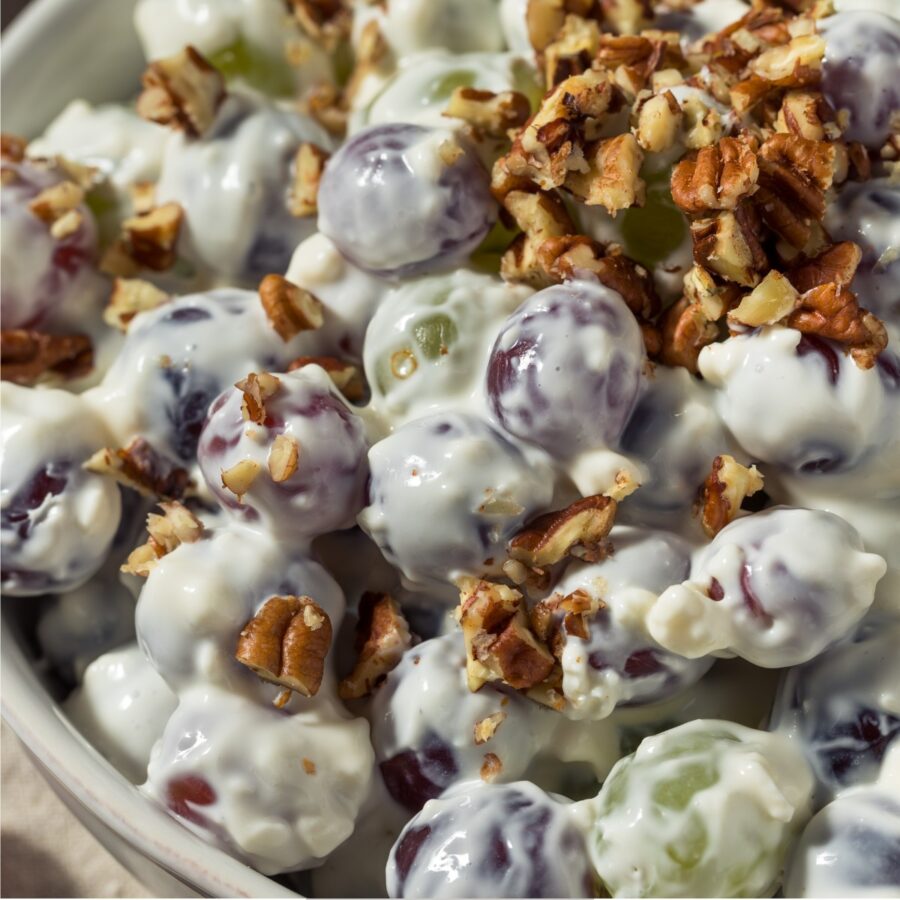
The topping, made with brown sugar, chopped nuts, and mini marshmallows, provides an added crunch and a little extra sweetness, making every bite a harmonious blend of creamy, crunchy, tangy, and sweet.
Ingredients You’ll Need
This recipe uses simple, everyday ingredients that come together to create a flavorful, creamy salad. Here’s what you’ll need:
- Fresh Grapes - The star of the salad, grapes add natural sweetness and juiciness. You can use red or green grapes, or a combination of both for color contrast.
- Cream Cheese - Adds a rich and creamy base for the dressing. Softened cream cheese ensures it mixes smoothly without lumps.
- Greek Yogurt - Provides a bit of tang and creaminess, making the dressing lighter than using just cream cheese or sour cream.
- Vanilla Extract - Adds warmth and depth to the dressing, enhancing the overall sweetness of the salad.
- Melted Butter - Helps the sugar stick to the chopped nuts.
- Granulated Sugar - Sweetens the dressing, balancing the tartness of the yogurt and cream cheese.
- Mini Marshmallows - Adds a soft, chewy texture and a slight sweetness to the salad. (Optional but highly recommended for extra fun!)
- Chopped Nuts - Pecans or walnuts are perfect for adding a crunchy contrast to the creamy grapes.
- Brown Sugar - Used to coat the chopped nuts, it adds a caramelized sweetness and extra crunch.
- Cinnamon- A pinch of cinnamon adds a warm, spiced note that enhances the flavors, especially if you’re serving it as a dessert.
How To Make Grape Salad
- Prepare the Grapes . Start by washing and drying the grapes thoroughly. Remove the stems and cut them in half if you prefer smaller pieces. Place them in a large mixing bowl.
- Make the Creamy Dressing . In a separate bowl, beat together the softened cream cheese and Greek yogurt until smooth and well combined. Add granulated sugar and vanilla extract to the mixture, and continue to mix until the dressing is fluffy and well-blended.
- Combine the Grapes and Dressing . Pour the creamy dressing over the grapes. Gently fold the mixture together using a spatula or spoon until the grapes are well coated with the dressing.
- Prepare the Topping . In a small bowl, combine the chopped nuts (pecans or walnuts), melted butter, and brown sugar. Stir until the nuts are coated with the sugar. This will give them a nice caramelized crunch. Optional: If you like the extra sweetness and texture, fold in mini marshmallows for a chewy element.
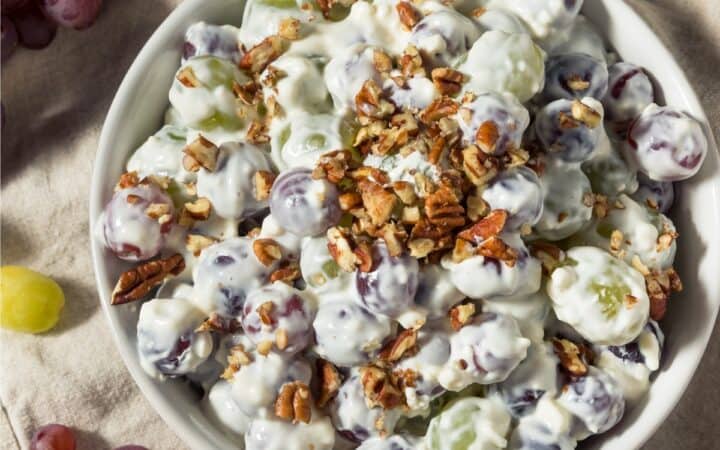
- Assemble the Salad . Spoon the dressed grapes into a serving dish or individual bowls. Top with the brown sugar-coated nuts and marshmallows. You can garnish with a light dusting of cinnamon for an added flavor boost.
- Chill and Serve . Refrigerate the salad for at least 1 hour before serving to allow the flavors to meld and the salad to chill. It’s best served cold, but if you’re in a hurry, you can serve it right away!
Tips And Tricks
Here are some tips and tricks to ensure your Grape Salad turns out absolutely delicious and perfectly balanced:
- Use Cold Grapes . Make sure your grapes are well chilled before making the salad for a refreshing bite. If you’re prepping in advance, you can even freeze the grapes for an extra cold treat.
- Use Softened Cream Cheese . To avoid lumps in your dressing, make sure the cream cheese is softened to room temperature before mixing.
- Sweeten to Taste . Depending on the sweetness of your grapes and personal preference, you can adjust the amount of granulated sugar and brown sugar.
Variations
While this grape salad recipe is delicious as is, here are a few variations to give it a personal twist:
- Tropical- Add pineapple chunks, shredded coconut, and mango to give your salad a tropical flair.
- Berry- Swap out some of the grapes for blueberries, raspberries, or strawberries for a mixed berry version.
- Nut-Free Version - If you need a nut-free salad, you can leave out the nuts and use sunflower seeds or pumpkin seeds for crunch.
- Vegan- Substitute the cream cheese and Greek yogurt with vegan cream cheese and plant-based yogurt to make this recipe completely vegan.
What To Eat With Grape Salad
This creamy grape salad is perfect as a side dish or dessert. Here are some ideas for what to serve it with:
- Grilled Chicken or Tofu - The sweet and tangy flavors of the grape salad pair wonderfully with grilled meats or plant-based proteins.
- BBQ Dishes - Serve it alongside vegan BBQ sandwiches or grilled veggie skewers for a refreshing contrast to smoky flavors.
- Sandwiches and Wraps - This salad also makes a great accompaniment to vegan wraps, tacos , or sandwiches for a light and satisfying meal.
How Long Does It Last?
Creamy Grape Salad can be stored in the refrigerator for up to 2 days in an airtight container. While the salad is best fresh, it will still taste delicious after a couple of days.
If you’re planning to store it, try to keep the nuts and marshmallows separate until you’re ready to serve to maintain their texture.
Can You Freeze It?
Freezing creamy grape salad is not recommended due to the creamy texture and the presence of fresh fruit. Freezing may cause the grapes to lose their firmness and the creamy dressing to separate. It’s best enjoyed fresh or stored in the fridge for a few days.
More Tasty Treats
- Cherry Fluff
- Strawberry Pretzel Salad
- Peach Galette
- Lemon Curd
- Cannoli Pie
- Waldorf Salad
- Air Fryer Donut Holes
- Cranberry Salad

Watch The Video
Grape Salad Recipe | Easy Creamy Grape Salad
Ingredients
- ▢ 4 cups Grapes , assorted
- ▢ 8 ounces Cream Cheese
- ▢ 1 cup Plain Greek Yogurt
- ▢ 1 tsp Vanilla Extract
- ▢ 1/4 cup Granulated Sugar
- ▢ 1 cup Mini Marshmallows
- ▢ 1/2 cup Chopped Pecans
- ▢ 2 tbsp Brown Sugar
- ▢ 1/2 tsp Ground Cinnamon
- ▢ 1 tbsp Unsalted Butter , melted
Instructions
- Prepare the Grapes . Start by washing and drying the grapes thoroughly. Remove the stems and cut them in half if you prefer smaller pieces. Place them in a large mixing bowl.
- Make the Creamy Dressing . In a separate bowl, beat together the softened cream cheese and Greek yogurt until smooth and well combined. Add granulated sugar and vanilla extract to the mixture, and continue to mix until the dressing is fluffy and well-blended.
- Combine the Grapes and Dressing . Pour the creamy dressing over the grapes. Gently fold the mixture together using a spatula or spoon until the grapes are well coated with the dressing.
- Prepare the Topping . In a small bowl, combine the chopped nuts (pecans or walnuts), melted butter, and brown sugar. Stir until the nuts are coated with the sugar. This will give them a nice caramelized crunch.
- Optional: If you like the extra sweetness and texture, fold in mini marshmallows for a chewy element.
- Assemble the Salad . Spoon the dressed grapes into a serving dish or individual bowls. Top with the brown sugar-coated nuts and marshmallows. You can garnish with a light dusting of cinnamon for an added flavor boost.
- Chill and Serve . Refrigerate the salad for at least 1 hour before serving to allow the flavors to meld and the salad to chill. It’s best served cold, but if you’re in a hurry, you can serve it right away!
