
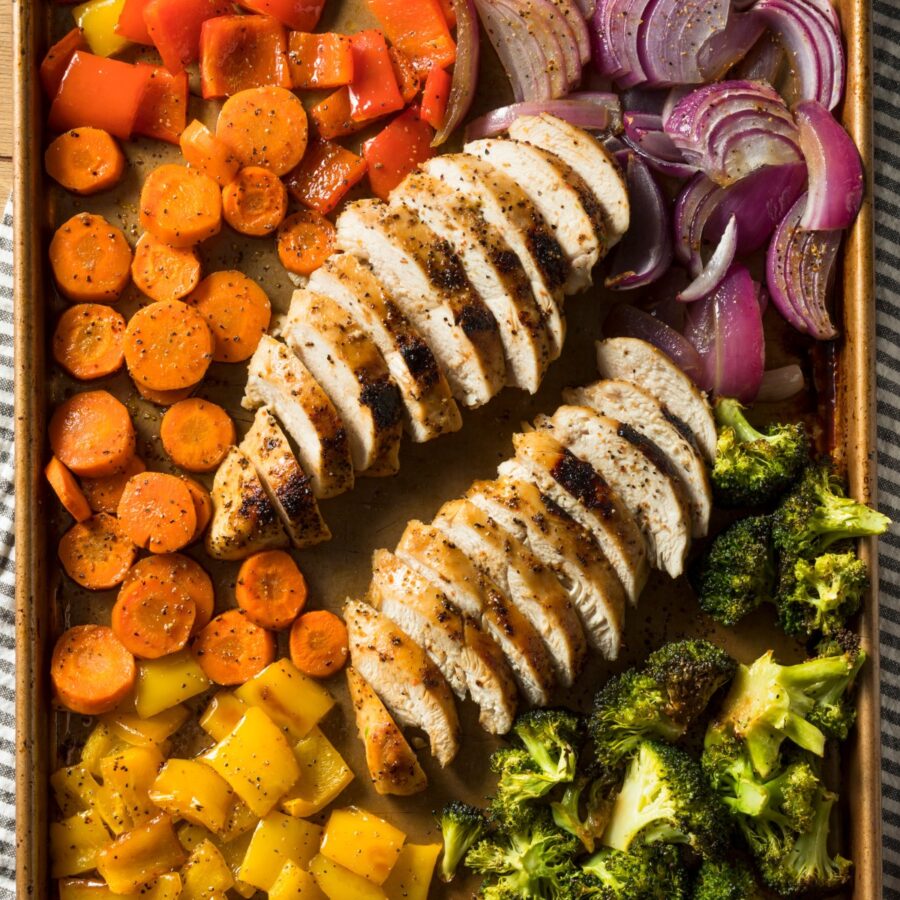
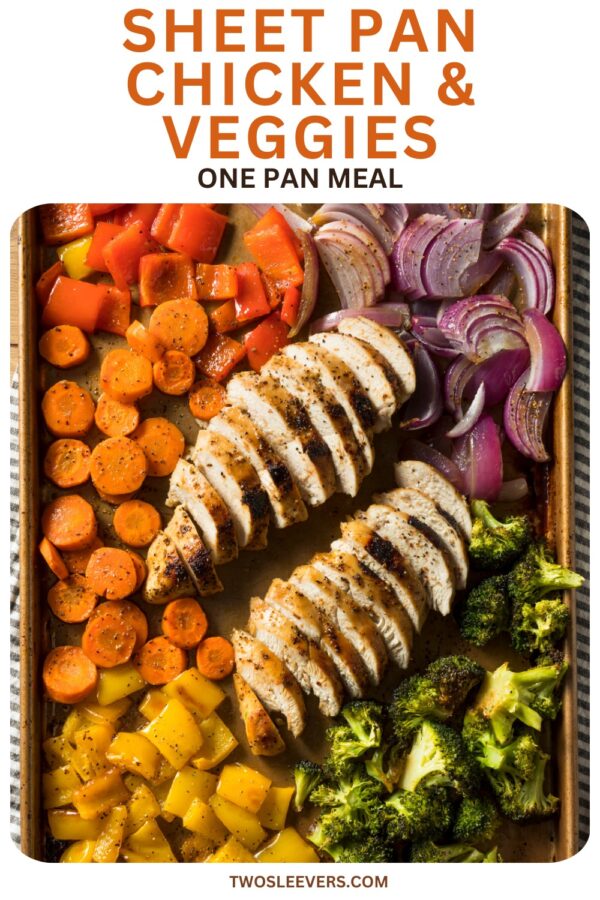
If you’re on the hunt for a quick, healthy, and flavor-packed dinner, this Sheet Pan Chicken and Veggies recipe is the answer! Perfectly roasted chicken combined with vibrant vegetables makes for a satisfying, nutrient-rich meal. It’s all cooked in one pan for easy cleanup.
Why You’ll Love This Wonderful Weeknight Meal
- Fast & Easy. Prepped and cooked in under 40 minutes!
- Nutritious. Packed with lean protein and fiber-rich vegetables.
- Customizable. Swap the veggies or seasonings to suit your taste.
- One-Pan Cleanup. Minimal dishes make this ideal for busy weeknights.
With this recipe, you’ll create a balanced, restaurant-quality meal right in your kitchen. Whether you’re feeding your family or meal prepping for the week, this dish will quickly become a favorite.
Is Sheet Pan Chicken And Veggies Healthy?
Yes! This recipe is not only delicious but also incredibly nutritious. Chicken provides lean protein, while the medley of vegetables offers essential vitamins, minerals, and fiber.
Cooking everything on one pan with olive oil keeps it light yet flavorful, making it a fantastic option for a wholesome meal.
Ingredients You’ll Need
- Chicken Breast or Thighs - The main protein source in the dish, chicken provides juicy, tender bites that pair perfectly with roasted vegetables. Chicken thighs offer more richness, while breasts are leaner and cook slightly faster.
- Bell Peppers - These add vibrant color to the dish and a natural sweetness that balances the savory and smoky flavors of the seasonings.
- Zucchini - With its mild and tender texture, zucchini complements the other veggies while soaking up the flavors of the seasonings.
- Red Onion - Roasts into a sweet and caramelized addition, offering a savory depth that enhances the overall flavor profile.
- Carrots - Their natural sweetness and crisp texture make them a delightful contrast to the savory chicken and other vegetables.
- Baby Potatoes - These are creamy and hearty, adding substance and making the dish satisfying as a complete meal.
- Olive Oil - Ensures even roasting by helping the seasonings stick to the chicken and veggies, while adding a light, buttery flavor.
- Garlic Powder - Brings a savory depth to the dish, complementing the natural flavors of the vegetables and chicken.
- Paprika - Adds a smoky touch with a hint of sweetness, giving the dish a deeper flavor and a vibrant color.
- Italian Seasoning - A blend of aromatic herbs (like oregano, basil, and thyme) that lends a Mediterranean-inspired flavor to the dish.
- Salt & Pepper - The essential seasonings that balance and enhance the natural flavors of every ingredient.
- Fresh Parsley - Adds a pop of color and freshness, giving the dish a visually appealing and herbaceous finish.
- Lemon Wedges - A tangy finish that brightens the dish, enhancing the flavors and cutting through the richness of the chicken and vegetables.
How To Make Sheet Pan Chicken And Veggies
- Preheat Your Oven. Set your oven to 425°F. Line a large sheet pan with parchment paper for easy cleanup.
- Prep the Ingredients. Slice the bell peppers, zucchini, red onion, and carrots into bite-sized pieces. Halve the baby potatoes for quicker cooking. If using chicken breasts, slice them in half lengthwise for even cooking.
- Season the Ingredients. In a large mixing bowl, combine the chicken and vegetables. Drizzle with olive oil and sprinkle with garlic powder, paprika, Italian seasoning, salt, and pepper. Toss until everything is evenly coated.
- Arrange on the Sheet Pan. Spread the chicken and vegetables in a single layer on the sheet pan, ensuring there’s space between the pieces for even roasting.
- Roast to Perfection. Bake in the preheated oven for 25–30 minutes, flipping the chicken and tossing the vegetables halfway through. The chicken should reach an internal temperature of 165°F, and the veggies should be tender with caramelized edges.
- Garnish and Serve. Remove from the oven and garnish with fresh parsley and a squeeze of lemon juice. Serve hot and enjoy!

Tips And Tricks
By following these tips, you’ll create a perfectly roasted, flavorful, and satisfying meal every time:
- Use Uniform Sizes. Cut the veggies into similar-sized pieces to ensure even cooking.
- Don’t Overcrowd the Pan. Spread everything out to allow proper roasting instead of steaming.
- Line Your Pan. Use parchment paper or aluminum foil for easier cleanup and to prevent sticking.
- Check the Chicken. Use a meat thermometer to avoid undercooking or overcooking.
Variations
With these variations, you can turn your Sheet Pan Chicken and Veggies into an endless array of delicious meals tailored to your cravings:
- Spicy- Add a pinch of cayenne or red pepper flakes for extra heat.
- Herb Butter Chicken - Swap olive oil for melted herb-infused butter for a richer flavor.
- Citrus - Add orange or lemon zest to the seasoning mix for a bright, zesty twist.
- Asian-Inspired - Use sesame oil and sprinkle with soy sauce and ginger for an umami-packed variation.
What To Eat With Sheet Pan Chicken And Veggies
Sheet Pan Chicken and Veggies is a versatile and balanced meal on its own, but pairing it with complementary sides or accompaniments can elevate the dish. Here are some delicious ideas:
- Rice or Quinoa - For extra carbs and a hearty base.
- Bread - Perfect for soaking up the juices.
- Salad - Adds a refreshing crunch.
How Long Does It Last?
Sheet Pan Chicken and Veggies can last up to 4 days when stored properly in the refrigerator. Once the dish has cooled to room temperature, transfer the chicken and vegetables into an airtight container to maintain their freshness.
When reheating, use an oven or stovetop to preserve the crisp texture of the veggies and keep the chicken juicy.
Can You Freeze It?
Yes! Cool the dish completely, then store in freezer-safe containers for up to 3 months.
Thaw your leftovers overnight in the fridge before reheating in the oven at 350°F until warmed through.
More Simple Chicken Recipes
- Instant Pot Butter Chicken
- Cajun Chicken Thighs
- Chicken Tostadas
- Bourbon Chicken
- Chicken Quesadillas

Sheet Pan Chicken And Veggies Recipe| Healthy Sheet Pan Meal
Ingredients
- ▢ 4 Chicken Breasts
- ▢ 2 Bell peppers , sliced
- ▢ 2 Zucchini , sliced
- ▢ 1 Red Onion , sliced
- ▢ 4 Carrots , peeled and diced
- ▢ 8 Baby Potatoes , optional, halved
- ▢ 2 tbsp Olive Oil
- ▢ 1 tsp Garlic Powder
- ▢ 1 tsp Paprika
- ▢ 1 tbsp Italian Seasoning
- ▢ 1 tsp Kosher Salt
- ▢ 1/2 tsp Ground Black Pepper
- ▢ Parsley , for garnish
- ▢ Lemon Wedges , for garnish
Instructions
- Preheat Your Oven. Set your oven to 425°F. Line a large sheet pan with parchment paper for easy cleanup.
- Prep the Ingredients . Slice the bell peppers, zucchini, red onion, and carrots into bite-sized pieces. Halve the baby potatoes (if using) for quicker cooking. If using chicken breasts, slice them in half lengthwise for even cooking.
- Season the Ingredients. In a large mixing bowl, combine the chicken and vegetables. Drizzle with olive oil and sprinkle with garlic powder, paprika, Italian seasoning, salt, and pepper. Toss until everything is evenly coated.
- Arrange on the Sheet Pan. Spread the chicken and vegetables in a single layer on the sheet pan, ensuring there’s space between the pieces for even roasting.
- Roast to Perfection. Bake in the preheated oven for 25–30 minutes, flipping the chicken and tossing the vegetables halfway through. The chicken should reach an internal temperature of 165°F, and the veggies should be tender with caramelized edges.
- Garnish and Serve. Remove from the oven and garnish with fresh parsley and a squeeze of lemon juice. Serve hot and enjoy!
Get support & connect with our community on Facebook!
Nutrition

If you already signed up, you should have received an email with a password to give you unlimited access to our FREE Printable Library. The password is case sensitive. Enter it below and get printing!
Password:

Sheet Pan Chicken And Veggies Recipe| Healthy Sheet Pan Meal
Ingredients
- 4 Chicken Breasts
- 2 Bell peppers sliced
- 2 Zucchini sliced
- 1 Red Onion sliced
- 4 Carrots peeled and diced
- 8 Baby Potatoes optional, halved
- 2 tbsp Olive Oil
- 1 tsp Garlic Powder
- 1 tsp Paprika
- 1 tbsp Italian Seasoning
- 1 tsp Kosher Salt
- 1/2 tsp Ground Black Pepper
- Parsley for garnish
- Lemon Wedges for garnish
Instructions
- Preheat Your Oven. Set your oven to 425°F. Line a large sheet pan with parchment paper for easy cleanup.
- Prep the Ingredients . Slice the bell peppers, zucchini, red onion, and carrots into bite-sized pieces. Halve the baby potatoes (if using) for quicker cooking. If using chicken breasts, slice them in half lengthwise for even cooking.
- Season the Ingredients. In a large mixing bowl, combine the chicken and vegetables. Drizzle with olive oil and sprinkle with garlic powder, paprika, Italian seasoning, salt, and pepper. Toss until everything is evenly coated.
- Arrange on the Sheet Pan. Spread the chicken and vegetables in a single layer on the sheet pan, ensuring there’s space between the pieces for even roasting.
- Roast to Perfection. Bake in the preheated oven for 25–30 minutes, flipping the chicken and tossing the vegetables halfway through. The chicken should reach an internal temperature of 165°F, and the veggies should be tender with caramelized edges.
- Garnish and Serve. Remove from the oven and garnish with fresh parsley and a squeeze of lemon juice. Serve hot and enjoy!
Sheet Pan Chicken And Veggies Recipe| Healthy Sheet Pan Meal https://twosleevers.com/sheet-pan-chicken-and-veggies/

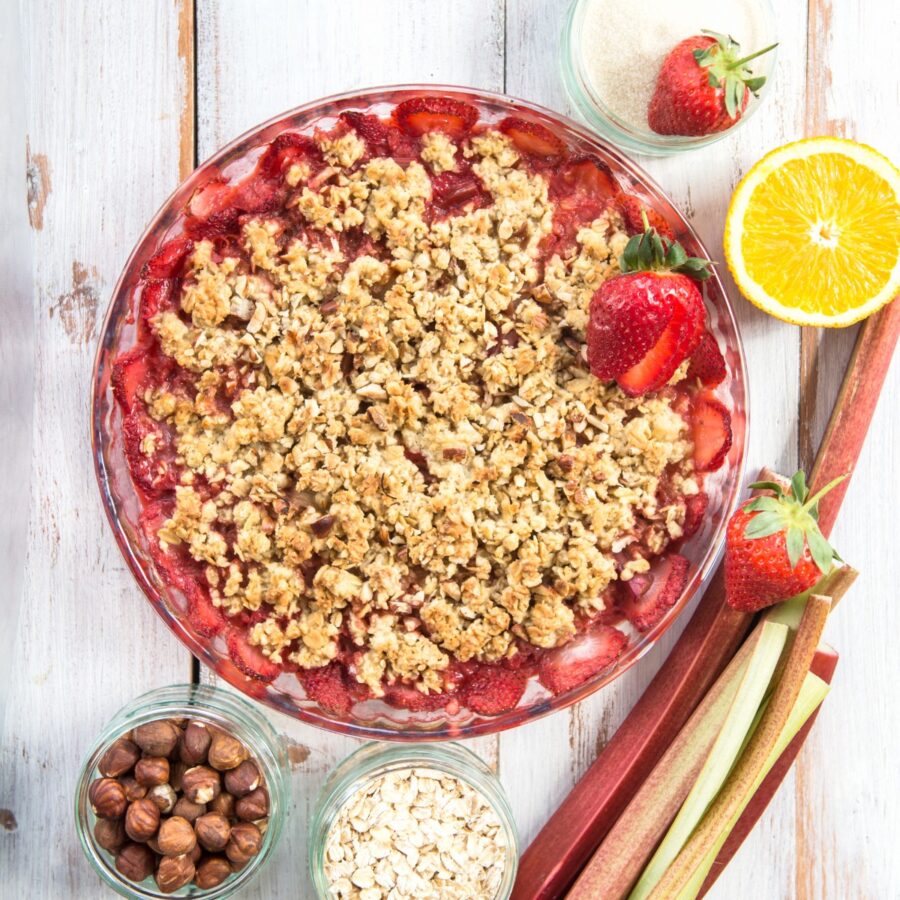
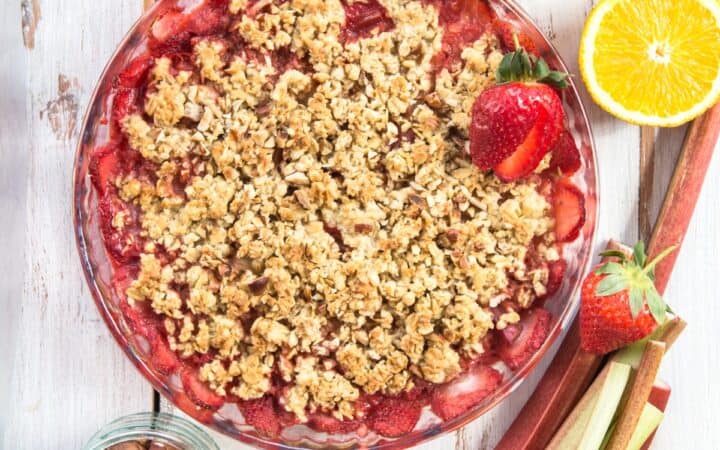
If you love warm, buttery desserts with juicy fruit filling and a crispy, golden topping, then this Strawberry Crumble is for you! This easy-to-make dessert features fresh strawberries tossed with sugar and lemon juice, baked under a crunchy oat crumble topping. It’s the perfect balance of sweet, tart, and buttery, making it a go-to treat for any occasion. Serve it warm with a scoop of vanilla ice cream, and you’ve got a dessert that’s absolutely irresistible!
Why You’ll Love This Delicious Dessert
- Easy to Make . No need for fancy techniques; just mix, bake, and enjoy!
- Crispy & Buttery . The oat crumble topping is golden brown and adds the perfect crunch.
- Naturally Sweet & Fruity . Juicy strawberries make this crumble fresh and flavorful.
- Perfect for Any Occasion . Great for family dinners, holidays, or summer get-togethers.
- Customizable . Make it gluten-free, dairy-free, or add extra fruit for a personal touch!
This Strawberry Crumble is a simple yet impressive dessert that lets the natural sweetness of the strawberries shine while delivering a buttery, crispy topping that everyone loves.
What Does Strawberry Crumble Taste Like?
Strawberry Crumble is a baked fruit dessert with a juicy, sweet strawberry filling and a crispy, buttery crumble topping made with oats, flour, and sugar. It’s similar to a crisp but has a more buttery and crumbly texture rather than a crunchy one.
It’s easier than pie but just as satisfying—no rolling out dough required!
Ingredients You’ll Need
- Strawberries - The main ingredient that provides natural sweetness, vibrant color, and juicy texture. As the crumble bakes, the strawberries soften, creating a warm, jam-like filling.
- Granulated Sugar - Helps draw out the juices from the strawberries, enhancing their natural sweetness. Caramelizes slightly during baking, giving the filling a richer flavor.
- Cornstarch - Works as a thickening agent, ensuring the strawberry filling doesn’t become too runny. Creates a silky, jam-like consistency that holds together when served.
- Lemon Juice - Adds a bright, tangy contrast to the sweetness of the strawberries. Helps balance flavors and prevents the filling from becoming too sugary.
- Vanilla Extract - Enhances the natural fruit flavors, giving the crumble a warm, aromatic depth.
- All-Purpose Flour - Forms the base of the crumble, giving it structure and a light, crumbly texture. Helps bind the butter and sugar together for a crisp finish.
- Old-Fashioned Oats - Adds texture and a slightly nutty flavor, making the crumble more hearty.
- Brown Sugar - Provides sweetness and a subtle caramel-like richness that complements the strawberries.
- Cinnamon - Adds a warm, spiced flavor that enhances the overall depth of the crumble. Pairs beautifully with both the strawberries and the oat topping.
- Unsalted Butter - Binds the dry ingredients together, creating the perfect crumbly texture.
- Pinch of salt - Balances the sweetness of the crumble and enhances the buttery flavor.
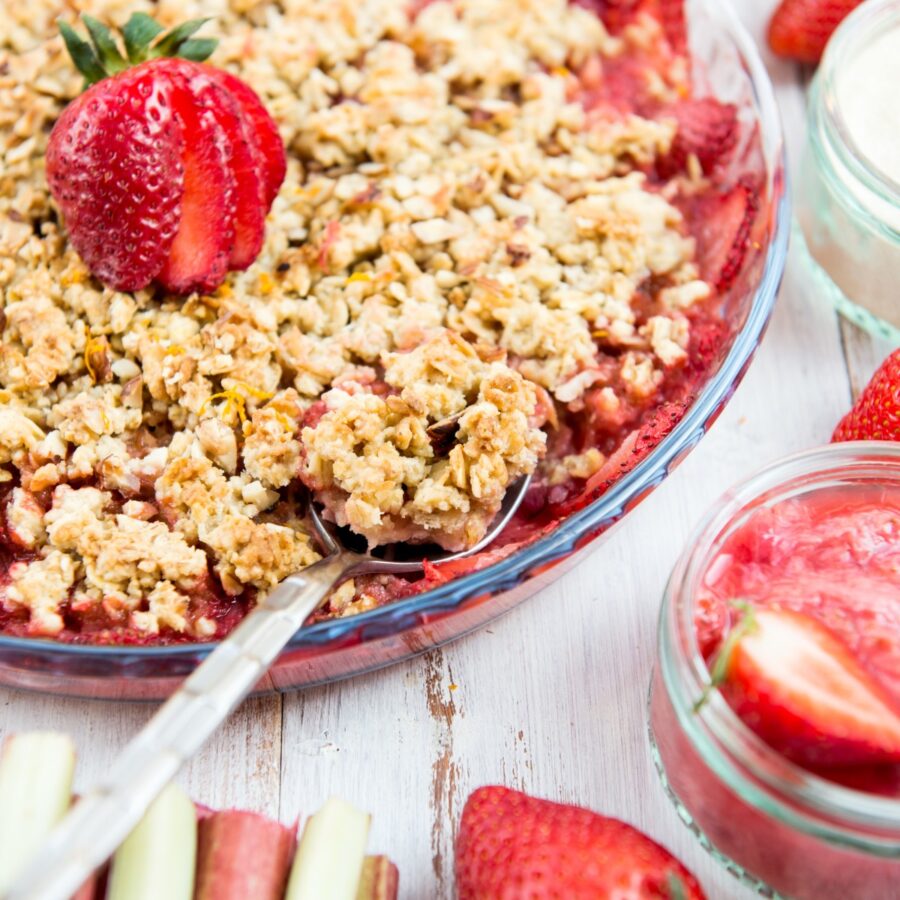
The strawberry filling turns soft and jammy while the crumble topping crisps up to golden perfection, creating a dessert that is sweet, buttery, and beautifully textured. When served warm with a scoop of vanilla ice cream, it’s truly irresistible!
How To Make Strawberry Crumble
- Preheat the Oven . Preheat your oven to 375°F. Grease a 9-inch baking dish with butter or nonstick spray.
- Prepare the Strawberry Filling . In a large bowl, combine sliced strawberries, sugar, cornstarch, lemon juice, and vanilla extract. Stir until the strawberries are well coated. Pour the strawberry mixture into the prepared baking dish, spreading it out evenly.
- Make the Crumble Topping . In a separate bowl, mix together flour, oats, brown sugar, cinnamon, and salt. Pour in the melted butter and stir until the mixture forms a crumbly, sand-like texture.
- Assemble and Bake . Sprinkle the crumble topping evenly over the strawberry filling. Bake for 35-40 minutes, or until the fruit is bubbling and the topping is golden brown and crisp.
- Cool and Serve . Let the crumble cool for about 10 minutes before serving to allow the filling to set. Serve warm with vanilla ice cream, whipped cream, or fresh mint for an extra-special touch!
Tips And Tricks
Want to make a perfectly sweet, juicy, and crisp Strawberry Crumble every time? Follow these expert tips and tricks to ensure your dessert turns out deliciously golden and bursting with flavor:
- Use Fresh or Frozen Strawberries . Fresh strawberries work best, but if using frozen strawberries, thaw and drain them before baking to prevent excess liquid.
- Don’t Skip the Cornstarch . Cornstarch helps thicken the filling and prevents it from becoming too runny.
- Bake Until Golden and Bubbly . The crumble is ready when the topping is golden brown and the fruit filling is bubbling at the edges.
- Let It Cool Before Serving . Allowing the crumble to cool for at least 10 minutes helps the juices thicken, making it easier to scoop.
- Adjust Sweetness to Taste . If your strawberries are extra sweet, reduce the sugar slightly. If they’re more tart, add an extra tablespoon of sugar.
Variations
Looking to change up your Strawberry Crumble recipe? Whether you want to add more fruit, make it healthier, or create a unique twist, these variations will help you customize this classic dessert while keeping its irresistible buttery, fruity goodness:
- Mixed Berry - Swap half the strawberries for blueberries, raspberries, or blackberries for a colorful, mixed berry version.
- Gluten-Free - Use gluten-free all-purpose flour or almond flour in the topping.
- Vegan - Replace butter with coconut oil or vegan butter for a dairy-free version.
- Strawberry Rhubarb - Add 1 cup of chopped rhubarb for a tart contrast to the sweet strawberries.
- Nutty Crumble Topping - Mix in ½ cup chopped almonds, pecans, or walnuts for a crunchy texture.
What To Enjoy With Strawberry Crumble
Strawberry Crumble is a warm, fruity, and buttery dessert that pairs well with a variety of toppings, sides, and beverages. Whether you want to elevate its flavors or balance its sweetness, here are the best pairings to enjoy with it:
- Vanilla Ice Cream – The creamy texture melts beautifully over the warm crumble.
- Whipped Cream – A light, fluffy topping that complements the rich flavors.
- Greek Yogurt – A tangy, protein-packed option for a healthier twist.
- Caramel Drizzle – Adds an indulgent, buttery sweetness.
How Long Does It Last?
Strawberry Crumble can be stored in the refrigerator for up to 4 days in an airtight container. The fruit filling will remain soft and flavorful, while the crumble topping may soften slightly over time.
To maintain its crisp texture, reheat individual portions in the oven at 350°F for about 10 minutes, or in an air fryer for a few minutes until warm and crispy.
Can You Freeze It?
If you want to store it for longer, freeze the crumble for up to 2 months. To do this, let it cool completely, wrap it tightly in plastic wrap or aluminum foil, and place it in a freezer-safe container.
When you’re ready to enjoy it, thaw the leftovers in the refrigerator overnight and reheat them in the oven to restore their texture.
More Sweet Treats
- Cottage Cheese Brownies
- Texas Sheet Cake
- Cannoli Pie
- Lemon Squares
- Brownie Mix Cookies

Strawberry Crumble Recipe | Quick And Easy Strawberry Crisp
Ingredients
Strawberry Filling
- ▢ 4 cups Strawberries , halved and hulled
- ▢ 1/3 cup Granulated Sugar
- ▢ 1 1/2 tbsp Cornstarch
- ▢ 1 tbsp Lemon Juice
- ▢ 1 tsp Vanilla Extract
Homemade Crumble
- ▢ 3/4 cup All Purpose Flour
- ▢ 3/4 cups Old Fashioned Oats
- ▢ 1/2 cup Brown Sugar
- ▢ 1 tsp Ground Cinnamon
- ▢ 1/2 cup Unsalted Butter , cold and cut into cubes
- ▢ 1/4 tsp Kosher Salt
Instructions
- Preheat the Oven . Preheat your oven to 375°F. Grease a 9-inch baking dish with butter or nonstick spray.
- Prepare the Strawberry Filling . In a large bowl, combine sliced strawberries, sugar, cornstarch, lemon juice, and vanilla extract. Stir until the strawberries are well coated. Pour the strawberry mixture into the prepared baking dish, spreading it out evenly.
- Make the Crumble Topping . In a separate bowl, mix together flour, oats, brown sugar, cinnamon, and salt. Pour in the melted butter and stir until the mixture forms a crumbly, sand-like texture.
- Assemble and Bake . Sprinkle the crumble topping evenly over the strawberry filling. Bake for 35-40 minutes, or until the fruit is bubbling and the topping is golden brown and crisp.
- Cool and Serve . Let the crumble cool for about 10 minutes before serving to allow the filling to set. Serve warm with vanilla ice cream, whipped cream, or fresh mint for an extra-special touch!
