


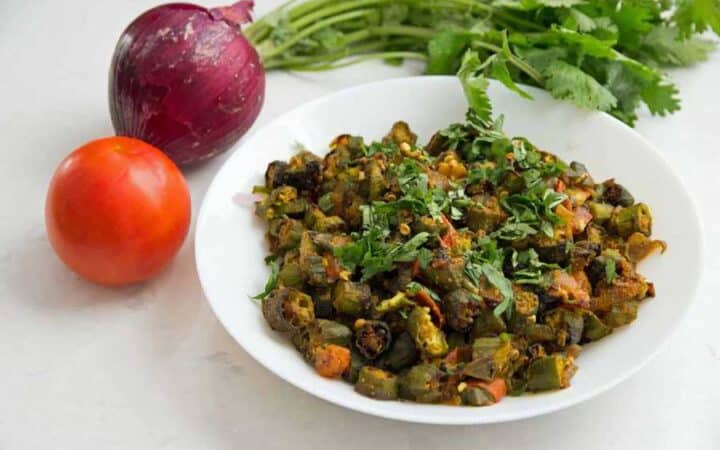
This Bhindi Masala recipe, or okra with onions and tomatoes, will be the easiest and most authentic tasting Bhindi Masala recipe you will ever make. Make it at home with very little effort.

What Makes Bhindi Fry So Good?
- Fast. Done in 30 minutes , not counting prep time.
- Easy. Cut, Season, pour and cook on a sheet pan.
- Vegetarian . An easy Indian Vegetarian side dish .
- Healthy. Cut down on the oil by using this sheet pan method.
What Do We Call Bhindi In English?
If you’re unfamiliar with Indian cuisine , you may not be familiar with what Bhindi is. But I promise you it’s something you’ve heard of, and probably even eaten before. It’s okra.
In India, you may also hear bhindi or okra referred to as ladyfingers. In America, ladyfingers are little sponge cakes. While both are delicious, they’re not even close to the same thing.
If you love okra, you should try out my Mediterranean Okra Tomato stew . I promise it’s delicious too.
How Do You Clean Lady Fingers?
Thoroughly rinse the okra under running water. Make sure to dry it completely with a paper towel before cutting it into small pieces for this Indian okra dish.
How Can I Make Bhindi Less Sticky?
The secret for how to cook okra and keep it from becoming sticky and slimy is to cook it on high heat and not really allowing it to braise.
Traditional Bhindi Masala
Traditional methods for cooking Bhindi Masala require a lot of standing and stirring. And then some more stirring. They also require a lot of oil so your okra doesn’t burn. This method makes it very hands-off.
Much though I love Bhindi Masala , I rarely make it for these reasons. I don’t have the patience to stir for half an hour and my old way of making it also involved multiple steps. First, I’d toast the okra by itself until it was almost cooked.
Then I’d add in the sliced onions and cook those. In went the spices. Then it was time for the tomatoes. Then back went the okra and then…omg I’m exhausted and bored just reciting these steps! That’s why I decided to come up with an easier way.
My Efficient Way To Make Indian Sheet Pan Bhindi Sabzi
Yup. I did it all on a sheet pan. In the oven. In almost one step. I have pictures to prove it!
How, you ask me? How did I do this?
- Season the okra and onions and spread them out on a sheet pan.
- Turn the oven to broil. Put the sheet pan two shelves down so as to not be too close to the broiler and burn before cooking.
- The large surface area of the pan and the overhead heat makes the bhindi (okra) cook fast, but not braise.
- Add the tomatoes for the last 5-10 minutes of cooking. This gives them time to cook but not create too much liquid for the raw okra to braise in, as the okra is cooked by the time they’re added. No sticky slime.
- What this means is that as long as you can lay it out in one single layer, there’s no reason why it won’t work in an air fryer ! I tried this in my Nuwave Air Fryer , and it took 20 minutes at 400F so you can try that option as well. The important thing is that the okra has to be in one single layer. No overlapping at all.
Equipment and Ingredients You’ll Need To Make this Bhindi Masala Recipe
- Heavy-duty baking sheet (I love these because they don’t warp)
- Spatula turner (I like this one because it’s thin but sturdy)
- Measuring cups
- Measuring Spoons
- Cutting Board (my fav one)
- Good set of Kitchen knives
- Cayenne Pepper
- Turmeric
- Ground cumin
- Ground Coriander
- Amchoor (can sub lemon juice)
How Do You Make Bhindi Masala?
- Place onions and sliced okra in a bowl
- Add all spices and oil
- Place onions and sliced okra on a sheet pan.
- Broil/Bake for 25 minutes
- Add in tomatoes and cook until wilted
How To Cook Bhindi Masala In The Air Fryer
- Place onions and sliced okra in a bowl
- Add all spices and oil
- Place onions and sliced okra in a pan that fits inside of your air fryer .
- Air fry the okra and onions at 375F for 20 minutes.
- Add in tomatoes and cook until wilted
Part of the way through cooking you will notice that the okra may start to look slimy. Don’t panic. Just keep cooking. It will crisp up. It’s ok for you to pile the okra up in the air fryer to cook it because it will shrink as it cooks. Stir a few times while cooking so the okra is evenly cooked.
How Do You Keep Bhindi Green When Cooking?
What Do You Serve This Bhindi Masala Recipe With?
- Naan
- Chappatis
- Rice
- Enjoy it alone
Want More Indian Dishes?
- Butter Chicken - deliciously authentic and the best Instant Pot Butter Chicken you’ll ever taste.
- Chicken Korma - Authentic and delicious.
- Lamb Rogan Josh - It’s great with beef or chicken, too.
- Homemade Ghee - Just like I grew up making it.

If you want a delicious meal, but don’t have time to babysit, you’re going to love this Bhindi Masala recipe. If you love it as much as I do, make sure you share the recipe with your friends on Facebook and Pinterest so they can try it too.
Sheet Pan Bhindi Masala Indian Okra
Ingredients
- ▢ 4 cups ( 400 g ) Okra , about 1 lb
- ▢ 1 cup ( 14 g ) Red Onion. chopped
- ▢ 2 tablespoons ( 2 tablespoons ) Oil
- ▢ 1 teaspoon ( 1 teaspoon ) Turmeric
- ▢ 1/4 - 1/2 teaspoon Cayenne Pepper
- ▢ 1 teaspoon ( 1 teaspoon ) Kosher Salt
- ▢ 1 teaspoon ( 1 teaspoon ) Ground Cumin
- ▢ 1 teaspoon ( 1 teaspoon ) Ground Coriander
- ▢ 1/4 teaspoon Amchoor , (optional)
- ▢ 1/2 cup ( 74.5 g ) diced tomatoes
- ▢ 1/4 cup ( 4 g ) Chopped Cilantro or Parsley
- ▢ 1 Lemon , juiced
Instructions
- Preheat oven on Broil setting.
- Move a shelf to two notches down from the top of the oven so it’s not too terribly close to the broiler.
- Prepare a heavy-duty baking sheet by lining with foil or parchment paper.
- Slice the okra into 1/4 inch chunks and place in a bowl.
- Add the rough chopped onion into the bowl.
- Pour over the oil and all the spices (Everything except tomatoes and cilantro).
- Spread out the spiced vegetables across the baking tray, ensuring as even and flat a layer as possible.
- Broil for 15 minutes, stirring once halfway. Don’t panic if you see some stickiness to the okra. This will dissipate once it cooks.
- As the okra and onions are almost cooked, clear away a space in the middle, and place tomatoes in this space to broil along with the okra and onions.
- Once the tomato has wilted and is cooked through, remove the pan from the oven, pour lemon juice, and mix everything together well.
- Plate and garnish with cilantro.
- Serve with naan, chappatis, or eat plain. I often eat this hot one day, and with yogurt the next day as a cold salad.
Air Fryer Instructions
- Place onions and sliced okra in a bowl
- Add all spices and oil
- Place onions and sliced okra in a single layer on a pan that fits inside of your air fryer
- Air fry the okra and onions at 375F for 20 minutes
- Add in tomatoes and cook until wilted
Get support & connect with our community on Facebook!
Nutrition
And don’t forget to check out my air fryer cookbooks! Every day easy air fryer , and Air Fryer Revolution .

This Bhindi Masala recipe, or okra with onions and tomatoes, will be the easiest and most authentic tasting Bhindi Masala recipe you will ever make. Make it at home with very little effort.
What Makes Bhindi Fry So Good?
- Fast. Done in 30 minutes , not counting prep time.
- Easy. Cut, Season, pour and cook on a sheet pan.
- Vegetarian . An easy Indian Vegetarian side dish .
- Healthy. Cut down on the oil by using this sheet pan method.
What Do We Call Bhindi In English?
If you’re unfamiliar with Indian cuisine , you may not be familiar with what Bhindi is. But I promise you it’s something you’ve heard of, and probably even eaten before. It’s okra.
In India, you may also hear bhindi or okra referred to as ladyfingers. In America, ladyfingers are little sponge cakes. While both are delicious, they’re not even close to the same thing.
If you love okra, you should try out my Mediterranean Okra Tomato stew . I promise it’s delicious too.
How Do You Clean Lady Fingers?
Thoroughly rinse the okra under running water. Make sure to dry it completely with a paper towel before cutting it into small pieces for this Indian okra dish.
How Can I Make Bhindi Less Sticky?
The secret for how to cook okra and keep it from becoming sticky and slimy is to cook it on high heat and not really allowing it to braise.
Traditional Bhindi Masala
Traditional methods for cooking Bhindi Masala require a lot of standing and stirring. And then some more stirring. They also require a lot of oil so your okra doesn’t burn. This method makes it very hands-off.
Much though I love Bhindi Masala , I rarely make it for these reasons. I don’t have the patience to stir for half an hour and my old way of making it also involved multiple steps. First, I’d toast the okra by itself until it was almost cooked.
Then I’d add in the sliced onions and cook those. In went the spices. Then it was time for the tomatoes. Then back went the okra and then…omg I’m exhausted and bored just reciting these steps! That’s why I decided to come up with an easier way.
My Efficient Way To Make Indian Sheet Pan Bhindi Sabzi
Yup. I did it all on a sheet pan. In the oven. In almost one step. I have pictures to prove it!
How, you ask me? How did I do this?
- Season the okra and onions and spread them out on a sheet pan.
- Turn the oven to broil. Put the sheet pan two shelves down so as to not be too close to the broiler and burn before cooking.
- The large surface area of the pan and the overhead heat makes the bhindi (okra) cook fast, but not braise.
- Add the tomatoes for the last 5-10 minutes of cooking. This gives them time to cook but not create too much liquid for the raw okra to braise in, as the okra is cooked by the time they’re added. No sticky slime.
- What this means is that as long as you can lay it out in one single layer, there’s no reason why it won’t work in an air fryer ! I tried this in my Nuwave Air Fryer , and it took 20 minutes at 400F so you can try that option as well. The important thing is that the okra has to be in one single layer. No overlapping at all.
Equipment and Ingredients You’ll Need To Make this Bhindi Masala Recipe
- Heavy-duty baking sheet (I love these because they don’t warp)
- Spatula turner (I like this one because it’s thin but sturdy)
- Measuring cups
- Measuring Spoons
- Cutting Board (my fav one)
- Good set of Kitchen knives
- Cayenne Pepper
- Turmeric
- Ground cumin
- Ground Coriander
- Amchoor (can sub lemon juice)
How Do You Make Bhindi Masala?
- Place onions and sliced okra in a bowl
- Add all spices and oil
- Place onions and sliced okra on a sheet pan.
- Broil/Bake for 25 minutes
- Add in tomatoes and cook until wilted
How To Cook Bhindi Masala In The Air Fryer
- Place onions and sliced okra in a bowl
- Add all spices and oil
- Place onions and sliced okra in a pan that fits inside of your air fryer .
- Air fry the okra and onions at 375F for 20 minutes.
- Add in tomatoes and cook until wilted
Part of the way through cooking you will notice that the okra may start to look slimy. Don’t panic. Just keep cooking. It will crisp up. It’s ok for you to pile the okra up in the air fryer to cook it because it will shrink as it cooks. Stir a few times while cooking so the okra is evenly cooked.
How Do You Keep Bhindi Green When Cooking?
What Do You Serve This Bhindi Masala Recipe With?
- Naan
- Chappatis
- Rice
- Enjoy it alone
Want More Indian Dishes?
- Butter Chicken - deliciously authentic and the best Instant Pot Butter Chicken you’ll ever taste.
- Chicken Korma - Authentic and delicious.
- Lamb Rogan Josh - It’s great with beef or chicken, too.
- Homemade Ghee - Just like I grew up making it.
If you want a delicious meal, but don’t have time to babysit, you’re going to love this Bhindi Masala recipe. If you love it as much as I do, make sure you share the recipe with your friends on Facebook and Pinterest so they can try it too.
Sheet Pan Bhindi Masala Indian Okra
Ingredients
- ▢ 4 cups ( 400 g ) Okra , about 1 lb
- ▢ 1 cup ( 14 g ) Red Onion. chopped
- ▢ 2 tablespoons ( 2 tablespoons ) Oil
- ▢ 1 teaspoon ( 1 teaspoon ) Turmeric
- ▢ 1/4 - 1/2 teaspoon Cayenne Pepper
- ▢ 1 teaspoon ( 1 teaspoon ) Kosher Salt
- ▢ 1 teaspoon ( 1 teaspoon ) Ground Cumin
- ▢ 1 teaspoon ( 1 teaspoon ) Ground Coriander
- ▢ 1/4 teaspoon Amchoor , (optional)
- ▢ 1/2 cup ( 74.5 g ) diced tomatoes
- ▢ 1/4 cup ( 4 g ) Chopped Cilantro or Parsley
- ▢ 1 Lemon , juiced
Instructions
- Preheat oven on Broil setting.
- Move a shelf to two notches down from the top of the oven so it’s not too terribly close to the broiler.
- Prepare a heavy-duty baking sheet by lining with foil or parchment paper.
- Slice the okra into 1/4 inch chunks and place in a bowl.
- Add the rough chopped onion into the bowl.
- Pour over the oil and all the spices (Everything except tomatoes and cilantro).
- Spread out the spiced vegetables across the baking tray, ensuring as even and flat a layer as possible.
- Broil for 15 minutes, stirring once halfway. Don’t panic if you see some stickiness to the okra. This will dissipate once it cooks.
- As the okra and onions are almost cooked, clear away a space in the middle, and place tomatoes in this space to broil along with the okra and onions.
- Once the tomato has wilted and is cooked through, remove the pan from the oven, pour lemon juice, and mix everything together well.
- Plate and garnish with cilantro.
- Serve with naan, chappatis, or eat plain. I often eat this hot one day, and with yogurt the next day as a cold salad.
Air Fryer Instructions
- Place onions and sliced okra in a bowl
- Add all spices and oil
- Place onions and sliced okra in a single layer on a pan that fits inside of your air fryer
- Air fry the okra and onions at 375F for 20 minutes
- Add in tomatoes and cook until wilted
Get support & connect with our community on Facebook!
Nutrition
And don’t forget to check out my air fryer cookbooks! Every day easy air fryer , and Air Fryer Revolution .

If you already signed up, you should have received an email with a password to give you unlimited access to our FREE Printable Library. The password is case sensitive. Enter it below and get printing!
Password:

Sheet Pan Bhindi Masala Indian Okra
Ingredients
- 4 cups Okra about 1 lb
- 1 cup Red Onion. chopped
- 2 tablespoons Oil
- 1 teaspoon Turmeric
- 1/4 - 1/2 teaspoon Cayenne Pepper
- 1 teaspoon Kosher Salt
- 1 teaspoon Ground Cumin
- 1 teaspoon Ground Coriander
- 1/4 teaspoon Amchoor (optional)
- 1/2 cup diced tomatoes
- 1/4 cup Chopped Cilantro or Parsley
- 1 Lemon juiced
Instructions
- Preheat oven on Broil setting.
- Move a shelf to two notches down from the top of the oven so it’s not too terribly close to the broiler.
- Prepare a heavy-duty baking sheet by lining with foil or parchment paper.
- Slice the okra into 1/4 inch chunks and place in a bowl.
- Add the rough chopped onion into the bowl.
- Pour over the oil and all the spices (Everything except tomatoes and cilantro).
- Spread out the spiced vegetables across the baking tray, ensuring as even and flat a layer as possible.
- Broil for 15 minutes, stirring once halfway. Don’t panic if you see some stickiness to the okra. This will dissipate once it cooks.
- As the okra and onions are almost cooked, clear away a space in the middle, and place tomatoes in this space to broil along with the okra and onions.
- Once the tomato has wilted and is cooked through, remove the pan from the oven, pour lemon juice, and mix everything together well.
- Plate and garnish with cilantro.
- Serve with naan, chappatis, or eat plain. I often eat this hot one day, and with yogurt the next day as a cold salad.
Air Fryer Instructions
- Place onions and sliced okra in a bowl
- Add all spices and oil
- Place onions and sliced okra in a single layer on a pan that fits inside of your air fryer
- Air fry the okra and onions at 375F for 20 minutes
- Add in tomatoes and cook until wilted
Sheet Pan Bhindi Masala Indian Okra https://twosleevers.com/sheet-pan-bhindi-masala/


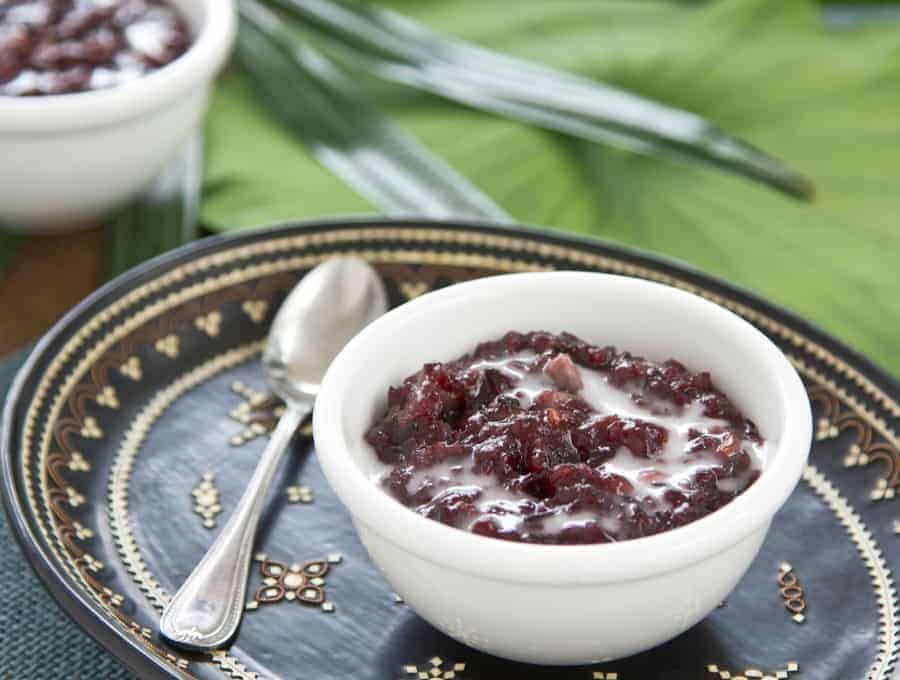
This very simple recipe for Black Rice Pudding may very well make you finally put away your rice cooker and start using your Instant Pot! It’s wonderfully sweet and super simple to make.
What Makes This Black Rice Pudding Recipe So Good
If you’ve never had Black Rice Pudding before, I wouldn’t be too terribly surprised. However, I must advise you to make it. Like right now. Because it’s that good.
This Black Rice Pudding recipe is like nothing you’ve probably ever had before. It has a sweet and nutty taste that’s simply heavenly. It’s a deliciously hearty dish that’s perfect for a dessert or even as a breakfast dish . As a matter of fact, it’s actually served as a breakfast dish in many Asian countries.
Is Black Rice Healthier?
Black rice has more fiber than brown rice . Much like brown rice, black rice has a mild, nutty taste. Black rice has a deep black/purple color and usually turns quite dark purple when cooked. This color comes from something called anthocyanin which is the same thing that makes eggplants purple. It has more antioxidants and more fiber than either white or brown rice, so it can be a healthful choice.
Choosing a good quality black rice is critical. For these experiments, I used this black rice and I found it to work really well.
How To Make Black Rice Pudding
- Place all ingredients for the rice in the inner liner of your Instant Pot or pressure cooker.
- Cook on High Pressure for 22 minutes and allow it to release pressure naturally for 15 minutes. Then release any remaining pressure.
- Open the lid and stir the rice vigorously to break up the rice grains and allow it to leach the starch.
- Slowly start adding the additional coconut milk while still mixing vigorously. As you do this, the rice is giving up its starchy goodness into the coconut milk and making a beautifully yummy concoction.
- You may not need all the coconut milk, but let it sit for 5-10 minutes before you decide that, as the rice continues to soak up the coconut milk. This is a good time to taste and see if it’s sweet enough for you. You might have to eat a lot of it to decide that.
- Once the coconut milk is absorbed you’re ready to eat!
Are You Sure Your Rice And Water Measurements Are Right?
This recipe for Black Rice Pudding may surprise you with the proportions of rice and water that I’m recommending, but I assure the measurements are correct. Just #trustUrvashi on this one.
If you’d like to better understand how this all works, check out the video below that walks you through different types of rice, what makes them different, and how best to cook each one in the pressure cooker.
Is Black Rice The Same As Black Glutinous Rice?
Though I use black glutinous rice for this Black Rice Pudding recipe, there are actually multiple varieties of black rice, some of which aren’t glutinous rice. Always make sure you’re using the right rice for the job to ensure your dishes don’t vary from the recipes you’re following.
Do You Need To Soak Black Rice?
There’s a lot of debate about whether or not you need to soak black rice before cooking it. Some say that it makes the rice cook faster and gives it a better texture, whereas others say that it has no bearing on either texture or cook time.
The good news is that there is no need to soak the rice for this Black Rice Pudding. That’s just one of the many advantages of cooking rice in the Instant Pot : no presoak necessary!
Want more information on how to make perfect rice in the Instant Pot? Check out my complete guide on Perfect Pressure Cooker Rice !
Tips And Tricks For Making Black Rice Pudding
- Make sure you are using good quality black rice ! Your rice pudding is only as good as the rice you use, so make sure you get some good rice.
- Rinse and drain the rice as well as you can. Rinsing the rice removes the surface starch from the rice, which will keep it from clumping together and turning into a gooey mess.
- Make sure you measure the water and rice carefully! Too much water and it will be mush, too much rice and it will be crunchy.
- Allow the rice to NPR (natural pressure release) for 15 minutes. This is important to allow it to cook
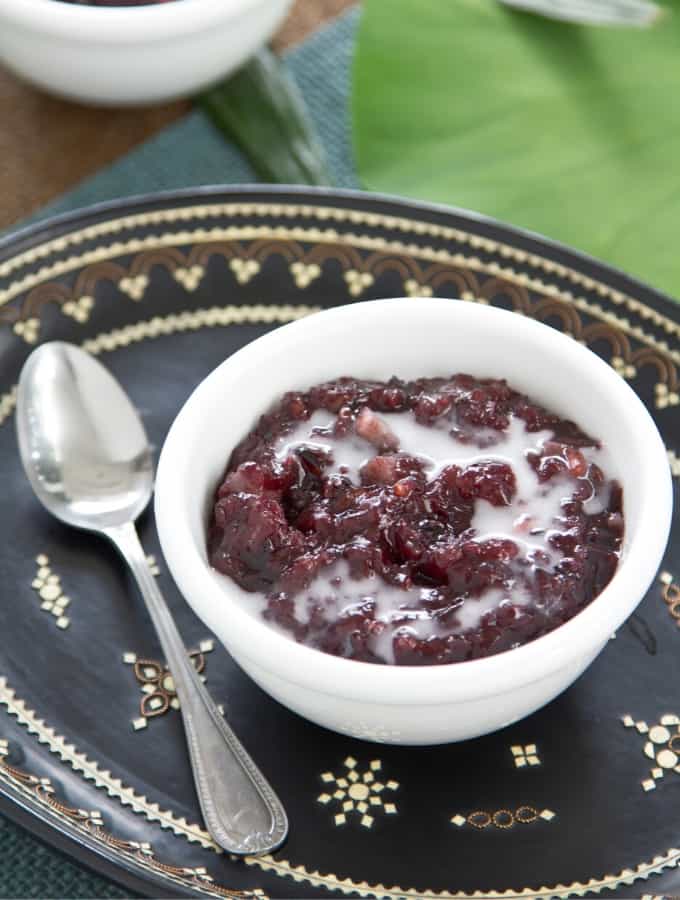
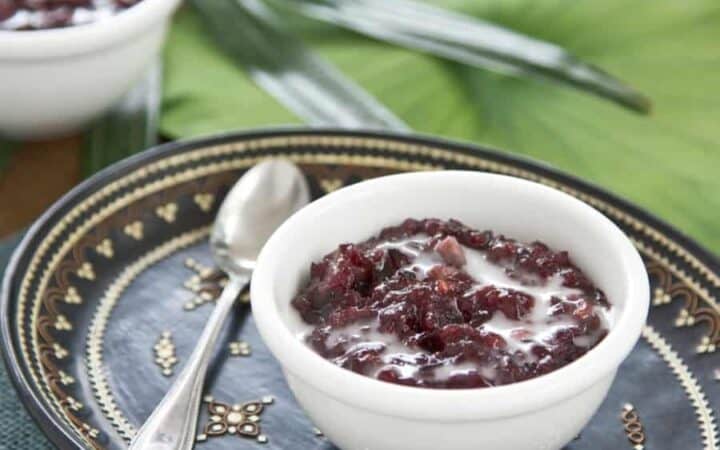
- Feel free to drizzle some warm coconut milk over the finished Black Rice Pudding for some added coconut goodness.
- You can also add some fruit to the pudding to mix it up a little.
Why Pressure CookerBlack Rice?
I didn’t just choose to cook this recipe in my Instant Pot because I like Instant Pot recipes. Here are just a few reasons why cooking Black Rice Pudding in a pressure cooker makes the most sense:
- It gelatinizes the starch for a softer mouthfeel
- May make nutrients more bioavailable
- There is less water loss due to evaporation
- It reduces cooking time and preserves the aroma
- There’s no need to pre-soak the rice
- There’s no babysitting required
- You can put away your rice cooker for daily use
And if that doesn’t convince you to put that rice cooker away, I don’t know what will. The Instant Pot just makes rice recipes so simple and hands-off that I couldn’t imagine cooking it any other way.
Looking For More Great Rice Recipes? Check These Out!
- Basmati Rice Pilau - This Instant Pot recipe is certainly one of my favorite basmati rice recipes
- Jamaican Peas and Rice - Authentic Jamaican Peas and Rice at home in a flash.
- Chicken Biryani - Make an authentic biryani right in your pressure cooker.
- Caldo de Pollo - A warming soup that’s bursting with Mexican flavors!
- Instant Pot Dolma Recipe - A fantastic way to make dolma without having to wrap it.
- Instant Pot Sabzi Polo - Make a perfect Persian Herbed Rice in your pressure cooker.
- Perfect Pressure Cooker Rice - Learn how to make white rice, jasmine rice, black rice, brown rice, and arborio rice in your Instant Pot.
- 6+ Best Healthy Instant Pot Chicken and Rice Recipes - A fantastic collection of healthy chicken and rice recipes.
- 12+ Best Pressure Cooker Rice One Pot Meals - Here’s a whole slew of recipes that use basmati rice for you to enjoy!
Black Rice Pudding
Equipment
- Instant Pot
Ingredients
For the Rice
- ▢ 1 cup ( 185 g ) black rice , rinsed and drained
- ▢ 1 cup ( 250 ml ) Water
- ▢ 1/2 cups ( 113 ml ) Full-Fat Coconut Milk , from a can
- ▢ 1/4 cup ( 0.25 g ) Truvia , or 1/2 cup sugar
- ▢ 1/2 teaspoon ( 0.5 teaspoon ) Kosher Salt
For Finishing
- ▢ 1 cup ( 226 ml ) Full-Fat Coconut Milk , from a can
Instructions
- Place all ingredients for the rice in the inner liner of your Instant Pot or pressure cooker.
- Cook on High Pressure for 22 minutes and allow it to release pressure naturally for 15 minutes. Then release any remaining pressure.
- Open the lid and stir the rice vigorously to break up the rice grains and allow it to leach the starch.
- Slowly start adding the additional coconut milk while still mixing vigorously. As you do this, the rice is giving up its starchy goodness into the coconut milk and making a beautifully yummy concoction.
- You may not need all the coconut milk, but let it sit for 5-10 minutes before you decide that, as the rice continues to soak up the coconut milk. This is a good time to taste and see if it’s sweet enough for you. You might have to eat a lot of it to decide that.
- Once the coconut milk is absorbed you’re ready to eat!
Tips And Tricks For Making Black Rice Pudding
- Make sure you are using good quality black rice ! Your rice pudding is only as good as the rice you use, so make sure you get some good rice.
- Rinse and drain the rice as well as you can. Rinsing the rice removes the surface starch from the rice, which will keep it from clumping together and turning into a gooey mess.
- Make sure you measure the water and rice carefully! Too much water and it will be mush, too much rice and it will be crunchy.
- Allow the rice to NPR (natural pressure release) for 15 minutes. This is important to allow it to cook
- Feel free to drizzle some warm coconut milk over the finished Black Rice Pudding for some added coconut goodness.
- You can also add some fruit to the pudding to mix it up a little.
Get support & connect with our community on Facebook!
Nutrition
Don’t forget to check out my otherBest-selling Instant Pot Cookbooks!
Indian Instant Pot , Keto Instant Pot, Instant Pot Fast and Easy , Healthy Instant Pot & Vegetarian Instant Pot .

