
If you’re looking for a showstopping side dish for potlucks, summer cookouts, or holiday gatherings, this Seven Layer Salad recipe is the answer. Crisp lettuce, colorful veggies, creamy dressing, and crunchy bacon create layers of flavor and texture in every bite.
Why You’ll Love This Salad Recipe
- Fast. You can make this tasty salad recipe in less than 30 minutes and a small amount of prep work.
- Easy. Prep your ingredients, layer, and enjoy.
- Low Carb . While this recipe isn’t exactly keto , it works well for a low carb lifestyle.
- Versatile. Use your favorite ingredients to make a tasty dish the whole family will love.
People love Seven Layer Salad for its combination of fresh, crunchy, creamy, and savory layers that create a flavorful, crowd-pleasing dish. Its beautiful presentation, make-ahead convenience, and nostalgic comfort make it a staple at gatherings and potlucks year after year.
What Does Seven Layer Salad Taste Like?
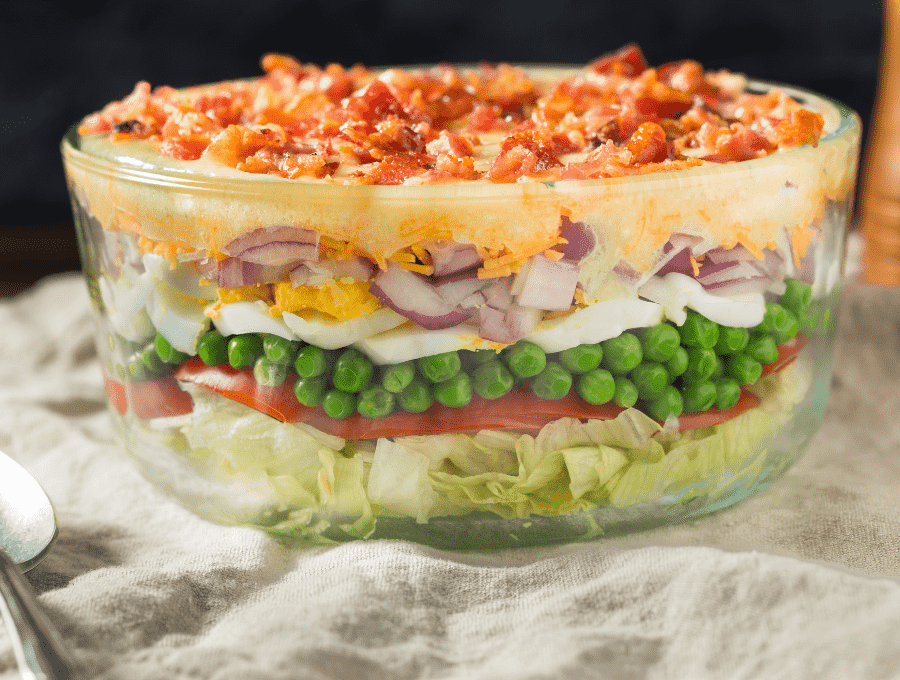
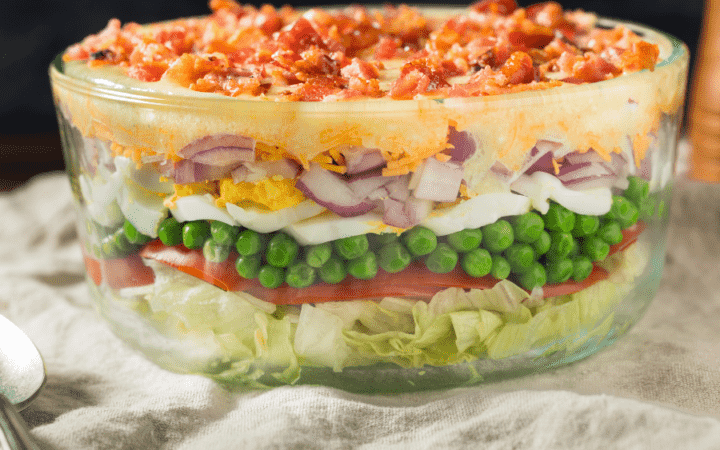
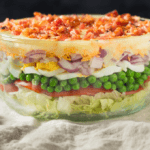
Seven layer salad combines classic ingredients layered beautifully in a glass bowl.
Crisp lettuce forms the base, topped with juicy tomatoes, peas, cheddar cheese, bacon, and a creamy sweet-savory dressing that ties it all together.
Ingredients You’ll Need
- 1 head Iceberg Lettuce - Iceberg lettuce forms the crisp, refreshing base layer of the salad. Its sturdy texture holds up well under the weight of the other layers and keeps the salad crunchy.
- 1 pint Cherry Tomatoes - Cherry tomatoes add a juicy, sweet-tart layer that balances the richness of the dressing and cheese. Their bright color also enhances the visual appeal of the layered presentation.
- 1 1/2 cups Frozen Peas - The peas contribute a pop of sweetness and color. Because they’re used frozen, they help keep the salad chilled and thaw perfectly by the time you serve it.
- 1/2 cup Red Onion - Red onion adds a sharp, slightly sweet bite that cuts through the creaminess of the dressing. It also provides aromatic depth and color contrast.
- 1 1/2 cups Cheddar Cheese - Shredded cheddar cheese brings richness, saltiness, and a satisfying creamy-chewy layer. It helps tie together the flavors of the vegetables and dressing.
- 8 slices Cooked Bacon - Bacon adds smoky, salty crunch that complements the freshness of the veggies and the creaminess of the dressing. It’s often one of the most beloved layers in the dish.
- 1 cup Mayonnaise - Mayonnaise serves as the base of the iconic creamy dressing. It provides body, richness, and smooth texture, helping bind the top layer of the salad.
- 1/2 cup Sour Cream - Sour cream lightens the dressing slightly and adds tangy flavor, preventing the mayo mixture from feeling too heavy while enhancing creaminess.
- 1 tbsp Granulated Sugar - The sugar balances the acidity of the sour cream and the savoriness of the bacon and cheese. It gives the dressing a classic, slightly sweet flavor.
- 1/2 tsp Salt - Salt enhances all the flavors in the dressing and ensures the creamy layer tastes well-seasoned.
- 1/2 tsp Ground Black Pepper - Pepper adds mild heat and a subtle bite to the dressing, rounding out the flavor profile.
How To Make 7 Layer Salad
- Prep Ingredients. Wash and chop lettuce, halve tomatoes, thaw peas, and slice onions.
- Layer. In a clear glass trifle bowl or large salad bowl, layer in this order: lettuce, tomatoes, peas, onions, cheese, and bacon.
- Make Dressing. In a bowl, whisk together mayonnaise, sour cream, sugar, salt, and pepper until smooth.
- Top. Spread dressing evenly over the top layer to seal the salad. Sprinkle with additional cheese or bacon if desired.
- Chill. Cover and refrigerate for at least 4 hours or overnight to allow flavors to meld.
- Serve. Scoop down through all layers for the perfect balanced bite every time.
Tips and Tricks
Creating the perfect Seven Layer Salad is easy with a few simple tips to keep each layer fresh, crisp, and flavorful:
- Plan Ahead. Sometimes there’s nothing better than a quick and easy recipe for nights you can’t bother to cook or a social function you forgot about making a dish for. Prep your bacon and eggs ahead of time for a salad recipe that is ready in a flash.
- Absorb Excess Moisture. To prevent a soggy salad, make sure you take extra time to pat any extra moisture off of your lettuce, peas, onions, or any other veggie layer that may hold any excess water.
- Don’t Skimp on the Dressing. This is everyone’s favorite part of the salad. It’s super simple to make, but it’s incredibly flavorful and takes this 7 Layer Salad to the next level.
- Customize It. If you’re not a fan of any of these layers, don’t be afraid to substitute something else in it’s place. I know it’s called a seven layer salad, but there’s nothing to say it can’t be a five layer salad or even a nine layer salad depending on your preferences.
Variations
While the classic Seven Layer Salad is always a crowd-pleaser, try these delicious variations to suit your tastes and dietary preferences:
- Protein Boost- Add diced hard-boiled eggs or grilled chicken for extra protein and heartiness.
- Cheese Swap - Replace cheddar cheese with shredded Monterey Jack, pepper jack, or crumbled feta for a different flavor profile.
- Different Greens - Use romaine, spinach, or a spring mix instead of iceberg lettuce for added nutrients and texture.
- Vegetarian Version - Omit the bacon or replace it with crispy chickpeas or smoked almonds for a plant-based crunch.
- Healthier Dressing - Substitute Greek yogurt for some or all of the mayonnaise and sour cream for a lighter, protein-rich dressing.
What To Serve With It
Seven-layer salad is one of my favorite dishes to take to potlucks or any other social gathering where I’m asked to bring a side dish. Not only is it absolutely delicious, but it also pairs well with almost any protein or main course.
These are some of my favorites to serve with this yummy side:
- Pork Tenderloin
- Sous Vide Steak
- German Rouladen
How Long Does It Last?
For best results, I would suggest enjoying this salad recipe within a day or two of making it.
While it may taste just as good as the day you made it longer than that, for a crisp, refreshing texture, you will want to enjoy it quickly. The moisture from all of the delicious layers can begin to release and create a less-than-desirable bite.
Other Tasty Salad Recipes
If you’re a fan of lighter meals or a tasty salad, check out some of these amazing recipes that are favorites among our readers:
- Keto Broccoli Salad - An easy to make side dish that is even better as leftovers.
- Big Mac Salad - A salad that is the perfect low carb substitute for your favorite takeout order.
- Indian Carrot Salad - Authentic Indian spices mixed with a tasty blend of veggies.
- Quinoa Salad - High in protein and easily made in the Instant Pot.
- Antipasto Salad - One of our most popular dishes. It’s incredibly easy to make, filling, and full of all of your favorite salad toppings.
Seven Layer Salad | Easy 7 Layer Salad Recipe
Ingredients
- ▢ 1 head Iceberg Lettuce , chopped
- ▢ 1 pint Cherry Tomatoes , halved
- ▢ 1 1/2 cups Frozen Peas
- ▢ 1/2 cup Red Onion , diced
- ▢ 1 1/2 cups Cheddar Cheese , shredded
- ▢ 8 slices Cooked Bacon , crumbled
- ▢ 1 cup Mayonnaise
- ▢ 1/2 cup Sour Cream
- ▢ 1 tbsp Granulated Sugar
- ▢ 1/2 tsp Kosher Salt
- ▢ 1/2 tsp Ground Black Pepper
Instructions
- Prep Ingredients. Wash and chop lettuce, halve tomatoes, thaw peas, and slice onions.
- Layer. In a clear glass trifle bowl or large salad bowl, layer in this order: lettuce, tomatoes, peas, onions, cheese, and bacon.
- Make Dressing. In a bowl, whisk together mayonnaise, sour cream, sugar, salt, and pepper until smooth.
- Top. Spread dressing evenly over the top layer to seal the salad. Sprinkle with additional cheese or cooked bacon if desired.
- Chill. Cover and refrigerate for at least 4 hours or overnight to allow flavors to meld.
- Serve. Scoop down through all layers for the perfect balanced bite every time.
Get support & connect with our community on Facebook!
Nutrition
Don’t forget to check out my other Ketocookbooks.
Keto Instant Pot, Keto Fat Bombs, Sweets, & Treats , and Easy keto in 30 minutes.


If you already signed up, you should have received an email with a password to give you unlimited access to our FREE Printable Library. The password is case sensitive. Enter it below and get printing!
Password:
Seven Layer Salad | Easy 7 Layer Salad Recipe
Ingredients
- 1 head Iceberg Lettuce chopped
- 1 pint Cherry Tomatoes halved
- 1 1/2 cups Frozen Peas
- 1/2 cup Red Onion diced
- 1 1/2 cups Cheddar Cheese shredded
- 8 slices Cooked Bacon crumbled
- 1 cup Mayonnaise
- 1/2 cup Sour Cream
- 1 tbsp Granulated Sugar
- 1/2 tsp Kosher Salt
- 1/2 tsp Ground Black Pepper
Instructions
- Prep Ingredients. Wash and chop lettuce, halve tomatoes, thaw peas, and slice onions.
- Layer. In a clear glass trifle bowl or large salad bowl, layer in this order: lettuce, tomatoes, peas, onions, cheese, and bacon.
- Make Dressing. In a bowl, whisk together mayonnaise, sour cream, sugar, salt, and pepper until smooth.
- Top. Spread dressing evenly over the top layer to seal the salad. Sprinkle with additional cheese or cooked bacon if desired.
- Chill. Cover and refrigerate for at least 4 hours or overnight to allow flavors to meld.
- Serve. Scoop down through all layers for the perfect balanced bite every time.
Seven Layer Salad | Easy 7 Layer Salad Recipe https://twosleevers.com/7-layer-salad/
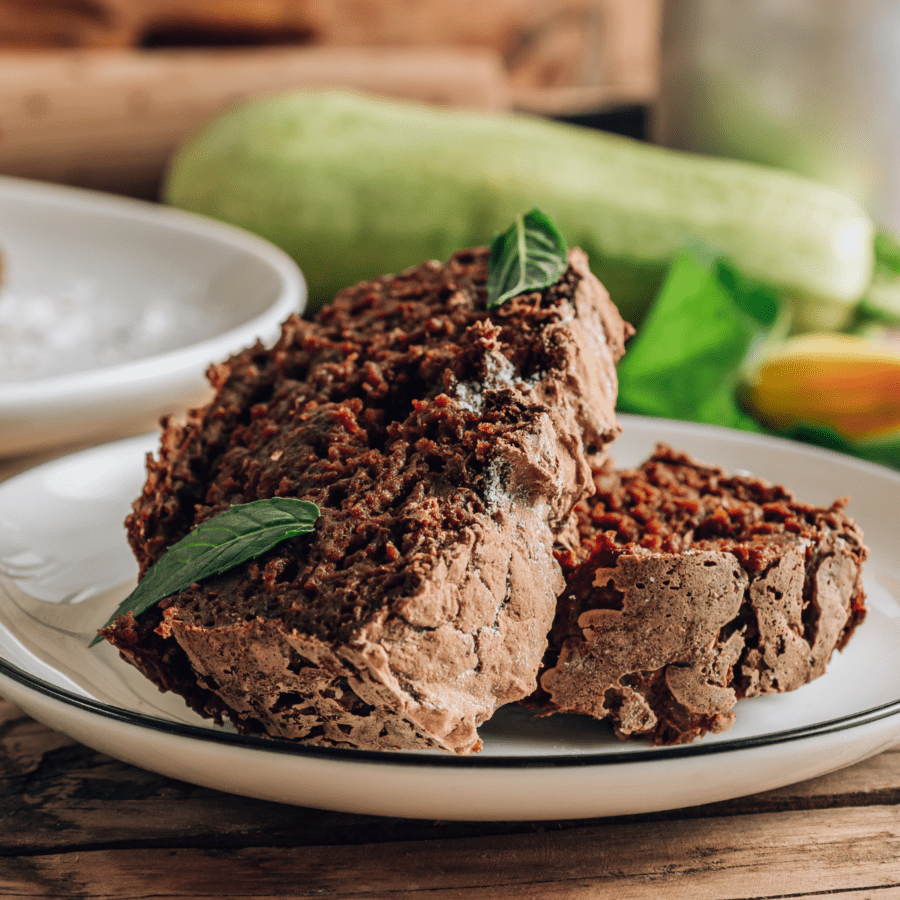
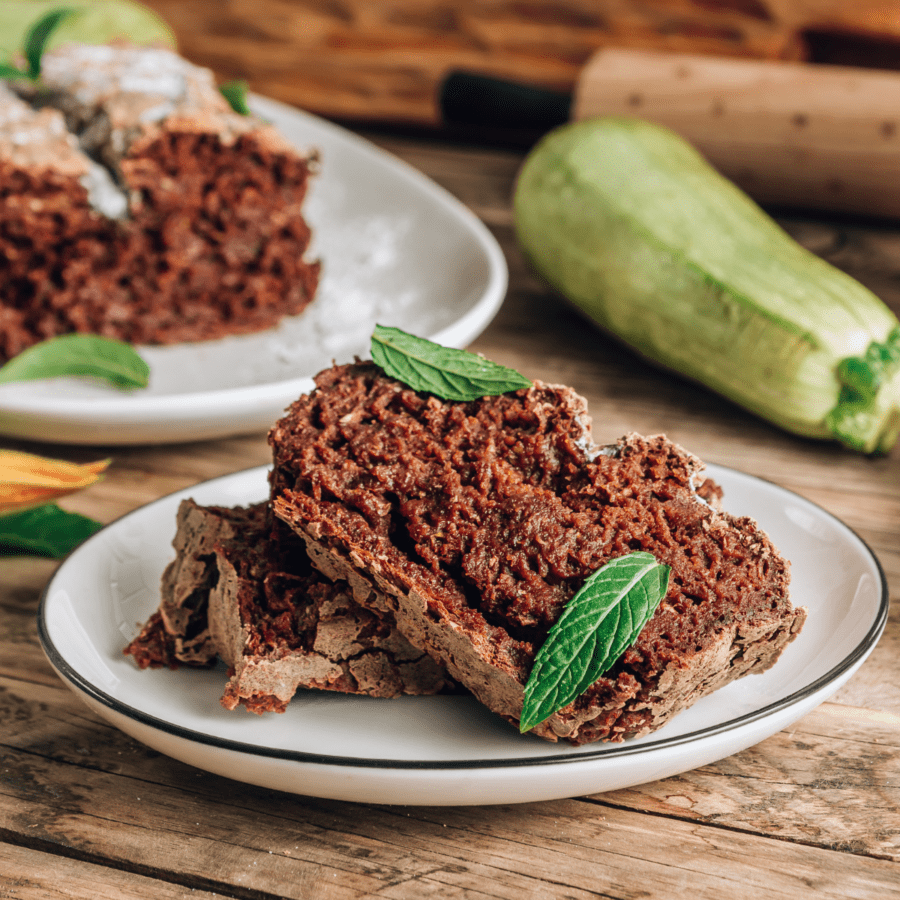
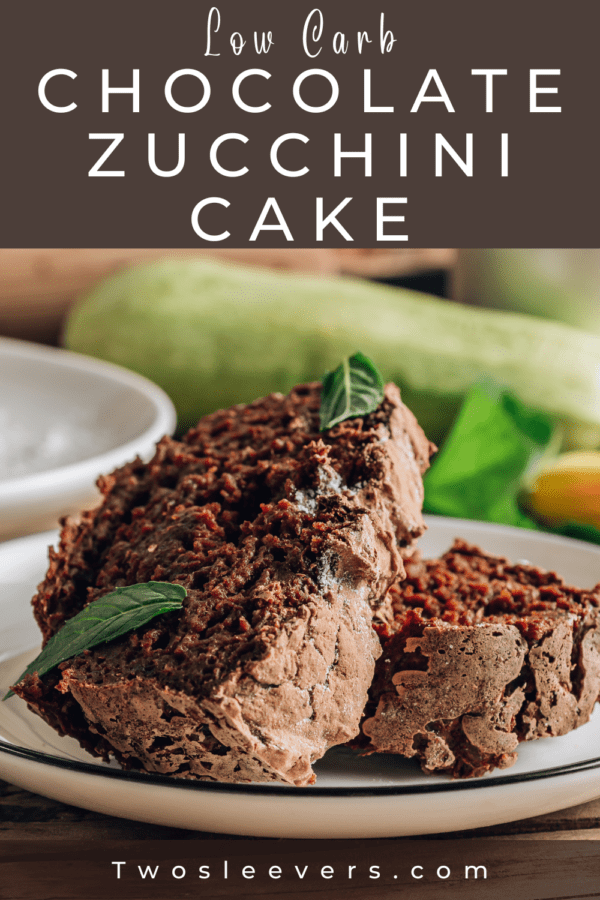
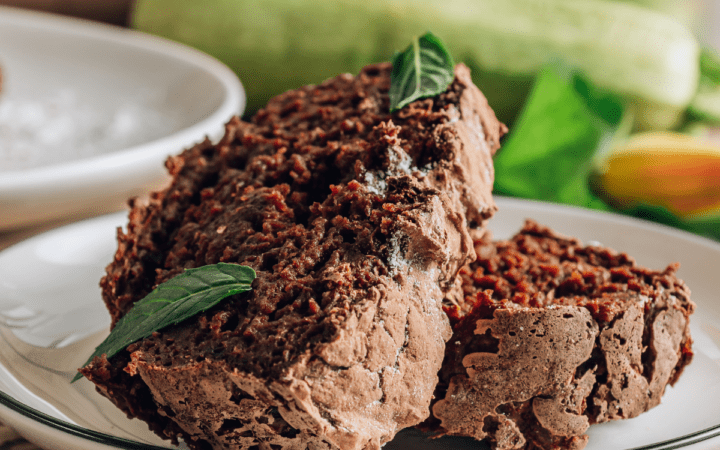
If you’re a fan of decadent, fudgy chocolate desserts but are watching your carb intake, you’re going to love this Low Carb Chocolate Zucchini Cake! It’s rich, incredibly moist, and completely grain-free, making it the perfect guilt-free indulgence.
Why This Will Be Your New Favorite Cake
- Moist. Zucchini gives this cake a soft, fudgy texture.
- Low Carb . A dessert made with almond flour and sugar-free sweetener.
- Chocolate Lover Approved. Rich cocoa and melty chocolate chips in every bite.
- Sneaky Veggies. Even picky eaters won’t notice the zucchini!
- Gluten Free . Perfect for those following keto, paleo, or GF diets.
This is the kind of cake you make when you want something sweet, satisfying, and surprisingly healthy. Whether you’re hosting a brunch, celebrating a birthday, or simply treating yourself, this cake is a winner!
Do You Peel Zucchini For Baking?
It depends on the recipe and personal preference. Some recipes call for peeled zucchini while others do not. If the recipe calls for peeled zucchini, it is best to peel it.
If the recipe does not call for peeled zucchini, it is up to personal preference. Zucchini skin is edible and can add fiber to the dish. For this Zucchini Cake recipe, I chose not to peel the zucchini.
Is Baking With Zucchini Healthy?
Honestly, it depends on what you’re preparing with it. Baking with zucchini can be a healthy way to incorporate more veggies into your diet. Zucchini is a low-calorie, low-carb food that is high in fiber and vitamins. It is also a good source of antioxidants and minerals.
Ingredients You’ll Need
- Almond Flour - A grain-free, low carb flour that keeps the cake light and tender.
- Cocoa Powder - Use unsweetened cocoa powder for deep chocolate flavor.
- Zucchini - Grated and lightly squeezed. No need to peel!
- Eggs - Provide structure and moisture.
- Sugar-Free Sweetener - Erythritol, monk fruit, or allulose work great.
- Baking Powder - Helps the cake rise and stay fluffy.
- Salt - Enhances the chocolate and balances sweetness.
- Vanilla Extract - Adds warm, aromatic flavor.
- Coconut Oil or Butter - Fat keeps the cake rich and delicious.
- Sugar-Free Chocolate Chips (optional) - For melty pockets of chocolate goodness.
How To Make Chocolate Zucchini Cake
- Prep the Zucchini. Grate the zucchini using the fine side of a box grater. Lightly squeeze out the excess water with your hands or a towel, but don’t overdo it. You want some moisture left for a soft texture.
- Mix the Dry Ingredients. In a large bowl, whisk together the almond flour, cocoa powder, sweetener, baking powder, and salt until well combined and lump-free.
- Add Wet Ingredients. Stir in the eggs, melted coconut oil (or butter), and vanilla extract. Mix until you get a smooth batter.
- Fold in Zucchini and Chocolate Chips. Gently fold the grated zucchini and chocolate chips (if using) into the batter. It might look thick at first, but the zucchini will release moisture as it bakes.
- Bake to Perfection. Pour the batter into a greased 8x8 inch pan and smooth the top. Bake at 350°F for 30–35 minutes, or until a toothpick inserted in the center comes out mostly clean. A few moist crumbs are okay.
- Cool and Slice. Let the cake cool in the pan before slicing. Enjoy as-is or with a dusting of powdered sweetener or keto whipped cream.
Tips And Tricks
Want to guarantee a perfect low carb chocolate zucchini cake every time? Here are some helpful tips:
- Don’t Over-Squeeze the Zucchini. You want it damp, not dry. Too much water removed = dry cake.
- Use Room Temperature Eggs. They blend better with the batter and create a smoother texture.
- Let it Cool Before Slicing. The cake sets up as it cools, making it easier to cut cleanly.
- Use a Metal Pan. It conducts heat better and helps bake the cake evenly.
- Add a Ganache Topping. For extra indulgence, top with a sugar-free chocolate ganache or cream cheese frosting!
Variations
Once you master the base recipe, try these delicious variations:
- Add nuts - You can add chopped nuts such as pecans, walnuts, or almonds to the batter for added texture and flavor.
- Stir in chocolate chips - Mixing in chocolate chips can add a nice burst of chocolate flavor.
- Top with frosting - You can add chocolate or cream cheese frosting to the cake to make it even more decadent.
What To Enjoy With It
This rich, fudgy cake is fantastic on its own, but here are some keto-friendly pairings to round out the experience:
- Whipped Coconut Cream - Light, fluffy, and dairy-free.
- Keto Ice Cream - Chocolate or vanilla flavors are perfect partners.
- Fresh Berries - Raspberries or strawberries add a pop of tartness.
- Almond Milk Latte - Great for an afternoon treat.
- Cream Cheese Frosting - Low carb and ultra decadent.
How Long Is Zucchini Cake Good For?
Chocolate zucchini cake can last for several days if stored properly. Here are a few tips to help prolong the shelf life of your cake:
- Keep the cake covered. Cover the cake with plastic wrap or aluminum foil to keep it fresh.
- Refrigerate the cake. Place the cake in the refrigerator to slow down the growth of bacteria. This will help to keep the cake fresh for up to 5 days.
- Freeze the cake - If you won’t be able to eat the cake within a few days, you can also freeze it for up to 3 months. Just be sure to wrap it tightly in plastic wrap or aluminum foil before freezing.
Our Best Zucchini Recipes
- Lemon Zucchini Bread
- Indian Zucchini Kheer
- Zucchini Brownies
- Apple Zucchini Salad
- Zucchini Pancakes
This low carb chocolate zucchini cake is the perfect way to enjoy a sweet treat while still sticking to your healthy eating goals. And, with the added bonus of hidden vegetables, it’s a great option for picky eaters as well!
Zucchini Cake | Chocolate Zucchini Cake Recipe
Ingredients
- ▢ 1 1/2 cups Almond Flour
- ▢ 1/2 cup Unsweetened Cocoa Powder
- ▢ 1 cup Zucchini , finely grated and drained
- ▢ 3 Eggs
- ▢ 1/2 cup Granulated Sugar
- ▢ 1 1/2 tsp Baking Powder
- ▢ 1/4 tsp Kosher Salt
- ▢ 1 tsp Vanilla Extract
- ▢ 1/4 cup Coconut Oil , melted
- ▢ 1/3 cup Sugar Free Chocolate Chips
Instructions
- Prep the Zucchini. Grate the zucchini using the fine side of a box grater. Lightly squeeze out the excess water with your hands or a towel, but don’t overdo it. You want some moisture left for a soft texture.
- Mix the Dry Ingredients. In a large bowl, whisk together the almond flour, cocoa powder, sweetener, baking powder, and salt until well combined and lump-free.
- Add Wet Ingredients. Stir in the eggs, melted coconut oil (or butter), and vanilla extract. Mix until you get a smooth batter.
- Fold in Zucchini and Chocolate Chips. Gently fold the grated zucchini and chocolate chips (if using) into the batter. It might look thick at first, but the zucchini will release moisture as it bakes.
- Bake to Perfection. Pour the batter into a greased 8x8 inch pan and smooth the top. Bake at 350°F for 30–35 minutes, or until a toothpick inserted in the center comes out mostly clean. A few moist crumbs are okay.
- Cool and Slice. Let the cake cool in the pan before slicing. Enjoy as-is or with a dusting of powdered sweetener or keto whipped cream.
Get support & connect with our community on Facebook!
Nutrition
Don’t forget to check out my other Ketocookbooks.
Keto Instant Pot, Keto Fat Bombs, Sweets, & Treats , and Easy keto in 30 minutes.
