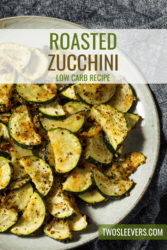
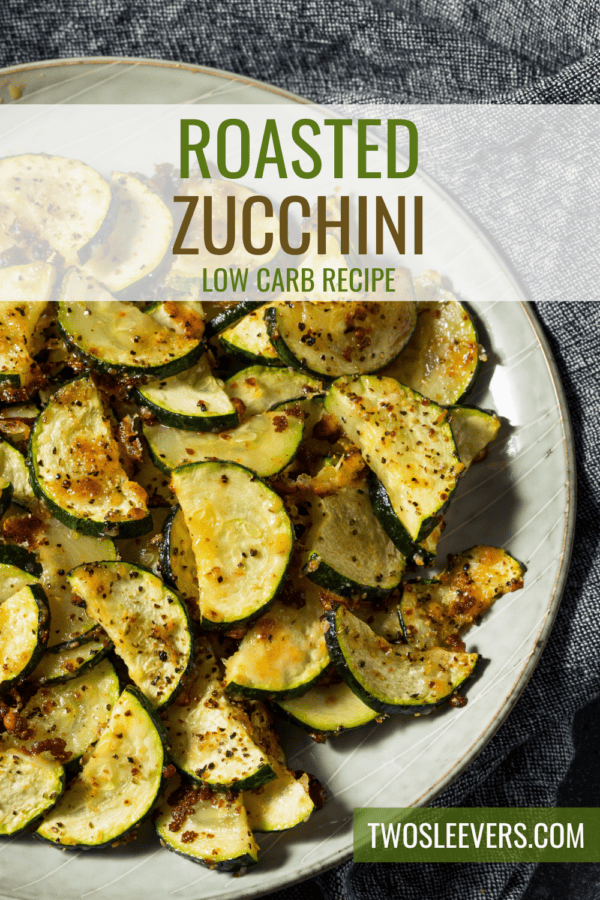
With summer in full swing, our gardens are exploding with beautiful fresh produce. Roasted Zucchini is a fantastic way to bring out its natural sweetness and create a delightful side dish.
Why This Will Be Your Favorite Way To Prepare Zucchini
- Fast. Ready in under 30 minutes, not including the time it takes to preheat your oven.
- Easy. Slice up fresh zucchini, season, bake, and serve! Just a few simple steps for a side dish your whole family will love.
- Low Carb . Only net carbs per serving in this keto-friendly side dish recipe.
- Gluten Free. A great allergy-friendly dish to serve with your next gluten-free main course.
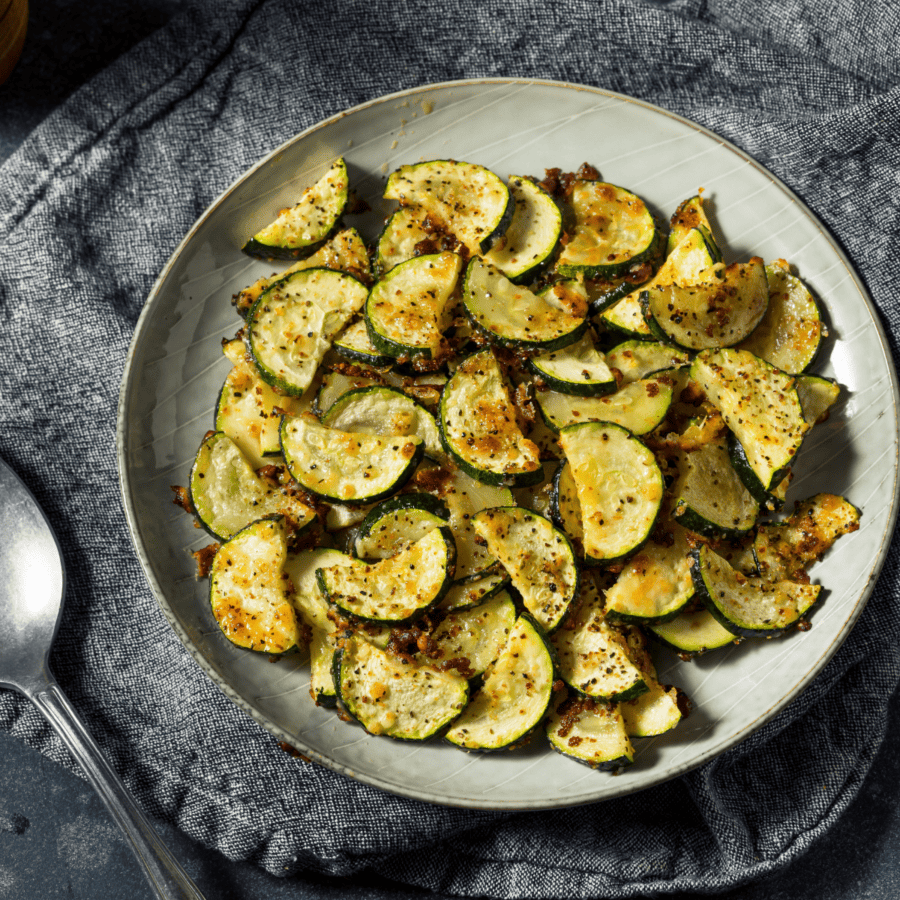
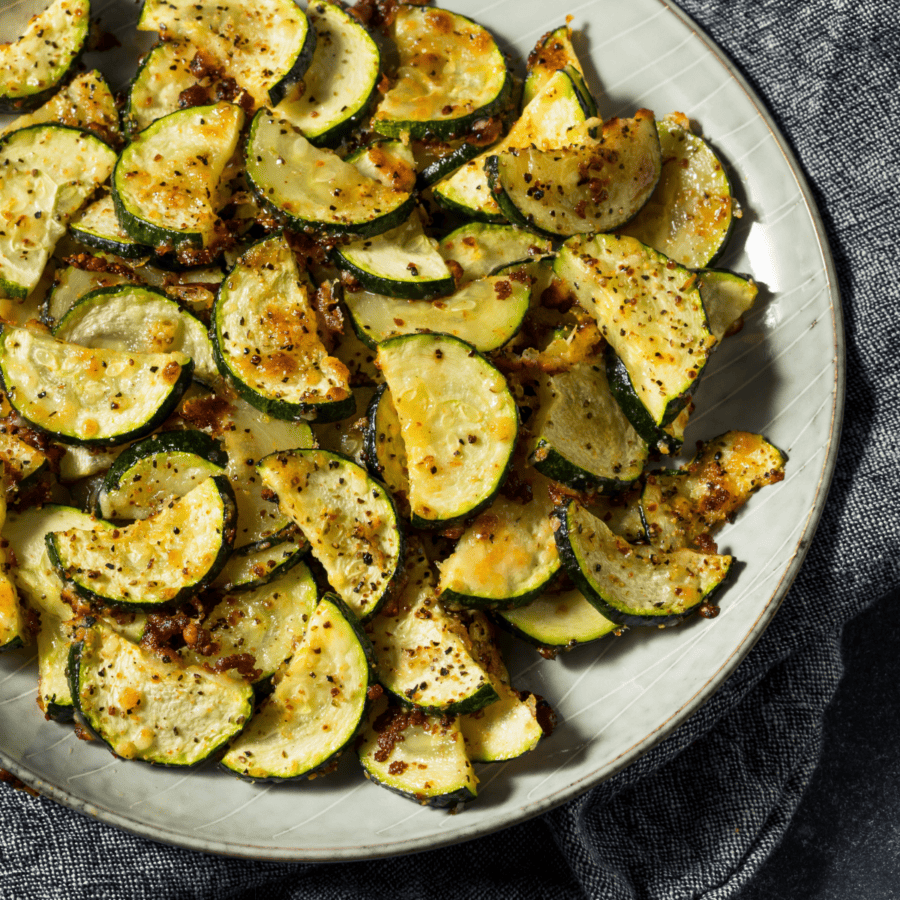
Whether you’re looking to enjoy a light and healthy meal or elevate a hearty dinner, oven roasted zucchini is a versatile and satisfying addition to any menu. The tender texture, caramelized edges, and burst of flavors will leave you craving more.
How Do You Keep Roasted Zucchini From Getting Soggy?
To ensure your roasted zucchini maintains a deliciously crispy texture, there are a few key steps to follow. Check out some of these tips and tricks for a perfectly crisp bite:
Slice it thin . Slice the zucchini into uniform pieces, approximately 1/4 to 1/2 inch thick. This allows for even cooking and prevents some slices from becoming soggy while others remain undercooked.
Preheat your oven. Make sure it is heated to the desired temperature before placing the zucchini inside. A fully preheated oven helps to quickly evaporate any moisture, resulting in a crispier texture.
Cook in a single layer. Spread the zucchini slices in a single layer, ensuring they have some space between them. Overcrowding the pan can trap moisture and lead to steaming rather than roasting.
Cook right before enjoying. Serve the roasted zucchini immediately after it comes out of the oven. The longer it sits, the more likely it is to release moisture and become softer.
Do You Leave The Skin On Zucchini When You Cook It?
Whether to leave the skin on the zucchini when roasting is a matter of personal preference. I personally prefer to leave the skin on, as it provides additional fiber.
The skin of the zucchini is edible and adds a bit of texture to the dish. It also contains additional nutrients. However, some people may find the skin slightly tough or prefer a smoother texture.
If you choose to leave the skin on, make sure to wash the zucchini thoroughly before slicing and roasting. It’s recommended to use organic zucchini or give it a good scrub to remove any dirt or residues.
If you prefer a softer texture or want a more uniform appearance, you can peel the zucchini before roasting. Use a vegetable peeler or a knife to remove the skin, ensuring you have an even layer of flesh.
Ingredients You’ll Need
- Zucchini
- Olive oil
- Garlic
- Italian Seasoning
- Salt and Pepper
- Grated Parmesan Cheese
How To Make Roasted Zucchini
- Preheat the Oven. Preheat your oven to 425F and position the rack in the center of the oven. This will ensure even cooking and optimal browning.
- Prepare the Zucchini. Wash the zucchini thoroughly under cold water, then pat them dry. Trim off the ends and cut the zucchini into uniform slices, approximately 1/4 to 1/2 inch thick. This will help ensure even cooking.
- Toss with Flavor. In a large mixing bowl, combine the zucchini slices, olive oil, minced garlic, dried Italian seasoning, salt, and pepper. Toss the zucchini gently to coat each slice with the flavorful mixture.
- Arrange on a Baking Sheet. Spread the seasoned zucchini slices in a single layer on a baking sheet lined with parchment paper or aluminum foil. Avoid overcrowding the slices to ensure proper browning and crispiness.
- Roast to Perfection. Place the baking sheet in the preheated oven and let the zucchini roast for approximately 15-20 minutes, or until they become tender and golden brown around the edges. You can flip the slices halfway through the cooking time for even browning, if desired.
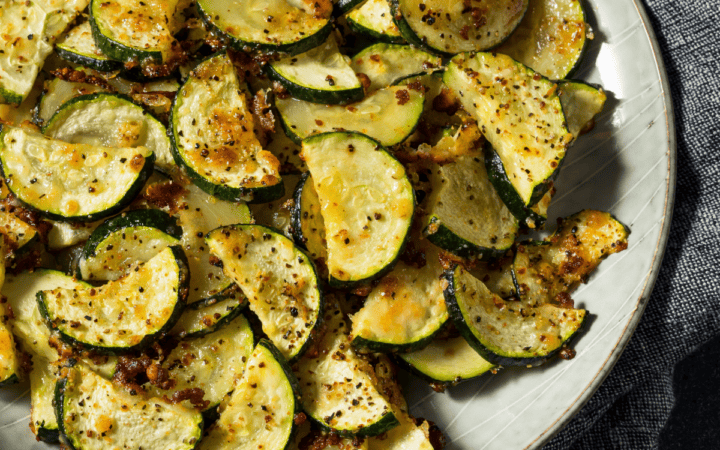
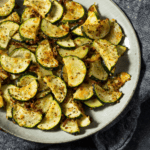
- Garnish and Serve. Once the zucchini slices are beautifully roasted, remove them from the oven. If desired, sprinkle grated Parmesan cheese over the top for an extra layer of flavor. Allow the zucchini to cool for a few minutes, then transfer them to a serving platter. Serve warm as a delightful side dish that complements a wide range of main courses.
Tips And Tricks
Here are some tips and tricks to help you make the most delicious roasted zucchini:
- Choose the Right Zucchini - Look for zucchini that is firm, with smooth skin and no blemishes. Smaller to medium-sized zucchini tend to have a better flavor and texture for roasting.
- Slice Evenly - To ensure even cooking, slice the zucchini into uniform pieces. Aim for slices that are about 1/4 to 1/2 inch thick. This helps to achieve consistent texture and prevent some pieces from becoming overcooked or undercooked.
- Season Generously - Don’t be shy with the seasoning. Toss the zucchini slices with a generous amount of olive oil, salt, and pepper. You can also add other seasonings like garlic powder, dried herbs, or spices that complement your dish.
Variations
Looking for even more delicious ways to enjoy fresh roasted zucchini? Try one of these tasty variations to find new ways to enjoy zucchini with even more meals:
- Lemon and Garlic - Add a refreshing twist to your roasted zucchini by squeezing fresh lemon juice over the slices before roasting. Additionally, toss the zucchini with minced garlic and a drizzle of olive oil for a vibrant and zesty flavor.
- Mediterranean-Inspired - Combine roasted zucchini with other Mediterranean ingredients for a delightful side dish. Toss the zucchini with diced tomatoes, Kalamata olives, crumbled feta cheese, and a sprinkle of dried oregano before roasting. The flavors will transport you to the sunny shores of the Mediterranean.
- Spicy Kick - For those who enjoy a bit of heat, sprinkle red pepper flakes or chili powder over the zucchini slices before roasting. The spice will add a fiery kick to the dish, complementing the natural sweetness of the zucchini.
What To Serve With Roasted Zucchini
Roasted zucchini pairs well with a variety of dishes, whether you’re looking for complementary flavors or a balanced meal. Here are some ideas on what to serve with it:
- Grilled or Roasted Protein - Serve roasted zucchini alongside grilled or roasted proteins such as chicken, steak, fish, or shrimp. The zucchini’s light and flavorful nature complements the savory and juicy qualities of the protein.
- Pasta or Grain Salads - Toss roasted zucchini into a pasta or grain salad. Combine it with cooked pasta or grains like quinoa, couscous, or farro, along with other fresh vegetables, herbs, and a light vinaigrette. This creates a refreshing and satisfying side dish or even a main course.
- Mediterranean Platter - Create a Mediterranean-inspired platter with roasted zucchini, hummus, tzatziki sauce, olives, feta cheese, pita bread, and other traditional mezze items. The roasted zucchini adds a lovely vegetable component to the assortment of flavors and textures.
How Long Does It Last?
Roasted zucchini can be stored in the refrigerator for up to 3 to 4 days. To maximize its freshness and quality, allow the roasted zucchini to cool completely at room temperature before storing it. Place the roasted zucchini in an airtight container or a resealable plastic bag. This helps to maintain its moisture and prevent it from drying out.
Can You Freeze It?
If you have a large batch of roasted zucchini that you won’t be able to consume within the recommended timeframe, consider freezing it. Freezing can extend its shelf life for several months. Simply transfer the roasted zucchini to a freezer-safe container or bag, label it with the date, and store it in the freezer.
When you’re ready to use it, thaw it in the refrigerator overnight before reheating or incorporating it into your desired recipes.
Best Zucchini Recipes
- Zucchini Pancakes
- Air Fryer Zucchini
- Zucchini Noodles
- Poblano Zucchini
- Zucchini Casserole
Roasted Zucchini | Oven Roasted Zucchini Recipe
Ingredients
- ▢ 2 Zucchini
- ▢ 2 tbsp Olive Oil
- ▢ 1 tbsp Minced Garlic
- ▢ 1 tsp Italian Seasoning
- ▢ 1/2 tsp Salt
- ▢ 1/4 tsp Pepper
- ▢ 1/4 cup Parmesan Cheese
Instructions
- Preheat the Oven. Preheat your oven to 425F and position the rack in the center of the oven. This will ensure even cooking and optimal browning.
- Prepare the Zucchini. Wash the zucchini thoroughly under cold water, then pat them dry. Trim off the ends and cut the zucchini into uniform slices, approximately 1/4 to 1/2 inch thick. This will help ensure even cooking.
- Toss with Flavor. In a large mixing bowl, combine the zucchini slices, olive oil, minced garlic, dried Italian seasoning, salt, and pepper. Toss the zucchini gently to coat each slice with the flavorful mixture.
- Arrange on a Baking Sheet. Spread the seasoned zucchini slices in a single layer on a baking sheet lined with parchment paper or aluminum foil. Avoid overcrowding the slices to ensure proper browning and crispiness.
- Roast to Perfection. Place the baking sheet in the preheated oven and let the zucchini roast for approximately 15-20 minutes, or until they become tender and golden brown around the edges. You can flip the slices halfway through the cooking time for even browning, if desired.
- Garnish and Serve. Once the zucchini slices are beautifully roasted, remove them from the oven. If desired, sprinkle grated Parmesan cheese over the top for an extra layer of flavor. Allow the zucchini to cool for a few minutes, then transfer them to a serving platter. Serve warm as a delightful side dish that complements a wide range of main courses.
Get support & connect with our community on Facebook!
Nutrition
Don’t forget to check out my other Ketocookbooks.
Keto Instant Pot, Keto Fat Bombs, Sweets, & Treats , and Easy keto in 30 minutes.


If you already signed up, you should have received an email with a password to give you unlimited access to our FREE Printable Library. The password is case sensitive. Enter it below and get printing!
Password:
Roasted Zucchini | Oven Roasted Zucchini Recipe
Ingredients
- 2 Zucchini
- 2 tbsp Olive Oil
- 1 tbsp Minced Garlic
- 1 tsp Italian Seasoning
- 1/2 tsp Salt
- 1/4 tsp Pepper
- 1/4 cup Parmesan Cheese
Instructions
- Preheat the Oven. Preheat your oven to 425F and position the rack in the center of the oven. This will ensure even cooking and optimal browning.
- Prepare the Zucchini. Wash the zucchini thoroughly under cold water, then pat them dry. Trim off the ends and cut the zucchini into uniform slices, approximately 1/4 to 1/2 inch thick. This will help ensure even cooking.
- Toss with Flavor. In a large mixing bowl, combine the zucchini slices, olive oil, minced garlic, dried Italian seasoning, salt, and pepper. Toss the zucchini gently to coat each slice with the flavorful mixture.
- Arrange on a Baking Sheet. Spread the seasoned zucchini slices in a single layer on a baking sheet lined with parchment paper or aluminum foil. Avoid overcrowding the slices to ensure proper browning and crispiness.
- Roast to Perfection. Place the baking sheet in the preheated oven and let the zucchini roast for approximately 15-20 minutes, or until they become tender and golden brown around the edges. You can flip the slices halfway through the cooking time for even browning, if desired.
- Garnish and Serve. Once the zucchini slices are beautifully roasted, remove them from the oven. If desired, sprinkle grated Parmesan cheese over the top for an extra layer of flavor. Allow the zucchini to cool for a few minutes, then transfer them to a serving platter. Serve warm as a delightful side dish that complements a wide range of main courses.
Roasted Zucchini | Oven Roasted Zucchini Recipe https://twosleevers.com/roasted-zucchini/

Low carb Raspberry Vinaigrette Dressing is the perfect keto-friendly salad topper! If you’re trying to cut back on carbs, one of the easiest ways is by making your own salad dressings. Store-bought dressings can be high in sugar and carbohydrates, but by making your own, you can control what goes into them.

Why This Will Take Your Salads To The Next Level
- Fast.
- Easy.
- Gluten Free.
- Low Carb.
Making your own low-carb salad dressings is an easy way to cut back on carbs and avoid the added sugars found in many store-bought dressings.
This raspberry vinaigrette is a delicious and healthy option that can be used in a variety of ways. Give it a try and see how it can elevate your salads and other dishes!
Is Raspberry Vinaigrette Good For You?
Raspberry vinaigrette can be good for you when made with wholesome, natural ingredients and consumed in moderation as part of a balanced diet. Check out some potential health benefits of the ingredients in a raspberry vinaigrette:
- Raspberries - Raspberries are a good source of fiber, vitamin C, and antioxidants. These nutrients can help support a healthy immune system, aid in digestion, and protect the body against cellular damage from harmful free radicals.
- White wine vinegar - Vinegar is known to have anti-inflammatory and blood sugar-regulating properties. It can also help with digestion and contribute to feelings of fullness, which may help with weight management.
- Olive oil - Olive oil is a heart-healthy fat that contains monounsaturated and polyunsaturated fats, which can help reduce bad cholesterol levels in the body. It is also a good source of vitamin E and antioxidants, which can help protect the body against cellular damage.
- Garlic - Garlic contains sulfur compounds that can help boost the immune system and improve cardiovascular health by reducing inflammation and cholesterol levels.
- Dijon mustard - Mustard is a low-calorie, low-fat condiment that contains antioxidants and anti-inflammatory compounds. It can also help boost metabolism and aid in digestion.
What Is Raspberry Vinaigrette Made Of?
- Raspberries
- White wine vinegar
- Olive oil
- Garlic
- Dijon mustard
- Salt
- Black pepper
- Stevia
How To Make Raspberry Vinaigrette Dressing
- Start by washing the raspberries and removing any stems or leaves. Place them in a small bowl and mash them with a fork until they are broken down and juicy.
- In a separate bowl, whisk together the white wine vinegar, olive oil, minced garlic, Dijon mustard, salt, and black pepper.
- Pour the mashed raspberries into the vinegar mixture and whisk until everything is well combined.
- If you want your vinaigrette to be a little sweeter, add a small amount of stevia or other low-carb sweeteners. Start with a small amount and adjust to taste.
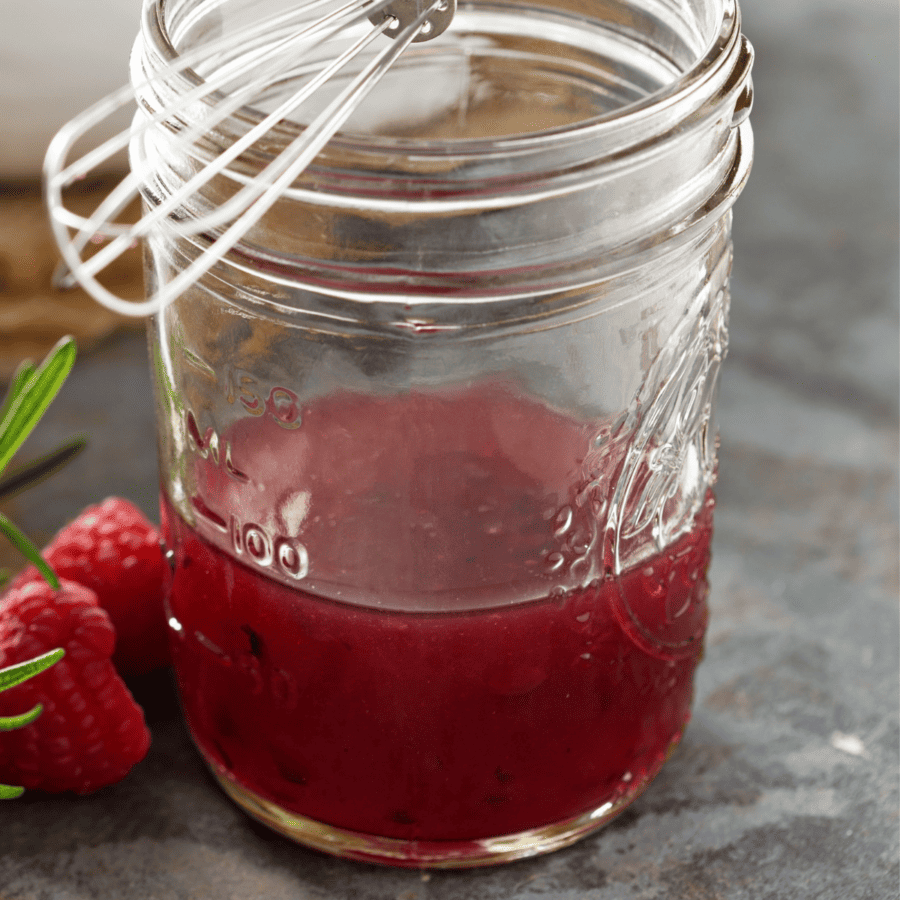
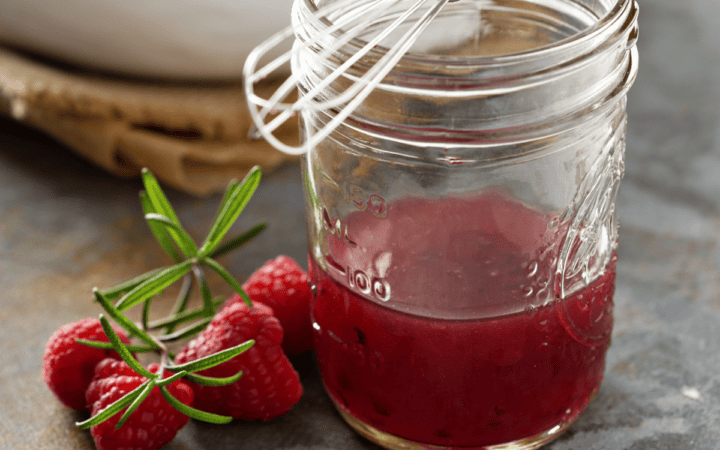
- Transfer the vinaigrette to a jar or bottle with a tight-fitting lid. Shake well before using.
Tips And Tricks
- Use fresh raspberries. Fresh raspberries will give your vinaigrette a bright, tangy flavor that’s hard to beat. Be sure to rinse the raspberries and remove any stems or leaves before mashing them.
- Adjust the sweetness . If you prefer a sweeter vinaigrette, you can add a small number of low-carb sweeteners, such as stevia, to the mixture. Start with a small amount and adjust to taste.
- Use high-quality vinegar . White wine vinegar works well in this recipe, but you can also use other types of vinegar, such as red wine vinegar or apple cider vinegar. Just be sure to choose high-quality vinegar for the best flavor.
- Use a blender. If you want a smoother consistency, you can use a blender to blend the ingredients together instead of mashing the raspberries by hand. This will also help to incorporate the ingredients more thoroughly.
- Let it sit. After making the vinaigrette, let it sit in the refrigerator for at least an hour before serving to allow the flavors to meld together.
- Shake well before using. Before using the vinaigrette, be sure to give it a good shake to re-incorporate any separated ingredients.
Variations
- Experiment with herbs and spices. If you want to add some extra flavor to your vinaigrette, you can experiment with different herbs and spices, such as thyme, basil, or black pepper.
- Switch up the vinegar . Substitute balsamic vinegar for white wine vinegar for a deeper, more complex flavor.
- Add some fresh lemon. Add a splash of lemon juice to the recipe for a tangy twist.
- Make it spicy. Add a pinch of cayenne pepper or chili flakes for a spicy kick.
- Add a citrusy orange kick. Substitute orange juice for the vinegar and add a pinch of orange zest for a fresh citrus flavor.
What To Serve It On
This raspberry vinaigrette is perfect for drizzling over salads or using it as a marinade for grilled chicken or pork. It has a tangy, slightly sweet flavor that pairs well with a variety of ingredients.
Plus, because it’s made with fresh raspberries and minimal added sugar, it’s a much healthier option than many store-bought dressings.
How Long Does It Last?
A homemade raspberry vinaigrette that is made with fresh ingredients can last for up to one week when stored properly in the refrigerator.
If you notice any changes in color, texture, or smell, or if the vinaigrette has been stored for longer than a week, it’s best to discard it.
Can You Freeze It?
If you’re planning to make a large batch of raspberry vinaigrette, you can freeze it in an airtight container for up to three months.
When you’re ready to use the dressing that you saved, place it in the refrigerator the night before you are planning on enjoying it to allow it to defrost completely. Shake well before using to reincorporate all of the ingredients that may have settled during the freezing process.
More Salad Dressing Recipes
- Poppyseed Dressing
- Thai Peanut Dressing
- Keto Ranch Dressing
- Italian Dressing
- Taco Salad Dressing
- Dijon Vinaigrette

Raspberry Vinaigrette | Simple Raspberry Vinaigrette Dressing
Ingredients
- ▢ 1 cup raspberries
- ▢ 1/4 cup white wine vinegar
- ▢ 1/4 cup olive oil
- ▢ 1 clove garlic
- ▢ 1 tsp Dijon mustard
- ▢ 1/2 tsp Salt
- ▢ 1/4 tsp Black Pepper
- ▢ 1/4 tsp Stevia
Instructions
- Start by washing the raspberries and removing any stems or leaves. Place them in a small bowl and mash them with a fork until they are broken down and juicy.
- In a separate bowl, whisk together the white wine vinegar, olive oil, minced garlic, Dijon mustard, salt, and black pepper.
- Pour the mashed raspberries into the vinegar mixture and whisk until everything is well combined.
- If you want your vinaigrette to be a little sweeter, add a small amount of stevia or other low-carb sweeteners. Start with a small amount and adjust to taste.
- Transfer the vinaigrette to a jar or bottle with a tight-fitting lid. Shake well before using.
Get support & connect with our community on Facebook!
Nutrition
Don’t forget to check out my other Ketocookbooks.
Keto Instant Pot, Keto Fat Bombs, Sweets, & Treats , and Easy keto in 30 minutes.
