
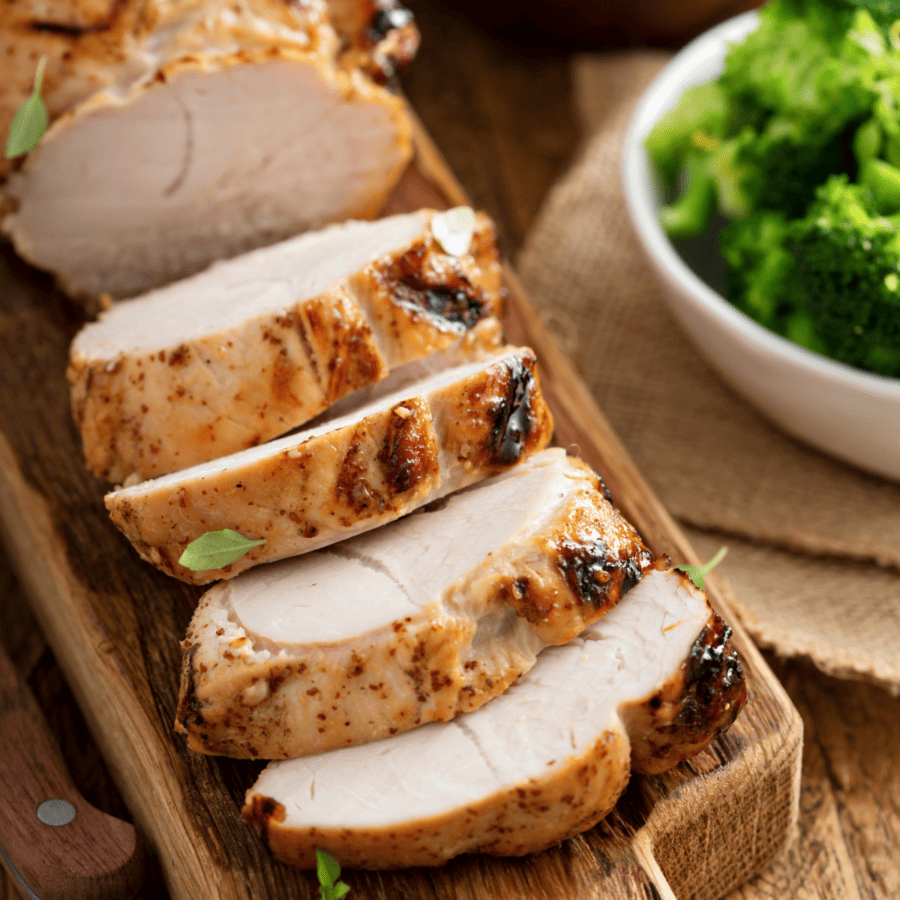
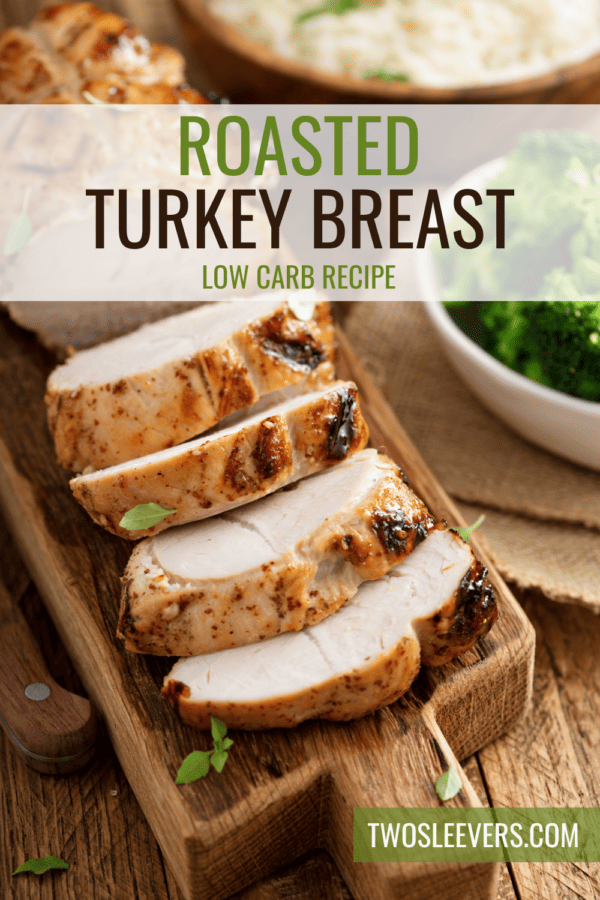
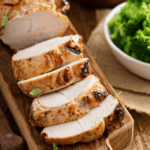
Roasting a turkey breast can be a game-changer, especially when you’re short on time or cooking for a smaller group. This recipe for Roasted Turkey Breast is your ticket to a succulent and flavorful turkey dinner in a fraction of the time it takes to roast a whole bird.
Why This Is The Perfect Turkey Breast Recipe
- Saves Time . Forget about spending hours in the kitchen. With this recipe, you can have a delicious turkey breast ready in much less time.
- Easy Preparation . Roasting a turkey breast is simpler than dealing with a whole turkey. It’s perfect for both beginners and seasoned home cooks.
- Juicy and Tender . The turkey breast turns out incredibly juicy and tender, with crispy skin on the outside and flavorful meat on the inside.
- Versatile Flavors . This recipe allows you to infuse your turkey breast with a medley of aromatic herbs, making it a versatile centerpiece for any meal.
How Do You Keep Turkey Breast Moist When Roasting?
Keeping a turkey breast moist while roasting is essential for a delicious and tender result. Here are some tips to help you achieve a moist roasted turkey breast:
- Brine the Turkey . Brining involves soaking the turkey in a solution of salt and water, sometimes with sugar and aromatics, for several hours or overnight before roasting. This helps the turkey absorb moisture and flavor, making it juicier. Rinse and pat dry before roasting.
- Use a Meat Thermometer . Invest in a good meat thermometer to monitor the turkey’s internal temperature. Overcooking can lead to dry meat. Roast the turkey until the thickest part of the breast registers 165°F).
- Butter or Oil Under the Skin . Gently loosen the skin from the breast meat and rub softened butter or olive oil underneath. This helps to baste the meat from the inside as it melts during roasting.
- Baste During Cooking . Basting the turkey with its own juices or a flavorful liquid (such as broth or white wine) every 30 minutes can help keep it moist. However, opening the oven frequently can also extend the cooking time, so baste sparingly.
- Use a Roasting Rack . Elevating the turkey on a roasting rack allows hot air to circulate evenly around it, helping it cook more evenly and preventing it from sitting in its juices, which can lead to steaming and uneven cooking.
- Cover with Foil . If you notice that the turkey breast is browning too quickly, you can tent it with aluminum foil to prevent excessive browning while the meat continues to cook.
- Rest the Turkey . After removing the turkey from the oven, let it rest for at least 15-30 minutes before carving. During this time, the juices redistribute, and the meat continues to cook slightly, resulting in juicier slices.
Should I Cover Turkey Breast When Roasting?
Covering the turkey breast with foil is an option if you want to retain moisture, prevent excessive browning, or promote even cooking. However, if you prefer crispy skin and a faster cooking time, leaving it uncovered is a better choice.
How Many Minutes Per Pound Should You Cook A Turkey Breast?
When roasting a turkey breast, the general rule of thumb for cooking time is approximately 20 minutes per pound at a temperature of 325°F.
Ingredients You’ll Need
- Bone-in Turkey Breast- The turkey breast is the star of the dish. It provides the main protein and flavor. Roasting it with the bone-in helps keep the meat moist and adds extra flavor.
- Butter- The butter is used to coat the turkey breast. This coating helps crisp up the skin, adds richness, and contributes to browning during roasting.
- Salt and Pepper- Salt and pepper are essential for seasoning the turkey breast. They enhance the natural flavors of the meat and create a balanced taste.
- Paprika- Paprika is an optional seasoning that adds a subtle smokiness and a reddish color to the turkey’s skin.
- Dried Sage- Dried sage is an optional herb that imparts a warm, earthy, and slightly peppery flavor.
- Dried Rosemary- Dried rosemary contributes a piney and herbal flavor to the turkey.
- Dried Thyme- Dried thyme, like rosemary, is an optional herb that adds an earthy, slightly floral flavor to the turkey.
- Garlic- Minced garlic adds a rich, pungent, and aromatic quality to the dish.
- Lemon- Lemon quarters are used to provide a citrusy brightness and aroma.
These ingredients work together to create a well-seasoned, flavorful, and aromatic roasted turkey breast. The optional herbs and spices allow you to customize the flavor profile to your liking, while the aromatics and liquids contribute to a moist and delicious final result.
How To Make Roasted Turkey Breast
- Preheat the Oven . Preheat your oven to 325°F.
- Prepare the Turkey Breast. Remove the turkey breast from its packaging and pat it dry with paper towels. Place the turkey breast on a roasting rack in a roasting pan. This helps the turkey cook more evenly by allowing air to circulate around it.
- Season the Turkey. Rub the turkey breast with softened butter. This will help the skin brown and keep the meat moist. Season the turkey generously with salt and pepper. You can also add optional seasonings like paprika, dried sage, dried rosemary, and dried thyme for extra flavor.
- Add Aromatic Ingredients. Place minced garlic, lemon quarters, fresh thyme sprigs, and fresh rosemary sprigs around the turkey in the roasting pan. These aromatics will infuse the turkey with wonderful flavors as it roasts.
- Roasting . Place the roasting pan with the turkey breast in the preheated oven. Roast the turkey breast for about 20 minutes per pound. A 4-6 pound turkey breast will take approximately 80-120 minutes to cook. Use a meat thermometer to check for doneness.
- Check Internal Temperature. Begin checking the turkey’s internal temperature after about 1 hour of roasting. The turkey breast is done when it reaches an internal temperature of 165°F in the thickest part of the meat.
- Resting. Once the turkey reaches the desired temperature, remove it from the oven. Tent the turkey loosely with aluminum foil and let it rest for about 15-20 minutes. This allows the juices to redistribute and ensures a juicy, tender result when you carve the turkey.
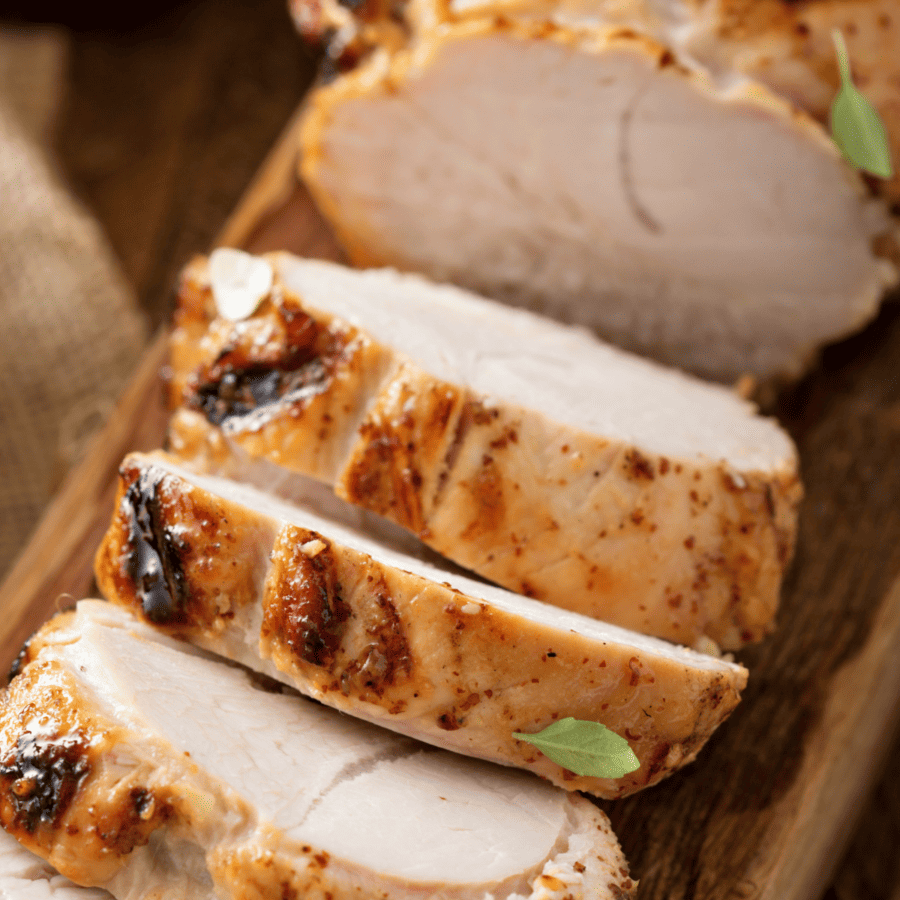
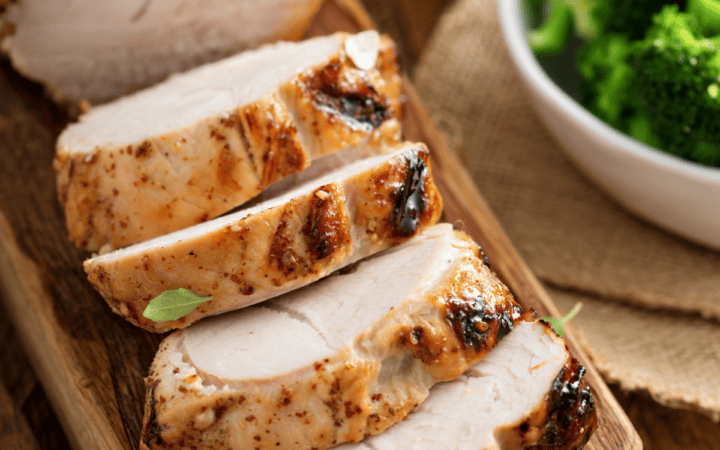
- Carve and Serve. After resting, carve the roasted turkey breast into slices and serve with your favorite side dishes and gravy if desired.
Tips And Tricks
Roasting a turkey breast can be a flavorful and satisfying meal, whether you’re preparing it for a holiday feast or a regular family dinner. Here are some tips and tricks to ensure your turkey breast turns out perfect:
- Choose the Right Size . Select a turkey breast that suits the number of servings you need. Estimate about 1/2 to 3/4 pounds of turkey breast per person.
- Seasoning . Rub the turkey breast with olive oil or melted butter to promote a crispy, golden skin. Season generously with salt, pepper, and any desired herbs or spices. You can also insert garlic cloves, fresh herbs, and lemon slices under the skin for added flavor.
Variations
Roasted turkey breast is a versatile dish that can be customized with various seasonings, marinades, and accompaniments to suit your taste preferences. Here are some delicious variations:
- Citrus-Herb Roasted Turkey Breast- Season the turkey breast with a mixture of lemon or orange zest, fresh herbs like rosemary, thyme, and sage, along with minced garlic. Add citrus slices (lemon, orange, or lime) to the roasting pan for extra flavor.
- Garlic-Herb Roasted Turkey Breast- Create a garlic herb paste using minced garlic, fresh herbs (rosemary, thyme, sage, and parsley), olive oil, salt, and pepper. Rub this mixture all over the turkey breast before roasting.
- Cajun-Spiced Roasted Turkey Breast- Season the turkey breast with a Cajun spice blend for a bold and spicy flavor. You can make your own blend with paprika, cayenne pepper, garlic powder, onion powder, oregano, and thyme.
What To Serve With This Roasted Turkey Breast Recipe
When serving roasted turkey breast, you have a variety of side dishes and accompaniments to choose from to create a well-rounded and delicious meal. Here are some popular options to consider:
- Gravy - Homemade turkey gravy made from the pan drippings is a classic and essential choice to drizzle over the turkey and side dishes.
- Mashed Potatoes - Creamy mashed potatoes are a comforting and traditional side that pairs perfectly with roasted turkey. You can add garlic, butter, or herbs to customize the flavor.
- Stuffing - A savory stuffing or dressing made with bread, herbs, vegetables, and sometimes sausage complements the turkey’s flavor and adds texture to the meal.
- Cranberry Sauce- Homemade or canned cranberry sauce provides a sweet and tangy contrast to the savory turkey. It’s a classic Thanksgiving pairing.
- Green Beans - Roasted or steamed green beans seasoned with garlic, butter, or almonds make for a vibrant and nutritious side dish.
- Roasted Root Vegetables - A medley of roasted root vegetables like carrots, parsnips, and sweet potatoes adds color and earthy flavors to the meal.
- Brussels Sprouts - Roasted Brussels sprouts with bacon or balsamic glaze offer a delightful balance of flavors and textures.
How Long Does It Last?
A roasted turkey breast can be stored in the refrigerator for up to 3 to 4 days. To maximize its freshness and safety, follow these guidelines:
- Cooling - Allow the roasted turkey breast to cool down at room temperature for no more than 2 hours after cooking. This helps prevent the growth of harmful bacteria.
- Storage - Once cooled, transfer the turkey breast to an airtight container or wrap it tightly in aluminum foil or plastic wrap. You can also place it in a resealable plastic bag.
- Refrigeration - Store the wrapped or containerized turkey breast in the refrigerator at or below 40°F.
- Labeling - It’s a good practice to label the container or wrapping with the date when the turkey breast was cooked so you can easily keep track of its freshness.
Can You Freeze It?
After the 3 to 4-day mark, the turkey breast may still be safe to eat, but its quality and flavor can deteriorate, and it may become dry. If you have leftovers that you don’t plan to consume within this timeframe, consider freezing them for longer storage.
Properly wrapped and frozen, roasted turkey breast can last for 2 to 6 months in the freezer without significant loss of quality.
More Tasty Turkey Recipes
- Air Fryer Turkey Burgers
- Air Fryer Turkey Breast
- Instant Pot Turkey Chili
- Instant Pot Turkey Breast
Roasted Turkey Breast Recipe | Easy Baked Turkey Breast
Ingredients
- ▢ 1 4 pound Turkey Breast
- ▢ 6 tbsp Unsalted Butter
- ▢ 1 tbsp Minced Garlic
- ▢ 1 tbsp Sage
- ▢ 1 tbsp Thyme
- ▢ 2 tsp Salt
- ▢ 1/2 tsp Black Pepper
- ▢ 1 tbsp Rosemary
- ▢ 1 tsp Paprika
Instructions
- Preheat the Oven . Preheat your oven to 325°F.
- Prepare the Turkey Breast. Remove the turkey breast from its packaging and pat it dry with paper towels. Place the turkey breast on a roasting rack in a roasting pan. This helps the turkey cook more evenly by allowing air to circulate around it.
- Season the Turkey. Rub the turkey breast with softened butter. This will help the skin brown and keep the meat moist. Season the turkey generously with salt and pepper. You can also add optional seasonings like paprika, dried sage, dried rosemary, and dried thyme for extra flavor.
- Add Aromatic Ingredients. Place minced garlic, lemon quarters, fresh thyme sprigs, and fresh rosemary sprigs around the turkey in the roasting pan. These aromatics will infuse the turkey with wonderful flavors as it roasts.
- Roasting . Place the roasting pan with the turkey breast in the preheated oven. Roast the turkey breast for about 20 minutes per pound. A 4-6 pound turkey breast will take approximately 80-120 minutes to cook. Use a meat thermometer to check for doneness.
- Check Internal Temperature. Begin checking the turkey’s internal temperature after about 1 hour of roasting. The turkey breast is done when it reaches an internal temperature of 165°F in the thickest part of the meat.
- Resting. Once the turkey reaches the desired temperature, remove it from the oven. Tent the turkey loosely with aluminum foil and let it rest for about 15-20 minutes. This allows the juices to redistribute and ensures a juicy, tender result when you carve the turkey.
- Carve and Serve. After resting, carve the roasted turkey breast into slices and serve with your favorite side dishes and gravy if desired.
Get support & connect with our community on Facebook!
Don’t forget to check out my other Ketocookbooks.
Keto Instant Pot, Keto Fat Bombs, Sweets, & Treats , and Easy keto in 30 minutes.


If you already signed up, you should have received an email with a password to give you unlimited access to our FREE Printable Library. The password is case sensitive. Enter it below and get printing!
Password:
Roasted Turkey Breast Recipe | Easy Baked Turkey Breast
Ingredients
- 1 4 pound Turkey Breast
- 6 tbsp Unsalted Butter
- 1 tbsp Minced Garlic
- 1 tbsp Sage
- 1 tbsp Thyme
- 2 tsp Salt
- 1/2 tsp Black Pepper
- 1 tbsp Rosemary
- 1 tsp Paprika
Instructions
- Preheat the Oven . Preheat your oven to 325°F.
- Prepare the Turkey Breast. Remove the turkey breast from its packaging and pat it dry with paper towels. Place the turkey breast on a roasting rack in a roasting pan. This helps the turkey cook more evenly by allowing air to circulate around it.
- Season the Turkey. Rub the turkey breast with softened butter. This will help the skin brown and keep the meat moist. Season the turkey generously with salt and pepper. You can also add optional seasonings like paprika, dried sage, dried rosemary, and dried thyme for extra flavor.
- Add Aromatic Ingredients. Place minced garlic, lemon quarters, fresh thyme sprigs, and fresh rosemary sprigs around the turkey in the roasting pan. These aromatics will infuse the turkey with wonderful flavors as it roasts.
- Roasting . Place the roasting pan with the turkey breast in the preheated oven. Roast the turkey breast for about 20 minutes per pound. A 4-6 pound turkey breast will take approximately 80-120 minutes to cook. Use a meat thermometer to check for doneness.
- Check Internal Temperature. Begin checking the turkey’s internal temperature after about 1 hour of roasting. The turkey breast is done when it reaches an internal temperature of 165°F in the thickest part of the meat.
- Resting. Once the turkey reaches the desired temperature, remove it from the oven. Tent the turkey loosely with aluminum foil and let it rest for about 15-20 minutes. This allows the juices to redistribute and ensures a juicy, tender result when you carve the turkey.
- Carve and Serve. After resting, carve the roasted turkey breast into slices and serve with your favorite side dishes and gravy if desired.
Roasted Turkey Breast Recipe | Easy Baked Turkey Breast https://twosleevers.com/roasted-turkey-breast-recipe/

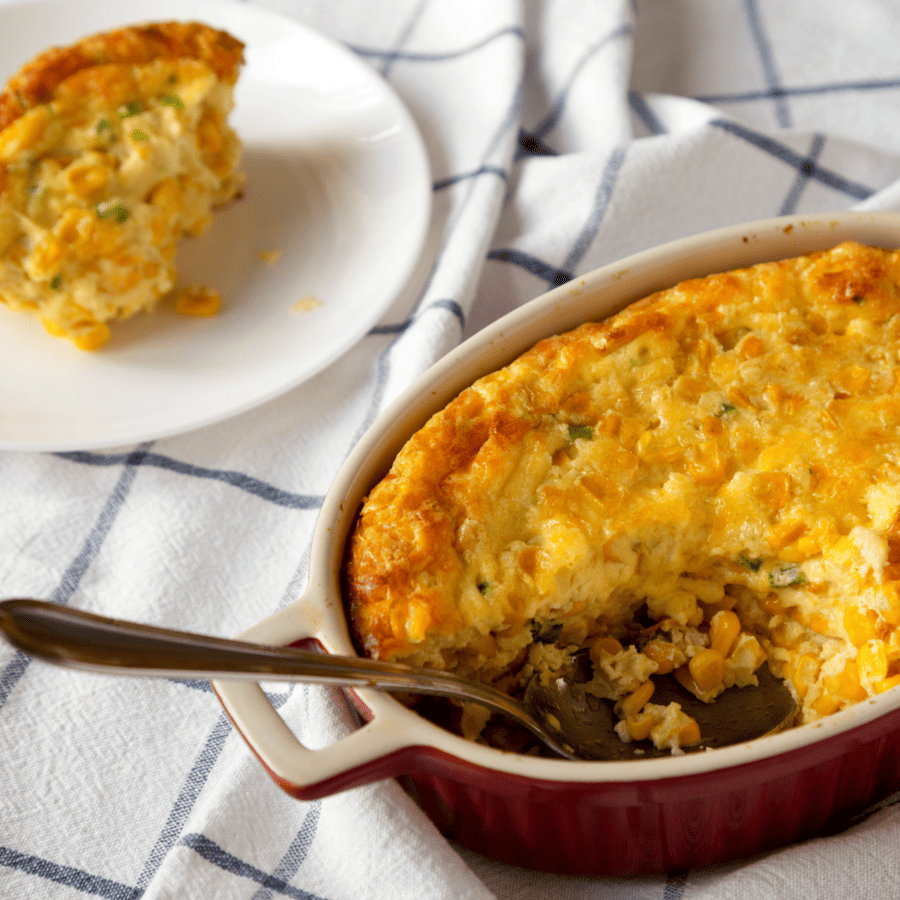
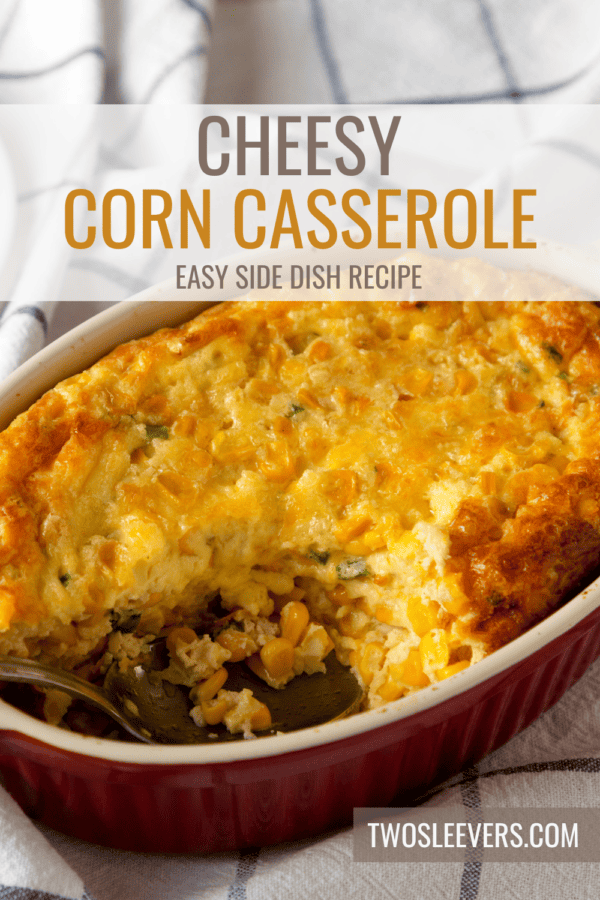
Get ready to elevate your side dish game with our delectable Cheesy Corn Casserole recipe. This dish combines the convenience of a quick and easy preparation with a burst of flavors that will leave your taste buds dancing.
Why This Will Be Your New Favorite Side Dish
- Creamy and savory. A rich combination of whole kernel corn, cream-style corn, sour cream, and melted butter creates a creamy and savory base.
- Comforting and satisfying . It’s the ultimate comfort food, perfect for family gatherings, holidays, or any cozy meal.
- Easy preparation . Simple to make with minimal effort, making it a go-to side dish for busy cooks.
What Is The Difference Between Corn Casserole And Cornbread?
Cornbread is a baked bread with a firm texture and can be savory or sweet, while corn casserole is a moist, custard-like side dish made with cornbread mix, whole corn kernels, and cream-style corn.
They both use cornmeal or cornbread mix as a base but result in different textures and flavors. Cornbread is more like a traditional bread, while corn casserole is a rich and creamy side dish.
Why Is My Corn Casserole Soupy?
The most common reason for a soupy corn casserole is an incorrect ratio of wet to dry ingredients. If you added too much liquid, such as sour cream, milk, or eggs, it can make the casserole too runny. Ensure that you follow the recipe’s measurements accurately.
Undercooking the casserole can also lead to a soupy consistency. Make sure to bake it for the full recommended time or until it’s set and the top is golden brown. The center should not appear jiggly or liquidy.
Ingredients You’ll Need
- Canned Whole Kernel Corn- The whole kernel corn adds a sweet and slightly crunchy texture to the casserole. It provides bursts of corn flavor and visual appeal.
- Canned Cream-Style Corn- Cream-style corn adds creaminess and moisture to the casserole. It acts as a binding agent, helping to hold the dish together while infusing it with a sweet and creamy corn flavor.
- Sour Cream- Sour cream adds a rich and tangy flavor to the casserole. It contributes to the creaminess of the dish while balancing the sweetness of the corn.
- Unsalted Butter- Melted butter enhances the flavor and richness of the casserole. It also helps provide moisture and aids in achieving a tender and moist cornbread texture on top.
- Cornbread Mix- The cornbread mix is the primary dry ingredient that, when combined with the other wet ingredients, forms the cornbread topping for the casserole. It gives the dish its classic cornbread flavor and a slightly crisp texture on top.
- Shredded Cheddar Cheese- Cheddar cheese adds a savory and cheesy element to the casserole. It melts into the mixture, providing gooey pockets of cheesy goodness throughout the dish.
- Salt- Salt is essential for enhancing the overall flavor of the casserole. It balances the sweetness and adds depth to the taste.
- Black Pepper- Black pepper contributes a subtle hint of spiciness and complexity to the dish. It complements the sweetness of the corn and cheese.
- Parsley- Fresh parsley is used as a garnish to add a pop of color and a touch of freshness to the finished casserole.
Together, these ingredients create a harmonious blend of sweet and savory flavors, creamy and moist textures, and a golden, cheesy cornbread topping that makes Cheesy Cornbread Casserole a delightful and comforting side dish.
How To Make Cheesy Corn Casserole
- Preheat and Prep . Begin by preheating your oven to 350°F. Grease a 9x13-inch baking dish for that perfect casserole shape.
- Mix the Goodness. In a large bowl, combine the drained whole kernel corn, cream-style corn, sour cream, melted butter, cornbread mix, shredded cheddar cheese, salt, and black pepper. Stir this delightful mixture until all ingredients are well incorporated.
- Casserole Creation . Pour this creamy corn mixture into your prepared baking dish, spreading it evenly to ensure every bite is as delicious as the last.
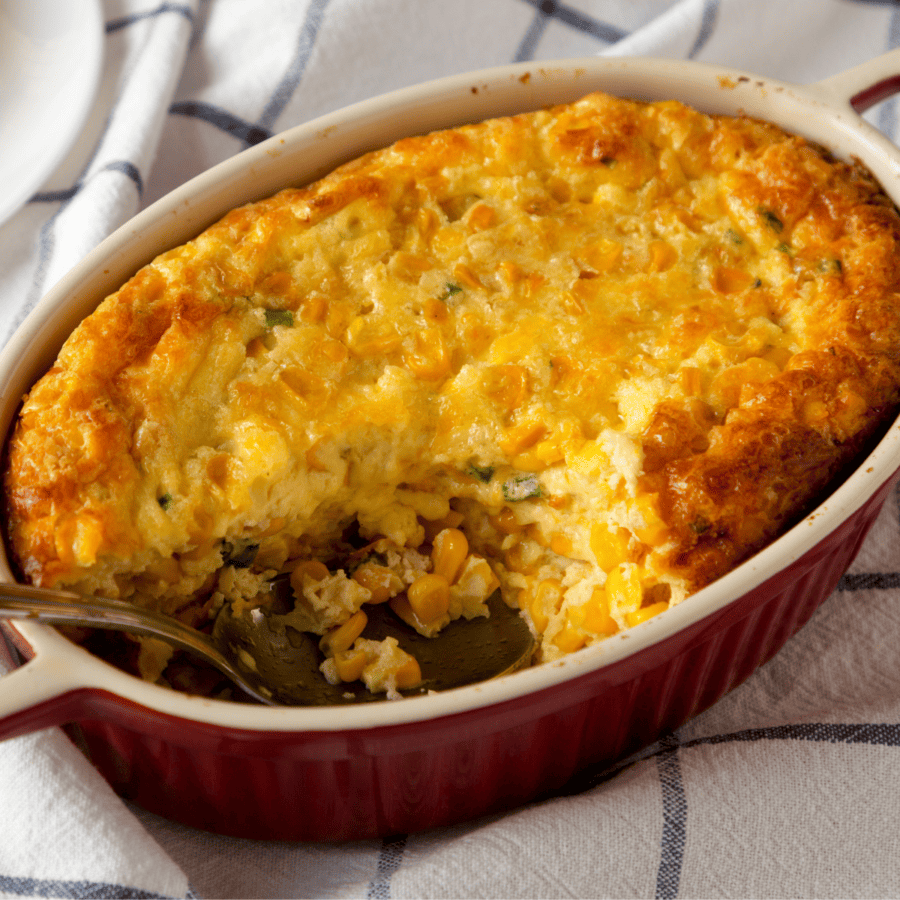
- Bake to Perfection. Slide your casserole into the preheated oven and let it bake for approximately 45 to 50 minutes or until it’s golden brown and slightly set in the center. A toothpick inserted into the center should come out mostly clean.
- Garnish and Serve . Once your Cheesy Corn Casserole is out of the oven, sprinkle it with freshly chopped parsley for a burst of color and added freshness. Then, slice it into squares and serve warm.
Tips And Tricks
Creating the perfect Cheesy Corn Casserole is a breeze, but a few tips and tricks can ensure it turns out fabulous every time:
- Variation Options . Feel free to customize your casserole by adding ingredients like diced jalapeños for a spicy kick, crispy bacon bits for extra indulgence, or even a dash of hot sauce for some zing.
- Texture Check . To guarantee your casserole has the ideal texture, aim for it to be slightly jiggly in the center when you remove it from the oven. It will continue to set as it cools.
- Make Ahead . This casserole can be prepared in advance and baked when needed. Simply assemble it, cover with plastic wrap or aluminum foil, and refrigerate for up to 24 hours. Bake as directed when ready to serve.
Variations
Cheesy corn casserole is a versatile dish that you can customize to your liking. Here are some variations and additions to consider to change up the flavor and texture of your casserole:
- Spicy Cheesy Corn Casserole - Add some heat to your casserole by including diced jalapeños or green chilies. You can use canned, pickled, or fresh jalapeños, depending on your preference. Adjust the amount to your desired level of spiciness.
- Bacon and Cheddar - Crispy bacon bits and extra shredded cheddar cheese take this casserole to the next level. Simply cook some bacon until crispy, crumble it, and fold it into the corn mixture before baking. You can also sprinkle additional cheddar cheese on top.
- Herb and Garlic Corn Casserole - Elevate the flavor by adding fresh or dried herbs like chopped parsley, chives, or thyme. A touch of minced garlic or garlic powder can also enhance the taste.
- Caramelized Onions - Sautéed caramelized onions add sweetness and depth of flavor to your casserole. Cook thinly sliced onions in butter until they become golden brown and sweet, then mix them into the corn mixture.
What To Serve With Cheesy Corn Casserole
Cheesy Corn Casserole is incredibly versatile and pairs beautifully with a variety of dishes. Here are some mouthwatering options:
- BBQ Delights - Serve it alongside grilled chicken, pulled pork, or smoked ribs for a classic barbecue feast.
- Holiday Feast - Elevate your holiday spread by including this casserole alongside turkey, ham, or roast beef.
- Meatless Marvel - Turn it into a satisfying vegetarian meal by pairing it with a crisp green salad or roasted vegetables.
How Long Does It Last?
Allow the leftover casserole to cool to room temperature before refrigerating it. Cover it tightly with plastic wrap, or aluminum foil, or transfer it to an airtight container.
Cheesy Corn Casserole can be safely stored in the refrigerator for up to 3 to 4 days.
Can You Freeze It?
If you anticipate having leftovers but won’t be able to consume them within a few days, consider freezing portions of the casserole. Properly packaged, frozen Cheesy Corn Casserole can last for 2 to 3 months in the freezer.
More Savory Side Dishes
- Air Fryer Broccoli
- Cucumber Tomato Onion Salad
- Crab Rangoon
- Cauliflower Mac And Cheese
- Instant Pot Green Beans And Bacon
- Colcannon
- Creamed Corn

Cheesy Corn Casserole | Corn Casserole Recipe
Ingredients
- ▢ 30 oz Canned Corn
- ▢ 15 oz Cream Style Corn
- ▢ 1 cup Sour Cream
- ▢ 1/2 cup Unsalted Butter , melted
- ▢ 8.5 oz Cornbread Mix
- ▢ 2 cups shredded sharp cheddar cheese
- ▢ 1 tsp Salt
- ▢ 1/2 tsp Black Pepper
- ▢ Parsley , for garnish
Instructions
- Preheat and Prep . Begin by preheating your oven to 350°F. Grease a 9x13-inch baking dish for that perfect casserole shape.
- Mix the Goodness. In a large bowl, combine the drained whole kernel corn, cream-style corn, sour cream, melted butter, cornbread mix, shredded cheddar cheese, salt, and black pepper. Stir this delightful mixture until all ingredients are well incorporated.
- Casserole Creation . Pour this creamy corn mixture into your prepared baking dish, spreading it evenly to ensure every bite is as delicious as the last.
- Bake to Perfection. Slide your casserole into the preheated oven and let it bake for approximately 45 to 50 minutes or until it’s golden brown and slightly set in the center. A toothpick inserted into the center should come out mostly clean.
- Garnish and Serve . Once your Cheesy Corn Casserole is out of the oven, sprinkle it with freshly chopped parsley for a burst of color and added freshness. Then, slice it into squares and serve warm.
