
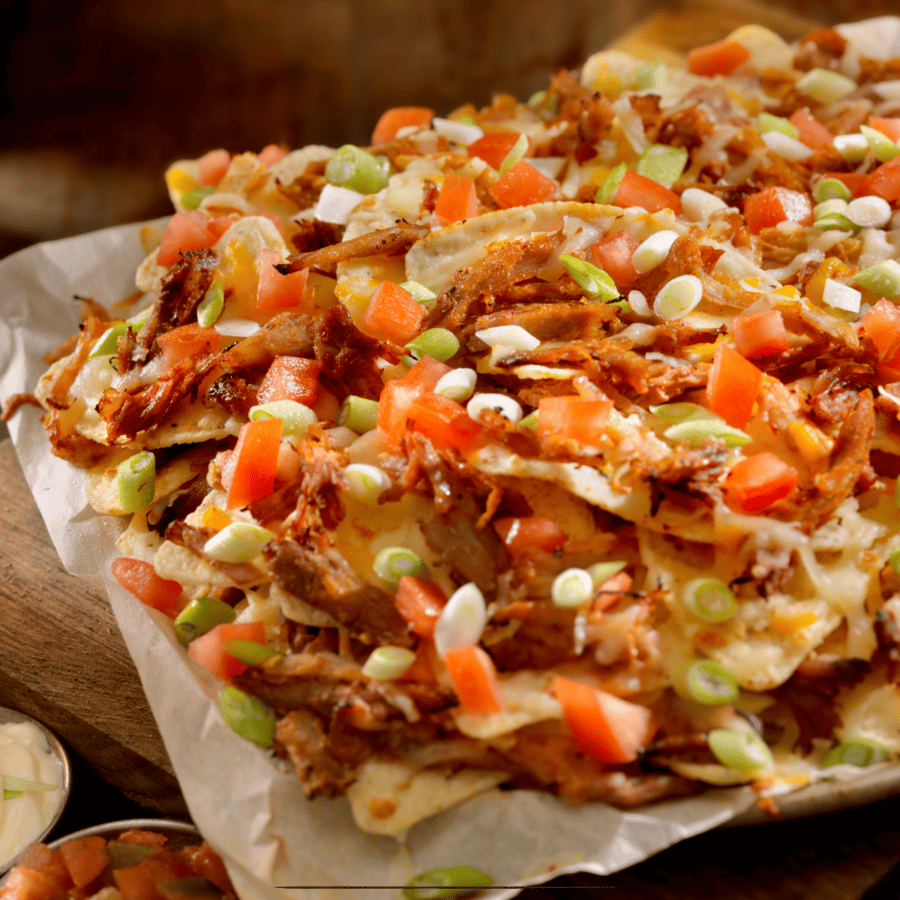
If you’re craving the ultimate game day snack or simply looking to indulge in a crowd-pleasing treat, these Pulled Pork Nachos are an absolute must-try! Loaded with tender pulled pork, gooey cheese, tangy barbecue sauce, and all your favorite toppings, they’re guaranteed to be a hit at any gathering.

Why These Will Be Your New Favorite Twist On Nachos
- Irresistible Combination . These nachos boast a mouthwatering medley of flavors and textures, from the savory pulled pork to the creamy melted cheese and zesty toppings.
- Customizable . Feel free to customize your nachos with your favorite toppings, whether it’s diced tomatoes, sliced jalapenos, or creamy guacamole. The possibilities are endless!
- Easy to Make . With pre-made pulled pork and store-bought tortilla chips, these nachos come together in no time, making them perfect for busy weeknights or impromptu gatherings.
Whether you’re hosting a watch party, feeding a hungry crowd, or simply treating yourself to a delicious snack, these Pulled Pork Nachos are sure to satisfy your cravings and leave you craving more!
Are Pulled Pork Nachos Good?
Absolutely! Pulled pork nachos are a favorite among food enthusiasts for good reason. They offer a winning combination of flavors and textures that are guaranteed to please your taste buds.
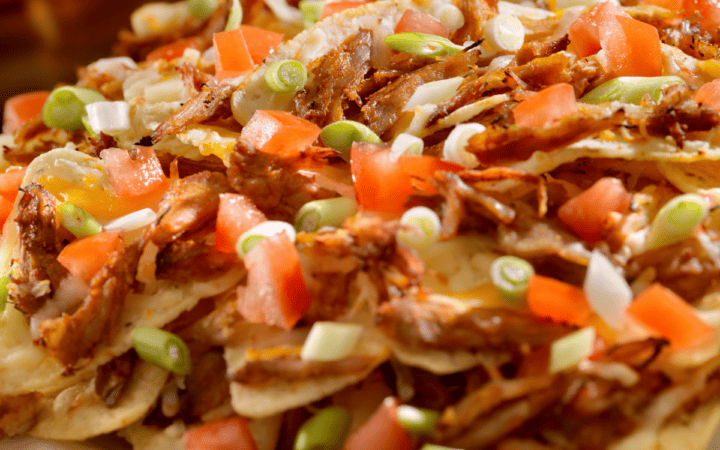
The tender, smoky pulled pork pairs perfectly with the gooey melted cheese and crunchy tortilla chips, while the barbecue sauce adds a tangy sweetness that takes these nachos to the next level.
Do You Put Meat Or Cheese First On Nachos?
When assembling nachos, there isn’t a strict rule about whether to put meat or cheese first. However, a common practice is to layer the ingredients in a way that ensures even distribution and maximum flavor.
Some people prefer to start with a layer of tortilla chips, followed by a layer of cheese to help hold the toppings together. Then, they add the meat, beans, and other toppings before repeating the layers as needed.
Ultimately, the order can vary based on personal preference, and the most important thing is to create delicious and satisfying nachos however you like them!
Ingredients You’ll Need
- Pulled Pork - Use your favorite homemade (you’ll love my quick and easy Instant Pot version)or store-bought pulled pork for convenience.
- Tortilla Chips - Opt for sturdy tortilla chips that can hold up to the weight of the toppings.
- Shredded Cheese - Choose a blend of your favorite cheeses, such as cheddar, Monterey Jack, or pepper jack, for maximum flavor.
- Barbecue Sauce - Use your preferred barbecue sauce to drizzle over the nachos for that signature smoky sweetness.
- Toppings - Customize your nachos with toppings like diced tomatoes, sliced jalapenos, chopped cilantro, diced onions, sour cream, and guacamole.
How To Make Pulled Pork Nachos
- Preheat the Oven . Preheat your oven to 375°F and line a baking sheet with parchment paper.
- Layer the Ingredients . Spread a layer of tortilla chips on the prepared baking sheet, followed by a generous amount of pulled pork and shredded cheese.
- Add Toppings . Sprinkle your desired toppings over the pulled pork and cheese, such as diced tomatoes, sliced jalapenos, and chopped cilantro.
- Bake Until Cheese is Melted . Place the baking sheet in the preheated oven and bake for 8-10 minutes, or until the cheese is melted and bubbly.
- Drizzle with Barbecue Sauce . Remove the nachos from the oven and drizzle with barbecue sauce.
- Serve Immediately . Serve the nachos immediately, garnished with additional toppings if desired.
Tips And Tricks
Making pulled pork nachos is a delicious and crowd-pleasing dish. Here are some tips and tricks to ensure they turn out perfectly:
- Layering is Key . Layer your nachos strategically to ensure every chip gets plenty of toppings. Start with a single layer of tortilla chips on a baking sheet, followed by pulled pork, shredded cheese, and any other toppings you desire. Repeat the layers until you’ve used all your ingredients.
- Don’t Overload. While it’s tempting to pile on the toppings, be mindful not to overload your nachos. Too many toppings can make the chips soggy and difficult to eat. Aim for a balance of flavors and textures without overcrowding.
- Customize Your Toppings . Get creative with your toppings to suit your taste preferences. Some popular options include diced tomatoes, sliced jalapenos, black beans, corn kernels, diced onions, chopped cilantro, sour cream, guacamole, and salsa.
Variations
There are countless variations you can try to customize your pulled pork nachos to suit your taste preferences. Here are some delicious variations to consider:
- Tex-Mex - Add a Tex-Mex twist to your nachos by topping them with pulled pork, black beans, corn kernels, diced tomatoes, sliced jalapenos, and a blend of cheddar and Monterey Jack cheese. Serve with guacamole, sour cream, and salsa on the side.
- Hawaiian - Create a tropical-inspired twist by topping your nachos with pulled pork, diced pineapple, red bell peppers, red onions, and shredded mozzarella cheese. Finish with a sprinkle of chopped cilantro and a drizzle of teriyaki sauce for a sweet and savory flavor.
- Breakfas t - Enjoy nachos for breakfast by topping them with pulled pork, scrambled eggs, crispy bacon or sausage crumbles, diced avocado, and shredded cheddar cheese. Serve with salsa and sour cream for a hearty and satisfying morning meal.
What To Serve With Pork Nachos
Pork nachos are a flavorful and hearty dish that pairs well with a variety of complementary sides and accompaniments. Here are some delicious options to consider serving alongside them:
- Guacamole - Creamy and rich, guacamole adds a fresh and vibrant element to the nachos. Its coolness contrasts nicely with the warm, savory flavors of the pork.
- Salsa - A classic accompaniment, salsa provides a zesty and tangy flavor that enhances the overall taste of the nachos. You can serve both mild and spicy varieties to cater to different preferences.
- Sour cream - Creamy and tangy, sour cream adds a cooling element to the nachos, balancing out the richness of the pork and cheese.
- Pico de Gallo - Made with fresh tomatoes, onions, cilantro, and lime juice, pico de gallo adds a burst of freshness and acidity to the nachos.
How Long Do They Last?
Pulled pork nachos are best enjoyed immediately while the cheese is hot and gooey. However, if you have leftovers, you can store them in an airtight container in the refrigerator for up to 2 days. Reheat in the oven or microwave until warmed through before serving.
More Perfect Pork Recipes
- Mexican Pork Stew
- Pork Curry
- Instant Pot Pork Chops
- Crispy Pork Belly
- Carne Adovada
- Sweet and Sour Pork
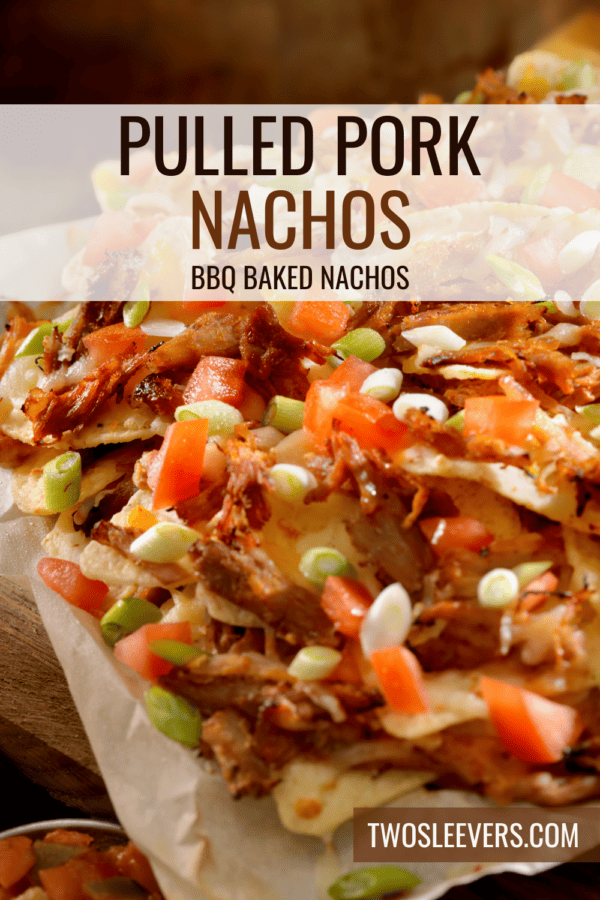
Pulled Pork Nachos | BBQ Pork Nachos Recipe
Ingredients
- ▢ 2 cups Pulled Pork
- ▢ 4 cups Tortilla Chips
- ▢ 1 1/2 cups Colby Jack Cheese , shredded
- ▢ 1 cup BBQ Sauce
- ▢ 1/3 cup Tomatoes , diced
- ▢ 1/4 cup Jalapenos , sliced
- ▢ 1/4 cup Red Onion , diced
- ▢ Cilantro , for garnish
- ▢ Green Onion , for garnish
Instructions
- Preheat the Oven . Preheat your oven to 375°F and line a baking sheet with parchment paper.
- Layer the Ingredients . Spread a layer of tortilla chips on the prepared baking sheet, followed by a generous amount of pulled pork and shredded cheese.
- Add Toppings . Sprinkle your desired toppings over the pulled pork and cheese, such as diced tomatoes, sliced jalapenos, and chopped cilantro.
- Bake Until Cheese is Melted . Place the baking sheet in the preheated oven and bake for 8-10 minutes, or until the cheese is melted and bubbly.
- Drizzle with Barbecue Sauce . Remove the nachos from the oven and drizzle with barbecue sauce.
- Serve Immediately . Serve the nachos immediately, garnished with additional toppings if desired.
Get support & connect with our community on Facebook!
Nutrition

If you already signed up, you should have received an email with a password to give you unlimited access to our FREE Printable Library. The password is case sensitive. Enter it below and get printing!
Password:

Pulled Pork Nachos | BBQ Pork Nachos Recipe
Ingredients
- 2 cups Pulled Pork
- 4 cups Tortilla Chips
- 1 1/2 cups Colby Jack Cheese shredded
- 1 cup BBQ Sauce
- 1/3 cup Tomatoes diced
- 1/4 cup Jalapenos sliced
- 1/4 cup Red Onion diced
- Cilantro for garnish
- Green Onion for garnish
Instructions
- Preheat the Oven . Preheat your oven to 375°F and line a baking sheet with parchment paper.
- Layer the Ingredients . Spread a layer of tortilla chips on the prepared baking sheet, followed by a generous amount of pulled pork and shredded cheese.
- Add Toppings . Sprinkle your desired toppings over the pulled pork and cheese, such as diced tomatoes, sliced jalapenos, and chopped cilantro.
- Bake Until Cheese is Melted . Place the baking sheet in the preheated oven and bake for 8-10 minutes, or until the cheese is melted and bubbly.
- Drizzle with Barbecue Sauce . Remove the nachos from the oven and drizzle with barbecue sauce.
- Serve Immediately . Serve the nachos immediately, garnished with additional toppings if desired.
Pulled Pork Nachos | BBQ Pork Nachos Recipe https://twosleevers.com/pulled-pork-nachos/

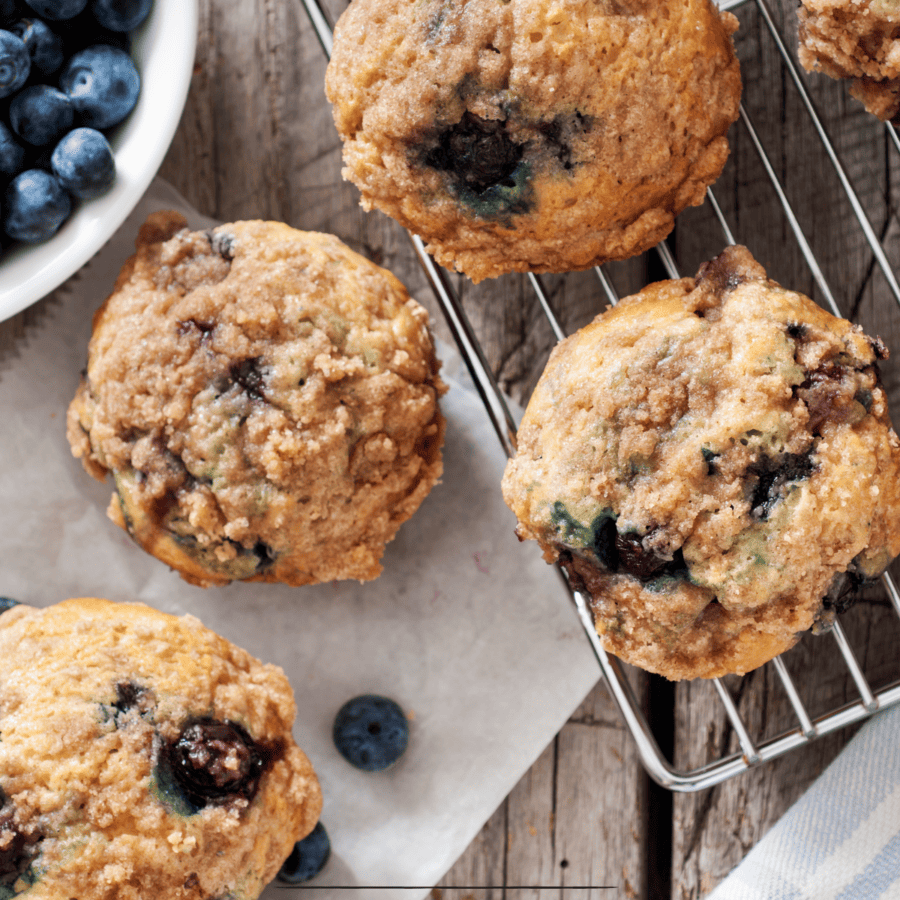
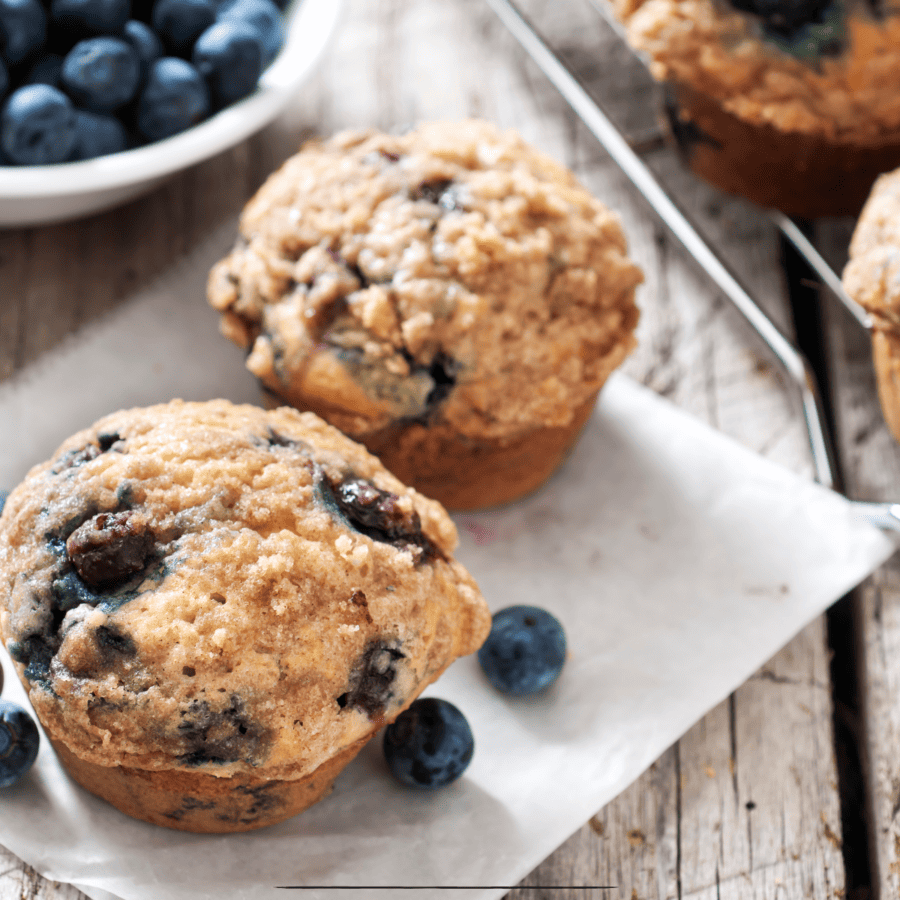
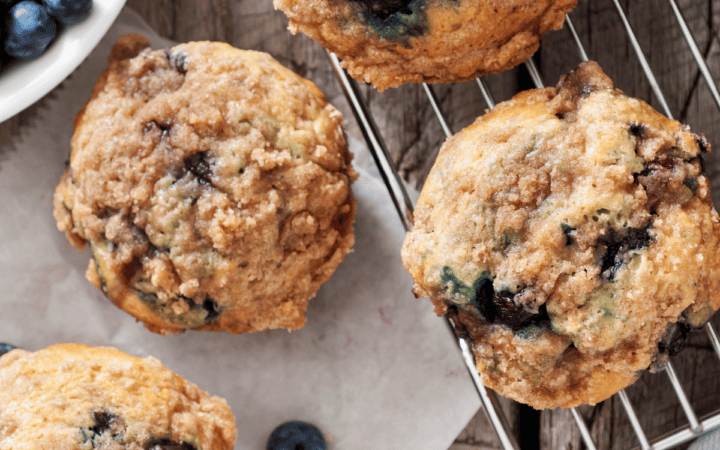
If you’re a fan of the delightful combination of tangy lemon and juicy blueberries, get ready to tantalize your taste buds with these Lemon Blueberry Muffins. Bursting with bright citrus flavor and plump berries, these muffins are the perfect treat for any time of day.
Why You’ll Love This Flavor Combo
- Fresh . The zesty lemon and sweet blueberries create a refreshing burst of flavor.
- Easy . Simple ingredients and straightforward instructions make these muffins a breeze to bake.
- Versatile . Enjoy these muffins for breakfast, as a snack, or even as a dessert.
- Homemade Goodness . Experience the joy of baking from scratch with this delicious recipe.
With the irresistible aroma wafting through your kitchen, these Lemon Blueberry Muffins are sure to become a family favorite in no time!
What Is The Secret To Moist Muffins?
The secret to moist muffins lies in a few key factors:
- Proper Mixing Technique . Overmixing the batter can lead to tough, dry muffins. To avoid this, mix the batter just until the dry ingredients are incorporated into the wet ingredients. It’s okay if there are a few lumps remaining in the batter.
- Don’t Overbake . Overbaking can quickly dry out muffins. Keep a close eye on your muffins and remove them from the oven as soon as a toothpick inserted into the center comes out with a few moist crumbs attached, rather than completely clean.
- Room Temperature Ingredients . Using room temperature ingredients, particularly eggs and dairy, can help ensure even mixing and better incorporation into the batter, resulting in moist muffins.
Why Are Bakery Muffins So Much Better?
Bakery muffins often have a reputation for being superior to homemade muffins for several reasons:
- Quality Ingredients . Bakeries typically use high-quality ingredients, often sourced from reputable suppliers. These ingredients can include premium flour, fresh eggs, real butter, and top-notch fruits or flavorings. The use of quality ingredients can significantly impact the taste and texture of the final product.
- Consistency . Bakeries often follow standardized recipes and procedures to ensure consistency across batches. This consistency results in muffins that are reliably delicious and meet customers’ expectations every time they visit the bakery.
- Freshness . Bakeries often bake their muffins in small batches throughout the day to ensure freshness. Customers can enjoy muffins that are still warm from the oven, with a soft and tender crumb that’s hard to replicate at home.
- Presentation . Bakeries pay attention to the presentation of their muffins, often packaging them attractively and displaying them in a visually appealing manner. This attention to detail enhances the overall experience of enjoying a bakery muffin.
Ingredients You’ll Need
- All-purpose Flour - Provides the base for the muffin batter, ensuring a tender crumb.
- Granulated Sugar - Adds sweetness to balance the tartness of the lemon and blueberries.
- Baking Powder - Helps the muffins rise and achieve a light, fluffy texture.
- Salt - Enhances the flavor of the other ingredients and balances the sweetness.
- Unsalted Butter - Provides richness and moisture to the muffins.
- Eggs- Bind the ingredients together and add structure to the batter.
- Lemon Zest - Infuses the muffins with bright, citrusy flavor.
- Lemon Juice- Adds tanginess and acidity to the batter.
- Milk - Creates a moist and tender crumb in the muffins.
- Fresh Blueberries - Bursting with juicy sweetness, blueberries add a pop of color and flavor to the muffins.
How To Make Lemon Blueberry Muffins
- Preheat Your Oven . Preheat the oven to 375°F and line a muffin tin with paper liners or grease the cups.
- Mix Dry Ingredients . In a large bowl, whisk together the flour, sugar, baking powder, and salt until well combined.
- Prepare Wet Ingredients . In a separate bowl, melt the butter and let it cool slightly. Then, whisk in the eggs, lemon zest, lemon juice, and milk until smooth.
- Combine Wet and Dry Ingredients . Pour the wet ingredients into the dry ingredients and gently fold them together until just combined. Be careful not to overmix.
- Add Blueberries . Gently fold the blueberries into the batter, being careful not to crush them.
- Fill Muffin Cups . Divide the batter evenly among the prepared muffin cups, filling each cup about two-thirds full.
- Bake . Bake the muffins in the preheated oven for 18-20 minutes, or until the tops are golden brown and a toothpick inserted into the center comes out clean.
- Cool and Enjoy . Allow the muffins to cool in the pan for a few minutes before transferring them to a wire rack to cool completely. Serve warm or at room temperature.
Tips And Tricks
Here are some tips and tricks to help you make delicious lemon blueberry muffins:
- Don’t Overmix the Batter . Overmixing can lead to tough muffins. Mix the batter just until the ingredients are combined. It’s okay if there are a few lumps remaining.
- Fold in Blueberries Carefully . Gently fold the blueberries into the batter to avoid crushing them. This helps distribute the berries evenly throughout the muffins.
- Prevent Soggy Bottoms . To prevent the blueberries from sinking to the bottom of the muffins and creating a soggy bottom, toss them in a tablespoon of flour before folding them into the batter. This helps suspend the berries in the batter.
Variations
Here are some delicious variations you can try for lemon blueberry muffins:
- Lemon Poppy Seed Blueberry Muffins - Add poppy seeds to the batter along with the lemon zest for extra texture and flavor. The combination of lemon, poppy seeds, and blueberries creates a delightful muffin experience.
- Streusel Topping- Sprinkle a homemade streusel topping over the muffins before baking. To make the streusel, combine flour, sugar, and cold butter until crumbly, then sprinkle it over the muffin batter before baking. The crunchy topping adds a sweet and buttery contrast to the soft muffin interior.
- Cream Cheese Swirl - Create a cream cheese swirl by mixing softened cream cheese with sugar and a splash of lemon juice. Drop spoonfuls of the cream cheese mixture onto the muffin batter and gently swirl with a toothpick before baking. The tangy cream cheese complements the lemon and blueberry flavors beautifully.
What To Enjoy With Lemon Blueberry Muffins
Here are some delightful options to enjoy alongside your freshly baked muffins:
- Hot Beverages - Serve your Lemon Blueberry Muffins with a steaming cup of coffee, tea, or hot chocolate. The warmth of the beverage complements the muffins’ tender texture and zesty flavor, creating a cozy and comforting combination.
- Yogurt - Enjoy your muffins with a dollop of creamy yogurt on the side. The tangy yogurt provides a refreshing contrast to the sweet and citrusy muffins, creating a balanced and satisfying snack or breakfast.
- Fresh Fruit - Pair your muffins with a colorful assortment of fresh fruit for a vibrant and nutritious treat. Sliced strawberries, raspberries, or sliced bananas make excellent accompaniments that add a burst of flavor and texture to each bite.
How Long Do They Last?
Lemon blueberry muffins can typically last for about 2 to 3 days when stored properly at room temperature. To maximize their freshness and shelf life, it’s essential to store them in an airtight container or resealable plastic bag to prevent them from drying out or becoming stale.
If you want to extend the shelf life of your muffins, you can store them in the refrigerator for up to 5 to 7 days. However, keep in mind that refrigeration can sometimes cause the muffins to become slightly denser in texture.
Can You Freeze Them?
For longer-term storage, you can freeze your lemon blueberry muffins for up to 2 to 3 months. Wrap each muffin individually in plastic wrap or aluminum foil and place them in a freezer-safe container or resealable plastic bag.
When you’re ready to enjoy them, simply thaw them at room temperature or reheat them in the microwave or oven until warmed through.
More Lovely Lemon Recipes
- Lemon Pepper Chicken
- Keto Lemon Mousse
- Lemon Pepper Wings
- Lemon Ricotta Cheesecake
- Keto Lemon Pound Cake
- Chocolate Chip Muffins

Lemon Blueberry Muffins | Blueberry Muffin Recipe
Ingredients
- ▢ 2 cups All Purpose Flour
- ▢ 1/2 cup Granulated Sugar
- ▢ 1 tbsp Baking Powder
- ▢ 1/2 tsp Baking Soda
- ▢ 1/4 tsp Salt
- ▢ 1 cup Blueberries
- ▢ Lemon Zest , from 2 lemons
- ▢ 1/4 cup Lemon Juice
- ▢ 1/2 cup Unsalted Butter
- ▢ 2 Eggs
- ▢ 1 cup Plain Yogurt
- ▢ 1 tsp Vanilla Extract
Instructions
- Preheat Your Oven . Preheat the oven to 375°F and line a muffin tin with paper liners or grease the cups.
- Mix Dry Ingredients . In a large bowl, whisk together the flour, sugar, baking powder, and salt until well combined.
- Prepare Wet Ingredients . In a separate bowl, melt the butter and let it cool slightly. Then, whisk in the eggs, lemon zest, lemon juice, and milk until smooth.
- Combine Wet and Dry Ingredients . Pour the wet ingredients into the dry ingredients and gently fold them together until just combined. Be careful not to overmix.
- Add Blueberries . Gently fold the blueberries into the batter, being careful not to crush them.
- Fill Muffin Cups . Divide the batter evenly among the prepared muffin cups, filling each cup about two-thirds full.
- Bake . Bake the muffins in the preheated oven for 18-20 minutes, or until the tops are golden brown and a toothpick inserted into the center comes out clean.
- Cool and Enjoy . Allow the muffins to cool in the pan for a few minutes before transferring them to a wire rack to cool completely. Serve warm or at room temperature.
