
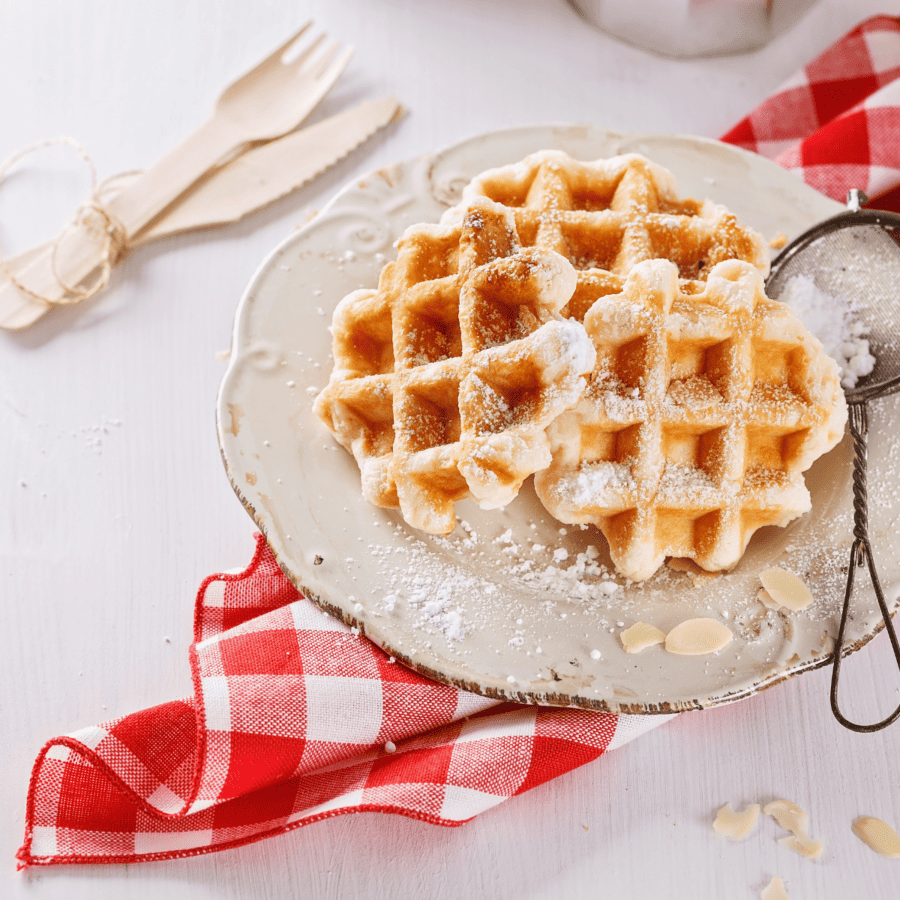
Make Protein Waffles using your trusty Dash waffle maker! It’s a quick and easy recipe that will leave you satisfied and ready to conquer the day ahead.
Why This Will Be Your New Favorite Breakfast
- Fast.
- Easy.
- High Protein.
- Delicious.
These nutritious and delicious waffles are a perfect way to kickstart your day with a dose of protein. Whether you’re a fitness enthusiast or simply looking for a wholesome breakfast option, these protein waffles will satisfy your cravings and keep you fueled throughout the morning.
Are Protein Waffles Healthy?
The overall healthiness of protein waffles depends on the ingredients used, portion sizes, and the balance of your entire meal. When prepared mindfully and paired with nutrient-rich toppings, protein waffles can be a satisfying and nutritious breakfast option.
As with any food, moderation, and personal dietary considerations are key to a healthy eating plan.
What Are Protein Waffles Made Of?
- Protein pancake/waffle mix - Use your favorite brand. I like Kodiak or Birch Benders for a nice texture and consistency.
- Protein powder - Get creative by using vanilla, chocolate, or whatever new flavor you’re currently enjoying.
- Milk - You can use traditional dairy or a plant-based variety.
- Oil - I get the crispest waffles with coconut oil or melted butter.
- Optional toppings - Take your protein waffles to the next level by using fresh berries, sliced bananas, nuts, maple syrup, Greek yogurt, or honey.
How To Make Protein Waffles
- Preheat Your Dash Waffle Maker. Plug in your Dash waffle maker and allow it to preheat according to the manufacturer’s instructions. This usually takes a few minutes and ensures evenly cooked waffles.
- Mix the Batter. In a mixing bowl, combine the protein pancake/waffle mix, protein powder, milk, and oil. Stir the ingredients together until well combined. Be careful not to overmix, as this can result in dense waffles. The batter should be smooth and pourable.
- Grease the Waffle Maker . Lightly grease the waffle maker with cooking spray, oil, or melted butter. This helps prevent sticking and ensures easy waffle removal.
- Pour the Batter and Cook. Pour the batter onto the center of the preheated waffle maker, using a ladle or measuring cup. The amount of batter will depend on the size of your Dash waffle maker. Close the lid and cook the waffle according to the manufacturer’s instructions. The cooking time may vary, but it typically takes about 3-5 minutes to achieve a golden brown waffle.
- Remove and Repeat. Once the waffle is cooked to your desired level of crispness, carefully open the waffle maker and remove the waffle using a silicone spatula or tongs. Place it on a wire rack to cool slightly. Repeat the process with the remaining batter, greasing the waffle maker as needed.
- Customize and Enjoy. Now comes the fun part—customizing your protein waffles! Top them with your favorite healthy additions like fresh berries, sliced bananas, nuts, Greek yogurt, or a drizzle of maple syrup or honey. Let your creativity and taste preferences guide you.

Why Are My Protein Waffles Dry?
Dryness in protein pancakes can occur due to a few reasons. Here are some possible causes and solutions:
- Protein Powder Absorption - Protein powder has a tendency to absorb liquid quickly, which can result in a drier batter. To counter this, you can try increasing the amount of liquid in the waffle batter. Add a bit more milk, water, or another liquid ingredient to achieve a more moist and pourable consistency.
- Overcooking - Overcooking protein waffles can lead to dryness. Protein powders can make pancakes cook faster, so be mindful of the cooking time. Cook the pancakes over medium heat and flip them when the edges start to look set and small bubbles appear on the surface. Avoid leaving them on the heat for too long.
- Mixing Technique - Overmixing the waffle batter can lead to gluten development, resulting in a denser and drier texture. Mix the ingredients until they are just combined, using a gentle hand. It’s okay if there are a few lumps remaining in the batter.
Variations
Protein waffles offer endless possibilities for customization and flavor variations. Here are some ideas to inspire your creativity:
- Chocolate Lover’s Delight - Add cocoa powder to your batter for a rich chocolate flavor. You can also mix in chocolate protein powder or chocolate chips for an extra dose of decadence. Top your waffles with fresh berries and a drizzle of melted dark chocolate for a delightful treat.
- Berry Burst - Fold fresh or frozen berries like blueberries, raspberries, or strawberries into the waffle batter before cooking. The burst of juicy fruit complements the protein waffles perfectly. Serve with a dollop of Greek yogurt and a sprinkle of granola for added texture.
- Peanut Butter Power - Incorporate a spoonful of creamy peanut butter into the batter for a protein-packed and indulgent twist. Spread more peanut butter on top of the cooked waffles and add sliced bananas or a drizzle of honey for a satisfying combination.
What To Serve With Them
When it comes to serving protein waffles, there are plenty of delicious and nutritious accompaniments that can enhance your breakfast experience. Here are some ideas:
- Fresh Fruits - Top your protein waffles with an assortment of fresh fruits like sliced strawberries, blueberries, raspberries, or banana slices. The natural sweetness and vibrant colors of the fruits complement the waffles beautifully.
- Greek Yogurt - Serve a dollop of creamy Greek yogurt alongside your protein waffles. Greek yogurt adds a tangy flavor and provides an additional protein boost. You can also mix in a touch of honey or maple syrup for added sweetness.
- Nut Butter - Spread your favorite nut butter, such as almond butter or peanut butter, on top of your waffles. The rich and creamy texture pairs perfectly with the fluffy waffles and adds a satisfying nutty flavor.
- Maple Syrup or Honey - Drizzle some pure maple syrup or honey over your protein waffles for a touch of sweetness. Opt for high-quality, natural sweeteners to enhance the flavors without excessive added sugars.
How Long Do They Last?
Want to make extra protein waffles to enjoy later in the week without whipping up the batter again?
After making protein waffles, allow them to cool completely at room temperature. Once cooled, transfer them to an airtight container or zip-top bag and store them in the refrigerator. Protein waffles can typically be kept in the refrigerator for up to 3 to 4 days.
Can You Freeze Them?
If you have a surplus of protein waffles or want to make a larger batch for future use, you can freeze them. Place the cooled waffles in a freezer-safe container or wrap them individually in plastic wrap or foil. Ensure they are well-sealed to prevent freezer burn.
Protein waffles can be frozen for up to 2 to 3 months.
To enjoy frozen protein waffles, remove them from the freezer and thaw them in the refrigerator overnight. Once thawed, you can reheat them using various methods such as toasting them in a toaster, heating them in a preheated oven, or microwaving them for a short period.
More High Protein Breakfast Ideas
- Air Fryer Eggs
- Air Fryer Bacon
- Indian Frankie
- Protein Pancakes
- Ham And Cheese Frittata


Protein Waffles | High Protein Breakfast Solution
Ingredients
- ▢ 1 cup kodiak waffle mix
- ▢ 1 cup milk
- ▢ 2 tbsp oil
- ▢ 1 scoop protein powder
Instructions
- Preheat Your Dash Waffle Maker. Plug in your Dash waffle maker and allow it to preheat according to the manufacturer’s instructions. This usually takes a few minutes and ensures evenly cooked waffles.
- Mix the Batter. In a mixing bowl, combine the protein pancake/waffle mix, protein powder, milk, and oil. Stir the ingredients together until well combined. Be careful not to overmix, as this can result in dense waffles. The batter should be smooth and pourable.
- Grease the Waffle Maker . Lightly grease the waffle maker with cooking spray, oil, or melted butter. This helps prevent sticking and ensures easy waffle removal.
- Pour the Batter and Cook. Pour the batter onto the center of the preheated waffle maker, using a ladle or measuring cup. The amount of batter will depend on the size of your Dash waffle maker. Close the lid and cook the waffle according to the manufacturer’s instructions. The cooking time may vary, but it typically takes about 3-5 minutes to achieve a golden brown waffle.
- Remove and Repeat. Once the waffle is cooked to your desired level of crispness, carefully open the waffle maker and remove the waffle using a silicone spatula or tongs. Place it on a wire rack to cool slightly. Repeat the process with the remaining batter, greasing the waffle maker as needed.
- Customize and Enjoy. Now comes the fun part—customizing your protein waffles! Top them with your favorite healthy additions like fresh berries, sliced bananas, nuts, Greek yogurt, or a drizzle of maple syrup or honey. Let your creativity and taste preferences guide you.
Get support & connect with our community on Facebook!
Nutrition
And don’t forget to check out my air fryer cookbooks! Every day easy air fryer , and Air Fryer Revolution .


If you already signed up, you should have received an email with a password to give you unlimited access to our FREE Printable Library. The password is case sensitive. Enter it below and get printing!
Password:

Protein Waffles | High Protein Breakfast Solution
Ingredients
- 1 cup kodiak waffle mix
- 1 cup milk
- 2 tbsp oil
- 1 scoop protein powder
Instructions
- Preheat Your Dash Waffle Maker. Plug in your Dash waffle maker and allow it to preheat according to the manufacturer’s instructions. This usually takes a few minutes and ensures evenly cooked waffles.
- Mix the Batter. In a mixing bowl, combine the protein pancake/waffle mix, protein powder, milk, and oil. Stir the ingredients together until well combined. Be careful not to overmix, as this can result in dense waffles. The batter should be smooth and pourable.
- Grease the Waffle Maker . Lightly grease the waffle maker with cooking spray, oil, or melted butter. This helps prevent sticking and ensures easy waffle removal.
- Pour the Batter and Cook. Pour the batter onto the center of the preheated waffle maker, using a ladle or measuring cup. The amount of batter will depend on the size of your Dash waffle maker. Close the lid and cook the waffle according to the manufacturer’s instructions. The cooking time may vary, but it typically takes about 3-5 minutes to achieve a golden brown waffle.
- Remove and Repeat. Once the waffle is cooked to your desired level of crispness, carefully open the waffle maker and remove the waffle using a silicone spatula or tongs. Place it on a wire rack to cool slightly. Repeat the process with the remaining batter, greasing the waffle maker as needed.
- Customize and Enjoy. Now comes the fun part—customizing your protein waffles! Top them with your favorite healthy additions like fresh berries, sliced bananas, nuts, Greek yogurt, or a drizzle of maple syrup or honey. Let your creativity and taste preferences guide you.
Protein Waffles | High Protein Breakfast Solution https://twosleevers.com/protein-waffles/

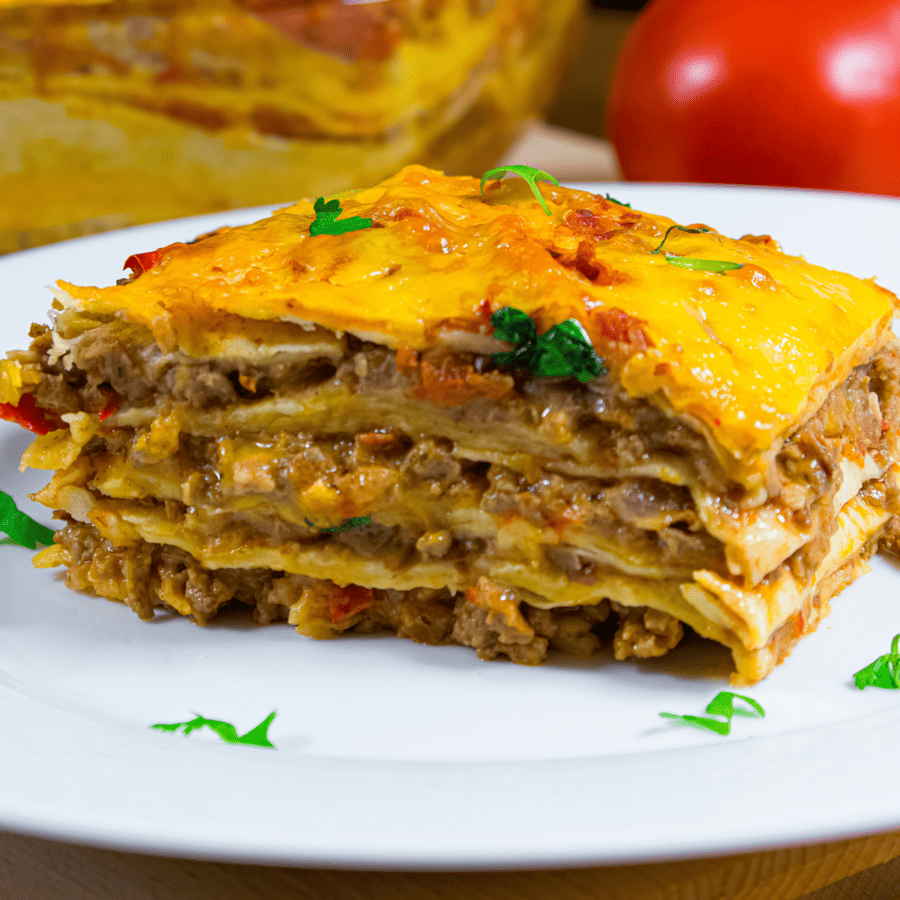
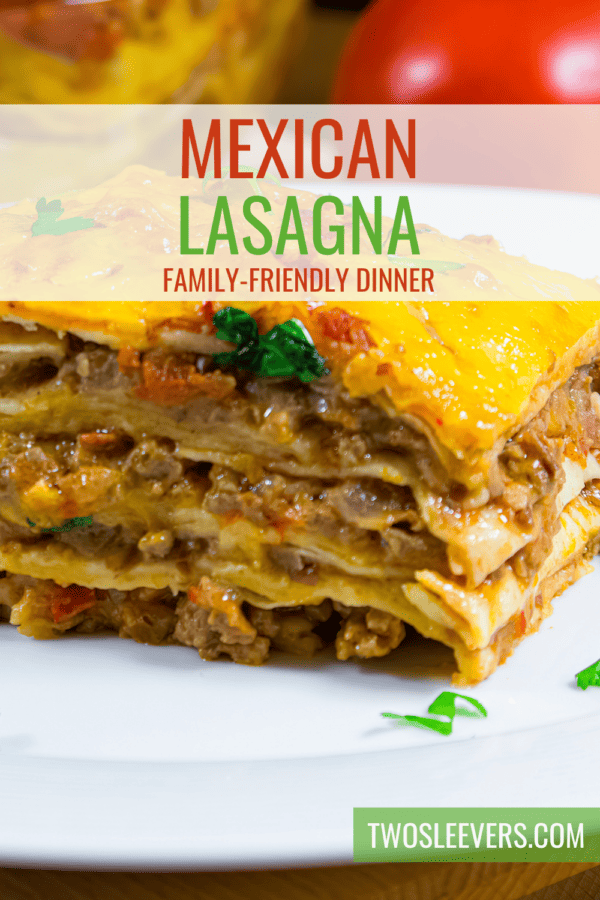
If you’re a fan of Mexican food and Italian classics, Mexican Lasagna is the perfect dish for you. This Southwest Lasagna recipe combines the best of both worlds, merging the richness of lasagna with the zest of Mexican spices.
Why Your Family Will Love This
- Easy.
- Delicious.
- Versatile.
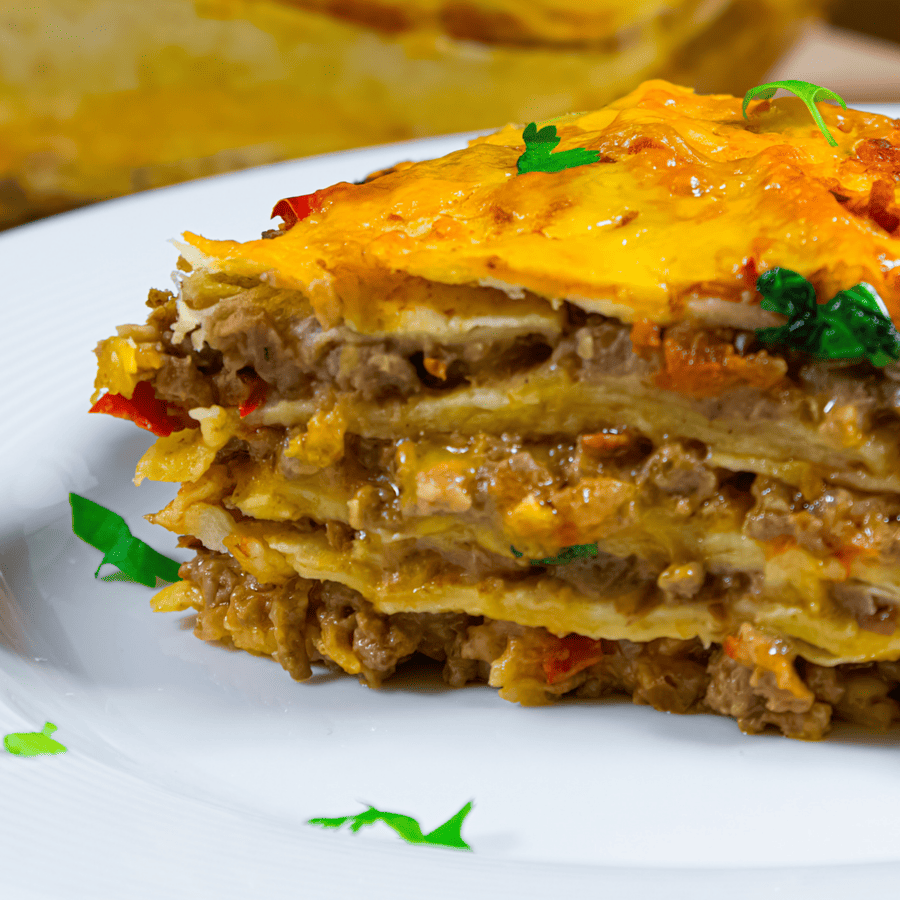
Mexican Lasagna with Tortilla Shells is a fantastic twist on a traditional recipe, infusing the vibrant flavors of Mexican cuisine with the comforting layers of a classic lasagna. The combination of seasoned meats, hearty beans, tangy tomatoes, and gooey melted cheese sandwiched between layers of tortilla shells creates an irresistible meal.
Where Did Mexican Lasagna Originate?
Mexican lasagna is not a traditional Mexican dish and does not have a specific origin in Mexican culinary history. It is considered a fusion dish that combines elements of Mexican and Italian cuisines.
The exact origin of Mexican lasagna is difficult to pinpoint, as it likely emerged from the creativity of home cooks and chefs who sought to combine the flavors and ingredients of both cuisines.
Ingredients You’ll Need
- Ground Beef
- Onion
- Garlic
- Bell Pepper
- Black Beans
- Corn
- Diced Tomatoes
- Tomato Sauce
- Chili Powder
- Cumin
- Oregano
- Salt and Pepper
- Flour Tortillas
- Mexican Cheese Blend
- Cilantro
How To Make Mexican Lasagna
- Preheat your oven. Preheat your oven to 375F.
- Cook the meat and veggies. In a large skillet or frying pan, cook the ground beef over medium heat until browned. Add the diced onion, minced garlic, and diced bell pepper. Cook until the vegetables are tender and the meat is fully cooked.
- Season the cooked meat and veggies. Drain any excess grease from the skillet. Add the black beans, corn, diced tomatoes, and tomato sauce to the skillet, stirring well to combine. Season the mixture with chili powder, cumin, dried oregano, salt, and pepper. Allow the flavors to meld together over medium heat for 5-7 minutes, stirring occasionally.
- Begin Layering. Grease a baking dish and layer the bottom with a thin amount of the meat and vegetable mixture. Place a tortilla shell on top to cover the mixture.
- Add some cheesy goodness. Spoon a generous portion of the meat and vegetable mixture onto the tortilla shell, spreading it evenly. Sprinkle a handful of shredded cheese on top.
- Finish layering. Place another tortilla shell on top and repeat the layering process until all the ingredients are used, finishing with a layer of meat and vegetables and a generous amount of shredded cheese on top.
- Cover and bake. Cover the baking dish with foil and bake in the preheated oven for 20-25 minutes. Then, remove the foil and continue baking for an additional 5-10 minutes, or until the cheese is melted and bubbly.
- Let the lasagna rest. Once the Mexican Lasagna with Tortilla Shells is cooked to perfection, remove it from the oven and let it cool for a few minutes. Garnish with fresh cilantro leaves for a vibrant touch.
- Serve and enjoy! Slice the lasagna into portions and serve it warm.
Tips And Tricks
Here are some tips and tricks to help you make a delicious Mexican lasagna:
- Choose the Right Tortillas. Opt for large flour tortillas that are sturdy enough to hold the layers of filling without becoming too soggy. Corn tortillas can also be used, but they may require slightly different handling.
- Precook the Tortillas . To prevent the tortillas from becoming too soft during baking, you can choose to lightly fry or bake them for a few minutes before assembling the lasagna. This will give them a crispy texture and help maintain their structure.
- Don’t Overload the Layers . While it’s tempting to pile on the filling and cheese, try to maintain a balance of flavors and textures. Overfilling the layers can make the lasagna difficult to slice and serve neatly.
- Let It Rest . After removing the lasagna from the oven, allow it to rest for a few minutes before slicing. This will help the layers set and make it easier to serve without losing its shape.
Variations
- Vegetarian or Vegan - Skip the meat and opt for a vegetarian or vegan version of Mexican lasagna. Replace the ground meat with plant-based alternatives like crumbled tofu or tempeh. You can also add additional vegetables such as zucchini, spinach, or mushrooms for added flavor and texture.
- Gluten-Free - If you’re following a gluten-free diet, use gluten-free tortillas or substitute them with thinly sliced zucchini or eggplant. Ensure that all the ingredients, such as sauces and seasonings, are also gluten-free.
- Green Chile - Add a spicy kick by incorporating roasted green chiles into the filling. You can use canned or fresh roasted green chiles, depending on availability. The mild heat and smoky flavor of the chiles will add depth to the dish.
Feel free to experiment and combine different ingredients and flavors to create your own signature variation of Mexican lasagna. Let your creativity guide you, and don’t be afraid to try new ingredients and techniques.
What Do You Serve With Mexican Lasagna?
When it comes to serving Mexican lasagna, there are several complementary dishes and accompaniments that can enhance your meal. Here are a few suggestions:
- Mexican Rice - Serve a side of flavorful Mexican rice to complement the lasagna. The combination of aromatic rice, spices, and vegetables pairs well with the bold flavors of the lasagna.
- Refried Beans - Refried beans make an excellent side dish for Mexican lasagna. Their creamy texture and savory taste add depth and richness to the meal. You can either make them from scratch or use canned refried beans for convenience.
- Guacamole and Salsa - Offer a platter of fresh guacamole and salsa for a refreshing contrast. The creamy guacamole, made from ripe avocados, and the tangy salsa will provide a cool and vibrant element to balance the richness of the lasagna.
- Tortilla Chips - Serve a bowl of tortilla chips alongside the Mexican lasagna. They can be used for scooping up the lasagna or enjoyed on their own with salsa or guacamole.
The goal is to create a well-rounded and satisfying meal that celebrates the vibrant and bold flavors of Mexican cuisine.
How Long Does It Last?
Once the Mexican lasagna has cooled down, cover it tightly with plastic wrap or transfer it to an airtight container. Properly refrigerated, Mexican lasagna can typically last for up to 3-4 days.
Can You Freeze It?
If you have a larger batch of Mexican lasagna or want to save some for later, you can freeze it. Wrap the lasagna tightly with plastic wrap and then foil to protect it from freezer burn. Frozen Mexican lasagna can retain its quality for up to 2-3 months.
More Mexican-Inspired Dishes
- Slow Cooker Chipotle Chicken
- Salsa Chicken
- Shrimp Fajitas
- Carne Guisada
- Instant Pot Tamale Pie

Mexican Lasagna | Southwest Lasagna Recipe
Ingredients
- ▢ 1 pound Ground Beef
- ▢ 1/2 cup Onion
- ▢ 1 tbsp Minced Garlic
- ▢ 1/2 cup Bell pepper
- ▢ 1 cup Black Beans
- ▢ 1/2 cup Corn
- ▢ 1/2 cup Diced Tomatoes
- ▢ 1/2 tsp Chili Powder
- ▢ 1/2 tsp Cumin
- ▢ 1/2 tsp Oregano
- ▢ 1 tsp Salt
- ▢ 1/2 tsp Black Pepper
- ▢ 4 low carb tortillas
- ▢ 2 cups Mexican Blend Shredded Cheese
- ▢ Cilantro , to garnish
Instructions
- Preheat your oven. Preheat your oven to 375F.
- Cook the meat and veggies. In a large skillet or frying pan, cook the ground beef over medium heat until browned. Add the diced onion, minced garlic, and diced bell pepper. Cook until the vegetables are tender and the meat is fully cooked.
- Season the cooked meat and veggies. Drain any excess grease from the skillet. Add the black beans, corn, diced tomatoes, and tomato sauce to the skillet, stirring well to combine. Season the mixture with chili powder, cumin, dried oregano, salt, and pepper. Allow the flavors to meld together over medium heat for 5-7 minutes, stirring occasionally.
- Begin Layering. Grease a baking dish and layer the bottom with a thin amount of the meat and vegetable mixture. Place a tortilla shell on top to cover the mixture.
- Add some cheesy goodness. Spoon a generous portion of the meat and vegetable mixture onto the tortilla shell, spreading it evenly. Sprinkle a handful of shredded cheese on top.
- Finish layering. Place another tortilla shell on top and repeat the layering process until all the ingredients are used, finishing with a layer of meat and vegetables and a generous amount of shredded cheese on top.
- Cover and bake. Cover the baking dish with foil and bake in the preheated oven for 20-25 minutes. Then, remove the foil and continue baking for an additional 5-10 minutes, or until the cheese is melted and bubbly.
- Let the lasagna rest. Once the Mexican Lasagna with Tortilla Shells is cooked to perfection, remove it from the oven and let it cool for a few minutes. Garnish with fresh cilantro leaves for a vibrant touch.
- Serve and enjoy! Slice the lasagna into portions and serve it warm.
