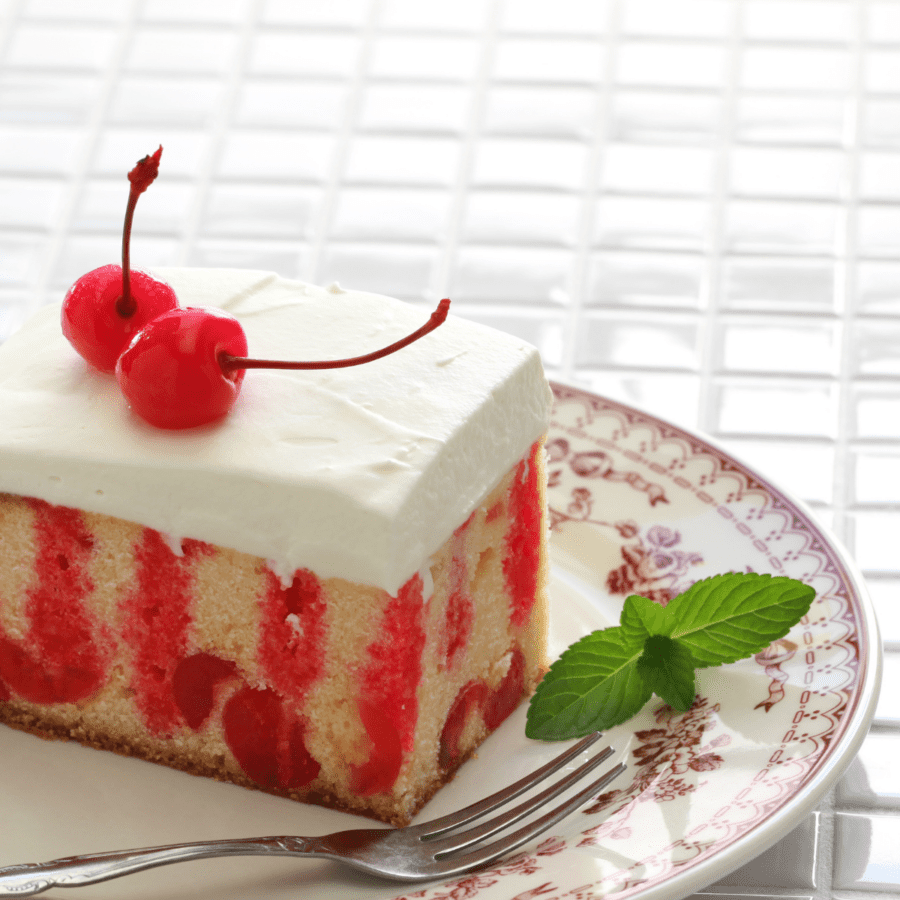
Cherry Poke Cake is a simple and delicious way to satisfy your sweet tooth. With just a few ingredients and a simple to follow recipe, you’ll have a cake you’ll want to sneak bites of again and again.

Why You’ll Love This Cake Recipe
- Easy. Bake the cake, poke some holes, pour the syrup, frost, and enjoy. Just a few simple steps for a dessert your family or guests will adore.
- Vegetarian. Unlike many other poke cakes, this is a poke cake without jello. So, there’s no need to be concerned about using gelatin.
- Delicious. With rich cherry flavors in every bite, you’ll fall in love with this decadent cake recipe.
- Low Carb. While this cake is far from keto-approved because of a few ingredients that include simple sugars, it is low in carbs compared to many cakes and can be enjoyed in moderation if you’re primarily eating low carb for weight reduction.
Why Is It Called Poke Cake?
The name given to this cake comes from the tell-tale holes that you poke in the cake to create wells of flavor throughout.
While you won’t be able to see the holes in the cake once it is frosted, you will be able to tell that it is indeed a poke cake when you cut your first piece.
What Do You Use To Poke Holes In Cake?
When creating the holes in the cake to pour the cherry syrup into, you have several options. There is no “correct” way to go about this. You can use something large for bigger deposits of cherry flavor, or you can use something small if you want to ensure your flavor is distributed equally throughout the cake.
Here are a few different things you can use to poke the holes:
- Toothpick
- Bamboo skewer
- Chopstick
- Straw
- Handle end of a fork or spoon
Ingredients You’ll Need
The list of ingredients below may seem rather lengthy, but this will be everything you will need for not only the poke cake but the cherry “filling” and the cream cheese frosting as well.
- Almond Flour - Use almond flour instead of all-purpose flour in this recipe to keep it low carb and gluten-free.
- Coconut Flour - Adds sweetness while maintaining a low carb count.
- Truvia - Skip the sugar and use Truvia to sweeten your cake without the guilt.
- Baking Soda -Keeps the cake light and fluffy.
- Salt - To help balance the sweetness of the other ingredients.
- Butter - Melted butter gives additional moisture and richness to the low carb cake mix.
- Eggs - To bind the cake and prevent it from being crumbly.
- Cherry Skinny Syrup - Gives the illusion of biting into a juicy maraschino cherry without overloading with sugar.
- Maraschino Cherries - Yes, I know these are far from low carb. Use them sparingly–or omit them completely to keep this dish light.
- Heavy Whipping Cream - Creates a creamy frosting.
- Truvia Confectioner’s Sugar - Provides sweetness to the keto frosting without adding unnecessary carbs.
- Almond Extract - Almond pairs extremely well with the flavor of the cherry syrup and maraschino cherries in the cake mix.
- Cream Cheese - Thickens the frosting and adds a finishing layer of tanginess to the cake.
How To Make A Poke Cake
To Make The Cake
- In a large bowl, mix together the almond flour, Truvia, baking soda, and salt.
- In a separate bowl, whisk together melted butter, eggs, and vanilla extract.
- Slowly combine the wet ingredients with the dry ingredients.
- Once the two bowls of ingredients are combined, chop and gently fold in the maraschino cherries.
- Pour the cake mix into a well-greased cake pan.
- Bake the cake at 350F for 35 minutes.
- Remove the cake from the oven and allow it to rest for at least 30 minutes.
- Once the cake has cooled, use a chopstick to poke small holes evenly (approximately 1 inch apart).
- Take the cherry flavored skinny syrup and pour it into the holes you have created in the cake.
- Once the cake is baked and the cherry syrup has been poured into the holes, use the keto frosting recipe below to cover the top of the cake.
- Cut into 12 servings, garnish, and enjoy!
To Make The Frosting
- In a large bowl, combine the softened cream cheese, almond extract, Truvia Confectioner’s sugar, and heavy whipping cream.
- Mix until well combined and slightly fluffy.
Why Is My Poke Cake Soggy?
There can be two different things that can cause your poke cake to become soggy. Check out the reasons why before you get started to avoid a cake that is anything less than perfect:
- Too much filling. If you’re one of those people that believes that more is always better, try to avoid that mindset when making this cake. Sure, the skinny cherry syrup tastes amazing, but adding too much to your cake can cause it to become oversaturated and soggy. Trust me when I say that a little bit goes a long way.
- Not enough rest time. Give your baked cake plenty of time to cool before poking holes and pouring the cherry syrup over the top. While the cake is cooling the residual heat inside will continue to cook the cake and create a firm structure to create the wells of flavor you will add later on. Adding the syrup to the poke cake before it is cooled may result in the cake not setting up properly and leaving the middle muddled and soggy.
Variations
- Switch up the syrup. Use a variety of cocktail syrups to switch up this flavor-packed poke cake. Try pina colada, salted caramel, or strawberry sugar-free syrup instead of cherry.
- Mix up the cake. While vanilla makes a delightful pairing with the cherry syrup, you might also enjoy this poke cake made with chocolate or coconut cake mix.
- Add more fruit. The amount of fruit in this cake is minimal to keep the carbs low, but if you’re not watching your carbs or are cooking for a crowd that isn’t eating keto, you can double the amount of fruit without making this cake too dense or soggy.
How Long Does It Last?
While it is possible to make a poke cake several days in advance for an event, you will get optimal results preparing it the evening before. This will give the cake plenty of time to rest and the ingredients to incorporate well.
For the best bite, I would suggest storing any leftovers in the refrigerator and eating them within a day or two of preparing this cake. The longer this poke cake without jello sits, the soggier the inside of the cake will become.
More Delicious Desserts
If you have a sweet tooth but are tired of the same old cookie or cupcake recipes, give some of my other tasty dessert recipes a try!
- No Bake Peanut Butter Bars
- French Silk Pie
- Mango Cheesecake
- Cherry Fluff

Poke Cake | Cherry Poke Cake Recipe
Ingredients
For The Cake
- ▢ 1 1/4 cup Superfine Almond Flour
- ▢ 3/4 cup Coconut Flour
- ▢ 2 tsp Baking Powder
- ▢ 1/2 tsp Kosher Salt
- ▢ 1 cup Truvia
- ▢ 1/4 cup Unsalted Butter
- ▢ 4 Eggs
- ▢ 1/2 cup maraschino cherries
- ▢ 1 cup cherry skinny syrup
- ▢ 1 tsp Almond Extract
- ▢ 1/2 cup Unsweetened Almond Milk
For The Frosting
- ▢ 8 ounces Cream Cheese
- ▢ 1 tsp Almond Extract
- ▢ 2 tbsp Powdered Swerve
Instructions
For The Cake
- In a large bowl, mix together the almond flour, Truvia, baking soda, and salt. In a separate bowl, whisk together melted butter, eggs, and vanilla extract.
- Slowly combine the wet ingredients with the dry ingredients. Once the two bowls of ingredients are combined, chop and gently fold in the maraschino cherries.
- Pour the cake mix into a well-greased cake pan.Bake the cake at 350F for 35 minutes.
- Remove the cake from the oven and allow it to rest for at least 30 minutes. Once the cake has cooled, use a chopstick to poke small holes evenly (approximately 1 inch apart).
- Take the cherry flavored skinny syrup and pour it into the holes you have created in the cake.
- Once the cake is baked and the cherry syrup has been poured into the holes, use the keto frosting recipe below to cover the top of the cake.
- Cut into 12 servings, garnish, and enjoy!
For The Frosting
- In a large bowl, combine the softened cream cheese, almond extract, Truvia Confectioner’s sugar, and heavy whipping cream.
- Mix until well combined and slightly fluffy.
Get support & connect with our community on Facebook!
Nutrition
Don’t forget to check out my other Ketocookbooks.
Keto Instant Pot, Keto Fat Bombs, Sweets, & Treats , and Easy keto in 30 minutes.


If you already signed up, you should have received an email with a password to give you unlimited access to our FREE Printable Library. The password is case sensitive. Enter it below and get printing!
Password:

Poke Cake | Cherry Poke Cake Recipe
Ingredients
For The Cake
- 1 1/4 cup Superfine Almond Flour
- 3/4 cup Coconut Flour
- 2 tsp Baking Powder
- 1/2 tsp Kosher Salt
- 1 cup Truvia
- 1/4 cup Unsalted Butter
- 4 Eggs
- 1/2 cup maraschino cherries
- 1 cup cherry skinny syrup
- 1 tsp Almond Extract
- 1/2 cup Unsweetened Almond Milk
For The Frosting
- 8 ounces Cream Cheese
- 1 tsp Almond Extract
- 2 tbsp Powdered Swerve
Instructions
For The Cake
- In a large bowl, mix together the almond flour, Truvia, baking soda, and salt. In a separate bowl, whisk together melted butter, eggs, and vanilla extract.
- Slowly combine the wet ingredients with the dry ingredients. Once the two bowls of ingredients are combined, chop and gently fold in the maraschino cherries.
- Pour the cake mix into a well-greased cake pan.Bake the cake at 350F for 35 minutes.
- Remove the cake from the oven and allow it to rest for at least 30 minutes. Once the cake has cooled, use a chopstick to poke small holes evenly (approximately 1 inch apart).
- Take the cherry flavored skinny syrup and pour it into the holes you have created in the cake.
- Once the cake is baked and the cherry syrup has been poured into the holes, use the keto frosting recipe below to cover the top of the cake.
- Cut into 12 servings, garnish, and enjoy!
For The Frosting
- In a large bowl, combine the softened cream cheese, almond extract, Truvia Confectioner’s sugar, and heavy whipping cream.
- Mix until well combined and slightly fluffy.
Poke Cake | Cherry Poke Cake Recipe https://twosleevers.com/poke-cake/
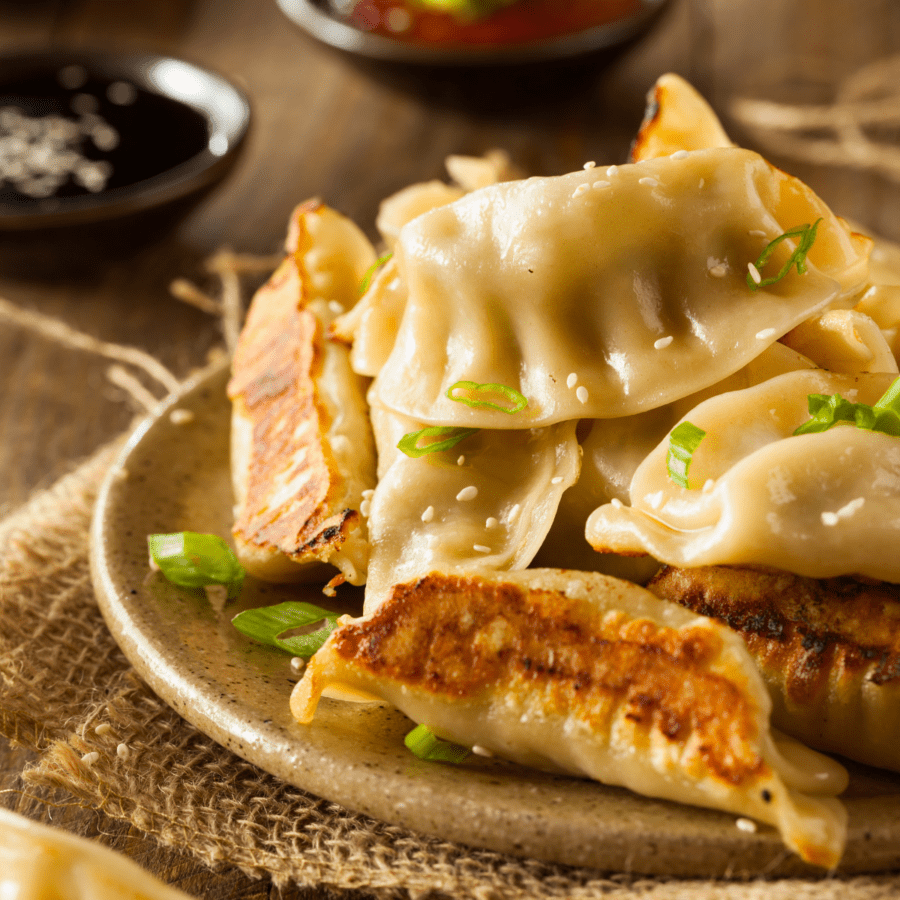
Potstickers are a deliciously satisfying tender and flavorful bite. Enjoy them as a quick side dish, or appetizer that is sure to please any crowd.
Why You’ll Want To Make These At Home
- Fast. A quick appetizer that is ready to enjoy in under 30 minutes .
- Easy. Mix the filling, fold the dumplings, toss in a pan, and cook on the stovetop until tender and caramelized.
- Customizable. Fill these tasty Asian bites with your favorite flavor combinations for a side dish that pairs perfectly with your main course .
- Delicious. Absolutely packed with deliciously sweet, salty, earthy, and umami flavors.
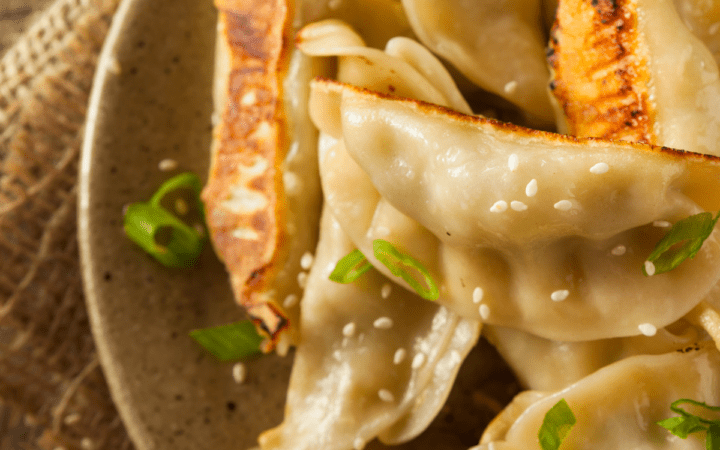
What Are Potstickers?
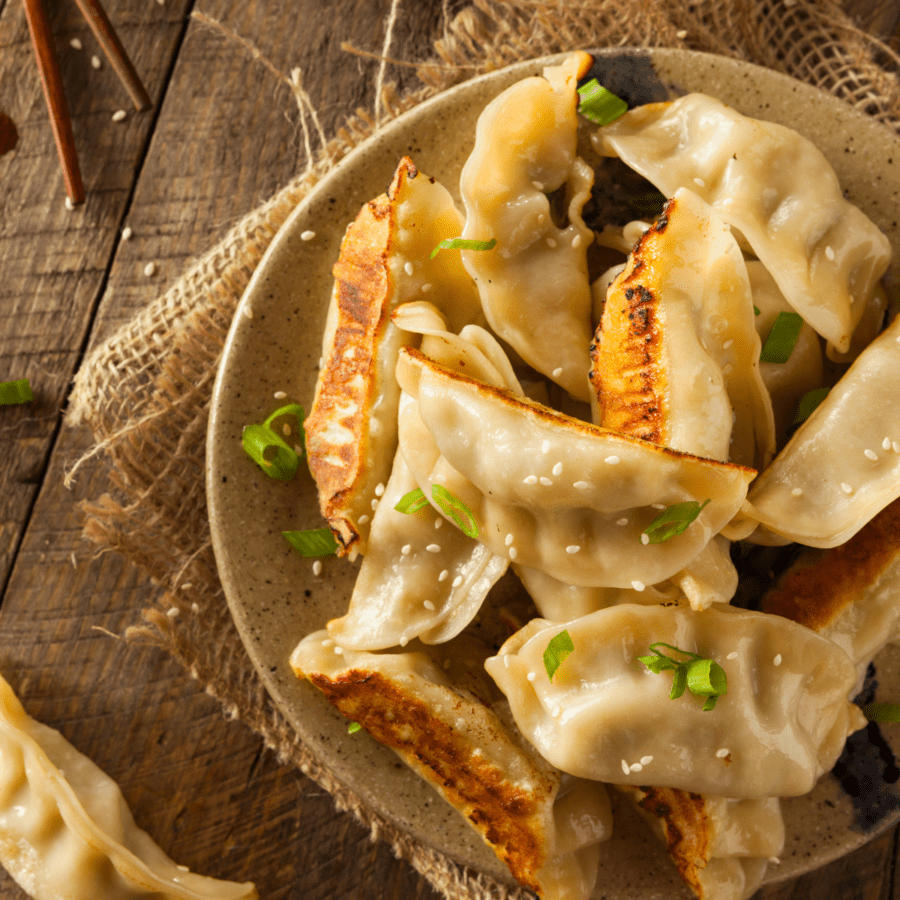
Potstickers are lovely dumpling that is filled with a combination of deliciously flavored ingredients. They are pan-fried to create a caramelized flavor and slightly crisp texture and then steamed to finish for a tender bite.
Why Are They Called Potstickers?
Potstickers are called pot stickers because–well–they are known to stick to the pan when you cook them.
You pan-fry them until the exterior begins to caramelize and stick to the pan and continue cooking them in liquid to gently steam and cook the wrappers and filling.
Are They Chinese or Japanese?
Potstickers are actually believed to have originated in China around the time of the Song Dynasty. A popular Japanese equivalent of a potsticker would be gyoza, which is actually another dish that was created in China and then modified over time.
What Is The Difference Between Potstickers And Dumplings?
Potstickers and dumplings are very similar bites. They’re both encased in dough and filled with delicious ingredients.
Technically, all potstickers are dumplings. The only thing that makes a potsticker different from a dumpling is the way it is cooked. Searing the wrapper before it is steamed is what differentiates the two.
Ingredients You’ll Need
The list of ingredients for these Potstickers may seem lengthy, but many of them are pantry staples if you’re a sauce connoisseur. Grab these ingredients to get started:
- Wonton wrappers
- Ground Pork
- Cabbage
- Rice Vinegar
- Soy Sauce
- Egg
- Garlic
- Green Onion
- Sesame Oil
- Salt
- Pepper
How To Make Potstickers
Don’t be intimidated by the long list of steps to make these juicy little bites. The list of steps may be long, but they’re all incredibly simple and the end result is well worth the effort!
- In a large bowl, stir together the ground pork, shredded cabbage, rice vinegar, soy sauce, garlic, chopped green onion, sesame oil, salt, and pepper until well combined.
- In a separate bowl, scramble an egg.
- Place the wonton wrapper on a dry, flat surface.
- Add one large spoonful of filling to the middle of the wonton wrapper.
- Lightly brush the outer edge of the wonton wrapper with the beaten egg mixture.
- Pinch together the edges of the wrapper to close the potsticker.
- Heat some oil in a nonstick skillet. Once it is hot, place the potstickers in, ensuring they do not touch.
- Cook until the exterior of the potsticker is slightly browned on both sides.
- Once they have a browned exterior, add a cup of water to the pan and cover it.
- Allow the potstickers to steam until they are tender and fully cooked.
- Remove them from the pan and serve with your favorite sauce or main course.
Chicken Pot Stickers
You’ll be happy to know that chicken Potstickers are made with the same simple ingredients as the pork potstickers above. The only difference is that you will use ground chicken when creating the filling instead of ground pork.
As always, you will want to ensure the internal temperature of the chicken has reached at least 165F before enjoying one of these juicy bites for food safety reasons.
Vegetable Pot Stickers
For a vegetarian take on this potsticker recipe, omit the ground pork and add extra chopped carrots and mushrooms to the cabbage and green onions to make the filling.

What To Serve With Them
Potstickers are often served as appetizers or side dishes for your favorite Asian main course.
When served as an appetizer, you will most often enjoy them with Potsticker Sauce or Thai Peanut Dressing .
If you’re enjoying these pot stickers as a side dish, here are a few of my favorite main courses to serve them alongside:
- Hot and Sour Soup
- Miso Soup
- Shrimp Fried Rice
- Spicy Noodles
How Long Do They Last?
The moisture inside of these Potstickers can cause the texture to change significantly if they are stored for too long. The potsticker wrappers can become chewy or gluey if they are exposed to excess moisture for too long of a period of time.
That being said, you CAN still store leftovers to enjoy later. For the best bite, I would suggest keeping the potstickers in the refrigerator in an airtight container for up to 2 days after you prepare them.
More Amazing Asian Recipes
- Keto Sushi
- Thai Peanut Chicken
- Sesame Ginger Broccoli
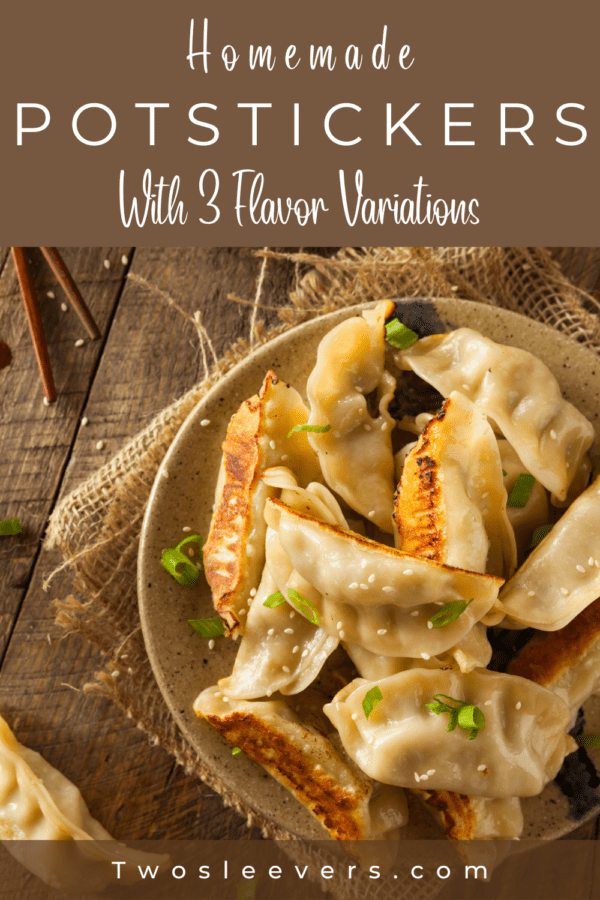
Potstickers Recipe | How To Make Pot Stickers + 3 Variations
Ingredients
- ▢ 1/2 pound ground pork
- ▢ 1/2 cup shredded cabbage
- ▢ 1 tbsp Minced Garlic
- ▢ 1 tbsp Rice Vinegar
- ▢ 1 tbsp Soy Sauce
- ▢ 1/8 cup Green Onions
- ▢ 1 tbsp Sesame Oil
- ▢ 1 tsp Kosher Salt
- ▢ 1/2 tsp Ground Black Pepper
- ▢ 1 Eggs
- ▢ 20 wonton wrappers
Instructions
- In a large bowl, stir together the ground pork, shredded cabbage, rice vinegar, soy sauce, garlic, chopped green onion, sesame oil, salt, and pepper until well combined.
- In a separate bowl, scramble an egg.
- Place the wonton wrapper on a dry, flat surface.
- Add one large spoonful of filling to the middle of the wonton wrapper. Lightly brush the outer edge of the wonton wrapper with the beaten egg mixture.
- Pinch together the edges of the wrapper to close the potsticker.
- Heat some oil in a nonstick skillet. Once it is hot, place the potstickers in, ensuring they do not touch.
- Cook until the exterior of the potsticker is slightly browned on both sides. About 3 minutes on each side.
- Once they have a browned exterior, add a cup of water to the pan and cover it.
- Allow the potstickers to steam for 4 minutes until they are tender and fully cooked.
- Remove them from the pan and serve with your favorite sauce or main course.
Get support & connect with our community on Facebook!
Nutrition
Don’t forget to check out my other Ketocookbooks.
Keto Instant Pot, Keto Fat Bombs, Sweets, & Treats , and Easy keto in 30 minutes.
