
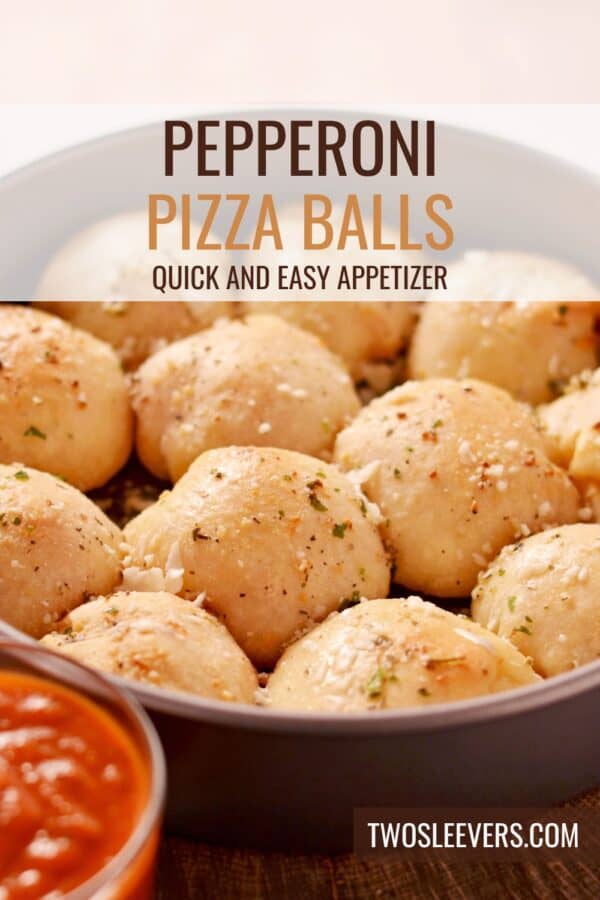
If you love the delicious flavors of pizza packed into a bite-sized snack, you’re going to adore these Pizza Balls! They’re crispy on the outside, gooey on the inside, and filled with your favorite pizza flavors—perfect for game days, parties, or a quick snack fix. With minimal ingredients and maximum flavor, these pizza bites are sure to be a hit with both kids and adults alike.
Why You’ll Love This Perfect Pizza Dish
- Quick & Easy. Ready in under 30 minutes, making them the perfect snack or appetizer.
- Customizable. Fill them with your favorite pizza toppings to suit your taste.
- Bite-Sized Fun. Perfect for parties, gatherings, or as an after-school snack.
- Crowd-Pleaser. Packed with gooey cheese and savory flavors that everyone will love.
Whether you’re craving a quick bite or need a fun appetizer for your next event, these pizza balls are a guaranteed winner!
What Are Pizza Balls?
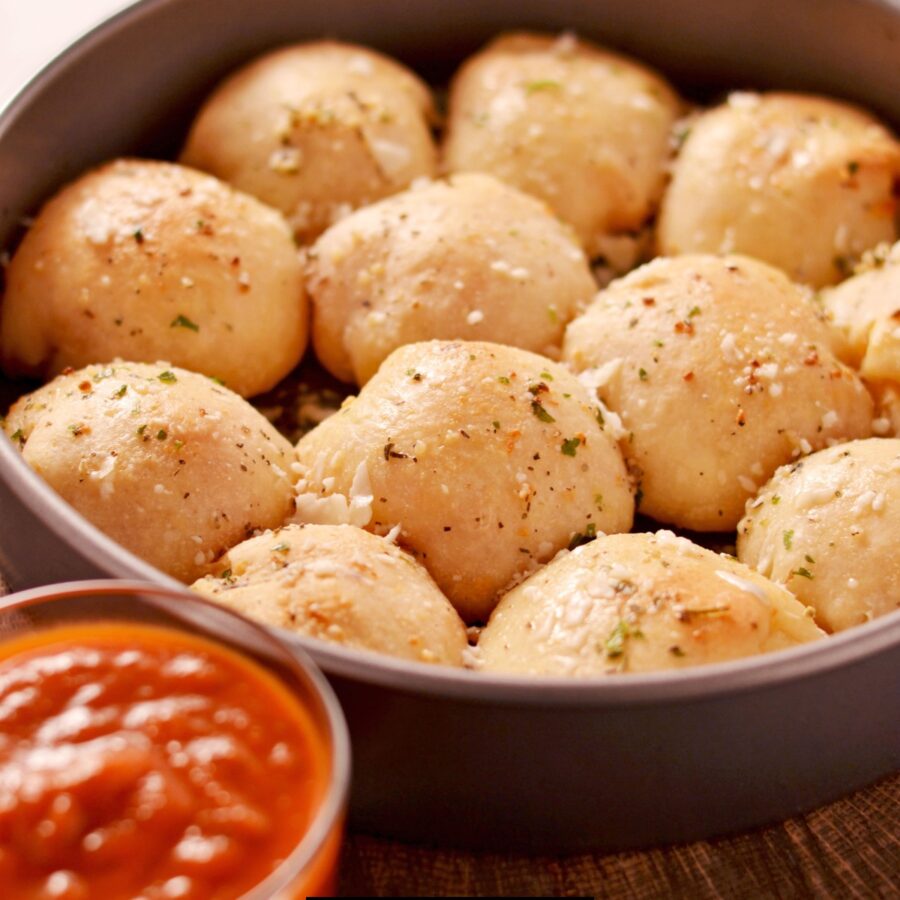
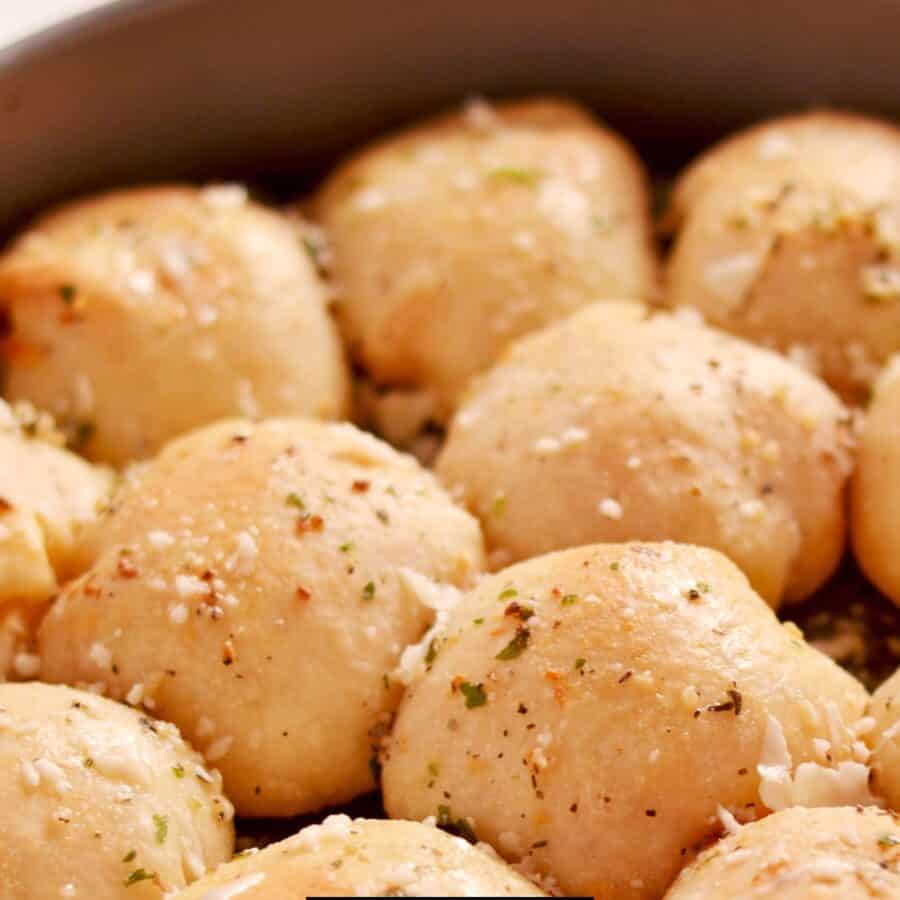
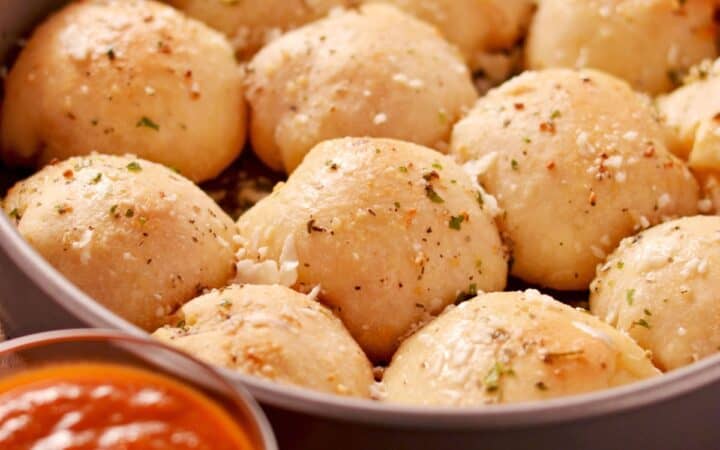
Pizza balls are bite-sized, stuffed dough treats that capture all the delicious flavors of traditional pizza in a convenient, handheld form. They consist of pizza dough wrapped around classic pizza fillings such as mozzarella cheese, pepperoni, and marinara sauce, then baked to golden perfection.
These savory bites are brushed with garlic butter and topped with herbs like parsley or Italian seasoning for extra flavor.
What Do They Taste Like?
Pizza Balls combine all the best elements of pizza—cheesy goodness, savory fillings, and a crispy crust—in one delicious bite.
The golden brown exterior provides the perfect crunch, while the melty cheese and seasoned fillings make each bite irresistible.
Ingredients You’ll Need
- Pizza Dough - Whether store-bought or homemade, the dough acts as the foundation, wrapping around the flavorful fillings to create a crispy, golden shell.
- Olive Oil - Brushed on the exterior, olive oil helps achieve a golden-brown crust, adding richness and preventing the dough from becoming too dry.
- Mozzarella Cheese - This key ingredient melts beautifully, providing that irresistible gooey, stretchy texture that makes pizza so satisfying.
- Pepperoni (Optional) - If included, pepperoni adds a savory, meaty bite with a hint of spice, giving the pizza balls a classic pizzeria taste.
- Marinara Sauce - A tangy, tomato-based sauce that infuses each bite with bold, rich flavors and complements the cheese and toppings perfectly.
- Italian Seasoning - A fragrant blend of herbs such as oregano, basil, and thyme, which enhances the pizza flavor and gives the filling an authentic Italian touch.
- Grated Parmesan - Adds a nutty, salty depth of flavor to the filling, elevating the cheesiness and enhancing the overall taste profile.
- Garlic Butter - Brushed over the baked pizza balls, garlic butter infuses them with a rich, buttery aroma and irresistible garlic flavor.
- Fresh Parsley - A final garnish that adds a vibrant pop of color and a refreshing, herby finish, balancing out the richness of the cheese and butter.
Together, these ingredients create Pizza Balls that are crispy on the outside, cheesy and flavorful on the inside, and perfect for snacking or entertaining.
How To Make Pizza Balls
- Prepare the Dough. Preheat your oven to 375°F. Roll out your pizza dough on a floured surface and cut it into small squares, about 2x2 inches.
- Add the Filling . Place a small spoonful of marinara sauce, shredded mozzarella cheese, and a slice of pepperoni in the center of each dough square. Sprinkle with Italian seasoning.
- Shape the Balls. Gather the edges of the dough and pinch them together to seal, forming a ball. Make sure the seam is tightly closed to prevent any filling from leaking out.
- Bake to Perfection. Place the pizza balls seam-side down on a greased baking sheet. Brush the tops with olive oil and bake for 15-20 minutes or until golden brown and crispy.
- Add the Finishing Touch. Once out of the oven, brush the pizza balls with melted garlic butter and sprinkle with grated Parmesan and fresh parsley.
- Serve and Enjoy. Pair with your favorite dipping sauces like marinara, ranch, or garlic butter for the ultimate snack experience.
Tips And Tricks
Making Pizza Balls is super simple, but these tips will help you achieve the best results every time:
- Seal the Dough Well . Ensure the edges are tightly sealed to prevent any cheese from oozing out during baking.
- Use Parchment Paper . It prevents sticking and makes cleanup a breeze.
- Customize Your Fillings . Try adding mushrooms, bell peppers, or cooked sausage for extra flavor.
- Crispier Crust . Bake at a higher temperature (400°F) for a few minutes if you prefer a crunchier bite.
Variations
Love experimenting in the kitchen? Here are a few delicious variations to try:
- Supreme- Add diced bell peppers, onions, and sausage for a supreme-style flavor.
- Veggie Delight- Skip the meat and load up on spinach, olives, and mushrooms for a vegetarian option.
- BBQ Chicken - Substitute marinara with BBQ sauce and use shredded rotisserie chicken and red onions for a tangy twist.
- Cheesy Garlic Balls - Skip the sauce inside and fill with mozzarella and garlic for an indulgent cheesy treat.
What To Eat With Pizza Balls
These tasty bites pair perfectly with a variety of sides and dips. Here are a few great options:
- Dipping Sauces - Marinara , garlic butter, ranch , or spicy sriracha mayo.
- Salad - A simple Caesar or garden salad balances out the richness.
- Soup - Pair with tomato basil soup for a comforting meal.
- French Fries - Serve alongside crispy fries for a fun, indulgent snack.
How Long Do They Last?
Pizza Balls are best enjoyed fresh, but they can be stored in an airtight container in the refrigerator for up to 3 days.
Simply reheat them in the oven at 350°F for about 5-7 minutes to regain their crispy texture.
Can You Freeze Them?
Yes! You can freeze unbaked pizza balls for later. Place them on a baking sheet to freeze individually, then transfer to a freezer-safe bag for up to 2 months.
When ready to bake, simply add a few extra minutes to the baking time.
Best Pizza Recipes
- Mexican Pizza
- Low Carb Pizza
- Keto Pizza Casserole
- Chicken Alfredo Pizza
- Pepperoni Pizza Pinwheels
- Sheet Pan Pizza
Pizza Balls | Easy Stuffed Pizza Bites
Ingredients
For The Pizza Balls
- ▢ 16 ounces Refrigerated Pizza Dough
- ▢ 1 tbsp Olive Oil
- ▢ 1 cup Shredded Mozzarella Cheese
- ▢ 1/2 cup Pepperoni Slices
- ▢ 1/2 cup Marinara Sauce
- ▢ 1 tsp Italian Seasoning
- ▢ 1/4 cup Shredded Parmesan Cheese
For The Butter Topping
- ▢ 3 tbsp Unsalted Butter , melted
- ▢ 1 tsp Garlic Powder
- ▢ 1/2 tsp Italian Seasoning
- ▢ 2 tsp Parsley , chopped
Instructions
- Prepare the Dough. Preheat your oven to 375°F. Roll out your pizza dough on a floured surface and cut it into small squares, about 2x2 inches.
- Add the Filling . Place a small spoonful of marinara sauce, shredded mozzarella cheese, and a slice of pepperoni in the center of each dough square. Sprinkle with Italian seasoning.
- Shape the Balls. Gather the edges of the dough and pinch them together to seal, forming a ball. Make sure the seam is tightly closed to prevent any filling from leaking out.
- Bake to Perfection. Place the pizza balls seam-side down on a greased baking sheet. Brush the tops with olive oil and bake for 15-20 minutes or until golden brown and crispy.
- Add the Finishing Touch. Once out of the oven, brush the pizza balls with melted garlic butter and sprinkle with grated Parmesan and fresh parsley.
- Serve and Enjoy. Pair with your favorite dipping sauces like marinara, ranch, or garlic butter for the ultimate snack experience.
Get support & connect with our community on Facebook!
Nutrition

If you already signed up, you should have received an email with a password to give you unlimited access to our FREE Printable Library. The password is case sensitive. Enter it below and get printing!
Password:

Pizza Balls | Easy Stuffed Pizza Bites
Ingredients
For The Pizza Balls
- 16 ounces Refrigerated Pizza Dough
- 1 tbsp Olive Oil
- 1 cup Shredded Mozzarella Cheese
- 1/2 cup Pepperoni Slices
- 1/2 cup Marinara Sauce
- 1 tsp Italian Seasoning
- 1/4 cup Shredded Parmesan Cheese
For The Butter Topping
- 3 tbsp Unsalted Butter melted
- 1 tsp Garlic Powder
- 1/2 tsp Italian Seasoning
- 2 tsp Parsley chopped
Instructions
- Prepare the Dough. Preheat your oven to 375°F. Roll out your pizza dough on a floured surface and cut it into small squares, about 2x2 inches.
- Add the Filling . Place a small spoonful of marinara sauce, shredded mozzarella cheese, and a slice of pepperoni in the center of each dough square. Sprinkle with Italian seasoning.
- Shape the Balls. Gather the edges of the dough and pinch them together to seal, forming a ball. Make sure the seam is tightly closed to prevent any filling from leaking out.
- Bake to Perfection. Place the pizza balls seam-side down on a greased baking sheet. Brush the tops with olive oil and bake for 15-20 minutes or until golden brown and crispy.
- Add the Finishing Touch. Once out of the oven, brush the pizza balls with melted garlic butter and sprinkle with grated Parmesan and fresh parsley.
- Serve and Enjoy. Pair with your favorite dipping sauces like marinara, ranch, or garlic butter for the ultimate snack experience.
Pizza Balls | Easy Stuffed Pizza Bites https://twosleevers.com/pizza-balls/
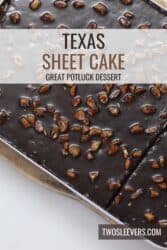
If you’re a fan of indulgent chocolate desserts, this Texas Sheet Cake recipe is about to become your go-to treat. Moist, rich, and topped with a luscious chocolate glaze, this iconic cake is a crowd-pleaser for any occasion.
Why You’ll Love This Delicious Dessert
- Easy to Make . With simple ingredients and straightforward steps, this cake is beginner-friendly.
- Perfect for Crowds . Baked in a large sheet pan, it’s ideal for serving a big group.
- Rich and Flavorful . The combination of cocoa and buttermilk creates an irresistibly deep chocolate flavor.
- Quick Dessert . Ready in under an hour, from prep to plate.
Whether it’s a backyard barbecue or a potluck, this dessert steals the show every time.
What Is Texas Sheet Cake?
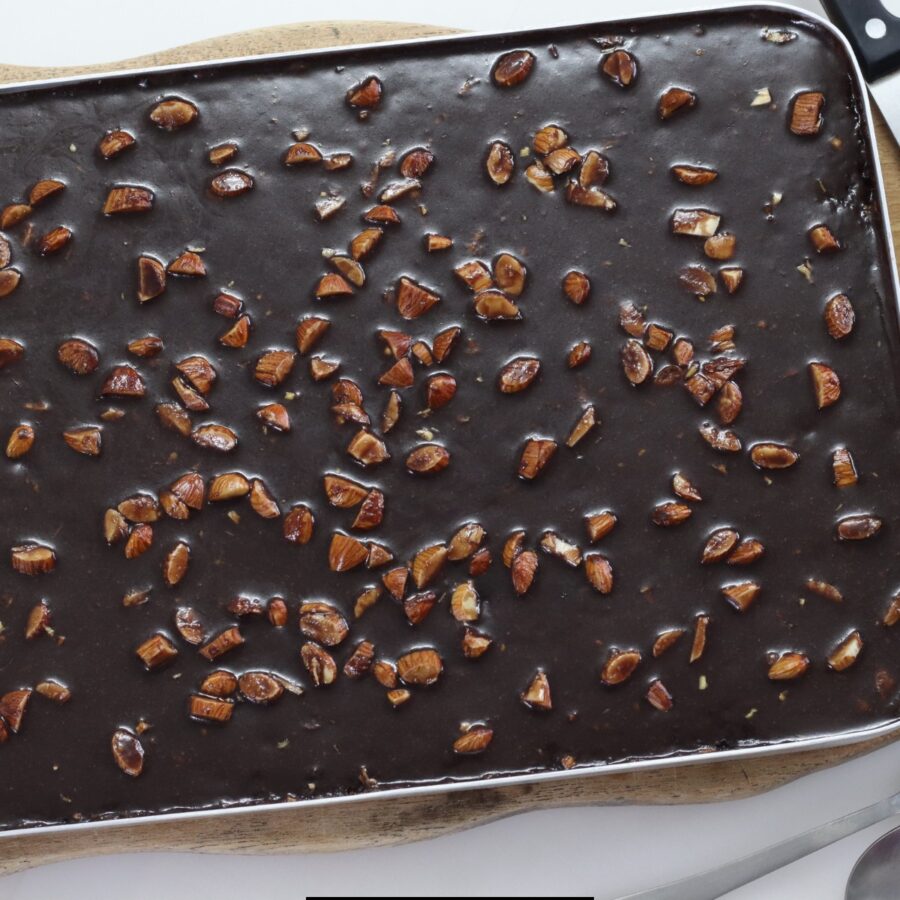
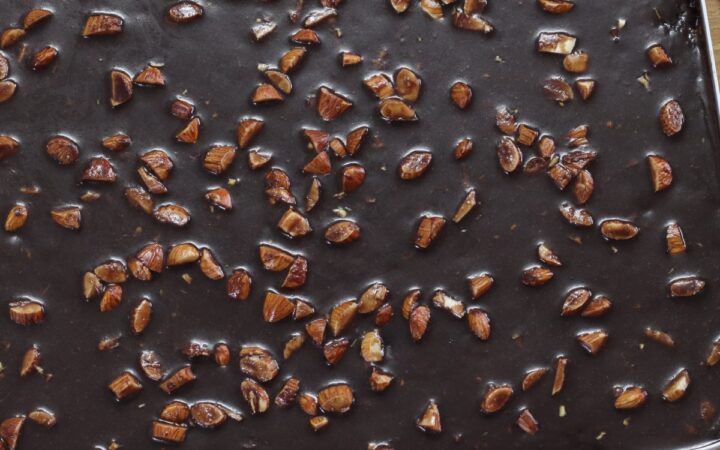
Texas Sheet Cake is a classic Southern dessert featuring a thin, moist chocolate cake topped with a warm, glossy chocolate icing. Known for its rich flavor and melt-in-your-mouth texture, it’s baked in a large jelly roll pan, making it perfect for gatherings.
What Does It Taste Like?
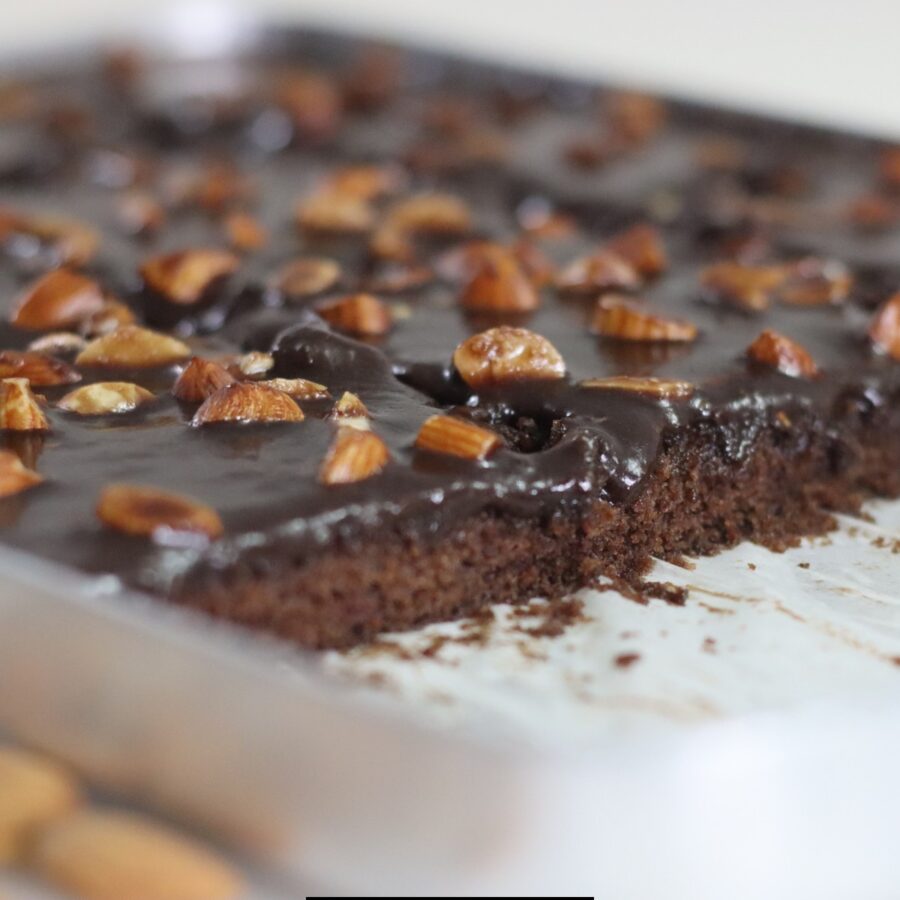
Texas Sheet Cake is a chocolate lover’s dream. Its flavor is rich and indulgent, with a deep chocolatey base that’s perfectly balanced by the sweetness of the frosting. The cake itself is incredibly moist and tender, thanks to the use of buttermilk and a warm chocolate batter.
The frosting, poured over the cake while still warm, creates a glossy, fudgy layer that soaks slightly into the surface, adding even more decadence.
Ingredients You’ll Need
For the Cake
- All-Purpose Flour - Provides structure and ensures a tender crumb.
- Granulated Sugar - Sweetens the cake while helping achieve a moist texture.
- Unsalted Butter - Adds richness and helps create that signature melt-in-your-mouth texture.
- Cocoa Powder - Gives the cake its deep chocolate flavor.
- Buttermilk - Reacts with baking soda to create a tender, fluffy cake.
- Eggs - Bind the ingredients together for a cohesive batter.
- Vanilla Extract - Enhances the overall flavor profile.
- Baking Soda & Salt - Ensure the cake rises perfectly and balances the sweetness.
For The Chocolate Frosting
- Unsalted Butter - Forms the base of the glossy glaze.
- Cocoa Powder - Adds rich chocolate flavor to the frosting.
- Powdered Sugar - Sweetens and thickens the frosting for a smooth finish.
- Milk - Helps achieve the perfect frosting consistency.
- Vanilla Extract - Adds a final touch of flavor.
- Chopped Pecans (Optional) - Adds crunch and Southern charm.
How To Make Texas Sheet Cake
- Prepare the Cake Batter . Preheat your oven to 350°F. Grease a 9x13-inch sheet pan or line it with parchment paper. In a large mixing bowl, whisk together the flour, sugar, baking soda, and salt. In a saucepan, melt the butter, then stir in cocoa powder and water. Bring to a gentle boil, then pour over the dry ingredients, mixing until combined. Add the buttermilk, eggs, and vanilla extract, mixing until smooth.
- Bake the Cake . Pour the batter into the prepared sheet pan, spreading it evenly. Bake for 20-25 minutes or until a toothpick inserted into the center comes out clean.
- Prepare the Frosting . While the cake bakes, melt the butter in a saucepan over medium heat. Stir in cocoa powder and milk, then bring to a gentle simmer. Remove from heat and whisk in powdered sugar and vanilla extract until smooth.
- Frost the Cake . Pour the warm frosting over the hot cake, spreading it quickly and evenly. Sprinkle with chopped pecans if desired.
- Cool and Serve . Allow the cake to cool at room temperature until the frosting sets. Slice into squares and enjoy!
Tips And Tricks
By following these tips, you’ll achieve a Texas Sheet Cake that’s rich, moist, and irresistibly delicious every time:
- Use Buttermilk . Don’t skip the buttermilk—it’s essential for the moist texture and tangy flavor.
- Frost While Warm . Pouring the frosting over the warm cake helps it soak into the surface for extra richness.
- Room-Temperature Ingredients . Ensure your eggs and buttermilk are at room temperature for a smoother batter.
Variations
These variations allow you to customize Texas Sheet Cake to suit any occasion, flavor preference, or dietary need:
- Nut-Free - Skip the pecans or swap them with shredded coconut for a nut-free twist.
- Double Chocolate - Add chocolate chips to the batter for an extra chocolatey kick.
- Spiced Sheet Cake - Mix in a pinch of cinnamon or espresso powder for added depth of flavor.
- Gluten-Free - Substitute all-purpose flour with a 1:1 gluten-free baking mix.
What To Enjoy With Texas Sheet Cake
Texas sheet cake is a rich, chocolatey dessert that pairs wonderfully with a variety of accompaniments. Whether you’re hosting a gathering or enjoying a slice at home, here are some delicious options to elevate your dessert experience:
- Whipped Cream - A dollop of freshly whipped cream balances the richness.
- Vanilla Ice Cream - The perfect pairing for warm slices of cake.
- Fresh Berries - Adds a pop of freshness and tartness.
- Hot Coffee or Milk - Complements the sweet, chocolatey flavors.
How Long Does It Last?
Texas sheet cake can last up to 4–5 days when stored properly, making it a convenient dessert for gatherings or meal prep. To maintain its freshness, store the cake in an airtight container at room temperature.
If your kitchen is particularly warm, you can refrigerate it to extend its shelf life and prevent the frosting from becoming too soft. When refrigerated, the cake stays moist and delicious for up to a week.
Can You Freeze It?
If you’d like to make it ahead or keep leftovers for longer, Texas sheet cake can also be frozen. Wrap individual slices or the entire cake tightly in plastic wrap, followed by aluminum foil, and store in a freezer-safe bag or container.
Properly frozen, it will retain its flavor and texture for up to 3 months. When ready to enjoy, let the cake thaw in the refrigerator or at room temperature.
More Sweet Treats
- Rum Balls
- Apple Upside Down Cake
- Brownie Cookie Mix Cookies
- Lemonade Pie
- Peach Crisp
- Coffee Mug Cake

Texas Sheet Cake Recipe | The Best Chocolate Sheet Cake
Ingredients
For The Cake
- ▢ 2 cups All Purpose Flour
- ▢ 2 cups Granulated Sugar
- ▢ 1 cup Unsalted Butter
- ▢ 1/4 cup Unsweetened Cocoa Powder
- ▢ 1 cup Water
- ▢ 1/2 cup Buttermilk
- ▢ 2 Eggs
- ▢ 1 tsp Vanilla Extract
- ▢ 1 tsp Baking Soda
- ▢ 1/2 tsp Kosher Salt
For The Frosting
- ▢ 1/2 cup Unsalted Butter
- ▢ 1/4 cup Unsweetened Cocoa Powder
- ▢ 6 tbsp Milk
- ▢ 3 1/2 cups Powdered Sugar
- ▢ 1 tsp Vanilla Extract
- ▢ 1 cup Chopped Pecans
Instructions
- Prepare the Cake Batter . Preheat your oven to 350°F. Grease a 9x13-inch sheet pan or line it with parchment paper. In a large mixing bowl, whisk together the flour, sugar, baking soda, and salt. In a saucepan, melt the butter, then stir in cocoa powder and water. Bring to a gentle boil, then pour over the dry ingredients, mixing until combined. Add the buttermilk, eggs, and vanilla extract, mixing until smooth.
- Bake the Cake . Pour the batter into the prepared sheet pan, spreading it evenly. Bake for 20-25 minutes or until a toothpick inserted into the center comes out clean.
- Prepare the Frosting . While the cake bakes, melt the butter in a saucepan over medium heat. Stir in cocoa powder and milk, then bring to a gentle simmer. Remove from heat and whisk in powdered sugar and vanilla extract until smooth.
- Frost the Cake . Pour the warm frosting over the hot cake, spreading it quickly and evenly. Sprinkle with chopped pecans if desired.
- Cool and Serve . Allow the cake to cool at room temperature until the frosting sets. Slice into squares and enjoy!
