Red pickled cabbage is a versatile and tangy side dish that pairs perfectly with a variety of meals, from grilled meats to sandwiches. It’s packed with flavor, offering a delightful balance of sourness, sweetness, and a touch of spice. This quick and easy recipe will teach you how to make the perfect batch of pickled cabbage that’s sure to impress your family and friends.
Why You’ll Love This Spectacular Side
- Quick and Easy . Ready in just under 30 minutes, with only a few ingredients required.
- Perfectly Tangy . The balance of vinegar, sugar, and spices creates a delightful zing that will enhance any meal.
- Versatile . Ideal for pairing with tacos, burgers, BBQ, and more. It also makes a great topping for sandwiches and salads.
- Healthy . Packed with nutrients, fiber, and beneficial probiotics if left to ferment, this pickled cabbage is as nutritious as it is tasty.
Whether you’re looking to add a crunchy element to your meal or preparing a side dish for a BBQ or holiday gathering, this red pickled cabbage is a must-try!
What Is Pickled Cabbage?
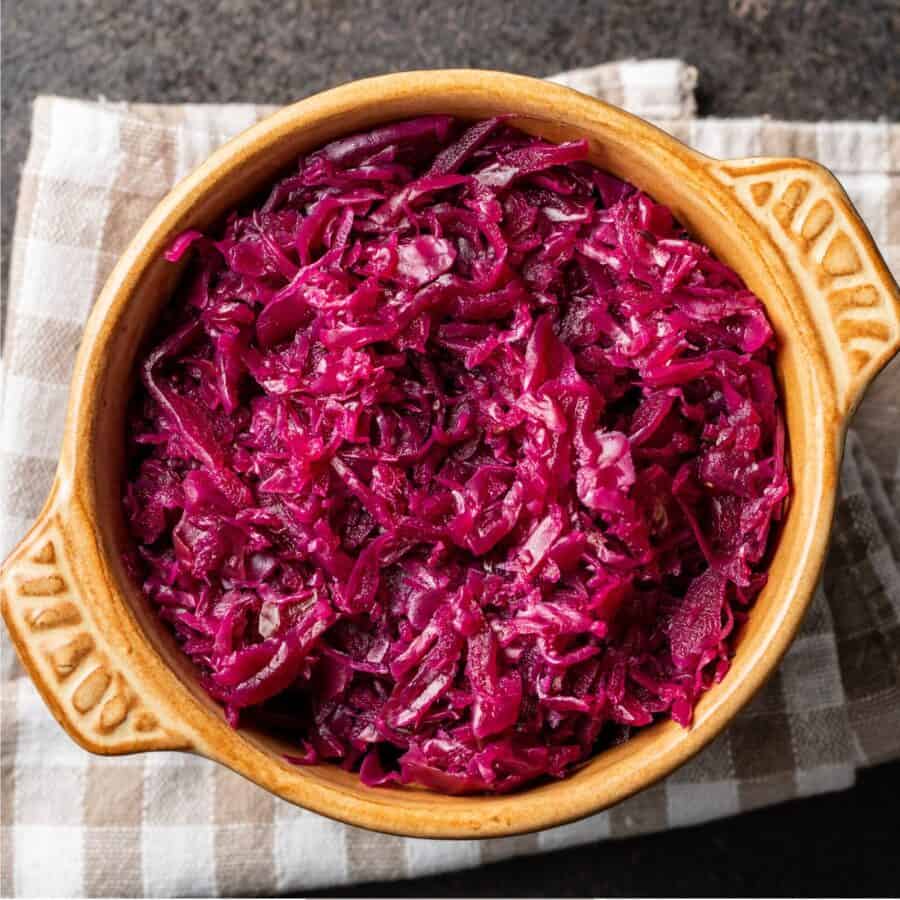
Pickled cabbage is a traditional dish made by soaking shredded cabbage in a brine, typically made from vinegar, water, salt, sugar, and spices. The brining process gives the cabbage a tangy flavor, while the vegetables retain their crunch. Red cabbage is often used for pickling due to its vibrant color, which turns even more striking after pickling.
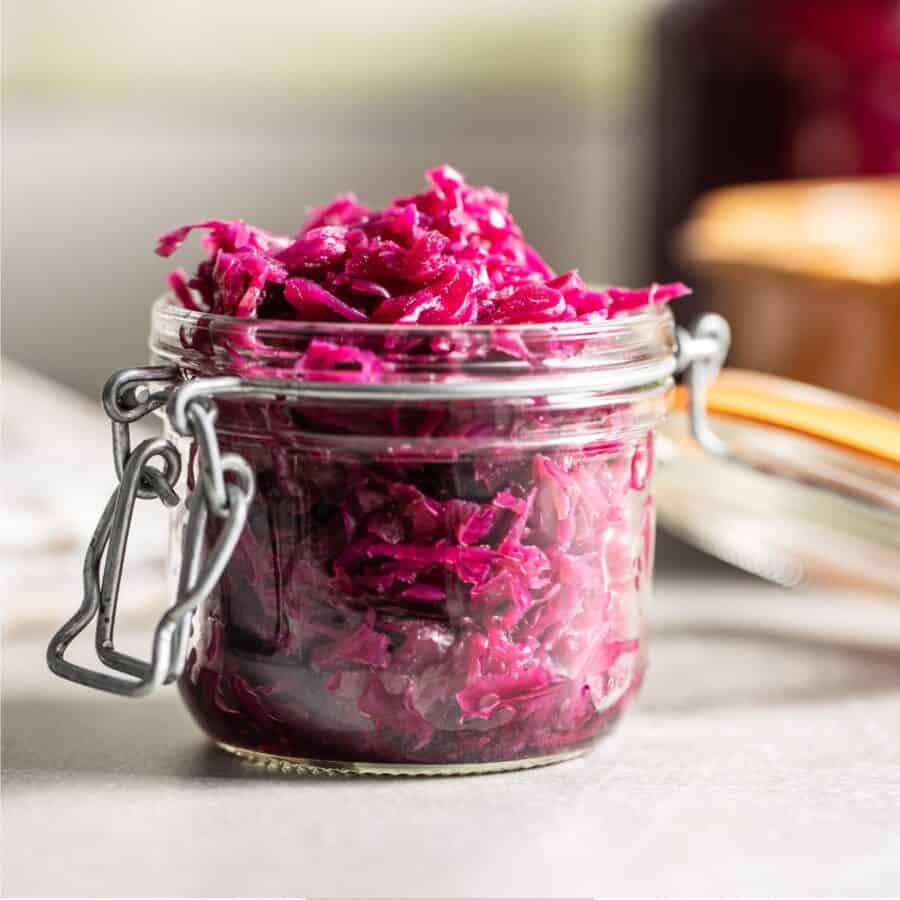
This version of red pickled cabbage is made quickly and can be stored in the fridge to be enjoyed for days, allowing the flavors to intensify. It’s an easy recipe that doesn’t require any complicated equipment or long preparation times.
Ingredients You’ll Need
To make delicious, tangy red pickled cabbage, gather the following ingredients:
- Red cabbage - The main ingredient, offering a mild, slightly sweet flavor with a hearty texture that’s perfect for pickling.
- Carrot - Adds a pop of color and subtle sweetness to balance the tang of the vinegar.
- Onion - Provides a savory flavor that complements the cabbage and carrots.
- Garlic - For a fragrant, savory punch that enhances the overall flavor of the pickled cabbage.
- Apple cider vinegar - The tangy base of the brine that adds acidity to the cabbage.
- Water - To dilute the vinegar and balance the acidity of the brine.
- Sugar - Adds sweetness to balance the sharpness of the vinegar and salt.
- Kosher salt - For seasoning and aiding in the pickling process.
- Black peppercorns - Provides a mild heat that enhances the flavor profile.
- Mustard seeds - Adds a slight warmth and depth to the brine.
- Crushed red pepper flakes - For a hint of heat; you can adjust the amount based on your spice preference.
- Bay leaf - Adds a subtle herbal note to the brine, enriching the flavor of the pickled cabbage.
How To Make Pickled Cabbage
- Prepare the Vegetables . Start by removing the outer leaves from the cabbage and cutting it into quarters. Remove the core, then thinly slice the cabbage into strips about 1/4 inch wide. You can use a mandolin or a sharp knife for this.
- Prepare the Carrots and Onion . Peel and julienne the carrot into matchstick-sized pieces. Slice the onion into thin strips.
- Prepare the Pickling Brine . In a saucepan, combine apple cider vinegar, water, sugar, salt, black peppercorns, mustard seeds, crushed red pepper flakes, and bay leaf. Bring the mixture to a boil over medium heat, stirring occasionally to dissolve the sugar and salt. Once the brine comes to a boil, reduce the heat and let it simmer for about 3-5 minutes to allow the spices to infuse the liquid.
- Pack the Vegetables into Jars . While the brine is simmering, place the sliced cabbage, carrots, sliced onion, and garlic cloves into sterilized mason jars. Pack the vegetables tightly but leave some space at the top to allow the brine to fully cover them.
- Pour the Brine Over the Vegetables . Once the brine has simmered and the sugar and salt have dissolved, carefully pour the hot brine over the vegetables in the jars. Make sure the cabbage is fully submerged.
- Seal and Cool . Seal the jars with lids and allow them to cool at room temperature for 20-30 minutes. Once the jars are cool, transfer them to the refrigerator.
- Let It Pickle . Allow the red pickled cabbage to sit in the fridge for at least 4 hours before serving. The flavors will intensify as the cabbage absorbs the brine. For the best results, let the cabbage pickle for 24-48 hours for more robust flavors.
Tips And Tricks
- Use Fresh Ingredients . Fresh cabbage and vegetables will yield the best texture and flavor in your pickled cabbage.
- Customize the Spice Level . Adjust the amount of crushed red pepper flakes to control the level of heat. For extra heat, try adding some fresh chili peppers.
- Coat the Vegetables in Salt . For a more traditional pickling process, you can sprinkle some salt over the cabbage and let it sit for 30 minutes to draw out moisture before making the brine.
- Sterilize Your Jars . Be sure to sterilize your jars before use to avoid contamination. This ensures your pickled cabbage stays fresh longer.
Variations
Red pickled cabbage is a flavorful and versatile dish, and you can easily adjust the ingredients to create different variations:
- Sweet and Tangy- For a sweeter twist, you can balance out the vinegar’s acidity by adding more sugar or other sweeteners. This variation is perfect for those who love a balance of sweet and sour.
- Spicy- Add a kick of heat to your red pickled cabbage by increasing the amount of crushed red pepper flakes or adding fresh chili peppers.
- Curry- Add a bold twist with curry powder. The combination of the tangy cabbage and the warm, aromatic spices of curry will create a unique pickled experience.
- Caraway Seed- For a more traditional flavor, especially in Eastern European-style pickles, add caraway seeds. The slightly nutty and peppery taste of caraway will balance the tanginess of the vinegar perfectly.
What To Eat With Pickled Cabbage
Red pickled cabbage is incredibly versatile and pairs well with a wide range of dishes. Here are a few suggestions for serving this tangy treat:
- Tacos - Pickled cabbage adds a delightful crunch to fish tacos, pulled pork tacos, or even veggie tacos.
- Pulled Pork - Serve the pickled cabbage alongside slow-cooked pulled pork for a balanced bite of richness and acidity.
- BBQ - Pickled cabbage is an excellent side dish for BBQ, particularly with ribs , sausages, or burgers.
- Grilled Meats - Whether it’s grilled chicken , steak, or sausages, pickled cabbage is the perfect contrast to the smoky flavors of grilled meats.
- Sandwiches - Pile some on top of a sandwich or burger to give it a zesty, crunchy crunch
How Long Does It Last?
When stored properly in an airtight container in the refrigerator, red pickled cabbage can last for up to 2 weeks.
The flavors will continue to develop as it sits, so it’s a great dish to make ahead for gatherings or to keep on hand for an easy side dish throughout the week.
Can You Freeze It?
It is not recommended to freeze pickled cabbage, as freezing can alter the texture and flavor. The cabbage will lose its crispness, and the brine may become watery.
More Classic Cabbage Recipes
- Szechuan Cabbage
- Cabbage Steaks
- Indian Cabbage Slaw
- Fried Cabbage
- Instant Pot German Red Cabbage

Pickled Cabbage Recipe | Quick Pickled Red Cabbage
Ingredients
- ▢ 1/2 Red Cabbage , sliced
- ▢ 1 Carrot , peeled and julienned
- ▢ 1 Onion , thinly sliced
- ▢ 2 cloves Garlic , minced
- ▢ 1 cup Apple Cider vinegar
- ▢ 1/2 cup Water
- ▢ 2 tbsp Granulated Sugar
- ▢ 2 tsp Kosher Salt
- ▢ 1/2 tsp Black peppercorns
- ▢ 1/2 tsp Mustard Seeds
- ▢ 1/4 tsp Crushed Red Pepper Flakes
- ▢ 1 Bay Leaf
Instructions
- Prepare the Vegetables . Start by removing the outer leaves from the cabbage and cutting it into quarters. Remove the core, then thinly slice the cabbage into strips about 1/4 inch wide. You can use a mandolin or a sharp knife for this.
- Prepare the Carrots and Onion . Peel and julienne the carrot into matchstick-sized pieces. Slice the onion into thin strips.
- Prepare the Pickling Brine . In a saucepan, combine apple cider vinegar, water, sugar, salt, black peppercorns, mustard seeds, crushed red pepper flakes, and bay leaf. Bring the mixture to a boil over medium heat, stirring occasionally to dissolve the sugar and salt. Once the brine comes to a boil, reduce the heat and let it simmer for about 3-5 minutes to allow the spices to infuse the liquid.
- Pack the Vegetables into Jars . While the brine is simmering, place the sliced cabbage, carrots, sliced onion, and garlic cloves into sterilized mason jars. Pack the vegetables tightly but leave some space at the top to allow the brine to fully cover them.
- Pour the Brine Over the Vegetables . Once the brine has simmered and the sugar and salt have dissolved, carefully pour the hot brine over the vegetables in the jars. Make sure the cabbage is fully submerged.
- Seal and Cool . Seal the jars with lids and allow them to cool at room temperature for 20-30 minutes. Once the jars are cool, transfer them to the refrigerator.
- Let It Pickle . Allow the red pickled cabbage to sit in the fridge for at least 4 hours before serving. The flavors will intensify as the cabbage absorbs the brine. For the best results, let the cabbage pickle for 24-48 hours for more robust flavors.
Get support & connect with our community on Facebook!
Nutrition

If you already signed up, you should have received an email with a password to give you unlimited access to our FREE Printable Library. The password is case sensitive. Enter it below and get printing!
Password:

Pickled Cabbage Recipe | Quick Pickled Red Cabbage
Ingredients
- 1/2 Red Cabbage sliced
- 1 Carrot peeled and julienned
- 1 Onion thinly sliced
- 2 cloves Garlic minced
- 1 cup Apple Cider vinegar
- 1/2 cup Water
- 2 tbsp Granulated Sugar
- 2 tsp Kosher Salt
- 1/2 tsp Black peppercorns
- 1/2 tsp Mustard Seeds
- 1/4 tsp Crushed Red Pepper Flakes
- 1 Bay Leaf
Instructions
- Prepare the Vegetables . Start by removing the outer leaves from the cabbage and cutting it into quarters. Remove the core, then thinly slice the cabbage into strips about 1/4 inch wide. You can use a mandolin or a sharp knife for this.
- Prepare the Carrots and Onion . Peel and julienne the carrot into matchstick-sized pieces. Slice the onion into thin strips.
- Prepare the Pickling Brine . In a saucepan, combine apple cider vinegar, water, sugar, salt, black peppercorns, mustard seeds, crushed red pepper flakes, and bay leaf. Bring the mixture to a boil over medium heat, stirring occasionally to dissolve the sugar and salt. Once the brine comes to a boil, reduce the heat and let it simmer for about 3-5 minutes to allow the spices to infuse the liquid.
- Pack the Vegetables into Jars . While the brine is simmering, place the sliced cabbage, carrots, sliced onion, and garlic cloves into sterilized mason jars. Pack the vegetables tightly but leave some space at the top to allow the brine to fully cover them.
- Pour the Brine Over the Vegetables . Once the brine has simmered and the sugar and salt have dissolved, carefully pour the hot brine over the vegetables in the jars. Make sure the cabbage is fully submerged.
- Seal and Cool . Seal the jars with lids and allow them to cool at room temperature for 20-30 minutes. Once the jars are cool, transfer them to the refrigerator.
- Let It Pickle . Allow the red pickled cabbage to sit in the fridge for at least 4 hours before serving. The flavors will intensify as the cabbage absorbs the brine. For the best results, let the cabbage pickle for 24-48 hours for more robust flavors.
Pickled Cabbage Recipe | Quick Pickled Red Cabbage https://twosleevers.com/pickled-cabbage-recipe/

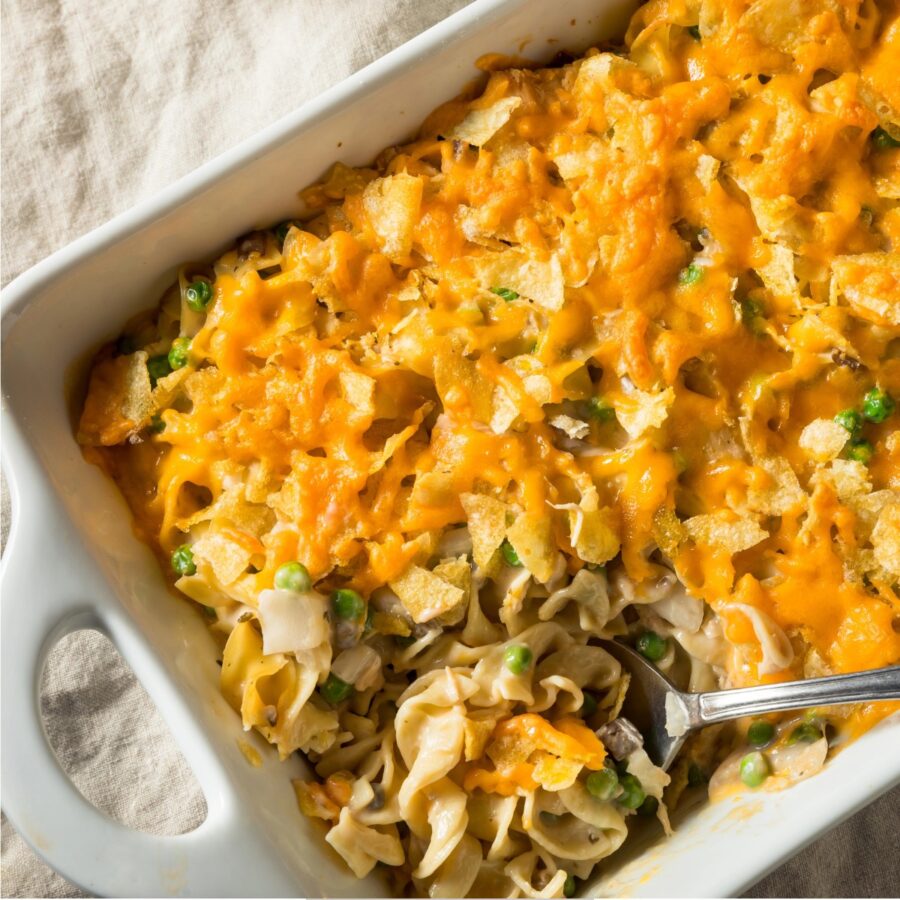
If you’re craving a classic comfort food that’s both satisfying and easy to make, this Tuna Casserole is the perfect choice. Packed with hearty noodles, creamy sauce, and flavorful tuna, this dish will quickly become a family favorite.
Why You’ll Love This Comforting Casserole
- Quick & Easy . Ready in under 40 minutes, making it a perfect meal for busy days.
- Comforting . A warm, creamy casserole that’s sure to hit the spot.
- Family-Friendly . The mild flavor and simple ingredients make it a hit with kids and adults alike.
- Versatile . Add or swap ingredients based on your preferences or dietary needs.
Whether you’re cooking for a busy weeknight or preparing a dish to feed a crowd, this tuna casserole is quick, filling, and guaranteed to please.
What Does Tuna Casserole Taste Like?
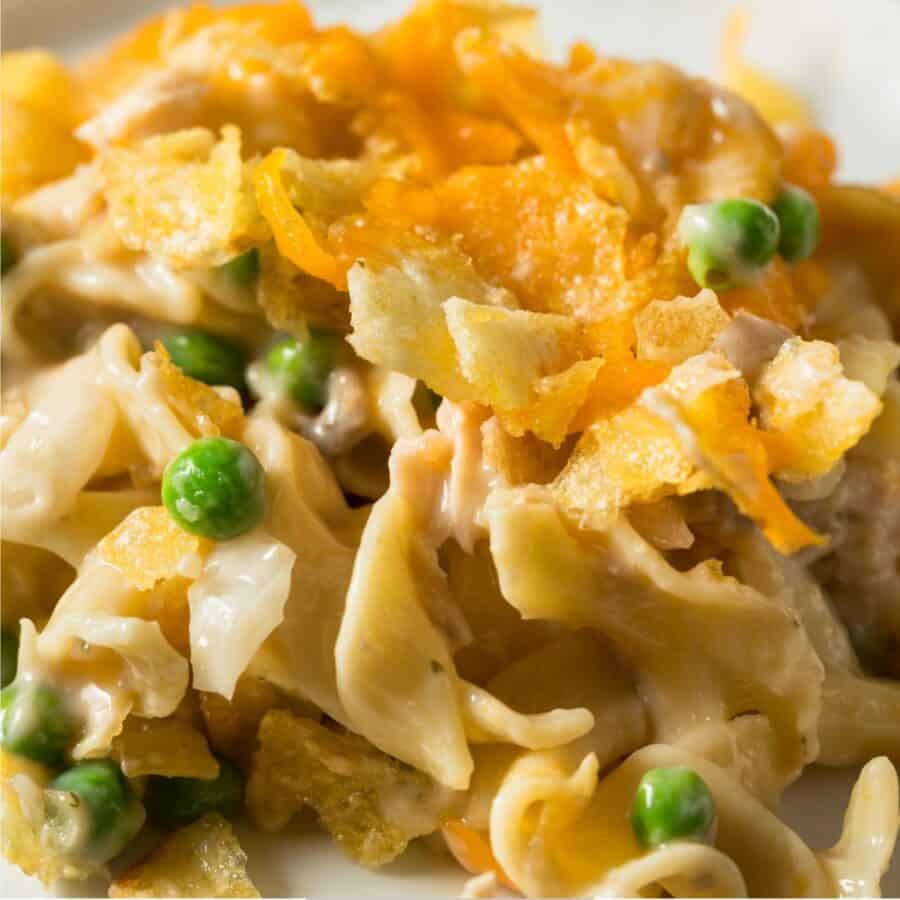
Tuna Casserole is a comforting blend of creamy sauce, tender noodles, and savory tuna. The mild flavor of tuna combined with the rich creaminess of the sauce and a crispy, cheesy topping makes this dish irresistibly good.
It’s the ultimate balance of flavor and texture, with a slight crunch on top and a soft, creamy filling.
Ingredients You’ll Need
Here’s what you’ll need to make this classic Tuna Casserole:
- Egg Noodles - They provide the perfect base for the casserole, soft and hearty when baked.
- Canned Tuna - A classic and budget-friendly choice for protein, making the dish both filling and flavorful.
- Cream of Mushroom Soup - This adds richness and helps bind the casserole together.
- Milk - Used to create a creamy sauce, adding moisture to the dish.
- Cheddar Cheese - Sharp cheddar adds flavor and melty goodness.
- Frozen Peas - For added texture and color. You can also use any vegetable you prefer.
- Onion - A mild aromatic that deepens the flavor of the casserole.
- Potato Chips - Topping the casserole with thin and crispy chips adds a satisfying crunch.
How To Make Tuna Casserole
- Cook the Noodles . Start by boiling the egg noodles according to the package instructions, then drain and set aside.
- Prepare the Tuna Mixture . In a large mixing bowl, combine the cooked noodles, canned tuna (drained), peas, and chopped onion. Stir in the cream of mushroom soup and milk, then season with salt and pepper to taste. The mixture should be creamy and well combined.
- Assemble the Casserole . Transfer the tuna mixture into a greased 9x13-inch baking dish. Spread it out evenly to ensure it bakes uniformly.
- Add the Cheese and Chips . Top the casserole with shredded cheddar cheese, making sure it covers the surface. Then sprinkle a generous amount of chips over the cheese for a crispy topping.
- Bake . Preheat your oven to 350°F. Place the casserole in the oven and bake for 20–25 minutes, or until the cheese is bubbly and the top is golden brown. You can also broil it for 1–2 minutes at the end for an extra crispy topping.
- Serve and Enjoy . Let the casserole cool slightly before serving. It pairs wonderfully with a simple side salad or steamed vegetables.
Tips And Tricks
Here are some creative variations you can try when making Tuna Casserole to suit different tastes or dietary preferences:
- Customize Your Vegetables . If you’re not a fan of peas, try adding other vegetables like corn, green beans, or even carrots for added flavor and texture.
- Add Extra Cheese . For a cheesier casserole, sprinkle extra cheese on top before baking or even mix it into the casserole filling.
- Use Fresh Herbs . Add parsley or thyme to enhance the flavor profile.
- Make It Gluten-Free . Use gluten-free pasta and substitute a gluten-free cream of mushroom soup if needed.
Variations
Here are some creative variations you can try when making Tuna Casserole to suit different tastes or dietary preferences:
- Spicy - Add some jalapeños or a bit of cayenne pepper to the sauce for a spicy kick.
- Tuna & Broccoli - Mix in steamed broccoli for a boost of nutrition and color.
- Low-Carb - Swap the noodles for zucchini noodles or cauliflower rice to make this casserole lower in carbs.
- With Crispy Onions - Top the casserole with crispy fried onions instead of breadcrumbs for a different crunch.
- Tuna & Spinach - Add spinach for added greens and a fresh flavor that complements the tuna.
What To Eat With Tuna Casserole
Tuna casserole is hearty and satisfying, but a few sides can elevate the meal even further. Here are some perfect pairings:
- Salad - A simple green salad with a light vinaigrette helps balance the richness of the casserole.
- Garlic Bread - Serve with garlic bread or toasted rolls for an extra indulgent side.
- Roasted Vegetables - A mix of roasted carrots, sweet potatoes, or brussels sprouts pairs nicely with the creamy casserole.
- Coleslaw - A tangy coleslaw adds a crunchy, refreshing element to the meal.
How Long Does It Last?
Leftover tuna casserole can be stored in the refrigerator in an airtight container for up to 3-4 days. The flavors often intensify as it sits, making it even better the next day!
Can You Freeze It?
Yes! Tuna casserole freezes well. Let it cool completely before transferring to a freezer-safe container. It will last in the freezer for up to 2-3 months.
When you’re ready to eat, thaw it in the refrigerator overnight and bake it at 350°F for 20-25 minutes until heated through.
More Terriffic Tuna Recipes
- Tuna Melt
- Smoked Tuna Dip
- Keto Tuna Salad
- Salade Niçoise


Tuna Casserole Recipe | Classic Comforting Casserole
Ingredients
- ▢ 6 ounces Egg Noodles
- ▢ 10 ounces Canned Tuna , drained and flaked
- ▢ 10.5 ounces Cream of Mushroom Soup
- ▢ 1/2 cup Milk
- ▢ 1 1/2 cups Cheddar Cheese , shredded
- ▢ 1 cup Peas , frozen
- ▢ 1/2 Onion , chopped
- ▢ 1 cup Potato Chips , crushed
Instructions
- Cook the Noodles . Start by boiling the egg noodles according to the package instructions, then drain and set aside.
- Prepare the Tuna Mixture . In a large mixing bowl, combine the cooked noodles, canned tuna (drained), peas, and chopped onion. Stir in the cream of mushroom soup and milk, then season with salt and pepper to taste. The mixture should be creamy and well combined.
- Assemble the Casserole . Transfer the tuna mixture into a greased 9x13-inch baking dish. Spread it out evenly to ensure it bakes uniformly.
- Add the Cheese and Chips . Top the casserole with shredded cheddar cheese, making sure it covers the surface. Then sprinkle a generous amount of chips over the cheese for a crispy topping.
- Bake . Preheat your oven to 350°F. Place the casserole in the oven and bake for 20–25 minutes, or until the cheese is bubbly and the top is golden brown. You can also broil it for 1–2 minutes at the end for an extra crispy topping.
- Serve and Enjoy . Let the casserole cool slightly before serving. It pairs wonderfully with a simple side salad or steamed vegetables.
