
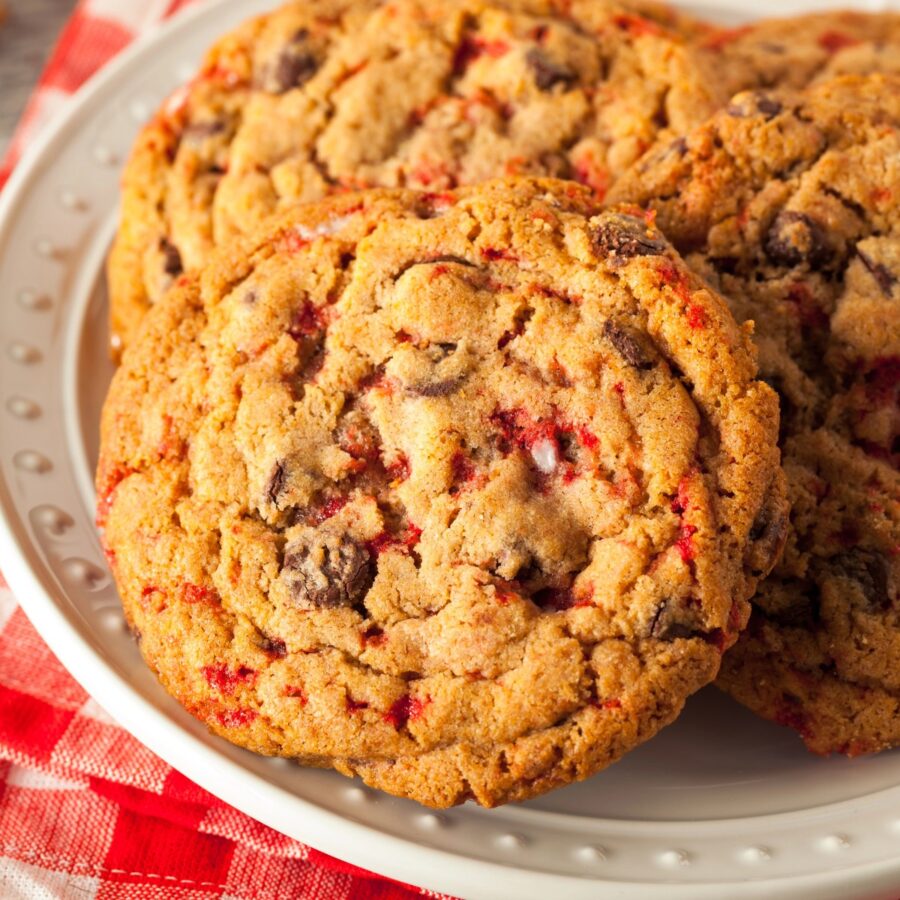
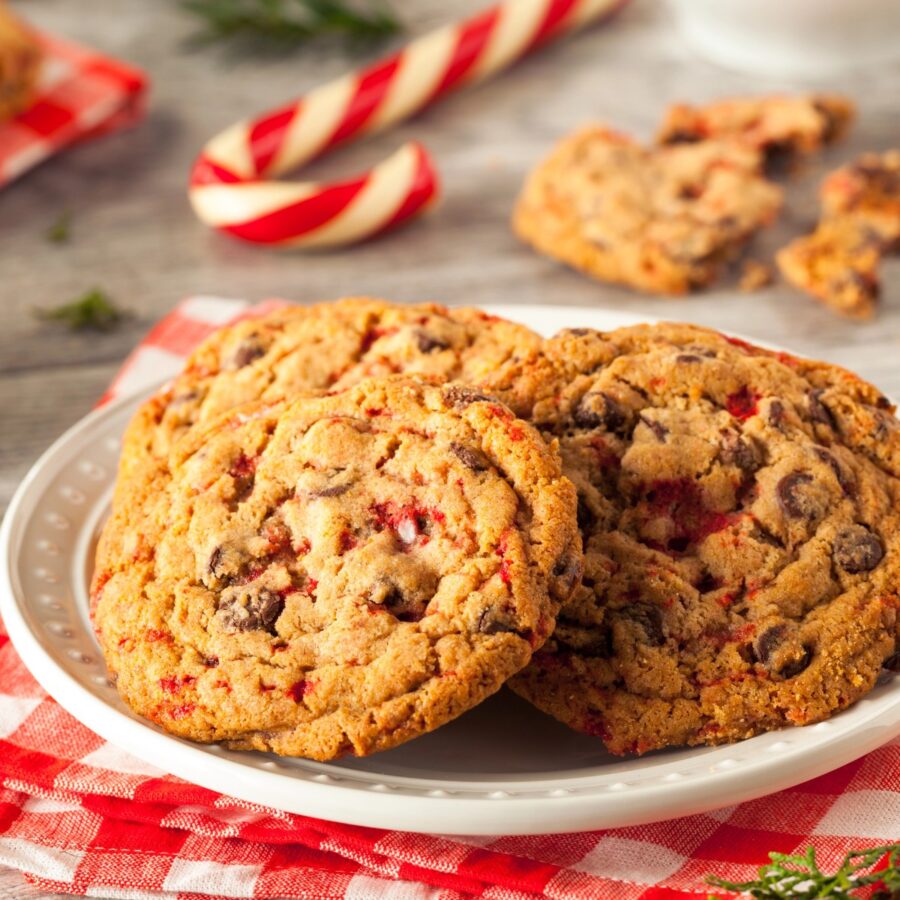
If you’re looking for the ultimate holiday cookie, Chocolate Chip Peppermint Cookies are a must-try! With their soft, buttery texture, sweet white chocolate chips, and refreshing peppermint crunch, these cookies will be the star of your holiday dessert spread. Perfectly festive and incredibly easy to make, they’re a delightful treat for cookie swaps, holiday parties, or simply enjoying with a cozy cup of hot cocoa.
Why You’ll Love These Craveable Cookies
- Festive Flavors. The combination of chocolate and peppermint screams holiday cheer!
- Soft and Chewy Texture. These cookies are perfectly tender with just the right amount of crispness at the edges.
- Easy to Make. Minimal prep time and simple ingredients make this dessert recipe beginner-friendly.
- Crowd-Pleasing. They’re a hit with kids and adults alike, making them perfect for gatherings.
Whether you’re baking for loved ones or whipping up a batch to gift, these cookies will become a holiday favorite in no time.
What Do White Chocolate Peppermint Cookies Taste Like?
These cookies offer a delightful balance of sweet and minty flavors. The buttery dough is complemented by creamy white chocolate and crunchy peppermint bits, creating a harmonious blend that’s impossible to resist.
What Makes Cookies More Chewy?
To make cookies more chewy , follow these tips and tricks focused on ingredients, baking techniques, and storage:
- Use More Brown Sugar . Brown sugar contains more moisture than granulated sugar due to its molasses content. This moisture helps retain softness and chewiness in the cookies. A higher ratio of brown sugar to granulated sugar makes cookies softer and chewier.
- Add an Extra Egg Yolk . Egg yolks are rich in fat and help create a denser, chewier texture. Replace one whole egg with two egg yolks or add an additional yolk to the recipe for extra richness.
- Choose Bread Flour . Bread flour has a higher protein content than all-purpose flour, which creates more gluten and contributes to a chewier texture. Substitute part or all of the all-purpose flour with bread flour for chewier cookies.
If you’re looking for perfectly chewy cookies, check out my Soft Sugar Cookies , Brownie Mix Cookies , or even Applesauce Cookies .
Ingredients You’ll Need
- All-Purpose Flour- The base for soft, tender cookies.
- Baking Soda and Baking Powder- Ensures the cookies rise perfectly.
- Salt- Balances the sweetness.
- Unsalted Butter- Softened to create a rich, buttery flavor.
- Granulated Sugar and Brown Sugar- For sweetness and moisture.
- Eggs- Provide structure and help the cookies bind.
- Vanilla Extract- Enhances the overall flavor.
- Peppermint Extract- Adds that iconic holiday flavor.
- Chocolate Chips - The creamy counterpart to the minty crunch.
- Crushed Candy Canes- Add a festive and slightly crunchy finish.
How To Make Peppermint Cookies
- Prepare the Dough . In a medium bowl, whisk together flour, baking soda, baking powder, and salt. In a large bowl, beat softened butter, granulated sugar, and brown sugar until creamy. Add eggs, vanilla extract, and peppermint extract, and mix until smooth. Gradually add the dry ingredients, mixing until just combined. Fold in chocolate chips and crushed candy canes.
- Chill the Dough . Cover the bowl with plastic wrap and refrigerate the dough for 30 minutes to prevent spreading.
- Shape the Cookies . Preheat your oven to 350°F and line baking sheets with parchment paper. Scoop out 1.5-tablespoon portions of dough, roll into balls, and place them 2 inches apart on the baking sheets.
- Bake to Perfection . Bake for 10-12 minutes, or until the edges are golden and the centers look slightly underbaked. Allow cookies to cool on the baking sheet for 5 minutes before transferring them to a wire rack.
- Optional Garnish . While the cookies are still warm, sprinkle additional crushed candy canes on top for extra crunch and festive flair.
Tips And Tricks
Here are some creative variations for Chocolate Chip Peppermint Cookies to make them uniquely yours:
- Don’t Overbake. Keep an eye on the cookies. Slightly underbaking them ensures a soft, chewy texture.
- Crush Candy Canes Easily. Place candy canes in a zip-top bag and gently crush them with a rolling pin.
- Chill the Dough. Chilling helps the cookies hold their shape and prevents them from spreading too much during baking.
- Use Fresh Ingredients. Fresh baking soda, baking powder, and peppermint extract ensure the best flavor and texture.
These variations allow you to customize your cookies to suit different tastes or occasions, making them perfect for holiday gatherings, cookie swaps, or simply indulging at home!
Variations
Here are some creative variations for Chocolate Chip Peppermint Cookies to make them uniquely yours:
- Dark Chocolate- Replace white chocolate chips with dark chocolate for a richer flavor.
- Add Nuts- Fold in chopped pecans or walnuts for added crunch.
- Drizzle with Chocolate- Once cooled, drizzle cookies with melted white or dark chocolate for an elegant finish.
- Gluten-Free Option- Use a 1:1 gluten-free flour blend for a celiac-friendly treat.
What To Enjoy With Peppermint Cookies
These cookies are delightful on their own, but pairing them with a cozy beverage elevates the experience. Here are some ideas:
- Hot Cocoa - The ultimate holiday pairing.
- Peppermint Mocha - Double down on the peppermint flavor.
- Eggnog - A creamy, festive complement.
- Vanilla Ice Cream - Turn your cookies into an indulgent dessert by sandwiching them with ice cream.
- Cookie Platter - Use a variety of cookies from our list of Best Cookie Recipes to create the ultimate holiday gift.
How Long Do They Last?
Store the cookies in an airtight container for 5-7 days to prevent them from drying out or becoming stale. Keep them in a cool, dry place away from direct sunlight or heat sources.
For longer storage, place the cookies in an airtight container or a resealable plastic bag. Put them in the coldest part of your refrigerator for 2-3 weeks.
Refrigeration helps preserve freshness longer, but it may slightly alter the texture (making them firmer). Let them come to room temperature before serving.
Can You Freeze Them?
Place the peppermint cookies in a freezer-safe container or wrap them individually in plastic wrap and store them in a freezer bag for 2-3 months.
To enjoy, thaw cookies at room temperature for 20–30 minutes or warm them slightly in the microwave or oven for a freshly baked feel.
More Festive Foods
- Christmas Charcuterie Board
- Keto Ginger Cookies
- Eggnog French Toast
- Christmas Punch
- Molasses Cookies
- Peppermint Fudge


Peppermint Cookies | Chocolate Chip Peppermint Cookie Recipe
Ingredients
- ▢ 2 1/2 cups All Purpose Flour
- ▢ 1/2 tsp Baking Soda
- ▢ 1 tsp Baking Powder
- ▢ 1/2 tsp Kosher Salt
- ▢ 1 cup Unsalted Butter , softened
- ▢ 3/4 cup Granulated Sugar
- ▢ 3/4 cup Brown Sugar
- ▢ 2 Eggs
- ▢ 1 tsp Vanilla Extract
- ▢ 1 1/2 tsp Vanilla Extract
- ▢ 2 cups Chocolate Chips
- ▢ 1/2 cup Crushed Candy Canes
Instructions
- Prepare the Dough . In a medium bowl, whisk together flour, baking soda, baking powder, and salt. In a large bowl, beat softened butter, granulated sugar, and brown sugar until creamy. Add eggs, vanilla extract, and peppermint extract, and mix until smooth. Gradually add the dry ingredients, mixing until just combined. Fold in chocolate chips and crushed candy canes.
- Chill the Dough . Cover the bowl with plastic wrap and refrigerate the dough for 30 minutes to prevent spreading.
- Shape the Cookies . Preheat your oven to 350°F and line baking sheets with parchment paper. Scoop out 1.5-tablespoon portions of dough, roll into balls, and place them 2 inches apart on the baking sheets.
- Bake to Perfection . Bake for 10-12 minutes, or until the edges are golden and the centers look slightly underbaked. Allow cookies to cool on the baking sheet for 5 minutes before transferring them to a wire rack.
- Optional Garnish . While the cookies are still warm, sprinkle additional crushed candy canes on top for extra crunch and festive flair.
Get support & connect with our community on Facebook!
Nutrition

If you already signed up, you should have received an email with a password to give you unlimited access to our FREE Printable Library. The password is case sensitive. Enter it below and get printing!
Password:

Peppermint Cookies | Chocolate Chip Peppermint Cookie Recipe
Ingredients
- 2 1/2 cups All Purpose Flour
- 1/2 tsp Baking Soda
- 1 tsp Baking Powder
- 1/2 tsp Kosher Salt
- 1 cup Unsalted Butter softened
- 3/4 cup Granulated Sugar
- 3/4 cup Brown Sugar
- 2 Eggs
- 1 tsp Vanilla Extract
- 1 1/2 tsp Vanilla Extract
- 2 cups Chocolate Chips
- 1/2 cup Crushed Candy Canes
Instructions
- Prepare the Dough . In a medium bowl, whisk together flour, baking soda, baking powder, and salt. In a large bowl, beat softened butter, granulated sugar, and brown sugar until creamy. Add eggs, vanilla extract, and peppermint extract, and mix until smooth. Gradually add the dry ingredients, mixing until just combined. Fold in chocolate chips and crushed candy canes.
- Chill the Dough . Cover the bowl with plastic wrap and refrigerate the dough for 30 minutes to prevent spreading.
- Shape the Cookies . Preheat your oven to 350°F and line baking sheets with parchment paper. Scoop out 1.5-tablespoon portions of dough, roll into balls, and place them 2 inches apart on the baking sheets.
- Bake to Perfection . Bake for 10-12 minutes, or until the edges are golden and the centers look slightly underbaked. Allow cookies to cool on the baking sheet for 5 minutes before transferring them to a wire rack.
- Optional Garnish . While the cookies are still warm, sprinkle additional crushed candy canes on top for extra crunch and festive flair.
Peppermint Cookies | Chocolate Chip Peppermint Cookie Recipe https://twosleevers.com/peppermint-cookies/
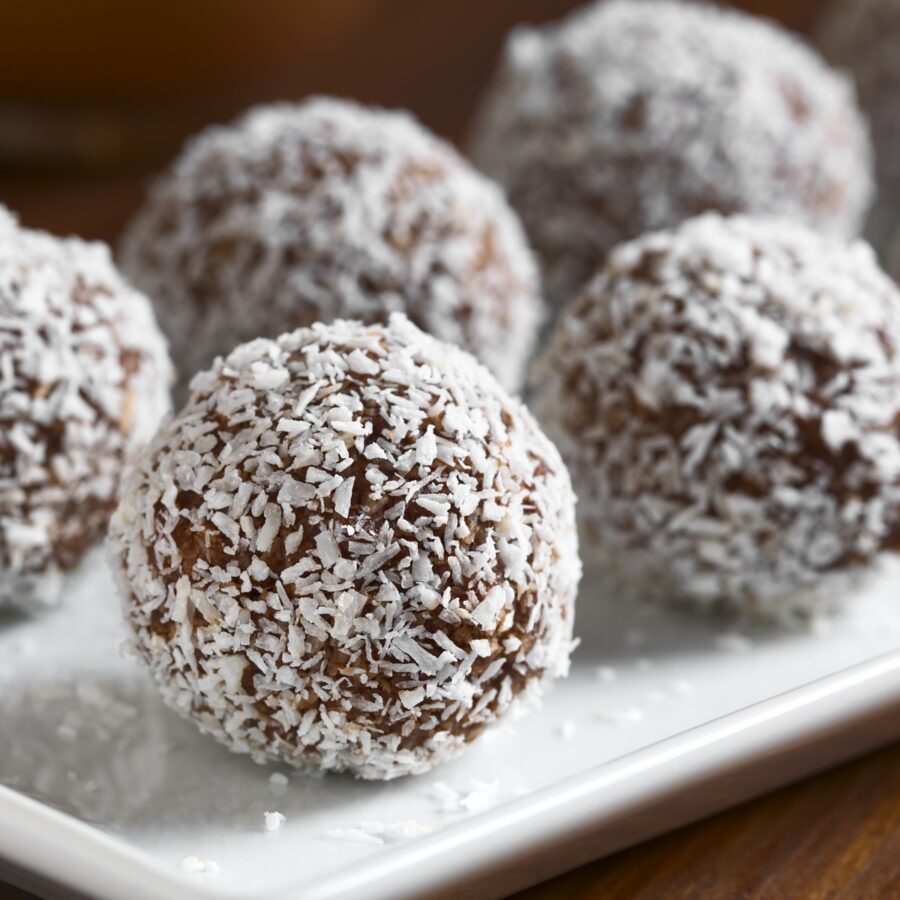
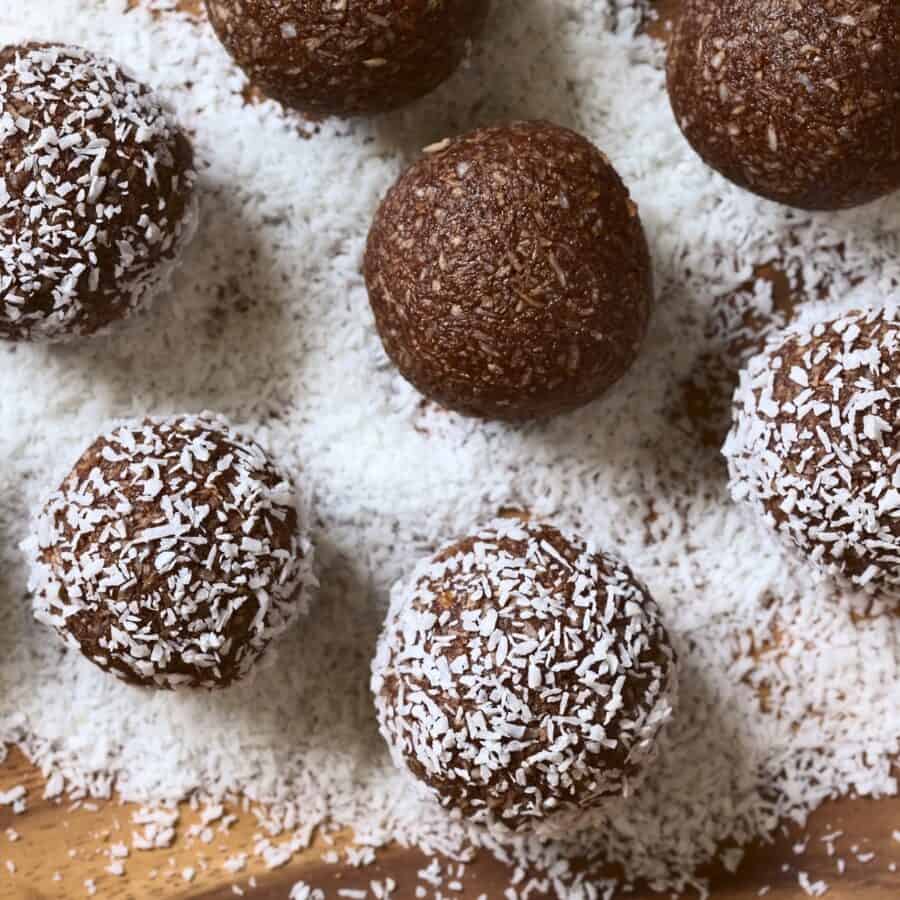
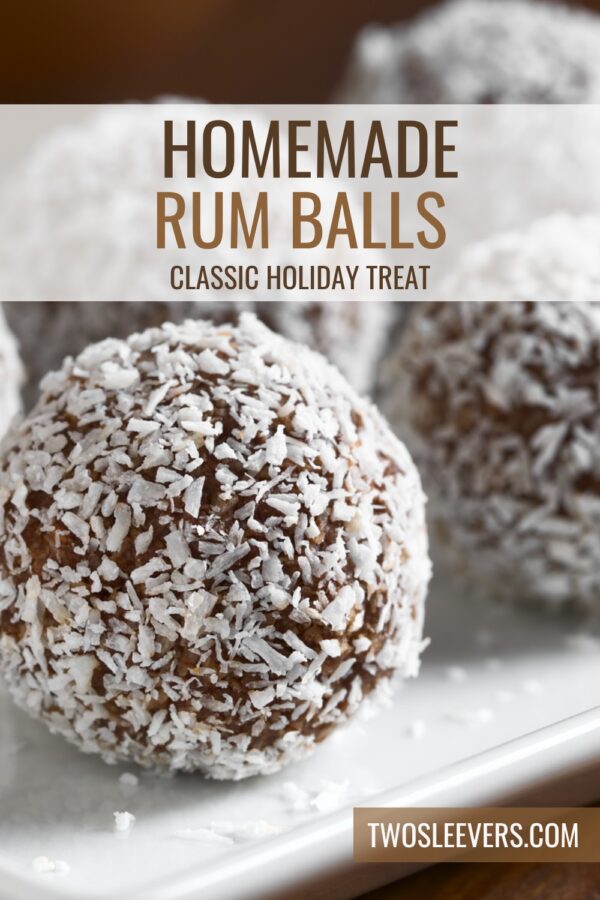
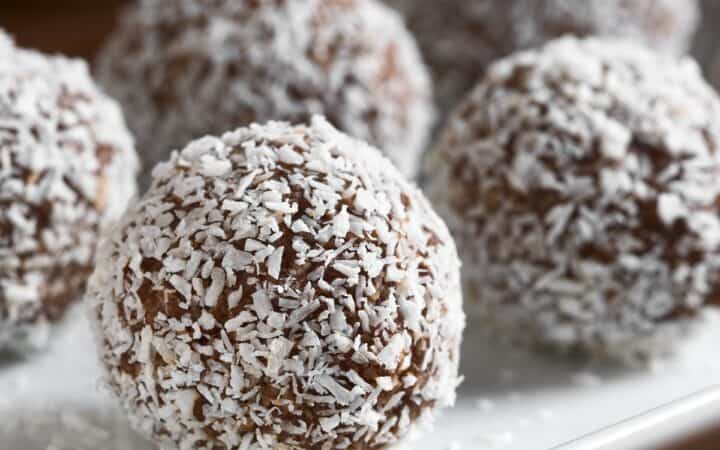
Looking for a no-bake dessert that’s easy, indulgent, and perfect for parties? Let me introduce you to Rum Balls! These bite-sized treats are packed with rich chocolate flavor, a hint of rum, and a nutty crunch, all rolled in powdered sugar or sprinkles for the ultimate festive flair. Whether you’re preparing for the holidays or just treating yourself, this recipe will quickly become a favorite.
Why You’ll Love This Tasty Treat
- No-Bake Dessert. No oven? No problem! These Rum Balls come together quickly without baking.
- Customizable . Adjust the rum strength, roll them in your favorite coatings, or add mix-ins to suit your taste.
- Perfect for Gifting . They’re easy to package up for a sweet, homemade gift.
- Make-Ahead Friendly . These only get better as the flavors meld together over time.
This indulgent and easy Rum Balls recipe will quickly become a favorite in your home. Perfect for any celebration or a sweet, boozy treat, they’re as versatile as they are delicious. Enjoy making them, eating them, and sharing them with friends and family!
What Do Rum Balls Taste Like?
Rum Balls are an irresistible treat! The combination of crushed cookies, cocoa, nuts, and a splash of rum creates a sweet, decadent bite with a warm, boozy kick.
The texture is soft yet slightly chewy, with a satisfying crunch from the nuts. They’re perfect for anyone who loves a balance of sweet and spirited flavors.
Will Rum Balls Get You Drunk?
While rum is an ingredient in the recipe, the amount used is typically spread out over dozens of small balls. This means each individual bite contains only a tiny amount of alcohol.
Rum balls are usually eaten in moderation. You’d have to eat a significant number of them in a short period to feel any effects, which is highly unlikely due to their richness.
Rum balls are more about enjoying the flavor of rum than experiencing its effects. However, if you’re serving these to someone who avoids alcohol entirely, consider making a non-alcoholic version by substituting rum with rum extract or another liquid like orange juice.
Ingredients You’ll Need
Here’s a quick rundown of what you’ll need to create these festive delights:
- Vanilla Wafer Cookies - Crushed finely to form the base of the mixture.
- Cocoa Powder - Adds deep chocolate flavor.
- Powdered Sugar - Sweetens the mix and doubles as a coating.
- Dark Rum - The star ingredient that gives these balls their signature boozy flavor.
- Corn Syrup - Binds the ingredients together and keeps them moist.
- Pecans (or Walnuts) - Add a nutty crunch to the texture.
- Optional Coatings - Powdered sugar, sprinkles, shredded coconut, or cocoa powder for rolling.
How To Make Rum Balls
- Prepare the Dry Ingredients . In a large bowl, combine finely crushed vanilla wafer cookies, cocoa powder, powdered sugar, and chopped nuts. Stir until well blended.
- Add the Wet Ingredients . Pour in the dark rum and corn syrup. Mix until the ingredients come together to form a thick, sticky dough.
- Shape the Balls . Using your hands or a small cookie scoop, form the mixture into 1-inch balls.
- Roll in Coating . Roll each ball in your preferred coating—powdered sugar, sprinkles, or shredded coconut. Place them on a parchment-lined tray.
- Chill . Refrigerate the Rum Balls for at least 2 hours to allow the flavors to meld and the texture to firm up.
Tips And Tricks
Making rum balls is a straightforward process, but these tips and tricks will help ensure they turn out perfectly every time:
- Crush Cookies Finely. Use a food processor for the smoothest texture. Larger chunks may cause the balls to crumble.
- Adjust Rum Flavor . For a milder taste, reduce the rum slightly or substitute part of it with orange juice.
- Chill the Dough . If the mixture feels too sticky, refrigerate it for 30 minutes before rolling.
- Use Gloves . Rolling the balls can get messy! Wear gloves to keep your hands clean.
Variations
Rum balls are a classic treat, but there’s so much room for creativity! Whether you want to experiment with flavors, coatings, or ingredients, these variations will take them to the next level:
- Bourbon Balls - Swap the rum for bourbon for a different flavor profile.
- Nut-Free Version - Skip the nuts and use crushed pretzels or graham crackers for texture.
- Spiced Rum Balls - Use spiced rum and add a pinch of cinnamon or nutmeg.
- Chocolate Coated - Dip the balls in melted chocolate for an extra layer of indulgence.
- Holiday Themed - Use red and green sprinkles for a festive look during the holidays.
What To Enjoy With Rum Balls
Rum balls are a decadent treat, and their rich, boozy flavor pairs wonderfully with a variety of accompaniments. Here are some ideas to complement and elevate your experience:
- Coffee or Espresso - The rich flavors complement each other perfectly.
- Ice Cream - Serve alongside vanilla or chocolate ice cream for a decadent dessert.
- Cocktails - Enjoy with a glass of eggnog or a classic rum cocktail.
- Cheese Platter - Balance the sweetness by serving them on a charcuterie or dessert board.
How Long Do They Last?
Rum Balls are the ultimate make-ahead treat. When stored in an airtight container in the refrigerator, they can last up to 2 weeks.
In fact, they taste even better after a couple of days as the flavors meld together.
Can You Freeze Them?
Yes! Rum Balls freeze exceptionally well. Place them in a single layer on a baking sheet to freeze, then transfer them to an airtight container or freezer bag. Thaw them in the refrigerator overnight before serving.
More Delicious Desserts
- Snow Balls
- Molasses Cookies
- Peppermint Chocolate Chip Cookies
- Eggnog
- Keto Ginger Cookies
Rum Balls Recipe | Classic Rum Balls
Ingredients
- ▢ 2 cups Vanilla Wafer Cookies
- ▢ 1/4 cup Cocoa Powder
- ▢ 1 cup Powdered Sugar
- ▢ 1/3 cup Dark Rum
- ▢ 1/4 cup Corn Syrup
- ▢ 1/2 cup Pecans , finely chopped
- ▢ 1 cup Coconut Flakes , for rolling
Instructions
- Prepare the Dry Ingredients . In a large bowl, combine finely crushed vanilla wafer cookies, cocoa powder, powdered sugar, and chopped nuts. Stir until well blended.
- Add the Wet Ingredients . Pour in the dark rum and corn syrup. Mix until the ingredients come together to form a thick, sticky dough.
- Shape the Balls . Using your hands or a small cookie scoop, form the mixture into 1-inch balls.
- Roll in Coating . Roll each ball in your preferred coating—powdered sugar, sprinkles, or shredded coconut. Place them on a parchment-lined tray.
- Chill . Refrigerate the Rum Balls for at least 2 hours to allow the flavors to meld and the texture to firm up.
