
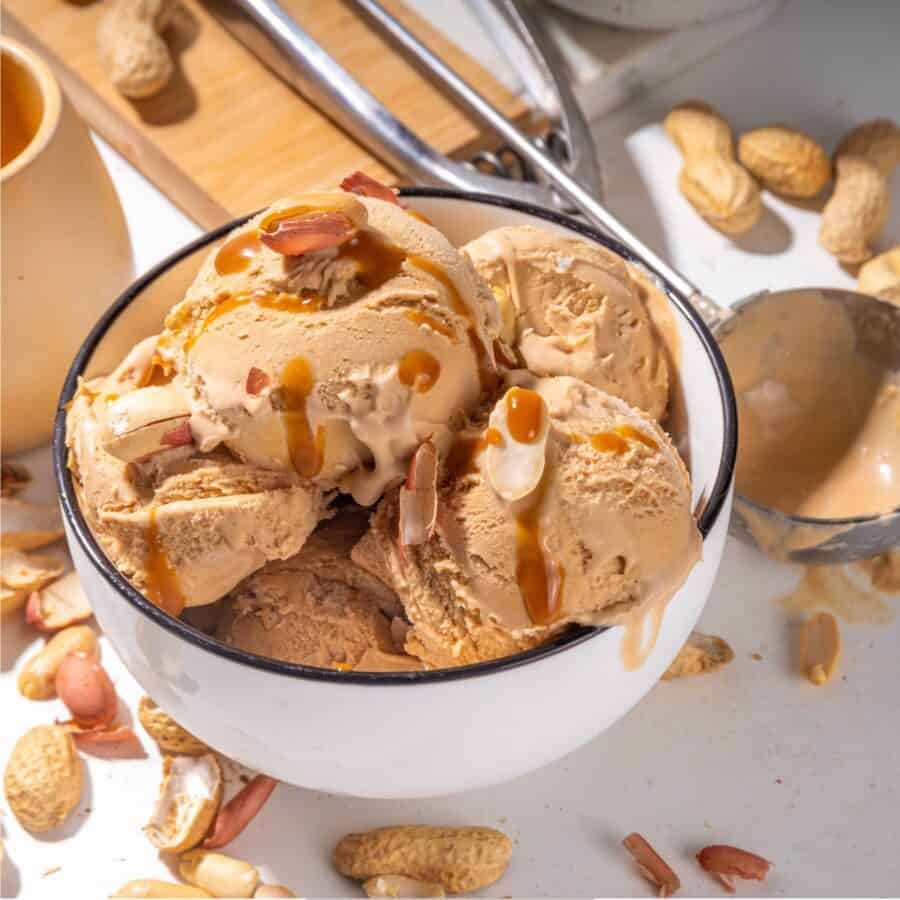
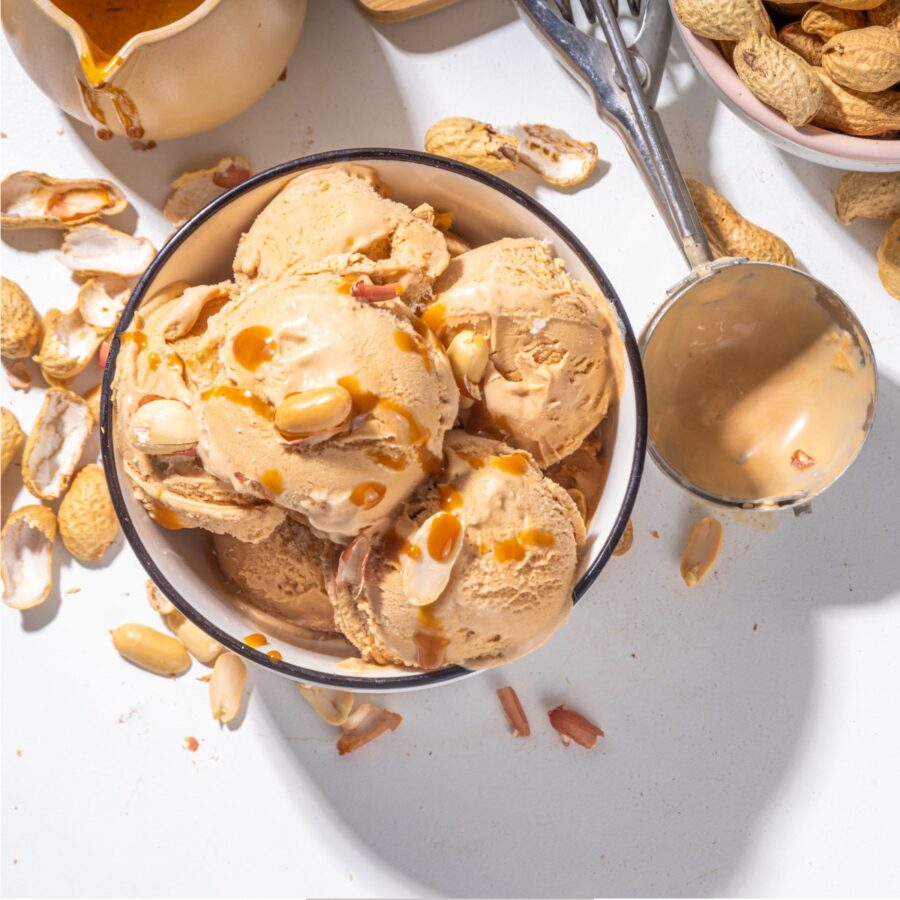
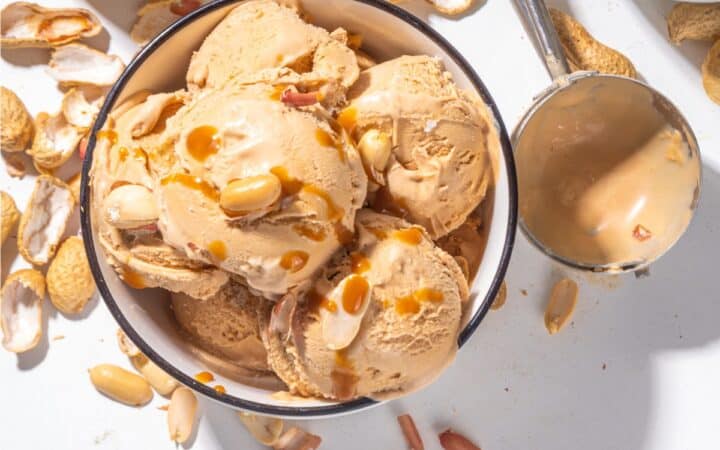
If you’re obsessed with the creamy, nutty richness of peanut butter and looking for a simple way to cool down, you’ll love this easy Peanut Butter Ice Cream recipe. No ice cream maker? No problem. This no-churn version delivers the same luscious texture and decadent flavor with just a few ingredients and minimal prep.
Why You’ll Love This Incredible Ice Cream Recipe
- No-Churn. No special equipment required. All you need is a hand mixer and a freezer!
- Creamy & Dreamy. This dessert has a thick, smooth texture thanks to whipped cream and sweetened condensed milk.
- Peanut Butter Perfection. Rich, salty-sweet peanut butter flavor in every bite.
- Customizable. Stir in your favorite add-ins like chocolate chips or peanut butter cups.
Whether you’re hosting a backyard BBQ or need a quick make-ahead dessert, this homemade peanut butter ice cream is the ultimate cool-down treat that everyone will crave.
Is Peanut Butter Ice Cream Good?
Absolutely! Peanut Butter Ice Cream is beloved for its velvety smooth texture and deeply satisfying flavor.
The nuttiness from the peanut butter pairs beautifully with the creamy base, striking a perfect balance between salty and sweet. It’s indulgent without being over-the-top and makes a great base for toppings like chocolate drizzle, caramel, or crushed peanuts.
What Is Peanut Butter Ice Cream Made Of?
- Heavy Cream – Adds richness and creaminess to the ice cream.
- Sweetened Condensed Milk – Provides sweetness and a smooth texture.
- Peanut Butter – Use your favorite creamy or chunky peanut butter.
- Vanilla Extract – Enhances the overall flavor.
- Salt – Balances the sweetness and enhances the peanut butter flavor.
How To Make Peanut Butter Ice Cream
- Prepare the Mixture. In a large mixing bowl, combine the sweetened condensed milk, peanut butter, vanilla extract, and salt. Stir until the mixture is smooth and well combined.
- Whip the Cream. In a separate bowl, whip the heavy cream until stiff peaks form. This usually takes about 3-4 minutes using an electric mixer on medium-high speed.
- Combine the Mixtures. Gently fold the whipped cream into the peanut butter mixture. Be careful not to deflate the whipped cream, as this will ensure a light and airy texture.
- Freeze. Transfer the mixture to a loaf pan or airtight container. Smooth the top with a spatula and cover with plastic wrap or a lid. Freeze for at least 6 hours or overnight.
- Serve. Scoop it into bowls or cones. Enjoy as is, or top with additional peanut butter, chocolate chips, or crushed peanuts for extra flavor and texture.
Tips And Tricks
Making Peanut Butter Ice Cream is a simple and rewarding process, and a few tips and tricks can help you achieve the best possible results. Here are some pointers to ensure your ice cream turns out perfectly creamy and flavorful:
- Use Cold Ingredients – Make sure your heavy cream is cold before whipping. This helps achieve stiff peaks and a creamy texture.
- Don’t Overmix – When folding the whipped cream into the peanut butter mixture, be gentle to maintain the airy texture.
- Adjust Sweetness – Taste the mixture before freezing and adjust the sweetness to your liking by adding more sweetened condensed milk if necessary.
Variations
If you love this recipe and want to try some creative variations, here are a few delicious ideas to explore:
- Chocolate Peanut Butter – Swirl melted chocolate or chocolate chips into the mixture before freezing for a delightful chocolatey twist.
- Banana Peanut Butter – Add mashed bananas to the peanut butter mixture for a fruity, nutty flavor combination.
- Peanut Butter Cup – Mix in chopped peanut butter cups for an extra indulgent treat.
What To Enjoy With Peanut Butter Ice Cream
Peanut Butter Ice Cream is a versatile dessert that pairs well with a variety of toppings and accompaniments. Here are some delicious options to consider serving alongside it:
- Chocolate Syrup – Drizzle over the ice cream for a rich, chocolatey contrast.
- Whipped Cream – Add a dollop of whipped cream for extra creaminess.
- Caramel Sauce – The sweet, buttery flavor of caramel complements the nutty peanut butter perfectly.
- Cookies – Serve with chocolate chip cookies or peanut butter cookies for a delightful crunch.
How Long Does It Last?
Peanut Butter Ice Cream can be stored in the freezer in an airtight container for up to 2 weeks. For the best texture and flavor, allow it to sit at room temperature for a few minutes before scooping.
More Delicious Desserts
- Deviled Strawberries
- Chocolate Chip Cookie Bars
- S’mores Brownies
- Lemon Tarts
- Cool Whip Cookies
- Cottage Cheese Ice Cream
- Strawberry Trifle
Watch The Video

Peanut Butter Ice Cream Recipe | No Churn Ice Cream
Ingredients
- ▢ 2 cups Heavy Cream
- ▢ 14 oz Sweetened Condensed Milk
- ▢ 1 cup Creamy Peanut Butter
- ▢ 1 tsp Vanilla Extract
- ▢ 1/4 tsp Kosher Salt
Instructions
- Prepare the Mixture. In a large mixing bowl, combine the sweetened condensed milk, peanut butter, vanilla extract, and salt. Stir until the mixture is smooth and well combined.
- Whip the Cream. In a separate bowl, whip the heavy cream until stiff peaks form. This usually takes about 3-4 minutes using an electric mixer on medium-high speed.
- Combine the Mixtures. Gently fold the whipped cream into the peanut butter mixture. Be careful not to deflate the whipped cream, as this will ensure a light and airy texture.
- Freeze. Transfer the mixture to a loaf pan or airtight container. Smooth the top with a spatula and cover with plastic wrap or a lid. Freeze for at least 6 hours or overnight.
- Serve. Scoop it into bowls or cones. Enjoy as is, or top with additional peanut butter, chocolate chips, or crushed peanuts for extra flavor and texture.
Get support & connect with our community on Facebook!
Nutrition

If you already signed up, you should have received an email with a password to give you unlimited access to our FREE Printable Library. The password is case sensitive. Enter it below and get printing!
Password:

Peanut Butter Ice Cream Recipe | No Churn Ice Cream
Ingredients
- 2 cups Heavy Cream
- 14 oz Sweetened Condensed Milk
- 1 cup Creamy Peanut Butter
- 1 tsp Vanilla Extract
- 1/4 tsp Kosher Salt
Instructions
- Prepare the Mixture. In a large mixing bowl, combine the sweetened condensed milk, peanut butter, vanilla extract, and salt. Stir until the mixture is smooth and well combined.
- Whip the Cream. In a separate bowl, whip the heavy cream until stiff peaks form. This usually takes about 3-4 minutes using an electric mixer on medium-high speed.
- Combine the Mixtures. Gently fold the whipped cream into the peanut butter mixture. Be careful not to deflate the whipped cream, as this will ensure a light and airy texture.
- Freeze. Transfer the mixture to a loaf pan or airtight container. Smooth the top with a spatula and cover with plastic wrap or a lid. Freeze for at least 6 hours or overnight.
- Serve. Scoop it into bowls or cones. Enjoy as is, or top with additional peanut butter, chocolate chips, or crushed peanuts for extra flavor and texture.
Peanut Butter Ice Cream Recipe | No Churn Ice Cream https://twosleevers.com/peanut-butter-ice-cream-recipe/

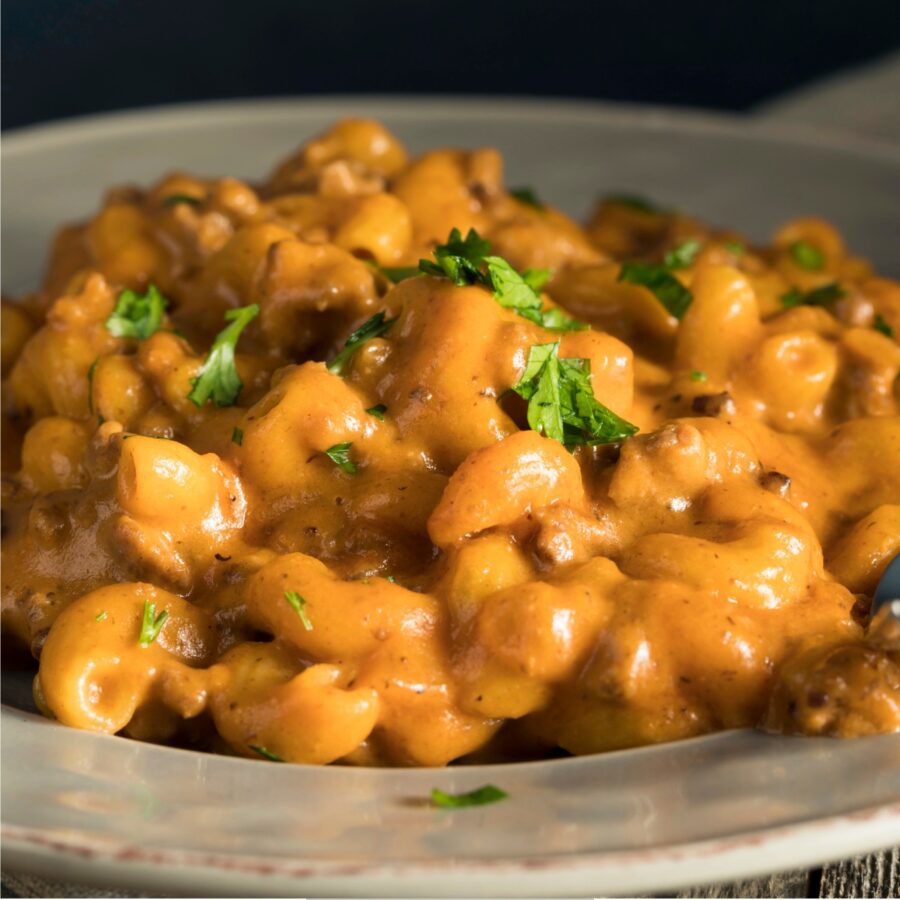
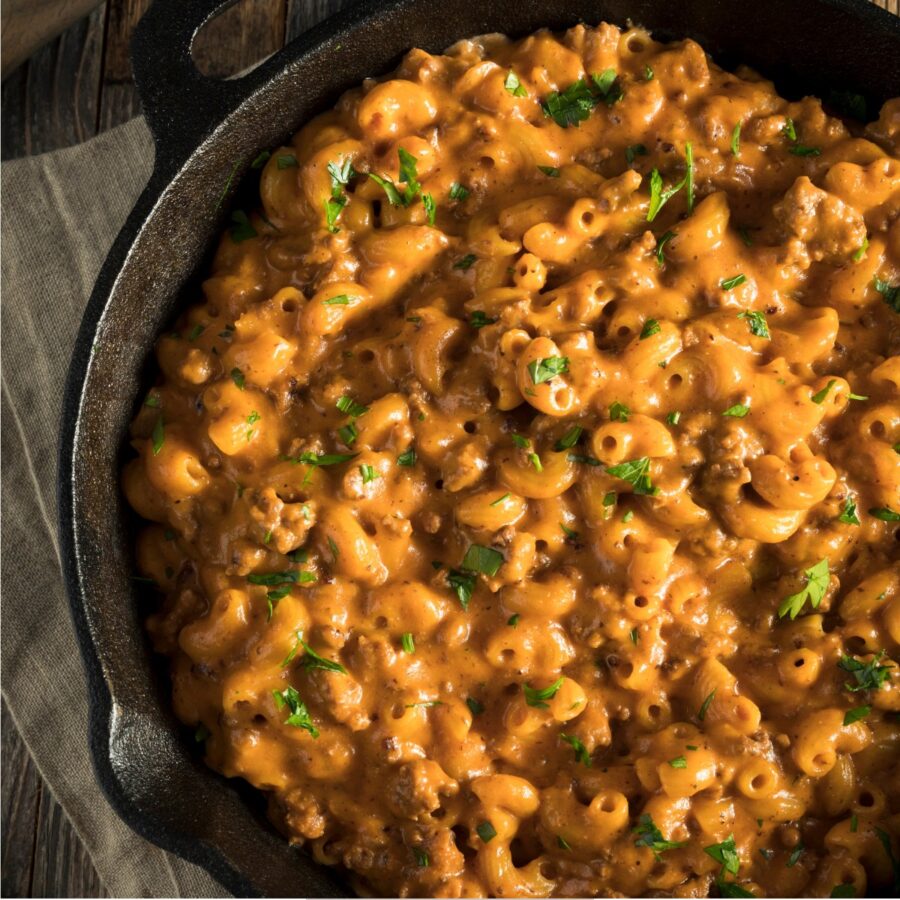
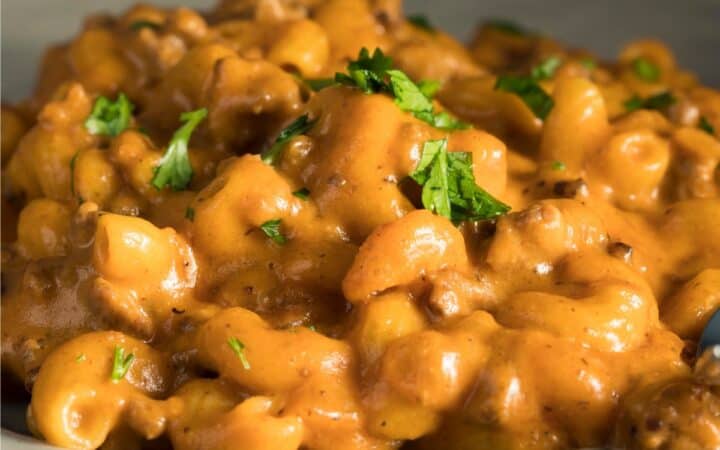
If you’re a fan of easy comfort food that pairs tender pasta with juicy ground beef and a rich, cheesy sauce, you’re in for a treat! Learn how to make the easiest Instant Pot Cheeseburger Macaroni. You’ll love that perfect balance of savory ground beef, al dente macaroni, and a velvety cheese blend without standing over the stove.
Why You’ll Love This Perfect Pasta
- Fast. Ready in under 30 minutes with the help of your Instant Pot.
- Easy. Brown the beef, add ingredients, and let the pressure cooker do the work.
- Crowd-Pleasing. Creamy sauce, meaty goodness, and tender pasta check all the boxes for a hearty family meal.
- Delicious. Packed with flavor that is absolutely kid-approved—and adult-adored too!
With these straightforward steps, you’ve created a restaurant-quality dish that will keep everyone coming back for seconds. Whether you’re hosting a casual gathering or planning a quick weeknight dinner, Instant Pot Cheeseburger Macaroni is guaranteed to be a hit.
What Does Cheeseburger Macaroni Taste Like?
Instant Pot Cheeseburger Macaroni is absolutely delicious and insanely popular among pasta and cheese lovers. This dish offers a delectable combination of savory ground beef, creamy sauce, and perfectly cooked pasta that appeals to a wide range of palates.
Its rich, comforting taste makes it a go-to dinner option—think of it as a homemade spin on a boxed classic, but better.
Ingredients You’ll Need
- Ground Beef - The main protein, giving the dish its signature “cheeseburger” flavor. Lean beef helps avoid excess grease and keeps the sauce clean.
- Onion - Finely chopped for a sweet, savory base that elevates the ground beef’s flavor.
- Garlic - Adds aromatic depth and pairs perfectly with beef, enhancing every bite.
- Paprika or Chili Powder - For a subtle warmth and extra flavor dimension, letting you customize the spice level.
- Salt & Black Pepper - Essential seasonings to enhance the savory notes, ensuring the final dish isn’t bland.
- Beef Broth - Provides liquid for the pasta to cook and enriches the overall taste, contributing a meaty backbone to the sauce.
- Elbow Macaroni - The foundation that absorbs all the cheesy goodness, cooking to a tender bite in the Instant Pot.
- Tomato Sauce or Diced Tomatoes - Adds a tangy bite reminiscent of burger condiments, rounding out the “cheeseburger” profile.
- Shredded Cheese - Melts into a creamy sauce that ties everything together, delivering comforting richness.
- Heavy Cream or Half-and-Half - For extra richness and a silkier sauce, making each spoonful indulgently smooth.
How To Make Cheeseburger Macaroni
- Sauté the Beef & Onion . Turn the Instant Pot to Sauté mode. Add a drizzle of oil (or use cooking spray) if desired. Brown the ground beef and onion together, breaking up the meat until no longer pink. Stir in minced garlic, paprika, salt, and pepper for about 1 minute.
- Add Pasta & Liquids . Cancel the Sauté function. Add beef broth, tomato sauce (or diced tomatoes), and elbow macaroni. Stir gently to ensure the pasta is submerged.
- Pressure Cook . Lock the Instant Pot lid in place and set the valve to Sealing. Select High Pressure and cook for 4–5 minutes (depending on pasta package instructions). When the cooking cycle finishes, quick release the pressure carefully.
- Stir in Cheese & Optional Cream . Once the pin drops, open the lid and stir the contents. If you prefer a creamier sauce, add a splash of heavy cream or half-and-half. Gradually add the shredded cheese, stirring until melted and evenly distributed.
Tips And Tricks
Making Instant Pot Cheeseburger Macaroni is straightforward, but these tips can help you achieve the best possible results:
- Use Lean Ground Beef . Minimizes extra grease, resulting in a cleaner sauce.
- Season in Layers . Sprinkle salt, pepper, and optional spices during sautéing for better flavor.
- Avoid Overcooking Pasta . A quick pressure cook ensures the macaroni remains al dente.
- Slowly Add Cheese . Prevents clumping and ensures a smooth sauce.
- Taste & Adjust . Sample the final dish and add more seasoning, cheese, or cream if desired.
Variations
If you’re a fan of Instant Pot Cheeseburger Macaroni and want to get creative, here are a few delicious ideas:
- Bacon Cheeseburger Mac - Stir in crispy bacon bits for a smoky twist.
- Taco Mac - Swap paprika for taco seasoning and top with shredded lettuce, salsa, or sour cream.
- Veggie Boost - Add diced bell peppers, mushrooms, or spinach during the sauté step.
- White Cheddar - Try a sharp white cheddar for a tangier flavor profile.
What To Eat With Cheeseburger Macaroni
Cheeseburger Macaroni is a hearty, one-pot meal, but here are some accompaniments to round it out:
- Salad - A crisp salad with a light dressing contrasts the creamy pasta.
- Garlic Bread - Perfect for scooping up extra sauce.
- Roasted Vegetables - Balance the richness with a tray of roasted broccoli or zucchini.
- Pickles or Jalapeños - Adds a tangy, crunchy element reminiscent of a burger topping.
How Long Does It Last?
Instant Pot Cheeseburger Macaroni can be stored in the refrigerator for 3–4 days in an airtight container.
The flavors may deepen over time, so for the best bite, reheat gently on the stovetop or microwave with a splash of milk to keep it creamy.
Can You Freeze It?
Yes, you can freeze Instant Pot Cheeseburger Macaroni for up to 2 months. Let it cool completely before transferring it to a freezer-safe container.
Thaw your leftovers overnight in the refrigerator and reheat on the stove or microwave, adding a bit of liquid to restore creaminess.
More Easy Instant Pot Recipes
- Instant Pot Butter Chicken
- Arroz Con Pollo
- Korean Beef Bowl
- Keto Chili
- Mango Cheesecake

Cheeseburger Macaroni Recipe | Instant Pot Cheeseburger Mac
Ingredients
- ▢ 1 pound Ground Beef
- ▢ 1 Onion , diced
- ▢ 3 cloves Garlic , minced
- ▢ 1 tsp Paprika
- ▢ 1 tsp Kosher Salt
- ▢ 1/2 tsp Black Pepper
- ▢ 3 cups Beef Broth
- ▢ 2 cups Elbow Macaroni
- ▢ 15 ounces Tomato Sauce
- ▢ 1 1/2 cups Cheddar Cheese , shredded
- ▢ 1/2 cup Heavy Cream , optional
Instructions
- Sauté the Beef & Onion . Turn the Instant Pot to Sauté mode. Add a drizzle of oil (or use cooking spray) if desired. Brown the ground beef and onion together, breaking up the meat until no longer pink. Stir in minced garlic, paprika, salt, and pepper for about 1 minute.
- Add Pasta & Liquids . Cancel the Sauté function. Add beef broth, tomato sauce (or diced tomatoes), and elbow macaroni. Stir gently to ensure the pasta is submerged.
- Pressure Cook . Lock the Instant Pot lid in place and set the valve to Sealing. Select High Pressure and cook for 4–5 minutes (depending on pasta package instructions). When the cooking cycle finishes, quick release the pressure carefully.
- Stir in Cheese & Optional Cream . Once the pin drops, open the lid and stir the contents. If you prefer a creamier sauce, add a splash of heavy cream or half-and-half. Gradually add the shredded cheese, stirring until melted and evenly distributed.
