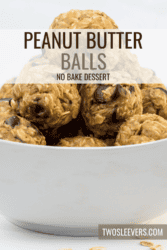
If you’re a fan of the classic combo of peanut butter and chocolate, get ready to indulge in a healthier way. Today, we’re sharing our recipe for Protein Peanut Butter Balls. These bite-sized treats are not only delicious but also packed with protein, making them a guilt-free snack or dessert option.
Why This Will Be Your New Favorite Snack
- Protein-Packed- With protein powder as one of the key ingredients, these peanut butter balls are a great way to satisfy your sweet tooth while getting an extra protein boost.
- Easy to Make - This recipe is incredibly simple, requiring just a handful of ingredients and minimal prep time.
- No-Bake - No need to turn on the oven for this one! These peanut butter balls come together without any baking, making them perfect for hot summer days when you don’t want to heat up the kitchen.
- Customizable - You can get creative with add-ins like chocolate chips, chopped nuts, or dried fruit to tailor these treats to your taste.
Can You Make Peanut Butter Balls With No Butter?
Yes, you can make peanut butter balls without butter. Peanut butter balls are a versatile treat, and there are many recipes that don’t use traditional butter (like this one!) but still yield delicious results.
Why Are My Peanut Butter Balls Too Soft?
If your peanut butter balls are turning out too soft, it could be due to a few reasons. Here are some common factors that can contribute to soft peanut butter balls and how to address them:
- Peanut Butter Consistency- The type and consistency of peanut butter you use can significantly impact the texture. Natural peanut butter, which tends to be runnier and has a thinner consistency, can make the mixture softer. To counter this, try using a peanut butter that is thicker or has less oil separation.
- Too Much Liquid - If you’ve added too much liquid to your mixture, it can make the balls soft. This liquid can come from ingredients like honey or maple syrup. To remedy this, adjust the amount of liquid you add or increase the dry ingredients (e.g., oats, and protein powder) to balance the consistency.
- Refrigeration - Proper chilling is essential. If you don’t refrigerate them long enough, they may not firm up properly. Typically, they should be chilled in the refrigerator for at least 30 minutes to an hour before shaping into balls.
Ingredients You’ll Need
- Creamy Peanut Butter
- Protein Powder
- Quick Oats
- Honey
- Dark Chocolate Chips
- Shredded Coconut
- Salt
These Peanut Butter Balls are a fantastic snack option when you need a quick energy boost or a post-workout recovery treat. Plus, you can customize them with your favorite protein powder flavor and add-ins for a snack that suits your taste buds.
How To Make Peanut Butter Balls
- Combine Ingredients . In a large mixing bowl, combine the creamy peanut butter, protein powder, honey or maple syrup, and a pinch of salt. Stir until the mixture becomes well combined and forms a thick, dough-like consistency.
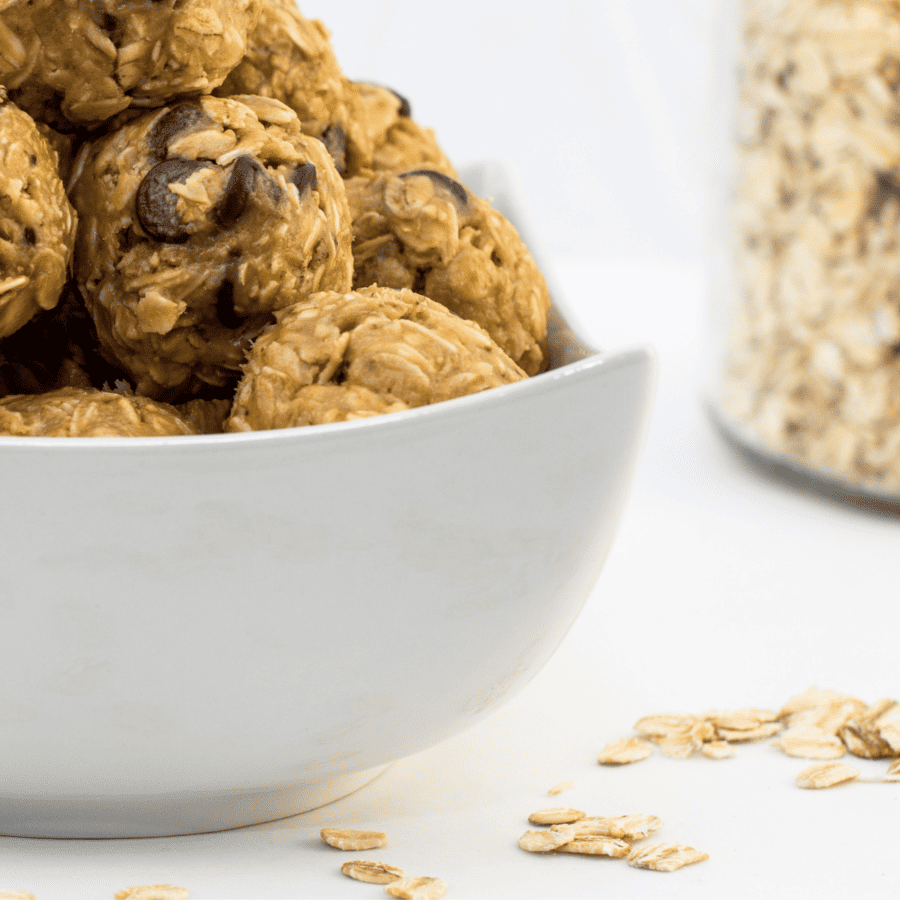
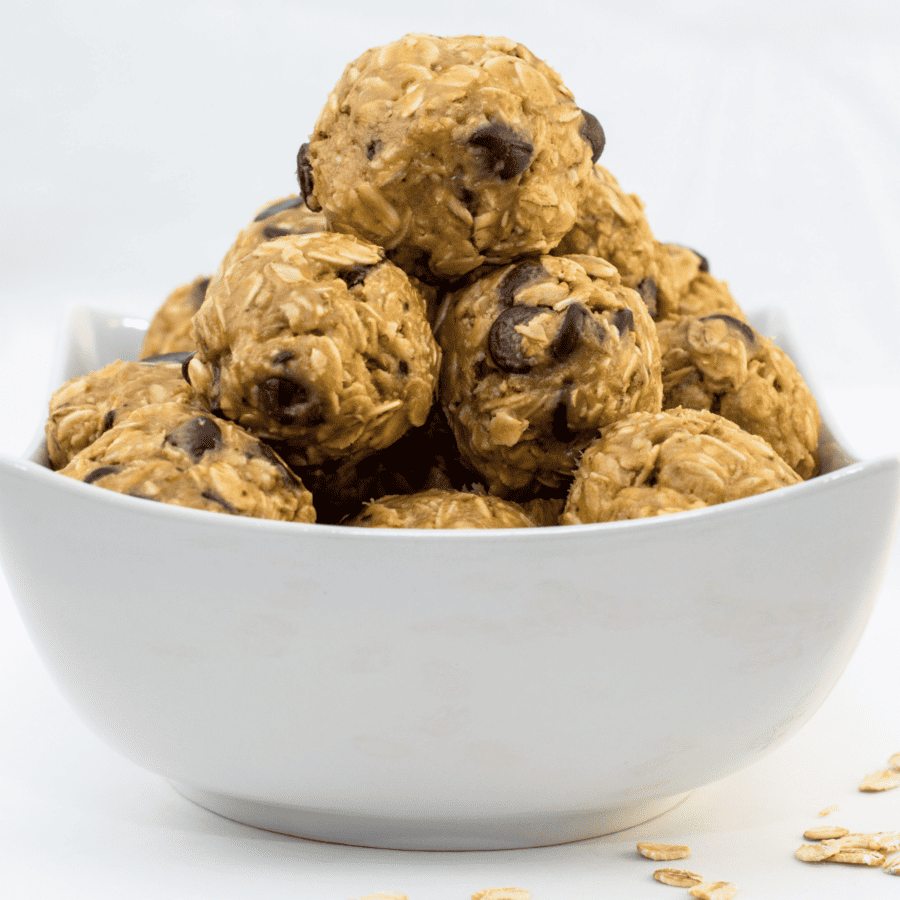
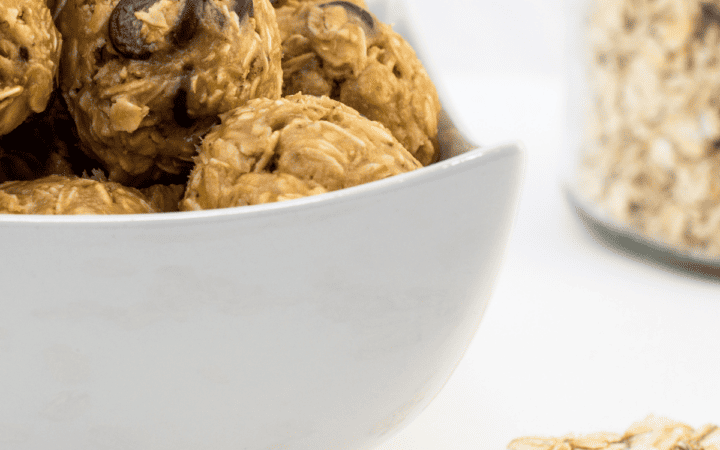
- Add Optional Mix-Ins . If you’re using chocolate chips or shredded coconut (or any other mix-ins of your choice), fold them into the peanut butter mixture until they’re evenly distributed.
- Shape the Balls . Take small portions of the mixture and roll them between your palms to form bite-sized balls. You can make them as big or small as you like. Place each ball on a parchment paper-lined tray or plate.
- Chill . Once all the balls are shaped, place them in the refrigerator for about 15-20 minutes. Chilling helps them set and become firmer.
- Enjoy! Once the protein peanut butter balls have chilled, they’re ready to enjoy. Store any leftovers in an airtight container in the refrigerator for longer shelf life.
Tips And Tricks
Making protein peanut butter balls is a delightful way to satisfy your sweet cravings while adding a dose of protein to your diet. Here are some tips and tricks to help you make them perfect every time:
- Sweeteners and Flavors - Adjust the sweetness to your preference by adding honey, maple syrup, or a sugar substitute like stevia. Enhance the flavor with vanilla extract, cocoa powder, cinnamon, or other spices that complement the taste of peanut butter.
- Consistent Ball Size - Use a cookie scoop or your hands to portion the mixture into evenly sized balls. This ensures they all cook and chill at the same rate.
- Non-Stick Hands- Rub your hands with a small amount of coconut oil or water to prevent the mixture from sticking to your hands when rolling the balls.
Variations
Feel free to get creative with your Protein Peanut Butter Balls. Here are some ideas:
- Chocolate Lover’s Dream - Coat the balls in melted dark chocolate for a decadent twist.
- Nutty Crunch - Add chopped nuts like almonds, peanuts, or cashews to the mixture for extra crunch and flavor.
- Fruity Delight - Incorporate dried fruits like cranberries, raisins, or chopped dates for a sweet and chewy contrast.
- Spice It Up - A pinch of cinnamon or a dash of vanilla extract can add delightful warmth to the flavor.
How Long Do They Last?
If you keep your protein balls in an airtight container in the refrigerator, they should stay fresh for about 1 to 2 weeks.
Make sure the container is well-sealed to prevent them from drying out or absorbing any odors from the fridge.
Can You Freeze Them?
For longer-term storage, you can freeze protein peanut butter balls. Place them on a baking sheet and freeze until they’re firm. Then transfer them to an airtight container or a freezer bag, separating layers with parchment paper to prevent sticking.
Frozen protein peanut butter balls can last for up to 2 to 3 months.
More Simple Dessert Recipes
- No Bake Peanut Butter Bars
- Protein Pudding
- Cheesecake Dip
- Keto Cookie Dough Bites
- Low Carb Brownies

Peanut Butter Balls Recipe | Peanut Butter Protein Balls
Ingredients
- ▢ 1/2 cup Peanut Butter
- ▢ 2 tbsp Protein Powder
- ▢ 1 cup Quick Oats
- ▢ 1/3 cup Honey
- ▢ 1/2 cup Dark Chocolate Chips
- ▢ 1/2 cup Shredded Coconut
- ▢ 1 tsp Salt
Instructions
- Combine Ingredients . In a large mixing bowl, combine the creamy peanut butter, protein powder, honey or maple syrup, and a pinch of salt. Stir until the mixture becomes well combined and forms a thick, dough-like consistency.
- Add Optional Mix-Ins . If you’re using chocolate chips or shredded coconut (or any other mix-ins of your choice), fold them into the peanut butter mixture until they’re evenly distributed.
- Shape the Balls . Take small portions of the mixture and roll them between your palms to form bite-sized balls. You can make them as big or small as you like. Place each ball on a parchment paper-lined tray or plate.
- Chill . Once all the balls are shaped, place them in the refrigerator for about 15-20 minutes. Chilling helps them set and become firmer.
- Enjoy! Once the protein peanut butter balls have chilled, they’re ready to enjoy. Store any leftovers in an airtight container in the refrigerator for longer shelf life.
Get support & connect with our community on Facebook!
Nutrition

If you already signed up, you should have received an email with a password to give you unlimited access to our FREE Printable Library. The password is case sensitive. Enter it below and get printing!
Password:

Peanut Butter Balls Recipe | Peanut Butter Protein Balls
Ingredients
- 1/2 cup Peanut Butter
- 2 tbsp Protein Powder
- 1 cup Quick Oats
- 1/3 cup Honey
- 1/2 cup Dark Chocolate Chips
- 1/2 cup Shredded Coconut
- 1 tsp Salt
Instructions
- Combine Ingredients . In a large mixing bowl, combine the creamy peanut butter, protein powder, honey or maple syrup, and a pinch of salt. Stir until the mixture becomes well combined and forms a thick, dough-like consistency.
- Add Optional Mix-Ins . If you’re using chocolate chips or shredded coconut (or any other mix-ins of your choice), fold them into the peanut butter mixture until they’re evenly distributed.
- Shape the Balls . Take small portions of the mixture and roll them between your palms to form bite-sized balls. You can make them as big or small as you like. Place each ball on a parchment paper-lined tray or plate.
- Chill . Once all the balls are shaped, place them in the refrigerator for about 15-20 minutes. Chilling helps them set and become firmer.
- Enjoy! Once the protein peanut butter balls have chilled, they’re ready to enjoy. Store any leftovers in an airtight container in the refrigerator for longer shelf life.
Peanut Butter Balls Recipe | Peanut Butter Protein Balls https://twosleevers.com/peanut-butter-balls-recipe/

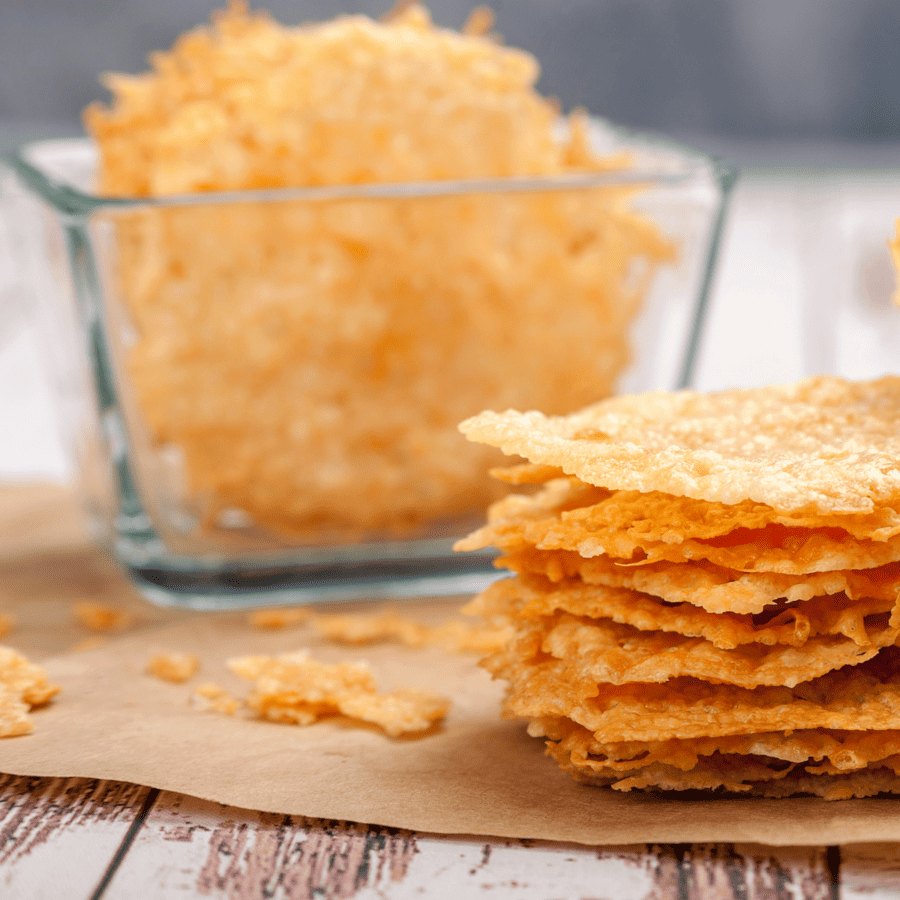
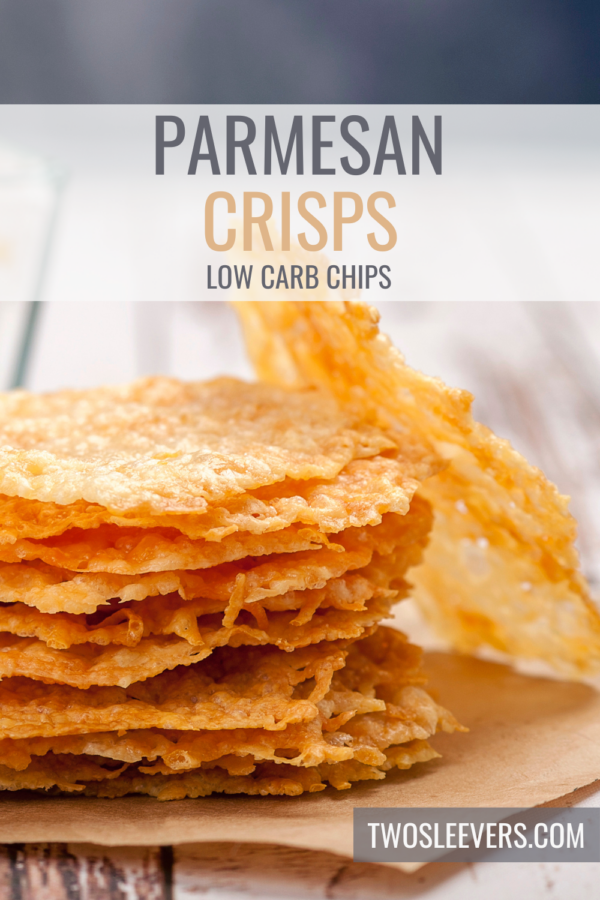
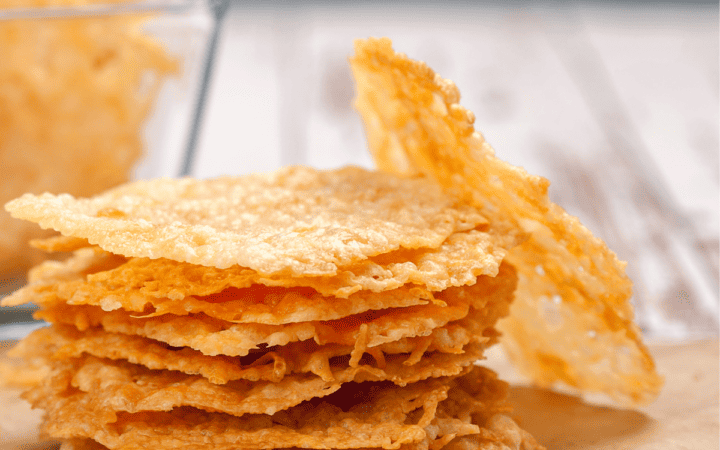
If you’re a fan of the delectable combination of savory cheese and crispy, crunchy goodness, you’re in for a treat! Learn how to make the easiest Parmesan Crisps right at home. You’ll achieve that perfect balance between a cheesy exterior and a delicate, lacy texture while indulging in irresistible flavors.

Why You’ll Love Snacking On These
- Fast . Ready in under 15 minutes, making it a quick and satisfying snack.
- Easy . Only one ingredient and a simple process.
- Low Carb. A perfect low-carb and keto-friendly snack.
- Delicious . Packed with the rich, nutty flavor of Parmesan cheese that is absolutely addictive.
With the convenience of this recipe, you’ve achieved a restaurant-quality snack that will leave your friends and family craving more. Whether you’re hosting a party or simply looking for a delicious nibble, these Parmesan Crisps are guaranteed to be a hit.
Are Parmesan Crisps A Healthy Snack?
Parmesan crisps can be considered a relatively healthy snack option when compared to many other traditional snack choices.
Keep in mind that Parmesan crisps are still a calorie-dense snack due to their cheese content. They can be high in sodium, especially if you’re using pre-grated Parmesan cheese. While they can be a healthy snack when enjoyed in moderation, try not to overindulge.
Are Parmesan Crisps Good?
Absolutely! Parmesan crisps are incredibly delicious and a favorite among cheese enthusiasts.
These crisps offer a delightful blend of flavors - the savory, nutty taste of Parmesan cheese paired with the satisfying crunch of perfectly baked cheese. It’s a simple yet incredibly satisfying snack that’s sure to please your palate.
Ingredients You’ll Need
You’ll only need ONE ingredient for this delicious, low carb snack! Not only are they easy to make, but you likely already have everything you need in your kitchen waiting for you.
- Parmesan Cheese - Use high-quality Parmesan cheese, preferably freshly grated. You can also use pre-grated Parmesan, but freshly grated cheese tends to yield better results.
How To Make Parmesan Crisps
- Preheat your oven . Begin by preheating your oven to 375°F. Line a baking sheet with parchment paper or a silicone baking mat.
- Portion out the cheese . Take small heaps (about 1 tablespoon each) of grated Parmesan cheese and place them on the prepared baking sheet. Make sure to space them a few inches apart, as they will spread during baking.
- Shape and flatten . Gently flatten each heap of cheese with the back of a spoon to create a thin, even layer. You can shape them into rounds or ovals, but leave some space between them to allow for spreading.
- Bake to perfection . Place the baking sheet in the preheated oven and bake for about 5-7 minutes, or until the crisps turn a beautiful golden brown color. Keep a close eye on them, as they can go from perfect to overdone quickly.
- Cool and enjoy . Remove the Parmesan crisps from the oven and let them cool on the baking sheet for a few minutes. They will continue to crisp up as they cool. Once they’re completely cool and firm, carefully peel them off the parchment paper or baking mat.
Tips And Tricks
Making Parmesan Crisps is a breeze, but a few tips can help you achieve the best results:
- Use freshly grated Parmesan for the best flavor and texture.
- Leave enough space between mounds of cheese to allow for spreading during baking.
- Keep a close eye on them in the oven to prevent over-browning.
Variations
While classic Parmesan crisps are delightful on their own, you can experiment with different flavors and additions:
- Herb-Infused - Sprinkle dried herbs like rosemary, thyme, or oregano on top of the cheese before baking for a burst of herbal goodness.
- Spiced- Add a pinch of red pepper flakes or freshly cracked black pepper for a hint of heat.
- Everything Bagel - Incorporate everything bagel seasoning for a delightful savory crunch.
- Balsamic Drizzle - After baking, drizzle a small amount of balsamic glaze over the cooled crisps for a sweet and tangy twist.
What To Serve With Parmesan Crisps
Parmesan crisps make a delicious and versatile snack or appetizer, and there are various accompaniments you can serve with them to enhance their flavors. Here are some ideas:
- Hummus - The creamy texture and mild flavor of hummus complement the savory and salty notes.
- Guacamole - The richness of guacamole pairs well with the crispiness of the crisps. It’s a delightful combination of textures.
- Salsa - A fresh tomato salsa or a fruit salsa can add a refreshing contrast to the cheese crisps.
- Ranch Dressing - The creamy and tangy qualities of ranch dressing can be a great match for Parmesan crisps.
- Soup or Salad - Use them as croutons for salads or as a garnish for soups like tomato bisque or gazpacho.
How Long Do They Last?
Parmesan crisps can be stored in an airtight container at room temperature for up to 3-5 days. However, they are best enjoyed fresh for maximum crunchiness.
Can You Freeze Them?
If you’ve just made fresh Parmesan crisps, allow them to cool completely at room temperature. This helps prevent condensation inside the packaging, which can lead to fogginess.
Place the Parmesan crisps in an airtight container or resealable freezer-safe bag. You can also separate layers of crisps with parchment paper or wax paper to prevent them from sticking together.
They can generally be stored in the freezer for up to 2 to 3 months without significant loss of quality.
More Low Carb Snacks
- Keto Crackers
- Low Carb Chips
- Almond Flour Cookies
- No Bake Peanut Butter Bars
- Keto Ice Cream
Parmesan Crisps are incredibly versatile. Serve them as a snack, appetizer, or alongside soups and salads. Get creative with your toppings and flavors to customize them to your liking. These crisps are a simple yet elegant addition to any meal, and once you make them, you’ll find endless ways to enjoy them.
Parmesan Crisps | Protein Chip Recipe
Ingredients
- ▢ 1 cup Parmesan Cheese
Instructions
- Preheat your oven . Begin by preheating your oven to 375°F. Line a baking sheet with parchment paper or a silicone baking mat.
- Portion out the cheese . Take small heaps (about 1 tablespoon each) of grated Parmesan cheese and place them on the prepared baking sheet. Make sure to space them a few inches apart, as they will spread during baking.
- Shape and flatten . Gently flatten each heap of cheese with the back of a spoon to create a thin, even layer. You can shape them into rounds or ovals, but leave some space between them to allow for spreading.
- Bake to perfection . Place the baking sheet in the preheated oven and bake for about 5-7 minutes, or until the crisps turn a beautiful golden brown color. Keep a close eye on them, as they can go from perfect to overdone quickly.
- Cool and enjoy . Remove the Parmesan crisps from the oven and let them cool on the baking sheet for a few minutes. They will continue to crisp up as they cool. Once they’re completely cool and firm, carefully peel them off the parchment paper or baking mat.
Get support & connect with our community on Facebook!
Nutrition
Don’t forget to check out my other Ketocookbooks.
Keto Instant Pot, Keto Fat Bombs, Sweets, & Treats , and Easy keto in 30 minutes.

