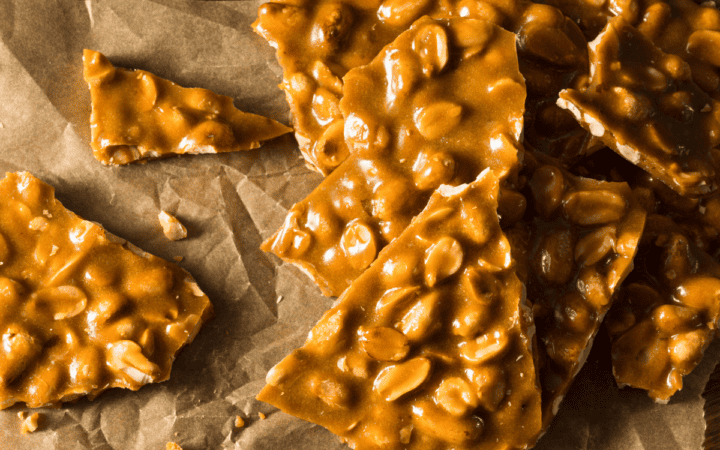
Peanut Brittle is a classic, crunchy, and nutty treat that’s loved by people of all ages. Whether you’re making it for a holiday gathering, a special gift, or just to satisfy your sweet tooth, this recipe is a timeless favorite that’s surprisingly simple to make. With its golden color, delightful peanut crunch, and a hint of caramel sweetness, you’ll find it hard to resist this homemade candy.
Why You’ll Love This Nostalgic Candy
- Addictive Crunch . The satisfying snap of peanut brittle is utterly addictive, making it a delightful treat for snack lovers.
- Easy to Make . Despite its gourmet appearance, peanut brittle is straightforward to prepare with just a handful of ingredients.
- Great for Gifting . Homemade peanut brittle is a thoughtful and delicious gift for family and friends, especially during the holiday season.
- Customizable . While this recipe uses peanuts, you can experiment with other nuts like almonds or cashews for a unique twist.
- Long Shelf Life . Properly stored peanut brittle can last for several weeks, so you can enjoy it over time.
With its delightful combination of flavors and textures, this Peanut Brittle is sure to become a cherished recipe in your collection.
Why Didn’t My Homemade Peanut Brittle Get Hard?
If your homemade peanut brittle didn’t become hard and turned out too soft, several factors could be responsible. Achieving the right texture for peanut brittle can be a bit tricky, but understanding these common issues can help you troubleshoot and improve your recipe for next time:
- Temperature Not Reached: Peanut brittle needs to reach a specific temperature to achieve the desired hard and brittle texture. Usually, this is around 300°F to 310°F (149°C to 154°C) on a candy thermometer. If the mixture didn’t reach this temperature, it might remain soft. Make sure your candy thermometer is calibrated and accurate.
- Undercooking: Even if the temperature is reached, the mixture may not have cooked long enough. It needs to be at the hard crack stage, which means that the sugar syrup has cooked sufficiently to become hard and brittle when it cools. This stage is usually achieved at the specified temperature, but cooking times can vary.
- Not Stirring Constantly: During the cooking process, it’s crucial to stir the mixture constantly to ensure even heating and prevent hot spots. Uneven stirring can result in some areas being undercooked and not achieving the proper texture.
- Humidity: High humidity can affect the outcome of your peanut brittle. Excess moisture in the air can cause the brittle to absorb moisture and become softer. Try making peanut brittle on a dry day or use a dehumidifier in your kitchen.
Ingredients You’ll Need
- Granulated Sugar- The primary sweetening agent in peanut brittle. It caramelizes during the cooking process, providing the brittle with its characteristic sweetness and contributing to its hard texture.
- Light Corn Syrup- Serves multiple purposes in peanut brittle. It prevents the sugar from crystallizing, resulting in a smoother texture. It also adds moisture to the mixture, making it easier to work with, and enhances the brittle’s shine.
- Water- Is used to dissolve the sugar and corn syrup, creating a syrupy mixture. It aids in the cooking process by allowing the sugar to reach the desired temperature for the brittle.
- Salt- Enhances the flavor of the peanut brittle, balancing the sweetness and adding a subtle savory element. It complements the nutty and sweet profile of the candy.
- Roasted Unsalted Peanuts- The star ingredient in peanut brittle. They provide the signature nutty flavor, crunch, and texture to the candy. Roasting the peanuts intensifies their flavor and enhances the overall taste of the brittle.
- Unsalted Butter- Adds richness and a creamy texture to the peanut brittle. It also contributes to the flavor profile and helps prevent the candy from sticking to the pan during cooking.
- Pure Vanilla Extract- Imparts a subtle vanilla flavor to the peanut brittle, enhancing its overall taste. It complements the sweetness and nuttiness of the candy.
- Baking Soda- Serves as a leavening agent in peanut brittle. When added, it causes a chemical reaction with the sugar syrup, creating tiny bubbles that make the brittle light and airy. This gives it a pleasing, less dense texture and allows it to snap when broken.
How To Make This Peanut Brittle Recipe
- Prepare a Baking Sheet . Line a baking sheet with parchment paper and set it aside. You’ll pour the hot brittle mixture onto this sheet later.
- Combine Sugar, Corn Syrup, Water, and Salt . In a heavy-bottomed saucepan, combine the sugar, corn syrup, water, and salt. Stir them together over medium-high heat until the sugar dissolves. Once the mixture begins to boil, insert a candy thermometer.
- Cook to 300°F (Hard Crack Stage) . Without stirring, let the mixture cook until it reaches 300°F (Hard Crack Stage) on the candy thermometer. This will take about 8-10 minutes. Be patient and keep an eye on the temperature.
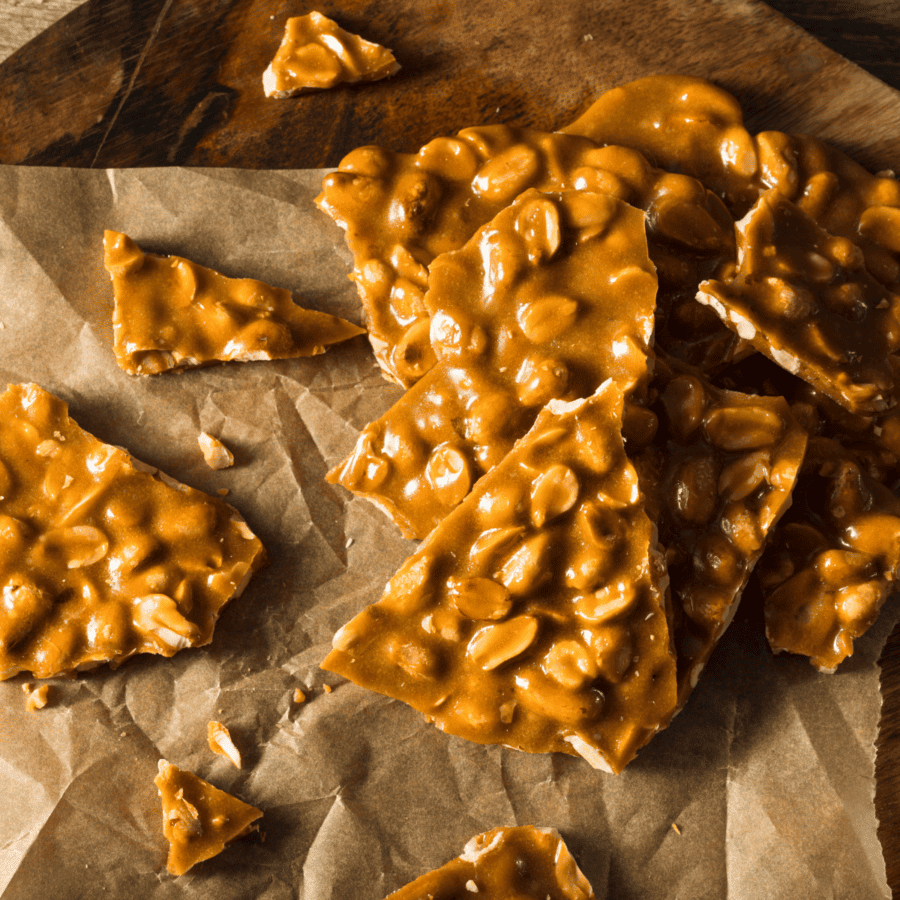
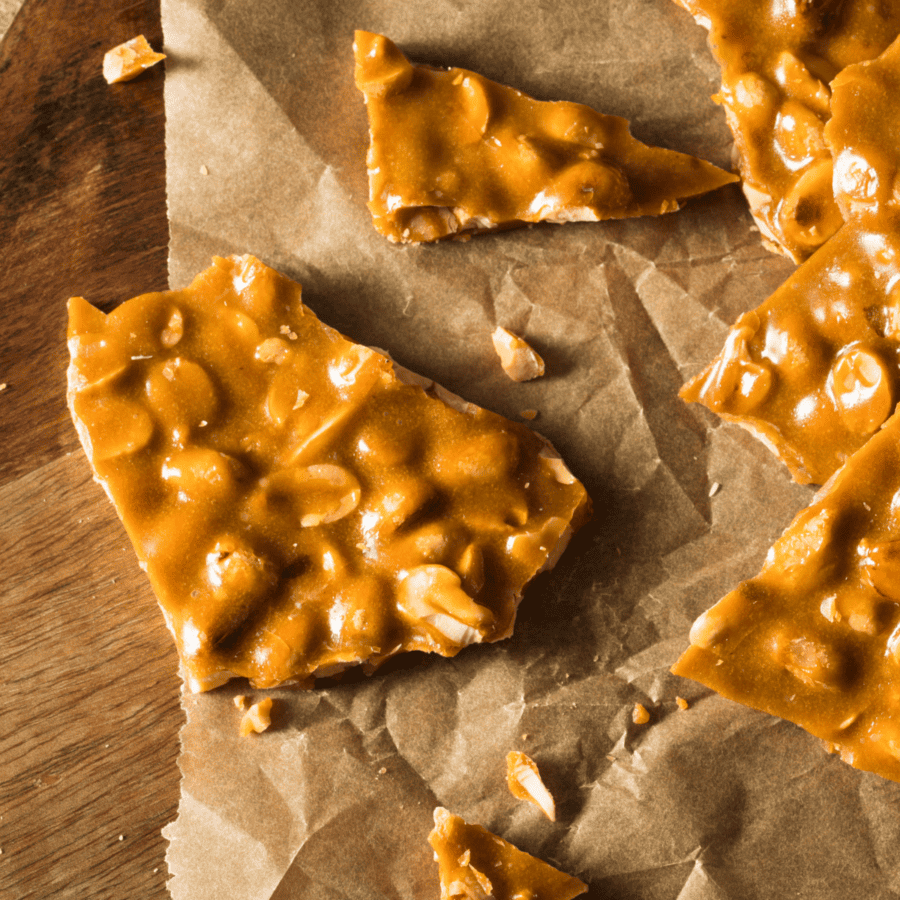
- Add Peanuts and Butter . Once the mixture reaches 300°F, stir in the roasted peanuts and butter. Continue cooking, stirring constantly, until the temperature reaches 310°F (Hard Crack Stage). This should take another 3-5 minutes. The mixture will turn a lovely golden color.
- Remove from Heat and Add Vanilla and Baking Soda . Remove the saucepan from the heat and quickly stir in the vanilla extract and baking soda. Be cautious as the mixture will bubble up when you add these ingredients. Mix until everything is well combined.
- Pour onto Baking Sheet . Immediately pour the hot peanut brittle mixture onto the prepared baking sheet. Use a heat-resistant spatula or the back of a spoon to spread it out into an even layer. Allow it to cool and harden completely.
- Break into Pieces Once the peanut brittle has cooled and hardened (usually within 30 minutes to an hour), break it into bite-sized pieces using your hands or a mallet.
- Store . Store the peanut brittle in an airtight container at room temperature. It should stay fresh for several weeks.
Tips And Tricks
Making peanut brittle can be a rewarding but somewhat challenging endeavor due to the precise cooking temperatures involved. Here are some tips and tricks to help you make it perfect:
- Use a Candy Thermometer . A reliable candy thermometer is essential for making peanut brittle. It helps you monitor the temperature accurately and ensures you reach the hard crack stage, usually between 300°F to 310°F.
- Prep Ingredients in Advance . Have all your ingredients measured and prepared before you start cooking. Once the sugar syrup reaches the right temperature, you’ll need to act quickly, so having everything ready is crucial.
- Stir Constantly . During the cooking process, stir the sugar mixture constantly to prevent it from burning or developing hot spots. Use a wooden spoon or heat-resistant spatula to stir.
- Use a Heavy-Bottomed Pan . A heavy-bottomed saucepan distributes heat evenly and reduces the risk of scorching the sugar mixture.
Variations
Peanut brittle is a classic candy, and while the traditional recipe is beloved, there are several delightful variations you can explore to add different flavors and textures to this sweet treat. Here are some variations:
- Cashew Brittle - Substitute peanuts with cashews for a more buttery and slightly sweeter brittle. Cashews add a creamy texture and a unique flavor.
- Almond Brittle - Replace peanuts with whole or chopped almonds. Almond brittle offers a nuttier and slightly milder taste compared to peanuts.
- Pecan Brittle - Pecans can add a rich, buttery flavor and a delightful crunch to your brittle. Chopped pecans work well for this variation.
What To Enjoy With Peanut Brittle
Peanut brittle is a delightful sweet treat that can be enjoyed on its own or paired with various complementary items for a delicious experience. Here are some ideas for what to enjoy with it:
- Ice Cream - Peanut brittle makes a fantastic topping for ice cream. Crush it into small pieces or crumble it over your favorite ice cream flavor for added crunch and sweetness.
- Chocolate - Peanut brittle and chocolate are a classic combination. Melt some chocolate and drizzle it over broken pieces of brittle, or dip the brittle into melted chocolate for a satisfying contrast of flavors and textures.
- Coffee or Tea - Enjoy a piece of peanut brittle alongside your morning coffee or afternoon tea. The sweetness and crunch of the brittle can be a delightful accompaniment to your hot beverage.
Does Peanut Brittle Go Bad?
Properly stored peanut brittle can last for several weeks to a couple of months. Keep it in an airtight container at room temperature, and it should stay fresh and crunchy.
Can You Freeze It?
Yes, you can freeze peanut brittle for longer-term storage. Freezing can help preserve the freshness and extend the shelf life of your peanut brittle, especially if you’ve made a large batch or want to enjoy it over an extended period.
It’s worth noting that while freezing can help preserve the peanut brittle’s texture and flavor, it may still become slightly stickier upon thawing due to the sugar content. However, this should not affect its overall taste.
Properly stored, frozen peanut brittle can remain good for several months, ensuring you can enjoy this delicious treat whenever you like.
More Homemade Candy Recipes
- Peppermint Bark
- No Bake Peanut Butter Bars
- Chocolate Covered Pretzels
- Keto Gummy Bears
- Sweet Cream Truffles
Peanut Brittle Recipe | Easy Homemade Peanut Brittle
Ingredients
- ▢ 2 cups Granulated Sugar
- ▢ 1 cup Light Corn Syrup
- ▢ 1/2 cup Water
- ▢ 1/2 tsp Salt
- ▢ 2 cups Roasted Unsalted Peanuts
- ▢ 2 tbsp Unsalted Butter
- ▢ 1 tsp Vanilla Extract
- ▢ 1 tsp Baking Soda
Instructions
- Prepare a Baking Sheet . Line a baking sheet with parchment paper and set it aside. You’ll pour the hot brittle mixture onto this sheet later.
- Combine Sugar, Corn Syrup, Water, and Salt . In a heavy-bottomed saucepan, combine the sugar, corn syrup, water, and salt. Stir them together over medium-high heat until the sugar dissolves. Once the mixture begins to boil, insert a candy thermometer.
- Cook to 300°F (Hard Crack Stage) . Without stirring, let the mixture cook until it reaches 300°F (Hard Crack Stage) on the candy thermometer. This will take about 8-10 minutes. Be patient and keep an eye on the temperature.
- Add Peanuts and Butter . Once the mixture reaches 300°F, stir in the roasted peanuts and butter. Continue cooking, stirring constantly, until the temperature reaches 310°F (Hard Crack Stage). This should take another 3-5 minutes. The mixture will turn a lovely golden color.
- Remove from Heat and Add Vanilla and Baking Soda . Remove the saucepan from the heat and quickly stir in the vanilla extract and baking soda. Be cautious as the mixture will bubble up when you add these ingredients. Mix until everything is well combined.
- Pour onto Baking Sheet . Immediately pour the hot peanut brittle mixture onto the prepared baking sheet. Use a heat-resistant spatula or the back of a spoon to spread it out into an even layer. Allow it to cool and harden completely.
- Break into Pieces Once the peanut brittle has cooled and hardened (usually within 30 minutes to an hour), break it into bite-sized pieces using your hands or a mallet.
- Store . Store the peanut brittle in an airtight container at room temperature. It should stay fresh for several weeks.
Get support & connect with our community on Facebook!

If you already signed up, you should have received an email with a password to give you unlimited access to our FREE Printable Library. The password is case sensitive. Enter it below and get printing!
Password:

Peanut Brittle Recipe | Easy Homemade Peanut Brittle
Ingredients
- 2 cups Granulated Sugar
- 1 cup Light Corn Syrup
- 1/2 cup Water
- 1/2 tsp Salt
- 2 cups Roasted Unsalted Peanuts
- 2 tbsp Unsalted Butter
- 1 tsp Vanilla Extract
- 1 tsp Baking Soda
Instructions
- Prepare a Baking Sheet . Line a baking sheet with parchment paper and set it aside. You’ll pour the hot brittle mixture onto this sheet later.
- Combine Sugar, Corn Syrup, Water, and Salt . In a heavy-bottomed saucepan, combine the sugar, corn syrup, water, and salt. Stir them together over medium-high heat until the sugar dissolves. Once the mixture begins to boil, insert a candy thermometer.
- Cook to 300°F (Hard Crack Stage) . Without stirring, let the mixture cook until it reaches 300°F (Hard Crack Stage) on the candy thermometer. This will take about 8-10 minutes. Be patient and keep an eye on the temperature.
- Add Peanuts and Butter . Once the mixture reaches 300°F, stir in the roasted peanuts and butter. Continue cooking, stirring constantly, until the temperature reaches 310°F (Hard Crack Stage). This should take another 3-5 minutes. The mixture will turn a lovely golden color.
- Remove from Heat and Add Vanilla and Baking Soda . Remove the saucepan from the heat and quickly stir in the vanilla extract and baking soda. Be cautious as the mixture will bubble up when you add these ingredients. Mix until everything is well combined.
- Pour onto Baking Sheet . Immediately pour the hot peanut brittle mixture onto the prepared baking sheet. Use a heat-resistant spatula or the back of a spoon to spread it out into an even layer. Allow it to cool and harden completely.
- Break into Pieces Once the peanut brittle has cooled and hardened (usually within 30 minutes to an hour), break it into bite-sized pieces using your hands or a mallet.
- Store . Store the peanut brittle in an airtight container at room temperature. It should stay fresh for several weeks.
Peanut Brittle Recipe | Easy Homemade Peanut Brittle https://twosleevers.com/peanut-brittle-recipe/
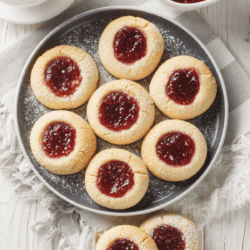
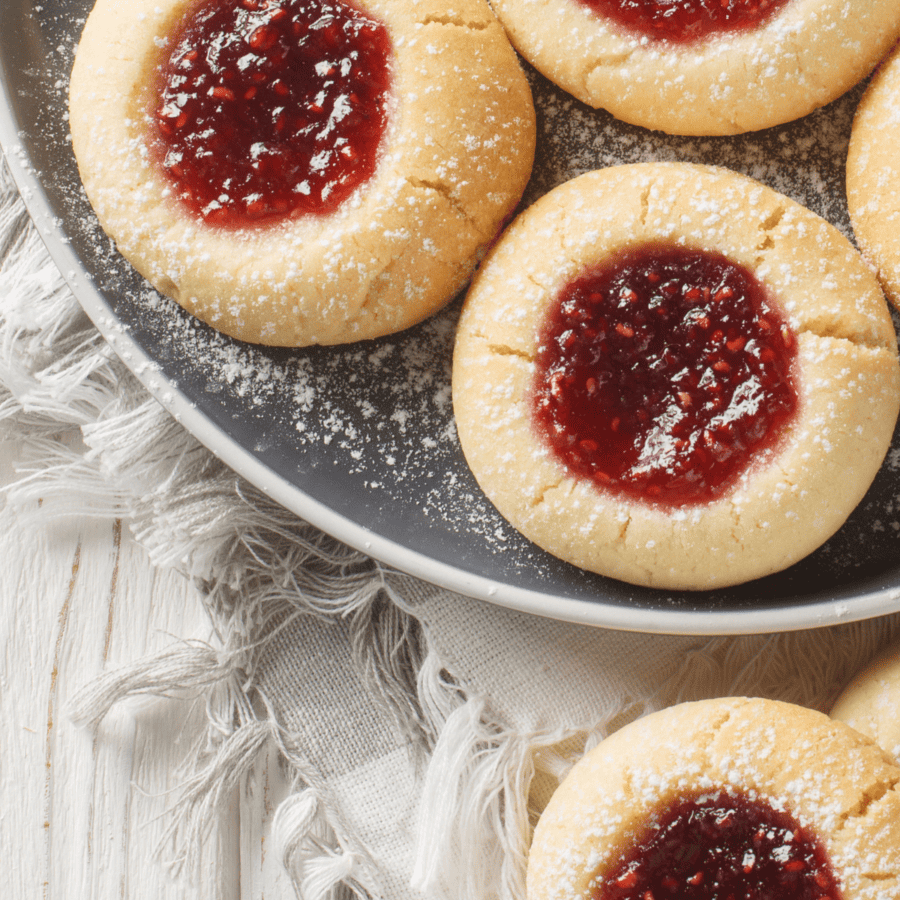
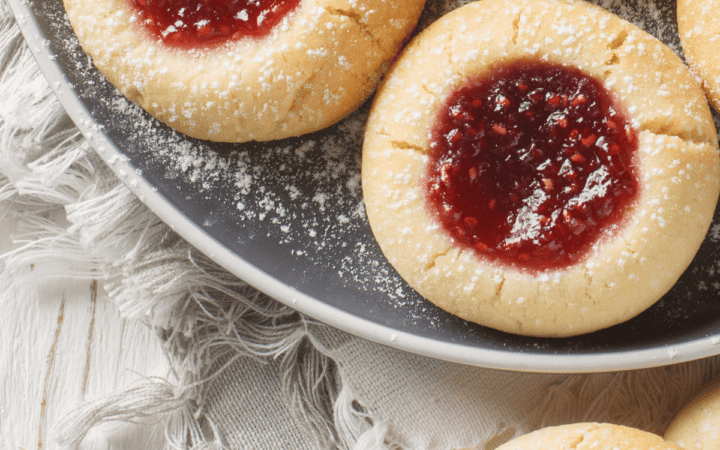
Satisfy your sweet tooth with our delectable Raspberry Thumbprint Cookies recipe. These delightful treats combine the buttery richness of shortbread cookies with a burst of tangy raspberry jam in every bite. Whether you’re baking for the holidays or just craving something sweet, these cookies are a must-try.

Why You’ll Love This Fruit-Flavored Dessert
- Irresistible Flavor . The combination of buttery cookie dough and sweet-tart raspberry jam creates a flavor explosion that’s simply irresistible.
- Easy to Make . Impress your family and friends with this beautiful dessert that is surprisingly easy to whip up. They make a great addition to any cookie platter.
- Versatile . Customize your thumbprint cookies with different fruit jams or preserves to suit your taste preferences. Apricot, strawberry, or blackberry are excellent alternatives to raspberry.
With their delightful crumbly texture and vibrant raspberry centers, these thumbprint cookies are a delightful treat for any occasion.
Why Are They Called Thumbprint Cookies?
Thumbprint cookies are called “thumbprint cookies” because of the distinctive method used to create a well or indentation in the center of each cookie. Typically, a thumb or the back of a spoon is gently pressed into the dough to make this signature thumbprint shape.
Why Do My Thumbprint Cookies Spread?
Ensuring that your thumbprint cookies maintain their shape and don’t overspread during baking requires proper preparation and careful steps. Here are some things to take into consideration before getting started:
- Chilled Dough . After mixing the cookie dough, refrigerate it for about 30 minutes. Chilled dough spreads less while baking, resulting in cookies with a better shape.
- Create Thumbprints Carefully . Use your thumb or the back of a measuring spoon to make an indentation in the center of each cookie. Be gentle to avoid cracking the dough.
- Preheat Your Oven . Make sure your oven is fully preheated to the specified temperature before placing the cookies inside. This helps them set quickly and hold their shape.
Why Is My Thumbprint Cookie Dough Crumbly?
If your thumbprint cookie dough is crumbly, there are several possible reasons for this issue. Here are some common factors and solutions to help you achieve the ideal cookie dough consistency:
- Dry Ingredients Ratio . One of the most common reasons for crumbly cookie dough is an incorrect ratio of dry ingredients, particularly flour. If you added too much flour, the dough can become dry and crumbly. Solution - To fix this, try adding a small amount of liquid (such as milk or water) to the dough, one tablespoon at a time, until it reaches the desired consistency. Be cautious not to overmix, as this can make the cookies tough.
- Overmixing . Overmixing the cookie dough can lead to a crumbly texture. Excessive mixing can develop gluten, which can result in a dry and tough cookie. Solution - Mix the dough only until the ingredients are combined. Overmixing should be avoided. Once the ingredients are integrated, stop mixing.
- Insufficient Binding Agent . The egg or egg yolk in the dough acts as a binding agent. If you didn’t use enough egg or egg yolk, the dough can be crumbly. Solution . Check the recipe and make sure you added the correct amount of eggs or egg yolks. If needed, add an extra yolk or a small amount of beaten egg to improve the dough’s consistency.
- Overworking the Dough . If you knead or handle the dough excessively, it can become crumbly. Thumbprint cookies are typically delicate and should not be overworked. Solution - Handle the dough gently when shaping the cookies. Avoid kneading or pressing it too much.
Ingredients You’ll Need
- Butter - Unsalted butter is the base of these cookies, providing richness and flavor.
- Granulated Sugar - Adds sweetness to the cookie dough.
- Egg Yolk - The yolk contributes to the tender texture of the cookies.
- Vanilla Extract - Infuses a delightful vanilla aroma and flavor.
- All-Purpose Flour - The main dry ingredient for the cookie dough.
- Salt - Enhances the overall flavor of the cookies.
- Raspberry Jam - Fills the thumbprints with fruity goodness.
- Powdered Sugar - For a dusting of sweetness on top.
How To Make Thumbprint Cookies
- Prepare the Cookie Dough . Cream together butter and sugar until light and fluffy. Add egg yolk and vanilla extract, then gradually mix in the flour and salt until the dough forms.
- Chill the Dough . Wrap the cookie dough in plastic wrap and refrigerate it for about 30 minutes.
- Shape and Fill . Roll the dough into small balls and place them on a baking sheet. Make an indentation in each cookie with your thumb or the back of a measuring spoon. Fill each indentation with raspberry jam.
- Bake to Perfection . Bake the cookies in a preheated oven until they’re golden brown around the edges.
- Cool and Enjoy . Allow the cookies to cool on a wire rack. Once cooled, dust them with powdered sugar for an extra touch of sweetness.
Tips And Tricks
Creating the perfect Raspberry Thumbprint Cookies can be a delightful baking experience. Here are some tips and tricks to help you make these delicious cookies with ease and precision:
- Softened Butter . Ensure that your butter is softened to room temperature before using it in the cookie dough. This makes it easier to cream with sugar and results in a smoother dough.
- Chill the Dough . After mixing the cookie dough, wrap it in plastic wrap and refrigerate it for about 30 minutes. Chilled dough is less likely to spread during baking, helping your cookies maintain their shape.
- Consistent Cookie Sizes . Keep the cookie sizes consistent to ensure even baking. Using a cookie scoop can help with this.
Variations
Thumbprint cookies are incredibly versatile, and you can get creative with various flavor combinations and fillings. Here are some delightful variations to try:
- Strawberry- Swap out the raspberry jam for strawberry jam or preserves for a different fruity twist.
- Chocolate- Fill the thumbprints with chocolate ganache or Nutella for a rich and indulgent treat.
- Cherry -Use cherry jam or cherry preserves for a sweet and vibrant filling.
- Cream Cheese and Fruit- Combine cream cheese with your choice of fruit preserves for a creamy and fruity center.
What To Enjoy With Thumbprint Cookies
These cookies are delightful on their own, but you can enhance your serving by pairing them with:
- Tea or Coffee - Enjoy these cookies with a hot cup of tea or coffee for a comforting treat.
- Ice Cream - Serve Raspberry Thumbprint Cookies alongside vanilla ice cream for a decadent dessert.
- Milk - Dunking these cookies in a glass of cold milk is a classic choice.
Should You Refrigerate Thumbprint Cookies?
Thumbprint cookies can be stored at room temperature in an airtight container for a few days, usually up to a week, without the need for refrigeration.
If your thumbprint cookies have a highly perishable filling, such as fresh fruit or dairy-based fillings like cream cheese or custard, it’s advisable to refrigerate them to prevent spoilage and foodborne illnesses.
Can You Freeze Them?
Yes, you can freeze these cookies for up to three months. Make sure they’re well wrapped to prevent freezer burn. Thaw at room temperature before serving.
More Of OurBest Cookie Recipes
- Almond Flour Cookies
- Keto Ginger Cookies
- Low Carb Chocolate Chip Cookies
- Cookie Dough Bites
- Air Fryer Chocolate Chip Cookies
Thumbprint Cookies Recipe | Raspberry Thumbprint Cookies
Ingredients
- ▢ 1/2 cup Unsalted Butter , softened
- ▢ 1/3 cup Granulated Sugar
- ▢ 1 Egg Yolk
- ▢ 1 tsp Vanilla Extract
- ▢ 1 1/4 cup All Purpose Flour
- ▢ 1/4 tsp Salt
- ▢ 1/3 cup Raspberry Preserves
- ▢ Powdered Sugar , for dusting
Instructions
- Prepare the Cookie Dough . Cream together butter and sugar until light and fluffy. Add egg yolk and vanilla extract, then gradually mix in the flour and salt until the dough forms.
- Chill the Dough . Wrap the cookie dough in plastic wrap and refrigerate it for about 30 minutes.
- Shape and Fill . Roll the dough into small balls and place them on a baking sheet. Make an indentation in each cookie with your thumb or the back of a measuring spoon. Fill each indentation with raspberry jam.
- Bake to Perfection . Bake the cookies in a preheated oven until they’re golden brown around the edges.
- Cool and Enjoy . Allow the cookies to cool on a wire rack. Once cooled, dust them with powdered sugar for an extra touch of sweetness.
Get support & connect with our community on Facebook!

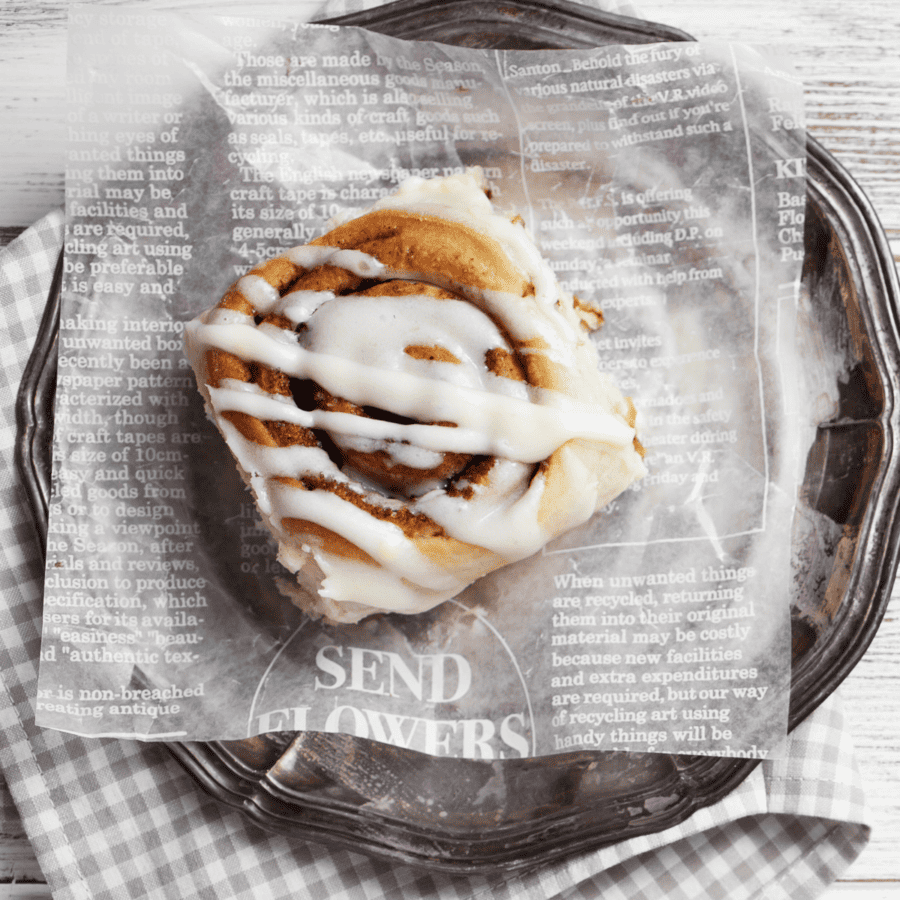
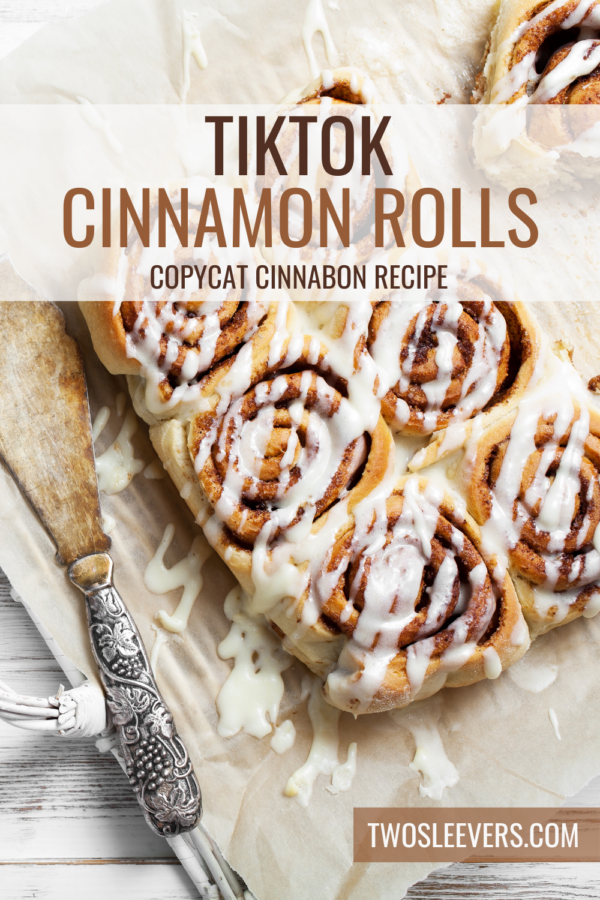
If you’re a fan of sweet, gooey, and irresistible treats, you’re in for a delightful experience! Learn how to make TikTok Cinnamon Rolls using refrigerated cinnamon roll dough. With just a few simple steps, you’ll have these mouthwatering cinnamon rolls ready to devour. Get ready to indulge in the warm, aromatic embrace of cinnamon and sugar – a perfect treat for breakfast or anytime you’re craving a little sweetness.

Why You’ll Fall In Love With These Cinnamon Rolls
- Quick and Easy . Ready in under 30 minutes with minimal effort.
- No Fuss . Skip the hassle of making dough from scratch with refrigerated cinnamon roll dough.
- Delicious. The sweet, cinnamon-spiced goodness is simply irresistible.
- Customizable . Add your favorite toppings or icing for a personalized touch.
With the convenience of pre-made cinnamon roll dough, you’ll have a delicious treat that will leave your taste buds dancing with joy. Whether you’re making these for a special occasion or a lazy weekend breakfast , TikTok Cinnamon Rolls are sure to be a hit.
Why Do You Add Heavy Cream To Cinnamon Rolls?
Adding heavy cream to cinnamon rolls enhances their flavor, texture, and overall indulgence. Here’s why heavy cream is a delicious addition to cinnamon rolls:
- Sweetness - Heavy cream adds another layer of indulgence, making it even more delicious and harmonizing with the cinnamon and sugar in the rolls.
- Flavor Infusion - Heavy cream carries flavor well, allowing it to absorb the cinnamon and sugar from the rolls, creating a cohesive and luscious taste throughout the pastry.
- Moisture - The moisture from the heavy cream helps keep the cinnamon rolls soft and prevents them from drying out, ensuring they remain tender and gooey.
Ingredients You’ll Need
- Refrigerated Cinnamon Roll Dough- This is the base of your cinnamon rolls. It provides the soft, doughy texture and the sweet cinnamon flavor.
- Heavy Cream- Used to add moisture to the baking dish and create a creamy texture in the finished rolls. It contributes to the gooeyness and richness of the cinnamon rolls.
- Salted Butter- Combined with brown sugar and ground cinnamon to create a sweet, buttery filling that’s spread over the dough. It adds a rich, savory note to balance the sweetness.
- Brown Sugar- Is one of the key ingredients for the cinnamon sugar filling. It provides sweetness and a caramel-like flavor that melds with the cinnamon and butter.
- Ground Cinnamon- The star of the show, providing that warm, spicy, and comforting flavor that makes cinnamon rolls so irresistible. It’s mixed with the brown sugar and butter for the filling.
- Icing- The icing that comes with the store-bought cinnamon roll dough is used as the base for the cream cheese icing that tops the rolls.
- Cream Cheese- Cream cheese is a key ingredient in the icing. It adds creaminess, tanginess, and richness to the glaze.
- Vanilla Extract- Vanilla extract is used in the icing to add a subtle vanilla flavor that complements the sweetness of the rolls.
- Powdered Sugar- Combined with the cream cheese, butter, and vanilla extract to create a thick and sweet icing that’s drizzled over the warm cinnamon rolls. It provides sweetness and helps thicken the icing.
How To Make Tiktok Cinnamon Rolls
- Preheat Your Oven . Preheat your oven to 350°F. Spray a 9x13-inch baking dish with baking spray to prevent sticking.
- Prepare the Cinnamon Rolls . Open the cans of refrigerated cinnamon rolls and arrange them in the prepared baking dish. Reserve the icing that comes with the rolls for later use.
- Add Heavy Cream . Pour the heavy cream over and around the cinnamon rolls until it covers the bottom of the pan. This step adds moisture and richness to the rolls as they bake.
- Prepare the Cinnamon Sugar Mixture . In a small bowl, combine the melted butter, brown sugar, and ground cinnamon. Stir until well combined. This mixture will infuse your rolls with delicious cinnamon flavor.
- Drizzle with Cinnamon Sugar . Spoon or pour the cinnamon sugar mixture evenly over the cinnamon rolls, making sure to cover them thoroughly. The sweet and cinnamony goodness will create a delectable filling.
- Cover and Bake . Cover the baking dish with aluminum foil. Place the dish in the preheated oven and bake for 30-40 minutes, or until the rolls are lightly browned on top and cooked through.
- Prepare the Creamy Icing . While the cinnamon rolls are baking, let’s prepare the creamy icing. In a mixing bowl, beat the softened cream cheese and softened butter together using a hand mixer until the mixture becomes creamy and smooth. Add the vanilla extract and the icing from the cinnamon roll cans. Mix well.
- Add Powdered Sugar . Gradually add the powdered sugar and continue mixing until the icing is smooth and thick.
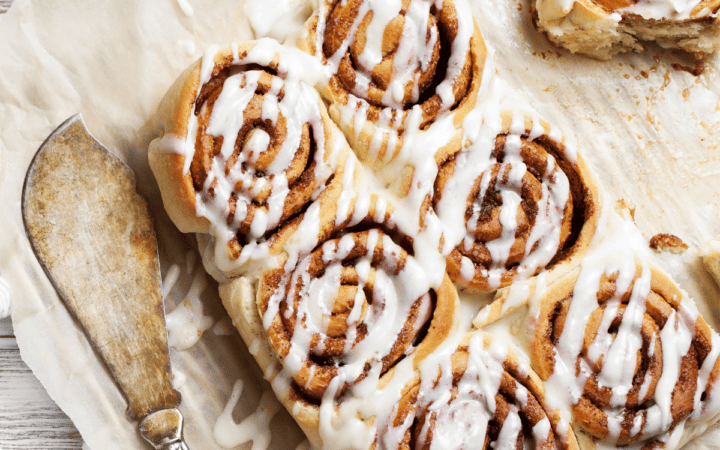
- Finish and Serve . Once the cinnamon rolls are done baking, allow them to cool until they are comfortable to touch. While they’re still warm, generously drizzle the prepared icing over the top. The warmth of the rolls will help the icing to spread and create a luscious glaze.
- Serve Warm . These TikTok-worthy cinnamon rolls are best enjoyed while still warm. Share with friends and family for a delightful treat that’s sure to impress!
Tips And Tricks
Making viral TikTok cinnamon rolls requires attention to detail and a few creative touches to ensure they look and taste amazing. Here are some tips and tricks to help you make them:
- Choose the Right Dough . Consider using refrigerated cinnamon roll dough that comes in a tube. This type of dough is convenient and typically yields consistent results. However, if you prefer homemade dough, make sure it’s well-prepared and properly proofed.
- Unroll Carefully. When removing the cinnamon rolls from the packaging, unroll the package carefully. This will prevent the cinnamon roll dough from falling apart and needing to be re-rolled.
- Use an Even Hand . When applying the butter, cinnamon, and sugar mixture to the dough, use a steady hand to ensure even coverage. This will help create uniform swirls and a balanced flavor.
Variations
Creating variations of TikTok cinnamon rolls can be a fun way to experiment with flavors and textures. Here are some delicious variations to try:
- Fruit-Filled Cinnamon Rolls - Add a fruity twist by spreading a layer of fruit preserves or pie filling (such as apple or cherry) over the dough before rolling it up. This adds a burst of fruity flavor to each bite.
- Nutty Cinnamon Rolls - Sprinkle chopped nuts (like pecans, walnuts, or almonds) over the cinnamon-sugar mixture before rolling the dough. The nuts add a delightful crunch and nutty flavor.
- Chocolate Cinnamon Rolls - Spread a layer of chocolate-hazelnut spread (like Nutella) over the dough before sprinkling with cinnamon and sugar. You can also add chocolate chips for an extra chocolatey kick.
- Pumpkin Spice Cinnamon Rolls - Add a seasonal touch by incorporating pumpkin puree and pumpkin spice into the cinnamon roll filling. Serve them with a cream cheese frosting infused with a hint of cinnamon.
What To Enjoy With Tiktok Cinnamon Rolls
Copycat TikTok Cinnamon Rolls with heavy cream glaze are delightful on their own, but you can enhance your breakfast or brunch experience by serving them with:
- Fresh Fruit - A bowl of fresh berries, sliced bananas, or oranges complements the sweetness of the cinnamon rolls.
- Coffee or Tea - A hot cup of coffee or tea is the perfect beverage to enjoy with your cinnamon rolls.
- Bacon or Sausage - For a heartier breakfast, serve your cinnamon rolls alongside crispy bacon or sausage links.
How Long Do They Last?
Cinnamon rolls are best enjoyed fresh and warm, but if you have leftovers, store them in an airtight container at room temperature for up to two days. Reheat them in the microwave or oven to regain their soft and gooey texture.
Can You Freeze Them?
Yes, you can freeze Copycat TikTok Cinnamon Rolls with heavy cream glaze for longer storage. Follow these steps:
- Allow the cinnamon rolls to cool completely.
- Individually wrap each roll in plastic wrap.
- Place the wrapped rolls in an airtight container or freezer bag.
- Label and date the container or bag.
- Store in the freezer for up to three months.
When ready to enjoy, remove a roll from the freezer, unwrap it, and reheat in the microwave or oven until warm.
Our Best Cinnamon Roll Recipes
- Chocolate Cinnamon Rolls
- Protein Cinnamon Rolls
- Pumpkin Cinnamon Rolls
- Apple Cinnamon Rolls
- Blueberry Cinnamon Rolls
TikTok Cinnamon Rolls | Cinnamon Rolls With Heavy Cream
Ingredients
- ▢ 1 can Refrigerated Cinnamon Rolls
- ▢ 1/4 cup Heavy Cream
- ▢ 4 tbsp Salted Butter
- ▢ 1/2 cup Brown Sugar
- ▢ 1 tbsp Cinnamon
- ▢ Icing , included with cinnamon rolls
- ▢ 2 oz Cream Cheese
- ▢ 1/2 tsp Vanilla Extract
- ▢ 1 cup Powdered Sugar
Instructions
- Preheat Your Oven . Preheat your oven to 350°F. Spray a 9x13-inch baking dish with baking spray to prevent sticking.
- Prepare the Cinnamon Rolls . Open the cans of refrigerated cinnamon rolls and arrange them in the prepared baking dish. Reserve the icing that comes with the rolls for later use.
- Add Heavy Cream . Pour the heavy cream over and around the cinnamon rolls until it covers the bottom of the pan. This step adds moisture and richness to the rolls as they bake.
- Prepare the Cinnamon Sugar Mixture . In a small bowl, combine the melted butter, brown sugar, and ground cinnamon. Stir until well combined. This mixture will infuse your rolls with delicious cinnamon flavor.
- Drizzle with Cinnamon Sugar . Spoon or pour the cinnamon sugar mixture evenly over the cinnamon rolls, making sure to cover them thoroughly. The sweet and cinnamony goodness will create a delectable filling.
- Cover and Bake . Cover the baking dish with aluminum foil. Place the dish in the preheated oven and bake for 30-40 minutes, or until the rolls are lightly browned on top and cooked through.
- Prepare the Creamy Icing . While the cinnamon rolls are baking, let’s prepare the creamy icing. In a mixing bowl, beat the softened cream cheese and softened butter together using a hand mixer until the mixture becomes creamy and smooth. Add the vanilla extract and the icing from the cinnamon roll cans. Mix well.
- Add Powdered Sugar . Gradually add the powdered sugar and continue mixing until the icing is smooth and thick.
- Finish and Serve . Once the cinnamon rolls are done baking, allow them to cool until they are comfortable to touch. While they’re still warm, generously drizzle the prepared icing over the top. The warmth of the rolls will help the icing to spread and create a luscious glaze.
- Serve Warm . These TikTok-worthy cinnamon rolls are best enjoyed while still warm. Share with friends and family for a delightful treat that’s sure to impress!
