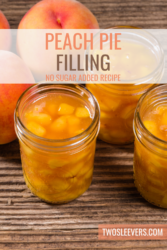
Peach Pie Filling is a homemade fruit pie filling made with ripe peaches, lemon juice, vanilla extract, cinnamon, cornstarch, and unsweetened apple juice (or water). It’s quick and works well for a no-sugar-added dessert option, perfect for pies, cobblers, or make-ahead treats when you want big peach flavor without a ton of fuss. Unlike canned peach pie filling (often loaded with added sugar and a heavy gel), this version thickens fast on the stovetop with a simple cornstarch slurry and lets the natural sweetness of the peaches shine.

Why This Will Be Your Favorite Way To Eat Peaches
- Sweet and Juicy Flavor . Bursting with the natural sweetness of ripe peaches, every bite feels like a taste of summer.
- Comforting Dessert Base . Perfectly spiced and thickened, it creates that classic, cozy pie experience everyone craves.
- Versatile . Not just for pies. Use it in cobblers, crisps, turnovers, parfaits, or even over ice cream and pancakes.
- Homemade Goodness . Freshly made peach filling has a vibrant, authentic flavor that canned versions can’t match.
With this easy-to-follow recipe, you can enjoy the delectable flavors of a peach pie without the need for added sugar. The natural sweetness of ripe peaches combined with a touch of citrus and warm spices creates a filling that is bursting with flavor.
What Is The Best Way To Peel Peaches For Fresh Peach Pie?
Peeling peaches for a fresh pie can be made easier by following a few simple steps. Here’s the way that works best for me:
- Choose Ripe Peaches Select ripe peaches that are slightly firm but not too hard. The peels should easily come off without being overly delicate.
- Blanching Method Bring a large pot of water to a boil. Make sure the pot is deep enough to fully submerge the peaches. While the water is heating up, prepare an ice bath in a large bowl or sink filled with cold water and ice cubes. Score the bottom of each peach with a small “X” using a sharp knife. This helps loosen the peel during blanching. Carefully lower the peaches into the boiling water and let them blanch for about 30 seconds to 1 minute. The exact timing may vary depending on the size and ripeness of the peaches. Using a slotted spoon or tongs, quickly transfer the blanched peaches to the ice bath to stop the cooking process and cool them down.
What Is Peach Pie Filling Made Of?
- 8 Ripe peaches - These will need to be peeled, pitted, and sliced.
- 2 TBSP Lemon juice- The tartness of the apple juice helps balance the natural sweetness of the peaches.
- 1 tsp Vanilla extract - Enhances the natural flavors of the other ingredients.
- 1/2 tsp Ground cinnamon - Provides a nice earthy, comforting flavor.
- 2 TBSP Cornstarch - Is used to thicken the delicious sauce that surrounds the peaches in this peach pie filling.
- 1/4 Cup Unsweetened apple juice - You can also use water for an even lower sugar bite.
How To Make Peach Pie Filling
- Prepare the Peaches. Start by peeling the peaches. You can do this by blanching them in boiling water for about 30 seconds and then immediately transferring them to an ice bath. The skins should easily peel off. Once peeled, slice the peaches into wedges or desired shape.
- Combine the Ingredients. In a mixing bowl, combine the peach slices, lemon juice, vanilla extract, and ground cinnamon. Gently toss the peaches to coat them evenly with the lemon juice and spices. Let the mixture sit for about 10 minutes to allow the flavors to meld.
- Thicken the Filling. In a small bowl, whisk together the cornstarch or arrowroot powder and unsweetened apple juice or water until smooth. This mixture will act as a natural thickener for the peach filling.
- Cook the Filling. Transfer the peach mixture to a saucepan and heat it over medium heat. Once the peaches start to release their juices, add the cornstarch mixture to the saucepan. Stir continuously to prevent any lumps from forming.
- Simmer and Thicken. Reduce the heat to low and allow the peach mixture to simmer gently. Stir occasionally until the filling thickens and coats the back of a spoon. This process usually takes about 5-7 minutes. Keep a close eye on it to prevent scorching.
- Serve and Enjoy! Serve your no sugar added peach pie filling with one of my favorite serving suggestions below and enjoy!
Tips And Tricks
- Choose Ripe and Sweet Peaches - Opt for ripe peaches that are naturally sweet. The sweetness of the peaches will enhance the flavor of the pie filling without the need for added sugar.
- Serve with a Topping - If you desire a touch of sweetness, you can serve the no-sugar-added peach pie with a dollop of whipped cream made from unsweetened heavy cream or a sprinkle of powdered stevia or cinnamon on top. These additions provide a hint of sweetness without relying on refined sugar.
- Taste and Adjust - As you assemble the pie filling, taste the mixture and adjust the flavors as needed. If the peaches aren’t as sweet as desired, you can add a small amount of a natural sweetener like stevia or monk fruit extract, if desired. However, try to rely on the natural sweetness of the peaches as much as possible.
The key to a delicious no-sugar-added peach pie filling is to let the natural sweetness of the peaches shine through. With the right combination of ripe peaches, flavorsome spices, and natural thickening agents, you can enjoy a delectable pie without the need for added sugar.
Variations
If you are in the height of the peach season and have a lot of peaches to work with, you may want to try a few different variations to keep things exciting! Here are a few of my favorite twists to try:
- Almond Essence - Enhance the filling with a touch of almond essence or almond extract. The nutty undertones add a delightful twist to the peach pie.
- Berry Bliss - Create a mixed fruit filling by adding some fresh berries like raspberries, blackberries, or blueberries to the peach filling. The combination of sweet peaches and tart berries adds complexity and richness to the pie.
- Caramel Drizzle - While not entirely sugar-free, you can add a drizzle of sugar-free caramel sauce over the peach pie filling before baking. This adds a touch of indulgence without relying on refined sugar.
Remember to adjust the other ingredients and flavors accordingly to maintain the balance of sweetness. Feel free to get creative and combine different variations to create your own unique and delicious no-sugar-added peach pie filling.
Ways To Enjoy It
Now that you have your homemade no added sugar peach pie filling ready, you can use it in various ways. Here are some of my favorites:
Note that this is not a SUGAR-FREE recipe. Peaches are still naturally high in sugar, so use caution in how you use them if your sugar consumption is strictly limited.
- Classic Peach Pie - Pour the cooled filling into your favorite pie crust and bake according to your preferred pie recipe.
- Peach Crumble - Top the peach filling with a crumbly oat or nut-based topping and bake until golden and bubbly.
- Pancake or Waffle Topping - Warm up the peach pie filling and drizzle it over pancakes or waffles for a sweet and fruity twist.
- Yogurt Parfait - Layer the peach filling with Greek yogurt and granola for a delightful and healthy breakfast or dessert.
How Long Does It Last?
Remove the peach pie filling from the heat when it is freshly prepared and let it cool completely. Once cooled, transfer it to airtight containers or jars and refrigerate. The filling can be stored for up to one week.
Can You Freeze It?
Yes, you can freeze no-sugar-added peach pie filling for future use. Freezing the filling allows you to preserve the flavors of fresh peaches when they are in season and enjoy them later. Here’s how you can freeze the filling:
- Prepare the Peach Pie Filling. Follow your preferred recipe for making the no-sugar-added peach pie filling, ensuring that it is cooked and cooled before freezing.
- Portion the Filling. Divide the cooled peach pie filling into desired portions based on your future needs. Consider the size of the pies or desserts you plan to make, and portion the filling accordingly.
- Packaging. Place each portion of the peach pie filling in a freezer-safe container or airtight freezer bags. Make sure to leave some headspace in the container or bag to allow for expansion during freezing.
- Label and Date. Clearly label each container or bag with the contents and the date of freezing. This will help you keep track of the filling and ensure that you use it within a reasonable timeframe.
- Freeze. Place the containers or bags of peach pie filling in the freezer and ensure they are stored flat to prevent any leakage or uneven freezing.
- Thawing and Using . When you’re ready to use the frozen peach pie filling, simply transfer it to the refrigerator and allow it to thaw overnight. Once thawed, you can use it as directed in your favorite pie or dessert recipe.
It’s worth noting that freezing can slightly alter the texture of the peach pie filling. The peaches may become softer after thawing, but the flavors should still be delicious. The frozen peach pie filling should be used within 3 to 4 months for the best quality.
For homemade peach pie filling, fresh peaches are usually best when they’re truly ripe (you get the brightest flavor and the best texture), but frozen peaches are a great option when fresh aren’t in season because they’re picked ripe and convenient. The main difference is moisture. Peach pie filling with frozen peaches tends to be a bit watery/runny unless you thaw and drain (or simmer longer) and adjust your thickener (like a cornstarch slurry) to get that glossy, spoonable set. So, fresh for peak flavor in season, frozen for reliable year-round filling with a small tweak for extra liquid.
More Fruit-Filled Recipes
- Low Carb Berries And Cream Popsicles
- Fruit Hand Pies
- Air Fryer Pineapples
- Blueberry Overnight Oats
- Peach Cobbler Dump Cake
- Cherry Pie Filling
- Cherry Pie

Peach Pie Filling Recipe | How To Make Peach Pie Filling
Ingredients
- ▢ 8 peaches
- ▢ 2 tbsp lemon juice
- ▢ 1 tsp vanilla extract
- ▢ 1/2 tsp cinnamon
- ▢ 2 tbsp cornstarch
- ▢ 1/4 cup unsweetened apple juice
Instructions
- Prepare the Peaches. Start by peeling the peaches. You can do this by blanching them in boiling water for about 30 seconds and then immediately transferring them to an ice bath. The skins should easily peel off. Once peeled, slice the peaches into wedges or desired shape.
- Combine the Ingredients. In a mixing bowl, combine the peach slices, lemon juice, vanilla extract, and ground cinnamon. Gently toss the peaches to coat them evenly with the lemon juice and spices. Let the mixture sit for about 10 minutes to allow the flavors to meld.
- Thicken the Filling. In a small bowl, whisk together the cornstarch or arrowroot powder and unsweetened apple juice or water until smooth. This mixture will act as a natural thickener for the peach filling.
- Cook the Filling. Transfer the peach mixture to a saucepan and heat it over medium heat. Once the peaches start to release their juices, add the cornstarch mixture to the saucepan. Stir continuously to prevent any lumps from forming.
- Simmer and Thicken. Reduce the heat to low and allow the peach mixture to simmer gently. Stir occasionally until the filling thickens and coats the back of a spoon. This process usually takes about 5-7 minutes. Keep a close eye on it to prevent scorching.
- Serve and Enjoy! Serve your no sugar added peach pie filling with one of my favorite serving suggestions below and enjoy!
Get support & connect with our community on Facebook!
Nutrition
Don’t forget to check out my otherBest-selling Instant Pot Cookbooks!
Indian Instant Pot , Keto Instant Pot, Instant Pot Fast and Easy , Healthy Instant Pot & Vegetarian Instant Pot .


If you already signed up, you should have received an email with a password to give you unlimited access to our FREE Printable Library. The password is case sensitive. Enter it below and get printing!
Password:
Peach Pie Filling Recipe | How To Make Peach Pie Filling
Ingredients
- 8 peaches
- 2 tbsp lemon juice
- 1 tsp vanilla extract
- 1/2 tsp cinnamon
- 2 tbsp cornstarch
- 1/4 cup unsweetened apple juice
Instructions
- Prepare the Peaches. Start by peeling the peaches. You can do this by blanching them in boiling water for about 30 seconds and then immediately transferring them to an ice bath. The skins should easily peel off. Once peeled, slice the peaches into wedges or desired shape.
- Combine the Ingredients. In a mixing bowl, combine the peach slices, lemon juice, vanilla extract, and ground cinnamon. Gently toss the peaches to coat them evenly with the lemon juice and spices. Let the mixture sit for about 10 minutes to allow the flavors to meld.
- Thicken the Filling. In a small bowl, whisk together the cornstarch or arrowroot powder and unsweetened apple juice or water until smooth. This mixture will act as a natural thickener for the peach filling.
- Cook the Filling. Transfer the peach mixture to a saucepan and heat it over medium heat. Once the peaches start to release their juices, add the cornstarch mixture to the saucepan. Stir continuously to prevent any lumps from forming.
- Simmer and Thicken. Reduce the heat to low and allow the peach mixture to simmer gently. Stir occasionally until the filling thickens and coats the back of a spoon. This process usually takes about 5-7 minutes. Keep a close eye on it to prevent scorching.
- Serve and Enjoy! Serve your no sugar added peach pie filling with one of my favorite serving suggestions below and enjoy!
Peach Pie Filling Recipe | How To Make Peach Pie Filling https://twosleevers.com/peach-pie-filling/

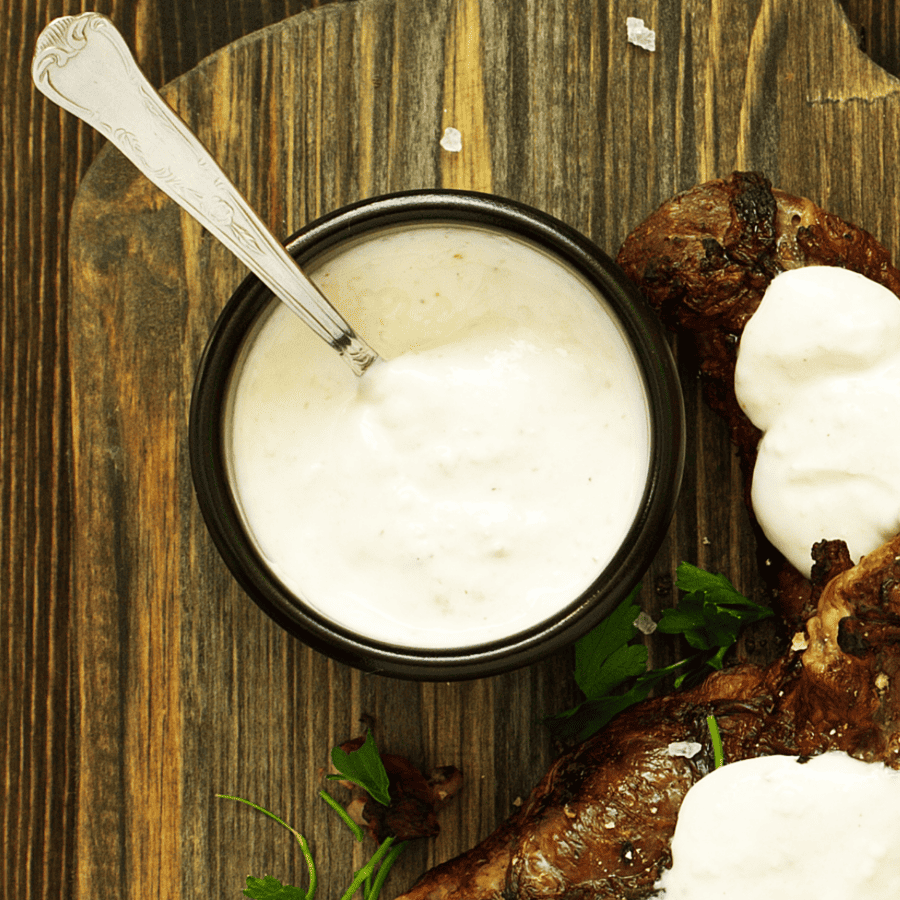
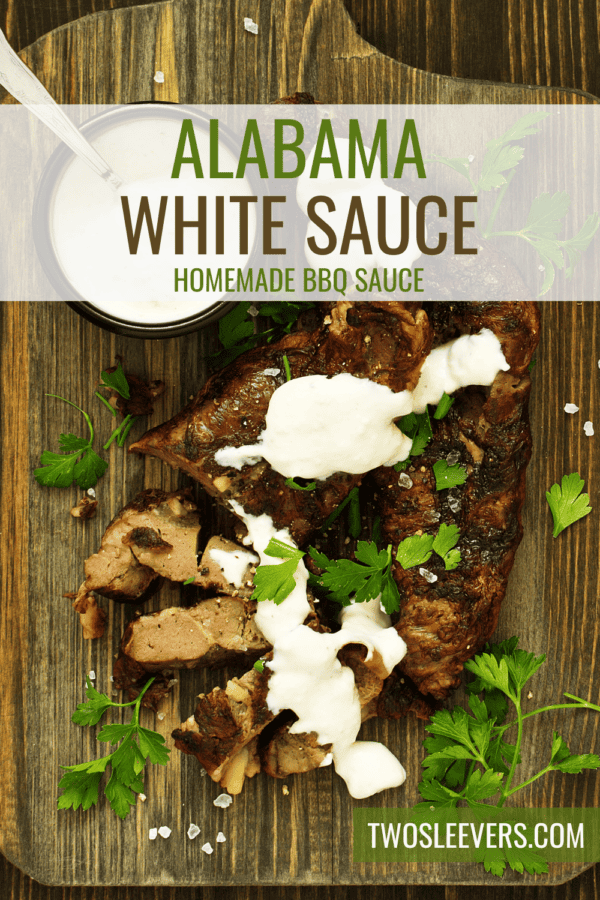
Alabama White Sauce is unlike any other, with its unique tangy flavor and creamy texture that perfectly complements smoked meats. it’s a secret weapon that has been tantalizing taste buds for generations.
Why You’ll Want This On Everything
- Fast.
- Easy.
- Delicious.
- Versatile.
- Low Carb.
This heavenly concoction of mayonnaise, vinegar, and a blend of spices will transform your barbecue game and leave your guests craving for more. Whether you’re a fan of tangy sauces or looking to explore new flavors, Alabama White Sauce is a must-try.
What Does It Taste Like?
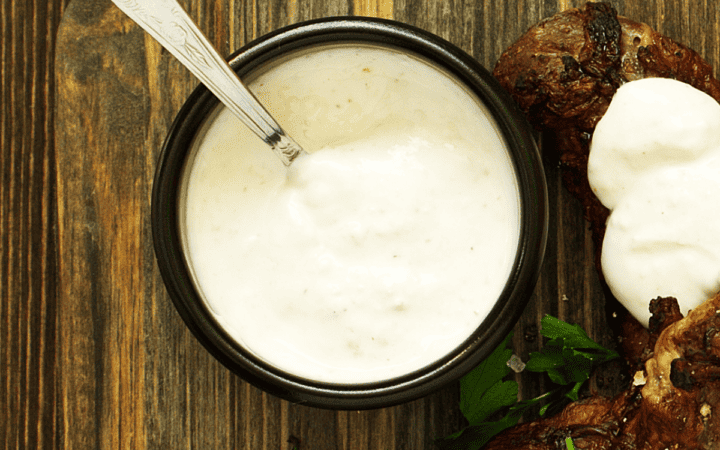
Alabama White Sauce is known for its unique flavor profile. It has a tangy, creamy, and slightly zesty taste that sets it apart from other barbecue sauces. The combination of mayonnaise, vinegar, and spices creates a harmonious blend of flavors.
Is Alabama White Sauce The Same As Ranch?
While both Alabama White Sauce and ranch dressing have a creamy texture, their flavor profiles, and intended uses are different. It is primarily used as a barbecue sauce, while ranch dressing is commonly used as a salad dressing, dip, or condiment for various foods.
What Is Alabama White Sauce Made Of?
- Mayonnaise
- Apple cider vinegar
- Lemon juice
- Horseradish
- Worcestershire sauce
- Garlic powder
- Onion powder
- Black pepper
- Salt
- Cayenne pepper
How To Make Alabama White Sauce
- Mix the Base. In a medium-sized mixing bowl, combine the mayonnaise, apple cider vinegar, and lemon juice. Whisk these ingredients together until they are well incorporated. The tangy foundation of the white BBQ sauce is starting to take shape.
- Add the Flavors. Next, add the prepared horseradish, Worcestershire sauce, garlic powder, onion powder, black pepper, salt, and cayenne pepper (if desired) to the mixing bowl. These ingredients will infuse the sauce with layers of flavor, providing a delightful kick.
- Whisk to Perfection. Using a whisk or spoon, vigorously stir the mixture until all the ingredients are thoroughly combined. The sauce should become smooth and creamy, with a consistent texture throughout. Take a moment to savor the tantalizing aroma that begins to fill the air.
- Adjust the Flavor. Give the sauce a taste and adjust the seasonings to suit your preferences. Feel free to add more vinegar for tang, horseradish for heat, or any other ingredient to enhance the flavors according to your liking. Remember, the beauty of this white BBQ sauce lies in its versatility.
- Let It Rest. Cover the mixing bowl with plastic wrap or transfer the sauce to an airtight container. Allow it to rest in the refrigerator for at least 2 hours, or preferably overnight. This resting period will give the flavors a chance to mingle and intensify, resulting in an even more delectable sauce.
What To Serve It With
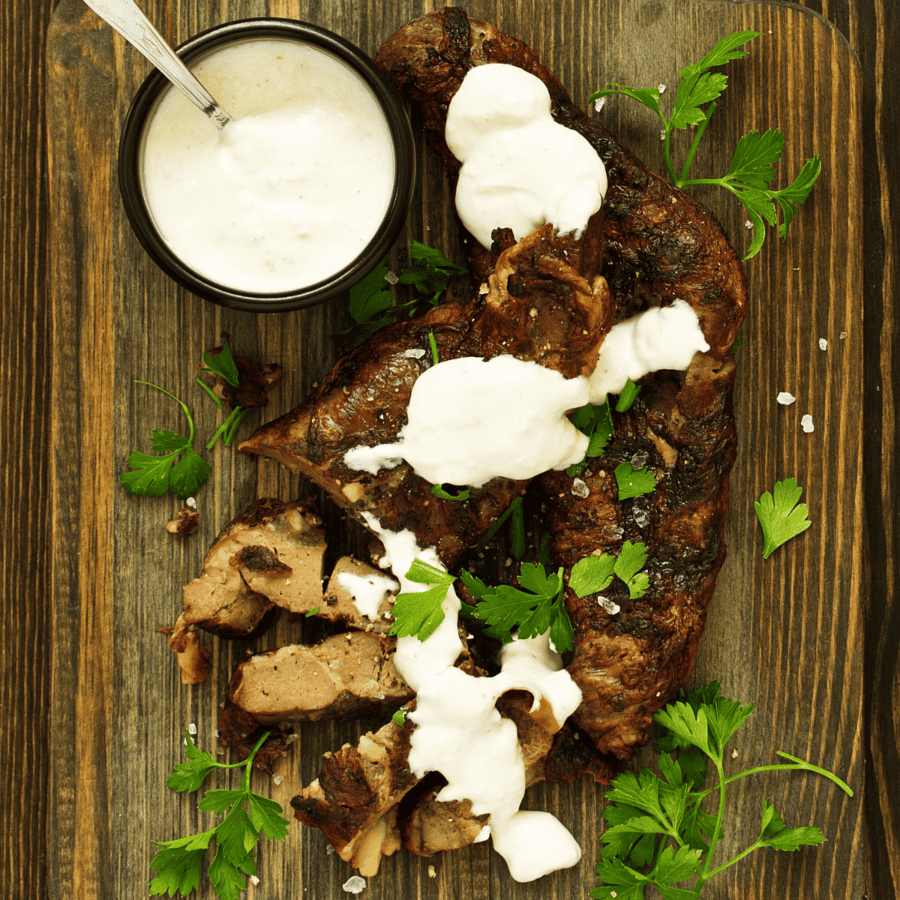
Alabama White Sauce pairs splendidly with a variety of grilled or smoked meats. It’s particularly renowned for its affinity with chicken, smoked turkey, and pork.
Drizzle it generously over your barbecued creations, or serve it as a dipping sauce on the side. The creamy texture and tangy zing of the sauce will elevate your culinary experience to new heights.
How Long Does It Last?
Alabama White Sauce can be stored in the refrigerator for up to one week. It is important to keep it in an airtight container to maintain its freshness.
The flavors may intensify over time, so you might find that the sauce becomes even more flavorful after a day or two of refrigeration.
Can You Freeze It?
Yes, you can freeze Alabama White Sauce for longer storage. Freezing can extend its shelf life for up to three months.
Freezing may slightly alter the texture of the sauce, making it slightly thinner or separated. However, a thorough stir should help restore its original consistency.
More Awesome Sauce Recipes
- Baja Sauce
- Big Mac Sauce
- Pomodoro Sauce
- Chimichurri
- Hot Honey Sauce
Alabama White Sauce | White BBQ Sauce Recipe
Ingredients
- ▢ 1 cup Mayonnaise
- ▢ 1/4 cup apple cider vinegar
- ▢ 2 tbsp lemon juice
- ▢ 1 tbsp horseradish
- ▢ 1 tbsp worchestershire sauce
- ▢ 1/2 tsp garlic powder
- ▢ 1/2 tsp onion powder
- ▢ 1/2 tsp black pepper
- ▢ 1/2 tsp salt
- ▢ 1/4 tsp cayenne pepper
Instructions
- Mix the Base. In a medium-sized mixing bowl, combine the mayonnaise, apple cider vinegar, and lemon juice. Whisk these ingredients together until they are well incorporated. The tangy foundation of the white BBQ sauce is starting to take shape.
- Add the Flavors. Next, add the prepared horseradish, Worcestershire sauce, garlic powder, onion powder, black pepper, salt, and cayenne pepper (if desired) to the mixing bowl. These ingredients will infuse the sauce with layers of flavor, providing a delightful kick.
- Whisk to Perfection. Using a whisk or spoon, vigorously stir the mixture until all the ingredients are thoroughly combined. The sauce should become smooth and creamy, with a consistent texture throughout. Take a moment to savor the tantalizing aroma that begins to fill the air.
- Adjust the Flavor. Give the sauce a taste and adjust the seasonings to suit your preferences. Feel free to add more vinegar for tang, horseradish for heat, or any other ingredient to enhance the flavors according to your liking. Remember, the beauty of this white BBQ sauce lies in its versatility.
- Let It Rest. Cover the mixing bowl with plastic wrap or transfer the sauce to an airtight container. Allow it to rest in the refrigerator for at least 2 hours, or preferably overnight. This resting period will give the flavors a chance to mingle and intensify, resulting in an even more delectable sauce.
Get support & connect with our community on Facebook!
Nutrition
Don’t forget to check out my other Ketocookbooks.
Keto Instant Pot, Keto Fat Bombs, Sweets, & Treats , and Easy keto in 30 minutes.

