
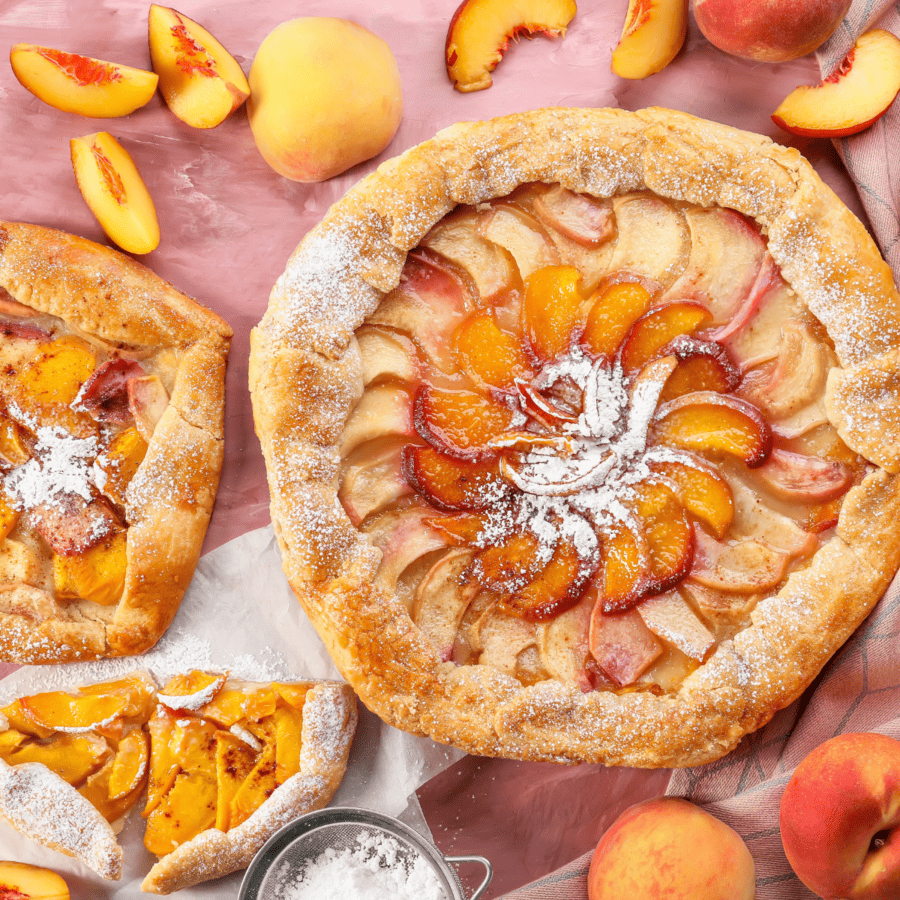
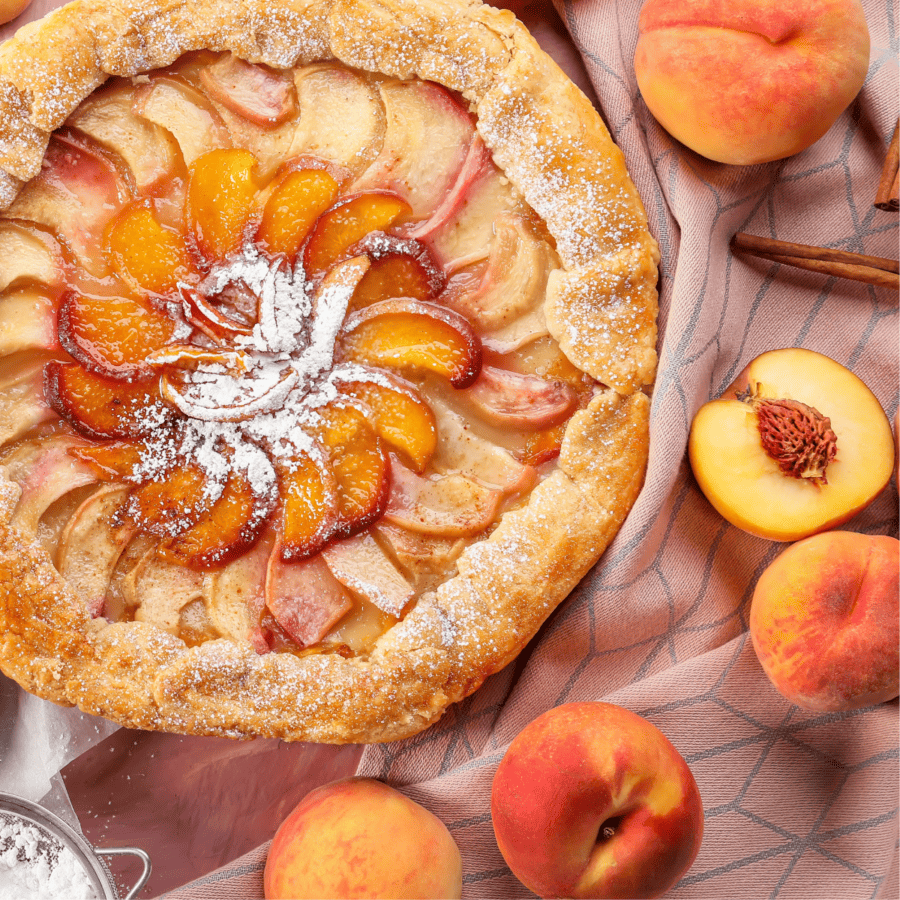
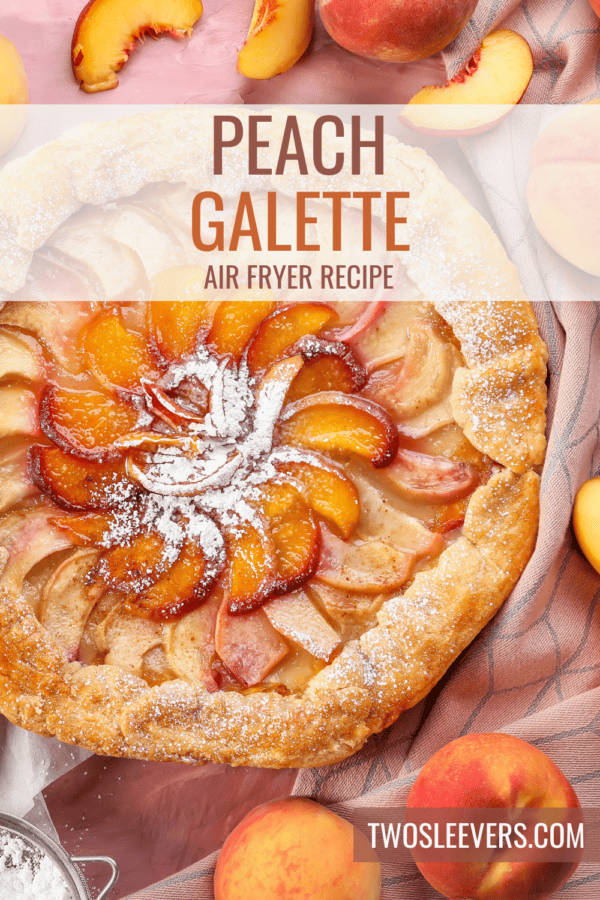
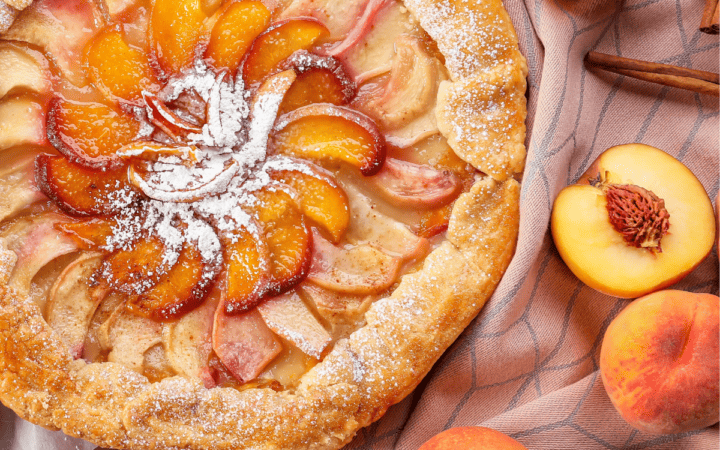
This Air Fryer Peach Galette is the perfect way to showcase the beautifully sweet tastes of summer. Bursting with the luscious flavors of ripe peaches and enveloped in a flaky, golden crust, this rustic dessert captures the magic of summer in each delectable bite .
Why You’ll Love This Dessert
- Easy.
- Delicious.
- Versatile.
The flaky crust, tender peaches, and delightful interplay of flavors create a dessert that’s as pleasing to the eyes as it is to the palate.
Whether shared with loved ones during a backyard gathering or savored as a solo treat, this peach galette is a masterpiece that captures the essence of the season.
How Do You Keep The Bottom Of A Galette From Getting Soggy?
Keeping the bottom of a galette from getting soggy is a common concern when baking this rustic pastry. Here are some techniques used in this recipe to help you achieve a crispy and flaky bottom crust for your galette:
- Thicken the filling. Ripe fruit, like the peaches used in this dish, has a tendency to release a lot of liquid. The excess juice can make the galette dough soggy if it isn’t thickened or drained before adding it to the middle. This air fryer Peach Galette uses a thickened peach filling to help avoid a soggy crust.
- Prebake the galette dough. Air frying the dough for just a few minutes before adding the peaches helps to create a slightly cooked barrier between the filling and the dough. This prevents the area covered by the peaches from being under cooked and soggy.
Is Galette Dough The Same As Pie Dough?
While galette dough and pie dough use the same ingredients and often have the same general flavor and texture, the use and appearance of the two are what really make them stand apart.
- Galette dough is designed to be rolled out and folded over the edges of a filling, creating a rustic and uneven border. It is versatile and can be used for both sweet and savory galettes, making it a great option for a variety of fillings.
- Pie dough is rolled out and placed into a pie dish, where it lines the bottom and sometimes the top of the pie. It can be crimped or decorated along the edges. It is commonly used for both single-crust and double-crust pies, as well as for making quiches and other baked dishes.
Ingredients You’ll Need
Flaky Dough
- All-Purpose Flour
- Granulated Sugar
- Salt
- Unsalted Butter
Peach Filling
- Peaches
- Granulated Sugar
- Cornstarch
- Vanilla Extract
- Lemon Zest
- Salt
Easy Assembly
- Egg Wash
- Light Brown Sugar
How To Make A Peach Galette
- Prepare the Dough. In a food processor, combine the flour, sugar, and salt. Pulse to combine. Add the cold, cubed butter and pulse until the mixture resembles coarse crumbs. Slowly add ice water, one tablespoon at a time, and pulse until the dough just comes together. Shape the dough into a disk, wrap it in plastic wrap, and refrigerate for at least 30 minutes.
- Make the Filling. In a bowl, gently toss the sliced peaches with granulated sugar, cornstarch, vanilla extract, lemon zest, and a pinch of salt. Allow the mixture to sit for about 10-15 minutes to let the flavors meld.
- Roll Out the Dough. On a lightly floured surface, roll out the chilled dough into a rough circle, about 12-14 inches in diameter.
- Prebake for the Best Texture. Preheat the air fryer to 350°F. Transfer the rolled-out dough to a piece of parchment paper. Air fry for 5 minutes to begin baking the dough.
- Assemble the Galette. Remove the undercooked dough from the air fryer. Arrange the peach slices in the center of the dough, leaving a border of about 2 inches. Gently fold the edges of the dough over the peaches, creating pleats as you go.
- Egg Wash and Sugar Sprinkle. Brush the edges of the dough with beaten egg for a golden finish. Sprinkle turbinado sugar over the egg-washed edges.
- Air Fry. Carefully transfer the parchment paper with the galette onto the air fryer basket. Air fry the galette for about 18-20 minutes or until the crust is golden brown and the peaches are tender.
- Serve and Enjoy. Allow the galette to cool slightly before slicing.
Tips And Tricks
Making an air fryer peach galette is a fantastic way to enjoy a delicious and rustic dessert with a crisp, flaky crust. Here are some tips and tricks to help you achieve the best results:
- Choose Ripe Peaches. Opt for ripe, juicy peaches that are at their peak of sweetness. Ripe peaches will release their natural juices during baking, enhancing the flavor of the galette.
- Preheat the Air Fryer . Preheat your air fryer to the temperature specified in your recipe. Preheating ensures even cooking and helps achieve a golden crust.
- Adjust Cooking Time . Air fryer cooking times can vary, so monitor the galette closely. It may take slightly less time to bake in the air fryer compared to a conventional oven. Check for doneness by ensuring the crust is golden brown and the peaches are tender.
Variations
There are numerous creative variations you can explore when making a peach galette. By incorporating different ingredients and flavors, you can customize your galette to suit your preferences and experiment with exciting taste combinations.
Here are some delightful variations to consider:
- Peach and Raspberry Galette - Combine sliced peaches with fresh raspberries for a burst of tartness that complements the sweetness of the peaches.
- Peach and Blueberry Galette - Blueberries add a beautiful color contrast and a slightly tangy flavor to the galette.
- Peach and Blackberry Galette - Combine peaches with blackberries for a delightful blend of flavors and colors.
Can I Substitute Puff Pastry In A Galette?
Yes, you can substitute puff pastry for the traditional galette dough in a galette recipe. Using puff pastry can provide a different texture and flavor to your galette while still resulting in a delicious and visually appealing dish.
Simply prepare the galette with puff pastry according to the instructions in this recipe and cook according to the directions on the package of purchased puff pastry.
What To Serve With A Peach Galette
A peach galette is a delightful and flavorful dessert that pairs well with a variety of accompaniments. Here are some delicious options to consider serving with it:
- Whipped Cream - A dollop of freshly whipped cream adds a creamy and luscious element that complements the sweetness of the peaches.
- Vanilla Ice Cream - Serving a scoop of high-quality vanilla ice cream alongside a warm slice of peach galette creates a wonderful contrast of temperatures and flavors.
- Caramel Sauce - Drizzling warm caramel sauce over the peach galette adds a decadent and indulgent touch.
How Long Does It Last?
A freshly baked peach galette can be kept at room temperature for about 1 to 2 days. However, keep in mind that the texture of the crust may become less crisp over time.
For longer storage, you can refrigerate a peach galette. Cover it loosely with plastic wrap or place it in an airtight container to prevent it from drying out. In the refrigerator, a peach galette can last for 3 to 4 days.
Before serving, you can briefly reheat it in the oven or toaster oven to refresh the crust.
Can You Freeze It?
A frozen peach galette can last for about 2 to 3 months. When you’re ready to enjoy it, thaw the galette in the refrigerator overnight and then reheat it in a preheated oven until warmed through.
More Air Fryer Desserts
- Air Fryer Sopapillas
- Keto Brownies
- Gluten Free Chocolate Cake
- Baked Apples
- Air Fryer S’mores
Peach Galette | Air Fryer Peach Galette Recipe
Ingredients
For The Crust
- ▢ 1 1/4 cups all purpose flour
- ▢ 1 tbsp granulated sugar
- ▢ 1/4 tsp salt
- ▢ 8 tbsp unsalted butter
- ▢ 4 tbsp Cold Water
For The Filling
- ▢ 4 Peaches
- ▢ 2 tbsp granulated sugar
- ▢ 1 tbsp cornstarch
- ▢ 1/2 tsp vanilla extract
- ▢ 1 tsp lemon zest
Assembly
- ▢ 1 egg
- ▢ 1 tbsp turbinado sugar
Instructions
- Prepare the Dough. In a food processor, combine the flour, sugar, and salt. Pulse to combine. Add the cold, cubed butter and pulse until the mixture resembles coarse crumbs. Slowly add ice water, one tablespoon at a time, and pulse until the dough just comes together. Shape the dough into a disk, wrap it in plastic wrap, and refrigerate for at least 30 minutes.
- Make the Filling. In a bowl, gently toss the sliced peaches with granulated sugar, cornstarch, vanilla extract, lemon zest, and a pinch of salt. Allow the mixture to sit for about 10-15 minutes to let the flavors meld.
- Roll Out the Dough. On a lightly floured surface, roll out the chilled dough into a rough circle, about 12-14 inches in diameter.
- Prebake for the Best Texture. Preheat the air fryer to 350°F. Transfer the rolled-out dough to a piece of parchment paper. Air fry for 5 minutes to begin baking the dough.
- Assemble the Galette. Remove the undercooked dough from the air fryer. Arrange the peach slices in the center of the dough, leaving a border of about 2 inches. Gently fold the edges of the dough over the peaches, creating pleats as you go.
- Egg Wash and Sugar Sprinkle. Brush the edges of the dough with beaten egg for a golden finish. Sprinkle turbinado sugar over the egg-washed edges.
- Air Fry. Carefully transfer the parchment paper with the galette onto the air fryer basket. Air fry the galette for about 18-20 minutes or until the crust is golden brown and the peaches are tender.
- Serve and Enjoy. Allow the galette to cool slightly before slicing.
Get support & connect with our community on Facebook!
Nutrition
And don’t forget to check out my air fryer cookbooks! Every day easy air fryer , and Air Fryer Revolution .


If you already signed up, you should have received an email with a password to give you unlimited access to our FREE Printable Library. The password is case sensitive. Enter it below and get printing!
Password:

Peach Galette | Air Fryer Peach Galette Recipe
Ingredients
For The Crust
- 1 1/4 cups all purpose flour
- 1 tbsp granulated sugar
- 1/4 tsp salt
- 8 tbsp unsalted butter
- 4 tbsp Cold Water
For The Filling
- 4 Peaches
- 2 tbsp granulated sugar
- 1 tbsp cornstarch
- 1/2 tsp vanilla extract
- 1 tsp lemon zest
Assembly
- 1 egg
- 1 tbsp turbinado sugar
Instructions
- Prepare the Dough. In a food processor, combine the flour, sugar, and salt. Pulse to combine. Add the cold, cubed butter and pulse until the mixture resembles coarse crumbs. Slowly add ice water, one tablespoon at a time, and pulse until the dough just comes together. Shape the dough into a disk, wrap it in plastic wrap, and refrigerate for at least 30 minutes.
- Make the Filling. In a bowl, gently toss the sliced peaches with granulated sugar, cornstarch, vanilla extract, lemon zest, and a pinch of salt. Allow the mixture to sit for about 10-15 minutes to let the flavors meld.
- Roll Out the Dough. On a lightly floured surface, roll out the chilled dough into a rough circle, about 12-14 inches in diameter.
- Prebake for the Best Texture. Preheat the air fryer to 350°F. Transfer the rolled-out dough to a piece of parchment paper. Air fry for 5 minutes to begin baking the dough.
- Assemble the Galette. Remove the undercooked dough from the air fryer. Arrange the peach slices in the center of the dough, leaving a border of about 2 inches. Gently fold the edges of the dough over the peaches, creating pleats as you go.
- Egg Wash and Sugar Sprinkle. Brush the edges of the dough with beaten egg for a golden finish. Sprinkle turbinado sugar over the egg-washed edges.
- Air Fry. Carefully transfer the parchment paper with the galette onto the air fryer basket. Air fry the galette for about 18-20 minutes or until the crust is golden brown and the peaches are tender.
- Serve and Enjoy. Allow the galette to cool slightly before slicing.
Peach Galette | Air Fryer Peach Galette Recipe https://twosleevers.com/peach-galette/

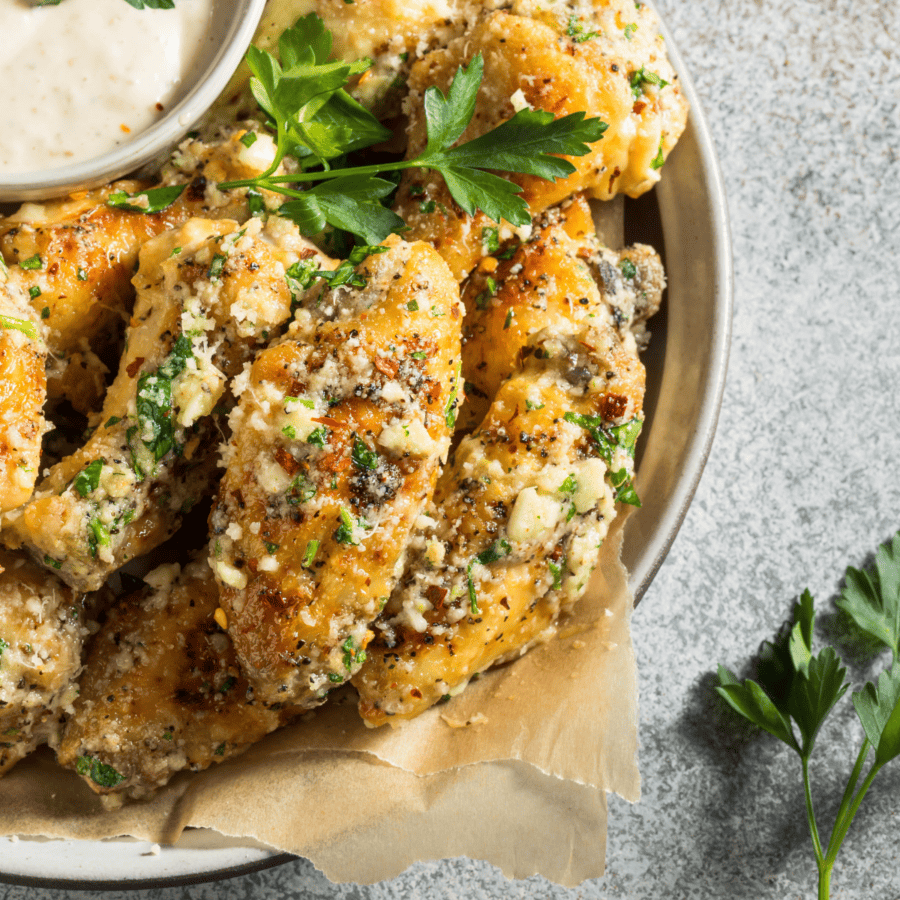
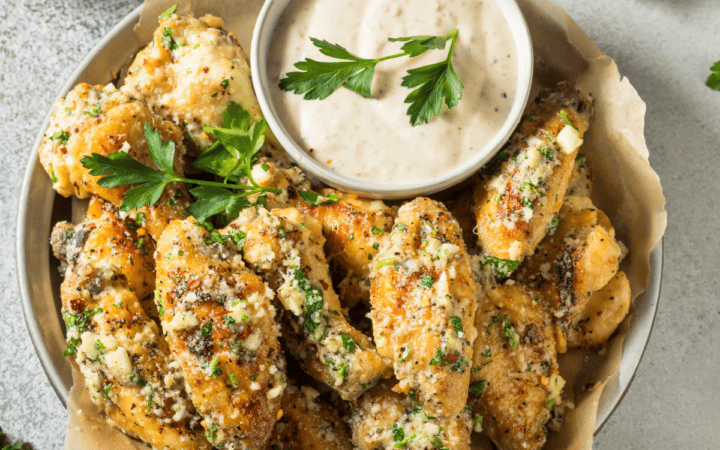
If you’re a fan of the delectable combination of garlic, Parmesan, and crispy chicken, you’re in for a treat! Learn how to make the easiest Air Fryer Garlic Parmesan Wings.

Why You’ll Love These Flavors
- Fast. Ready in under 30 minutes with the help of your air fryer .
- Easy. Cook the wings, create a delicious garlic parmesan sauce, and toss until they’re perfectly coated.
- Low Carb . Only 2 net carbs per serving!
- Delicious. Packed with flavor that is absolutely finger-licking good.
With the convenience of the air fryer, you’ve achieved a restaurant-quality dish that will leave your friends and family craving more. Whether you’re hosting a game day gathering and need an appetizer recipe or simply treating yourself to a delicious main course , these wings are guaranteed to be a hit.
Are Garlic Parmesan Wings Good?
Yes, Garlic Parmesan wings are absolutely delicious and insanely popular among wing enthusiasts. These wings offer a delectable combination of flavors that appeals to a wide range of palates.
The savory richness of garlic, the nuttiness of Parmesan cheese, and the crispy texture of the wings create a mouthwatering and satisfying eating experience.
Ingredients You’ll Need
- Chicken Wings - The main component of the dish, wings provide that tender, juicy interior and crispy exterior when cooked. Using a mix of flats and drums gives a variety of textures and eating experiences.
- Olive Oil - Coating the wings in olive oil helps them crisp up in the air fryer while adding a subtle richness and enhancing the overall flavor.
- Garlic - Adds the bold, aromatic flavor that defines garlic wings. Pre-minced garlic makes prep faster and ensures even distribution on the wings.
- Onion Powder - Adds a mild, savory depth to the seasoning, complementing the garlic and enhancing the overall flavor without overpowering it.
- Salt - Enhances all the flavors, helping the natural taste of the chicken and seasonings shine.
- Black Pepper - Provides a gentle heat and sharpness, balancing the richness of the butter and Parmesan.
- Parmesan Cheese - Brings a nutty, salty, and savory layer to the wings. The classic shaker-style Parmesan melts slightly, coating the wings and creating that signature flavor.
- Unsalted Butter - Used to make the garlic Parmesan sauce, it adds richness and helps the Parmesan stick to the wings. Using unsalted butter allows precise control over the saltiness of the final dish.
How To Make Garlic Parmesan Wings
- Prepare the Chicken Wings. Start by patting the chicken wings dry with paper towels. Dry wings will result in a crispier texture. In a bowl, toss the wings with olive oil, garlic, onion powder, salt, and black pepper until they are evenly coated with the seasoning.
- Air Fry to Perfection. Preheat your air fryer to 400°F. Place the seasoned wings in a single layer in the air fryer basket, making sure not to overcrowd them. Cook the wings for 20 minutes, flipping them halfway through the cooking time. The wings should be golden brown and cooked through.
- Create the Garlic Parmesan Coating. While the wings are cooking, prepare the garlic Parmesan coating. In a bowl, combine the Parmesan cheese and melted butter. Stir until the mixture forms a smooth and creamy paste.
- Toss the Wings. Once the wings are cooked, transfer them to a large bowl. Add the garlic Parmesan mixture to the bowl and toss the wings until they are thoroughly coated in the flavorful mixture.
- Garnish and Serve. Transfer the coated wings to a serving platter and sprinkle chopped fresh parsley over the top for a burst of color and added freshness.
Tips And Tricks
Making Air Fryer Garlic Parmesan Wings is a delicious endeavor, and a few tips and tricks can help you achieve the best possible results. Here are some pointers to ensure your wings turn out crispy, flavorful, and utterly irresistible:
- Preheat the Air Fryer - Preheat your air fryer before adding the wings. This helps create a consistent cooking environment and contributes to achieving that perfect crispy texture.
- Use a Single Layer - Avoid overcrowding the air fryer basket. Cook the wings in a single layer, leaving some space between them to allow for proper air circulation.
- Flip the Wings - Halfway through the cooking time, flip the wings to ensure even cooking and browning on all sides.
Variations
If you’re a fan of Garlic Parmesan wings and want to try some creative variations, here are a few delicious ideas to explore:
- Spicy Garlic Parmesan - Add a kick of heat to your wings by mixing crushed red pepper flakes or cayenne pepper into the garlic Parmesan coating. This combination of spicy and savory flavors will take your wings to a whole new level.
- Lemon Herb Garlic Parmesan - Enhance the garlic Parmesan flavor with a burst of citrus by adding freshly grated lemon zest to the coating. You can also sprinkle chopped fresh herbs like parsley, thyme, or rosemary for an aromatic twist.
- Creamy Garlic Parmesan- Create a creamy garlic Parmesan sauce by mixing the grated Parmesan cheese with a bit of heavy cream or Greek yogurt. Toss the wings in this luscious mixture for a rich and velvety coating.
What To Serve With Garlic Parmesan Wings
Garlic Parmesan wings are a flavorful and savory dish that pairs well with a variety of sides and accompaniments. Here are some delicious options to consider serving alongside them:
- Dipping Sauces - Offer a range of dipping sauces for added variety. Ranch dressing, blue cheese dressing, honey mustard, or even a creamy garlic dip complement the flavors of the wings.
- Vegetable Sticks - Serve a selection of fresh vegetable sticks, such as celery, carrot, and cucumber, on the side. The cool and crunchy veggies provide a refreshing contrast to the rich flavors of the wings.
- Potato Wedges - Crispy potato wedges are a hearty and satisfying option that complements the indulgent nature of the wings.
- Coleslaw - Creamy coleslaw adds a creamy and tangy component to balance the richness of the wings.
How Long Do They Last?
Cooked garlic Parmesan wings can be stored in the refrigerator in an airtight container for up to 3 to 4 days. The flavors may intensify over time, so for the best bite, they are best enjoyed as soon as possible.
Can You Freeze Them?
Yes, you can freeze garlic Parmesan wings to extend their shelf life and enjoy them at a later time. Freezing is a great way to preserve the flavors and texture of the wings.
Place cooled wings in an airtight container or resealable freezer-safe bag. Remove as much air as possible from the container or bag to prevent freezer burn. Place the container or bag in the freezer. Try to lay the wings flat to maximize storage space and ensure even freezing.
Properly frozen garlic Parmesan wings can last in the freezer for up to 2 to 3 months without significant loss of quality. However, for the best taste and texture, try to enjoy them within a few weeks of freezing.
More Of OurBest Wing Recipes
- Korean Chicken Wings
- Breaded Chicken Wings
- Buffalo Cauliflower Wings
- Baked Chicken Wings
- Lemon Pepper Wings
- Mango Habanero Wings

If you love these air fryer Garlic Parmesan Wings as much as we do, make sure you share them with your friends on Facebook and Instagram so they can try them too! Don’t forget to Pin the recipe so you can make it again soon.
Garlic Parmesan Wings | Air Fryer Parmesan Garlic Wings
Ingredients
- ▢ 2 pounds chicken wings
- ▢ 2 tbsp olive oil
- ▢ 1 tsp onion powder
- ▢ 2 tbsp minced garlic
- ▢ 1/2 tsp salt
- ▢ 1/2 tsp black pepper
- ▢ 1/4 cup parmesan cheese
- ▢ 3 tbsp unsalted butter
- ▢ parsley , for garnish
Instructions
- Prepare the Chicken Wings. Start by patting the chicken wings dry with paper towels. Dry wings will result in a crispier texture. In a bowl, toss the wings with olive oil, garlic, onion powder, salt, and black pepper until they are evenly coated with the seasoning.
- Air Fry to Perfection. Preheat your air fryer to 400°F. Place the seasoned wings in a single layer in the air fryer basket, making sure not to overcrowd them. Cook the wings for 20 minutes, flipping them halfway through the cooking time. The wings should be golden brown and cooked through.
- Create the Garlic Parmesan Coating. While the wings are cooking, prepare the garlic Parmesan coating. In a bowl, combine the Parmesan cheese and melted butter. Stir until the mixture forms a smooth and creamy paste.
- Toss the Wings. Once the wings are cooked, transfer them to a large bowl. Add the garlic Parmesan mixture to the bowl and toss the wings until they are thoroughly coated in the flavorful mixture.
- Garnish and Serve. Transfer the coated wings to a serving platter and sprinkle chopped fresh parsley over the top for a burst of color and added freshness.
Get support & connect with our community on Facebook!
Nutrition
And don’t forget to check out my air fryer cookbooks! Every day easy air fryer , and Air Fryer Revolution .
