
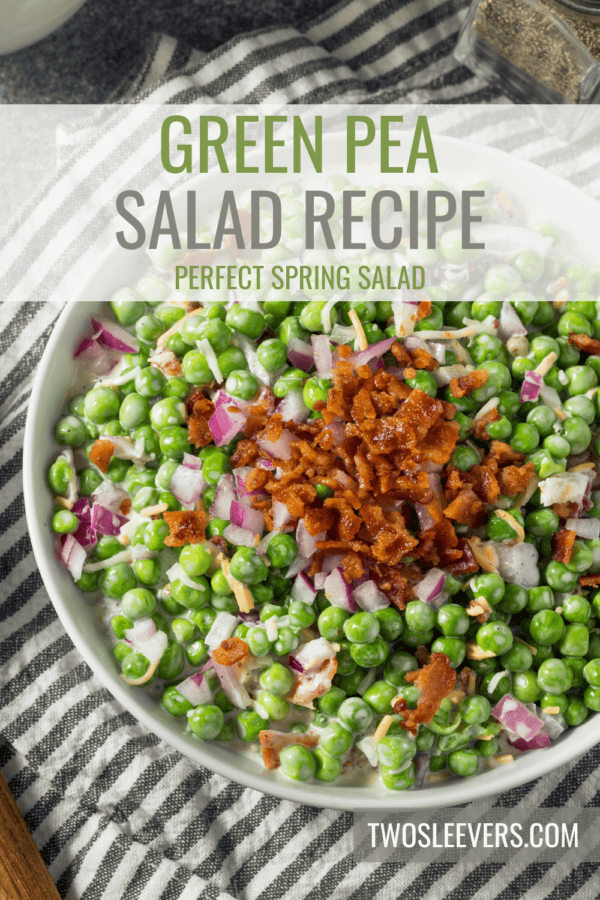
Discover the perfect balance of freshness and flavor with our tantalizing Pea Salad recipe. Elevate any meal with this delightful side dish that’s both refreshing and satisfying.
Why You’ll Love This Vibrant Salad
- Refreshing Crunch . Our Pea Salad bursts with freshness, thanks to crisp peas and crunchy veggies, creating a refreshing bite that complements any main course.
- Versatile Dish . Whether it’s a family barbecue, potluck, or weekday dinner, our Pea Salad is a versatile side dish that pairs well with a variety of main courses.
- Simple Ingredients. Made with everyday ingredients, our Pea Salad recipe is easy to whip up, saving you time without compromising on flavor.
What Are The Benefits Of Pea Salad?
- Rich in Protein . Peas are a good source of plant-based protein, which is essential for muscle growth and repair, as well as overall health. Adding peas to your salad can help increase your protein intake, especially if you’re following a vegetarian or vegan diet.
- High in Fiber . Peas are high in dietary fiber, which is important for digestive health and can help prevent constipation. Fiber also helps promote feelings of fullness, which can aid in weight management and prevent overeating.
- Packed with Vitamins and Minerals . Peas are rich in vitamins and minerals, including vitamin C, vitamin K, folate, and manganese. These nutrients play important roles in immune function, bone health, and energy metabolism.
What Does Pea Salad Taste Like?
Pea salad typically has a fresh, vibrant flavor with a combination of sweet and savory notes. The peas themselves have a slightly sweet taste, while other ingredients such as onions, cheese, and bacon (if included) add savory and salty elements. The dressing contributes tanginess and depth of flavor.
Ingredients You’ll Need
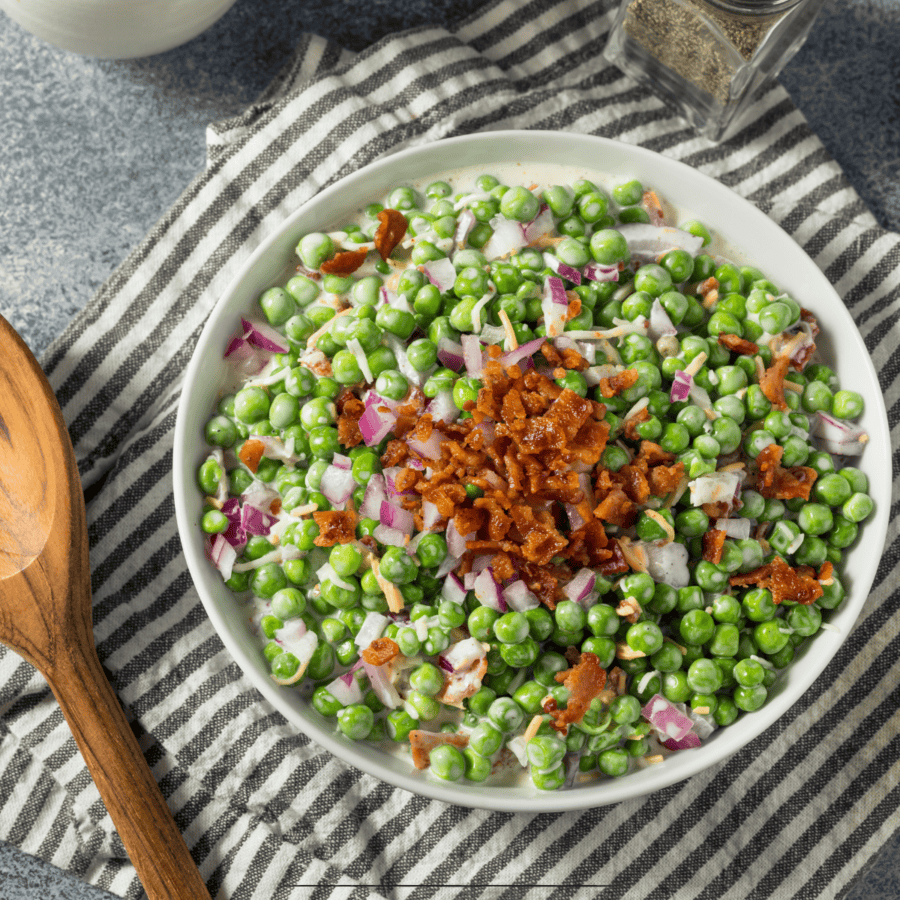
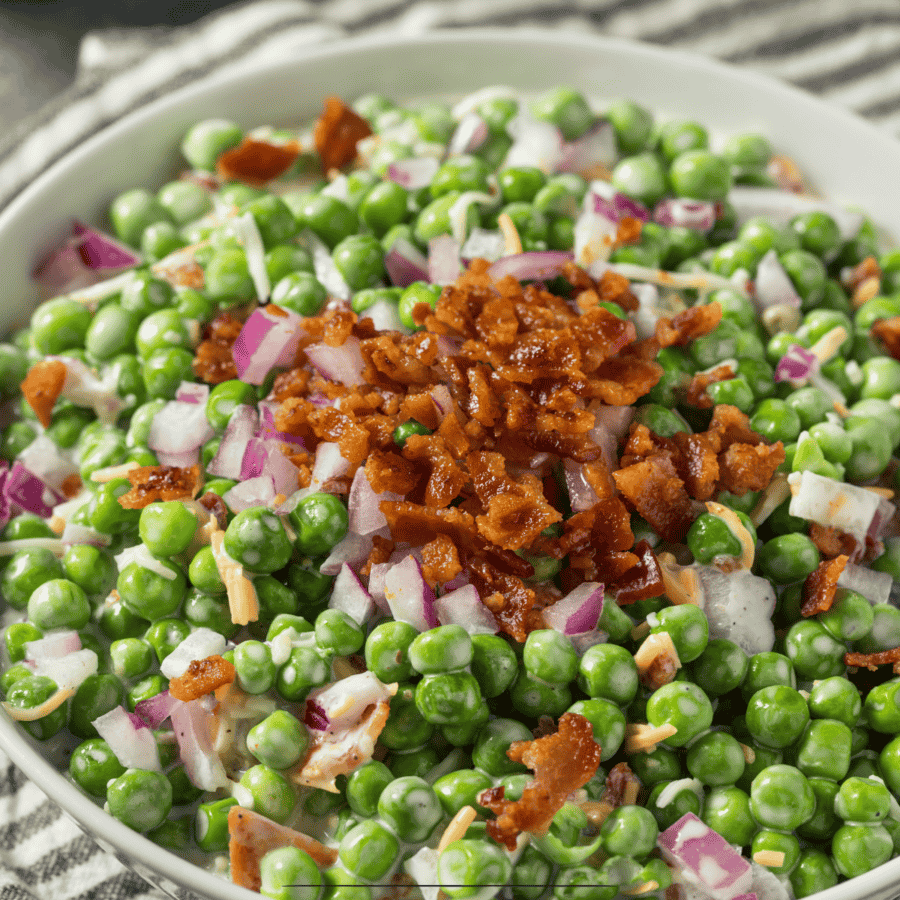
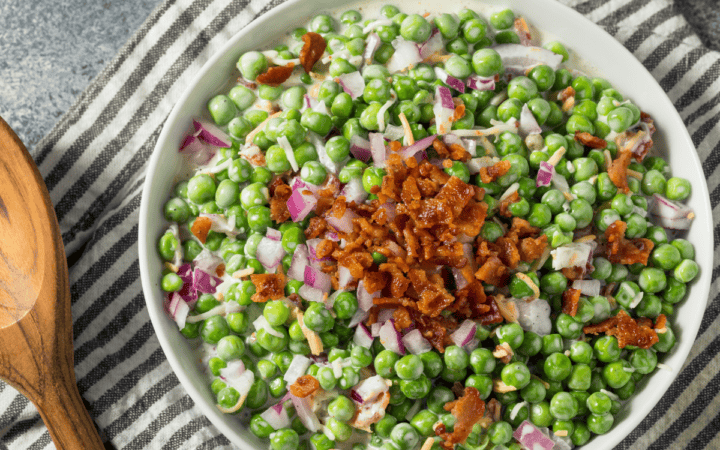
- Frozen Peas - Provide a sweet and vibrant pop of color to the salad.
- Crispy Bacon - Adds savory flavor and a satisfying crunch.
- Red Onion - Adds a sharp bite and contrasting color to the salad.
- Cheddar Cheese - Offers richness and creaminess to complement the sweetness of the peas.
- Creamy Dressing - A blend of mayonnaise, sour cream, and seasonings creates a creamy and flavorful dressing that ties the salad together.
Enjoy the vibrant flavors and crisp textures of our Pea Salad recipe, perfect for any occasion from picnics to family dinners. Try it today and watch it become a new favorite in your recipe collection!
How To Make Pea Salad
- Prepare Ingredients . Thaw frozen peas, cook and crumble bacon, dice red onion, and shredded cheddar cheese.
- Mix Ingredients . In a large bowl, combine peas, bacon, red onion, and cheddar cheese.
- Add Dressing . In a separate bowl, whisk together mayonnaise, sour cream, and seasonings. Pour over the pea mixture and toss until evenly coated.
- Chill and Serve . Cover the salad and refrigerate for at least one hour to allow flavors to meld. Serve chilled and enjoy!
Tips And Tricks
Creating a delicious and creamy pea salad requires attention to detail and a few key techniques. Here are some tips and tricks to help you make it perfect:
- Season Well . Season the dressing generously with salt and pepper to enhance the flavors of the salad. You can also add other seasonings like garlic powder, onion powder, or fresh herbs such as dill or parsley for extra flavor.
- Let it Chill . After mixing the salad ingredients together, refrigerate the salad for at least 1-2 hours before serving. Chilling allows the flavors to meld together and the salad to become properly chilled, which enhances the overall taste and texture.
- Garnish Before Serving . Just before serving, garnish the pea salad with additional toppings like chopped fresh herbs, crispy bacon, shredded cheese, or a sprinkle of paprika for added visual appeal and flavor.
Variations
Pea salad is a versatile dish that lends itself well to various flavor combinations and ingredient additions. Here are some delicious variations to try:
- Ranch - Mix cooked peas with ranch dressing for a tangy and herby flavor profile. Add diced red onions, cherry tomatoes, and chopped fresh dill for extra freshness and color.
- Greek - Combine peas with diced cucumbers, cherry tomatoes, red onion, and crumbled feta cheese. Toss with a lemony vinaigrette made with olive oil, lemon juice, garlic, and oregano for a refreshing and Mediterranean-inspired salad.
- Avocado and Corn - Add diced avocado and sweet corn kernels to the pea salad for a creamy and sweet twist. Toss with a lime-cilantro dressing and garnish with chopped cilantro and diced red bell peppers for extra flavor and color.
What To Eat With Pea Salad
Pea salad is a versatile dish that pairs well with a variety of foods, making it suitable for different occasions and meals. Here are some delicious options to enjoy alongside it:
- Grilled Chicken - Serve it as a side dish with grilled chicken breasts or thighs for a wholesome and balanced meal. The light and refreshing flavors of the salad complement the savory grilled chicken perfectly.
- Sandwiches - Pair pea salad with sandwiches such as turkey, ham, or tuna sandwiches for a satisfying lunch or light dinner. The creamy texture of the salad contrasts nicely with the hearty fillings of the sandwiches.
- Quiche - Enjoy pea salad alongside a slice of quiche for a delightful brunch or light dinner. The combination of the savory quiche and the fresh flavors of the salad creates a delicious and well-rounded meal.
How Long Does It Last?
Pea salad typically lasts for about 3 to 5 days when stored properly in the refrigerator. To maximize freshness and maintain its quality, store the pea salad in an airtight container.
The salad may become slightly softer over time due to the dressing, so it’s best enjoyed within a few days of preparation for optimal taste and texture.
Can You Freeze It?
While Pea Salad can be frozen, the texture may change upon thawing due to the mayonnaise-based dressing. Freeze in an airtight container for up to one month, thaw overnight in the refrigerator, and stir well before serving.
More Spectacular Salad
- Big Mac Salad
- Antipasto Salad
- Creamy Chicken Salad
- Chicken Caesar Salad
- Keto Broccoli Salad
Pea Salad Recipe | Classic Pea Salad
Ingredients
- ▢ 2 cups Frozen Peas
- ▢ 6 strips Bacon , cooked
- ▢ 1/4 cup Red Onion , chopped
- ▢ 1/2 cup Cheddar Cheese , shredded
- ▢ 1/4 cup Mayonnaise
- ▢ 1/4 cup Sour Cream
- ▢ 1 tsp Mustard
- ▢ 1/2 tsp Kosher Salt
- ▢ 1/4 tsp Black Pepper
Instructions
- Prepare Ingredients . Thaw frozen peas, cook and crumble bacon, dice red onion, and shredded cheddar cheese.
- Mix Ingredients . In a large bowl, combine peas, bacon, red onion, and cheddar cheese.
- Add Dressing . In a separate bowl, whisk together mayonnaise, sour cream, and seasonings. Pour over the pea mixture and toss until evenly coated.
- Chill and Serve . Cover the salad and refrigerate for at least one hour to allow flavors to meld. Serve chilled and enjoy!
Get support & connect with our community on Facebook!
Nutrition
Don’t forget to check out my other Ketocookbooks.
Keto Instant Pot, Keto Fat Bombs, Sweets, & Treats , and Easy keto in 30 minutes.


If you already signed up, you should have received an email with a password to give you unlimited access to our FREE Printable Library. The password is case sensitive. Enter it below and get printing!
Password:

Pea Salad Recipe | Classic Pea Salad
Ingredients
- 2 cups Frozen Peas
- 6 strips Bacon cooked
- 1/4 cup Red Onion chopped
- 1/2 cup Cheddar Cheese shredded
- 1/4 cup Mayonnaise
- 1/4 cup Sour Cream
- 1 tsp Mustard
- 1/2 tsp Kosher Salt
- 1/4 tsp Black Pepper
Instructions
- Prepare Ingredients . Thaw frozen peas, cook and crumble bacon, dice red onion, and shredded cheddar cheese.
- Mix Ingredients . In a large bowl, combine peas, bacon, red onion, and cheddar cheese.
- Add Dressing . In a separate bowl, whisk together mayonnaise, sour cream, and seasonings. Pour over the pea mixture and toss until evenly coated.
- Chill and Serve . Cover the salad and refrigerate for at least one hour to allow flavors to meld. Serve chilled and enjoy!
Pea Salad Recipe | Classic Pea Salad https://twosleevers.com/pea-salad-recipe/

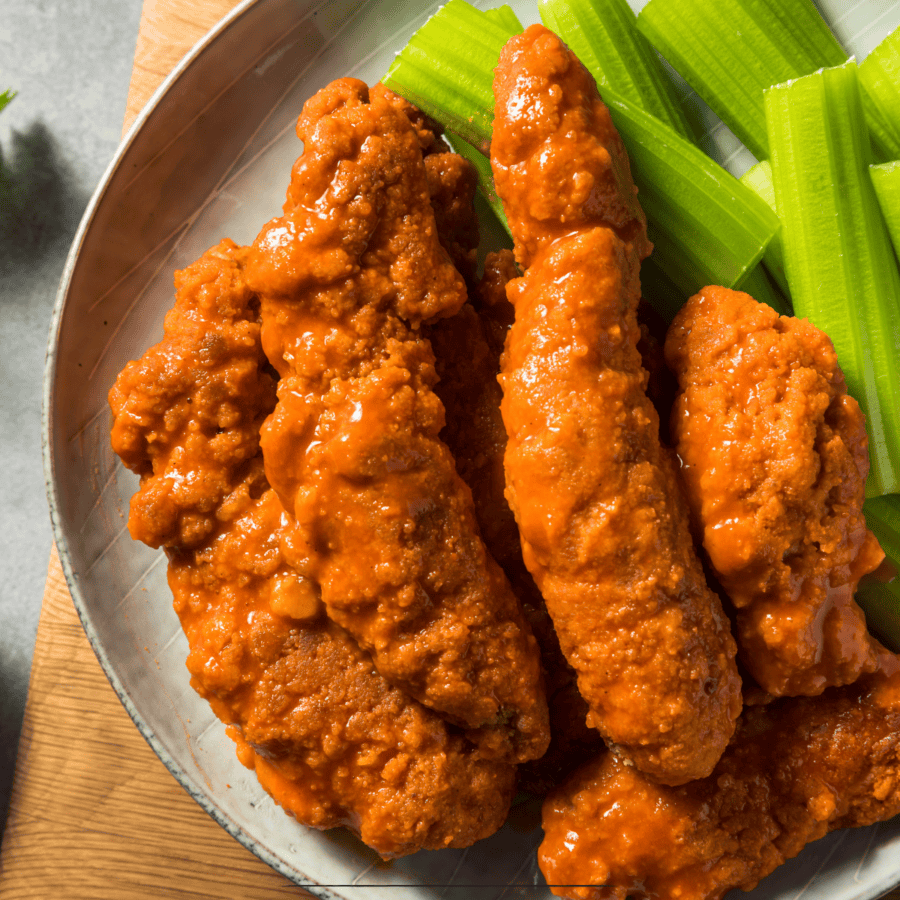
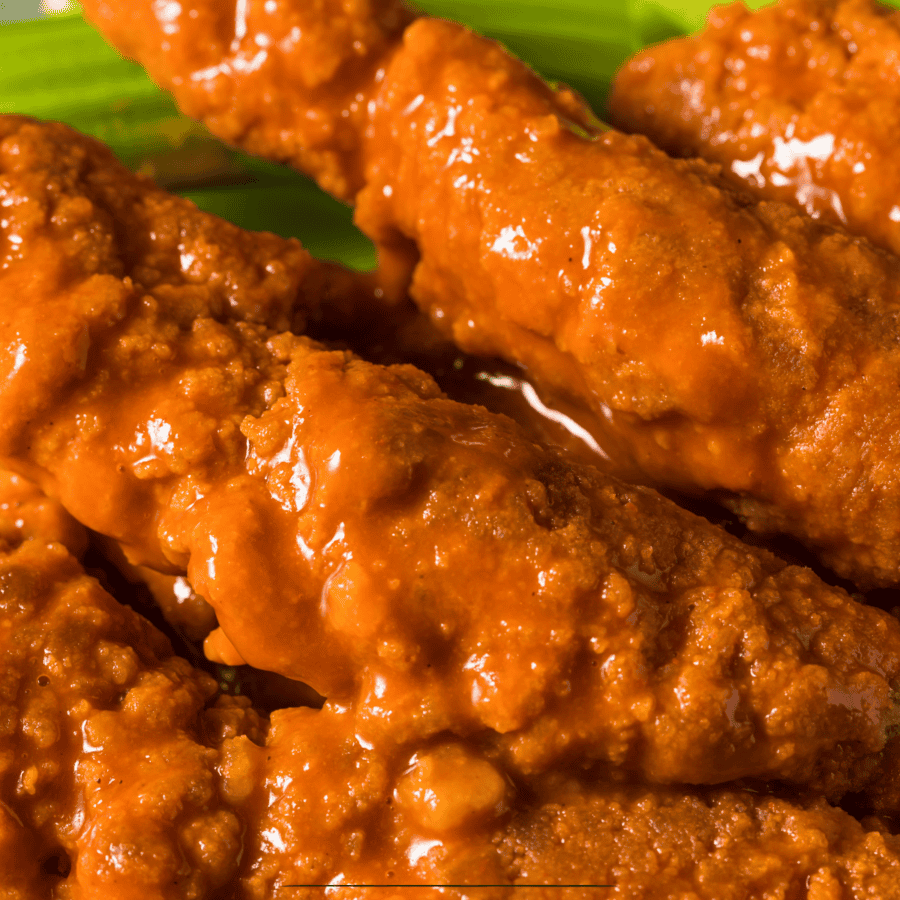
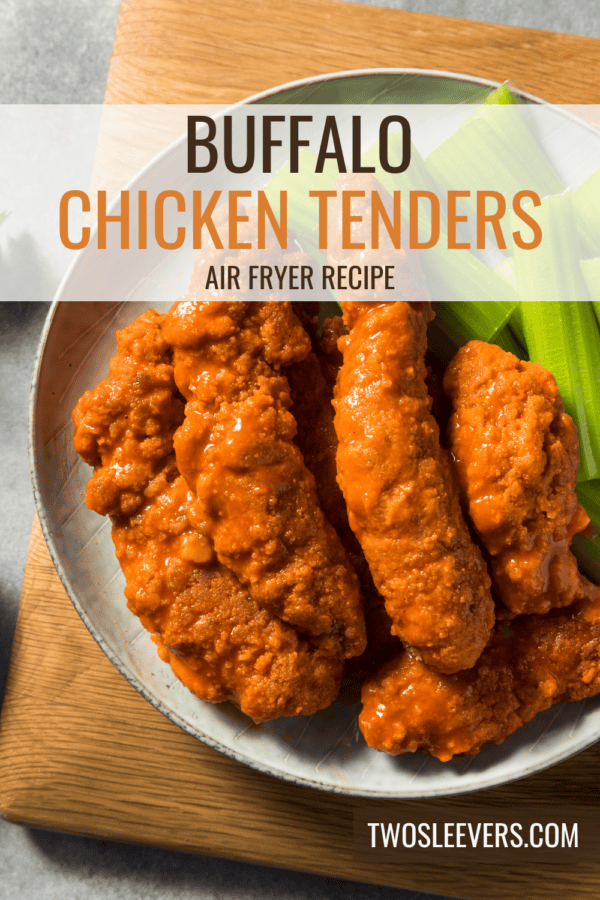
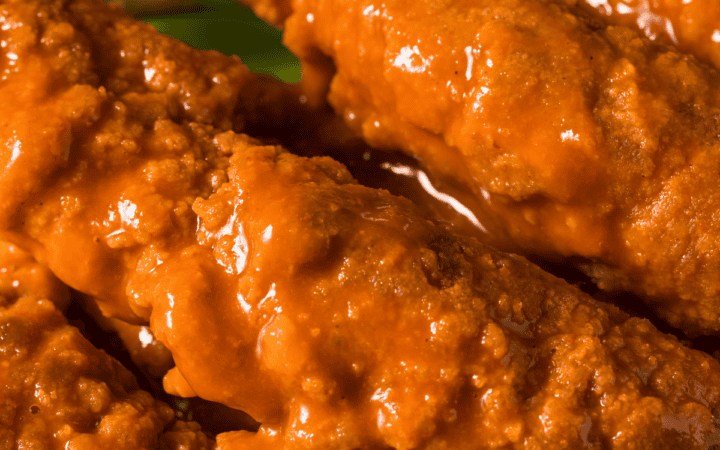
Spice up your dinner routine with these irresistibly crispy Air Fryer Buffalo Chicken Tenders! This recipe transforms simple ingredients into a mouth-watering dish with just the right kick of heat and a perfect crunch. Dive into the ultimate combination of ease and flavor with this foolproof method.
Why You’ll Love This Spicy Bite
- Quick . Ready in just 20 minutes from start to finish.
- Effortless . Minimal preparation for a no-fuss cooking experience.
- Incredibly Tasty . The spicy buffalo sauce combined with the tender juiciness of the chicken is a match made in heaven.
With the magic of the air fryer, you’ll achieve that desirable crispy coating without the need for deep frying, making it a healthier option that doesn’t sacrifice taste.
What Is The Difference Between Chicken Strips And Chicken Tenders?
The terms “chicken strips” and “chicken tenders” often cause some confusion, but they refer to slightly different things:
- Chicken Tenders - These are made from the actual tenderloin part of the chicken breast, which is a specific, elongated muscle situated underneath the breast meat. Chicken tenders are naturally tender and cook quickly because they are a softer, leaner section of the chicken. They are sometimes referred to as “chicken tenderloins” and are considered a prime part of the chicken.
- Chicken Strips - These can be made from either the chicken breast or other parts of the chicken, sliced into long, thin strips. Chicken strips might not always be from the tenderloin part and can vary in texture and flavor depending on which part of the chicken they are cut from. When made from breast meat that is not the tenderloin, they may require a little more culinary effort (like marinating or tenderizing) to ensure they’re not too tough when cooked.
While both are popular for frying and making quick meals like stir-fries or breaded and baked dishes, chicken tenders generally have a reputation for being slightly more premium due to their tenderness and being part of the breast.
Ingredients You’ll Need
For The Chicken
- Chicken Tenders- The main protein of the dish.
- Buffalo Sauce- This sauce provides the distinctive tangy, spicy flavor typical of Buffalo chicken.
- All-Purpose Flour- Used to create the initial coating on the chicken tenders.
- Egg- The beaten egg acts as a binder, helping the flour coating adhere to the chicken tenders.
- Garlic Powder- Adds a savory depth to the flour mixture, enhancing the overall flavor profile of the chicken tenders.
- Paprika- Paprika not only adds subtle earthiness and sweetness to the coating but also gives the chicken a vibrant, appealing color.
- Salt- Enhances the natural flavors of the chicken and the spices in the flour mixture.
- Black Pepper- Adds a slight heat and sharpness, complementing the other flavors.
- Olive Oil- Helps in crisping up the exterior and prevents the tenders from sticking to the air fryer basket.
For The Sauce
- Hot Sauce- Forms the base of the Buffalo sauce, providing the heat.
- Butter- Adds richness and mellows out the heat of the hot sauce, creating a balanced, smooth sauce.
- Vinegar- Adds a tangy note to the Buffalo sauce, enhancing its complexity.
- Worcestershire Sauce- Introduces an additional layer of savory umami flavor to the sauce, making it more robust.
- Garlic Powder- Complements the heat with a subtle garlic flavor, rounding out the taste of the Buffalo sauce.
How To Make Buffalo Chicken Tenders
- Prep the Chicken . Start by patting the chicken tenders dry with paper towels. This helps the coating stick better.
- Make the Flour Mixture . In a shallow bowl, mix the all-purpose flour, garlic powder, paprika, salt, and black pepper.
- Dip the Tenders . Dip each chicken tender first in the beaten egg, then dredge thoroughly in the flour mixture, shaking off any excess. This double coating will ensure a crispier finish.
- Air Fry . Preheat the air fryer to 375°F. Spray the chicken tenders with olive oil. Arrange the chicken tenders in a single layer in the air fryer basket. Cook for 10 minutes, then flip the tenders and cook for an additional 5-7 minutes or until the internal temperature reaches 165F.
- Prepare the Buffalo Sauce . If making your own sauce, combine the hot sauce, melted butter, vinegar, Worcestershire sauce, and a pinch of garlic powder in a bowl. Stir until well combined. If using store-bought, gently heat it up in a saucepan or in the microwave until warm.
- Toss with Sauce . Once the chicken tenders are cooked and still hot, toss them in the buffalo sauce until they are evenly coated.
- Serve . Serve your buffalo chicken tenders hot. They go perfectly with a side of celery sticks, carrot sticks, and blue cheese or ranch dressing for dipping.
Tips and Tricks
Making delicious Buffalo chicken tenders involves more than just the right ingredients; it’s about technique and a few kitchen tricks to ensure they turn out flavorful and satisfying. Here’s a comprehensive guide to perfecting them:
- Select the Right Cut. Use actual chicken tenders (the tenderloin of the chicken breast) for the best results. They’re naturally tender and cook quickly, making them ideal for a quick and juicy dish.
- Don’t Overcook. Chicken tenders are thin and cook quickly; overcooking will dry them out. Keep an eye on their internal temperature with a meat thermometer. The safe internal temperature for chicken is 165°F.
Variations
Buffalo chicken tenders are a versatile dish that can be adapted to suit a variety of tastes and dietary needs. Here are some creative variations on the classic:
- BBQ Buffalo Tenders - Mix some BBQ sauce into your Buffalo sauce for a smoky, sweet, and spicy combination.
- Honey Garlic Buffalo Tenders - Add honey and minced garlic to the Buffalo sauce to create a sweet and savory flavor profile.
- Teriyaki Buffalo Tenders - Incorporate some teriyaki sauce into the Buffalo sauce for an Asian twist.
What To Eat With Buffalo Chicken Tenders
Buffalo chicken tenders pair wonderfully with various sides and dips. Here are some great options:
- Classic Celery and Carrot Sticks - Provide a crunchy, cool contrast to the heat.
- Coleslaw - Adds a creamy and tangy element to balance the spiciness.
- Sweet Potato Fries - A sweet side that complements the tender’s heat beautifully.
- Instant Pot Mashed Potatoes - A quick and easy side dish that the whole family will love.
How Long Do They Last?
Store any leftovers in an airtight container in the refrigerator for up to 3 days. Reheat in the air fryer for a few minutes to restore the crispy texture before serving.
Can You Freeze Them?
Absolutely! Freeze the cooked and cooled chicken tenders on a baking sheet, then transfer to a freezer bag. They can be reheated directly from frozen in the air fryer, making them a convenient meal prep option.
More Simple Chicken Recipes
- Instant Pot Butter Chicken
- Firecracker Chicken
- Instant Pot Chicken Biryani
- Keto Sesame Ginger Chicken
- Chicken Korma
- Grilled Chicken Wraps
- Marry Me Chicken Pasta
- Honey Mustard Chicken
- Buffalo Chicken Tacos
- Honey BBQ Chicken Tenders
Buffalo Chicken Tenders | Spicy Chicken Strips
Ingredients
For The Chicken
- ▢ 1 pound Chicken Tenderloins
- ▢ 1/4 cup All Purpose Flour
- ▢ 1 Egg
- ▢ 1 tsp Garlic Powder
- ▢ 1 tsp Paprika
- ▢ 1/2 tsp Kosher Salt
- ▢ 1/4 tsp Pepper
- ▢ 2 tbsp Olive Oil
For The Sauce
- ▢ 1/2 cup Frank’s Red Hot
- ▢ 1/4 cup Butter , melted
- ▢ 1 tsp White vinegar
- ▢ 1/4 tsp Worchestershire Sauce
- ▢ 1/4 tsp Garlic Powder
Instructions
- Prep the Chicken . Start by patting the chicken tenders dry with paper towels. This helps the coating stick better.
- Make the Flour Mixture . In a shallow bowl, mix the all-purpose flour, garlic powder, paprika, salt, and black pepper.
- Dip the Tenders . Dip each chicken tender first in the beaten egg, then dredge thoroughly in the flour mixture, shaking off any excess. This double coating will ensure a crispier finish.
- Air Fry . Preheat the air fryer to 375°F. Spray the chicken tenders with olive oil. Arrange the chicken tenders in a single layer in the air fryer basket. Cook for 10 minutes, then flip the tenders and cook for an additional 5-7 minutes or until the internal temperature reaches 165F.
- Prepare the Buffalo Sauce . If making your own sauce, combine the hot sauce, melted butter, vinegar, Worcestershire sauce, and a pinch of garlic powder in a bowl. Stir until well combined. If using store-bought, gently heat it up in a saucepan or in the microwave until warm.
- Toss with Sauce . Once the chicken tenders are cooked and still hot, toss them in the buffalo sauce until they are evenly coated.
- Serve . Serve your buffalo chicken tenders hot. They go perfectly with a side of celery sticks, carrot sticks, and blue cheese or ranch dressing for dipping.
Get support & connect with our community on Facebook!
Nutrition
And don’t forget to check out my air fryer cookbooks! Every day easy air fryer , and Air Fryer Revolution .

