
Clear pantry bins, airtight containers, and lazy Susans are the top three because they create zones, reduce mess, and make everything easy to grab.
How do I organize a small pantry?
Use over-the-door storage, tiered risers, and stackable bins to maximize vertical space. Keep daily items at eye level and backstock up high.
Do airtight containers really help?
Yes, especially for flour, sugar, rice, pasta, cereal, and snacks. They prevent spills, keep things fresh, and make your pantry look instantly cleaner.

YIHONG 6 Pack Clear Pantry Organizer Bins
If you buy only one thing, buy these. Clear bins create instant categories and slide out like drawers—perfect for deep shelves and busy households.

Shazo 2 Pack EXTRA Large Airtight Food Storage Cereal Containers
These keep cereal fresh and pourable, plus they’re a huge visual upgrade. Great for granola and snacks too.

Airtight Food Storage Containers with Lids,
Decanting messy bags into airtight containers makes your pantry cleaner, keeps food fresher, and stops spills. Look for stackable, clear containers with locking lids.

Set of 4, 10 Inch Non-Skid Lazy Susan Organizers
Turntables are the secret weapon for oils, vinegars, nut butters, jams, sauces—especially in corner shelves or deep pantry spaces.
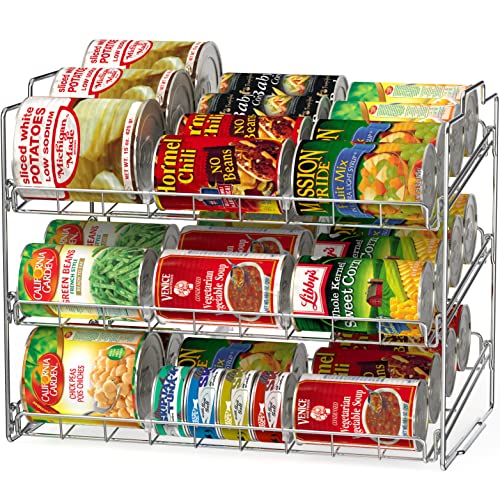
Deco Brothers Stackable Can Rack Organizer
When cans stack two deep, you forget what you own and buy duplicates. A can rack keeps labels visible and rotates older cans forward.
Dial Industries 3 Tier Adjustable Canned Goods Shelves
Shelf risers double your “eye-level” space and make it easier to see jars and cans at a glance.

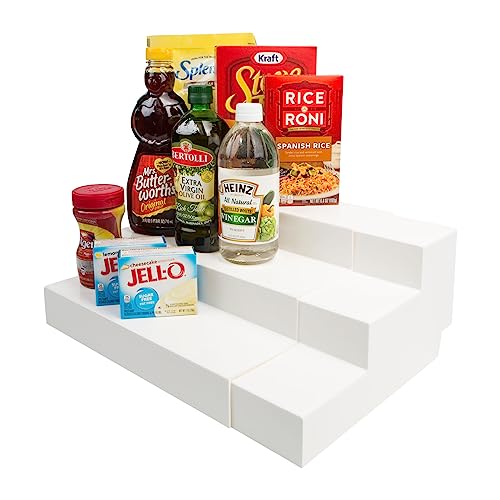
2 Pack Expandable Cabinet Countertop Shelves
These create mini “levels” on your pantry shelves—ideal for small appliances or snack containers.

Moforoco White 9-Tier Over The Door Pantry Organizer,
If you’re short on shelf space, the door is prime real estate. Use it for snacks, seasoning packets, wraps, or baking supplies.

Vtopmart 4 Pack Small Clear Stackable Storage Drawers
Perfect for pudding mixes, drink packets, granola bars, yeast packets, and all the little things that vanish.

6 Pack Wire Baskets
These hide visual clutter and are great for bulky or odd-shaped items (chips, bread, paper towels). Wire baskets also work well for produce if your pantry setup allows airflow.

Nelko Label Maker
Labels make it obvious where things go—so everyone in the house can maintain the system.

Jetmore 12 Pack Chip Clips Bag Clips

If you already signed up, you should have received an email with a password to give you unlimited access to our FREE Printable Library. The password is case sensitive. Enter it below and get printing!
Password:

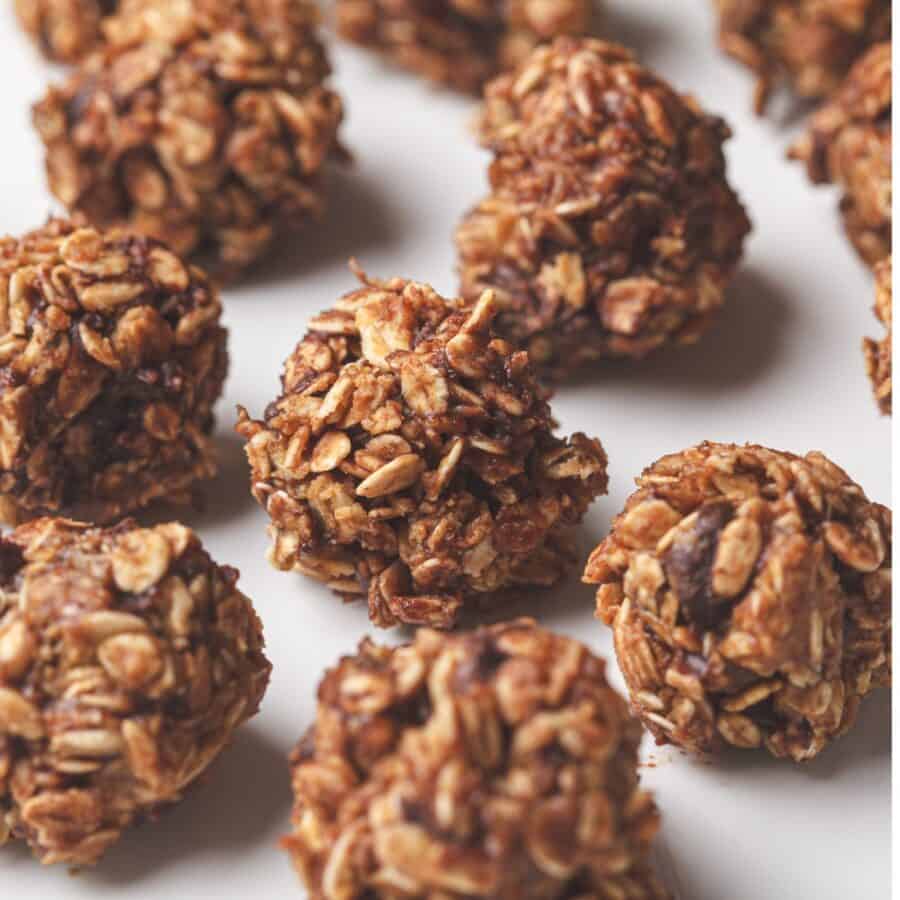
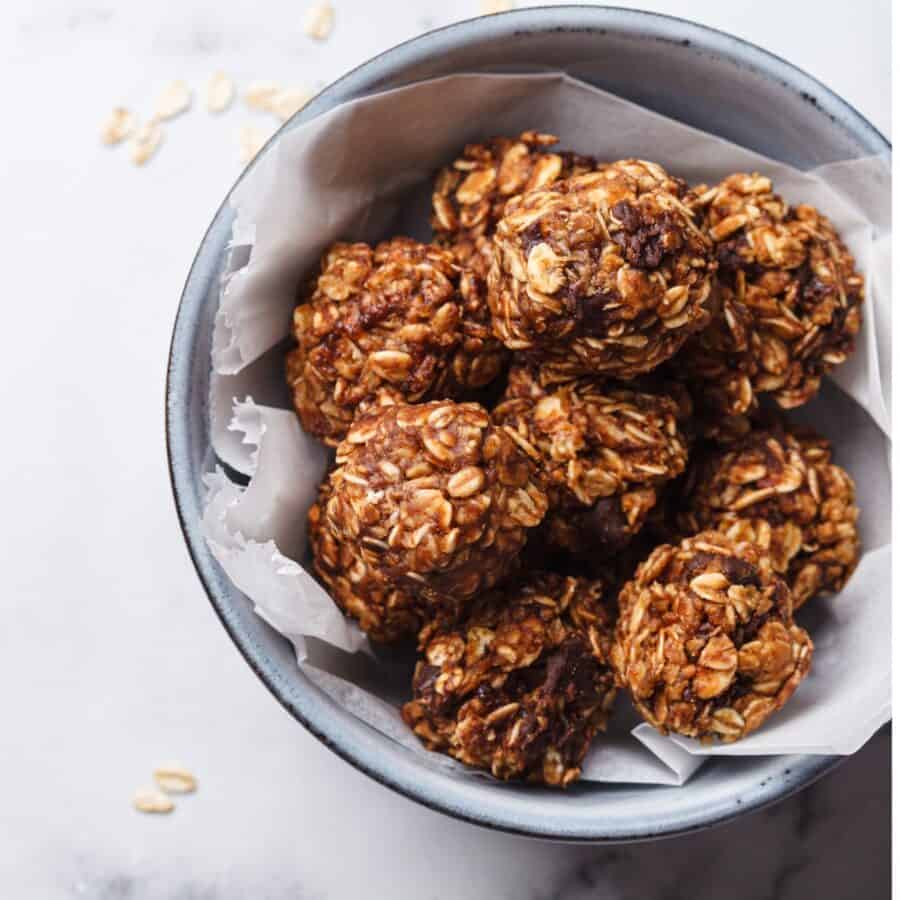
If you’re a fan of easy, no-bake treats that are both indulgent and wholesome, you’re in for a delightful surprise! Learn how to create these delectable No Bake Chocolate Balls that are perfect for satisfying your sweet cravings without spending hours in the kitchen.
Why You’ll Love These No Bake Balls
- Quick and Effortless - These treats come together in a flash, with no need for baking. Perfect for when you’re short on time but still want a delicious dessert.
- Simple Ingredients - You’ll only need a handful of basic ingredients that you likely already have in your pantry.
- Healthy Twist - Despite their chocolatey allure, these oat balls offer a nutritious side, thanks to the hearty oats and other wholesome components.
- Irresistible Taste - The combination of rich chocolate and oats creates a mouthwatering treat that’s hard to resist.
With the convenience of a no-bake recipe, you can whip up a batch of these No-Bake Chocolate Oat Balls anytime you’re craving a sweet indulgence.
What Is A Chocolate Ball?
A chocolate ball typically refers to a sweet confectionery made from chocolate. These balls can vary in size, flavor, and ingredients, but they all share the common characteristic of being chocolate-based treats.
They can be purchased from chocolate shops and candy stores, or made at home (like this tasty no bake recipe) with a range of ingredients and creative variations.
Ingredients You’ll Need
- Rolled oats - The main bulk and structure. They soak up moisture, make the balls sturdy, and add a chewy texture.
- Cocoa powder - The chocolate flavor (and color). It also slightly dries the mix, helping balance sticky ingredients.
- Honey - The sweetener + glue. It binds everything together so the balls hold their shape, and adds moisture.
- Peanut butter - The fat + binder + flavor. It makes the mixture creamy, helps everything stick, and adds richness/protein so the balls feel more filling.
- Shredded coconut - Adds texture and a little sweetness.
- Vanilla extract - Flavor booster. It rounds out the chocolate taste and makes the whole thing taste more “dessert-y.”
- Salt - Tiny amount, big impact. It sharpens the chocolate flavor, balances sweetness, and makes everything taste less flat.
How To Make Chocolate Balls
- Combine Dry Ingredients . In a large mixing bowl, combine the rolled oats and cocoa powder. Stir them together until well mixed.
- Add Wet Ingredients . To the dry mixture, add the honey or maple syrup, peanut butter or almond butter, vanilla extract, and a pinch of salt. Mix everything thoroughly until you have a homogenous dough-like mixture.
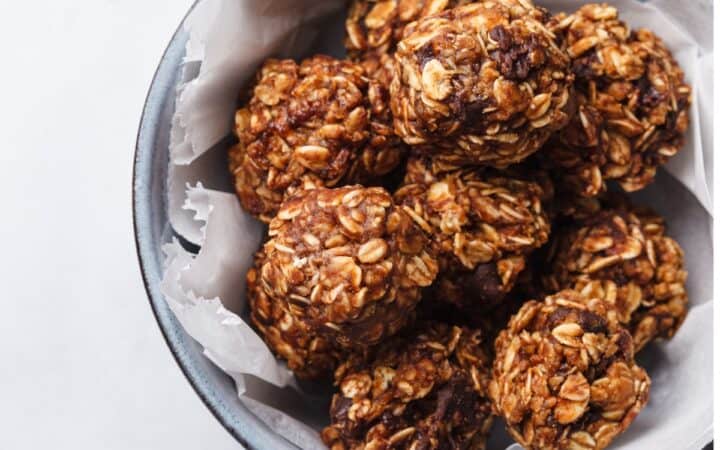
- Shape into Balls . Take small portions of the mixture and roll them between your palms to create uniform-sized balls. If desired, you can roll them in shredded coconut for an extra layer of flavor and texture.
- Chill . Place the chocolate oat balls on a tray or plate lined with parchment paper and put them in the refrigerator for about 30 minutes to firm up.
- Serve and Enjoy . Once they’re chilled and set, these delectable No-Bake Chocolate Oat Balls are ready to enjoy. Serve them as a delightful snack or dessert.
Tips And Tricks
- Adjust Sweetness - The sweetness of these oat balls can be customized to your liking. If you prefer a sweeter treat, add more honey or maple syrup; for a less sweet option, reduce the amount.
- Mix-Ins - Get creative by adding your favorite mix-ins like chopped nuts, dried fruits, or mini chocolate chips to the mixture for extra flavor and texture.
- Experiment - Feel free to experiment with different nut butters, such as almond, cashew, or sunflower seed butter, to create unique flavor profiles.
Variations For Chocolate Balls
Chocolate balls are incredibly versatile, and there are numerous variations you can explore to create unique and delicious treats. Here are some delightful variations for them:
- Nutty Chocolate Balls - Incorporate finely chopped nuts such as almonds, walnuts, or pecans into the chocolate mixture for a delightful crunch and added flavor. Roll the balls in crushed nuts for extra texture.
- Fruit and Chocolate Fusion - Mix in dried fruits like raisins, cranberries, apricots, or dates for a sweet and chewy texture. The combination of fruity sweetness and chocolate is a classic pairing.
- Protein-Packed Treats - Boost the protein content by incorporating protein powder, nut butter, or crushed protein bars into the mixture, making them a satisfying and nutritious snack.
How Long Do They Last?
Chocolate Balls with oats can be stored in an airtight container at room temperature for about 3 to 5 days. However, their texture may change over time, and they may become slightly softer.
Storing no bake chocolate balls in the refrigerator can extend their shelf life. When kept in an airtight container in the fridge, they should remain good for about 1 to 2 weeks.
Can You Freeze Chocolate Balls?
For longer-term storage, you can freeze no-bake chocolate balls. Place them in an airtight container or sealable freezer bag, making sure to remove as much air as possible to prevent freezer burn. Frozen, they can maintain their quality for up to 2 to 3 months.
More No Bake Desserts
- No Bake Peanut Butter Bars
- No Bake Keto Cookie Dough
- Keto Ice Cream
- Cheesecake Dip
- Keto Key Lime Cheesecake
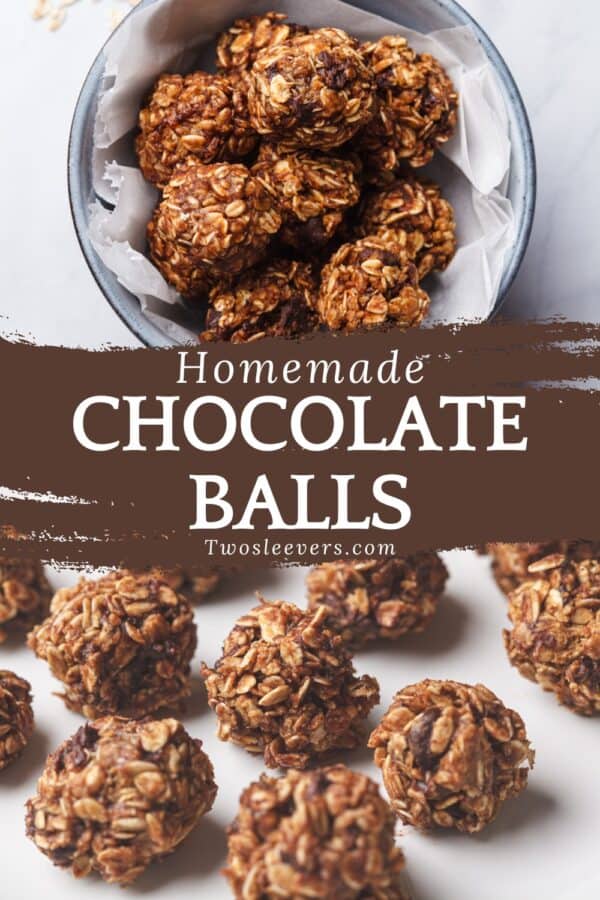
These No Bake Chocolate Balls are a delightful combination of convenience and flavor. They’re perfect for satisfying your sweet tooth when you’re short on time but still want a wholesome treat. Enjoy their rich, chocolatey goodness and share them with friends and family for a delightful snacking experience!
Chocolate Balls | No Bake Chocolate Balls Recipe
Ingredients
- ▢ 2 cups Rolled Oats
- ▢ 1/2 cup Cocoa Powder
- ▢ 2/3 cup Peanut Butter
- ▢ 1/2 cup Honey
- ▢ 1 tsp Vanilla Extract
- ▢ 1/4 tsp Kosher Salt
- ▢ 1/2 cup Shredded Coconut
Instructions
- Combine Dry Ingredients . In a large mixing bowl, combine the rolled oats and cocoa powder. Stir them together until well mixed.
- Add Wet Ingredients . To the dry mixture, add the honey or maple syrup, peanut butter or almond butter, vanilla extract, and a pinch of salt. Mix everything thoroughly until you have a homogenous dough-like mixture.
- Shape into Balls . Take small portions of the mixture and roll them between your palms to create uniform-sized balls. If desired, you can roll them in shredded coconut for an extra layer of flavor and texture.
- Chill . Place the chocolate oat balls on a tray or plate lined with parchment paper and put them in the refrigerator for about 30 minutes to firm up.
- Serve and Enjoy . Once they’re chilled and set, these delectable No-Bake Chocolate Oat Balls are ready to enjoy. Serve them as a delightful snack or dessert.
