
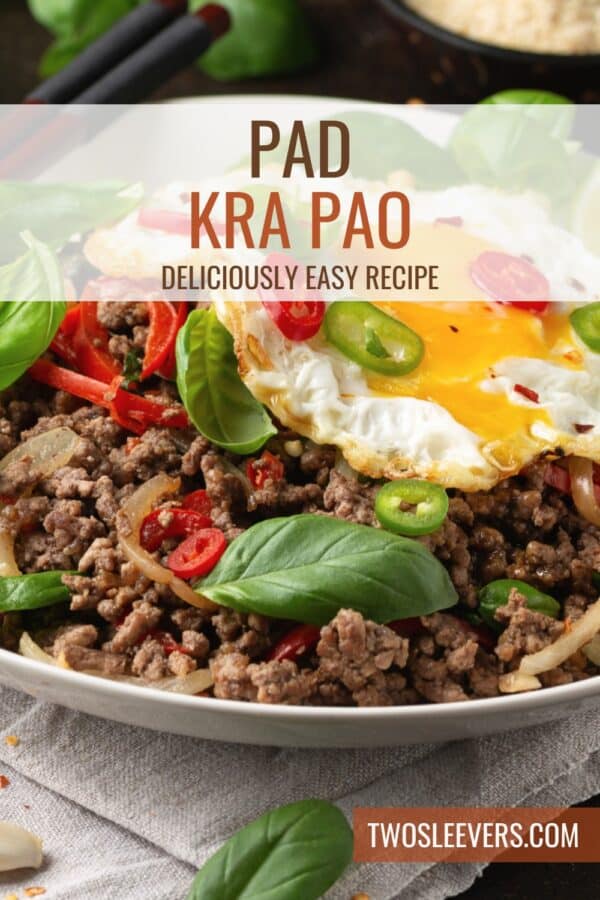
If you’re a fan of bold Thai flavors with a perfect balance of savory, spicy, and fresh basil, you’re in for a treat! Learn how to make the easiest and most delicious Pad Kra Pao (Thai Basil Stir Fry). In just 20 minutes, you’ll have a restaurant-quality meal ready to serve that’s perfect for any night of the week.

Why You’ll Love This Spectacular Stir Fry
- Quick & Easy . Ready in under 30 minutes, making it ideal for a busy weeknight meal.
- Packed with Flavor . A perfect blend of spicy chilies, savory garlic, and aromatic Thai basil.
- Customizable . Adjust the heat level or protein to your preference.
- Authentic Taste . Enjoy a dish that transports you straight to Thailand with every bite.
With just a few simple ingredients, you’ll create a dish bursting with authentic Thai flavors. Whether you’re cooking for yourself or impressing guests, this recipe for Pad Kra Pao is sure to become a household favorite.
What Does Pad Kra Pao Taste Like?
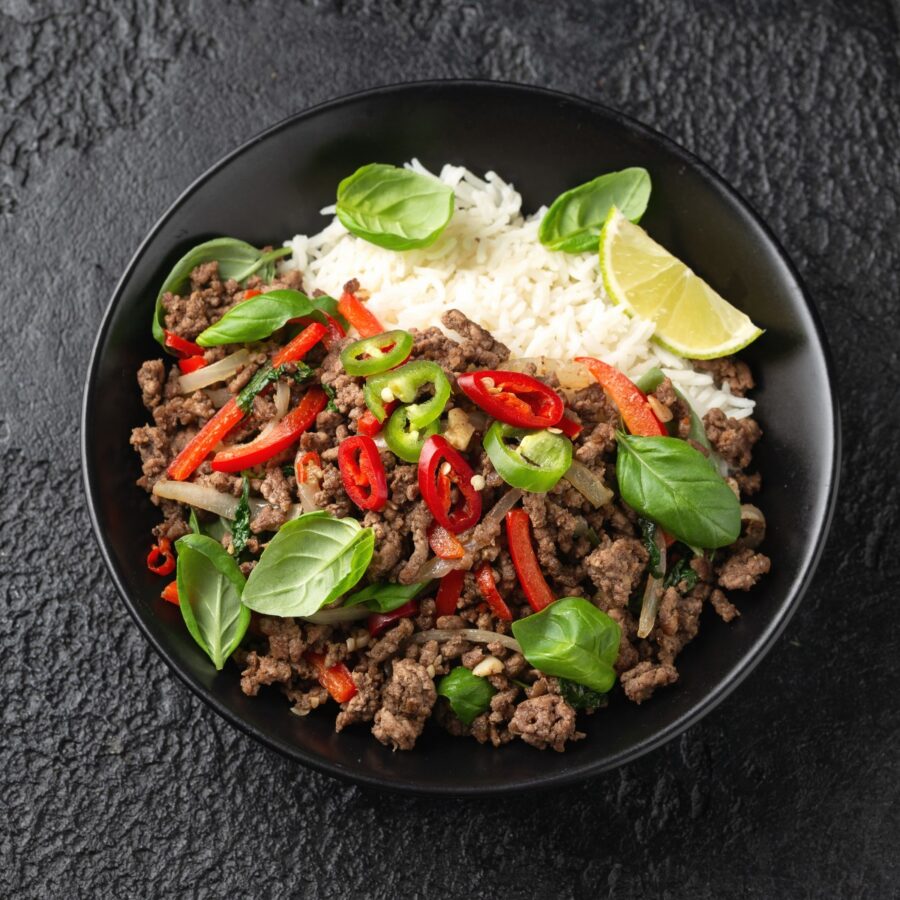
Pad Kra Pao, also known as Thai Basil Stir Fry, is one of Thailand’s most beloved street food dishes. Typically made with minced pork, chicken, or beef, it features a spicy and savory sauce with fragrant Thai basil.
Served over steamed rice and often topped with a fried egg, it’s a flavorful, filling meal that’s hard to resist.
Can I Use Regular Basil In Pad Kra Pao?
While Thai basil is the traditional choice for Pad Kra Pao, you can use regular basil if Thai basil is unavailable. However, the flavor will differ slightly. Thai basil has a more distinctive, peppery, and slightly anise-like taste, while regular basil has a milder, sweeter profile.
Ingredients You’ll Need
- Ground Pork or Chicken - Both work well, but ground pork is traditional for that juicy, tender bite.
- Thai Basil - Adds a distinctive peppery aroma that is key to the dish. Use fresh Thai basil if possible.
- Bird’s Eye Chilies - These bring the heat! Adjust the amount based on your spice tolerance.
- Garlic - Freshly minced garlic gives a bold, savory flavor.
- Onion - For an earthy and naturally sweet touch.
- Oyster Sauce - Provides a deep umami flavor that complements the dish.
- Soy Sauce - Adds saltiness and umami.
- Fish Sauce - For that essential punch of savory depth.
- Sugar - Balances out the savory and spicy elements.
- Vegetable Oil - For stir-frying the ingredients.
- Eggs - A crispy fried egg on top is optional, but highly recommended for a more authentic experience.
How To Make Pad Kra Pao
- Prepare the Ingredients . Start by mincing your garlic and chopping the bird’s eye chilies. If you’re sensitive to spice, you can reduce the number of chilies or remove the seeds.
- Cook the Meat . In a hot pan or wok, heat the vegetable oil and add the minced garlic, onion, and chilies. Stir-fry until fragrant, then add your ground pork or chicken. Cook the meat until browned and fully cooked.
- Add Sauces . Once the meat is cooked, pour in the oyster sauce, soy sauce, fish sauce, and sugar. Stir well to coat the meat with the savory sauce.
- Add Thai Basil . Toss in the Thai basil leaves and stir for a few seconds until they wilt. Remove from heat immediately to avoid overcooking the basil.
- Fry the Egg . In a separate pan, fry your eggs until the edges are crispy and the yolk is still soft. This step is optional but adds an extra layer of richness.
- Serve . Serve the stir-fried meat and basil over steamed jasmine rice and top with the fried egg.
Tips And Tricks
Making Pad Kra Pao is quick and straightforward, but a few tips will help you achieve the best possible flavors:
- Use Fresh Ingredients . Fresh garlic, chilies, and Thai basil make a big difference in flavor. Avoid using dried or wilted herbs.
- Adjust the Heat . If you’re sensitive to spice, reduce the number of chilies or remove the seeds. For spice lovers, feel free to add more!
- Don’t Overcook the Basil . Thai basil is delicate and should be added at the very end of cooking. Just a few seconds of heat is enough to release its aroma without losing flavor.
Variations
While traditional Pad Kra Pao is made with ground pork, you can experiment with other proteins or ingredients to suit your taste:
- Chicken - Substitute ground chicken for a leaner option that’s just as flavorful.
- Beef - For a heartier version, use ground beef or thinly sliced steak.
- Vegetarian - Swap the meat for tofu or mushrooms for a plant-based version. Use soy sauce and skip the fish sauce for a fully vegetarian dish.
- Spicier Version - Add a splash of Sriracha or more bird’s eye chilies if you crave extra heat.
What To Eat With Pad Kra Pao
Pad Kra Pao is a complete meal in itself when served with rice and a fried egg. However, if you’re looking to add a little more to your plate, here are some great side dishes that pair beautifully:
- Thai Cucumber Salad - A refreshing side that helps cool down the heat from the chilies.
- Spring Rolls - Crispy spring rolls with a tangy dipping sauce are a delicious appetizer.
- Mango Sticky Rice - End your meal with this classic Thai dessert made with sweet, juicy mango and coconut sticky rice.
How Long Does It Last?
Pad Kra Pao is best served fresh, but leftovers can be stored in the refrigerator for up to 3 days. Reheat in a pan over medium heat to maintain the best texture.
Can You Freeze It?
Yes! You can freeze Pad Kra Pao in an airtight container for up to 2 months. Thaw it in the refrigerator before reheating on the stovetop for a quick and flavorful meal anytime.
More Perfect Pork Recipes
- Pork Stew
- Crispy Pork Belly
- Keto Pork Stir Fry
- Instant Pot Carnitas
- Pork Bulgogi

Pad Kra Pao Recipe | Pork And Basil Stir Fry
Ingredients
- ▢ 1 pound Ground Pork
- ▢ 2 cups Thai Basil
- ▢ 4 Bird’s Eye Chilies , sliced
- ▢ 4 cloves Garlic , minced
- ▢ 1 Onion , thinly sliced
- ▢ 1 tbsp Oyster Sauce
- ▢ 2 tbsp Soy Sauce
- ▢ 1 tbsp Fish Sauce
- ▢ 1 tsp Granulated Sugar
- ▢ 2 tbsp Vegetable Oil
- ▢ 4 Eggs
Instructions
- Prepare the Ingredients . Start by mincing your garlic and chopping the bird’s eye chilies. If you’re sensitive to spice, you can reduce the number of chilies or remove the seeds.
- Cook the Meat . In a hot pan or wok, heat the vegetable oil and add the minced garlic, onion, and chilies. Stir-fry until fragrant, then add your ground pork or chicken. Cook the meat until browned and fully cooked.
- Add Sauces . Once the meat is cooked, pour in the oyster sauce, soy sauce, fish sauce, and sugar. Stir well to coat the meat with the savory sauce.
- Add Thai Basil . Toss in the Thai basil leaves and stir for a few seconds until they wilt. Remove from heat immediately to avoid overcooking the basil.
- Fry the Egg . In a separate pan, fry your eggs until the edges are crispy and the yolk is still soft. This step is optional but adds an extra layer of richness.
- Serve . Serve the stir-fried meat and basil over steamed jasmine rice and top with the fried egg.
Get support & connect with our community on Facebook!
Nutrition
Don’t forget to check out my other Ketocookbooks.
Keto Instant Pot, Keto Fat Bombs, Sweets, & Treats , and Easy keto in 30 minutes.


If you already signed up, you should have received an email with a password to give you unlimited access to our FREE Printable Library. The password is case sensitive. Enter it below and get printing!
Password:

Pad Kra Pao Recipe | Pork And Basil Stir Fry
Ingredients
- 1 pound Ground Pork
- 2 cups Thai Basil
- 4 Bird’s Eye Chilies sliced
- 4 cloves Garlic minced
- 1 Onion thinly sliced
- 1 tbsp Oyster Sauce
- 2 tbsp Soy Sauce
- 1 tbsp Fish Sauce
- 1 tsp Granulated Sugar
- 2 tbsp Vegetable Oil
- 4 Eggs
Instructions
- Prepare the Ingredients . Start by mincing your garlic and chopping the bird’s eye chilies. If you’re sensitive to spice, you can reduce the number of chilies or remove the seeds.
- Cook the Meat . In a hot pan or wok, heat the vegetable oil and add the minced garlic, onion, and chilies. Stir-fry until fragrant, then add your ground pork or chicken. Cook the meat until browned and fully cooked.
- Add Sauces . Once the meat is cooked, pour in the oyster sauce, soy sauce, fish sauce, and sugar. Stir well to coat the meat with the savory sauce.
- Add Thai Basil . Toss in the Thai basil leaves and stir for a few seconds until they wilt. Remove from heat immediately to avoid overcooking the basil.
- Fry the Egg . In a separate pan, fry your eggs until the edges are crispy and the yolk is still soft. This step is optional but adds an extra layer of richness.
- Serve . Serve the stir-fried meat and basil over steamed jasmine rice and top with the fried egg.
Pad Kra Pao Recipe | Pork And Basil Stir Fry https://twosleevers.com/pad-kra-pao-recipe/
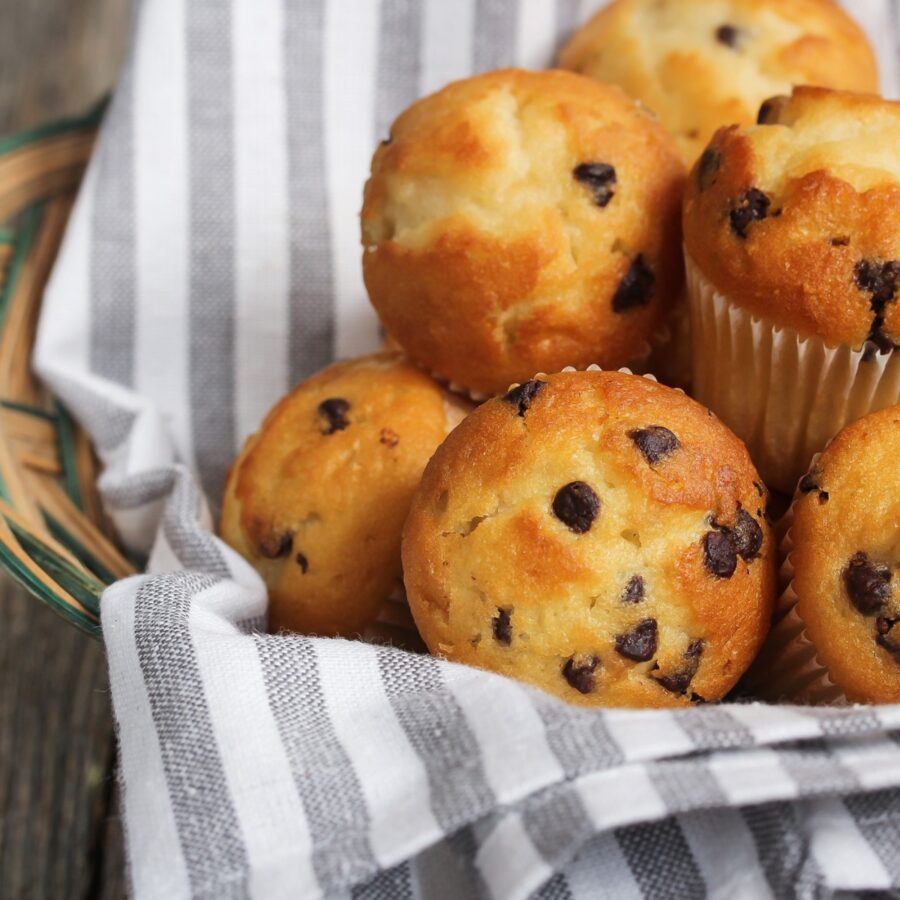
If you’re craving the delightful goodness of bite-sized baked treats, then you’ve come to the right place. Mini muffins are the perfect solution for a quick snack, a fun breakfast treat, or even a party dessert! Learn how to make the easiest, fluffiest Mini Muffins that are sure to be a hit with everyone. You’ll love the balance of tender, soft texture paired with incredible flavor in every bite.
Why You’ll Love These Magnificent Muffins
- Quick and Easy . Ready in under 25 minutes from start to finish!
- Perfect for Any Occasion . Great for lunch boxes, snacks, or breakfast on the go.
- Customizable . You can easily switch up the add-ins, like chocolate chips, blueberries, or nuts.
- Kid-Friendly . Mini muffins are the perfect size for little hands, making them a favorite among kids.
With just a few ingredients and minimal prep time, you can whip up a batch of mini muffins that will fill your home with the warm, inviting smell of freshly baked goodness. These muffins are so versatile—you can enjoy them plain or jazz them up with your favorite mix-ins.
What Do Mini Muffins Taste Like?
Mini muffins are more than just a smaller version of regular muffins—they’re packed with the same flavors and textures you love but in a perfectly portioned bite-sized form! They are great for portion control, and because they bake faster, you get to enjoy them quicker than traditional muffins.
Whether you prefer a simple vanilla base, rich chocolate, or fresh fruit fillings, mini muffins offer a world of possibilities.
Why Are My Mini Muffins Dry?
If your mini muffins are turning out dry, there are several common reasons that could be causing this issue. Here’s a breakdown of why it might be happening and what you can do to prevent dry muffins in the future:
- Overmixing the Batter . Overmixing is a common mistake that can lead to dense, dry muffins. When you stir the batter too much, you activate the gluten in the flour, which results in tougher muffins. Solution? Mix the batter just until the dry ingredients are incorporated. It’s okay if there are a few lumps in the mixture.
- Baking Too Long . Baking mini muffins even a few minutes longer than needed can dry them out. Mini muffins bake faster than regular-sized muffins, so keep a close eye on them and check for doneness around the 10-12 minute mark. Use the toothpick test — if it comes out clean, they’re ready to come out of the oven.
- Letting Muffins Cool in the Tin . Leaving your muffins to cool in the muffin tin for too long can cause them to steam and dry out. Once they’ve had a few minutes to cool, transfer them to a wire rack to finish cooling. This will help maintain their moisture and keep them soft.
By following these tips, you can avoid dry mini muffins and enjoy perfectly moist, tender results every time!
Ingredients You’ll Need
- All-Purpose Flour – This gives the muffins structure and a light, airy crumb.
- Baking Powder – Helps the muffins rise and gives them that perfect fluffy texture.
- Baking Soda - Acts as a leavening agent and creates a tender crumb.
- Greek Yogurt – Adds moisture and richness to the batter.
- Egg – Binds the ingredients together and contributes to the overall texture.
- Unsalted Butter – Adds richness and depth of flavor.
- Sugar – Sweetens the muffins without overpowering the other ingredients.
- Vanilla Extract – Adds a beautiful layer of flavor that complements any add-ins you choose.
- Optional Mix-ins - Chocolate chips, blueberries, nuts, or cinnamon for a delicious twist.
How To Make Mini Muffins
- Prep the Ingredients . Start by preheating your oven to 350°F and greasing a mini muffin tin or lining it with mini muffin liners.
- Make the Batter . In a medium-sized bowl, whisk together the flour, baking powder, baking soda, and a pinch of salt. In another bowl, combine the melted butter, sugar, egg, yogurt, and vanilla extract. Gradually fold the dry ingredients into the wet mixture, stirring just until combined. Be careful not to overmix, as this can lead to dense muffins.
- Add Your Favorite Mix-ins . Now’s the fun part! Fold in your favorite add-ins like chocolate chips, fresh berries, or nuts. This step allows you to personalize the muffins based on your preference or the occasion.
- Fill the Muffin Tin . Using a spoon or small scoop, fill the mini muffin tin, making sure each cavity is about 3/4 full. This gives the muffins enough room to rise while baking without overflowing.
- Bake to Perfection . Place the muffin tin in the preheated oven and bake for about 12-15 minutes, or until a toothpick inserted in the center comes out clean. The tops should be slightly golden and spring back when touched.
- Cool and Enjoy . Once baked, allow the muffins to cool in the tin for a few minutes before transferring them to a wire rack to cool completely. Enjoy them warm with a bit of butter, or store them for later snacking!

Tips And Tricks
Making mini muffins is easy, but a few tricks can take your muffins from good to great. Here are some helpful tips to ensure your muffins turn out light, fluffy, and full of flavor:
- Don’t Overmix . Overmixing the batter can cause the muffins to become dense. Stir the ingredients just until combined for the best results.
- Room Temperature Ingredients . Using room temperature butter, eggs, and milk will help the ingredients combine more smoothly, resulting in a better texture.
- Use a Cookie Scoop . For evenly sized muffins, use a cookie or ice cream scoop to fill the muffin tins. This ensures that all the muffins bake at the same rate.
- Cool Completely Before Storing . If you plan to store your muffins, let them cool completely before placing them in an airtight container to prevent them from becoming soggy.
Variations
The beauty of mini muffins is that they are incredibly versatile. You can experiment with different flavors and mix-ins to create a variety of muffins to suit your taste. Here are a few ideas to get you started:
- Chocolate Chip - Add chocolate chips to the batter for a sweet, indulgent treat.
- Blueberry - Fresh or frozen blueberries give these muffins a burst of fruity flavor.
- Banana Nut - Mash a ripe banana and fold it into the batter along with chopped walnuts for a tasty twist.
- Cinnamon Sugar Muffins : Mix cinnamon and sugar into the batter and sprinkle some on top before baking for a spiced-up version.
What To Enjoy With Mini Muffins
Mini muffins are perfect on their own, but you can serve them with various accompaniments to elevate your snacking experience:
- Fruit Salad - Fresh fruit adds a burst of refreshing flavor that complements the sweetness of the muffins.
- Yogurt - A dollop of Greek yogurt on the side makes for a light and healthy breakfast.
- Butter or Jam - Spread a bit of butter or your favorite fruit preserves on a warm muffin for extra richness.
How Long Do They Last?
Mini muffins can last for up to 3-4 days when stored in an airtight container at room temperature.
Can You Freeze Them?
Yes, mini muffins freeze beautifully. To freeze, allow them to cool completely after baking. Place them in a single layer on a baking sheet and freeze for about an hour. Then, transfer the muffins to a freezer-safe bag or container. You can store them in the freezer for up to 3 months .
When you’re ready to eat them, let them thaw at room temperature or warm them up in the microwave for a quick snack.
More Marvelous Muffin Recipes
- Apple Cinnamon Muffins
- Keto Blueberry Muffins
- Coffee Cake Muffins
- Egg Muffins
- Banana Oatmeal Muffins
- Lemon Muffins
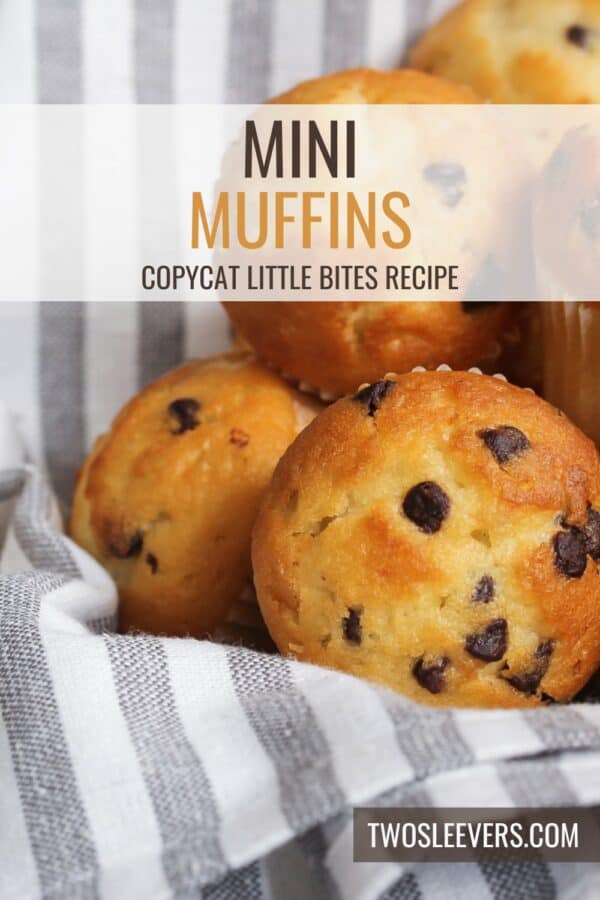

Mini Muffins | Copycat Little Bites Recipe
Ingredients
- ▢ 1 3/4 cups All Purpose Flour
- ▢ 1 1/2 tsp Baking Powder
- ▢ 1/2 tsp Baking Soda
- ▢ 1/2 cup Greek Yogurt
- ▢ 2 Eggs
- ▢ 1/4 cup Unsalted Butter
- ▢ 1/2 cup Granulated Sugar
- ▢ 1 tsp Vanilla Extract
- ▢ 1/2 cup Chocolate Chips
Instructions
- Prep the Ingredients . Start by preheating your oven to 350°F and greasing a mini muffin tin or lining it with mini muffin liners.
- Make the Batter . In a medium-sized bowl, whisk together the flour, baking powder, baking soda, and a pinch of salt. In another bowl, combine the melted butter, sugar, egg, Greek Yogurt, and vanilla extract. Gradually fold the dry ingredients into the wet mixture, stirring just until combined. Be careful not to overmix, as this can lead to dense muffins.
- Add Your Favorite Mix-ins . Now’s the fun part! Fold in your favorite add-ins like chocolate chips, fresh berries, or nuts. This step allows you to personalize the muffins based on your preference or the occasion.
- Fill the Muffin Tin . Using a spoon or small scoop, fill the mini muffin tin, making sure each cavity is about 3/4 full. This gives the muffins enough room to rise while baking without overflowing.
- Bake to Perfection . Place the muffin tin in the preheated oven and bake for about 12-15 minutes, or until a toothpick inserted in the center comes out clean. The tops should be slightly golden and spring back when touched.
- Cool and Enjoy . Once baked, allow the muffins to cool in the tin for a few minutes before transferring them to a wire rack to cool completely. Enjoy them warm with a bit of butter, or store them for later snacking!
