
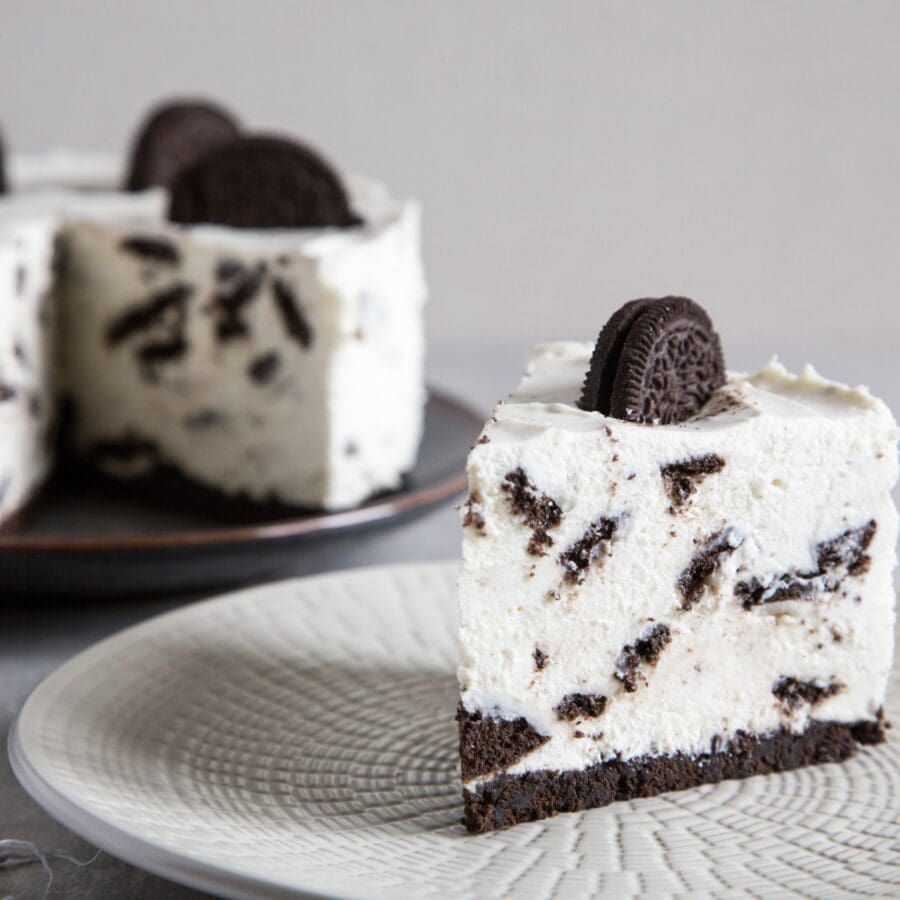
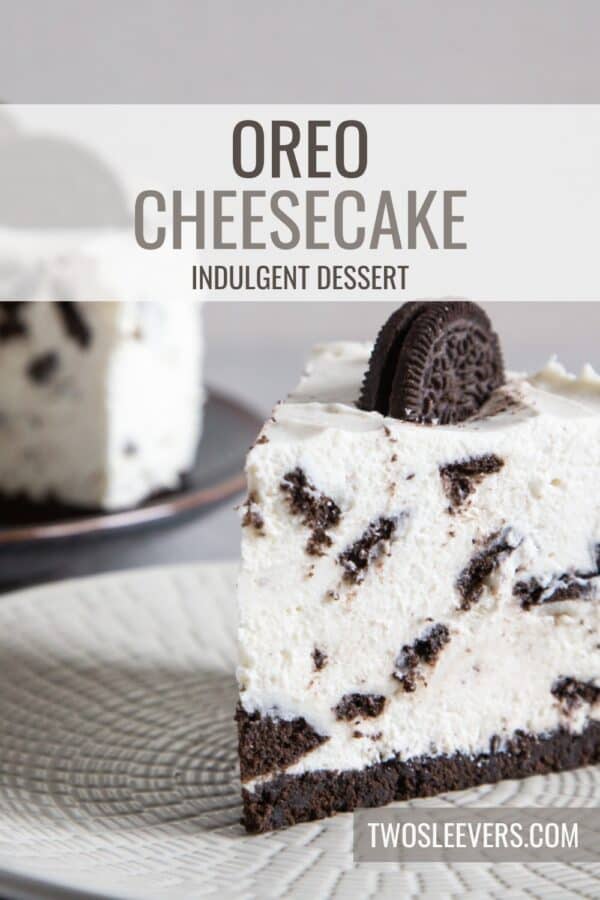
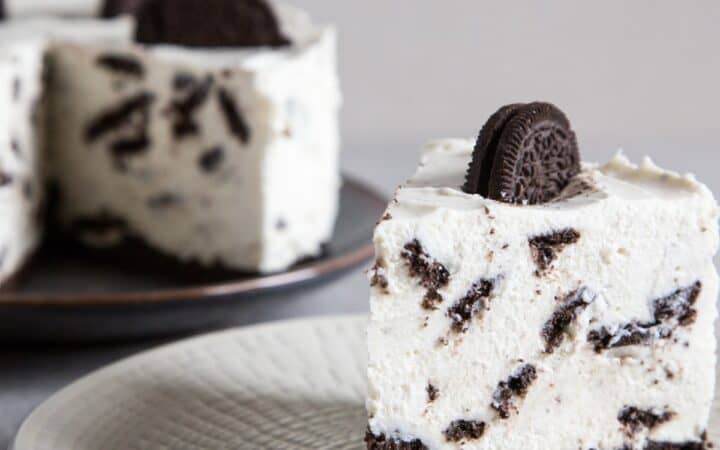
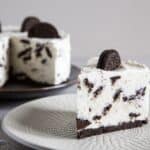
Indulge in the ultimate dessert experience with this Oreo Cheesecake! A rich and creamy cheesecake with a classic Oreo crust, this recipe is a must-try for all Oreo lovers. The velvety cheesecake filling, studded with Oreo pieces, sits atop a crunchy Oreo cookie base, making every bite a delightful mix of textures and flavors.
Why You’ll Love This Delicious Dessert
- Creamy and Rich. The cheesecake filling is smooth and luscious, with a perfect balance of sweetness.
- Crunchy and Chocolaty . The Oreo crust adds a delightful crunch and rich chocolate flavor.
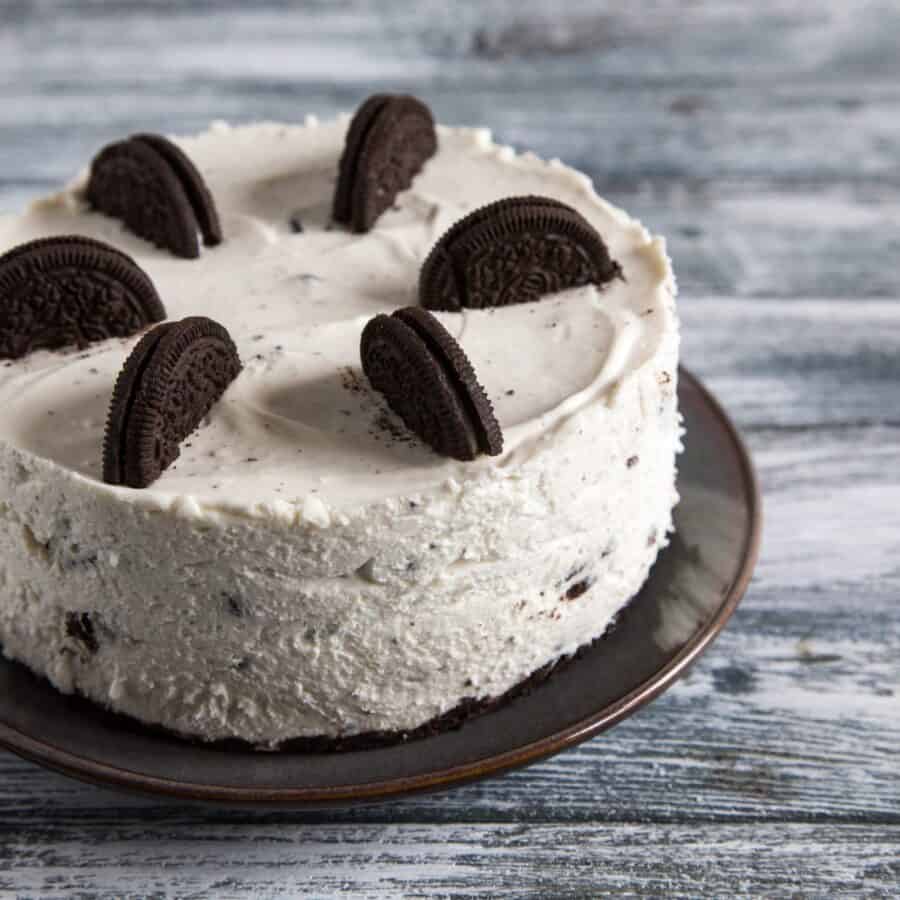
- Impressive Yet Easy . Looks and tastes like it came from a fancy bakery, but is simple enough to make at home.
Whether you’re making it for a special occasion or just because, this Oreo Cheesecake is sure to impress and satisfy your sweet tooth.
What Does Oreo Cheesecake Taste Like?
Oreo Cheesecake is rich and indulgent, making it a perfect dessert for special occasions or for satisfying a sweet tooth craving. The combination of creamy cheesecake and chocolaty Oreo flavors makes it a favorite among cheesecake and chocolate lovers alike.
How To Tell When Oreo Cheesecake Is Done
To determine if an Oreo Cheesecake is done baking, you can use several methods:
- Toothpick Test Insert a toothpick or a cake tester into the center of the cheesecake. It should come out with a few moist crumbs but not wet batter. Keep in mind that this test is less reliable for cheesecakes than for cakes, as cheesecakes can still appear moist even when fully cooked.
- Jiggle Test Gently shake the cheesecake while it’s still in the oven or give the pan a slight tap. The cheesecake should be mostly set but still have a slight jiggle in the center. The center should wobble slightly but not slosh around. The edges should be set and firm.
- Temperature Test For a more precise check, use an instant-read thermometer. Insert it into the center of the cheesecake. The cheesecake is done when the internal temperature reaches about 150°F. This method ensures the cheesecake is fully cooked without overbaking.
Using a combination of these methods can help you accurately judge when your Oreo Cheesecake is perfectly baked. Remember, it’s better to have a slightly underbaked center as it will firm up during cooling.
Ingredients You’ll Need
The Crust
- Oreo Cookies - The finely crushed Oreo cookies serve as the base of the crust for the cheesecake. The chocolate cookies provide a rich, chocolaty flavor and a slight crunch, which contrasts beautifully with the creamy cheesecake filling.
- Butter - The melted butter binds the crushed Oreo cookies together, helping to form a solid and cohesive crust that holds up well when sliced. The butter also adds a slight richness to the crust.
Cheesecake Filling
- Cream Cheese - The primary ingredient in the cheesecake filling, cream cheese provides the smooth and creamy texture that is characteristic of cheesecakes. It also contributes to the rich and slightly tangy flavor of the dessert.
- Sugar - Granulated sugar sweetens the cheesecake filling, balancing the tanginess of the cream cheese and other ingredients.
- Sour Cream - Sour cream adds a tangy richness to the cheesecake filling, enhancing the overall flavor and helping to create a smooth and creamy consistency.
- Vanilla Extract - Vanilla extract adds a subtle sweetness and depth of flavor to the cheesecake filling, complementing the other ingredients and adding warmth to the taste.
- Eggs - Eggs help set the cheesecake, providing structure and firmness to the filling once baked. They also contribute to the creamy texture of the cheesecake.
- Oreo Cookies - Additional roughly chopped Oreo cookies are folded into the filling, adding texture and bursts of chocolaty flavor throughout the cheesecake.
Toppings
- Whipped Cream - Whipped cream is used as a garnish, adding a light and airy contrast to the dense and creamy cheesecake. It also adds an extra layer of sweetness and a decorative element.
- Oreo Crumbs - Sprinkled on top of the cheesecake, Oreo crumbs provide additional texture and a visually appealing finish. They reinforce the Oreo flavor and add a bit of crunch to each bite.
How To Make Oreo Cheesecake
- Prepare the Crust. Preheat your oven to 325°F. In a mixing bowl, combine the finely crushed Oreo cookies and melted butter. Press the mixture firmly into the bottom of a 9-inch springform pan to form an even layer. Bake the crust for 10 minutes, then remove it from the oven and let it cool.
- Make the Cheesecake Filling. In a large mixing bowl, beat the softened cream cheese and sugar together until smooth and creamy. Add the sour cream and vanilla extract, mixing until fully combined. Add the eggs one at a time, beating on low speed after each addition until just blended. Gently fold in the chopped Oreo cookies.
- Bake the Cheesecake. Pour the cheesecake filling over the cooled crust, spreading it evenly. Place the springform pan on a baking sheet and bake in the preheated oven for 50-60 minutes, or until the center is almost set but still slightly jiggly. Turn off the oven and let the cheesecake cool in the oven with the door slightly open for about 1 hour.
- Chill the Cheesecake. Remove the cheesecake from the oven and run a knife around the edge of the pan to loosen it. Let it cool completely at room temperature, then refrigerate for at least 4 hours, preferably overnight.
- Serve. Before serving, garnish with whipped cream and additional Oreo crumbs if desired. Carefully remove the sides of the springform pan and slice the cheesecake. Enjoy!
Tips And Tricks
To make the best Oreo Cheesecake, keep these tips in mind:
- Room Temperature Ingredients . Make sure your cream cheese and eggs are at room temperature to ensure a smooth filling.
- Avoid Overmixing . Overmixing the batter can incorporate too much air, leading to cracks in the cheesecake.
- Water Bath . For an extra creamy texture, consider baking the cheesecake in a water bath. Wrap the springform pan in foil and place it in a larger pan filled with an inch of hot water.
Variations
Customize your Oreo Cheesecake with these fun variations:
- Chocolate Ganache Topping - Pour a layer of chocolate ganache over the cheesecake for an extra indulgent treat.
- Mint - Use Mint Oreo cookies in both the crust and the filling for a refreshing twist.
- Peanut Butter- Add a swirl of peanut butter into the filling for a delicious flavor combination.
What To Enjoy With Oreo Cheesecake
This rich and creamy dessert pairs well with:
- Fresh Berries - Add a burst of freshness and color to each slice.
- Coffee or Espresso - The bitterness of coffee complements the sweetness of the cheesecake.
- Vanilla Ice Cream - For an extra indulgent dessert experience.
How Long Does It Last?
Oreo Cheesecake can be stored in the refrigerator for up to 5 days. Make sure it’s covered or stored in an airtight container to prevent it from drying out or absorbing fridge odors.
Can You Freeze It?
Yes! You can freeze Oreo Cheesecake. Once fully set and cooled, wrap it tightly in plastic wrap and then in aluminum foil. It can be frozen for up to 3 months. Thaw in the refrigerator overnight before serving.
More Craveworthy Cheesecakes
- Mango Cheesecake
- Cheesecake Brownies
- Mini Cheesecake Bites
- Low Carb Cheesecake
- Gluten Free Cheesecake
- Cheesecake Bars
Oreo Cheesecake Recipe | Cookies And Cream Cheesecake
Ingredients
For The Crust
- ▢ 2 cups Oreos , crushed
- ▢ 1/2 cup Unsalted Butter , melted
For The Filling
- ▢ 24 oz Cream Cheese , softened
- ▢ 1 cup Granulated Sugar
- ▢ 1 cup Sour Cream
- ▢ 1 tsp Vanilla Extract
- ▢ 3 Eggs
- ▢ 1 1/2 cups Oreos , chopped
Garnish
- ▢ Whipped Cream , to garnish
- ▢ 6 Oreos , to garnish
Instructions
- Prepare the Crust. Preheat your oven to 325°F. In a mixing bowl, combine the finely crushed Oreo cookies and melted butter. Press the mixture firmly into the bottom of a 9-inch springform pan to form an even layer. Bake the crust for 10 minutes, then remove it from the oven and let it cool.
- Make the Cheesecake Filling. In a large mixing bowl, beat the softened cream cheese and sugar together until smooth and creamy. Add the sour cream and vanilla extract, mixing until fully combined. Add the eggs one at a time, beating on low speed after each addition until just blended. Gently fold in the chopped Oreo cookies.
- Bake the Cheesecake. Pour the cheesecake filling over the cooled crust, spreading it evenly. Place the springform pan on a baking sheet and bake in the preheated oven for 50-60 minutes, or until the center is almost set but still slightly jiggly. Turn off the oven and let the cheesecake cool in the oven with the door slightly open for about 1 hour.
- Chill the Cheesecake. Remove the cheesecake from the oven and run a knife around the edge of the pan to loosen it. Let it cool completely at room temperature, then refrigerate for at least 4 hours, preferably overnight.
- Serve. Before serving, garnish with whipped cream and additional Oreo crumbs if desired. Carefully remove the sides of the springform pan and slice the cheesecake. Enjoy!
Get support & connect with our community on Facebook!
Nutrition

If you already signed up, you should have received an email with a password to give you unlimited access to our FREE Printable Library. The password is case sensitive. Enter it below and get printing!
Password:
Oreo Cheesecake Recipe | Cookies And Cream Cheesecake
Ingredients
For The Crust
- 2 cups Oreos crushed
- 1/2 cup Unsalted Butter melted
For The Filling
- 24 oz Cream Cheese softened
- 1 cup Granulated Sugar
- 1 cup Sour Cream
- 1 tsp Vanilla Extract
- 3 Eggs
- 1 1/2 cups Oreos chopped
Garnish
- Whipped Cream to garnish
- 6 Oreos to garnish
Instructions
- Prepare the Crust. Preheat your oven to 325°F. In a mixing bowl, combine the finely crushed Oreo cookies and melted butter. Press the mixture firmly into the bottom of a 9-inch springform pan to form an even layer. Bake the crust for 10 minutes, then remove it from the oven and let it cool.
- Make the Cheesecake Filling. In a large mixing bowl, beat the softened cream cheese and sugar together until smooth and creamy. Add the sour cream and vanilla extract, mixing until fully combined. Add the eggs one at a time, beating on low speed after each addition until just blended. Gently fold in the chopped Oreo cookies.
- Bake the Cheesecake. Pour the cheesecake filling over the cooled crust, spreading it evenly. Place the springform pan on a baking sheet and bake in the preheated oven for 50-60 minutes, or until the center is almost set but still slightly jiggly. Turn off the oven and let the cheesecake cool in the oven with the door slightly open for about 1 hour.
- Chill the Cheesecake. Remove the cheesecake from the oven and run a knife around the edge of the pan to loosen it. Let it cool completely at room temperature, then refrigerate for at least 4 hours, preferably overnight.
- Serve. Before serving, garnish with whipped cream and additional Oreo crumbs if desired. Carefully remove the sides of the springform pan and slice the cheesecake. Enjoy!
Oreo Cheesecake Recipe | Cookies And Cream Cheesecake https://twosleevers.com/oreo-cheesecake-recipe/

Elevate your BBQ or dinner routine with these delicious Grilled Sweet Potatoes! This recipe turns simple ingredients into a delightful side dish, offering the perfect combination of sweetness and smokiness with a satisfying char.

Why You’ll Love This Simple Side Dish
- Quick and Easy . Ready in just 30 minutes from start to finish.
- Healthy and Nutritious . Sweet potatoes are packed with vitamins and fiber, making them a nutritious choice.
- Versatile . They pair well with a variety of main dishes and are perfect for any meal.
- Delicious Flavor . The natural sweetness of the potatoes is enhanced by a touch of char from the grill, making them irresistibly tasty.
Whether you’re hosting a summer cookout or looking for an easy weeknight side, these grilled sweet potatoes are sure to impress.
What Do Grilled Sweet Potatoes Taste Like?
Grilled sweet potatoes offer a delightful mix of flavors and textures that make them a favorite side dish. When grilled, sweet potatoes develop a slightly smoky flavor, which complements their natural sweetness.
The high heat of the grill caramelizes the sugars in the sweet potatoes, enhancing their inherent sweetness and creating a deliciously crisp exterior. Inside, they remain soft and tender, providing a satisfying contrast to the charred outside.
Are Grilled Sweet Potatoes Healthy?
Grilled sweet potatoes are quite healthy! They are a great source of dietary fiber, vitamins, and minerals. Here are a few health benefits they offer:
- High in Fiber . The fiber in sweet potatoes helps to promote a healthy digestive system and contributes to a feeling of fullness, which can aid in weight management.
- Nutrient-Rich . Sweet potatoes are rich in vitamins A and C, both of which are important for immune function and skin health. They also provide significant amounts of potassium and smaller amounts of other essential nutrients.
- Low in Fat . Grilling sweet potatoes is a cooking method that requires little to no added fat, which helps keep the overall calorie count relatively low.
- Antioxidant Properties . They are high in antioxidants, particularly beta-carotene, which the body converts into vitamin A.
Do You Need To Soak Sweet Potatoes Before Grilling?
No, you don’t need to soak sweet potatoes before grilling them. Soaking is more commonly recommended for white potatoes, especially when making fries, to remove excess starch.
Ingredients You’ll Need
- Sweet Potatoes - The star of the dish, sweet potatoes are naturally sweet and caramelize beautifully on the grill.
- Olive Oil - Helps to coat the potatoes and prevent sticking while adding a rich flavor.
- Salt and Pepper - Enhances the natural flavors of the sweet potatoes.
- Paprika - Adds a subtle smokiness and a hint of spice.
- Garlic Powder - Provides a savory depth that complements the sweetness.
- Red Pepper Flakes - For a touch of heat to balance the sweet.
- Fresh Herbs- Rosemary, thyme, or parsley for garnish and added aroma.
How To Make Grilled Sweet Potatoes
- Prepare the Sweet Potatoes . Wash and peel the sweet potatoes. Slice them into 1/2-inch thick rounds or wedges, ensuring they are uniform in size for even cooking.
- Season the Sweet Potatoes . In a large bowl, toss the sweet potato slices with olive oil, salt, pepper, paprika, and garlic powder. Make sure each piece is well-coated.
- Preheat the Grill . Preheat your grill to medium-high heat, about 400°F. Brush the grill grates with a little olive oil to prevent sticking.
- Grill the Sweet Potatoes . Place the sweet potato slices on the grill. Cook for about 5-7 minutes per side, or until they are tender and have beautiful grill marks. Keep an eye on them to avoid burning.
- Serve . Remove from the grill and transfer to a serving platter. Garnish with fresh herbs if desired. Serve warm and enjoy!

Tips And Tricks
Grilled sweet potatoes can be a delightful addition to any meal, bringing a smoky sweetness that’s hard to resist. Here are some tips and tricks to perfect them:
- Slice Evenly . To ensure your sweet potatoes cook evenly on the grill, slice them into uniform thickness. Typically, 1/2-inch thick rounds or wedges work best. This ensures that every piece cooks at the same rate.
- Parboil if Needed . For quicker grilling and to ensure they’re tender inside, you can parboil the sweet potato slices for a few minutes until they start to become tender but are still firm. This step is optional but can be a lifesaver if you’re short on grilling time.
- Oil Them Well . Before grilling, toss the sweet potato slices in olive oil. This not only prevents sticking but also helps the seasonings adhere to the sweet potatoes and enhances caramelization on the grill.
- Preheat the Grill . Make sure your grill is hot before adding the sweet potatoes. A preheated grill helps to sear the surfaces quickly, keeping them moist inside and preventing them from sticking.
Variations
Grilled sweet potatoes are versatile and can be adapted with various flavor profiles and toppings to suit different tastes and cuisines. Here are some delicious variations to try:
- Spicy Chipotle - Mix olive oil with chipotle powder, a dash of lime juice, and a pinch of salt. This mix will give your sweet potatoes a smoky, spicy kick that’s perfect for those who enjoy a little heat.
- Honey Glazed - Brush sweet potatoes with a mixture of honey and melted butter during the last few minutes of grilling for a sweet, caramelized finish. Sprinkle with a touch of cinnamon or nutmeg for added warmth.
- Garlic Parmesan - After grilling, sprinkle grated Parmesan cheese and minced garlic over hot sweet potato slices. The residual heat helps melt the cheese and infuse the garlic flavor deeply.
- Mediterranean Style - Brush the sweet potatoes with a mix of za’atar and olive oil before grilling. Serve with a dollop of Greek yogurt or tzatziki on the side.
What To Eat With Grilled Sweet Potatoes
Grilled sweet potatoes make an excellent side dish for a variety of meals. Here are some pairing ideas:
- Grilled Chicken or Steak - The sweet and smoky flavors complement the richness of grilled meats.
- Salads - Pair with a fresh garden salad for a light and balanced meal.
- BBQ - Serve alongside classic BBQ dishes like ribs or pulled pork for a hearty feast.
How Long Do They Last?
Grilled sweet potatoes can last in the refrigerator for about 3 to 5 days when stored properly.
Make sure to let them cool to room temperature before placing them in an airtight container to avoid condensation, which can lead to sogginess or spoilage. For the best texture and flavor, reheat them in the oven or on the grill before serving.
Can You Freeze Them?
If you want to extend their shelf life, you can freeze grilled sweet potatoes. Properly stored in freezer-safe bags or containers, they can last for up to 6 months.
Thaw them in the refrigerator overnight and reheat to serve. Reheating them in the oven or on a skillet can help restore some of the crispness lost during freezing.
More Perfect Potato Recipes
- Cheesy Potatoes
- Haluski
- Mashed Potato Casserole
- Smashed Potatoes
- Potato Casserole
- Sweet Potato Casserole
- Mashed Sweet Potatoes


Grilled Sweet Potatoes Recipe | Easy BBQ Side Dish
Ingredients
- ▢ 4 Sweet Potatoes
- ▢ 3 tbsp Olive Oil
- ▢ 1 tsp Kosher Salt
- ▢ 1/2 tsp Black Pepper
- ▢ 1 tsp Paprika
- ▢ 1 tsp Garlic Powder
- ▢ 1/4 tsp Red Pepper Flakes
- ▢ Fresh Herbs , to taste
Instructions
- Prepare the Sweet Potatoes . Wash and peel the sweet potatoes. Slice them into 1/2-inch thick rounds or wedges, ensuring they are uniform in size for even cooking.
- Season the Sweet Potatoes . In a large bowl, toss the sweet potato slices with olive oil, salt, pepper, paprika, and garlic powder. Make sure each piece is well-coated.
- Preheat the Grill . Preheat your grill to medium-high heat, about 400°F. Brush the grill grates with a little olive oil to prevent sticking.
- Grill the Sweet Potatoes . Place the sweet potato slices on the grill. Cook for about 5-7 minutes per side, or until they are tender and have beautiful grill marks. Keep an eye on them to avoid burning.
- Serve . Remove from the grill and transfer to a serving platter. Garnish with fresh herbs if desired. Serve warm and enjoy!
