
If you love the sweet citrusy flavor of fresh oranges combined with soft, pillowy dough, these homemade Orange Rolls will be your new favorite treat. Similar to cinnamon rolls but with a bright and zesty twist, these rolls are filled with a buttery orange-sugar mixture and topped with a luscious orange glaze. They are perfect for breakfast, brunch, or as an indulgent dessert.

Why You’ll Love This Brilliant Breakfast
- Soft and fluffy texture . These rolls are light, tender, and melt in your mouth.
- Bursting with citrus flavor . Fresh orange zest and juice make every bite bright and refreshing.
- Perfect for any occasion . Great for holiday mornings, special breakfasts, or weekend baking.
- Make-ahead friendly . Prepare the night before and bake fresh in the morning.
Whether enjoyed fresh out of the oven or as a special brunch centerpiece, orange rolls are a sweet, citrusy delight that brings joy with every bite.
What Do Orange Rolls Taste Like?
Yes, Orange Rolls are absolutely delicious and a wonderful alternative to classic cinnamon rolls. They have a delicate balance of sweet and citrusy flavors that complement the buttery dough.
The filling has just the right amount of orange zest to give a refreshing pop of flavor, and the glaze adds a smooth, sweet finish.
Ingredients You’ll Need
For The Dough
- All-Purpose Flour - Provides the structure and foundation of the rolls, giving them a soft but sturdy texture.
- Active Dry Yeast - Leavens the dough, allowing it to rise and become fluffy.
- Warm Milk - Activates the yeast and keeps the dough moist and tender.
- Granulated Sugar - Adds a touch of sweetness to the dough and helps feed the yeast for better rising.
- Salt – Balances the sweetness and enhances overall flavor.
- Unsalted Butter - Adds richness, moisture, and tenderness to the dough.
- Egg - Binds the ingredients together and contributes to a soft, slightly rich texture.
Filling
- Unsalted Butter - Ensures a smooth, rich filling that melts into the dough while baking.
- Granulated Sugar - Sweetens the filling, complementing the bright citrus flavor.
- Orange Zest - Infuses the rolls with a bold, fresh orange flavor.
- Orange Juice - Adds natural citrusy brightness and moisture to the filling.
For The Glaze
- Powdered Sugar - Creates a smooth, sweet glaze that perfectly coats the warm rolls.
- Orange Juice - Provides the perfect amount of tangy citrus flavor.
- Vanilla Extract - Enhances the glaze with a warm, subtle depth of flavor.
How To Make Orange Rolls
- Prepare the Dough . In a bowl, combine warm milk and yeast. Let sit for 5 minutes until foamy. Add sugar, salt, melted butter, and egg. Mix until combined. Gradually add flour, mixing until a soft dough forms. Knead the dough on a floured surface for 8-10 minutes until smooth and elastic. Place the dough in a greased bowl, cover, and let rise in a warm place for 1-1.5 hours until doubled in size.
- Make the Orange Filling . In a small bowl, mix softened butter, sugar, orange zest, and orange juice until well combined.
- Shape the Rolls . Roll out the dough into a 12x18-inch rectangle. Spread the orange filling evenly over the dough. Roll up tightly from the long side and slice into 12 equal pieces. Place rolls in a greased 9x13-inch baking dish. Cover and let rise for 30-45 minutes.
- Bake the Orange Rolls . Preheat oven to 350°F. Bake rolls for 20-25 minutes or until golden brown.
- Make the Orange Glaze . Whisk together powdered sugar, orange juice, and vanilla extract. Drizzle over warm rolls before serving.

Tips And Tricks
Orange rolls are a delightful citrusy twist on classic sweet rolls, and with a few expert tips, you can ensure they turn out soft, flavorful, and perfectly glazed every time:
- Use fresh orange zest and juice for the best citrus flavor. Bottled juice won’t have the same brightness.
- Knead the dough properly to ensure soft and fluffy rolls. If it’s too sticky, add a little more flour.
- Let the dough rise until doubled to achieve the best texture. Rushing the process may result in dense rolls.
- Slice the rolls evenly to ensure they bake at the same rate.
- Pour the glaze while warm so it soaks into the rolls slightly for extra moisture.
Variations
Orange rolls are already a delicious treat, but there are many ways to customize them to fit your preferences. Whether you want to add more citrus, incorporate different spices, or create a richer filling, here are some creative variations to try:
- Orange Cream Cheese Frosting - Swap the glaze for a creamy orange cream cheese icing.
- Nutty - Add chopped pecans or walnuts to the filling for a crunchy texture.
- Cinnamon - Sprinkle cinnamon into the filling for a warm, spiced twist.
- Chocolate - Mix in mini chocolate chips for a sweet citrus-chocolate combo.
What To Enjoy With Orange Rolls
Orange rolls are a sweet, citrusy delight that pair well with a variety of sides and beverages. Whether you’re serving them for breakfast , brunch, or dessert, here are some delicious ways to enjoy them:
- Fresh fruit - A side of berries or citrus slices complements the bright orange flavor.
- Scrambled eggs - A savory contrast to balance the sweetness.
- Coffee or tea - A warm drink enhances the comforting flavors of the rolls.
- Yogurt and granola - Adds protein and crunch to complete your breakfast.
How Long Do They Last?
Orange rolls can be stored at room temperature for up to 2 days in an airtight container to keep them soft and fresh.
If you need them to last longer, refrigerate them for up to 5 days, but be sure to warm them slightly before serving to restore their soft, fluffy texture.
Can You Freeze Them?
For extended storage, orange rolls freeze well—wrap them tightly in plastic wrap and store them in a freezer-safe bag or container for up to 3 months.
When ready to enjoy them, thaw the rolls at room temperature or warm in the oven at 300°F for about 10 minutes. Adding a fresh drizzle of glaze after reheating can help bring back their just-baked flavor and moisture.
More Of Our Best Cinnamon Rolls
- TikTok Cinnamon Rolls
- Blueberry Cinnamon Rolls
- Pumpkin Cinnamon Rolls
- Chocolate Cinnamon Rolls
- Apple Cinnamon Rolls


Orange Rolls | Homemade Orange Breakfast Roll Recipe
Ingredients
For The Dough
- ▢ 3 1/2 cups All Purpose Flour
- ▢ 2 1/4 tsp Active Dry Yeast
- ▢ 1 cup Warm Milk , 105-110F
- ▢ 1/3 cup Granulated Sugar
- ▢ 1 tsp Kosher Salt
- ▢ 1/4 cup Unsalted Butter , melted and cooled
- ▢ 1 Egg
Filling
- ▢ 1/3 cup Unsalted Butter , softened
- ▢ 1/2 cup Granulated Sugar
- ▢ 2 tbsp Orange Zest
- ▢ 3 tbsp Orange Juice
Glaze
- ▢ 1 1/2 cups Powdered Sugar
- ▢ 4 tbsp Orange Juice
- ▢ 1/2 tsp Vanilla Extract
Instructions
- Prepare the Dough . In a bowl, combine warm milk and yeast. Let sit for 5 minutes until foamy. Add sugar, salt, melted butter, and egg. Mix until combined. Gradually add flour, mixing until a soft dough forms. Knead the dough on a floured surface for 8-10 minutes until smooth and elastic. Place the dough in a greased bowl, cover, and let rise in a warm place for 1-1.5 hours until doubled in size.
- Make the Orange Filling . In a small bowl, mix softened butter, sugar, orange zest, and orange juice until well combined.
- Shape the Rolls . Roll out the dough into a 12x18-inch rectangle. Spread the orange filling evenly over the dough. Roll up tightly from the long side and slice into 12 equal pieces. Place rolls in a greased 9x13-inch baking dish. Cover and let rise for 30-45 minutes.
- Bake the Orange Rolls . Preheat oven to 350°F. Bake rolls for 20-25 minutes or until golden brown.
- Make the Orange Glaze . Whisk together powdered sugar, orange juice, and vanilla extract. Drizzle over warm rolls before serving.
Get support & connect with our community on Facebook!

If you already signed up, you should have received an email with a password to give you unlimited access to our FREE Printable Library. The password is case sensitive. Enter it below and get printing!
Password:

Orange Rolls | Homemade Orange Breakfast Roll Recipe
Ingredients
For The Dough
- 3 1/2 cups All Purpose Flour
- 2 1/4 tsp Active Dry Yeast
- 1 cup Warm Milk 105-110F
- 1/3 cup Granulated Sugar
- 1 tsp Kosher Salt
- 1/4 cup Unsalted Butter melted and cooled
- 1 Egg
Filling
- 1/3 cup Unsalted Butter softened
- 1/2 cup Granulated Sugar
- 2 tbsp Orange Zest
- 3 tbsp Orange Juice
Glaze
- 1 1/2 cups Powdered Sugar
- 4 tbsp Orange Juice
- 1/2 tsp Vanilla Extract
Instructions
- Prepare the Dough . In a bowl, combine warm milk and yeast. Let sit for 5 minutes until foamy. Add sugar, salt, melted butter, and egg. Mix until combined. Gradually add flour, mixing until a soft dough forms. Knead the dough on a floured surface for 8-10 minutes until smooth and elastic. Place the dough in a greased bowl, cover, and let rise in a warm place for 1-1.5 hours until doubled in size.
- Make the Orange Filling . In a small bowl, mix softened butter, sugar, orange zest, and orange juice until well combined.
- Shape the Rolls . Roll out the dough into a 12x18-inch rectangle. Spread the orange filling evenly over the dough. Roll up tightly from the long side and slice into 12 equal pieces. Place rolls in a greased 9x13-inch baking dish. Cover and let rise for 30-45 minutes.
- Bake the Orange Rolls . Preheat oven to 350°F. Bake rolls for 20-25 minutes or until golden brown.
- Make the Orange Glaze . Whisk together powdered sugar, orange juice, and vanilla extract. Drizzle over warm rolls before serving.
Orange Rolls | Homemade Orange Breakfast Roll Recipe https://twosleevers.com/orange-rolls/

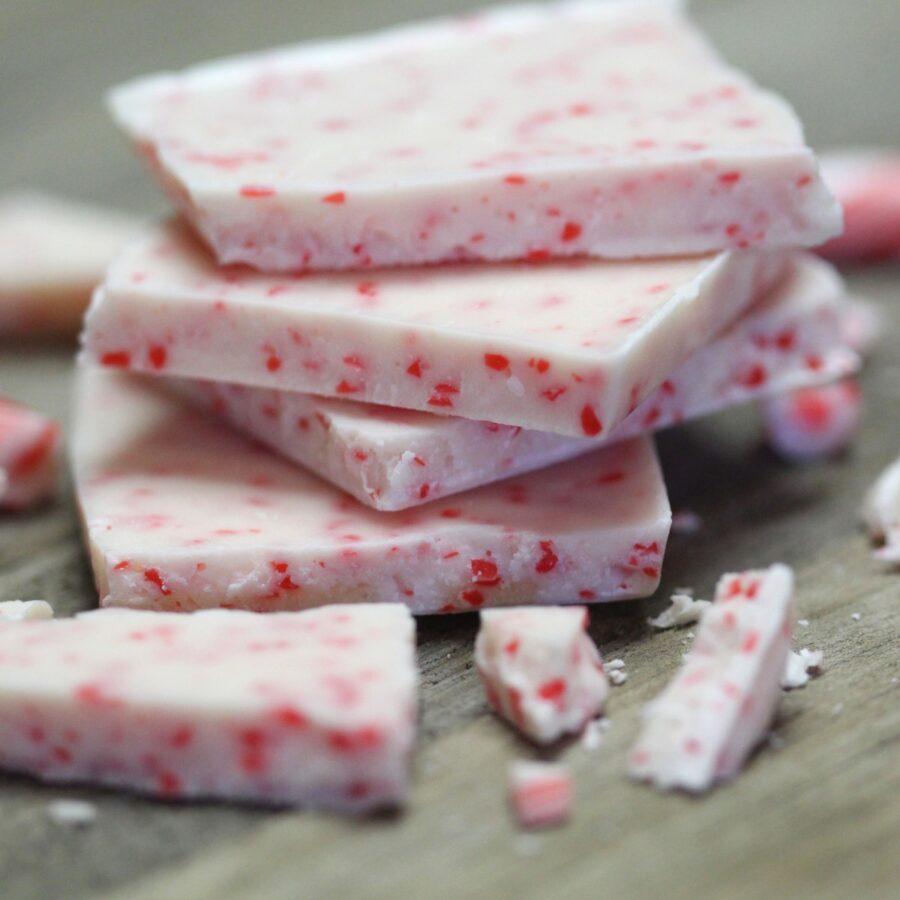
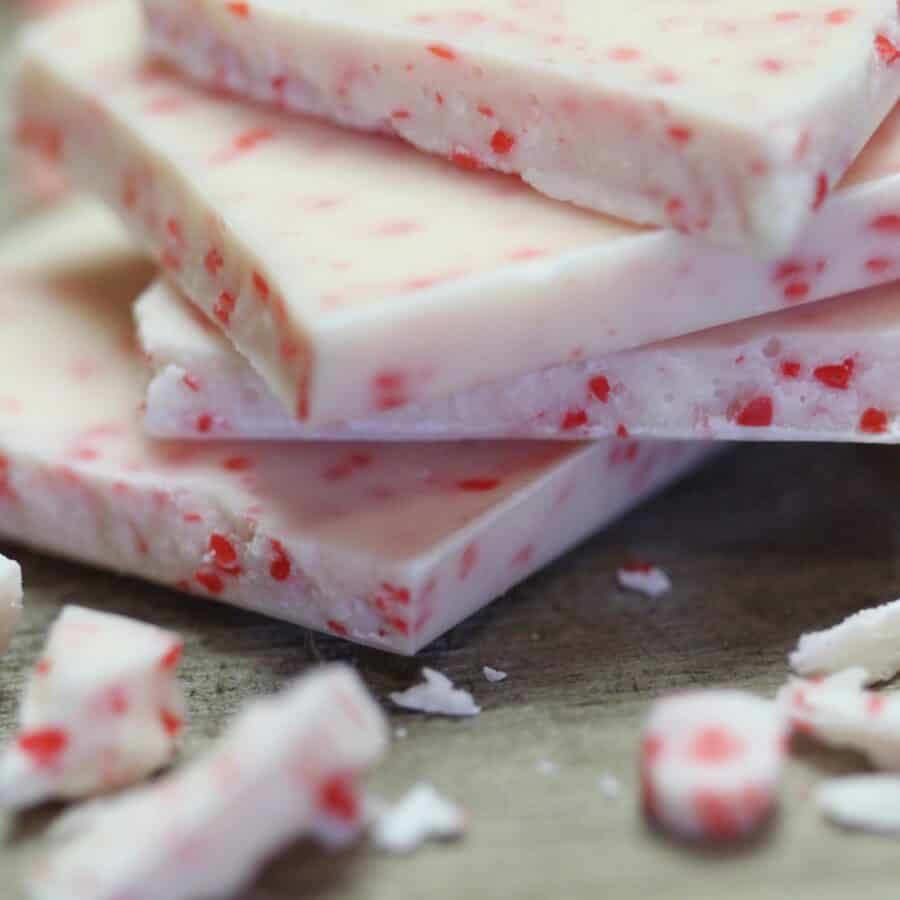
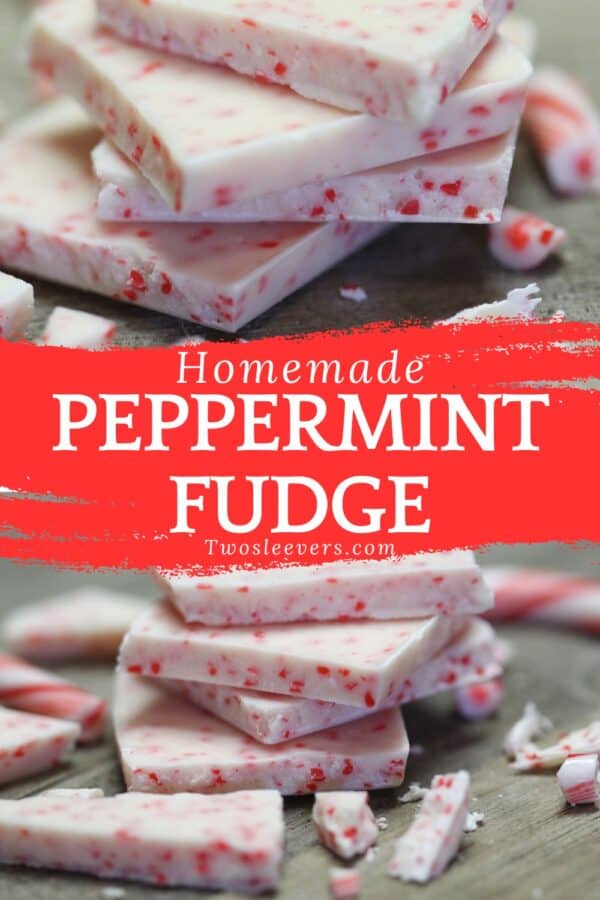
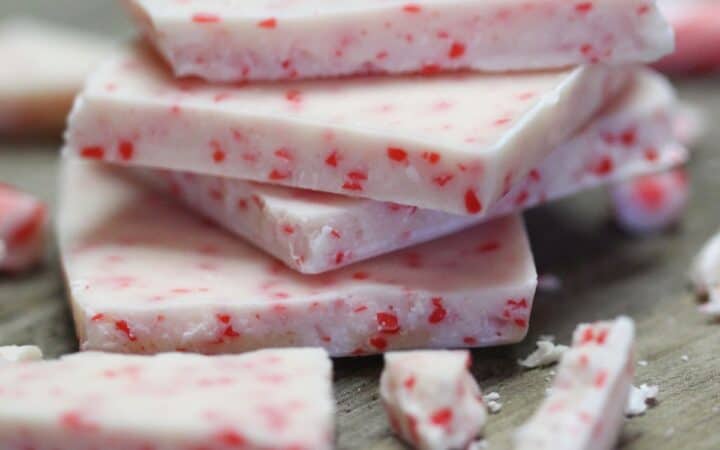
If you’re looking for a sweet treat that embodies the magic of the holiday season, you’ll fall in love with this White Peppermint Fudge recipe! It’s creamy, rich, and loaded with festive peppermint flavor, making it the perfect addition to any dessert table. Plus, it’s super easy to make, so even beginner cooks can whip up this holiday favorite.
Why You’ll Love This Fantastic Fudge
- Easy and Quick. Ready in under 30 minutes with no baking required.
- Festive Flavor. The perfect balance of creamy white chocolate and refreshing peppermint.
- Versatile. Customize it with fun toppings like crushed candy canes or sprinkles.
- Perfect for Gifting. Makes a thoughtful and delicious homemade holiday gift.
With minimal effort, you’ll have a crowd-pleasing dessert that captures the holiday spirit in every bite. Whether it’s for a cookie exchange, holiday gathering, or just a cozy night at home, this fudge is guaranteed to be a hit!
What Does Peppermint Fudge Taste Like?
White peppermint fudge is a delightful combination of rich, creamy sweetness and refreshing minty coolness.
The base flavor comes from the white chocolate, which delivers a smooth and luscious sweetness. Its milky, buttery taste provides the perfect canvas for the bold peppermint flavor.
The peppermint extract and crushed peppermint candies add a burst of freshness. The cool, crisp mint balances the richness of the white chocolate, creating a harmonious flavor blend.
Why Is My Fudge Not Setting Up?
If your fudge is not setting properly, there are several reasons why this may happen, ranging from ingredient proportions to cooking techniques. Here’s a detailed guide to troubleshoot and fix the issue:
- Improper Cooking Temperature . Fudge relies on precise temperature control. If it wasn’t heated to the right temperature, it may not set correctly.
- Too Much Liquid . Adding too much liquid, like cream, milk, or water, can make the fudge too wet to solidify.
- Not Enough Time to Cool . Fudge needs time to cool and set, usually a few hours at room temperature or in the fridge.
Ingredients You’ll Need
- White Chocolate Chips – The star ingredient for a smooth, creamy base.
- Sweetened Condensed Milk – Adds sweetness and helps create the perfect texture.
- Peppermint Extract – For that classic minty flavor.
- Crushed Peppermint Candies – Adds texture, flavor, and a festive touch.
How To Make Peppermint Fudge
- Prepare Your Pan . Line an 8x8-inch baking dish with parchment paper, leaving enough overhang for easy removal. This will prevent sticking and make cleanup a breeze.
- Melt the White Chocolate . In a medium saucepan, combine white chocolate chips and sweetened condensed milk. Cook over low heat, stirring continuously, until the mixture is smooth and fully melted. Be careful not to overheat, as white chocolate can burn easily.
- Add the Peppermint Flavor . Once the chocolate mixture is melted, remove it from the heat. Stir in the peppermint extract and finely crushed candy canes until well combined. Adjust the amount to your taste, but start with a small amount, as peppermint extract is potent.
- Pour and Smooth . Pour the fudge mixture into the prepared baking dish. Use a spatula to spread it evenly and smooth the top.
- Add the Festive Toppings . Sprinkle crushed peppermint candies over the fudge while it’s still warm for extra festive flair. Gently press them into the surface to ensure they stick.
- Chill Until Set . Refrigerate the fudge for at least 2 hours or until firm. Once set, lift it out of the pan using the parchment paper and cut it into squares.
Tips And Tricks
Making white peppermint fudge is a delightful holiday activity, and with a few pro tips, you can ensure it turns out perfectly creamy and festive every time. Here’s how to master this sweet treat:
- Use High-Quality White Chocolate. The better the chocolate, the creamier your fudge will be.
- Crush Peppermint Candies Easily. Place them in a zip-top bag and crush with a rolling pin for less mess.
- Room Temperature Serving. Let the fudge sit at room temperature for a few minutes before serving for the best texture.
- Control the Mint. If you prefer a milder flavor, reduce the peppermint extract slightly.
Variations
Peppermint fudge is a versatile dessert, and with a few tweaks, you can create unique versions to suit different tastes and occasions. Here are some delicious variations:
- Dark Chocolate- Substitute half of the white chocolate with dark chocolate for a marbled effect.
- Extra Crunch - Add chopped candy canes or white chocolate chips into the fudge mixture for texture.
- Festive Colors - Swirl in a few drops of red or green food coloring before pouring the fudge into the pan.
- Nutty Twist - Add crushed pistachios or almonds to the fudge for a crunchy bite.
What To Enjoy With Peppermint Fudge
Peppermint fudge is a versatile and festive treat that pairs well with a variety of complementary flavors and textures. Here are some delicious ideas to enjoy with it:
- Hot Chocolate - A warm drink complements the cool mint flavor perfectly.
- Coffee or Espresso - A rich cup of coffee balances the sweetness.
- Charcuterie Dessert Board - Include the fudge on a platter with cookies, chocolates, and fruits for a stunning holiday spread.
How Long Does It Last?
Peppermint fudge usually lasts about 1–2 weeks at room temperature if it’s kept in an airtight container in a cool, dry spot, because the sugar and fat help preserve its texture and flavor.
If your kitchen is warm, humid, or you’ve added ingredients that make it wetter (like a lot of crushed candy canes), it’s safer to store it in the refrigerator, where it will typically keep 2–3 weeks. Just expect it to firm up, so let it sit out a bit before eating.
Can You Freeze It?
Yes! To freeze, wrap individual squares in wax paper and place them in a freezer-safe bag or container. This method preserves freshness and makes it easy to grab a piece whenever a sweet craving strikes.
Perfect Peppermint Bites
- Peppermint Patty Recipe
- Homemade Peppermint Mocha
- Easy Peppermint Bark
- Peppermint Cookies
Peppermint Fudge Recipe | Homemade Candy Cane Fudge
Ingredients
- ▢ 2 cups White Chocolate Chips
- ▢ 14 ounces Sweetened Condensed Milk
- ▢ 1/2 tsp Peppermint Extract
- ▢ 1/3 cup Crushed Peppermint Candies , divided
Instructions
- Prepare Your Pan . Line an 8x8-inch baking dish with parchment paper, leaving enough overhang for easy removal. This will prevent sticking and make cleanup a breeze.
- Melt the White Chocolate . In a medium saucepan, combine white chocolate chips and sweetened condensed milk. Cook over low heat, stirring continuously, until the mixture is smooth and fully melted. Be careful not to overheat, as white chocolate can burn easily.
- Add the Peppermint Flavor . Once the chocolate mixture is melted, remove it from the heat. Stir in the peppermint extract and finely crushed candy canes until well combined. Adjust the amount to your taste, but start with a small amount, as peppermint extract is potent.
- Pour and Smooth . Pour the fudge mixture into the prepared baking dish. Use a spatula to spread it evenly and smooth the top.
- Add the Festive Toppings . Sprinkle crushed peppermint candies over the fudge while it’s still warm for extra festive flair. Gently press them into the surface to ensure they stick.
- Chill Until Set . Refrigerate the fudge for at least 2 hours or until firm. Once set, lift it out of the pan using the parchment paper and cut it into squares.
