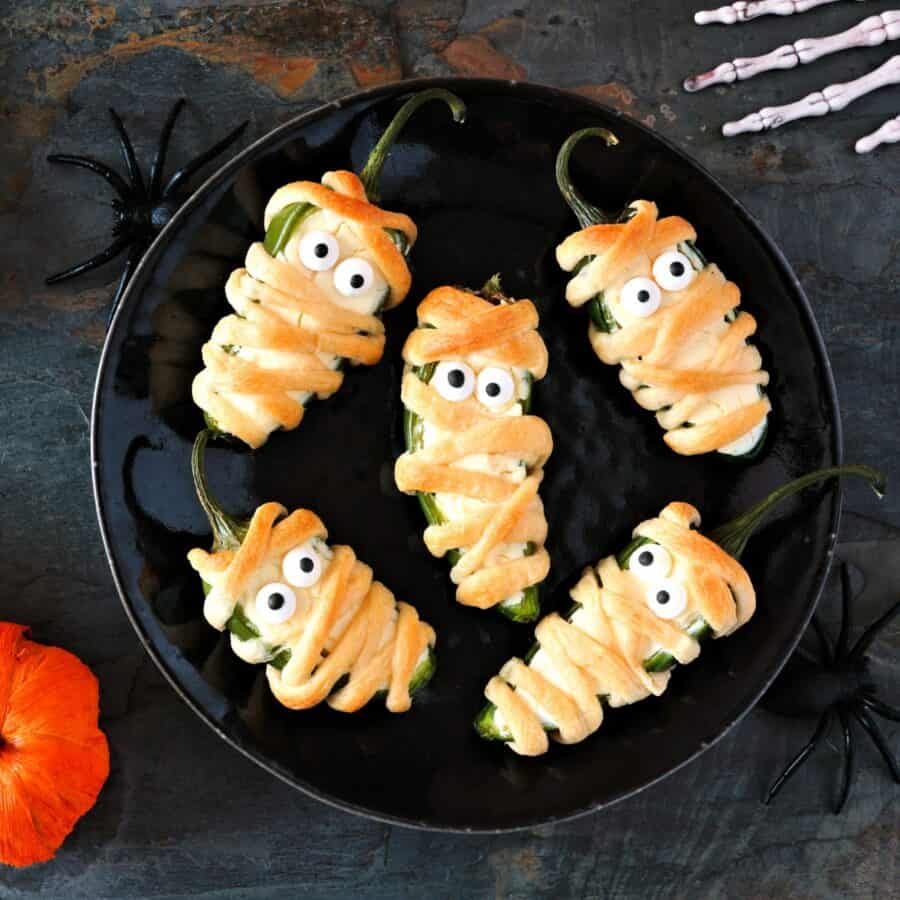
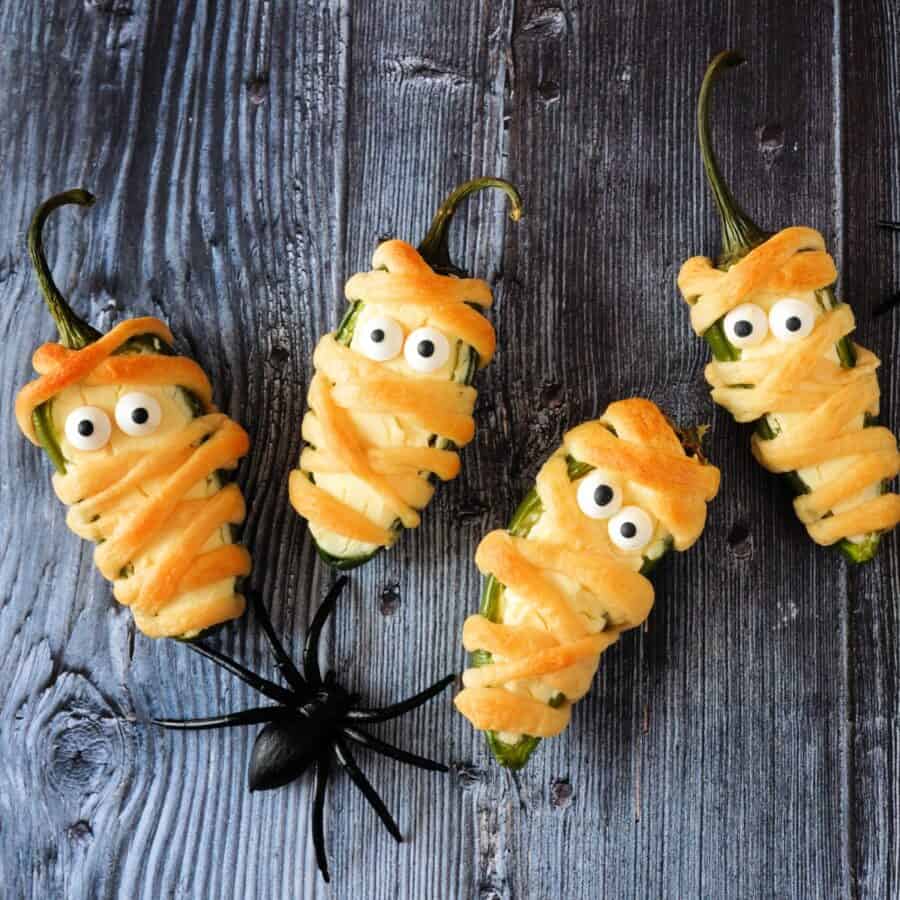
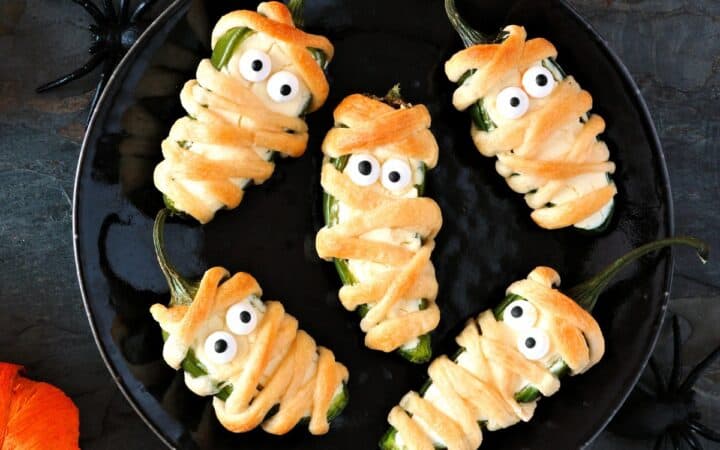
If you’re looking for a fun, spooky appetizer that’s perfect for Halloween, Mummy Jalapeno Poppers are the way to go! These adorable, spooky bites are filled with creamy, cheesy goodness and wrapped up in crescent dough to look just like little mummies.
Why You’ll Love This Awesome Appetizer
- Spooky and Fun . Perfect for Halloween gatherings or parties, these mummy poppers will wow your guests with their festive look.
- Delicious Flavor . Creamy, cheesy filling paired with the slight heat of jalapeños and wrapped in buttery crescent dough.
- Easy to Make . With minimal prep time, these jalapeño poppers come together quickly and look impressive!
- Customizable . You can adjust the spice level to your liking by choosing mild, medium, or hot jalapeños.
These Mummy Jalapeño Poppers are not only fun to eat but also super easy to make. They’re a fantastic finger food for your next Halloween gathering or as a playful snack for family movie night.
Are Mummy Jalapeno Poppers Spicy?
Yes, Mummy Jalapeño Poppers can have a bit of a kick depending on the jalapeños you use. If you prefer a milder flavor, be sure to remove all the seeds and membranes from the jalapeños, as this is where most of the heat comes from. For spicier poppers, leave some of the seeds in.
Ingredients You’ll Need
Here’s everything you’ll need to make these fun and flavorful Mummy Jalapeño Poppers:
- Jalapeños – The stars of the show, hollowed out and ready to be filled with cheesy goodness.
- Cream Cheese – Softened cream cheese makes the filling rich and creamy.
- Cheddar Cheese – Sharp cheddar adds extra flavor to the filling.
- Garlic Powder – Adds a savory depth to the filling.
- Crescent Roll Dough – This will be used to wrap the jalapeños and give them their mummy look.
- Candy Eyes – For the finishing touch, giving your jalapeño poppers their spooky personality!
How To Make Mummy Jalapeno Poppers
- Prep the Jalapeños . Start by slicing each jalapeño in half lengthwise and removing the seeds and membranes. This will create space for the filling and reduce the spice level.
- Make the Filling . In a medium bowl, combine softened cream cheese, shredded cheddar cheese, garlic powder, and a pinch of salt. Mix until smooth and creamy.
- Fill the Jalapeños . Spoon the cheese mixture into each jalapeño half, making sure to fill them generously.
- Wrap the Jalapeños . Open the crescent roll dough and cut it into thin strips. Wrap each jalapeño half with the dough strips, leaving some gaps to create the mummy effect. Don’t forget to leave space for the eyes!
- Bake . Preheat your oven to 375°F. Place the wrapped jalapeños on a parchment-lined baking sheet and bake for 12-15 minutes, or until the dough is golden brown and crispy.
- Add Eyes . Once out of the oven, let the poppers cool for a few minutes before adding candy eyes to complete the mummy look. Press the eyes gently into the crescent dough so they stick.
- Serve . Arrange your Mummy Jalapeño Poppers on a platter and serve them warm with your favorite dipping sauce or enjoy them on their own!
Tips And Tricks
Making Mummy Jalapeño Poppers is easy, but these tips will help ensure your poppers come out perfect every time:
- Use Gloves . When handling jalapeños, it’s a good idea to wear gloves to avoid the heat from transferring to your skin. Be careful not to touch your face!
- Cool the Filling . If you have time, chill the cream cheese filling for a bit before adding it to the jalapeños. This will make it easier to spoon into the peppers.
- Customize the Spice . For extra heat, leave some seeds in the jalapeños, or for a milder version, make sure to remove all seeds and membranes.
- Secure the Eyes . Use a tiny dab of cream cheese to help the candy eyes stick to the poppers if needed.
- Try Air Frying . For an even crispier texture, you can air fry these poppers at 350°F for about 8-10 minutes.
Variations
If you want to put your own twist on these Mummy Jalapeño Poppers, here are a few fun variations to try:
- Bacon-Wrapped - Instead of crescent dough, wrap the jalapeños in bacon strips before baking for a smoky flavor.
- Spicy Cream Cheese - Add a bit of hot sauce or diced jalapeños into the cream cheese filling for extra heat.
- Cheesy Explosion - Mix in different cheeses like mozzarella or pepper jack for a more complex flavor.
What To Enjoy With Mummy Jalapeno Poppers
These spooky poppers are delicious on their own, but you can also serve them with dipping sauces for added flavor. Here are a few ideas:
- Ranch Dressing – Cool and creamy, ranch is a classic dip that pairs perfectly with the spice of jalapeños.
- Sour Cream and Chives – For a lighter, tangy option.
- Chipotle Mayo – Adds a smoky heat to every bite.
- Guacamole – A creamy and rich dip that complements the cheesy filling.
How Long Do They Last?
You can store your Mummy Jalapeño Poppers in an airtight container in the fridge for up to 3 days. Reheat them in the oven at 350°F for about 5-7 minutes to maintain their crispy texture.
Can You Freeze Them?
Yes! You can freeze the poppers before baking. Simply wrap the filled jalapeños in the crescent dough, then place them on a baking sheet in the freezer. Once frozen, transfer them to a freezer-safe bag.
When you’re ready to bake, pop them in the oven straight from the freezer and add a few extra minutes to the cooking time.
More Amazing Appetizer Recipes
- White Bean Dip
- Sticky Chicken Wings
- Air Fryer Potato Skins
- Skillet Queso
- Cocktail Meatballs
- Halloween Charcuterie Board
- Stuffed Mini Peppers

Mummy Jalapeno Poppers | Easy Halloween Appetizer
Ingredients
- ▢ 12 Jalapeno Peppers
- ▢ 8 ounces Cream Cheese
- ▢ 1 cup Cheddar Cheese , shredded
- ▢ 1/2 tsp Garlic Powder
- ▢ 8 ounces Canned Crescent Rolls
- ▢ 24 Candy Eyes , Optional
Instructions
- Prep the Jalapeños . Start by slicing each jalapeño in half lengthwise and removing the seeds and membranes. This will create space for the filling and reduce the spice level.
- Make the Filling . In a medium bowl, combine softened cream cheese, shredded cheddar cheese, garlic powder, and a pinch of salt. Mix until smooth and creamy.
- Fill the Jalapeños . Spoon the cheese mixture into each jalapeño half, making sure to fill them generously.
- Wrap the Jalapeños . Open the crescent roll dough and cut it into thin strips. Wrap each jalapeño half with the dough strips, leaving some gaps to create the mummy effect. Don’t forget to leave space for the eyes!
- Bake . Preheat your oven to 375°F. Place the wrapped jalapeños on a parchment-lined baking sheet and bake for 12-15 minutes, or until the dough is golden brown and crispy.
- Add Eyes . Once out of the oven, let the poppers cool for a few minutes before adding candy eyes to complete the mummy look. Press the eyes gently into the crescent dough so they stick.
- Serve . Arrange your Mummy Jalapeño Poppers on a platter and serve them warm with your favorite dipping sauce or enjoy them on their own!
Get support & connect with our community on Facebook!
Nutrition

If you already signed up, you should have received an email with a password to give you unlimited access to our FREE Printable Library. The password is case sensitive. Enter it below and get printing!
Password:

Mummy Jalapeno Poppers | Easy Halloween Appetizer
Ingredients
- 12 Jalapeno Peppers
- 8 ounces Cream Cheese
- 1 cup Cheddar Cheese shredded
- 1/2 tsp Garlic Powder
- 8 ounces Canned Crescent Rolls
- 24 Candy Eyes Optional
Instructions
- Prep the Jalapeños . Start by slicing each jalapeño in half lengthwise and removing the seeds and membranes. This will create space for the filling and reduce the spice level.
- Make the Filling . In a medium bowl, combine softened cream cheese, shredded cheddar cheese, garlic powder, and a pinch of salt. Mix until smooth and creamy.
- Fill the Jalapeños . Spoon the cheese mixture into each jalapeño half, making sure to fill them generously.
- Wrap the Jalapeños . Open the crescent roll dough and cut it into thin strips. Wrap each jalapeño half with the dough strips, leaving some gaps to create the mummy effect. Don’t forget to leave space for the eyes!
- Bake . Preheat your oven to 375°F. Place the wrapped jalapeños on a parchment-lined baking sheet and bake for 12-15 minutes, or until the dough is golden brown and crispy.
- Add Eyes . Once out of the oven, let the poppers cool for a few minutes before adding candy eyes to complete the mummy look. Press the eyes gently into the crescent dough so they stick.
- Serve . Arrange your Mummy Jalapeño Poppers on a platter and serve them warm with your favorite dipping sauce or enjoy them on their own!
Mummy Jalapeno Poppers | Easy Halloween Appetizer https://twosleevers.com/mummy-jalapeno-poppers/

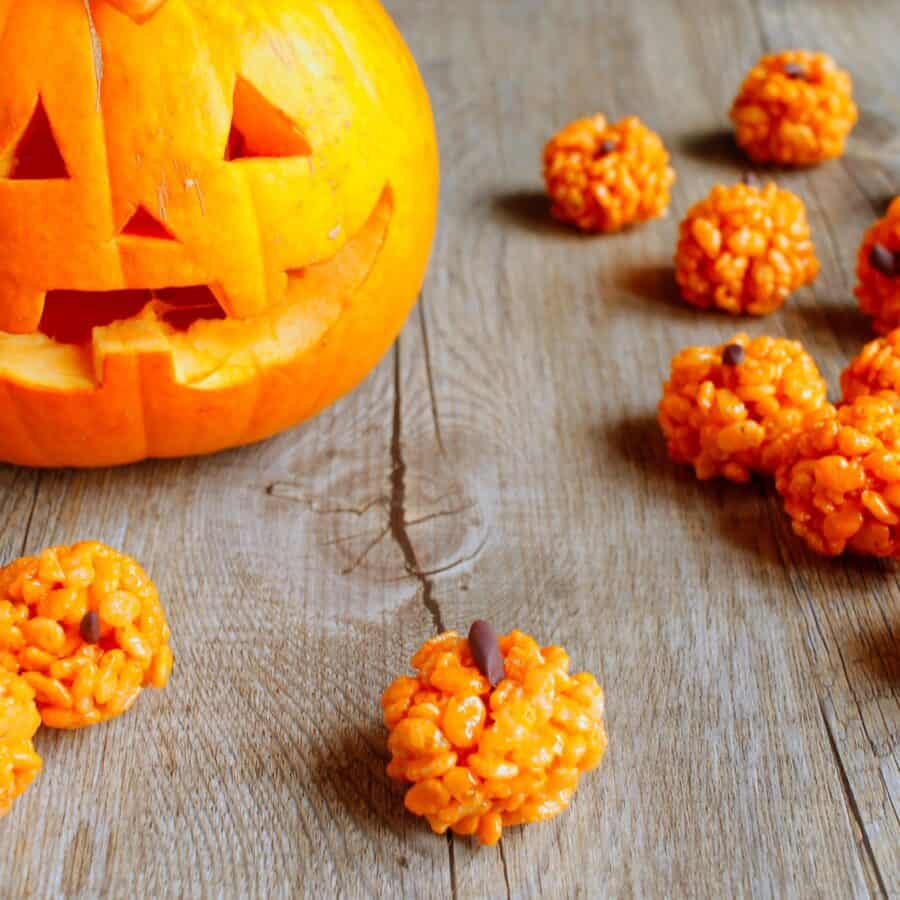
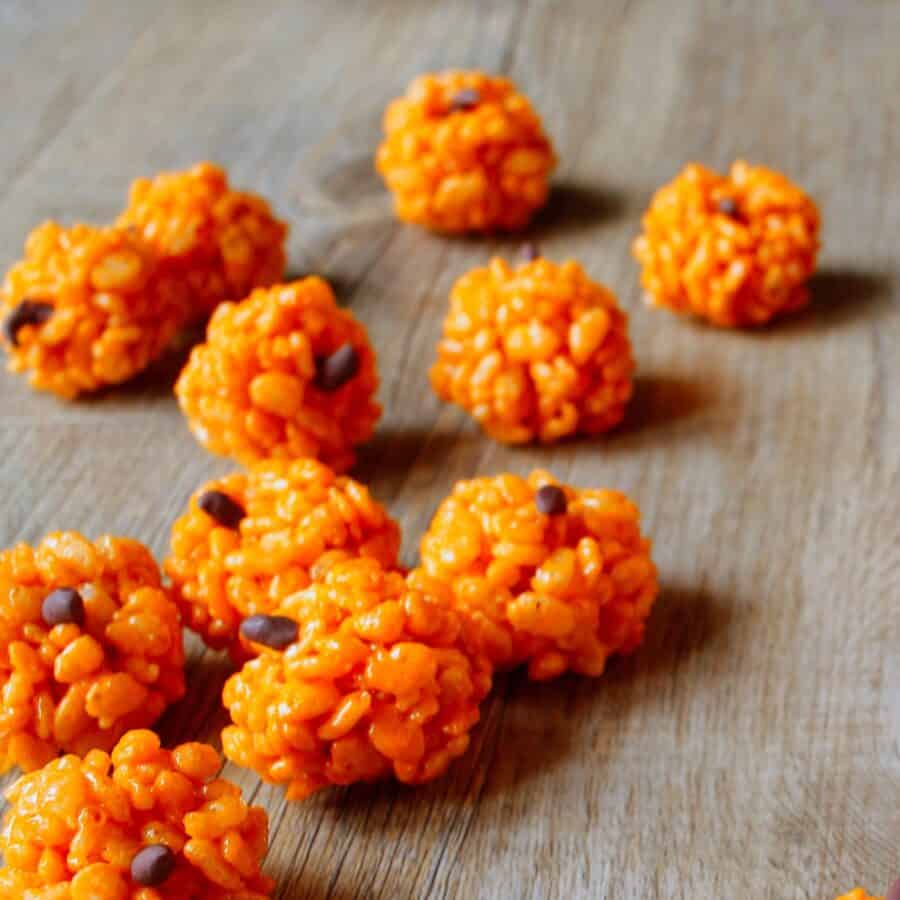
If you love the flavors of fall, then you’re going to adore these Pumpkin Rice Krispie Treats! They’re a fun, seasonal twist on the classic, making them the perfect treat for Halloween parties, fall gatherings, or simply enjoying a cozy autumn day. With just a few simple ingredients and some creativity, you can create adorable, festive pumpkin-shaped Rice Krispie treats that everyone will love.
Why You’ll Love These Tasty Treats
- Quick and Easy . Ready in under 30 minutes, no baking required.
- Festive Fun . Shaped and decorated like pumpkins, these treats add a festive touch to any fall occasion.
- Kid-Friendly . A great recipe to make with kids – they’ll love shaping and decorating the pumpkins.
- Delicious Fall Flavor . With the addition of pumpkin spice and warm marshmallows, these treats are packed with comforting autumn flavors.
Whether you’re hosting a Halloween party, having a fall bake sale, or simply want a fun snack to celebrate the season, these Pumpkin Rice Krispie Treats are a must-try. They’re gooey, crispy, and flavored with a hint of pumpkin spice, making them perfect for fall celebrations.
What Do Pumpkin Rice Krispie Treats Taste Like?
Pumpkin Rice Krispie Treats taste like a delightful combination of the classic, sweet, and buttery flavor of traditional Rice Krispie treats with a cozy fall twist.
The addition of pumpkin spice introduces warm, comforting notes of cinnamon, nutmeg, and cloves, giving them a slightly spiced, autumnal flavor. The marshmallow base keeps them gooey and soft, while the crisp rice cereal adds a satisfying crunch.
Though these treats are shaped like pumpkins, they don’t have a strong pumpkin flavor but instead capture the essence of fall with a subtle spice and sweetness.
Ingredients You’ll Need
- Rice Krispies Cereal - The base for these delicious treats, providing that perfect crispy texture.
- Marshmallows - Melted marshmallows give the treats their signature gooey sweetness.
- Butter - Adds richness and helps the marshmallows melt smoothly.
- Pumpkin Spice - A must for that fall flavor, with warm spices like cinnamon, nutmeg, and cloves.
- Orange Food Coloring - Creates that classic pumpkin hue.
- Green Candy for Stems - For decorating the pumpkin stems, you can use green M&M’s, candy sticks, or green Twizzlers.
- Pretzel Sticks (Optional) - These can also be used for the pumpkin stems.
How To Make Pumpkin Rice Krispie Treats
- Prepare Your Work Area . Line a baking sheet with parchment paper and set it aside. This will be where you shape and cool your pumpkin treats.
- Melt the Marshmallows . In a large pot over medium heat, melt the butter. Once melted, add the marshmallows and stir constantly until fully melted and smooth.
- Add Pumpkin Spice & Color . Stir in the pumpkin spice and orange food coloring until evenly distributed. Adjust the color to your liking for that perfect pumpkin look.
- Mix in the Rice Krispies . Remove the pot from the heat and gently fold in the Rice Krispies cereal. Stir until all the cereal is coated with the marshmallow mixture.
- Shape the Pumpkins . With greased hands, take a small handful of the mixture and shape it into a pumpkin. Place each one on the prepared baking sheet.
- Add the Stems . Insert a green candy or pretzel stick into the top of each pumpkin to create the stem.
- Cool and Set . Let the pumpkins cool and set at room temperature for about 20 minutes.
- Serve and Enjoy! Your Pumpkin Rice Krispie Treats are ready to enjoy!
Tips And Tricks
Creating Pumpkin Rice Krispie Treats is easy, but these tips will help you achieve the best results:
- Use Fresh Marshmallows . Fresh marshmallows will melt more smoothly and result in softer, gooier treats. Avoid using old, stale marshmallows as they can be harder to melt.
- Grease Your Hands . Shaping the Rice Krispie pumpkins can be a bit sticky. Grease your hands with butter or non-stick spray to make shaping easier.
- Color Consistency . Add food coloring slowly, a little at a time, until you reach your desired shade of orange.
- Cool for Clean Cutting . If you’re planning to cut the treats into bars or shapes instead of pumpkins, allow them to cool completely before cutting for cleaner edges.
Variations
Want to mix up the flavors and fun? Here are some variations you can try:
- Chocolate-Dipped Pumpkins - Dip the tops of the pumpkin treats into melted chocolate for an extra indulgent treat.
- Candy Corn Rice Krispie Treats - Add candy corn to the mix for a fun and festive twist.
- Pumpkin Spice Drizzle - Drizzle melted white chocolate over the treats and sprinkle with extra pumpkin spice for a decorative finish.
- Mini Pumpkins - Instead of shaping large pumpkins, make bite-sized mini pumpkins for easy snacking.
What To Enjoy With Pumpkin Rice Krispie Treats
Pumpkin Rice Krispie Treats are delicious on their own, but if you’re hosting a fall party or gathering, here are some ideas to pair with these treats:
- Apple Cider - The warm spiced flavor of apple cider pairs perfectly with the sweetness of these pumpkin treats.
- Hot Chocolate - Serve alongside a cup of rich, creamy hot chocolate for a cozy, indulgent treat.
- Pumpkin Spice Latte - For a double dose of pumpkin, pair these treats with a pumpkin spice latte.
- Fall Snack Board - Create a fall-themed snack board with other autumn favorites like caramel popcorn, candy corn, and apple slices.
How Long Do They Last?
Pumpkin Rice Krispie Treats will last for up to 3 days when stored in an airtight container at room temperature. Be sure to keep them in a cool, dry place to prevent them from getting too soft or soggy.
Can You Freeze Them?
Yes, you can freeze Pumpkin Rice Krispie Treats! To freeze, wrap each treat individually in plastic wrap, then place them in an airtight container or freezer bag. When you’re ready to enjoy, let them thaw at room temperature for about an hour.
More Perfect Pumpkin Recipes
- Pumpkin Mousse
- Pumpkin Oatmeal Cookies
- Low Carb Pumpkin Bars
- Pumpkin French Toast
- Pumpkin Bread Pudding
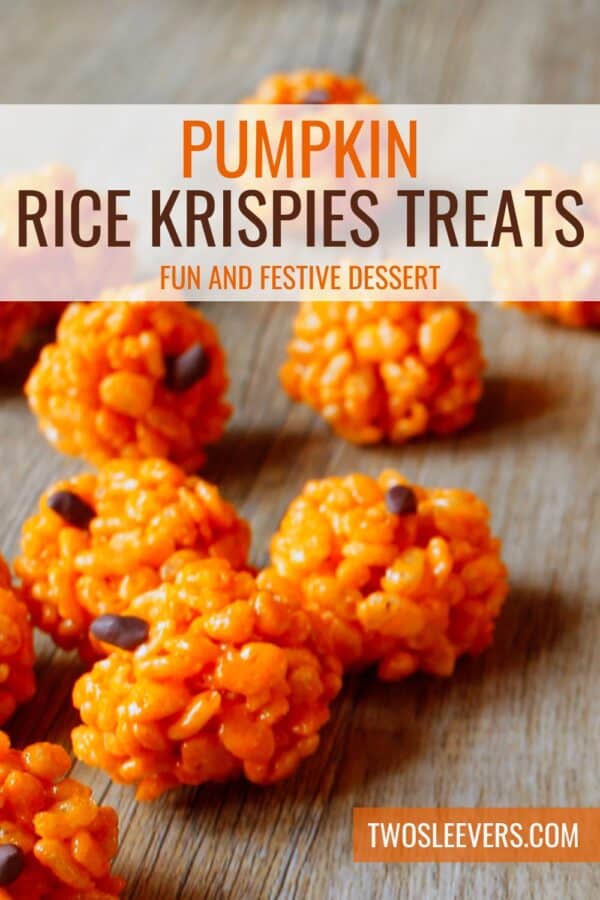

Pumpkin Rice Krispie Treats Recipe | Pumpkin Marshmallow Treat
Ingredients
- ▢ 6 cups Rice Krispies Cereal
- ▢ 10 oz Mini Marshmallows
- ▢ 4 tbsp Unsalted Butter
- ▢ 1 1/2 tsp Pumpkin Spice
- ▢ 10 drops Orange Food Coloring
- ▢ 12 Pretzel Sticks , broken in half
Instructions
- Prepare Your Work Area . Line a baking sheet with parchment paper and set it aside. This will be where you shape and cool your pumpkin treats.
- Melt the Marshmallows . In a large pot over medium heat, melt the butter. Once melted, add the marshmallows and stir constantly until fully melted and smooth.
- Add Pumpkin Spice & Color . Stir in the pumpkin spice and orange food coloring until evenly distributed. Adjust the color to your liking for that perfect pumpkin look.
- Mix in the Rice Krispies . Remove the pot from the heat and gently fold in the Rice Krispies cereal. Stir until all the cereal is coated with the marshmallow mixture.
- Shape the Pumpkins . With greased hands, take a small handful of the mixture and shape it into a pumpkin. Place each one on the prepared baking sheet.
- Add the Stems . Insert a green candy or pretzel stick into the top of each pumpkin to create the stem.
- Cool and Set . Let the pumpkins cool and set at room temperature for about 20 minutes.
- Serve and Enjoy! Your Pumpkin Rice Krispie Treats are ready to enjoy!
