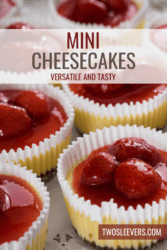
If you’re a dessert enthusiast who loves creamy, indulgent flavors, get ready for our No Bake Mini Cheesecakes. These delightful treats combine the rich and velvety taste of cheesecake with the convenience of a no bake recipe.
Why You’ll Love This Mini Cheesecake Recipe
- Quick and Easy . These no-bake mini cheesecakes come together in no time, making them an ideal last-minute dessert option.
- Creamy and Decadent. Indulge in a luxurious, silky-smooth texture that melts in your mouth with every bite.
- Customizable. Top your mini cheesecakes with a variety of toppings, from cherries to chocolate shavings.
- Perfect Portions. Enjoy individual servings that are not only visually appealing but also convenient for serving and enjoying.
Whether you’re hosting a dinner party, celebrating a special occasion, or simply satisfying your sweet tooth, these no-bake mini cheesecakes are sure to impress.
The delightful harmony of creamy cheesecake filling and a buttery graham cracker crust creates a symphony of flavors that’s hard to resist. Each bite offers a combination of sweetness and tanginess that leaves you craving more.
Is No Bake Cheesecake As Good As Baked?
No bake cheesecake and baked cheesecake are both delicious desserts, but they offer slightly different qualities and characteristics. Whether one is “better” than the other depends on personal preferences and the specific occasion.
No-Bake Cheesecake
- Texture- No-bake cheesecake typically has a creamier and lighter texture compared to baked cheesecake. It’s airy, smooth, and almost mousse-like.
- Ease of Preparation - No-bake cheesecake is easier and quicker to prepare. There’s no need to bake it in the oven, which can save time and effort.
- Flavor Variations - No-bake cheesecake allows for a wider range of flavor variations and mix-ins since you don’t have to worry about affecting the structure during baking.
- Setting Time - No-bake cheesecake requires refrigeration to set, usually for a few hours or overnight.
- Crust - The crust in a no-bake cheesecake is often made from crushed cookies or graham crackers mixed with butter, which results in a slightly softer crust compared to the crisp crust of a baked cheesecake.
- Occasion - No-bake cheesecake is great for warmer months when you might not want to use the oven, and it’s also wonderful for events where you need a quicker dessert option.
Baked Cheesecake
- Texture - Baked cheesecake has a denser and richer texture compared to no-bake cheesecake. It’s creamy but with a more substantial mouthfeel.
- Flavor Development - Baking cheesecake allows flavors to develop and deepen during the baking process, resulting in a more intense and complex flavor profile.
- Crust - The crust in a baked cheesecake is often pre-baked, leading to a crispier and more traditional crust.
- Occasion - Baked cheesecake is often associated with special occasions and holidays due to its decadence and the effort involved in baking. It’s a classic choice for formal gatherings.
Why Is My No Bake Cheesecake Still Soft?
If your no-bake cheesecake is still soft and not setting properly, there could be a few reasons for this issue. Here are some common factors that might contribute to a soft no-bake cheesecake:
- Not Enough Chilling Time - No bake cheesecakes need sufficient time to set and firm up in the refrigerator. If you haven’t allowed the cheesecake to chill for the recommended amount of time (usually several hours or overnight), it may remain soft.
- Incorrect Proportions - The balance of ingredients in the cheesecake filling is crucial for achieving the right texture. If you’ve used too much liquid or not enough stabilizing ingredients, the cheesecake might not set properly.
- Improper Mixing - Overmixing or undermixing the filling can affect the texture of the cheesecake. Overmixing can lead to a runny mixture, while undermixing can result in uneven distribution of ingredients.
Ingredients You’ll Need
- Graham Cracker Crumbs - For the base of the cheesecakes, providing that classic crust flavor.
- Unsalted Butter - Binds the graham cracker crumbs together to create a solid crust.
- Cream Cheese - The star of the show, delivering the creamy and velvety texture that defines cheesecake.
- Powdered Sugar - Adds sweetness and helps achieve the desired consistency of the filling.
- Vanilla Extract - Infuses the filling with a warm and comforting flavor.
- Heavy Cream - Provides richness and helps the filling set properly.
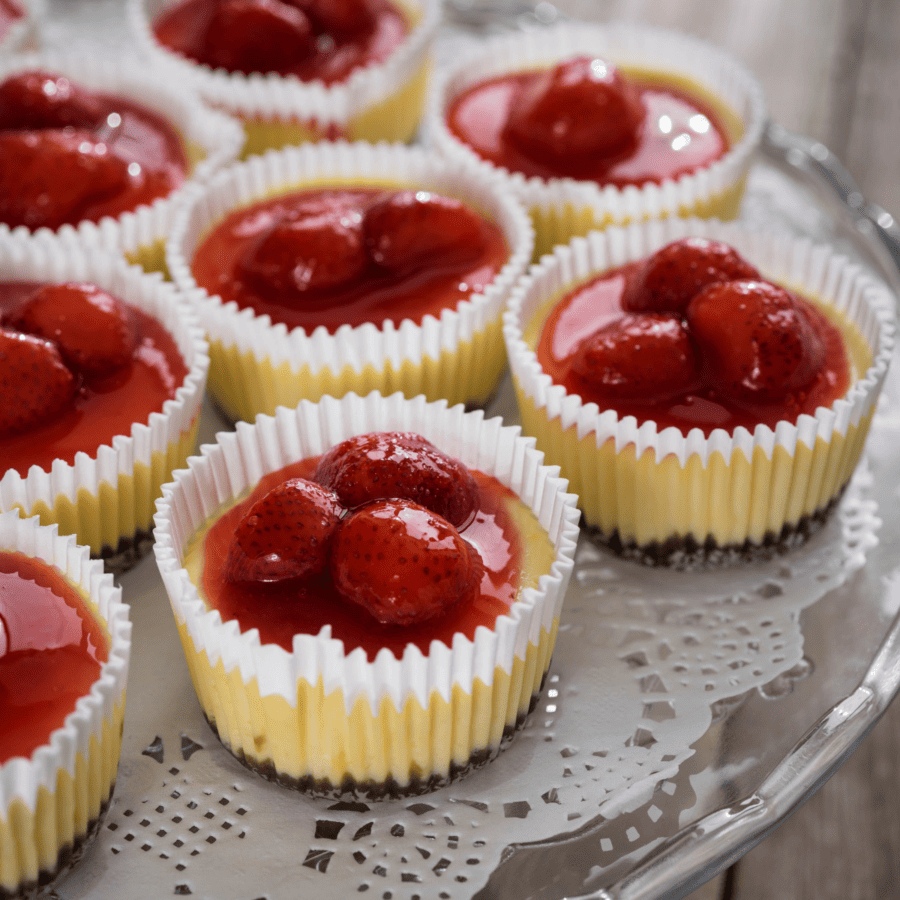
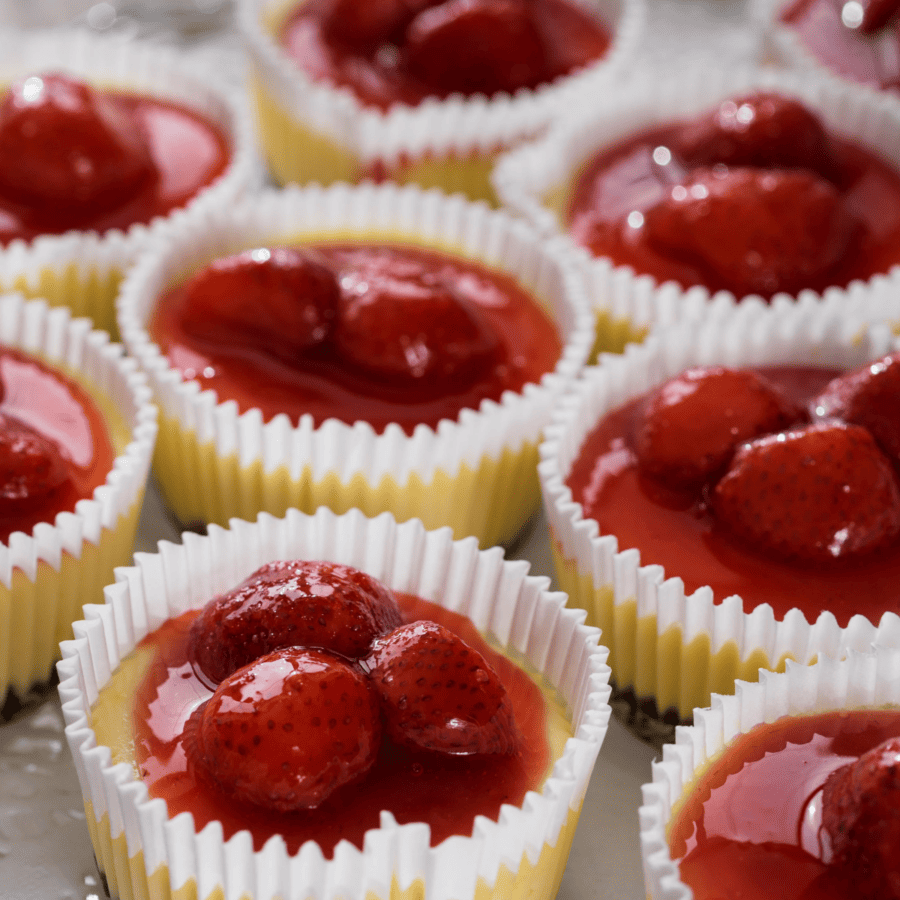
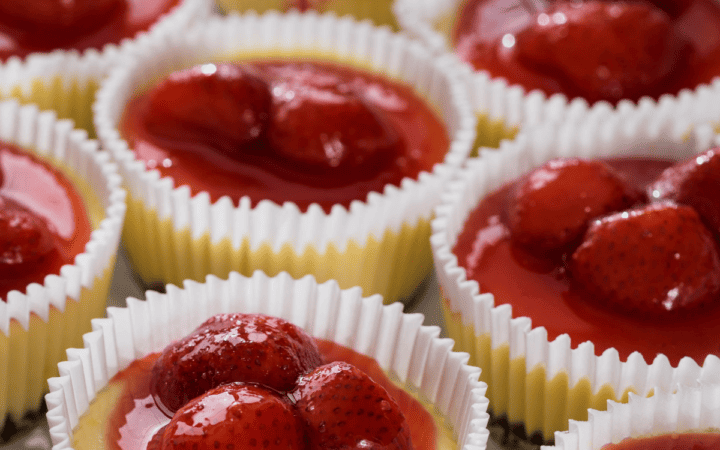
- Toppings of Your Choice - Get creative with cherry compote, fresh berries, chocolate sauce, caramel drizzle, or whipped cream.
How to Make No Bake Mini Cheesecakes
- Prepare the Crust . In a bowl, combine graham cracker crumbs and melted butter. Press the mixture into the bottom of individual serving cups or a mini muffin tin to form the crust.
- Whip Up the Filling. In a separate bowl, beat cream cheese until smooth. Add powdered sugar and vanilla extract, and continue beating until well combined.
- Add Creamy Texture . In another bowl, whip the heavy cream until stiff peaks form. Gently fold the whipped cream into the cream cheese mixture until smooth and airy.
- Assemble and Chill . Spoon the cream cheese mixture over the graham cracker crust in the serving cups. Smooth the tops with a spatula. Refrigerate the mini cheesecakes for at least 2 hours, allowing them to set.
- Top and Serve . Before serving, add your favorite toppings to the mini cheesecakes. Fresh berries, fruit compote, or chocolate shavings are fantastic options.
Tips And Tricks
Mini no-bake cheesecakes are the perfect bite-sized dessert. They’re rich, creamy, and easy to make without turning on the oven. Follow these helpful tips to ensure perfect texture, flavor, and presentation every time:
- Don’t skip the fat . Use full-fat cream cheese for the creamiest texture.
- Whip it good . Make sure to whip the heavy cream until stiff peaks form for a light and airy filling.
- Have some patience. Allow the cheesecakes to chill in the refrigerator for the specified time to ensure they set properly.
Variations
While these no-bake mini cheesecakes are divine as they are, you can experiment with different flavors and add-ins to suit your preferences:
- Chocolate Delight . Mix in cocoa powder to the cream cheese filling for a luscious chocolate twist.
- Fruit Fusion . Switch up the fruit flavor with something like strawberries, blueberries, or mango for a burst of fruity flavor.
- Nutty Indulgence . Incorporate finely chopped nuts into the graham cracker crust for added crunch and depth.
What To Serve With Them
Enjoying the delicious flavors of these tiny cheesecakes, but want to make them even better by pairing them with something else delicious? We suggest pairing your no-bake mini cheesecakes with:
- Coffee - A cup of freshly brewed coffee for an afternoon pick-me-up.
- Chocolate - A drizzle of melted chocolate for an elegant touch.
- Ice Cream - A scoop of vanilla ice cream for the ultimate indulgence.
How Long Do Mini Cheesecake Bites Last?
Store your no-bake mini cheesecakes in the refrigerator, covered with plastic wrap, or in an airtight container, for up to 3 days. We bet they won’t last that long before being devoured!
More Simple Dessert Recipes
- Cheesecake Dip
- Peach Galette
- Chocolate Pudding Pie
- Strawberry Brownies
- Keto Mug Cakes
- Oreo Cheesecake

These No Bake Mini Cheesecakes prove that you don’t need to turn on the oven to create a spectacular dessert. With their creamy texture, buttery crust, and endless topping possibilities, they’re bound to become your go-to dessert for gatherings, celebrations, and moments of self-indulgence.
Mini Cheesecakes | No Bake Mini Strawberry Cheesecake Recipe
Ingredients
Graham Cracker Crust
- ▢ 1 1/2 cups Graham Cracker Crumbs
- ▢ 1/3 cups Unsalted Butter , melted
Cheesecake Filling
- ▢ 16 ounces Cream Cheese , softened
- ▢ 1 cup Powdered Sugar
- ▢ 1 tsp Vanilla Extract
- ▢ 1 cup Heavy Cream
For Topping
- ▢ 21 oz Strawberry Pie Filling
Instructions
- Prepare the Crust . In a bowl, combine graham cracker crumbs and melted butter. Press the mixture into the bottom of individual serving cups or a mini muffin tin to form the crust.
- Whip Up the Filling. In a separate bowl, beat cream cheese until smooth. Add powdered sugar and vanilla extract, and continue beating until well combined.
- Add Creamy Texture . In another bowl, whip the heavy cream until stiff peaks form. Gently fold the whipped cream into the cream cheese mixture until smooth and airy.
- Assemble and Chill . Spoon the cream cheese mixture over the graham cracker crust in the serving cups. Smooth the tops with a spatula. Refrigerate the mini cheesecakes for at least 2 hours, allowing them to set.
- Top and Serve . Before serving, add your favorite toppings to the mini cheesecakes. Fresh berries, fruit compote, or chocolate shavings are fantastic options.
Get support & connect with our community on Facebook!
Nutrition

If you already signed up, you should have received an email with a password to give you unlimited access to our FREE Printable Library. The password is case sensitive. Enter it below and get printing!
Password:

Mini Cheesecakes | No Bake Mini Strawberry Cheesecake Recipe
Ingredients
Graham Cracker Crust
- 1 1/2 cups Graham Cracker Crumbs
- 1/3 cups Unsalted Butter melted
Cheesecake Filling
- 16 ounces Cream Cheese softened
- 1 cup Powdered Sugar
- 1 tsp Vanilla Extract
- 1 cup Heavy Cream
For Topping
- 21 oz Strawberry Pie Filling
Instructions
- Prepare the Crust . In a bowl, combine graham cracker crumbs and melted butter. Press the mixture into the bottom of individual serving cups or a mini muffin tin to form the crust.
- Whip Up the Filling. In a separate bowl, beat cream cheese until smooth. Add powdered sugar and vanilla extract, and continue beating until well combined.
- Add Creamy Texture . In another bowl, whip the heavy cream until stiff peaks form. Gently fold the whipped cream into the cream cheese mixture until smooth and airy.
- Assemble and Chill . Spoon the cream cheese mixture over the graham cracker crust in the serving cups. Smooth the tops with a spatula. Refrigerate the mini cheesecakes for at least 2 hours, allowing them to set.
- Top and Serve . Before serving, add your favorite toppings to the mini cheesecakes. Fresh berries, fruit compote, or chocolate shavings are fantastic options.
Mini Cheesecakes | No Bake Mini Strawberry Cheesecake Recipe https://twosleevers.com/mini-cheesecakes/
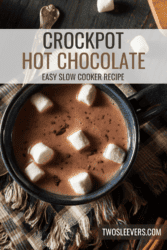
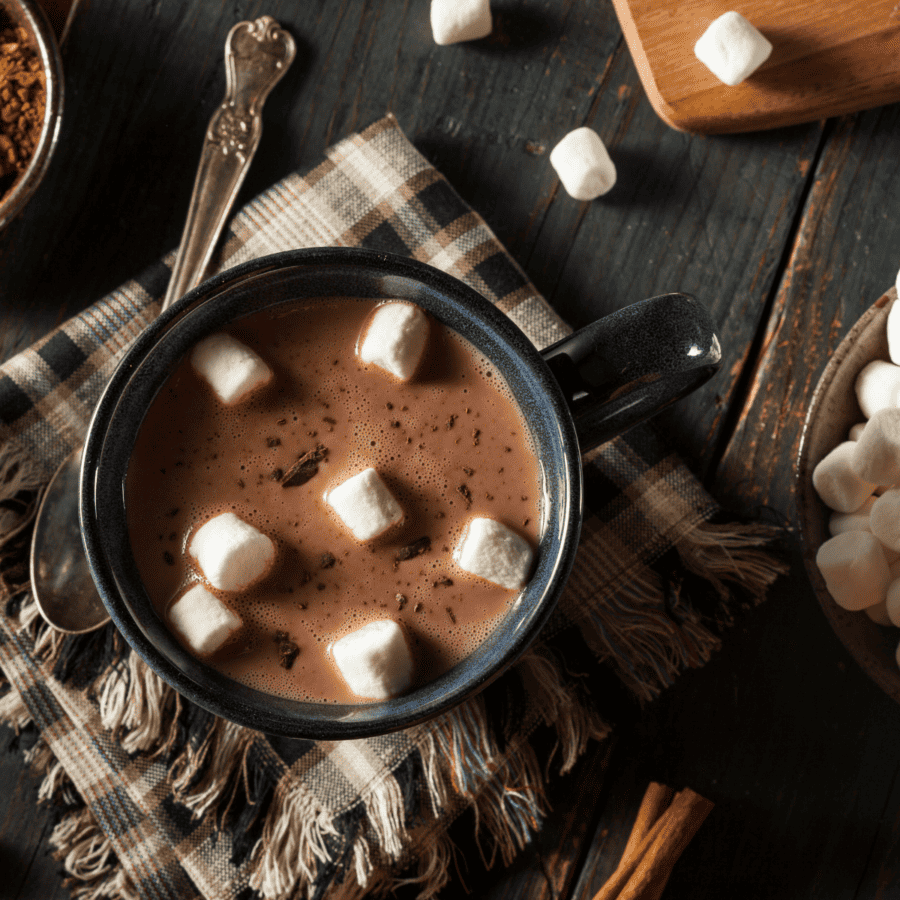
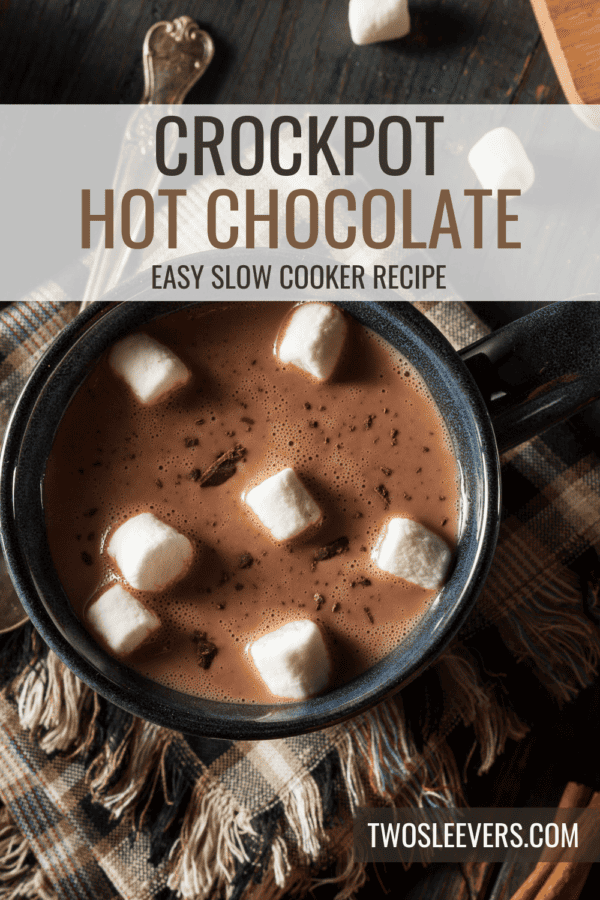
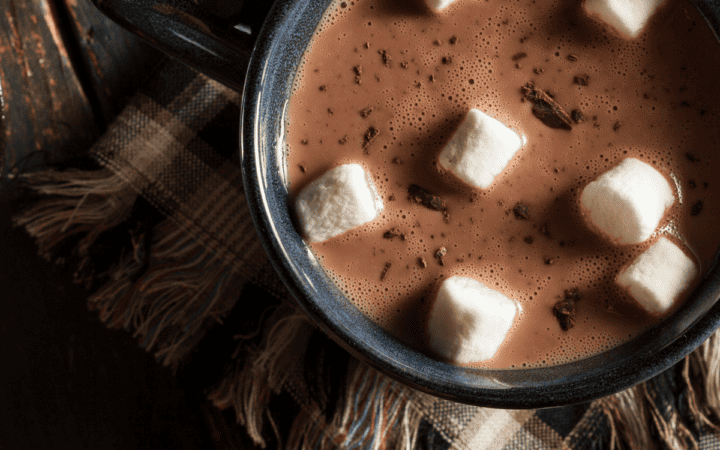
If you’re looking to elevate your winter beverage game, you’re in for a treat! Learn how to make the creamiest and most indulgent Crockpot Hot Chocolate. This cozy concoction is the perfect balance between rich chocolatey goodness and a velvety smooth texture. Plus, with the convenience of your crockpot, you can effortlessly create a delightful drink that will warm you up on chilly days.
Why Your Whole Family Will Love It
- Effortless . Ready in a few simple steps with the help of your trusty crockpot.
- Creamy . Achieve a luxurious, velvety texture that’s sure to satisfy your chocolate cravings.
- Customizable . Tweak the ingredients to your liking and add fun toppings for a personalized touch.
- Crowd-Pleaser . Perfect for entertaining guests during holiday gatherings or cozy nights in.
With this Crockpot Hot Chocolate recipe, you’ll be able to create a drink that goes beyond the ordinary. It’s a delightful way to treat yourself, your family, or your guests to a cup of warmth and happiness.
Is Hot Chocolate Better With Water Or Milk?
The choice between using water or milk for hot chocolate depends on personal preference and desired flavor and richness. Both options have their own set of characteristics:
Water
- Advantages Lighter Texture - Hot chocolate made with water tends to have a lighter and less creamy texture. Fewer Calories - Using water instead of milk reduces the overall calorie and fat content of the hot chocolate.
- Considerations: Thinner Consistency - Hot chocolate made with water can be thinner and less rich compared to those made with milk. Potential Lack of Creaminess - The absence of milk fat may result in a less creamy mouthfeel.
Milk
- Advantages Creaminess - Milk, especially whole milk, adds a creamy and rich texture to hot chocolate. Enhanced Flavor - The natural sugars and fats in milk can enhance the overall flavor profile of the hot chocolate. Nutritional Benefits - Milk provides additional nutrients such as calcium and protein.
- Considerations: Higher Caloric Content - Hot chocolate made with milk tends to be higher in calories and fat compared to water-based versions. Dairy Allergies or Preferences - If someone is lactose intolerant or has a dairy allergy, using milk may not be suitable.
What Is The Secret Ingredient In Gourmet Hot Chocolate?
The secret ingredient in gourmet hot chocolate often varies depending on the specific recipe and the flavor profile the chef or chocolatier aims to achieve. However, one common secret ingredient that is often used to elevate the richness and complexity of gourmet hot chocolate is dark chocolate.
While dark chocolate is a key secret ingredient, gourmet hot chocolate recipes might include other elements to enhance the overall experience. Some additional secret ingredients could include:
- Spices - Cinnamon, nutmeg, cardamom, or a pinch of cayenne pepper can add warmth and complexity to the hot chocolate, creating a gourmet twist.
- Vanilla Bean or Extract - A touch of high-quality vanilla extract or scraped vanilla bean seeds can enhance the flavor and aroma of the hot chocolate.
- Sea Salt - A small amount of sea salt can balance the sweetness and heighten the overall flavor profile by adding a touch of savory contrast.
- Espresso or Coffee - Adding a shot of espresso or a strong brewed coffee can deepen the chocolate flavor and provide a subtle hint of bitterness, creating a mocha-like experience.
- Liqueurs - For an adult twist, some gourmet hot chocolate recipes incorporate a splash of liqueurs such as Grand Marnier, Baileys, or Peppermint Schnapps.
- Whipped Cream with Flavorings - Top your gourmet hot chocolate with homemade whipped cream flavored with vanilla, cinnamon, or a liqueur for an extra layer of indulgence.
Ingredients You’ll Need
- Heavy Cream- Adds richness and a luxurious, creamy texture to the hot chocolate. It contributes to the velvety mouthfeel and enhances the overall indulgence of the drink.
- Whole Milk- Provides the base liquid for the hot chocolate. It adds a smooth consistency and a dairy richness to the beverage. Whole milk contributes to a creamier texture compared to lower-fat milk alternatives.
- Sweetened Condensed Milk- Serves as a sweetener and contributes to the overall sweetness of the hot chocolate. It also adds a creamy and thick consistency, enhancing the richness of the drink. Its sweetness eliminates the need for additional sugar.
- Semi-Sweet Chocolate Chips- The primary source of chocolate flavor in the hot chocolate. They melt during the cooking process, infusing the drink with rich, chocolaty goodness. The choice of semi-sweet chocolate provides a balance between sweetness and cocoa intensity.
- Unsweetened Cocoa Powder- Intensifies the chocolate flavor without adding extra sweetness. It contributes depth and a robust cocoa taste to the hot chocolate. Cocoa powder is a key ingredient for achieving a deep and satisfying chocolate profile.
- Vanilla Extract- Enhances the overall flavor profile of the hot chocolate, adding a subtle sweetness and aromatic depth. It complements the chocolate notes and provides a well-rounded taste to the beverage.
- Pinch of Salt- Enhances the flavors in the hot chocolate, helping to balance the sweetness and intensify the chocolate taste. It adds a subtle savory element that brings out the richness of the other ingredients.
- Optional Toppings- These serve as delightful additions to customize and garnish the hot chocolate. Whipped cream adds a light and airy texture, marshmallows contribute sweetness and a gooey consistency when melted, and chocolate shavings provide an extra layer of chocolatey goodness and visual appeal.
The combination of dairy, chocolate, sweeteners, and flavor enhancers results in a comforting and indulgent beverage perfect for warming up during chilly days. The optional toppings add a fun and personal touch to the final presentation of the hot chocolate.
How To Make Crockpot Hot Chocolate
- Combine Ingredients . In your crockpot, add the heavy cream, whole milk, sweetened condensed milk, semi-sweet chocolate chips, cocoa powder, vanilla extract, and a pinch of salt. Stir the ingredients until well combined.
- Set and Forget . Cover the crockpot and set it to low heat. Let the mixture simmer for 2-3 hours, stirring occasionally to ensure the chocolate chips are fully melted.
- Serve . Once everything is melted and well combined, give it a final stir and ladle the hot chocolate into mugs.
- Top and Enjoy . Add your favorite toppings, whether it’s a dollop of whipped cream, a handful of marshmallows, or a sprinkle of chocolate shavings.

Tips And Tricks
Making Crockpot Hot Chocolate is a breeze, but a few tips can elevate your experience:
- Use Quality Chocolate . The quality of your hot chocolate is heavily influenced by the chocolate you use. Opt for good-quality chocolate chips for a richer flavor.
- Stir Regularly . Stirring occasionally during the cooking process helps ensure that the chocolate chips melt evenly, creating a silky-smooth texture.
- Experiment with Toppings . Customize your hot chocolate with various toppings. Try crushed peppermint, a dash of cinnamon, or even a splash of flavored liqueur for a grown-up twist.
Variations
Take your Crockpot Hot Chocolate to the next level with these delicious variations:
- Salted Caramel Hot Chocolate - Drizzle salted caramel sauce into the crockpot and stir it in for a sweet and salty delight.
- Mint Chocolate Hot Chocolate - Add a drop or two of peppermint extract for a refreshing minty kick.
- Spiked Hot Chocolate - For a festive touch, add a splash of your favorite liqueur such as Baileys, Peppermint Schnapps, or Kahlúa.
What To Enjoy With Crockpot Hot Chocolate
rockpot Hot Chocolate pairs perfectly with a variety of treats:
- Chocolate-Dipped Marshmallows - A delightful and sweet companion to your hot chocolate.
- Assorted Cookies - From classic chocolate chip to delicate shortbread, cookies are a fantastic dipping option.
- Cinnamon Sticks - Stir your hot chocolate with a cinnamon stick for a hint of warmth and spice.
How Long Does It Last?
Crockpot Hot Chocolate can be stored in the refrigerator for up to 3-4 days. Reheat it on the stove or in the microwave, stirring well to restore its creamy consistency.
Can You Freeze It?
While it’s technically possible to freeze hot chocolate, it’s not recommended as the texture may change upon thawing. It’s best enjoyed fresh or refrigerated for a few days.
More Delicious Drinks
- Mango Lassi
- Instant Pot Iced Tea
- Pink Drink
- Horchata
- Keto Iced Caramel Macchiato
Crockpot Hot Chocolate | Slow Cooker Hot Chocolate Recipe
Ingredients
- ▢ 2 cups Heavy Cream
- ▢ 4 cups Whole Milk
- ▢ 14 oz Sweetened Condensed Milk
- ▢ 1 1/2 cups Semi Sweet Chocolate Chips
- ▢ 1/4 cup Unsweetened Cocoa Powder
- ▢ 1 tbsp Vanilla Extract
- ▢ 1/4 tsp Kosher Salt
Instructions
- Combine Ingredients . In your crockpot, add the heavy cream, whole milk, sweetened condensed milk, semi-sweet chocolate chips, cocoa powder, vanilla extract, and a pinch of salt. Stir the ingredients until well combined.
- Set and Forget . Cover the crockpot and set it to low heat. Let the mixture simmer for 2-3 hours, stirring occasionally to ensure the chocolate chips are fully melted.
- Serve . Once everything is melted and well combined, give it a final stir and ladle the hot chocolate into mugs.
- Top and Enjoy . Add your favorite toppings, whether it’s a dollop of whipped cream, a handful of marshmallows, or a sprinkle of chocolate shavings.
