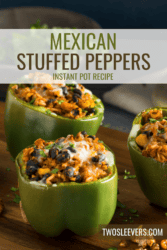
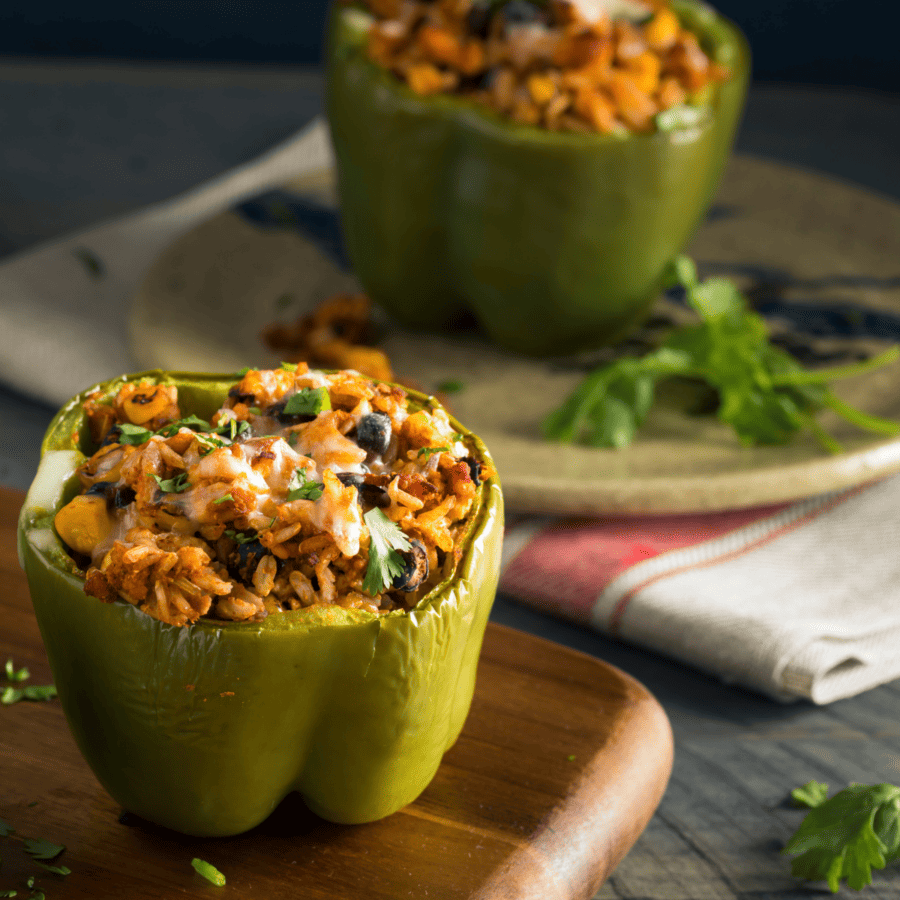
Bursting with vibrant colors and robust flavors, these Mexican Stuffed Peppers are a perfect combination of wholesome ingredients and traditional Mexican seasonings.

Why You’ll Love This Twist On Taco Tuesday
- Fast. Ready in under 30 minutes with the help of your Instant Pot .
- Easy. Stuff some bell peppers with some of your favorite taco fillings and spices and cook until the peppers are perfectly tender.
- Delicious. Perfectly spiced, flavorful, and wonderfully family-friendly.
- Versatile. Adjust the filling to fit your family’s personal preferences.
With their zesty blend of spices, wholesome ingredients, and ooey-gooey melted cheese, these peppers are sure to become a family favorite. So, the next time you’re craving some Mexican-inspired cuisine, don’t hesitate to whip up this easy and delectable dish.
Ingredients You’ll Need
- Bell Peppers - Choose a mix of colors for visual appeal.
- Cooked Rice - Grab white or brown based on your personal preferences.
- Ground Beef - You can use a meat substitute for a vegetarian version.
- Black Beans - Make sure they are drained and rinsed if using canned instead of precooked Instant Pot Black Beans .
- Corn Kernels - Use what you have in your kitchen–fresh, canned, or frozen.
- Diced Tomatoes
- Diced Onion
- Garlic
- Olive Oil
- Cumin
- Chili Powder
- Paprika
- Oregano
- Salt and Pepper
- Shredded Mexican Cheese Blend
- Cilantro
How To Make Mexican Stuffed Pepper
Prepare the Peppers. Start by washing the bell peppers and cutting off the tops. Carefully remove the seeds and membranes from inside the peppers, creating a hollow space for the filling. Rinse them again to ensure no seeds remain.
Sauté the Aromatics. Set your Instant Pot to “Sauté” mode and heat the olive oil. Add the diced onion and minced garlic, sautéing until they turn translucent and fragrant.
Brown the Meat. Add the ground beef or turkey to the Instant Pot, breaking it apart with a spatula. Cook until the meat is no longer pink and is nicely browned. If you’re using a meat substitute, follow the instructions on the package for cooking.
Season the Filling. Add the cooked rice, black beans, corn, diced tomatoes, ground cumin, chili powder, paprika, dried oregano, salt, and pepper to the Instant Pot. Stir everything together and let it cook.
Stuff the Peppers. Fill each hollowed-out bell pepper with the mixture from the Instant Pot. Press the filling gently to ensure it’s packed well.
Pressure Cook. Pour one cup of water into the Instant Pot. Place the trivet inside and carefully arrange the stuffed peppers on top. Close the lid, set the valve to “Sealing,” and select the “Pressure Cook” or “Manual” mode. Cook on high pressure for about 8 minutes.
Quick Release and Add Cheese. Once the cooking time is up, quickly release the pressure. Open the Instant Pot, and sprinkle the shredded Mexican cheese over the stuffed peppers. Close the lid and let the cheese melt.
Serve and Garnish. Remove the stuffed peppers from the Instant Pot. Garnish with chopped cilantro and serve!
Tips And Tricks For Mexican Stuffed Peppers
Making Mexican stuffed peppers in the Instant Pot can be a delightful experience, and with a few tips and tricks, you can ensure they turn out perfectly every time.
- Choose the Right Peppers - Opt for large, sturdy bell peppers with flat bottoms. This ensures they stand upright in the Instant Pot, preventing the filling from spilling out during cooking.
- Brown the Meat First - For better flavor and texture, brown the ground meat or meat substitute first using the “Sauté” mode. This adds depth to the overall dish and helps lock in the flavors.
- Make Extra - If you have extra filling, you can store it in an airtight container and use it for tacos, burritos, or as a base for another meal. This way, nothing goes to waste, and you get even more mileage out of your delicious creation.
Variations
Mexican stuffed peppers are incredibly versatile, allowing you to experiment with various flavors and ingredients. Here are some delicious variations to try:
- Vegetarian Black Bean and Rice Stuffed Peppers - Replace the meat with black beans and cooked rice. Enhance the flavors with sautéed onions, garlic, diced tomatoes, and a mix of Mexican spices. Top with melted cheese and garnish with fresh cilantro and sliced avocado.
- Beef Enchilada Stuffed Peppers - Create a fusion of flavors by preparing the filling with seasoned ground beef, cooked rice, black beans, diced green chilies, and enchilada sauce. Top with shredded cheese and drizzle extra enchilada sauce over the peppers before serving.
- Shrimp and Rice Stuffed Peppers - For a delightful seafood twist, use cooked and chopped shrimp as the protein. Mix them with cooked rice, diced tomatoes, sautéed onions, and bell peppers. Season with paprika, garlic powder, and a pinch of cayenne pepper for a kick.
What Do You Eat Stuffed Peppers With?
Stuffed peppers are a versatile and satisfying dish that can be enjoyed on their own or paired with various sides and accompaniments. Here are some delicious options to consider when serving Mexican stuffed peppers:
- Guacamole - Add a side of fresh guacamole for a creamy and flavorful addition that balances the heat from the peppers.
- Salsa - A side of salsa, whether it’s mild or spicy, enhances the overall taste and adds a tangy kick.
- Tortilla Chips - Crispy tortilla chips are a perfect accompaniment for scooping up any leftover filling or salsas.
- Mexican Street Corn - Also known as “Elote,” this grilled or roasted corn on the cob, coated with mayo, cheese, and spices, pairs wonderfully with stuffed peppers.
- Refried Beans - A side of refried beans brings a hearty and protein-rich element to the meal.
How Long Do They Last?
Properly stored, Mexican stuffed peppers can last in the refrigerator for 3 to 4 days. Make sure to store them in an airtight container to maintain their freshness.
Can You Freeze Them?
If you want to extend the shelf life of the stuffed peppers, consider freezing them. To do this, wrap each stuffed pepper individually in plastic wrap or aluminum foil to prevent freezer burn. Then, place them in an airtight container or freezer-safe bag.
Frozen stuffed peppers can typically be stored for up to 2 to 3 months.
More Mexican-Inspired Recipes
- Instant Pot Ground Beef Casserole
- Caldo de Res
- Keto Taco Seasoning
- Pulled Pork Carnitas
- Instant Pot Beef Barbacoa


Mexican Stuffed Peppers | Instant Pot Stuffed Bell Peppers Recipe
Ingredients
- ▢ 4 Bell Peppers
- ▢ 1 cups Cooked Rice
- ▢ 1 pound Ground Beef
- ▢ 1 cup Canned Black Beans , Drained and rinsed
- ▢ 1 cup Corn , Drained and rinsed
- ▢ 1 cup Diced Tomatoes
- ▢ 1/2 cup Onion , Diced
- ▢ 2 tbsp Minced Garlic
- ▢ 1 tbsp Olive Oil
- ▢ 1 tsp Ground Cumin
- ▢ 1 tsp Chili Powder
- ▢ 1/2 tsp Paprika
- ▢ 1/2 tsp Oregano
- ▢ 1 tsp Salt
- ▢ 1/2 Tsp Black Pepper
- ▢ 1 cup Mexican Blend Shredded Cheese
- ▢ 2 tbsp Cilantro
Instructions
- Prepare the Peppers. Start by washing the bell peppers and cutting off the tops. Carefully remove the seeds and membranes from inside the peppers, creating a hollow space for the filling. Rinse them again to ensure no seeds remain.
- Sauté the Aromatics. Set your Instant Pot to “Sauté” mode and heat the olive oil. Add the diced onion and minced garlic, sautéing until they turn translucent and fragrant.
- Brown the Meat. Add the ground beef or turkey to the Instant Pot, breaking it apart with a spatula. Cook until the meat is no longer pink and is nicely browned. If you’re using a meat substitute, follow the instructions on the package for cooking.
- Season the Filling. Add the cooked rice, black beans, corn, diced tomatoes, ground cumin, chili powder, paprika, dried oregano, salt, and pepper to the Instant Pot. Stir everything together and let it cook.
- Stuff the Peppers. Fill each hollowed-out bell pepper with the mixture from the Instant Pot. Press the filling gently to ensure it’s packed well.
- Pressure Cook. Pour one cup of water into the Instant Pot. Place the trivet inside and carefully arrange the stuffed peppers on top. Close the lid, set the valve to “Sealing,” and select the “Pressure Cook” or “Manual” mode. Cook on high pressure for about 8 minutes.
- Quick Release and Add Cheese. Once the cooking time is up, quickly release the pressure. Open the Instant Pot, and sprinkle the shredded Mexican cheese over the stuffed peppers. Close the lid and let the cheese melt.
- Serve and Garnish. Remove the stuffed peppers from the Instant Pot. Garnish with chopped cilantro and serve!
Get support & connect with our community on Facebook!
Nutrition
Don’t forget to check out my otherBest-selling Instant Pot Cookbooks!
Indian Instant Pot , Keto Instant Pot, Instant Pot Fast and Easy , Healthy Instant Pot & Vegetarian Instant Pot .


If you already signed up, you should have received an email with a password to give you unlimited access to our FREE Printable Library. The password is case sensitive. Enter it below and get printing!
Password:

Mexican Stuffed Peppers | Instant Pot Stuffed Bell Peppers Recipe
Ingredients
- 4 Bell Peppers
- 1 cups Cooked Rice
- 1 pound Ground Beef
- 1 cup Canned Black Beans Drained and rinsed
- 1 cup Corn Drained and rinsed
- 1 cup Diced Tomatoes
- 1/2 cup Onion Diced
- 2 tbsp Minced Garlic
- 1 tbsp Olive Oil
- 1 tsp Ground Cumin
- 1 tsp Chili Powder
- 1/2 tsp Paprika
- 1/2 tsp Oregano
- 1 tsp Salt
- 1/2 Tsp Black Pepper
- 1 cup Mexican Blend Shredded Cheese
- 2 tbsp Cilantro
Instructions
- Prepare the Peppers. Start by washing the bell peppers and cutting off the tops. Carefully remove the seeds and membranes from inside the peppers, creating a hollow space for the filling. Rinse them again to ensure no seeds remain.
- Sauté the Aromatics. Set your Instant Pot to “Sauté” mode and heat the olive oil. Add the diced onion and minced garlic, sautéing until they turn translucent and fragrant.
- Brown the Meat. Add the ground beef or turkey to the Instant Pot, breaking it apart with a spatula. Cook until the meat is no longer pink and is nicely browned. If you’re using a meat substitute, follow the instructions on the package for cooking.
- Season the Filling. Add the cooked rice, black beans, corn, diced tomatoes, ground cumin, chili powder, paprika, dried oregano, salt, and pepper to the Instant Pot. Stir everything together and let it cook.
- Stuff the Peppers. Fill each hollowed-out bell pepper with the mixture from the Instant Pot. Press the filling gently to ensure it’s packed well.
- Pressure Cook. Pour one cup of water into the Instant Pot. Place the trivet inside and carefully arrange the stuffed peppers on top. Close the lid, set the valve to “Sealing,” and select the “Pressure Cook” or “Manual” mode. Cook on high pressure for about 8 minutes.
- Quick Release and Add Cheese. Once the cooking time is up, quickly release the pressure. Open the Instant Pot, and sprinkle the shredded Mexican cheese over the stuffed peppers. Close the lid and let the cheese melt.
- Serve and Garnish. Remove the stuffed peppers from the Instant Pot. Garnish with chopped cilantro and serve!
Mexican Stuffed Peppers | Instant Pot Stuffed Bell Peppers Recipe https://twosleevers.com/mexican-stuffed-peppers/

With this scrumptious recipe for low carb strawberry brownies, you can indulge in the lusciousness of this classic treat without compromising your low-carb lifestyle. Bursting with juicy strawberries and rich chocolatey goodness, these guilt-free brownies are the perfect way to satisfy your sweet cravings.

Why You’ll Love This Low Carb Dessert
- Fast. Ready in under an hour for a quick solution when you’re craving something sweet.
- Easy. Mix together the brownie batter, bake, and spread on a delicious homemade low carb chocolate strawberry frosting to finish.
- Low Carb . Only 8 net carbs per serving!
- Gluten Free . Since this recipe doesn’t require any flour at all, it is a simple solution for a gluten-free dessert .
These delightful treats are rich, fudgy, and packed with the delightful sweetness of fresh strawberries. Best of all, they are low in carbs, making them the perfect guilt-free indulgence.
How Do You Keep Brownies Soft And Moist?
Keeping brownies soft and moist involves a few key techniques during the baking and storage process. Here are some tips to ensure your brownies stay deliciously tender and fudgy:
- Don’t Overbake : The most crucial factor in keeping brownies soft and moist is to avoid overbaking them. Brownies continue to cook slightly even after you take them out of the oven. Therefore, when a toothpick inserted into the center of the brownies comes out with a few moist crumbs clinging to it, it’s time to remove them from the oven. Overbaking can result in dry and crumbly brownies.
- Proper Mixing Technique : When combining the wet and dry ingredients, be careful not to overmix the batter. Overmixing can lead to a tougher texture. Mix until the ingredients are just combined, and no streaks of dry flour remain.
- Proper Storage : To keep brownies soft and moist after baking, store them properly. Allow the brownies to cool completely, then wrap them tightly in plastic wrap or aluminum foil to prevent them from drying out. Alternatively, store them in an airtight container.
Ingredients You’ll Need
Six ingredients are all you’ll need for this keto-friendly treat. Here are the items you’ll need to grab before you get started:
For The Brownies
- Sugar-Free Chocolate Chips
- Butter
- Eggs
- Truvia
- Vanilla Extract
For The Strawberry Chocolate Topping
- Strawberries
- Heavy Whipping Cream
- Butter
- Sugar-Free Chocolate Chips
How To Make Strawberry Brownies
Preparing these irresistible low carb brownies is so easy! All you need to do is prepare the brownie batter like usual, create a delicious low carb chocolate frosting, fold in the strawberries, and enjoy!
By following the steps below, you’ll have a dessert that turns out perfectly tasty every time.
Prepare The Brownies
- Melt the chocolate. In a microwave-safe bowl, melt butter and chocolate for about 1 minute. Remove and stir well.
- Mix the wet ingredients. In a separate bowl, add eggs, sweetener, and vanilla and blend until light and frothy.
- Create the brownie batter . Pour the melted butter and chocolate into the bowl of eggs, sweetener, and vanilla, and beat again until it is well incorporated.
- Bake the Strawberry Brownies . Pour the mixture into a cake pan and bake at 350F for 30-35 minutes until a knife inserted in the center emerges clean.
Top With Strawberry Chocolate Frosting
- Place the low carb chocolate chips in a bowl.
- Heat the heavy cream and butter in a microwave-safe bowl for 1 minute.
- Pour the heated cream onto the chocolate chips and allow it to begin melting the chocolate. Stir from time to time until the chocolate has melted and you have a smooth mixture.
- Allow the ganache to cool for 20-30 minutes and then whip the frosting until it is light and fluffy.
- Chop up the strawberries and carefully fold them into the frosting before spreading it on top of the cooled brownies.

Tips And Tricks
Making strawberry brownies can be a delightful and unique baking adventure. Here are some tips and tricks to ensure your strawberry brownies turn out perfect:
- Prevent Excess Moisture : Strawberries contain a lot of moisture, which can affect the texture of the brownies. To prevent excess moisture, dice the strawberries into small pieces and pat them dry with paper towels before adding them to the frosting.
- Adjust Sweetness : The sweetness of strawberries can vary, so adjust the amount of sweetener in the recipe to balance the flavors.
- Avoid Overbaking : Bake the brownies just until a toothpick inserted into the center comes out with a few moist crumbs. Overbaking can lead to dry and crumbly brownies.
Variations
Strawberry brownies offer a versatile canvas for experimenting with various flavors and ingredients. Here are some delicious variations to try:
- Strawberry Cheesecake Brownies - Swirl a layer of cream cheese filling into the brownie batter for a luscious strawberry cheesecake flavor.
- Nutty Strawberry Brownies - Fold chopped nuts, such as pecans or walnuts, into the brownie batter to add a crunchy texture and nutty flavor that pairs well with the strawberries.
- Raspberry Brownies - Substitute raspberries for strawberries to create raspberry brownies with a slightly tart and tangy flavor.
Do You Leave Brownies To Cool In The Tin?
Yes, it is recommended to leave brownies to cool in the tin for a short period before removing them. Allowing the brownies to cool in the tin helps them set properly and makes it easier to cut them into neat squares without falling apart.
Do You Cut Brownies Before Frosting?
If you’re using a soft and spreadable frosting, like the one used in this recipe, it’s often easier and neater to frost the entire pan of brownies before cutting them into individual servings. This way, you can achieve a smooth and even layer of frosting on top of the brownies.
What To Serve With Them
Serve these delightful low carb strawberry brownies with a dollop of whipped cream or a scoop of keto ice cream for an extra special treat.
Enjoy the joy of savoring a classic dessert while staying true to your low-carb lifestyle.
How Long Do They Last?
The shelf life of strawberry brownies depends on how they are stored and how many sweets lovers you have in your home!
Generally, homemade strawberry brownies can last for a few days to a week.
Can You Freeze Them?
Yes, you can freeze strawberry brownies to extend their shelf life and enjoy them at a later time. Freezing strawberry brownies is a great way to preserve their freshness and flavor, especially if you have a large batch.
After baking the strawberry brownies, allow them to cool completely at room temperature. Place the remaining batch of cooled strawberry brownies in an airtight container and put them in the freezer.
Properly frozen strawberry brownies can last for up to 2 to 3 months in the freezer.
More Of Our Best Brownie Recipes
- Lemon Brownies
- Peanut Butter Brownies
- S’mores Brownies
- Red Velvet Brownies
- Lunch Lady Brownies


Strawberry Brownies Recipe | Low Carb Brownies And Strawberries
Ingredients
For The Brownies
- ▢ 1/2 cup sugar free chocolate chips
- ▢ 1/2 cup butter
- ▢ 3 eggs
- ▢ 1/4 cup truvia
- ▢ 1 tsp vanilla
For The Frosting
- ▢ 3/4 cup heavy cream
- ▢ 1 tbsp butter
- ▢ 1 cup sugar free chocolate chips
- ▢ 1 cup Fresh Strawberries
Instructions
For The Brownies
- Melt the chocolate. In a microwave-safe bowl, melt butter and chocolate for about 1 minute. Remove and stir well.
- Mix the wet ingredients. In a separate bowl, add eggs, sweetener, and vanilla and blend until light and frothy.
- Create the brownie batter . Pour the melted butter and chocolate into the bowl of eggs, sweetener, and vanilla, and beat again until it is well incorporated.
- Bake the Strawberry Brownies . Pour the mixture into a cake pan and bake at 350F for 30-35 minutes until a knife inserted in the center emerges clean.
For The Frosting
- Place the low carb chocolate chips in a bowl.
- Heat the heavy cream and butter in a microwave-safe bowl for 1 minute.
- Pour the heated cream onto the chocolate chips and allow it to begin melting the chocolate. Stir from time to time until the chocolate has melted and you have a smooth mixture.
- Allow the ganache to cool for 20-30 minutes and then whip the frosting until it is light and fluffy.
- Chop up the strawberries and carefully fold them into the frosting before spreading it on top of the cooled brownies.
Get support & connect with our community on Facebook!
Nutrition
Don’t forget to check out my other Ketocookbooks.
Keto Instant Pot, Keto Fat Bombs, Sweets, & Treats , and Easy keto in 30 minutes.

