
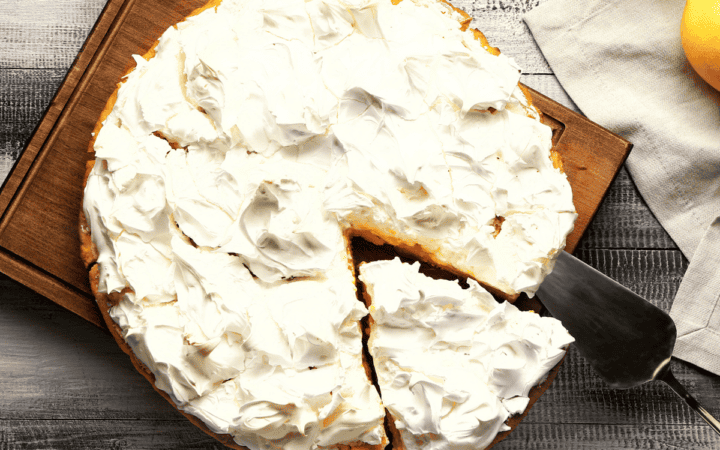
Refresh your dessert repertoire with this luscious Lemonade Pie! This delightful recipe combines simple ingredients into a creamy, tangy, and irresistibly refreshing dessert. Perfect for warm weather, this pie will be a hit at any gathering.

Why You’ll Love This Delicious Dessert
- Effortless. Minimal preparation for a delicious dessert.
- Incredibly Tasty. The tart lemonade flavor combined with the creamy filling is a match made in dessert heaven.
With this super simple recipe, you’ll achieve a smooth, luscious pie without a ton of ingredients or tedious steps, making it a quick and easy dessert option for last minute guests.
What Does Lemonade Pie Taste Like?
Lemonade pie tastes like a refreshing blend of sweet and tart flavors.
The primary flavor comes from the lemonade concentrate, which provides a bright and tangy citrus taste that is perfectly balanced by the sweetness of the condensed milk and the light, airy texture of the whipped topping.
The prebaked crust adds a slightly sweet, crunchy base that complements the creamy filling.
Ingredients You’ll Need
For The Crust
- Refrigerated Pie Crust
For The Filling
- Sweetened Condensed Milk - Adds creaminess and sweetness to the filling.
- Frozen Lemonade Concentrate - The star ingredient, providing a burst of tart lemonade flavor.
- Whipped Topping - Makes the filling light and fluffy
How To Make Lemonade Pie
Create The Crust
- Preheat and Press. Preheat your oven to 450F. Gently unroll the crust and press it into a 9-inch pie plate. Tuck or trim the edges and crimp as desired.
- Dock the Crust . Use a fork to prick the bottom and sides of the crust, this helps prevent bubbling.
- Bake . Bake for 12–14 minutes, or until the edges just start to brown.
- Cool . Let the crust cool completely before filling
Make The Filling
- Make the Filling. In a large mixing bowl, combine the sweetened condensed milk and frozen lemonade concentrate. Stir until fully combined and smooth. Fold in the whipped topping gently until the mixture is light and fluffy. If desired, add a few drops of yellow food coloring to achieve a vibrant color.
- Fill the Pie. Pour the lemonade filling into the prepared crust, spreading it evenly. Smooth the top with a spatula.
- Chill. Refrigerate the pie for at least 4 hours, or freeze for 2 hours. For best results, chill overnight.
- Serve. Once set, slice and serve your no bake lemonade pie. Garnish with additional whipped topping, lemon slices, or mint leaves if desired.

Tips And Tricks
Making a delicious lemonade pie involves more than just the right ingredients; it’s about technique and a few kitchen tricks to ensure it turns out perfect. Here’s how to perfect it:
- Use Cold Ingredients. Ensure your whipped topping and lemonade concentrate are cold. This helps the filling set properly and maintain its structure.
- Firmly Press the Crust. Press the pie crust firmly into the pie dish to create a solid base that holds together well when sliced. Don’t forget to prick it with a fork so it doesn’t bubble up when baked.
- Chill Completely. Allowing the pie to chill for at least 4 hours ensures the filling sets properly and achieves the best texture.
Variations
Lemonade pie is a versatile dessert that can be adapted to suit various tastes and dietary needs. Here are some creative variations on the classic:
- Strawberry - Mix in a few tablespoons of strawberry puree for a fruity twist.
- Limeade Pie - Substitute frozen limeade concentrate for the lemonade for a zesty lime flavor.
- Coconut - Add shredded coconut to the crust for a tropical flavor.
What To Enjoy With Lemonade Pie
Lemonade pie pairs wonderfully with various accompaniments. Here are some great options:
- Fresh Berries - Strawberries, raspberries, or blueberries add a fresh, fruity contrast.
- Vanilla Ice Cream - A scoop of vanilla ice cream complements the tartness of the pie.
- Mint Leaves - Garnish with fresh mint leaves for a pop of color and refreshing flavor.
How Long Does It Last?
Store any leftovers in an airtight container in the refrigerator for up to 3 days. The pie can be enjoyed chilled straight from the fridge.
Can You Freeze It?
Absolutely! You can freeze the lemonade pie. Cover it tightly with plastic wrap and aluminum foil. It will keep in the freezer for up to 1 month. To serve, thaw in the refrigerator for a few hours.
More Lemon Flavored Recipes
- Keto Lemon Pound Cake
- Lemon Pepper Chicken
- Lemon Tarts
- Keto Lemon Mousse
- Lemon Pepper Wings
Watch The Video

Lemonade Pie Recipe | Sweet And Tangy Lemonade Pie
Ingredients
- ▢ 14 oz Sweetened Condensed Milk
- ▢ 12 oz Frozen Lemonade Concentrate
- ▢ 8 oz Whipped Topping
- ▢ 1 Refrigerated Pie Crust
Instructions
For The Crust
- Preheat and Press. Preheat your oven to 450F. Gently unroll the crust and press it into a 9-inch pie plate. Tuck or trim the edges and crimp as desired.
- Dock the Crust . Use a fork to prick the bottom and sides of the crust, this helps prevent bubbling.
- Bake . Bake for 12–14 minutes, or until the edges just start to brown.
- Cool . Let the crust cool completely before filling
For The Filling
- Make the Filling. In a large mixing bowl, combine the sweetened condensed milk and frozen lemonade concentrate. Stir until fully combined and smooth. Fold in the whipped topping gently until the mixture is light and fluffy. If desired, add a few drops of yellow food coloring to achieve a vibrant color.
- Fill the Pie. Pour the lemonade filling into the prepared crust, spreading it evenly. Smooth the top with a spatula.
- Chill. Refrigerate the pie for at least 4 hours, or until set. For best results, chill overnight.
- Serve. Once set, slice and serve your no bake lemonade pie. Garnish with additional whipped topping, lemon slices, or mint leaves if desired.
Get support & connect with our community on Facebook!
Nutrition
Refresh your dessert repertoire with this luscious Lemonade Pie! This delightful recipe combines simple ingredients into a creamy, tangy, and irresistibly refreshing dessert. Perfect for warm weather, this pie will be a hit at any gathering.
Why You’ll Love This Delicious Dessert
- Effortless. Minimal preparation for a delicious dessert.
- Incredibly Tasty. The tart lemonade flavor combined with the creamy filling is a match made in dessert heaven.
With this super simple recipe, you’ll achieve a smooth, luscious pie without a ton of ingredients or tedious steps, making it a quick and easy dessert option for last minute guests.
What Does Lemonade Pie Taste Like?
Lemonade pie tastes like a refreshing blend of sweet and tart flavors.
The primary flavor comes from the lemonade concentrate, which provides a bright and tangy citrus taste that is perfectly balanced by the sweetness of the condensed milk and the light, airy texture of the whipped topping.
The prebaked crust adds a slightly sweet, crunchy base that complements the creamy filling.
Ingredients You’ll Need
For The Crust
- Refrigerated Pie Crust
For The Filling
- Sweetened Condensed Milk - Adds creaminess and sweetness to the filling.
- Frozen Lemonade Concentrate - The star ingredient, providing a burst of tart lemonade flavor.
- Whipped Topping - Makes the filling light and fluffy
How To Make Lemonade Pie
Create The Crust
- Preheat and Press. Preheat your oven to 450F. Gently unroll the crust and press it into a 9-inch pie plate. Tuck or trim the edges and crimp as desired.
- Dock the Crust . Use a fork to prick the bottom and sides of the crust, this helps prevent bubbling.
- Bake . Bake for 12–14 minutes, or until the edges just start to brown.
- Cool . Let the crust cool completely before filling
Make The Filling
- Make the Filling. In a large mixing bowl, combine the sweetened condensed milk and frozen lemonade concentrate. Stir until fully combined and smooth. Fold in the whipped topping gently until the mixture is light and fluffy. If desired, add a few drops of yellow food coloring to achieve a vibrant color.
- Fill the Pie. Pour the lemonade filling into the prepared crust, spreading it evenly. Smooth the top with a spatula.
- Chill. Refrigerate the pie for at least 4 hours, or freeze for 2 hours. For best results, chill overnight.
- Serve. Once set, slice and serve your no bake lemonade pie. Garnish with additional whipped topping, lemon slices, or mint leaves if desired.
Tips And Tricks
Making a delicious lemonade pie involves more than just the right ingredients; it’s about technique and a few kitchen tricks to ensure it turns out perfect. Here’s how to perfect it:
- Use Cold Ingredients. Ensure your whipped topping and lemonade concentrate are cold. This helps the filling set properly and maintain its structure.
- Firmly Press the Crust. Press the pie crust firmly into the pie dish to create a solid base that holds together well when sliced. Don’t forget to prick it with a fork so it doesn’t bubble up when baked.
- Chill Completely. Allowing the pie to chill for at least 4 hours ensures the filling sets properly and achieves the best texture.
Variations
Lemonade pie is a versatile dessert that can be adapted to suit various tastes and dietary needs. Here are some creative variations on the classic:
- Strawberry - Mix in a few tablespoons of strawberry puree for a fruity twist.
- Limeade Pie - Substitute frozen limeade concentrate for the lemonade for a zesty lime flavor.
- Coconut - Add shredded coconut to the crust for a tropical flavor.
What To Enjoy With Lemonade Pie
Lemonade pie pairs wonderfully with various accompaniments. Here are some great options:
- Fresh Berries - Strawberries, raspberries, or blueberries add a fresh, fruity contrast.
- Vanilla Ice Cream - A scoop of vanilla ice cream complements the tartness of the pie.
- Mint Leaves - Garnish with fresh mint leaves for a pop of color and refreshing flavor.
How Long Does It Last?
Store any leftovers in an airtight container in the refrigerator for up to 3 days. The pie can be enjoyed chilled straight from the fridge.
Can You Freeze It?
Absolutely! You can freeze the lemonade pie. Cover it tightly with plastic wrap and aluminum foil. It will keep in the freezer for up to 1 month. To serve, thaw in the refrigerator for a few hours.
More Lemon Flavored Recipes
- Keto Lemon Pound Cake
- Lemon Pepper Chicken
- Lemon Tarts
- Keto Lemon Mousse
- Lemon Pepper Wings
Watch The Video
Lemonade Pie Recipe | Sweet And Tangy Lemonade Pie
Ingredients
- ▢ 14 oz Sweetened Condensed Milk
- ▢ 12 oz Frozen Lemonade Concentrate
- ▢ 8 oz Whipped Topping
- ▢ 1 Refrigerated Pie Crust
Instructions
For The Crust
- Preheat and Press. Preheat your oven to 450F. Gently unroll the crust and press it into a 9-inch pie plate. Tuck or trim the edges and crimp as desired.
- Dock the Crust . Use a fork to prick the bottom and sides of the crust, this helps prevent bubbling.
- Bake . Bake for 12–14 minutes, or until the edges just start to brown.
- Cool . Let the crust cool completely before filling
For The Filling
- Make the Filling. In a large mixing bowl, combine the sweetened condensed milk and frozen lemonade concentrate. Stir until fully combined and smooth. Fold in the whipped topping gently until the mixture is light and fluffy. If desired, add a few drops of yellow food coloring to achieve a vibrant color.
- Fill the Pie. Pour the lemonade filling into the prepared crust, spreading it evenly. Smooth the top with a spatula.
- Chill. Refrigerate the pie for at least 4 hours, or until set. For best results, chill overnight.
- Serve. Once set, slice and serve your no bake lemonade pie. Garnish with additional whipped topping, lemon slices, or mint leaves if desired.
Get support & connect with our community on Facebook!
Nutrition

If you already signed up, you should have received an email with a password to give you unlimited access to our FREE Printable Library. The password is case sensitive. Enter it below and get printing!
Password:

Lemonade Pie Recipe | Sweet And Tangy Lemonade Pie
Ingredients
- 14 oz Sweetened Condensed Milk
- 12 oz Frozen Lemonade Concentrate
- 8 oz Whipped Topping
- 1 Refrigerated Pie Crust
Instructions
For The Crust
- Preheat and Press. Preheat your oven to 450F. Gently unroll the crust and press it into a 9-inch pie plate. Tuck or trim the edges and crimp as desired.
- Dock the Crust . Use a fork to prick the bottom and sides of the crust, this helps prevent bubbling.
- Bake . Bake for 12–14 minutes, or until the edges just start to brown.
- Cool . Let the crust cool completely before filling
For The Filling
- Make the Filling. In a large mixing bowl, combine the sweetened condensed milk and frozen lemonade concentrate. Stir until fully combined and smooth. Fold in the whipped topping gently until the mixture is light and fluffy. If desired, add a few drops of yellow food coloring to achieve a vibrant color.
- Fill the Pie. Pour the lemonade filling into the prepared crust, spreading it evenly. Smooth the top with a spatula.
- Chill. Refrigerate the pie for at least 4 hours, or until set. For best results, chill overnight.
- Serve. Once set, slice and serve your no bake lemonade pie. Garnish with additional whipped topping, lemon slices, or mint leaves if desired.
Lemonade Pie Recipe | Sweet And Tangy Lemonade Pie https://twosleevers.com/lemonade-pie-recipe/

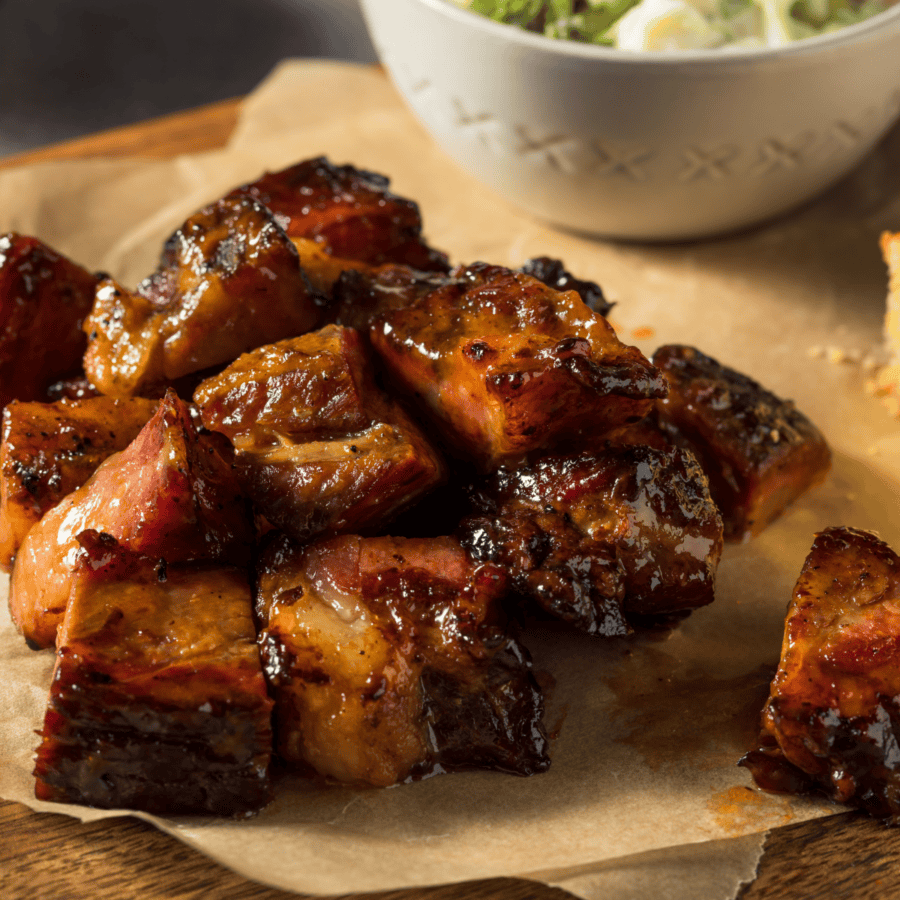
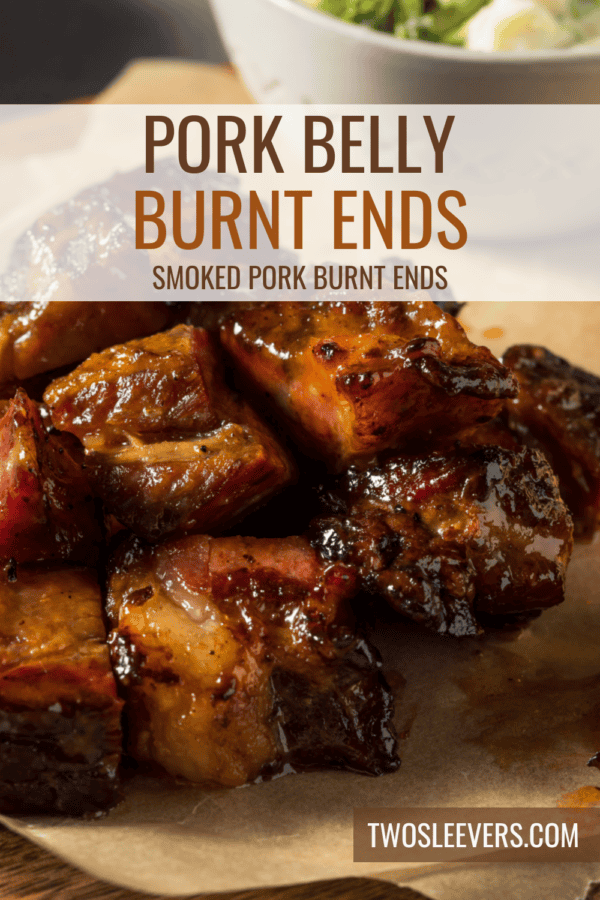
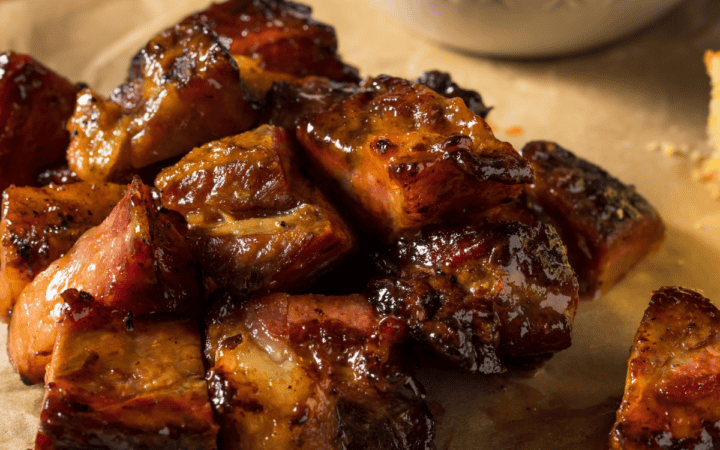
If you’re a barbecue enthusiast or just someone who loves indulging in delicious, smoky flavors, get ready to elevate your grilling game with our irresistible Pork Belly Burnt Ends recipe.
Why You’ll Love This Spectacular Smoked Recipe
- Savory Delight . Our Pork Belly Burnt Ends are packed with mouthwatering flavors that will tantalize your taste buds.
- Easy Preparation . With simple ingredients and easy-to-follow steps, you’ll be amazed at how effortless it is to create these culinary masterpieces.
- Perfect for BBQs . Whether you’re hosting a backyard barbecue or simply craving some delicious comfort food, these Pork Belly Burnt Ends are guaranteed to be a hit with family and friends.
- Versatile Dish . Serve them as appetizers, main dishes, or even as a tasty topping for salads and sandwiches.
Bursting with savory goodness and caramelized to perfection, these bite-sized delights will have you coming back for more.
Do You Cut The Skin Off Pork Belly For Burnt Ends?
Yes, when making pork belly burnt ends, it’s typically recommended to trim off the skin or rind from the pork belly before cubing it. The skin can become tough and chewy during the smoking process, detracting from the tender and succulent texture of the burnt ends.
By removing the skin, you allow the seasonings and smoke to penetrate the meat more effectively, resulting in a more flavorful and enjoyable end product.
How Long Does It Take To Make Pork Belly Burnt Ends?
The time it takes to make pork belly burnt ends can vary depending on several factors, including the size and thickness of the pork belly cubes, the cooking temperature, and the desired level of doneness.
In total, it can take anywhere from 3.5 to 5 hours to make pork belly burnt ends.
Ingredients You’ll Need
- Pork Belly - Opt for high-quality pork belly with a good balance of meat and fat for the best results.
- Dry Rub - Create a flavorful dry rub using a combination of spices like paprika, garlic powder, onion powder, brown sugar, salt, and black pepper.
- Barbecue Sauce - Choose your favorite barbecue sauce to coat the burnt ends and add a sweet and tangy flavor.
- Butter - Use unsalted butter to add richness and depth to the glaze.
How To Make Pork Belly Burnt Ends
- Prepare the Pork Belly . Trim any excess fat and remove the skin if it’s still attached. Cut the pork belly into 1-inch cubes and pat them dry with paper towels.
- Season the Pork Belly . Place the pork belly cubes in a large mixing bowl. Season them generously with BBQ rub. Let them sit at room temperature for 30 minutes to allow the flavors to penetrate.
- Preheat the Smoker . Preheat your smoker to 250°F. Add your favorite wood chips to the smoker for flavor. Hickory, apple, or cherry wood works well with pork.
- Smoke the Pork Belly . Once the smoker is ready, arrange the seasoned pork belly cubes on the smoker rack, leaving some space between them for air circulation. Smoke the pork belly cubes for 2.5 to 3 hours, or until they develop a mahogany color and an internal temperature of 160°F.
- Make the Glaze . While the pork belly is smoking, prepare the glaze. In a small saucepan over medium heat, melt the butter. Add the BBQ sauce, honey, brown sugar, apple cider vinegar, Worcestershire sauce, salt, and black pepper. Stir well. Let the glaze simmer for 5-7 minutes, then remove it from the heat.
- Braise the Pork Belly . Once the pork belly cubes are smoked, transfer them to a baking dish. Pour the prepared glaze over the pork belly cubes. Cover the pan with aluminum foil.
- Continue Cooking . Return the pan to the smoker and continue cooking the pork belly cubes for an additional 1 to 1.5 hours. Remove the foil during the last 30 minutes of cooking to allow the glaze to thicken and caramelize further.
- Rest and Serve . Once they are done, remove them from the smoker and let them rest for 10-15 minutes. Serve the burnt ends hot.
Tips And Tricks
Here are some tips and tricks to help you make delicious pork belly burnt ends:
- Choose the Right Cut . Start with a high-quality piece of pork belly with a good balance of meat and fat. Look for a belly slab that is well-marbled for the best flavor and texture.
- Trimming . Trim the excess fat from the pork belly to ensure even cooking and better flavor absorption from the seasoning and smoke.
- Uniform Cubes . Cut the trimmed pork belly into uniform cubes to ensure even cooking. Aim for cubes that are around 1 to 1.5 inches in size for the perfect bite.
Variations
Here are some delicious variations for pork belly burnt ends:
- Asian-Inspired Glaze - Brush it with a sweet and tangy glaze made with ingredients like soy sauce, honey, garlic, ginger, and chili paste.
- Spicy Rub - For a kick of heat, coat the pork belly cubes with a spicy rub made with ingredients like paprika, cayenne pepper, chili powder, and brown sugar.
- Maple Bourbon Sauce - Drizzle the cooked pork belly with a decadent maple bourbon sauce made with maple syrup, bourbon whiskey, brown sugar, and butter.
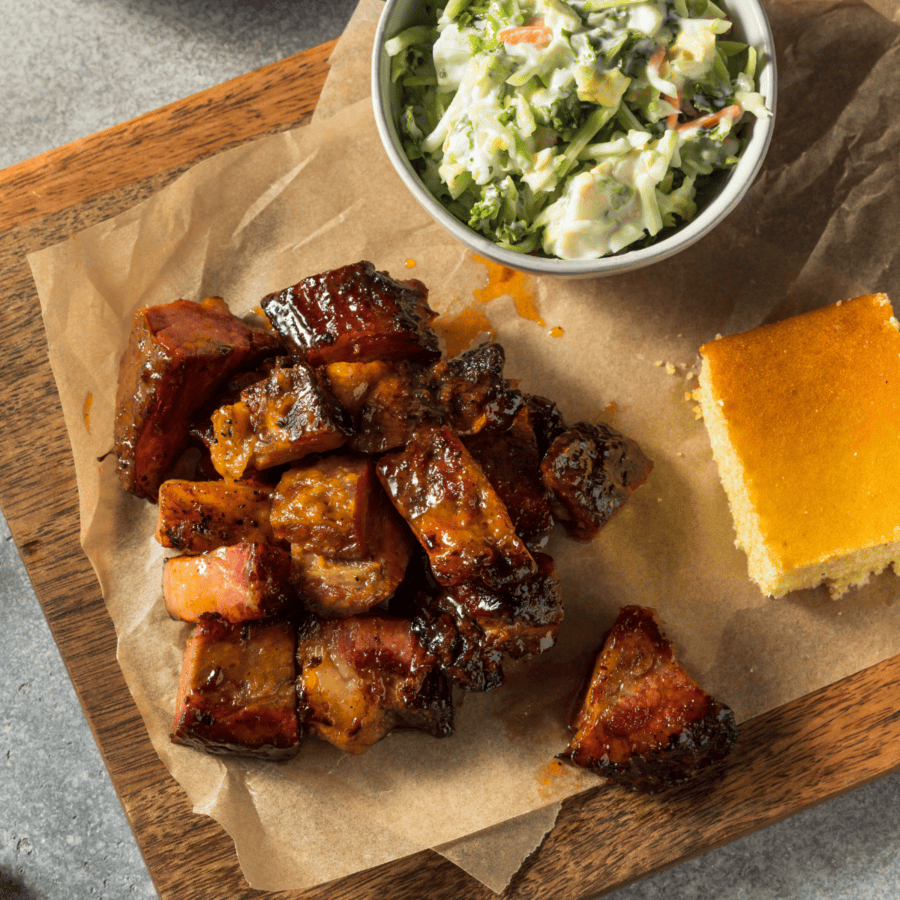
What To Eat With Pork Belly Burnt Ends
Pork belly burnt ends are a rich and flavorful dish that pairs well with a variety of complementary sides. Here are some delicious options to serve alongside them:
- Cornbread - The slightly sweet and crumbly texture of cornbread is the perfect accompaniment to the rich and savory flavors of the burnt ends.
- Coleslaw - Creamy coleslaw provides a refreshing contrast to the richness of the pork. Its tangy flavor and crunchy texture balance out the dish beautifully.
- Macaroni and Cheese - Creamy macaroni and cheese is a classic comfort food that complements the smoky and savory flavors.
How Long Do They Last?
Pork Belly Burnt Ends can be stored in an airtight container in the refrigerator for up to 3-4 days. Simply reheat them in the oven or microwave before serving.
Can You Freeze Them?
Yes, you can! Place the labeled container or bag in the freezer and store the pork belly burnt ends for up to 2 to 3 months for the best quality. Properly frozen burnt ends can last longer but may start to lose their flavor and texture over time.
When ready to enjoy them, transfer them to the refrigerator to thaw overnight. Alternatively, you can reheat them directly from frozen in the oven or microwave, but be sure to adjust the cooking time accordingly to prevent overcooking.
More Perfect Pork Recipes
- Pork Katsu
- Instant Pot Pork Stew
- Pork Bulgogi
- Pulled Pork Nachos
- Sweet and Sour Pork
Pork Belly Burnt Ends | Smoked Pork Belly
Ingredients
- ▢ 3 pounds Pork Belly
- ▢ 2 tbsp Paprika
- ▢ 1 tbsp Garlic Powder
- ▢ 1 tbsp Onion Powder
- ▢ 1/4 cup Brown Sugar
- ▢ 1 tbsp Kosher Salt
- ▢ 1 tsp Black Pepper
- ▢ 1 cup BBQ Sauce
- ▢ 3 tbsp Unsalted Butter
- ▢ 2 tbsp Honey
- ▢ 2 tbsp Apple Cider Vinegar
- ▢ 1 tbsp Worcestershire Sauce
Instructions
- Prepare the Pork Belly . Trim any excess fat and remove the skin if it’s still attached. Cut the pork belly into 1-inch cubes and pat them dry with paper towels.
- Season the Pork Belly . Place the pork belly cubes in a large mixing bowl. Season them generously with BBQ rub. Let them sit at room temperature for 30 minutes to allow the flavors to penetrate.
- Preheat the Smoker . Preheat your smoker to 250°F. Add your favorite wood chips to the smoker for flavor. Hickory, apple, or cherry wood works well with pork.
- Smoke the Pork Belly . Once the smoker is ready, arrange the seasoned pork belly cubes on the smoker rack, leaving some space between them for air circulation. Smoke the pork belly cubes for 2.5 to 3 hours, or until they develop a mahogany color and an internal temperature of 160°F.
- Make the Glaze . While the pork belly is smoking, prepare the glaze. In a small saucepan over medium heat, melt the butter. Add the BBQ sauce, honey, brown sugar, apple cider vinegar, Worcestershire sauce, salt, and black pepper. Stir well. Let the glaze simmer for 5-7 minutes, then remove it from the heat.
- Braise the Pork Belly . Once the pork belly cubes are smoked, transfer them to a baking dish. Pour the prepared glaze over the pork belly cubes. Cover the pan with aluminum foil.
- Continue Cooking . Return the pan to the smoker and continue cooking the pork belly cubes for an additional 1 to 1.5 hours. Remove the foil during the last 30 minutes of cooking to allow the glaze to thicken and caramelize further.
- Rest and Serve . Once they are done, remove them from the smoker and let them rest for 10-15 minutes. Serve the burnt ends hot.
