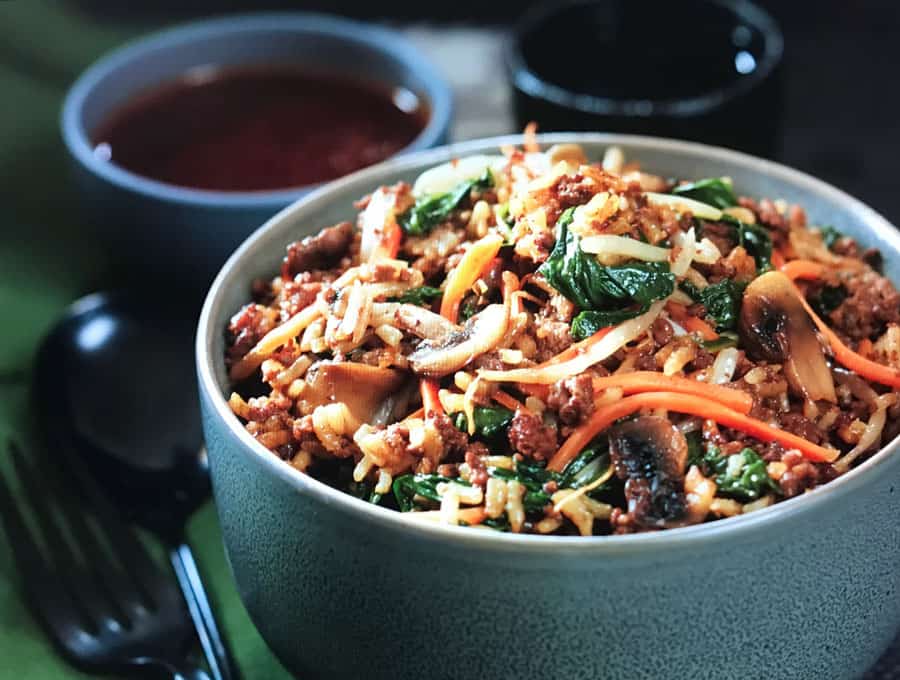
Korean Beef Bowl is a bibimbap-style Instant Pot rice bowl made with jasmine rice, lean ground beef, mushrooms, spinach, bean sprouts, shredded carrots, and a gochujang soy sesame sauce. It’s quick and works well for a busy weeknight dinner when you want bold Korean flavors in a single bowl. Unlike traditional bibimbap recipes that cook each component separately, this version uses the Instant Pot to cook the rice and beef while steaming the vegetables in a foil packet at the same time.
What Makes This One Of Our Best Beef Recipes
- Yummy. This comforting Korean beef bowl encompasses so much deliciousness in a single bite. Perfectly cooked jasmine rice , tasty ground beef , wonderfully steamed and marinated veggies and delicious gochujang sauce all in one bowl.
- One-pot. No need to worry about having to wash a sink full of dishes after making this Bibimbap recipe. This Instant Pot recipe uses some aluminum foil and a steamer rack , you can cook all of the ingredients at once .
- Customizable. Don’t want as much meat? Simply reduce the ground beef to half a pound. Want to add a fried egg into the mix? Have at it! Prefer vegetarian ? Check out the notes in the recipe card for how to make this Korean Beef Bowl with veggies like mushrooms instead.
- Efficient. This is NOT how you would traditionally make a proper Bibimbap bowl. You’d make almost every item independently, and then mix it. But as you know, I’m all about #ruthlessefficiency. So I had to make this a one-pot ground beef and rice dinner
Ingredients You’ll Need
For The Sauce
- 2 tablespoons Gochujang - A Korean fermented chili paste that brings heat, depth, and umami to the sauce.
- 1 tablespoon Soy Sauce - Adds a salty, savory backbone.
- 1 tablespoon Sesame Oil - Provides nutty richness, tying together the bold flavors with an authentic Korean aroma.
- 1 tablespoon Sugar - Balances the spice and saltiness with a touch of sweetness, creating a well-rounded sauce.
- 1 tablespoon White Vinegar - Introduces acidity to brighten the sauce and prevent it from tasting too heavy.
- 1 teaspoon Minced Garlic - Adds savory depth and aromatic punch that complements the gochujang.
- 2 tablespoons Water - Helps thin the sauce so it coats the beef evenly.
Main Dish
- 1/2 pound Lean Ground Beef - The protein centerpiece of the bowl.
- 1 tablespoon Soy Sauce - Enhances the beef with extra umami and saltiness.
- 1 tablespoon Sesame Oil - Infuses the beef with nutty aroma and helps prevent dryness.
- 2 teaspoons Minced Garlic - Provides a savory, aromatic layer to the beef’s flavor.
- 1 teaspoon Kosher Salt - Ensures the beef is well-seasoned, balancing sweetness from the sauce.
- 1 cup Jasmine Rice - A fragrant, fluffy rice that serves as the hearty base for the bowl.
- 1.25 cups Water - Used to cook the rice and to sauté or steam vegetables.
- 1 cup Mushrooms - Add an earthy, umami-rich element that complements the beef and soaks up the sauce.
Veggie Packet
- 1 cup Bean Sprouts - Provide a crunchy, fresh texture that balances the richness of the beef.
- 3 cups Spinach Leaves - Wilt into tender greens, adding nutrients and balancing the dish.
- 2 cups Shredded Carrots - Contribute sweetness, color, and crunch.
- 1 tablespoon Sesame Oil - Adds a nutty coating to the vegetables.
- 1/2 teaspoon Salt - Seasons the vegetables so they don’t taste flat.
How To Make This Instant Pot Korean Beef Bowl
- Sauce. In a medium mixing bowl , whisk together the gochujang, soy sauce, sesame oil, sugar, vinegar, garlic, and water. Set the bowl aside.
- Vegetables. In a large mixing bowl , stir together spinach leaves, sesame oil and salt. Use your hands to roughly macerate the spinach. Toss in bean sprouts and carrots and mix gently. Place vegetables on a large sheet of aluminum foil, and fold up the foil to enclose the vegetables. Close up the foil packet and set aside.
- Beef. Select SAUTÉ/Normal on the Instant Pot . When the pot is hot, add the ground beef and break up as much as you can. Add ¼ cup of water and deglaze thoroughly allowing the water to evaporate.
- Rice. Add in rice, soy sauce, sesame oil, garlic, and salt and stir well. Add mushrooms and water. Press CANCEL to turn the pot off.
- Steamer rack. Place a tall steamer rack in the pot on top of the rice. Place the foil packet on the rack.
- Pressure cook. Secure the lid on the pot. Close the pressure-release valve. Select MANUAL/PRESSURE COOK and set the pot at HIGH pressure for 4 minutes.
- Pressure release. When cook time is complete, let the pot release pressure naturally for 10 minutes. At the end of the cooking time, use a quick release to depressurize.
- Stir. Carefully remove and unpack the foil packet. Stir the contents of the packet into the rice.
- Serve. Serve the rice with the gochujang sauce.
What Is The Difference Between Bulgogi And Bibimbap?
Bulgogi , which literally translates to “fire meat”, is a dish made up of grilled slices of beef or pork.
Bibimbap, which translates to “mixed rice”, is a Korean rice dish consisting of various ingredients, namely rice, sauteed vegetables gochujang, soy sauce, beef and/or an egg.
How Do You Eat Bibimbap?
There are a few things you’ll want to do to ensure that you get the best Korean Beef Bowl experience:
- Use a spoon. Though chopsticks are often used to enjoy Korean food, it is actually more common to use a spoon when enjoying a rice dish such as this.
- Don’t skip out on the sauce. Drizzling a healthy portion of this delicious gochujang-based sauce really makes all the difference in how tasty this dish is.
- Mix it up. Don’t just layer the ingredients and then eat them layer by layer! Use your spoon to mix all of the deliciousness together into one cohesive and delectable bite.
- Add an egg. Top your deliciously easy Korean Beef Bowl with a perfectly fried egg. This simple addition really takes the dish to a whole new level.
Tips And Tricks
Instant Pot Korean Beef Bowls are quick, flavorful, and perfect for busy weeknights. With just a few smart techniques, you can elevate this simple dish into a restaurant-quality meal.
- Use Lean Ground Beef . Lean beef (around 90/10) absorbs the flavors of the sauce without releasing too much grease. If you use fattier beef, be sure to drain excess fat before adding the sauce.
- Cut Vegetables Evenly . For the foil packet veggies, slice mushrooms, carrots, and spinach in even portions so they steam at the same rate.
- Finish with Fresh Garnishes . Add sesame seeds, chopped green onions, or a drizzle of extra sesame oil before serving to brighten the flavors and add texture.
Variations
One of the best things about Korean Beef Bowls is how easy they are to customize. You can swap out proteins, adjust flavors, or change up the vegetables to fit your taste and dietary needs.
- Protein Swap - Use ground chicken, turkey, or pork in place of beef for a lighter or slightly different flavor profile. Tofu or tempeh also work well for a vegetarian option.
- Low-Carb Version - Replace the jasmine rice with cauliflower rice or zucchini noodles for a keto-friendly and lower-carb meal.
- Extra Veggie Boost - Add bell peppers, zucchini, or snap peas to the foil packet for more color, texture, and nutrients.
If you need gochujang substitutions for an Instant Pot Korean beef bowl, the closest swap is a mix of mild chili paste like sambal oelek or sriracha with a little soy sauce, a touch of sugar or honey, and a splash of rice vinegar to mimic gochujang’s sweet salty tang. For a deeper bibimbap style flavor, add a small amount of miso or doenjang if you have it, plus toasted sesame oil. If you want a non spicy version, use a little tomato paste or ketchup for body with soy sauce, garlic, and sesame oil, then adjust heat separately with red pepper flakes or gochugaru.
To reheat an Instant Pot Korean beef bowl and keep the rice fluffy, sprinkle 1 to 2 tablespoons of water or broth over the rice, cover, and warm it gently in the microwave or on the stovetop so it steams instead of drying out. Store and reheat the gochujang sauce and vegetables separately when possible, then toss everything together after the rice is hot to avoid soggy veggies and thickened sauce. If the rice clumps, fluff it with a fork right after reheating and finish with a few drops of toasted sesame oil for fresh Korean rice bowl flavor.
To keep rice fluffy in a one pot Instant Pot Korean beef bowl and avoid mushy rice, rinse jasmine rice well until the water runs mostly clear, then use the correct water or broth ratio and do not over-stir once the rice is layered in the pot. Deglaze after sautéing the beef so no browned bits are stuck to the bottom, then add rice on top and avoid mixing thick sauce like gochujang directly into the base, where it can scorch. After pressure cooking, let it sit on natural release for a few minutes, then fluff immediately with a fork and keep the lid off briefly so extra steam escapes.
More Korean Recipes
- Spicy Korean Beef Stew - A great keto beef stew recipe that’s just a little bit out of the ordinary.
- Korean Oi Muchim - A wonderful vegan, keto and simple cucumber salad recipe.
- Beef Bulgogi Burgers - A Korean twist on burgers.
- Korean Tacos - Crazy easy to make, and you’re going to love the flavors!
- Spicy Korean Grilled Por k - A wonderful way to get a savory, umami, spicy Korean grilled pork dish.
- Korean Short Ribs - A super yummy Korean short rib recipe.
- Gochujang Wings - the best air fryer chicken wings ever.

Instant Pot Korean Beef Bowl
Equipment
- Instant Pot
- Steamer Rack
Ingredients
Bibimbap Sauce
- ▢ 2 tablespoons Gochujang
- ▢ 1 tablespoon Soy Sauce
- ▢ 1 tablespoon Sesame Oil
- ▢ 1 tablespoon Sugar
- ▢ 1 tablespoon White Vinegar
- ▢ 1 teaspoon Minced Garlic
- ▢ 2 tablespoons Water
Main Dish
- ▢ 1/2 pound Lean Ground Beef
- ▢ 1 tablespoon Soy Sauce
- ▢ 1 tablespoon Sesame Oil
- ▢ 2 teaspoons Minced Garlic
- ▢ 1 teaspoon Kosher Salt
- ▢ 1 cup Jasmine Rice , rinsed and drained
- ▢ 1.25 cups Water , divided
- ▢ 1 cup Mushrooms , sliced
Foil Packet Vegetables
- ▢ 1 cup Bean Sprouts
- ▢ 3 cups Spinach Leaves
- ▢ 2 cups shredded carrots
- ▢ 1 tablespoon Sesame Oil
- ▢ 1/2 teaspoon Kosher Salt
Instructions
- In a medium mixing bowl , whisk together the gochujang, soy sauce, sesame oil, sugar, vinegar, garlic, and water. Set the bowl aside.
- In a large mixing bowl , stir together spinach leaves, sesame oil and salt. Use your hands to roughly macerate the spinach. Toss in bean sprouts and carrots and mix gently. Place vegetables on a large sheet of aluminum foil, and fold up the foil to enclose the vegetables. Close up the foil packet and set aside.
- Select SAUTÉ/Normal on the Instant Pot . When the pot is hot, add the ground beef and break up as much as you can. Add ¼ cup of water and deglaze thoroughly allowing the water to evaporate.
- Add in rice, soy sauce, sesame oil, garlic, and salt and stir well. Add mushrooms and water. Press CANCEL to turn the pot off.
- Place a tall steamer rack in the pot on top of the rice. Place the foil packet on the rack.
- Secure the lid on the pot. Close the pressure-release valve. Select MANUAL/PRESSURE COOK and set the pot at HIGH pressure for 4 minutes.
- When cook time is complete, let the pot release pressure naturally for 10 minutes. At the end of the cooking time, use a quick release to depressurize.
- Carefully remove and unpack the foil packet. Stir the contents of the packet into the rice, stirring gently.
- Serve the rice with the gochujang sauce.
Korean Beef Bowl Tips And Tricks
- You may also choose to reduce the ground meat to half a pound.
- This dish is perfect with a fried egg or two on top of the rice.
- For a meatless version, you can use Sliced Shiitake Mushrooms or large portobello mushrooms that have been sliced. Dried Shiitake Mushrooms: Soak the mushrooms in hot water while you get everything else together. Drain the water, and add mushrooms along with rice. The mushrooms will finish hydrating under pressure. Fresh Shiitake or Portobello: Discard the woody parts of the stem. If you’re using portobello mushrooms, use a spoon to remove the gills under the mushrooms to avoid a muddy dark color to your finished dish. Add with rice and proceed as directed.
Get support & connect with our community on Facebook!
Nutrition
Don’t forget to check out my otherBest-selling Instant Pot Cookbooks!
Indian Instant Pot , Keto Instant Pot, Instant Pot Fast and Easy , Healthy Instant Pot & Vegetarian Instant Pot .

Korean Beef Bowl is a bibimbap-style Instant Pot rice bowl made with jasmine rice, lean ground beef, mushrooms, spinach, bean sprouts, shredded carrots, and a gochujang soy sesame sauce. It’s quick and works well for a busy weeknight dinner when you want bold Korean flavors in a single bowl. Unlike traditional bibimbap recipes that cook each component separately, this version uses the Instant Pot to cook the rice and beef while steaming the vegetables in a foil packet at the same time.
What Makes This One Of Our Best Beef Recipes
- Yummy. This comforting Korean beef bowl encompasses so much deliciousness in a single bite. Perfectly cooked jasmine rice , tasty ground beef , wonderfully steamed and marinated veggies and delicious gochujang sauce all in one bowl.
- One-pot. No need to worry about having to wash a sink full of dishes after making this Bibimbap recipe. This Instant Pot recipe uses some aluminum foil and a steamer rack , you can cook all of the ingredients at once .
- Customizable. Don’t want as much meat? Simply reduce the ground beef to half a pound. Want to add a fried egg into the mix? Have at it! Prefer vegetarian ? Check out the notes in the recipe card for how to make this Korean Beef Bowl with veggies like mushrooms instead.
- Efficient. This is NOT how you would traditionally make a proper Bibimbap bowl. You’d make almost every item independently, and then mix it. But as you know, I’m all about #ruthlessefficiency. So I had to make this a one-pot ground beef and rice dinner
Ingredients You’ll Need
For The Sauce
- 2 tablespoons Gochujang - A Korean fermented chili paste that brings heat, depth, and umami to the sauce.
- 1 tablespoon Soy Sauce - Adds a salty, savory backbone.
- 1 tablespoon Sesame Oil - Provides nutty richness, tying together the bold flavors with an authentic Korean aroma.
- 1 tablespoon Sugar - Balances the spice and saltiness with a touch of sweetness, creating a well-rounded sauce.
- 1 tablespoon White Vinegar - Introduces acidity to brighten the sauce and prevent it from tasting too heavy.
- 1 teaspoon Minced Garlic - Adds savory depth and aromatic punch that complements the gochujang.
- 2 tablespoons Water - Helps thin the sauce so it coats the beef evenly.
Main Dish
- 1/2 pound Lean Ground Beef - The protein centerpiece of the bowl.
- 1 tablespoon Soy Sauce - Enhances the beef with extra umami and saltiness.
- 1 tablespoon Sesame Oil - Infuses the beef with nutty aroma and helps prevent dryness.
- 2 teaspoons Minced Garlic - Provides a savory, aromatic layer to the beef’s flavor.
- 1 teaspoon Kosher Salt - Ensures the beef is well-seasoned, balancing sweetness from the sauce.
- 1 cup Jasmine Rice - A fragrant, fluffy rice that serves as the hearty base for the bowl.
- 1.25 cups Water - Used to cook the rice and to sauté or steam vegetables.
- 1 cup Mushrooms - Add an earthy, umami-rich element that complements the beef and soaks up the sauce.
Veggie Packet
- 1 cup Bean Sprouts - Provide a crunchy, fresh texture that balances the richness of the beef.
- 3 cups Spinach Leaves - Wilt into tender greens, adding nutrients and balancing the dish.
- 2 cups Shredded Carrots - Contribute sweetness, color, and crunch.
- 1 tablespoon Sesame Oil - Adds a nutty coating to the vegetables.
- 1/2 teaspoon Salt - Seasons the vegetables so they don’t taste flat.
How To Make This Instant Pot Korean Beef Bowl
- Sauce. In a medium mixing bowl , whisk together the gochujang, soy sauce, sesame oil, sugar, vinegar, garlic, and water. Set the bowl aside.
- Vegetables. In a large mixing bowl , stir together spinach leaves, sesame oil and salt. Use your hands to roughly macerate the spinach. Toss in bean sprouts and carrots and mix gently. Place vegetables on a large sheet of aluminum foil, and fold up the foil to enclose the vegetables. Close up the foil packet and set aside.
- Beef. Select SAUTÉ/Normal on the Instant Pot . When the pot is hot, add the ground beef and break up as much as you can. Add ¼ cup of water and deglaze thoroughly allowing the water to evaporate.
- Rice. Add in rice, soy sauce, sesame oil, garlic, and salt and stir well. Add mushrooms and water. Press CANCEL to turn the pot off.
- Steamer rack. Place a tall steamer rack in the pot on top of the rice. Place the foil packet on the rack.
- Pressure cook. Secure the lid on the pot. Close the pressure-release valve. Select MANUAL/PRESSURE COOK and set the pot at HIGH pressure for 4 minutes.
- Pressure release. When cook time is complete, let the pot release pressure naturally for 10 minutes. At the end of the cooking time, use a quick release to depressurize.
- Stir. Carefully remove and unpack the foil packet. Stir the contents of the packet into the rice.
- Serve. Serve the rice with the gochujang sauce.
What Is The Difference Between Bulgogi And Bibimbap?
Bulgogi , which literally translates to “fire meat”, is a dish made up of grilled slices of beef or pork.
Bibimbap, which translates to “mixed rice”, is a Korean rice dish consisting of various ingredients, namely rice, sauteed vegetables gochujang, soy sauce, beef and/or an egg.
How Do You Eat Bibimbap?
There are a few things you’ll want to do to ensure that you get the best Korean Beef Bowl experience:
- Use a spoon. Though chopsticks are often used to enjoy Korean food, it is actually more common to use a spoon when enjoying a rice dish such as this.
- Don’t skip out on the sauce. Drizzling a healthy portion of this delicious gochujang-based sauce really makes all the difference in how tasty this dish is.
- Mix it up. Don’t just layer the ingredients and then eat them layer by layer! Use your spoon to mix all of the deliciousness together into one cohesive and delectable bite.
- Add an egg. Top your deliciously easy Korean Beef Bowl with a perfectly fried egg. This simple addition really takes the dish to a whole new level.
Tips And Tricks
Instant Pot Korean Beef Bowls are quick, flavorful, and perfect for busy weeknights. With just a few smart techniques, you can elevate this simple dish into a restaurant-quality meal.
- Use Lean Ground Beef . Lean beef (around 90/10) absorbs the flavors of the sauce without releasing too much grease. If you use fattier beef, be sure to drain excess fat before adding the sauce.
- Cut Vegetables Evenly . For the foil packet veggies, slice mushrooms, carrots, and spinach in even portions so they steam at the same rate.
- Finish with Fresh Garnishes . Add sesame seeds, chopped green onions, or a drizzle of extra sesame oil before serving to brighten the flavors and add texture.
Variations
One of the best things about Korean Beef Bowls is how easy they are to customize. You can swap out proteins, adjust flavors, or change up the vegetables to fit your taste and dietary needs.
- Protein Swap - Use ground chicken, turkey, or pork in place of beef for a lighter or slightly different flavor profile. Tofu or tempeh also work well for a vegetarian option.
- Low-Carb Version - Replace the jasmine rice with cauliflower rice or zucchini noodles for a keto-friendly and lower-carb meal.
- Extra Veggie Boost - Add bell peppers, zucchini, or snap peas to the foil packet for more color, texture, and nutrients.
If you need gochujang substitutions for an Instant Pot Korean beef bowl, the closest swap is a mix of mild chili paste like sambal oelek or sriracha with a little soy sauce, a touch of sugar or honey, and a splash of rice vinegar to mimic gochujang’s sweet salty tang. For a deeper bibimbap style flavor, add a small amount of miso or doenjang if you have it, plus toasted sesame oil. If you want a non spicy version, use a little tomato paste or ketchup for body with soy sauce, garlic, and sesame oil, then adjust heat separately with red pepper flakes or gochugaru.
To reheat an Instant Pot Korean beef bowl and keep the rice fluffy, sprinkle 1 to 2 tablespoons of water or broth over the rice, cover, and warm it gently in the microwave or on the stovetop so it steams instead of drying out. Store and reheat the gochujang sauce and vegetables separately when possible, then toss everything together after the rice is hot to avoid soggy veggies and thickened sauce. If the rice clumps, fluff it with a fork right after reheating and finish with a few drops of toasted sesame oil for fresh Korean rice bowl flavor.
To keep rice fluffy in a one pot Instant Pot Korean beef bowl and avoid mushy rice, rinse jasmine rice well until the water runs mostly clear, then use the correct water or broth ratio and do not over-stir once the rice is layered in the pot. Deglaze after sautéing the beef so no browned bits are stuck to the bottom, then add rice on top and avoid mixing thick sauce like gochujang directly into the base, where it can scorch. After pressure cooking, let it sit on natural release for a few minutes, then fluff immediately with a fork and keep the lid off briefly so extra steam escapes.
More Korean Recipes
- Spicy Korean Beef Stew - A great keto beef stew recipe that’s just a little bit out of the ordinary.
- Korean Oi Muchim - A wonderful vegan, keto and simple cucumber salad recipe.
- Beef Bulgogi Burgers - A Korean twist on burgers.
- Korean Tacos - Crazy easy to make, and you’re going to love the flavors!
- Spicy Korean Grilled Por k - A wonderful way to get a savory, umami, spicy Korean grilled pork dish.
- Korean Short Ribs - A super yummy Korean short rib recipe.
- Gochujang Wings - the best air fryer chicken wings ever.
Instant Pot Korean Beef Bowl
Equipment
- Instant Pot
- Steamer Rack
Ingredients
Bibimbap Sauce
- ▢ 2 tablespoons Gochujang
- ▢ 1 tablespoon Soy Sauce
- ▢ 1 tablespoon Sesame Oil
- ▢ 1 tablespoon Sugar
- ▢ 1 tablespoon White Vinegar
- ▢ 1 teaspoon Minced Garlic
- ▢ 2 tablespoons Water
Main Dish
- ▢ 1/2 pound Lean Ground Beef
- ▢ 1 tablespoon Soy Sauce
- ▢ 1 tablespoon Sesame Oil
- ▢ 2 teaspoons Minced Garlic
- ▢ 1 teaspoon Kosher Salt
- ▢ 1 cup Jasmine Rice , rinsed and drained
- ▢ 1.25 cups Water , divided
- ▢ 1 cup Mushrooms , sliced
Foil Packet Vegetables
- ▢ 1 cup Bean Sprouts
- ▢ 3 cups Spinach Leaves
- ▢ 2 cups shredded carrots
- ▢ 1 tablespoon Sesame Oil
- ▢ 1/2 teaspoon Kosher Salt
Instructions
- In a medium mixing bowl , whisk together the gochujang, soy sauce, sesame oil, sugar, vinegar, garlic, and water. Set the bowl aside.
- In a large mixing bowl , stir together spinach leaves, sesame oil and salt. Use your hands to roughly macerate the spinach. Toss in bean sprouts and carrots and mix gently. Place vegetables on a large sheet of aluminum foil, and fold up the foil to enclose the vegetables. Close up the foil packet and set aside.
- Select SAUTÉ/Normal on the Instant Pot . When the pot is hot, add the ground beef and break up as much as you can. Add ¼ cup of water and deglaze thoroughly allowing the water to evaporate.
- Add in rice, soy sauce, sesame oil, garlic, and salt and stir well. Add mushrooms and water. Press CANCEL to turn the pot off.
- Place a tall steamer rack in the pot on top of the rice. Place the foil packet on the rack.
- Secure the lid on the pot. Close the pressure-release valve. Select MANUAL/PRESSURE COOK and set the pot at HIGH pressure for 4 minutes.
- When cook time is complete, let the pot release pressure naturally for 10 minutes. At the end of the cooking time, use a quick release to depressurize.
- Carefully remove and unpack the foil packet. Stir the contents of the packet into the rice, stirring gently.
- Serve the rice with the gochujang sauce.
Korean Beef Bowl Tips And Tricks
- You may also choose to reduce the ground meat to half a pound.
- This dish is perfect with a fried egg or two on top of the rice.
- For a meatless version, you can use Sliced Shiitake Mushrooms or large portobello mushrooms that have been sliced. Dried Shiitake Mushrooms: Soak the mushrooms in hot water while you get everything else together. Drain the water, and add mushrooms along with rice. The mushrooms will finish hydrating under pressure. Fresh Shiitake or Portobello: Discard the woody parts of the stem. If you’re using portobello mushrooms, use a spoon to remove the gills under the mushrooms to avoid a muddy dark color to your finished dish. Add with rice and proceed as directed.
Get support & connect with our community on Facebook!
Nutrition
Don’t forget to check out my otherBest-selling Instant Pot Cookbooks!
Indian Instant Pot , Keto Instant Pot, Instant Pot Fast and Easy , Healthy Instant Pot & Vegetarian Instant Pot .

If you already signed up, you should have received an email with a password to give you unlimited access to our FREE Printable Library. The password is case sensitive. Enter it below and get printing!
Password:

Instant Pot Korean Beef Bowl
Ingredients
Bibimbap Sauce
- 2 tablespoons Gochujang
- 1 tablespoon Soy Sauce
- 1 tablespoon Sesame Oil
- 1 tablespoon Sugar
- 1 tablespoon White Vinegar
- 1 teaspoon Minced Garlic
- 2 tablespoons Water
Main Dish
- 1/2 pound Lean Ground Beef
- 1 tablespoon Soy Sauce
- 1 tablespoon Sesame Oil
- 2 teaspoons Minced Garlic
- 1 teaspoon Kosher Salt
- 1 cup Jasmine Rice rinsed and drained
- 1.25 cups Water divided
- 1 cup Mushrooms sliced
Foil Packet Vegetables
- 1 cup Bean Sprouts
- 3 cups Spinach Leaves
- 2 cups shredded carrots
- 1 tablespoon Sesame Oil
- 1/2 teaspoon Kosher Salt
Instructions
- In a medium mixing bowl , whisk together the gochujang, soy sauce, sesame oil, sugar, vinegar, garlic, and water. Set the bowl aside.
- In a large mixing bowl , stir together spinach leaves, sesame oil and salt. Use your hands to roughly macerate the spinach. Toss in bean sprouts and carrots and mix gently. Place vegetables on a large sheet of aluminum foil, and fold up the foil to enclose the vegetables. Close up the foil packet and set aside.
- Select SAUTÉ/Normal on the Instant Pot . When the pot is hot, add the ground beef and break up as much as you can. Add ¼ cup of water and deglaze thoroughly allowing the water to evaporate.
- Add in rice, soy sauce, sesame oil, garlic, and salt and stir well. Add mushrooms and water. Press CANCEL to turn the pot off.
- Place a tall steamer rack in the pot on top of the rice. Place the foil packet on the rack.
- Secure the lid on the pot. Close the pressure-release valve. Select MANUAL/PRESSURE COOK and set the pot at HIGH pressure for 4 minutes.
- When cook time is complete, let the pot release pressure naturally for 10 minutes. At the end of the cooking time, use a quick release to depressurize.
- Carefully remove and unpack the foil packet. Stir the contents of the packet into the rice, stirring gently.
- Serve the rice with the gochujang sauce.
Korean Beef Bowl Tips And Tricks
- You may also choose to reduce the ground meat to half a pound.
- This dish is perfect with a fried egg or two on top of the rice.
- For a meatless version, you can use Sliced Shiitake Mushrooms or large portobello mushrooms that have been sliced. Dried Shiitake Mushrooms: Soak the mushrooms in hot water while you get everything else together. Drain the water, and add mushrooms along with rice. The mushrooms will finish hydrating under pressure. Fresh Shiitake or Portobello: Discard the woody parts of the stem. If you’re using portobello mushrooms, use a spoon to remove the gills under the mushrooms to avoid a muddy dark color to your finished dish. Add with rice and proceed as directed.
Instant Pot Korean Beef Bowl https://twosleevers.com/korean-beef-bowl/


Make this Tandoori Chicken recipe in your air fryer with just a yogurt-based marinade. It’s a flavor-packed keto, low carb chicken recipe that is super easy to make and tastes like authentic tandoori chicken!

Why You’ll Love This Amazing Air Fryer Recipe
- Bursting with bold Indian spices and smoky flavor
- Cooks fast in the air fryer. It’s perfect for busy nights
- Naturally low-carb and high-protein
- Works great for meal prep, wraps, salads, or appetizers
This is one of our best air fryer chicken recipes , and it brings restaurant-style tandoori flavor straight to your kitchen with hardly any effort!
What Is Tandoori Chicken?
Besides being the easiest way to introduce people to Indian food, Tandoori chicken is made by marinating pieces of chicken in a yogurt-based marinade, spicing it with various things like turmeric, cayenne pepper, garam masala , etc., and then cooking it quickly in a hot, dry tandoor, or clay oven.
Many people use a Green Egg to approximate the high, dry heat akin to a tandoori oven. But I don’t have a green egg, and so I’ve tried to come up with other ways to approximate it.
I have a recipe for tandoori chicken tikka made in a frying pan on your stove, and that is very good. But I wanted to see if it was possible to make a tender, all-white meat tandoori chicken in the air fryer .
How To Make It Tender
The key to getting the most tender tandoori chicken you’ve ever had is to marinate in yogurt. Yogurt has in it two elements that help to tenderize meat: active microbes and lactic acid.
Of the two, the lactic acid is the real workhorse of this duo, breaking down meat proteins to make even white meat incredibly tender.
In fact, it can do such a good job that if you let the chicken sit in the yogurt marinade for too long, it gets almost too soft and mealy-tasting. Luckily it has a mild reaction, so it takes a while for it to mush. I recommend not going over 8 hours if possible.
But I’ve found that a 30-minute marinade time is ideal, which makes it great for a weeknight meal.
How Do You Keep Tandoori Chicken Moist?
The secret in keeping this Tandoori Chicken recipe moist isn’t really a secret at all. All you need is a great marinade and a meat thermometer to keep your chicken perfectly moist.
The greek yogurt that you use to marinate the Tandoori Chicken recipe will lock in tons of moisture and flavor. You’ll also want to make sure you’re monitoring the internal temperature of your chicken closely with a meat thermometer to cook it to exactly 165F. If you overcook your chicken, it will cause it to be dry.
For all of the delicious flavor this tandoori recipe has, you will be surprised at how few ingredients it takes to make it. Here’s what you will need to get a delicious chicken dinner on your table in no time:
Is Tandoori Chicken Healthy?
What is a healthy dish for one person might not be a healthy dish for another person. In my personal opinion, tandoori chicken is an extremely healthy choice. Here’s why:
- It’s low in carbs - Only two carbs per serving makes this the perfect low carb dinner or appetizer option.
- It is low in fat - Unlike some tasty keto dishes, this Tandoori Chicken uses spices to boost the flavor instead of fat.
- It’s high in protein - 25g of protein per serving makes this a great way to hit your daily macros.
- You make it in the air fryer - Skip the deep frying to get a perfectly crispy bite. Use a fraction of the oil without sacrificing taste or texture.
Why Is Tandoori Chicken So Red?
Most restaurants use artificial red color to get that typically-red tandoori chicken . I don’t like doing that, and most of us don’t do that when we cook at home.
I’ve found that using Sweet Smoked Red Paprika in this Tandoori Chicken recipe helps in two ways. Not only does it add a lovely and natural red color to the tandoori chicken , but it also lends it a slightly smoked flavor which elevates this Air Fryer Tandoori chicken to a wonderful smoky, tender, well-spiced dish.
What Ingredients Are In Tandoori Chicken?
- 1 pound Chicken Tenders - The main protein, quick-cooking and perfect for soaking up marinade flavors.
- ¼ cup Full-Fat Greek Yogurt - Tenderizes the chicken and creates a rich, creamy base for the marinade.
- 1 tablespoon Minced Ginger - Adds warm, zesty spice and classic tandoori complexity.
- 1 tablespoon Minced Garlic - Brings bold, aromatic depth to the marinade.
- ¼ cup Cilantro - Fresh herb flavor that brightens the dish.
- 1 teaspoon Salt - Enhances all the spices and helps the seasoning penetrate the meat.
- ½–1 teaspoon Cayenne Pepper - Provides adjustable heat for that signature spicy kick.
- 1 teaspoon Turmeric - Adds a warm earthiness and the iconic golden tandoori color.
- 1 teaspoon Garam Masala - Delivers authentic Indian spice complexity and warmth.
- 1 teaspoon Smoked Paprika - Adds smoky BBQ-like flavor and deeper red coloring reminiscent of traditional tandoor cooking.
For Finishing
- 1 tablespoon Oil or Ghee - Brushed on after cooking to boost moisture and shine.
- 2 teaspoons Lemon Juice - Adds tanginess to balance spices and brighten the final flavor.
- 2 tablespoons Chopped Cilantro - Fresh garnish that adds color and a final burst of herbal freshness.
How To Make This Tandoori Chicken Recipe
- Mix. Mix all ingredients except the basting oil, lemon juice and 2 tablespoons of cilantro.
- Time. Marinate for 25 minutes. Turn your air fryer to 350F for 5 minutes. This is to preheat your air fryer .
- Add Chicken. Once it is preheated, open up the air fryer and carefully lay the tandoori chicken in a single layer in your air fryer .
- Baste. Using a silicone brush , baste the chicken with either oil or ghee on one side.
- Air Fry. Cook the Chicken Tandoori at 350F for 10 minutes.
- Turn. Flip the chicken and baste with oil or ghee on the other side.
- Air Fry Some More. Cook for another 5 minutes.
- Check The Temp. Use a meat thermometer to check if the internal temperature has reached 165F. Do not skip this step, it is very important for food safety.
- Garnish And Serve. Remove garnish with lemon juice and fresh cilantro.

Tips And Tricks
Air Fryer Tandoori Chicken is all about juicy meat, bold spices, that iconic charred finish, and a few smart techniques can take it from good to irresistible. Here are some helpful tips to get perfect results every time:
- If you don’t have an air fryer , you can cook this recipe in a skillet. Just heat up a skillet until it’s screaming hot, add ghee that has a high smoke point, and cook the chicken for 4-5 minutes on each size.
- This chicken is marinated in spices. You won’t be able to tell if it’s done by just looking at the color. Without a meat thermometer , you’re likely to overcook the chicken. The best and only way to cook this without making rubber chicken is to use a meat thermometer, and cook until it reaches an internal temperature of 165F.
- I know many dairy-free folks will ask me what they can substitute for yogurt. The closest you could come would be to use lemon juice instead.
Variations
Air Fryer Tandoori Chicken is wonderfully adaptable, allowing you to tailor the spice level and flavor profile to match your mood or menu. Try one of these delicious variations:
- Mint & Yogurt Refresh - Add 1–2 tablespoons of mint chutney to the marinade for a cool, herbal twist.
- Extra Smoky Style - Include a bit more smoked paprika or a drop of liquid smoke for deeper barbecue flavor.
- Creamy Tikka Version - Stir in 1 tablespoon tomato paste or 2 tablespoons cream for a richer, tikka-inspired marinade.
How To Serve This Tandoori Recipe
The flavor in this chicken is not only amazing, but it’s also quite versatile. Here are a few different ways you can serve Chicken Tandoori :
- Serve alone as an appetizer
- Serve with green chutney as an appetizer
- Dip in tzatziki or raita
- Serve with naan as part of a meal. In this case, add some dal and a cold salad to round out the meal
- Make extra and add to your leftover butter chicken sauce
- Serve in lettuce leaves as a low carb wrap
How Long Does It Last?
Air Fryer Tandoori Chicken keeps well for 3–4 days when stored in an airtight container in the refrigerator, making it great for meal prep or leftover lunches.
To maintain its flavor and texture, reheat in the air fryer or oven just until warmed through so the outside stays slightly crisp.
Can You Freeze It?
If you’d like to store it longer, you can freeze the cooked chicken for up to 2–3 months. Just thaw the chicken overnight in the fridge before reheating.
Looking For More Great Air Fryer Indian Dishes?

- This Vegan Amchoor Potatoes recipe will rock your world with its combination of tart and spice!
- This Chicken Jalfrezi recipe is an air-fried take on a delicious and traditional Indian Jhalfrezi recipe. It’s gluten-free and low carb!
- Make Indian food seem familiar with this Air Fryer recipe for Beef Kheema Meatloaf ! It’s simple to make, but the flavors are amazing!


Tandoori Chicken Recipe | Make Chicken Tandoori In The Air Fryer
Equipment
- PHILLIPS AIR FRYER
- Mixing Bowl
- Silicone Basting Brush
- Meat Thermometer
- Measuring Spoons
- STAINLESS STEEL MEASURING CUPS
Ingredients
- ▢ 1 pound ( 453.59 g ) chicken tenders , each cut in half
- ▢ ¼ cup ( 50 g ) Full-Fat Greek Yogurt
- ▢ 1 tablespoon ( 1 tablespoon ) Minced Ginger
- ▢ 1 tablespoon ( 1 tablespoon ) Minced Garlic
- ▢ ¼ cup ( 4 g ) Cilantro , or sub parsley
- ▢ 1 teaspoon ( 1 teaspoon ) Kosher Salt
- ▢ ½ – 1 teaspoon Cayenne Pepper
- ▢ 1 teaspoon ( 1 teaspoon ) Turmeric
- ▢ 1 teaspoon ( 1 teaspoon ) Garam Masala
- ▢ 1 teaspoon ( 1 teaspoon ) Smoked Paprika , to add a smoky flavor to the chicken, and color
For Finishing
- ▢ 1 tablespoon ( 1 tablespoon ) Oil , or ghee for basting
- ▢ 2 teaspoons ( 2 teaspoons ) Lemon Juice , for finishing
- ▢ 2 tablespoons ( 2 tablespoons ) chopped cilantro , for garnishing
Instructions
In a glass bowl , mix all ingredients except the basting oil, lemon juice and 2 tablespoons of cilantro. Marinate for 30 minutes.
Open up the air fryer and carefully lay the tandoori chicken in a single layer on either the rack or in the basket of your air fryer .
Using a silicone brush , baste the chicken with either oil or ghee on one side.
Cook at 350F for 10 minutes.
Remove and flip over the chicken, and baste on the other side,
Cook for another 5 minutes.
Using a meat thermometer , check to see if the internal temperature has reached 165F. Do not skip this step.
Remove and place on a serving plate. Add lemon juice and mix, and sprinkle with cilantro.
If you don’t have an air fryer, you can cook this recipe in a skillet. Just heat up a skillet until it’s screaming hot, add ghee that has a high smoke point and cook the chicken for 4-5 minutes on each size.
This chicken is marinated in spices. You won’t be able to tell if it’s done by just looking at the color. Without a meat thermometer , you’re likely to overcook the chicken. The best and only way to cook this without making rubber chicken is to use a meat thermometer, and cook until it reaches an internal temperature of 165F.
I know many dairy-free folks will ask me what they can substitute for yogurt. The closest you could come would be to use lemon juice instead.
Serve alone as an appetizer
Serve with green chutney as an appetizer
Serve with tzatziki or raita as a dip
Serve with naan as part of a meal. In this case, add some dal and a cold salad to round out the meal
Make extra and add to your leftover butter chicken sauce
Eat in lettuce leaves as a low carb wrap
Get support & connect with our community on Facebook!
Nutrition
And don’t forget to check out my air fryer cookbooks! Every day easy air fryer , and Air Fryer Revolution .

