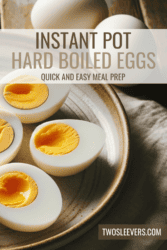
Are you tired of spending valuable time peeling eggs, only to end up with a pitted and less-than-perfect result? Look no further! Our Instant Pot Hard Boiled Eggs recipe is here to revolutionize your egg game. Get ready for consistently perfect hard-boiled eggs with minimal effort.
Why You’ll Love Making Eggs This Way
If you’ve ever struggled with stovetop boiling or wondered how to achieve that ideal hard-boiled egg, you’ll appreciate the benefits of using an Instant Pot:
- Consistency . Instant Pot delivers perfectly cooked eggs every time, with no guesswork or variation in results.
- Efficiency . Pressure cooking in the Instant Pot is faster than boiling on the stovetop. You’ll have your eggs ready in no time.
- Easy Peeling . With our method, you’ll experience easier peeling compared to traditional boiling methods.
- Customizable . Adjust the cooking time to your preference, whether you prefer slightly soft or completely hard yolks.
- Hands-Free . Once you set the Instant Pot, you can go about your tasks while it does the work.
With our Instant Pot Hard Boiled Eggs recipe, you’ll achieve perfect eggs every time without the hassle. Whether you enjoy them as a quick snack or incorporate them into various dishes, your Instant Pot will be your new favorite kitchen appliance for cooking flawless hard-boiled eggs.
What Is The 5-5-5 Method For Eggs?
The 5-5-5 method is a simple and easy-to-remember technique for cooking hard-boiled eggs in an Instant Pot or electric pressure cooker. It involves cooking the eggs at high pressure for 5 minutes, allowing a natural pressure release for 5 minutes, and then placing the eggs in an ice water bath for 5 minutes. This method ensures consistent and perfectly cooked hard-boiled eggs with fully set yolks and easy-to-peel shells.
Here’s a breakdown of the 5-5-5 method for cooking hard-boiled eggs in an Instant Pot:
- Cooking (5 minutes) - Place the eggs in the Instant Pot with a cup of water. Close the lid and set the Instant Pot to “Pressure Cook” or “Manual” mode. Adjust the cooking time to 5 minutes.
- Natural Pressure Release (5 minutes) - After the 5 minutes of cooking are complete, allow the Instant Pot to naturally release pressure for 5 minutes. During this time, the eggs continue to cook gently as the pressure decreases.
- Ice Water Bath (5 minutes) - Carefully transfer the eggs to a bowl of ice water using tongs or a slotted spoon. Let the eggs sit in the ice water bath for 5 minutes. This step stops the cooking process and helps in easy peeling.
Can You Make Eggs In The Instant Pot Without A Rack?
Yes, you can make eggs in the Instant Pot without using a rack. While using a rack helps to keep the eggs elevated and prevents them from touching the bottom of the Instant Pot, you can still achieve good results without one.
Ingredients You’ll Need
- Eggs- Use as many as you need.
- Water- Sufficient to create steam in your Instant Pot.
That’s right! All you need is two things to make perfectly cooked eggs in the Instant Pot. Feel free to garnish them to your preference with some of the suggestions below.
How To Make Instant Pot Hard Boiled Eggs
- Prepare Your Instant Pot . Place the trivet or a steamer basket in your Instant Pot. Add 1 cup of water to the pot.
- Add the Eggs . Place your eggs on the trivet or in the steamer basket. You can cook as few or as many eggs as you want, as long as they’re in a single layer.
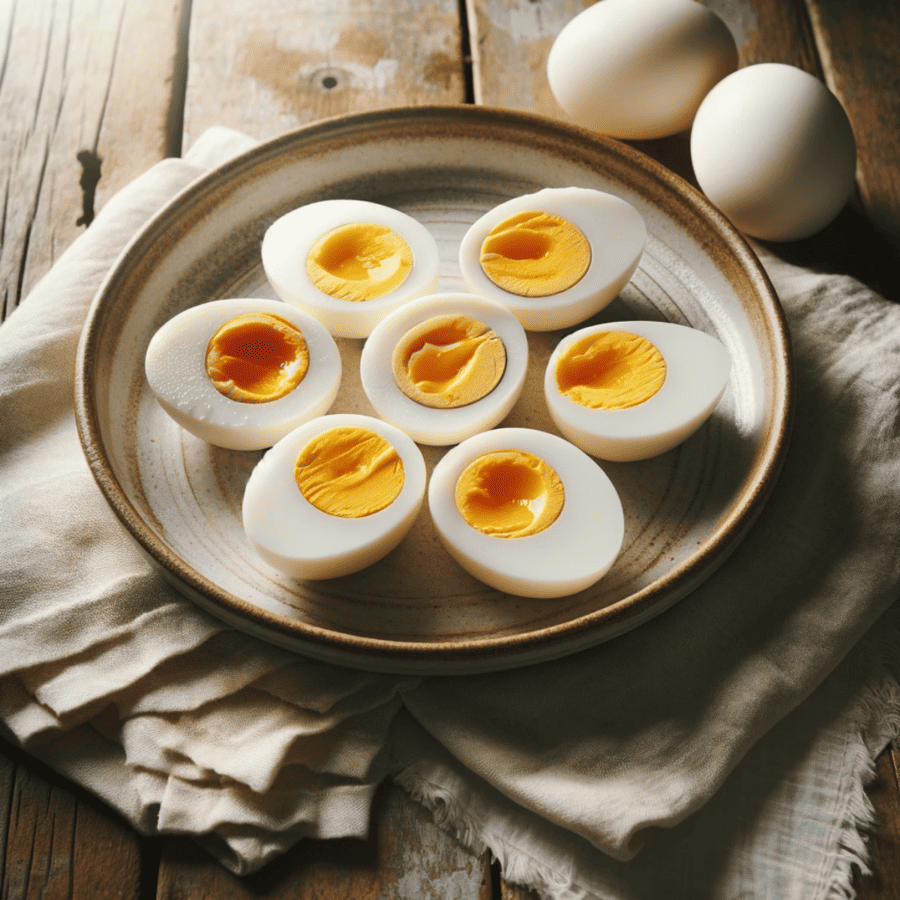
- Set the Instant Pot . Close the Instant Pot lid and ensure the valve is set to the “Sealing” position. Select the “Pressure Cook” or “Manual” setting and set the timer based on your desired yolk consistency: For soft-boiled eggs (runny yolk): 4 minutes For medium-boiled eggs (partially set yolk): 5-6 minutes For hard-boiled eggs (fully set yolk): 7-8 minutes
- Quick Release . As soon as the cooking time is up, perform a quick pressure release by turning the valve to the “Venting” position. Be cautious of hot steam.
- Ice Bath . Transfer the eggs to an ice water bath using tongs or a slotted spoon. Allow them to sit in the ice water for at least 5 minutes. This helps stop the cooking process and makes peeling easier.
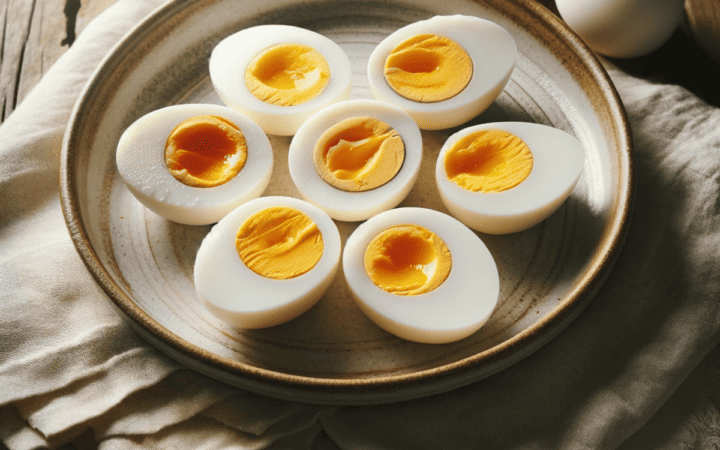
- Peel and Enjoy . Gently crack the eggs on a hard surface, then peel. Your Instant Pot Hard Boiled Eggs are now ready to enjoy!

Tips And Tricks
Making hard-boiled eggs in an Instant Pot is a convenient and foolproof method. Here are some tips and tricks to achieve the perfect eggs:
- Use Fresh Eggs . Fresh eggs tend to be easier to peel. If possible, choose eggs that are less than a week old.
- Rack or Trivet . While you can make Instant Pot hard-boiled eggs without a rack, using one can help prevent cracking and make it easier to place and remove the eggs from the Instant Pot. If you don’t have a rack, you can still make them successfully.
- Peeling . To peel the eggs, tap them gently on a hard surface to crack the shell, then roll them between your hands to loosen the shell. Start peeling from the larger end, where the air pocket is, as it’s often easier to begin peeling from there.
Variations
While perfect hard-boiled eggs are delicious on their own, you can get creative with these variations:
- Deviled Eggs . Slice your hard-boiled eggs in half, remove the yolks, mix them with mayo, mustard, and seasonings, then pipe the mixture back into the egg whites.
- Egg Salad . Chop hard-boiled eggs and mix them with mayonnaise, mustard, celery, and seasoning to make a classic egg salad.
- Pickled Eggs . Submerge your peeled hard-boiled eggs in a pickling solution of vinegar, water, and spices for a tangy and colorful treat.
How To Serve Instant Pot Hard Boiled Eggs
Instant Pot hard-boiled eggs are incredibly versatile and can be served in various ways. Here are some popular serving options:
- Classic Snack - Enjoy hard-boiled eggs as a simple and nutritious snack. Just sprinkle a pinch of salt and pepper on them and eat them as they are.
- Deviled Eggs - Turn your hard-boiled eggs into deviled eggs. Cut them in half, scoop out the yolks, and mix them with mayonnaise, mustard, a touch of vinegar, and seasoning. Pipe or spoon this filling back into the egg whites for a delicious appetizer.
- Egg Salad - Chop hard-boiled eggs and combine them with mayonnaise, diced celery, chopped green onions, mustard, and your favorite seasonings to create a classic egg salad. Enjoy it in sandwiches, wraps, or on a bed of lettuce.
- Sliced on Salads - Add sliced or chopped hard-boiled eggs to salads for an extra protein boost. They work well in green salads, Cobb salads, or as a topping for a Nicoise salad.
- As a Breakfast - Serve hard-boiled eggs as part of your breakfast. They pair nicely with toast, avocado, and fresh fruit for a balanced morning meal.
How Long Do They Last?
Instant Pot hard-boiled eggs, when properly stored, can last in the refrigerator for up to one week.
Always use your best judgment when assessing the freshness of hard-boiled eggs. If they develop an off-putting odor, unusual texture, or any signs of spoilage, it’s best to discard them.
Can You Freeze Them?
While it’s best to consume hard-boiled eggs fresh, you can freeze them for later use. However, freezing may change their texture slightly. If you plan to freeze them, peel the eggs, wrap them tightly in plastic wrap or aluminum foil, and place them in an airtight container.
They can be frozen for up to 3 months.
More Recipes With Eggs
- Air Fryer Hard Boiled Eggs
- Egg Korma
- Keto Scotch Eggs
- Egg Loaf
- Keto Egg Drop Soup

Instant Pot Hard Boiled Eggs | Super Easy Hard Boiled Eggs
Ingredients
- ▢ 6 Eggs
- ▢ 1/2 cup Water
Instructions
- Cooking (5 minutes) - Place the eggs in the Instant Pot with a cup of water. Close the lid and set the Instant Pot to “Pressure Cook” or “Manual” mode. Adjust the cooking time to 5 minutes.
- Natural Pressure Release (5 minutes) - After the 5 minutes of cooking are complete, allow the Instant Pot to naturally release pressure for 5 minutes. During this time, the eggs continue to cook gently as the pressure decreases.
- Ice Water Bath (5 minutes) - Carefully transfer the eggs to a bowl of ice water using tongs or a slotted spoon. Let the eggs sit in the ice water bath for 5 minutes. This step stops the cooking process and helps in easy peeling.
Get support & connect with our community on Facebook!
Nutrition
Don’t forget to check out my otherBest-selling Instant Pot Cookbooks!
Indian Instant Pot , Keto Instant Pot, Instant Pot Fast and Easy , Healthy Instant Pot & Vegetarian Instant Pot .

Are you tired of spending valuable time peeling eggs, only to end up with a pitted and less-than-perfect result? Look no further! Our Instant Pot Hard Boiled Eggs recipe is here to revolutionize your egg game. Get ready for consistently perfect hard-boiled eggs with minimal effort.
Why You’ll Love Making Eggs This Way
If you’ve ever struggled with stovetop boiling or wondered how to achieve that ideal hard-boiled egg, you’ll appreciate the benefits of using an Instant Pot:
- Consistency . Instant Pot delivers perfectly cooked eggs every time, with no guesswork or variation in results.
- Efficiency . Pressure cooking in the Instant Pot is faster than boiling on the stovetop. You’ll have your eggs ready in no time.
- Easy Peeling . With our method, you’ll experience easier peeling compared to traditional boiling methods.
- Customizable . Adjust the cooking time to your preference, whether you prefer slightly soft or completely hard yolks.
- Hands-Free . Once you set the Instant Pot, you can go about your tasks while it does the work.
With our Instant Pot Hard Boiled Eggs recipe, you’ll achieve perfect eggs every time without the hassle. Whether you enjoy them as a quick snack or incorporate them into various dishes, your Instant Pot will be your new favorite kitchen appliance for cooking flawless hard-boiled eggs.
What Is The 5-5-5 Method For Eggs?
The 5-5-5 method is a simple and easy-to-remember technique for cooking hard-boiled eggs in an Instant Pot or electric pressure cooker. It involves cooking the eggs at high pressure for 5 minutes, allowing a natural pressure release for 5 minutes, and then placing the eggs in an ice water bath for 5 minutes. This method ensures consistent and perfectly cooked hard-boiled eggs with fully set yolks and easy-to-peel shells.
Here’s a breakdown of the 5-5-5 method for cooking hard-boiled eggs in an Instant Pot:
- Cooking (5 minutes) - Place the eggs in the Instant Pot with a cup of water. Close the lid and set the Instant Pot to “Pressure Cook” or “Manual” mode. Adjust the cooking time to 5 minutes.
- Natural Pressure Release (5 minutes) - After the 5 minutes of cooking are complete, allow the Instant Pot to naturally release pressure for 5 minutes. During this time, the eggs continue to cook gently as the pressure decreases.
- Ice Water Bath (5 minutes) - Carefully transfer the eggs to a bowl of ice water using tongs or a slotted spoon. Let the eggs sit in the ice water bath for 5 minutes. This step stops the cooking process and helps in easy peeling.
Can You Make Eggs In The Instant Pot Without A Rack?
Yes, you can make eggs in the Instant Pot without using a rack. While using a rack helps to keep the eggs elevated and prevents them from touching the bottom of the Instant Pot, you can still achieve good results without one.
Ingredients You’ll Need
- Eggs- Use as many as you need.
- Water- Sufficient to create steam in your Instant Pot.
That’s right! All you need is two things to make perfectly cooked eggs in the Instant Pot. Feel free to garnish them to your preference with some of the suggestions below.
How To Make Instant Pot Hard Boiled Eggs
- Prepare Your Instant Pot . Place the trivet or a steamer basket in your Instant Pot. Add 1 cup of water to the pot.
- Add the Eggs . Place your eggs on the trivet or in the steamer basket. You can cook as few or as many eggs as you want, as long as they’re in a single layer.
- Set the Instant Pot . Close the Instant Pot lid and ensure the valve is set to the “Sealing” position. Select the “Pressure Cook” or “Manual” setting and set the timer based on your desired yolk consistency: For soft-boiled eggs (runny yolk): 4 minutes For medium-boiled eggs (partially set yolk): 5-6 minutes For hard-boiled eggs (fully set yolk): 7-8 minutes
- Quick Release . As soon as the cooking time is up, perform a quick pressure release by turning the valve to the “Venting” position. Be cautious of hot steam.
- Ice Bath . Transfer the eggs to an ice water bath using tongs or a slotted spoon. Allow them to sit in the ice water for at least 5 minutes. This helps stop the cooking process and makes peeling easier.
- Peel and Enjoy . Gently crack the eggs on a hard surface, then peel. Your Instant Pot Hard Boiled Eggs are now ready to enjoy!
Tips And Tricks
Making hard-boiled eggs in an Instant Pot is a convenient and foolproof method. Here are some tips and tricks to achieve the perfect eggs:
- Use Fresh Eggs . Fresh eggs tend to be easier to peel. If possible, choose eggs that are less than a week old.
- Rack or Trivet . While you can make Instant Pot hard-boiled eggs without a rack, using one can help prevent cracking and make it easier to place and remove the eggs from the Instant Pot. If you don’t have a rack, you can still make them successfully.
- Peeling . To peel the eggs, tap them gently on a hard surface to crack the shell, then roll them between your hands to loosen the shell. Start peeling from the larger end, where the air pocket is, as it’s often easier to begin peeling from there.
Variations
While perfect hard-boiled eggs are delicious on their own, you can get creative with these variations:
- Deviled Eggs . Slice your hard-boiled eggs in half, remove the yolks, mix them with mayo, mustard, and seasonings, then pipe the mixture back into the egg whites.
- Egg Salad . Chop hard-boiled eggs and mix them with mayonnaise, mustard, celery, and seasoning to make a classic egg salad.
- Pickled Eggs . Submerge your peeled hard-boiled eggs in a pickling solution of vinegar, water, and spices for a tangy and colorful treat.
How To Serve Instant Pot Hard Boiled Eggs
Instant Pot hard-boiled eggs are incredibly versatile and can be served in various ways. Here are some popular serving options:
- Classic Snack - Enjoy hard-boiled eggs as a simple and nutritious snack. Just sprinkle a pinch of salt and pepper on them and eat them as they are.
- Deviled Eggs - Turn your hard-boiled eggs into deviled eggs. Cut them in half, scoop out the yolks, and mix them with mayonnaise, mustard, a touch of vinegar, and seasoning. Pipe or spoon this filling back into the egg whites for a delicious appetizer.
- Egg Salad - Chop hard-boiled eggs and combine them with mayonnaise, diced celery, chopped green onions, mustard, and your favorite seasonings to create a classic egg salad. Enjoy it in sandwiches, wraps, or on a bed of lettuce.
- Sliced on Salads - Add sliced or chopped hard-boiled eggs to salads for an extra protein boost. They work well in green salads, Cobb salads, or as a topping for a Nicoise salad.
- As a Breakfast - Serve hard-boiled eggs as part of your breakfast. They pair nicely with toast, avocado, and fresh fruit for a balanced morning meal.
How Long Do They Last?
Instant Pot hard-boiled eggs, when properly stored, can last in the refrigerator for up to one week.
Always use your best judgment when assessing the freshness of hard-boiled eggs. If they develop an off-putting odor, unusual texture, or any signs of spoilage, it’s best to discard them.
Can You Freeze Them?
While it’s best to consume hard-boiled eggs fresh, you can freeze them for later use. However, freezing may change their texture slightly. If you plan to freeze them, peel the eggs, wrap them tightly in plastic wrap or aluminum foil, and place them in an airtight container.
They can be frozen for up to 3 months.
More Recipes With Eggs
- Air Fryer Hard Boiled Eggs
- Egg Korma
- Keto Scotch Eggs
- Egg Loaf
- Keto Egg Drop Soup
Instant Pot Hard Boiled Eggs | Super Easy Hard Boiled Eggs
Ingredients
- ▢ 6 Eggs
- ▢ 1/2 cup Water
Instructions
- Cooking (5 minutes) - Place the eggs in the Instant Pot with a cup of water. Close the lid and set the Instant Pot to “Pressure Cook” or “Manual” mode. Adjust the cooking time to 5 minutes.
- Natural Pressure Release (5 minutes) - After the 5 minutes of cooking are complete, allow the Instant Pot to naturally release pressure for 5 minutes. During this time, the eggs continue to cook gently as the pressure decreases.
- Ice Water Bath (5 minutes) - Carefully transfer the eggs to a bowl of ice water using tongs or a slotted spoon. Let the eggs sit in the ice water bath for 5 minutes. This step stops the cooking process and helps in easy peeling.
Get support & connect with our community on Facebook!
Nutrition
Don’t forget to check out my otherBest-selling Instant Pot Cookbooks!
Indian Instant Pot , Keto Instant Pot, Instant Pot Fast and Easy , Healthy Instant Pot & Vegetarian Instant Pot .

If you already signed up, you should have received an email with a password to give you unlimited access to our FREE Printable Library. The password is case sensitive. Enter it below and get printing!
Password:

Instant Pot Hard Boiled Eggs | Super Easy Hard Boiled Eggs
Ingredients
- 6 Eggs
- 1/2 cup Water
Instructions
- Cooking (5 minutes) - Place the eggs in the Instant Pot with a cup of water. Close the lid and set the Instant Pot to “Pressure Cook” or “Manual” mode. Adjust the cooking time to 5 minutes.
- Natural Pressure Release (5 minutes) - After the 5 minutes of cooking are complete, allow the Instant Pot to naturally release pressure for 5 minutes. During this time, the eggs continue to cook gently as the pressure decreases.
- Ice Water Bath (5 minutes) - Carefully transfer the eggs to a bowl of ice water using tongs or a slotted spoon. Let the eggs sit in the ice water bath for 5 minutes. This step stops the cooking process and helps in easy peeling.
Instant Pot Hard Boiled Eggs | Super Easy Hard Boiled Eggs https://twosleevers.com/instant-pot-hard-boiled-eggs/

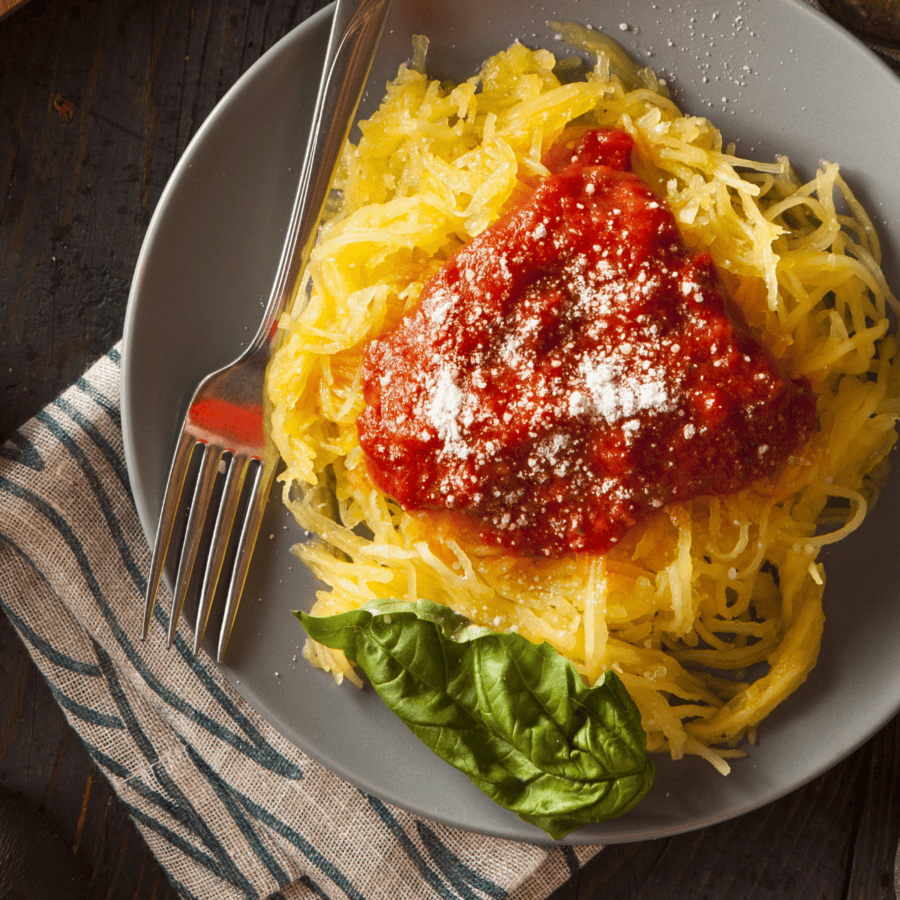
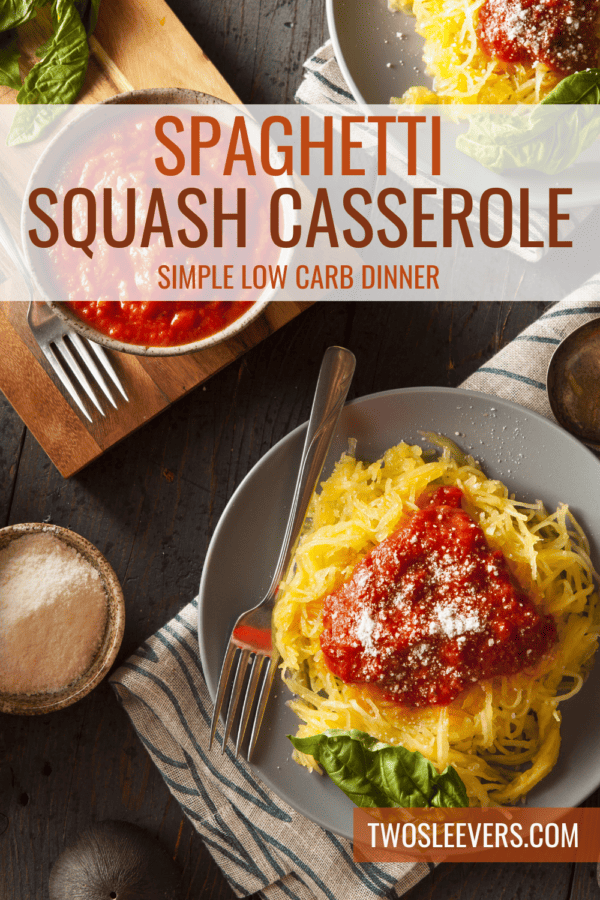
If you’re looking for a delicious and low-carb alternative to traditional pasta, our Low Carb Spaghetti Squash Casserole recipe is just what you need. It’s a fantastic way to enjoy the flavors and textures of pasta without the guilt of excess carbs.
Why You’ll Love This Low Carb Casserole
- Irresistible Flavor . Low Carb Spaghetti Squash offers a delightful, slightly nutty flavor that pairs well with various sauces and toppings.
- Low in Carbs . As the name suggests, spaghetti squash is significantly lower in carbohydrates than traditional pasta, making it a great option for those watching their carb intake.
- Easy to Prepare . Cooking spaghetti squash is a breeze, and it’s a versatile ingredient that can be used in various dishes.
- Nutrient-Rich . Spaghetti squash is a good source of vitamins and minerals, including vitamin C, vitamin A, and potassium.
- Gluten-Free . It’s naturally gluten-free, making it suitable for those with gluten sensitivities.
Whether you’re following a low-carb diet or simply want to incorporate more veggies into your meals, this recipe is a winner.
How Do You Keep Squash Casserole From Getting Watery?
To prevent squash casserole from becoming watery, you can follow these tips:
- Properly Drain the Squash . After cooking or roasting the squash, make sure to drain it thoroughly. Use a colander or a clean kitchen towel to remove excess moisture. You can gently press the squash to release any remaining water.
- Salt and Rest . Before cooking or roasting the squash, you can sprinkle it with some salt and allow it to rest for about 15-30 minutes. Salt will draw out some of the moisture. After resting, use a paper towel to pat the squash dry to remove any beads of moisture on the surface.
- Choose the Right Ingredients . When selecting ingredients like cheese or sauces, opt for low-moisture options. High-moisture ingredients can contribute to a watery casserole. For instance, use grated Parmesan cheese instead of mozzarella, and choose a thicker sauce.
Ingredients You’ll Need
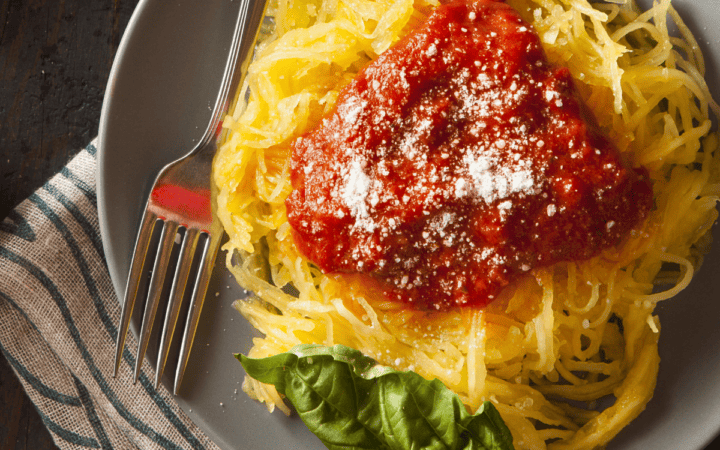
- Spaghetti Squash - The spaghetti squash is the star of the dish and serves as a low-carb alternative to traditional pasta. After being roasted and scraped, the flesh of the squash turns into long strands resembling spaghetti, forming the base of the casserole.
- Olive Oil - Olive oil is used to drizzle over the cut halves of the spaghetti squash before roasting. It helps enhance the flavor of the squash and aids in the roasting process, keeping it moist.
- Salt and Pepper - These seasonings are used to add flavor to the squash. Sprinkling salt and pepper over the squash before roasting helps bring out its natural taste.
- Low-Carb Pasta Sauce - You can choose your favorite low-carb pasta sauce to add flavor and moisture to the casserole. Common choices include marinara sauce, alfredo sauce, or pesto. The sauce is typically heated and then mixed with the shredded spaghetti squash before baking.
- Optional Toppings - Toppings such as grated Parmesan cheese, fresh basil, or red pepper flakes are used to garnish the casserole and add extra flavor. Grated Parmesan cheese adds a savory and cheesy element, fresh basil provides a burst of freshness, and red pepper flakes can add a touch of heat for those who enjoy a bit of spice.
How To Make Spaghetti Squash Casserole
- Preheat the Oven . Start by preheating your oven to 375°F.
- Prepare the Squash . Carefully cut the spaghetti squash in half lengthwise. Scoop out the seeds and discard them.
- Season and Roast . Drizzle each half of the squash with olive oil and sprinkle with salt and pepper. Place the halves, cut side down, on a baking sheet. Roast in the preheated oven for about 35-45 minutes or until the squash is tender and the flesh easily shreds into spaghetti-like strands with a fork. Check out this post for more info on How To Cook Spaghetti Squash
- Shred the Squash . Using a fork, scrape the flesh of the roasted squash into strands. It will resemble spaghetti!
- Top and Serve . Heat your favorite low-carb pasta sauce in a pan. Once heated, pour the sauce over the shredded squash. Top with optional toppings like grated Parmesan cheese, fresh basil, or red pepper flakes. Serve hot and enjoy!

Tips And Tricks
Making a delicious low-carb spaghetti squash casserole requires a few tips and tricks to ensure it turns out well. Here are some helpful tips:
- Choose the Right Squash. Look for a firm, heavy spaghetti squash with no soft spots or blemishes. A ripe squash will have a deep yellow color.
- Properly Cook the Squash . To achieve the right texture, bake or microwave the squash until it’s tender but not mushy. Overcooked squash can become watery.
- Drain Excess Moisture . After cooking the spaghetti squash, use a fork to scrape out the strands and place them in a colander. Sprinkle with salt and let them sit for a few minutes to release excess moisture. Then, gently squeeze or press with paper towels to remove even more moisture.
Variations
Low-carb spaghetti squash casserole is versatile, and you can customize it with various ingredients to suit your preferences. Here are some tasty variations to consider:
- Mediterranean Style - Combine cooked spaghetti squash with diced tomatoes, Kalamata olives, feta cheese, fresh basil, and a drizzle of olive oil. Add some grilled chicken or shrimp for extra protein.
- Veggie Lover’s Delight - Load up your casserole with sautéed or roasted low-carb vegetables like zucchini, bell peppers, mushrooms, and spinach. Mix them with your favorite low-carb sauce and cheese.
- Buffalo Chicken - Mix cooked spaghetti squash with shredded buffalo chicken, cream cheese, and shredded mozzarella. Top it with a drizzle of hot sauce and blue cheese crumbles.
- Tex-Mex Twist - Create a Tex-Mex casserole by combining spaghetti squash with seasoned ground beef or turkey, diced tomatoes, jalapeños, and a sprinkle of cheddar cheese. Serve with guacamole and sour cream.
What To Serve With Spaghetti Squash Casserole
Spaghetti squash casserole is a versatile dish that pairs well with a variety of sides. Here are some options to consider:
- Green Salad - A fresh green salad with a light vinaigrette or creamy dressing complements the casserole’s flavors and provides a refreshing contrast.
- Garlic Bread - Serve some warm garlic bread or garlic knots on the side for a satisfying and comforting addition.
- Roasted Vegetables - Roasted or grilled vegetables, such as asparagus, broccoli, or Brussels sprouts, add color, texture, and flavor to your meal.
- Protein - To make your meal more substantial, consider adding a protein source like grilled chicken, shrimp, or tofu.
How Long Does It Last?
Leftover Low Carb Spaghetti Squash can be stored in an airtight container in the refrigerator for up to 3-4 days.
Can You Freeze It?
Yes, you can freeze cooked spaghetti squash. Store it in an airtight container or freezer bag for up to 2-3 months.
Thaw it in the refrigerator before reheating.
Best Budget Friendly Recipes
- Barley Pilaf With Mushrooms
- Instant Pot Pork Chops
- Beef Shawarma
- Chile Relleno
- Vegetarian Chili
Spaghetti Squash Casserole | Baked Spaghetti Squash Recipe
Ingredients
- ▢ 3 pound Spaghetti Squash
- ▢ 3 tbsp Olive Oil
- ▢ 1 tsp Salt
- ▢ 1/2 tsp Pepper
- ▢ 4 cups Rao’ss Spaghetti Sauce
- ▢ 2 cups Parmesan Cheese
- ▢ Basil , for garnish
Instructions
- Preheat the Oven . Start by preheating your oven to 375°F.
- Prepare the Squash . Carefully cut the spaghetti squash in half lengthwise. Scoop out the seeds and discard them.
- Season and Roast . Drizzle each half of the squash with olive oil and sprinkle with salt and pepper. Place the halves, cut side down, on a baking sheet. Roast in the preheated oven for about 35-45 minutes or until the squash is tender and the flesh easily shreds into spaghetti-like strands with a fork.Check out this post for more info on How To Cook Spaghetti Squash
- Shred the Squash . Using a fork, scrape the flesh of the roasted squash into strands. It will resemble spaghetti!
- Top and Serve . Heat your favorite low-carb pasta sauce in a pan. Once heated, pour the sauce over the shredded squash. Top with optional toppings like grated Parmesan cheese, fresh basil, or red pepper flakes. Serve hot and enjoy!
Get support & connect with our community on Facebook!
Nutrition
Don’t forget to check out my other Ketocookbooks.
Keto Instant Pot, Keto Fat Bombs, Sweets, & Treats , and Easy keto in 30 minutes.

