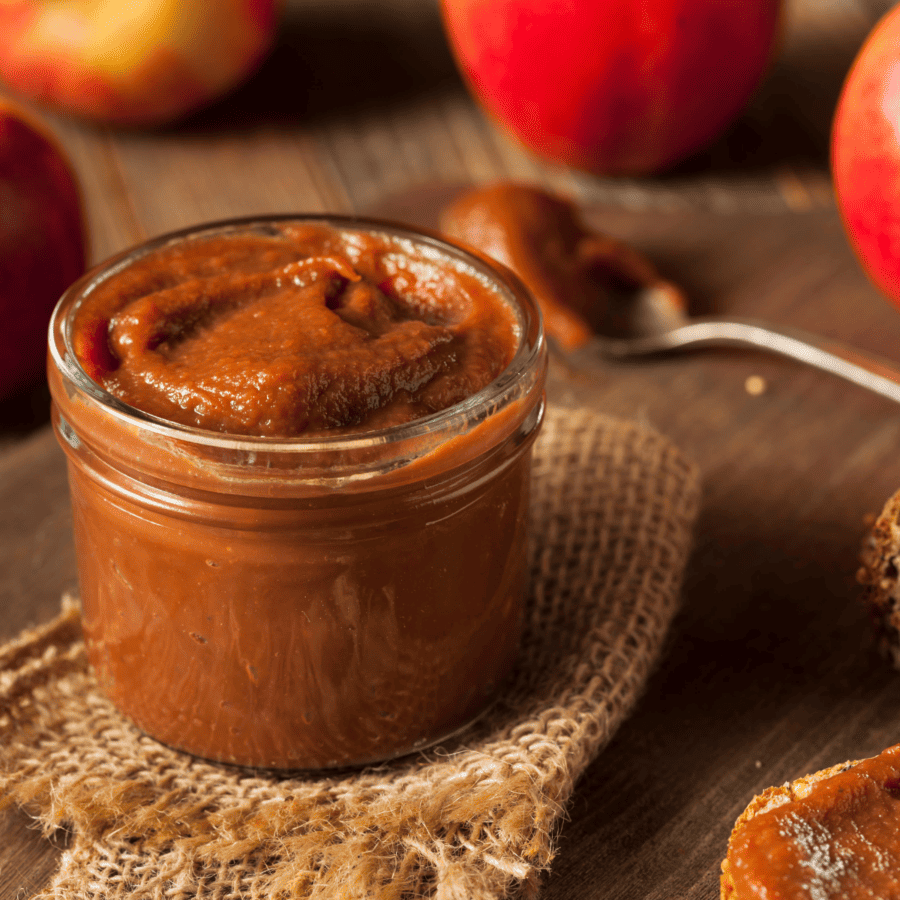
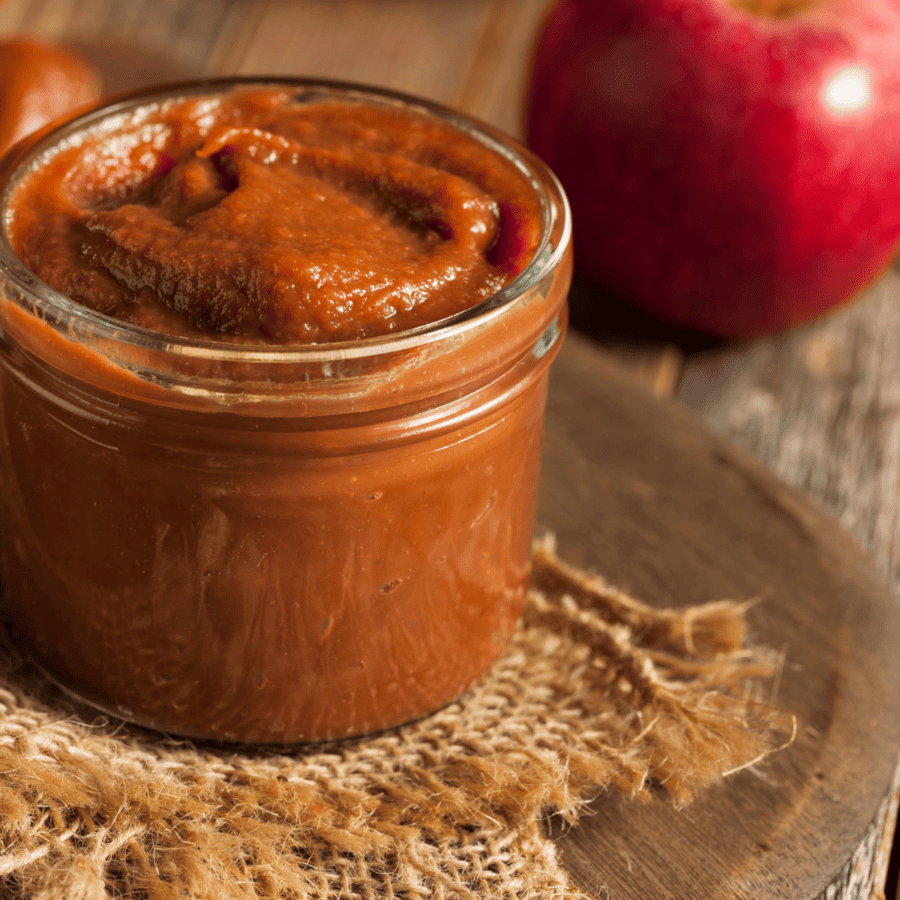
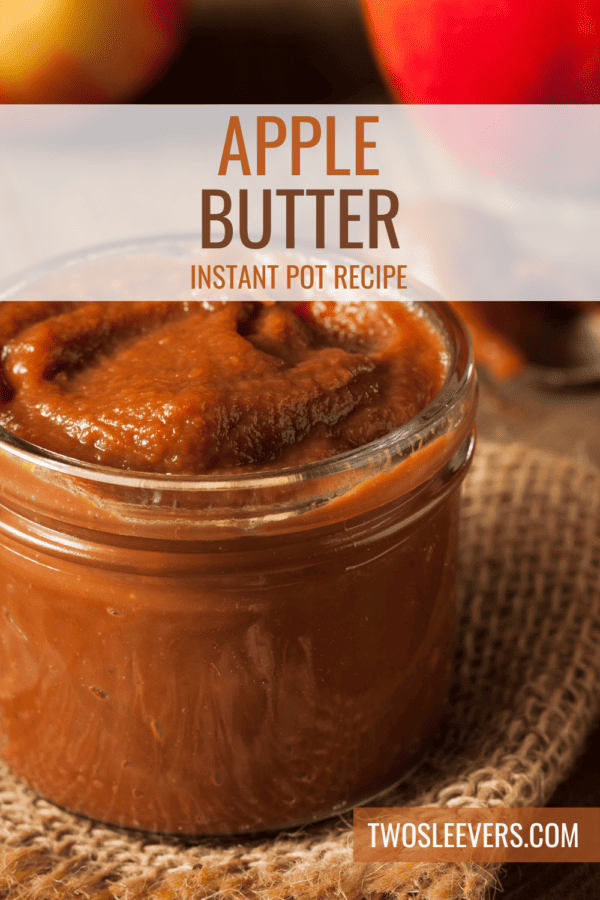
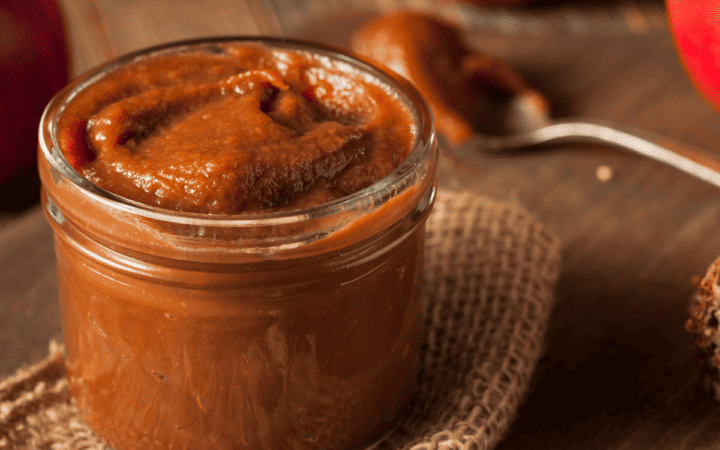
There’s something magical about homemade apple butter, especially when it’s made in the Instant Pot. This sweet, spiced spread captures the essence of fall and is incredibly versatile. Whether you slather it on toast, use it as a topping for pancakes, or incorporate it into your favorite recipes, Instant Pot apple butter is a delightful treat that will have your kitchen smelling like a cozy autumn day.
Why You’ll Fall In Love With This Apple Delight
- Fast and Easy . Instant Pot Apple Butter is ready in under 30 minutes, thanks to the magic of pressure cooking. It’s a quick and hassle-free way to enjoy the flavors of fall without spending hours in the kitchen.
- Flavorful and Versatile . This apple butter recipe is bursting with the warm, comforting flavors of cinnamon, nutmeg, and cloves. Plus, you can customize it with your preferred level of sweetness, making it perfect for everyone.
- Budget-Friendly . With just a few simple ingredients, many of which you likely already have on hand, making your own apple butter is a cost-effective way to enjoy this seasonal favorite.
What’s The Difference Between Applesauce And Apple Butter?
While both applesauce and apple butter are apple-based products, apple butter is a more concentrated, spiced, and caramelized version of applesauce.
The differences in ingredients, flavor, texture, and preparation make them distinct condiments, each with its own unique taste and culinary applications.
What Thickens Apple Butter?
Apple butter is typically thickened through a slow-cooking and reduction process rather than by adding thickeners like cornstarch or gelatin.
The natural thickening of apple butter occurs as the apples break down, release their pectin, and evaporate excess moisture during cooking.
Ingredients You’ll Need
- Apples- They provide the fruity base and natural sweetness to the spread. Mixing sweet and tart varieties like Granny Smith and Fuji creates a well-balanced flavor profile.
- Granulated Sugar- It is added to enhance the sweetness of the apple butter. The amount can be adjusted to suit your preference for sweetness.
- Brown Sugar- Brown sugar is used in combination with granulated sugar to deepen the sweetness and add a subtle molasses flavor. It also contributes to the rich, caramel-like color of the apple butter.
- Ground Cinnamon- Ground cinnamon is a classic spice used in apple butter recipes. It provides warm, aromatic notes that complement the apple flavor beautifully.
- Ground Nutmeg- Ground nutmeg adds a warm, nutty, and slightly earthy flavor to the apple butter. It enhances the overall spice profile and pairs wonderfully with the other spices.
- Ground Cloves- Contribute a hint of pungency and a spicy, earthy flavor to the apple butter. They complement the other spices and add complexity to the taste.
- Apple Cider- It adds liquid to the Instant Pot, allowing the apples to cook and soften. It also infuses the apple butter with more apple flavor and natural sweetness.
- Vanilla Extract- Vanilla extract is an optional ingredient that can be added for a subtle hint of vanilla flavor. It complements the apple and spice flavors and adds a layer of complexity.
How To Make Instant Pot Apple Butter
- Prepare the Apples . Wash, peel, core, and chop the apples into small pieces.
- Pressure Cook . Place the chopped apples into the Instant Pot. Add both sugars, ground cinnamon, ground nutmeg, ground cloves, and apple cider or juice to the Instant Pot. Close the Instant Pot lid, set the vent to “Sealing,” and cook on High Pressure for 5 minutes.
- Natural Release. Once the cooking time is complete, allow the Instant Pot to naturally release pressure for about 10-15 minutes.
- Blend and Simmer . Carefully open the Instant Pot lid, and use an immersion blender to puree the cooked apples until smooth. If you don’t have an immersion blender, you can transfer the mixture to a regular blender, blend until smooth, and return it to the Instant Pot. Add vanilla extract, if desired. Set the Instant Pot to “Saute” mode and simmer the mixture, uncovered, for 10-15 minutes or until it thickens to your desired consistency.
- Cool and Store. Allow the apple butter to cool completely before transferring it to clean, airtight jars or containers. Store in the refrigerator for up to two weeks or freeze for longer preservation.
Tips And Tricks
Making apple butter in an Instant Pot can be a convenient and delicious process. Here are some tips and tricks to help you achieve the best results:
- Choose the Right Apples . Use a mix of sweet and tart apple varieties for a well-balanced flavor. Popular choices include Granny Smith, Fuji, Honeycrisp, and Gala apples. Experiment with different combinations to suit your taste.
- Peel and Core the Apples . It’s recommended to peel and core the apples before cooking. This ensures a smoother texture and removes any tough or bitter parts of the apple.
- Adjust the Sugar . The amount of sugar needed may vary depending on the sweetness of your apples and your personal preference. Start with the suggested amount and adjust as needed during or after cooking. Remember, you can always add more sugar but can’t easily reduce it once it’s in.
Variations
Instant Pot apple butter is a versatile condiment that can be customized to suit your taste preferences. Here are some variations and flavor additions you can try:
- Maple Apple Butter - For a natural sweetener, replace some or all of the sugar with pure maple syrup. It adds a rich, earthy sweetness.
- Caramel Apple Butter - Elevate the sweetness by melting a bit of caramel into the apple butter. This variation is especially indulgent and decadent.
- Rum or Bourbon Apple Butter - Add a splash of dark rum or bourbon for a sophisticated and slightly boozy twist. Simmer the alcohol for a few minutes to cook off the alcohol content.
What To Serve With Instant Pot Apple Butter
Instant Pot apple butter is a versatile and flavorful condiment that can complement a variety of dishes. Here are some delicious ideas for what to serve with it:
- Toast or English Muffins - Spread a generous layer of apple butter on warm toast or English muffins for a delightful breakfast or snack.
- Pancakes or Waffles - Drizzle apple butter over pancakes or waffles as a sweet and fruity topping. It pairs well with maple syrup.
- Yogurt Parfait - Layer apple butter with yogurt and granola to create a delicious and balanced parfait.
- Pork Dishes - Apple butter is a classic accompaniment to pork dishes. Serve it with roasted pork tenderloin , pork chops , or pulled pork sandwiches for a sweet and savory combination.
- Cheese and Charcuterie - Include apple butter on a cheese and charcuterie board to add a fruity contrast to the salty and savory flavors of cheeses and cured meats.
How Long Does Fresh Apple Butter Last?
If you store homemade apple butter in an airtight container in the refrigerator, it can typically last for about 2 to 3 weeks. Be sure to keep it tightly sealed to prevent moisture and contaminants from entering the container.
Can You Freeze It?
For longer-term storage, you can freeze apple butter. When stored in an airtight container or freezer-safe bags, it can last for up to 6 months to a year in the freezer without significant loss of quality.
More Easy Instant Pot Recipes
- Instant Pot Butter Chicken
- Instant Pot Lasagna Soup
- American Goulash
- Mississippi Pot Roast
- Tomato Jam
Instant Pot Apple Butter | Easy Apple Butter Recipe
Ingredients
- ▢ 6 Apples
- ▢ 1/2 cup Granulated Sugar
- ▢ 1/2 cup Brown Sugar
- ▢ 1 tsp Ground Cinnamon
- ▢ 1/4 tsp Ground Nutmeg
- ▢ 1/4 tsp Ground Clove
- ▢ 1/2 cup Apple Cider
- ▢ 1 tsp Vanilla Extract
Instructions
- Prepare the Apples . Wash, peel, core, and chop the apples into small pieces.
- Pressure Cook . Place the chopped apples into the Instant Pot. Add both sugars, ground cinnamon, ground nutmeg, ground cloves, and apple cider or juice to the Instant Pot. Close the Instant Pot lid, set the vent to “Sealing,” and cook on High Pressure for 5 minutes.
- Natural Release. Once the cooking time is complete, allow the Instant Pot to naturally release pressure for about 10-15 minutes.
- Blend and Simmer . Carefully open the Instant Pot lid, and use an immersion blender to puree the cooked apples until smooth. If you don’t have an immersion blender, you can transfer the mixture to a regular blender, blend until smooth, and return it to the Instant Pot. Add vanilla extract, if desired. Set the Instant Pot to “Saute” mode and simmer the mixture, uncovered, for 10-15 minutes or until it thickens to your desired consistency.
- Cool and Store. Allow the apple butter to cool completely before transferring it to clean, airtight jars or containers. Store in the refrigerator for up to two weeks or freeze for longer preservation.
Get support & connect with our community on Facebook!
Nutrition
Don’t forget to check out my otherBest-selling Instant Pot Cookbooks!
Indian Instant Pot , Keto Instant Pot, Instant Pot Fast and Easy , Healthy Instant Pot & Vegetarian Instant Pot .


If you already signed up, you should have received an email with a password to give you unlimited access to our FREE Printable Library. The password is case sensitive. Enter it below and get printing!
Password:

Instant Pot Apple Butter | Easy Apple Butter Recipe
Ingredients
- 6 Apples
- 1/2 cup Granulated Sugar
- 1/2 cup Brown Sugar
- 1 tsp Ground Cinnamon
- 1/4 tsp Ground Nutmeg
- 1/4 tsp Ground Clove
- 1/2 cup Apple Cider
- 1 tsp Vanilla Extract
Instructions
- Prepare the Apples . Wash, peel, core, and chop the apples into small pieces.
- Pressure Cook . Place the chopped apples into the Instant Pot. Add both sugars, ground cinnamon, ground nutmeg, ground cloves, and apple cider or juice to the Instant Pot. Close the Instant Pot lid, set the vent to “Sealing,” and cook on High Pressure for 5 minutes.
- Natural Release. Once the cooking time is complete, allow the Instant Pot to naturally release pressure for about 10-15 minutes.
- Blend and Simmer . Carefully open the Instant Pot lid, and use an immersion blender to puree the cooked apples until smooth. If you don’t have an immersion blender, you can transfer the mixture to a regular blender, blend until smooth, and return it to the Instant Pot. Add vanilla extract, if desired. Set the Instant Pot to “Saute” mode and simmer the mixture, uncovered, for 10-15 minutes or until it thickens to your desired consistency.
- Cool and Store. Allow the apple butter to cool completely before transferring it to clean, airtight jars or containers. Store in the refrigerator for up to two weeks or freeze for longer preservation.
Instant Pot Apple Butter | Easy Apple Butter Recipe https://twosleevers.com/instant-pot-apple-butter/
A tostada is a beloved Mexican dish that’s all about layers of flavor and satisfying crunch. These crispy homemade tostadas are a fantastic addition to your recipe collection, whether you’re hosting a Mexican-themed fiesta or simply craving a delicious meal. In this step-by-step guide, we’ll show you how to make tostadas that are irresistible and bursting with authentic flavors.

Why You’ll Love This Easy Meal
- Crispy Goodness . Achieve that satisfying crunch without deep frying by baking your tostadas.
- Endless Customization. Load up your tostadas with your favorite toppings, from seasoned meats to fresh veggies and zesty sauces.
- Budget-Friendly . Making tostadas at home is cost-effective and can easily feed a crowd.
- Authentic Taste . Experience the authentic flavors of Mexican cuisine right in your kitchen.
Making your own tostadas at home is not only fun but also allows you to create a personalized masterpiece that suits your taste buds. Plus, these tostadas are a healthier alternative to deep-fried options since we’ll bake them to golden perfection. Here’s why you’ll love them.
What Is The Proper Way To Eat A Tostada?
Eating a tostada can be a delightful experience, but it can also be a messy one if not done properly. Here’s the proper way to eat a tostada to ensure you enjoy every bite without making a mess:
- Hold It Correctly . Pick up the tostada carefully, holding it with both hands. Ensure you have a firm grip to prevent it from breaking apart or the toppings from falling.
- Tilt It . Tostadas are typically piled high with toppings, so it’s essential to tilt it slightly toward your mouth to take a bite. This angle helps prevent the toppings from spilling out.
- Take a Bite . Take a bite from the edge of the tostada, focusing on the portion that’s easiest to reach without making a mess. Ensure you get a little bit of each layer in your bite for a balanced flavor.
- Rotate and Repeat . As you eat, continue to rotate the tostada, taking bites from different sides. This approach ensures you evenly enjoy all the toppings and keeps the tostada intact.
Is A Tostada Just A Flat Taco?
Tacos and tostadas share some similarities in terms of ingredients and fillings. The way they are prepared, their texture, and the overall eating experience make them unique dishes in Mexican cuisine.
Tacos are assembled by placing fillings inside the tortilla, which is then folded or rolled. Tostadas are assembled by layering toppings onto the flat, crispy tortilla. The toppings often include beans, meat, lettuce, cheese, salsa, and more.
What Are Tostadas Made Of?
- Corn Tortilla Shells
- Ground Beef
- Refried Beans
- Shredded Lettuce
- Tomatoes
- Onions
- Cilantro
- Sour Cream
- Shredded Monterey Jack Cheese
- Salsa
- Olive Oil
- Salt and Pepper
How To Make A Tostada
- Corn Tortillas . You’ll need corn tortillas. Heat a skillet or griddle over medium-high heat. Brush each tortilla lightly with olive oil on one side.
- Cook Tortillas . Place the tortillas, oiled side down, on the skillet. Cook until they become crisp and golden brown, about 2-3 minutes per side. Remove and let them cool.
- Cook Ground Meat . In a skillet, cook the ground beef over medium heat until browned and cooked through. Season the meat with your preferred spices, such as cumin, chili powder, paprika, salt, and pepper, for an authentic Mexican flavor.
- Warm Refried Beans . In a separate saucepan, heat the refried beans over low heat until warm. Stir occasionally to prevent sticking.
- Prepare Toppings . Dice the tomatoes, onions, and cilantro. Shred the lettuce and cheese. Have your salsa, hot sauce, or guacamole ready for an extra kick.
- Assemble Tostadas . Take a tostada shell and spread a generous layer of warm refried beans evenly on it. Add a portion of the cooked ground meat on top of the beans. Sprinkle shredded lettuce, diced tomatoes, and onions over the meat.
- Add Toppings . Drizzle sour cream over the veggies and meat. Sprinkle shredded cheese on top.
- Garnish and Serve . Finish off with a sprinkle of chopped cilantro. If you like it spicy, add salsa, hot sauce, or guacamole. Repeat the process with the remaining tostada shells.
- Enjoy! Your homemade tostadas are ready to be devoured. Serve them fresh and crispy for the best taste and texture.

Tips And Tricks
Making tostadas is a delightful way to enjoy crispy, open-faced tacos. Here are some tips and tricks to help you make them delicious every time:
- Use Corn Tortillas . Traditional tostadas are made with corn tortillas. Corn tortillas tend to yield a crisper texture than flour tortillas when fried.
- Select the Right Size . Use small corn tortillas for individual tostadas or larger ones for a meal-sized portion.
- Keep Toppings Light . Avoid overloading your tostada with heavy toppings, as this can make it challenging to eat. Keep the toppings balanced and manageable.
- Serve Immediately. Tostadas are best when served immediately after frying. Assemble and serve them promptly to enjoy the crispy texture.
Variations
Tostadas are incredibly versatile, and you can create a wide variety of delicious variations to suit your taste. Here are some ideas for different styles and flavors:
- Chicken Tostadas - Use shredded or diced cooked chicken seasoned with taco spices. Add lettuce, avocado, pico de gallo, and a drizzle of lime crema.
- Bean Tostadas - Spread refried beans on the tostada shell, and then add lettuce, diced onions, crumbled queso fresco, and a dash of hot sauce.
- Seafood Tostadas - Use grilled shrimp, fish, or even ceviche as your protein. Top with shredded cabbage, sliced radishes, cilantro, and a squeeze of lime.
What To Serve With Them
Tostadas are a versatile and delicious dish that can be served with a variety of sides and accompaniments to create a well-rounded meal. Here are some popular options to consider serving with them:
- Mexican Rice - Serve tostadas with a side of Mexican rice (arroz rojo) for a classic combination. The rice can be flavored with tomatoes, onions, and spices, and it complements the flavors of the tostadas.
- Refried Beans - Refried beans, either as a side or spread on the tostada itself, add a creamy and savory element to the meal. You can top the beans with cheese for extra flavor.
- Guacamole - Fresh guacamole is a fantastic accompaniment to tostadas. Its creamy texture and rich avocado flavor provide a nice contrast to the crispy tostada shell.
- Salsa - Offer a variety of salsas, such as pico de gallo, salsa verde, or salsa roja, for dipping or drizzling over the tostadas. Salsas add a burst of freshness and heat to the dish.
- Sour Cream - A dollop of sour cream on top of the tostadas can help balance the flavors and provide a cooling effect, especially if your tostadas have spicy elements.
How Long Do They Last?
Prepared tostadas have a limited shelf life, especially since they involve ingredients like toppings, which can become less fresh over time.
If you need to store prepared tostadas for a short period, you can refrigerate them. In the refrigerator, they will typically stay fresh for up to 2-3 days. Be sure to place them in an airtight container to prevent them from drying out or absorbing odors from the fridge.
More Mexican-Inspired Recipes
- Caldo de Res
- Slow Cooker Chipotle Chicken
- Instant Pot Beef Barbacoa
- Enchiladas Suizas
- Carne Picada
- Chicken Tostadas

Whether you’re cooking for a crowd or treating yourself to a solo fiesta, these tostadas are sure to impress. Enjoy your flavorful journey into the heart of Mexican cuisine!

Easy Tostada Recipe | How To Make Tostadas
Ingredients
- ▢ 4 Corn Tortillas
- ▢ 1 pound Ground Beef
- ▢ 1 cup Refried Beans
- ▢ 1 cup Lettuce , shredded
- ▢ 1/2 cup Tomatoes , diced
- ▢ 1/4 cup Onion , diced
- ▢ Cilantro , for garnish
- ▢ 1/4 cup Sour Cream
- ▢ 1/2 cup Mexican Blend Cheese
- ▢ 1/2 cup Salsa
- ▢ 2 tbsp Olive Oil , for frying
- ▢ 1 tsp Salt
- ▢ 1/2 tsp Black Pepper
Instructions
- Corn Tortillas . You’ll need corn tortillas. Heat a skillet or griddle over medium-high heat. Brush each tortilla lightly with olive oil on one side.
- Cook Tortillas . Place the tortillas, oiled side down, on the skillet. Cook until they become crisp and golden brown, about 2-3 minutes per side. Remove and let them cool.
- Cook Ground Meat . In a skillet, cook the ground beef over medium heat until browned and cooked through. Season the meat with your preferred spices, such as cumin, chili powder, paprika, salt, and pepper, for an authentic Mexican flavor.
- Warm Refried Beans . In a separate saucepan, heat the refried beans over low heat until warm. Stir occasionally to prevent sticking.
- Prepare Toppings . Dice the tomatoes, onions, and cilantro. Shred the lettuce and cheese. Have your salsa, hot sauce, or guacamole ready for an extra kick.
- Assemble Tostadas . Take a tostada shell and spread a generous layer of warm refried beans evenly on it. Add a portion of the cooked ground meat on top of the beans. Sprinkle shredded lettuce, diced tomatoes, and onions over the meat.
- Add Toppings . Drizzle sour cream over the veggies and meat. Sprinkle shredded cheese on top.
- Garnish and Serve . Finish off with a sprinkle of chopped cilantro. If you like it spicy, add salsa, hot sauce, or guacamole. Repeat the process with the remaining tostada shells.
