
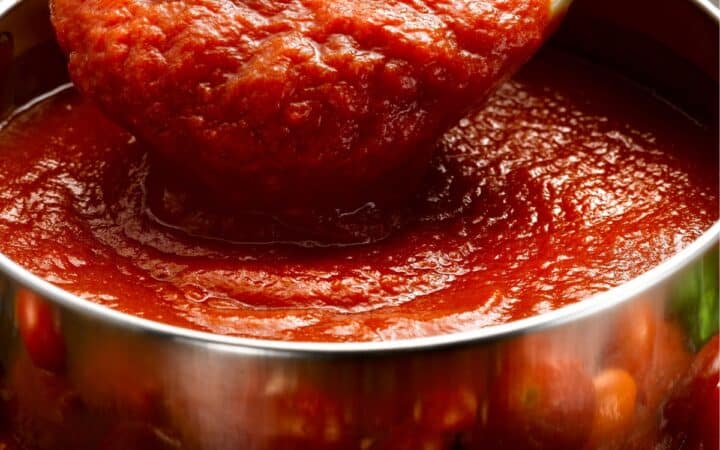
If you’re tired of bland store-bought jars, this Homemade Pizza Sauce will level up your pies with bright tomato flavor, garlic warmth, and Italian herb goodness.

Why You’ll Love This Spectacular Sauce
- Fresh Flavor. Ripe tomatoes, garlic, and herbs combine for a bright, vibrant sauce.
- Quick & Easy. Whip together in one pot in under 20 minutes—perfect for busy weeknights.
- Customizable. Adjust the sweetness, heat, or herb blend to suit your taste.
- Make-Ahead. Sauce stores beautifully in the fridge or freezer for later homemade pizzas.
What Does Homemade Pizza Sauce Taste Like?
Homemade pizza sauce delivers a bright, vibrant tomato flavor that’s both tangy and naturally sweet, with a fresh‐from‐the-garden quality you won’t get from jarred varieties.
The result is a sauce that’s bright yet balanced, savory yet sweet, with layers of herbal and garlicky richness, all working together to make your homemade pizza truly sing.
Is It Better Than Store-Bought?
Yes, homemade pizza sauce often outshines store-bought in flavor, freshness, and control over ingredients.
When you make your own, you’re using vine-ripened crushed tomatoes and aromatic garlic straight from the pan, rather than a jar that’s sat on a shelf. You control the sweetness with just a touch of sugar (no high-fructose corn syrup), balance acidity naturally, and season exactly to your taste with real Italian herbs and a splash of olive oil. Plus, there are no hidden preservatives or excess sodium.
The result is a brighter, more vibrant sauce whose layers of tomato, garlic, and herbs truly pop, transforming your pizza from “pretty good” to restaurant-quality at home.
Ingredients You’ll Need
- Crushed tomatoes - Provide the rich, slightly chunky tomato base, offering body and natural sweetness to the sauce.
- Tomato paste - Contributes concentrated tomato flavor, deepens the sauce’s color, and adds a velvety thickness.
- Extra-virgin olive oil - Sautés and caramelizes the garlic and herbs, and lends a smooth, fruity richness.
- Garlic - Infuses the sauce with warm, pungent aromatics that round out the tomato’s sweetness.
- Dried oregano - Brings classic Italian herbal warmth and a hint of earthiness.
- Dried basil - Adds sweet, peppery notes that brighten the tomato flavor.
- Red pepper flakes - Introduces a gentle kick of heat for those who like a spicy edge.
- Sugar - Balances the tomatoes’ natural acidity and amplifies their innate sweetness.
- Salt & freshly ground black pepper - Essential seasonings that enhance every flavor layer and sharpen the sauce’s profile.
How To Make Homemade Pizza Sauce
- Sauté the garlic. In a medium saucepan over medium heat, warm the olive oil until shimmering. Add the minced garlic and cook 30–45 seconds, stirring constantly, until fragrant (don’t let it brown).
- Add tomato paste. Stir in the tomato paste and cook for 1 minute, until it darkens slightly. This deepens the sauce’s flavor.
- Build the sauce. Pour in the crushed tomatoes, then sprinkle in oregano, basil, red pepper flakes (if using), and sugar.
- Simmer and season. Bring the sauce to a gentle simmer, then reduce heat and cook, uncovered, for 12–15 minutes, stirring occasionally, until slightly thickened. For an ultra-smooth sauce, use an immersion blender to pulse until your desired consistency. Skip this step if you prefer a rustic, chunky texture.
- Adjust to taste. Season with salt and pepper, tasting and tweaking until the sauce is balanced. Remove from heat.

Tips And Tricks
Here are a few tips and tricks to ensure your homemade pizza sauce turns out rich, balanced, and full of vibrant flavor:
- Use San Marzano–style tomatoes . These are best for the most authentic, naturally sweet flavor.
- Don’t overcook. A quick simmer keeps brightness; extended cooking can turn the sauce bitter.
- Layer flavors. Add a splash of red wine or a small pat of butter at the end for richness.
- Infuse garlic oil. Warm garlic in oil first to mellow its bite before sauce assembly.
Variations
If you love your homemade pizza sauce but want to switch things up, here are some delicious variations to try:
- Spicy Arrabbiata Sauce - Double the red pepper flakes and add a pinch of smoked paprika.
- Creamy White- Swap tomatoes for ½ cup heavy cream and ½ cup grated Parmesan.
- Pesto-Infused - Stir in 2 tablespoons of basil pesto off-heat for a herbaceous twist.
- Roasted Garlic Tomato - Roast whole garlic cloves until soft, then mash and add in place of raw garlic.
What To Eat With Homemade Pizza Sauce
Here are some delicious ways to enjoy your homemade pizza sauce beyond just spreading it on dough:
- As a dip - Serve warm with cauliflower breadsticks or mozzarella sticks .
- Pasta - Toss with cooked penne or rigatoni and top with fresh Parmesan.
- Meatball subs - Spoon over turkey or beef meatballs in toasted hoagies.
- Chicken Parmesan - Layer under melted mozzarella on breaded chicken cutlets.
How Long Does It Last?
Homemade pizza sauce stored in an airtight container will keep for about 5–7 days in the refrigerator.
The acidity of the tomatoes and added vinegar or sugar help slow bacterial growth, but it’s best to use it within the first week for optimal freshness and flavor.
Can You Freeze It?
If you’d like to preserve it longer, you can freeze the sauce in freezer-safe containers or heavy-duty resealable bags for up to 3 months, just thaw overnight in the fridge before reheating or using.
More Simple Sauce Recipes
- Big Mac Sauce
- Pomodoro Sauce
- Bang Bang Sauce
- Keto Ranch Dressing
- Honey Mustard

Homemade Pizza Sauce Recipe | Super Simple Pizza Sauce
Ingredients
- ▢ 15 ounces Crushed Tomatoes
- ▢ 2 tbsp Tomato Paste
- ▢ 2 tbsp Olive Oil
- ▢ 2 cloves Garlic , minced
- ▢ 1 tsp Dried Oregano
- ▢ 1 tsp Dried basil
- ▢ 1/4 tsp Red Pepper Flakes , optional
- ▢ 1/2 tsp Granulated Sugar
- ▢ 3/4 tsp Kosher Salt
- ▢ 1/4 tsp Ground Black Pepper
Instructions
- Sauté the garlic. In a medium saucepan over medium heat, warm the olive oil until shimmering. Add the minced garlic and cook 30–45 seconds, stirring constantly, until fragrant (don’t let it brown).
- Add tomato paste. Stir in the tomato paste and cook for 1 minute, until it darkens slightly. This deepens the sauce’s flavor.
- Build the sauce. Pour in the crushed tomatoes, then sprinkle in oregano, basil, red pepper flakes (if using), and sugar.
- Simmer and season. Bring the sauce to a gentle simmer, then reduce heat and cook, uncovered, for 12–15 minutes, stirring occasionally, until slightly thickened. For an ultra-smooth sauce, use an immersion blender to pulse until your desired consistency. Skip this step if you prefer a rustic, chunky texture.
- Adjust to taste. Season with salt and pepper, tasting and tweaking until the sauce is balanced. Remove from heat.
Get support & connect with our community on Facebook!
Nutrition

If you already signed up, you should have received an email with a password to give you unlimited access to our FREE Printable Library. The password is case sensitive. Enter it below and get printing!
Password:
Homemade Pizza Sauce Recipe | Super Simple Pizza Sauce
Ingredients
- 15 ounces Crushed Tomatoes
- 2 tbsp Tomato Paste
- 2 tbsp Olive Oil
- 2 cloves Garlic minced
- 1 tsp Dried Oregano
- 1 tsp Dried basil
- 1/4 tsp Red Pepper Flakes optional
- 1/2 tsp Granulated Sugar
- 3/4 tsp Kosher Salt
- 1/4 tsp Ground Black Pepper
Instructions
- Sauté the garlic. In a medium saucepan over medium heat, warm the olive oil until shimmering. Add the minced garlic and cook 30–45 seconds, stirring constantly, until fragrant (don’t let it brown).
- Add tomato paste. Stir in the tomato paste and cook for 1 minute, until it darkens slightly. This deepens the sauce’s flavor.
- Build the sauce. Pour in the crushed tomatoes, then sprinkle in oregano, basil, red pepper flakes (if using), and sugar.
- Simmer and season. Bring the sauce to a gentle simmer, then reduce heat and cook, uncovered, for 12–15 minutes, stirring occasionally, until slightly thickened. For an ultra-smooth sauce, use an immersion blender to pulse until your desired consistency. Skip this step if you prefer a rustic, chunky texture.
- Adjust to taste. Season with salt and pepper, tasting and tweaking until the sauce is balanced. Remove from heat.
Homemade Pizza Sauce Recipe | Super Simple Pizza Sauce https://twosleevers.com/homemade-pizza-sauce-recipe/

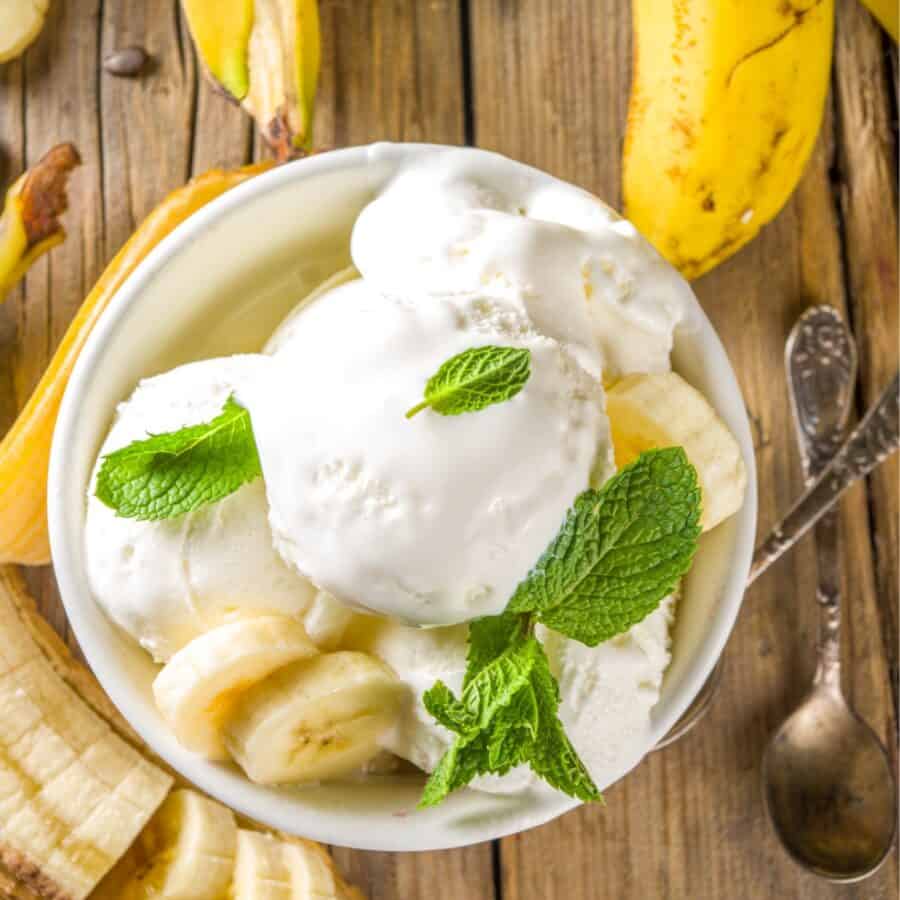
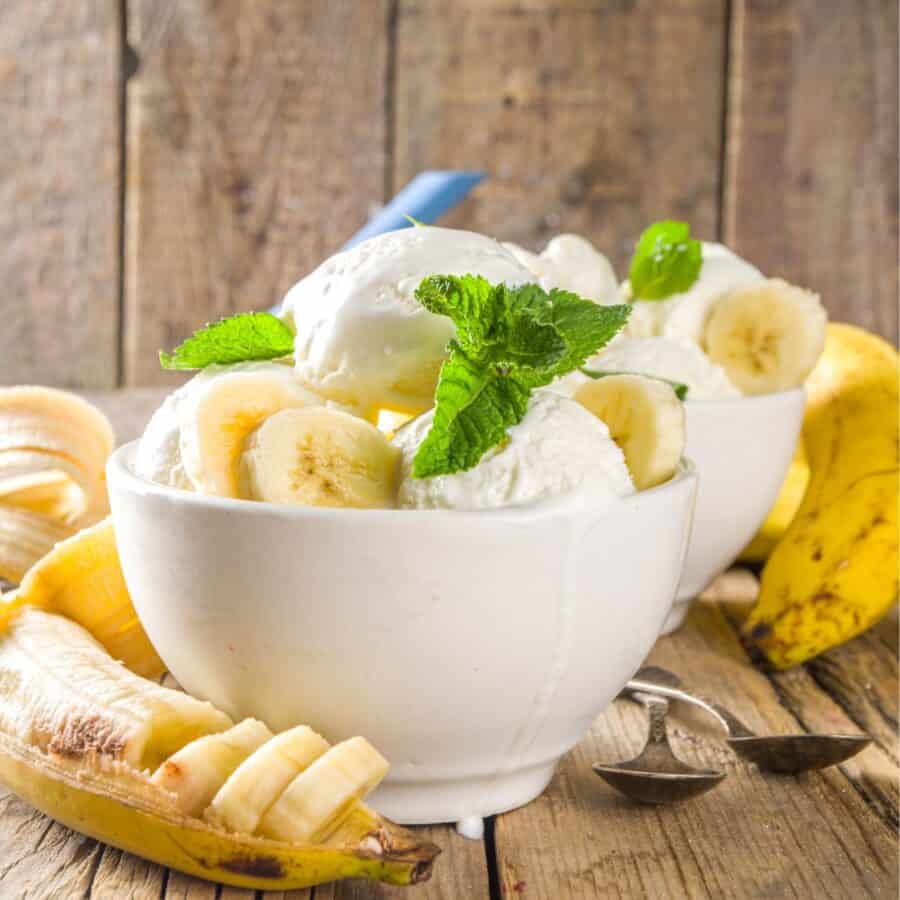
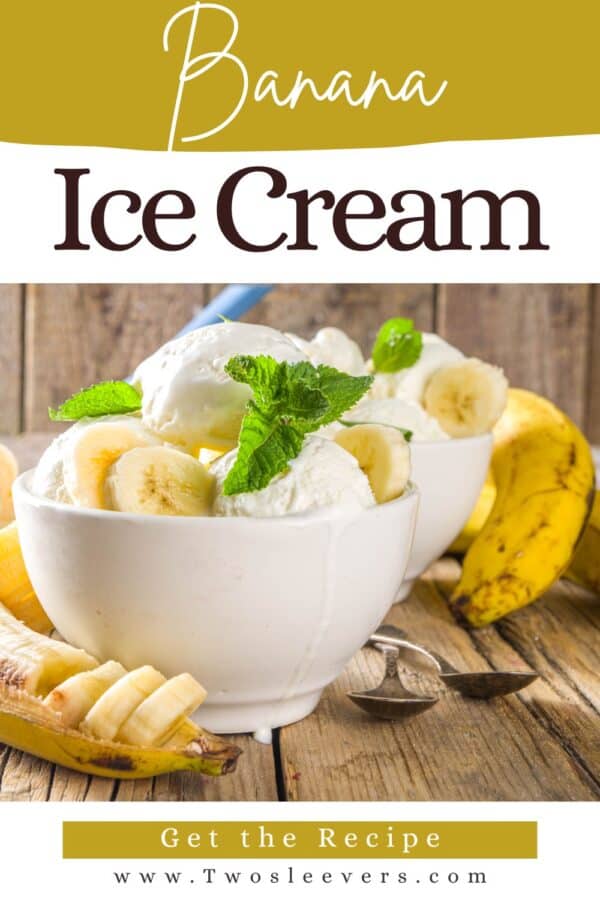
If you’re craving a cold, creamy treat that’s naturally sweet, dairy-free, and shockingly simple, you’re going to fall in love with Banana Ice Cream! With just a couple of ripe bananas and a blender or food processor, you can whip up a dessert that’s as satisfying as traditional ice cream with none of the added sugar or dairy.
Why You’ll Love This Incredible Ice Cream
- Fast. You can make banana ice cream in under 10 minutes once your bananas are frozen.
- Healthy. Naturally sweetened, vegan, and gluten-free. It’s great for nearly any dietary lifestyle.
- Customizable. Add cocoa powder, peanut butter, vanilla, or mix-ins to create endless flavor variations.
- No-Churn. No ice cream maker required. All you need is a high-speed mixer, blender, or food processor.
- Kid-Friendly. It’s a sneaky way to serve fruit as dessert (and they won’t even notice!).
Whether you enjoy it plain or load it up with your favorite mix-ins, Banana Ice Cream is a fast, guilt-free way to cool down.
What Does Banana Ice Cream Taste Like?
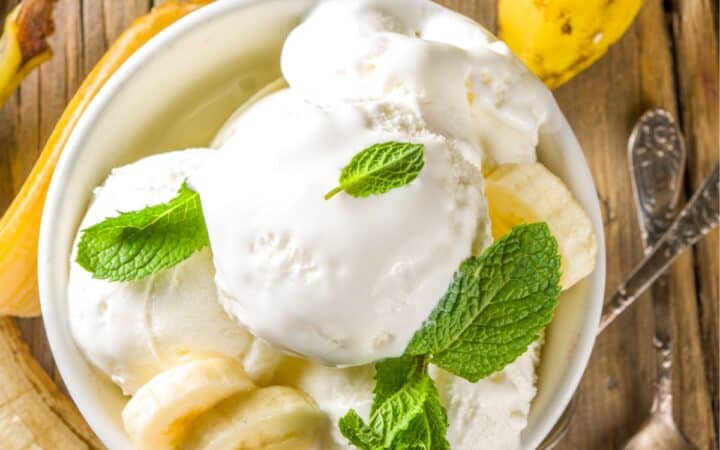
Banana ice cream is one of those recipes that surprises you with how decadent it tastes considering how healthy it actually is. It’s thick, creamy, and sweet, with the natural flavor of ripe bananas shining through.
You can dress it up to taste just like your favorite ice cream flavor without needing added sugars, artificial ingredients, or heavy cream.
How Do You Keep Your Bananas From Turning Brown?
To keep bananas from turning brown in banana ice cream, it’s important to minimize their exposure to air, which causes oxidation and discoloration. Start by using ripe bananas with brown spots, which are naturally sweeter, but avoid ones that are overly mushy or fermenting. After peeling, slice the bananas and freeze them promptly to lock in their color and flavor.
Spreading the slices in a single layer on a parchment-lined baking sheet before transferring them to an airtight container or freezer bag can help prevent clumping and oxidation.
If desired, a light toss in lemon juice can add extra protection against browning, thanks to the vitamin C content, though it may slightly alter the flavor.
Once the banana ice cream is blended, it’s best to enjoy it immediately for the freshest look and taste. If you need to store it, press plastic wrap directly onto the surface of the ice cream before sealing the container to reduce air exposure.
These simple steps will help maintain that creamy texture and naturally sweet flavor without the unappealing brown color.
Ingredients You’ll Need
- Ripe Bananas - The star and only essential ingredient in banana ice cream. Bananas with lots of brown spots are naturally sweeter and softer, which not only enhances the flavor but also blends into a smooth, creamy texture that mimics traditional ice cream without the need for dairy or added sugar.
Optional Add-Ins
- Vanilla Extract - A splash of vanilla deepens the overall flavor and adds a warm, sweet aroma that complements the natural banana taste.
- Peanut Butter - Adds a rich, nutty flavor and creamy consistency while boosting protein content. It creates a delicious “banana peanut butter” twist.
- Chocolate Chips or Chunks - Stirred in after blending, these provide texture and indulgent bites of chocolate throughout the ice cream.
- Cinnamon - Offers a cozy, spiced flavor that enhances the sweetness of the bananas and adds a subtle complexity.
- Dairy-Free Milk (if needed) - Just a small splash can help the bananas blend more easily, especially if they’re very solidly frozen. Almond, oat, or coconut milk are popular choices that keep the recipe vegan.
How To Make Banana Ice Cream
- Slice and Freeze the Bananas. Start with 3–4 ripe bananas. Peel them, slice into ½-inch rounds, and place in a single layer on a parchment-lined baking sheet. Freeze for at least 2 hours, or preferably overnight, until solid.
- Blend Until Creamy. Place the frozen banana slices into a high-speed blender or food processor. Pulse a few times to break them up, then blend until smooth and creamy. Scrape down the sides as needed. It will look crumbly at first, then suddenly turn into soft-serve ice cream. If your blender struggles, add a splash of plant-based milk to help the blades turn.
- Add Mix-Ins (Optional). Once smooth, stir in any add-ins like chocolate chips, peanut butter, or cinnamon.
- Serve Immediately or Freeze. Serve the banana ice cream right away for soft-serve consistency, or transfer to a freezer-safe container and freeze for 1–2 hours to scoop like traditional ice cream.
Tips And Tricks
Making banana ice cream at home is incredibly easy and naturally healthy, but a few key tips can help you achieve that ultra-smooth, creamy texture and rich flavor every time. Whether you’re enjoying it plain or adding creative mix-ins, these tricks will ensure your banana ice cream turns out delicious and scoopable every time.
- Use Very Ripe Bananas . Bananas with lots of brown spots are sweeter and blend more smoothly. Avoid green or underripe bananas—they won’t provide the same creaminess or flavor.
- Slice Before Freezing . Slice your bananas into ½-inch rounds before freezing. This makes them easier to blend evenly and prevents straining your blender or food processor.
- Single Layer Freeze . Freeze banana slices on a parchment-lined baking sheet in a single layer to prevent clumping. Once frozen solid, transfer them to a freezer bag for long-term storage.
- Don’t Overload the Blender . Blend in batches if necessary. Trying to process too many banana slices at once can slow down blending and strain your appliance.
Variations
Banana ice cream is incredibly versatile, making it a perfect base for a variety of flavor combinations. Whether you’re keeping it dairy-free and refined sugar-free or turning it into a decadent dessert, there are endless ways to customize this naturally sweet treat. Below are some fun and delicious variations to try the next time you’re blending frozen bananas.
- Chocolate- Blend in 1–2 tablespoons of unsweetened cocoa powder for a rich, chocolaty twist. Add chocolate chips or a fudge swirl for extra indulgence.
- Peanut Butter- Add a spoonful of creamy or crunchy peanut butter for a nutty, protein-packed version. Almond or cashew butter also works great.
- Strawberry- Add ½ cup of frozen strawberries during blending for a fruity, refreshing variation. You can also try raspberries or blueberries.
- Mocha- Add 1 teaspoon of instant espresso powder and cocoa powder for a bold coffee-chocolate flavor combo.
What To Enjoy With Banana Ice Cream
Banana ice cream is creamy, naturally sweet, and pairs beautifully with a variety of toppings and treats. Here are some delicious ideas for what to enjoy with it:
- Peanut Butter Drizzle - Adds rich, nutty flavor and creamy texture.
- Chocolate Sauce or Fudge - For a decadent, classic dessert feel.
- Chopped Nuts - Walnuts, almonds, or pecans provide a crunchy contrast.
- Fresh Berries - Strawberries, blueberries, or raspberries offer tartness and freshness.
- Granola - Adds texture and a wholesome crunch.
How Long Does It Last?
Banana ice cream is best enjoyed fresh, but you can store it in the freezer in an airtight container for up to 1 week. After that, it may start to crystallize or become too icy.
If frozen hard, let it sit out for 5–10 minutes before scooping for the best texture.
More Frozen Treats
- Keto Ice Cream
- Brownie Ice Cream
- Peanut Butter Ice Cream
- Coconut Ice Cream
- Strawberry Ice Cream
- Blackberry Ice Cream
Banana Ice Cream Recipe | No Churn Ice Cream With Bananas
Ingredients
- ▢ 4 Bananas , very ripe
- ▢ 1 tsp Vanilla Extract
- ▢ 2 tbsp Peanut Butter
- ▢ 2 tbsp Unsweetened Almond Milk
- ▢ 1/4 tsp Ground Cinnamon
- ▢ 1/3 cup Chocolate Chips , optional
Instructions
- Slice and Freeze the Bananas. Start with 3–4 ripe bananas. Peel them, slice into ½-inch rounds, and place in a single layer on a parchment-lined baking sheet. Freeze for at least 2 hours, or preferably overnight, until solid.
- Blend Until Creamy. Place the frozen banana slices into a high-speed blender or food processor. Pulse a few times to break them up, then blend until smooth and creamy. Scrape down the sides as needed. It will look crumbly at first, then suddenly turn into soft-serve ice cream. If your blender struggles, add a splash of plant-based milk to help the blades turn.
- Add Mix-Ins (Optional). Once smooth, stir in any add-ins like chocolate chips, peanut butter, or cinnamon.
- Serve Immediately or Freeze. Serve the banana ice cream right away for soft-serve consistency, or transfer to a freezer-safe container and freeze for 1–2 hours to scoop like traditional ice cream.
