
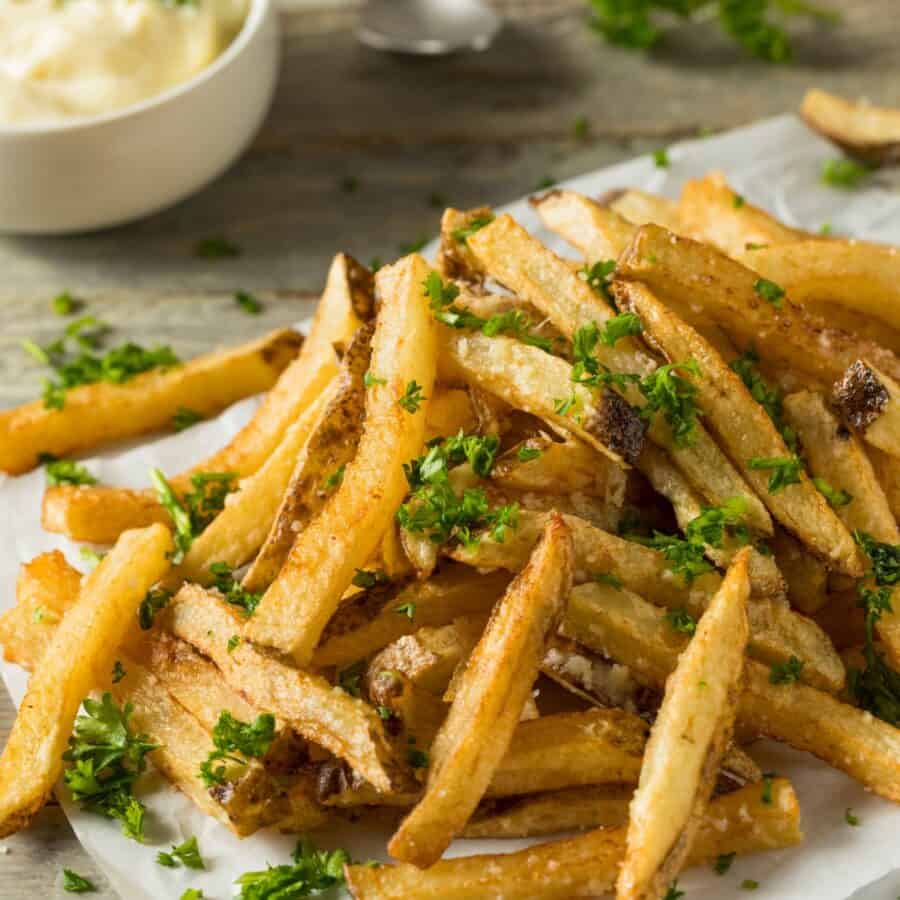
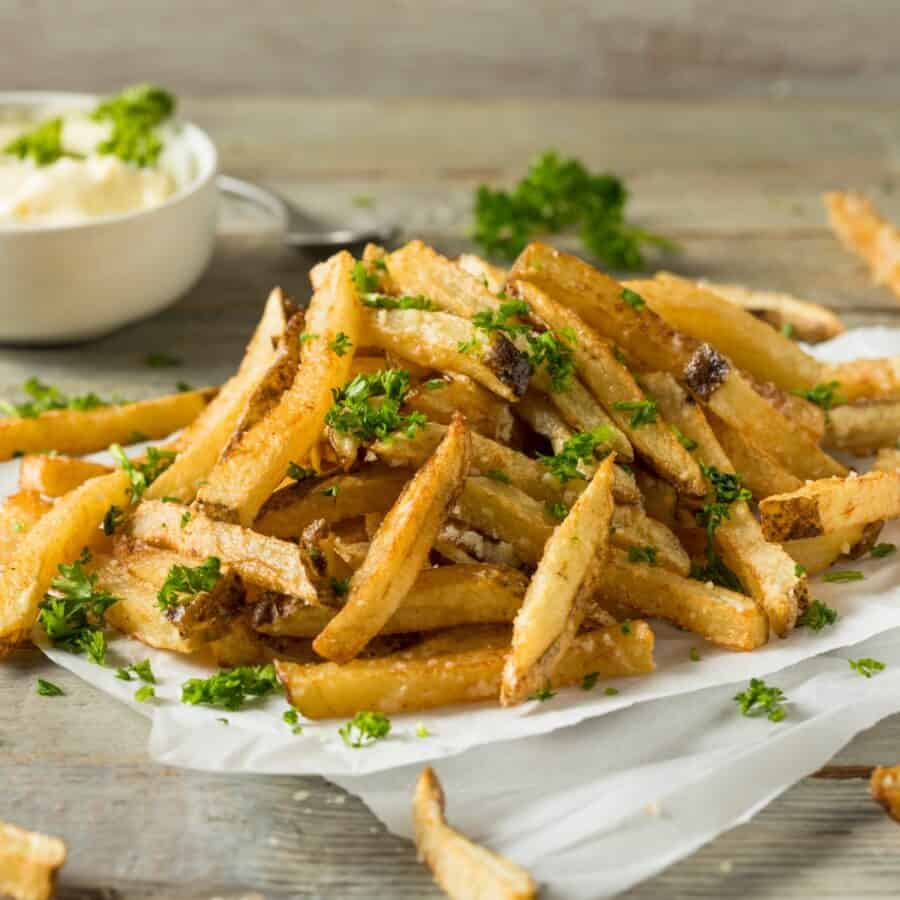
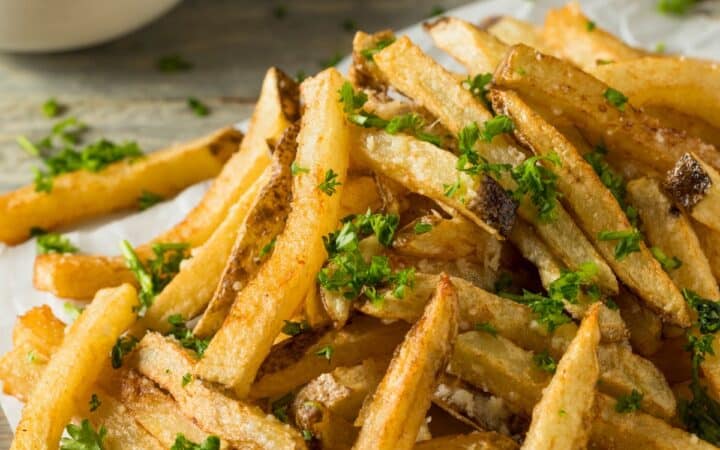
If you’re a fan of the classic, crispy French fry, you’re in for a treat! Learn how to make the easiest Homemade French Fries. You’ll achieve that perfect balance between a crispy exterior and tender interior while indulging in irresistible flavors.
Why You’ll Love These Crispy Fries
- Fast. Ready in under 30 minutes with simple ingredients.
- Easy. Prep the potatoes, fry them to golden perfection, and enjoy.
- Versatile. Season them to your liking for a customized taste experience.
- Delicious. Packed with flavor that is absolutely finger-licking good.
With the convenience of this recipe, you’ve achieved a restaurant-quality dish that will leave your friends and family craving more. Whether you’re hosting a game day gathering or simply treating yourself to a delicious meal, these fries are guaranteed to be a hit.
Do You Have To Soak Potatoes Before Frying?
Soaking potatoes before frying is not strictly necessary, but it is highly recommended for achieving the best results. Here are the reasons why soaking potatoes before frying can make a big difference:
- Removes Excess Starch . Soaking the cut potatoes in cold water helps to remove some of the excess starch. This prevents the fries from becoming too sticky and helps them achieve a crispier texture.
- Prevents Browning . Excess starch can cause the potatoes to brown too quickly on the outside while remaining undercooked on the inside. Soaking helps to prevent this by allowing for more even cooking.
- Improves Crispiness . By soaking the potatoes, you can achieve a crispier exterior when frying. The water helps to draw out some of the natural moisture from the potatoes, which is essential for getting that perfect golden crust.
What Is The Best Oil For Homemade French Fries?
The best oil for homemade French fries depends on a few factors such as smoke point, flavor, and health considerations. Here are some of the top choices:
- Peanut Oil Pros : High Smoke Point . About 450°F, which is ideal for frying. Flavor . Has a mild flavor that doesn’t overpower the taste of the fries. Cons : Allergies . Not suitable for those with peanut allergies.
- Canola Oil Pros : High Smoke Point . About 400°F. Healthier Option . Contains lower levels of saturated fats and higher levels of omega-3 fatty acids. Neutral Flavor . Won’t alter the taste of the fries. Cons : Refined . Some may prefer less processed oils.
- Vegetable Oil Pros : High Smoke Point . Varies, but generally around 400°F. Availability . Widely available and affordable. Cons : Blend of Oils . Can be a mix of different oils, which may not always be the healthiest choice.
Ingredients You’ll Need
- Potatoes - Russet potatoes are best for their starchy content, which helps achieve that crispy texture.
- Olive Oil - Helps crisp up the fries while they’re cooking.
- Salt - Enhances the flavor of the fries.
- Optional Seasonings - Garlic powder, onion powder, paprika, or any of your favorite spices.
How To Make Homemade French Fries
- Wash and Peel. Start by washing and peeling the potatoes. You can leave the skin on for extra texture if you prefer.
- Cut into Strips. Slice the potatoes into even strips. A fry cutter can be handy, but a sharp knife works just as well.
- Soak in Water. Place the potato strips in a bowl of cold water and let them soak for at least 30 minutes. This removes excess starch and helps the fries become crispy.
- Heat Oil. Preheat your deep fryer or a large pot with oil to 350°F.
- Dry the Potatoes. Drain the potato strips and pat them dry with paper towels. Dry potatoes will result in a crispier texture.
- First Fry. Fry the potatoes in batches for about 3-4 minutes until they are light golden and slightly soft. Remove and drain on paper towels.
- Second Fry. Increase the oil temperature to 375°F. Fry the potatoes again in batches for another 2-3 minutes until they are golden brown and crispy.
- Season. Immediately sprinkle the fries with salt and any other desired seasonings while they are hot.
- Serve Hot. Transfer the fries to a serving platter. Enjoy them fresh and hot, perfect with your favorite dipping sauces.
Tips And Tricks
Making Homemade French Fries is a delicious endeavor, and a few tips and tricks can help you achieve the best possible results. Here are some pointers to ensure your fries turn out crispy, flavorful, and utterly irresistible:
- Soak the Potatoes . Soaking the potato strips in cold water helps remove excess starch and is key to achieving crispy fries.
- Double Fry . Frying the potatoes twice—first at a lower temperature, then at a higher temperature—ensures they are crispy on the outside and tender on the inside.
- Season Immediately . Seasoning the fries while they are hot allows the salt and spices to stick better, enhancing the flavor.
Variations
If you’re a fan of Homemade French Fries and want to try some creative variations, here are a few delicious ideas to explore:
- Garlic Parmesan Fries - Toss the hot fries in minced garlic and grated Parmesan cheese for a savory twist.
- Spicy Cajun Fries - Add a blend of Cajun spices to the fries for a spicy kick.
- Truffle Fries - Drizzle the fries with truffle oil and sprinkle with Parmesan cheese for a gourmet touch.
What To Eat With Homemade French Fries
Homemade French Fries are a versatile dish that pairs well with a variety of sides and accompaniments. Here are some delicious options to consider serving alongside them:
- Dipping Sauces - Offer a range of dipping sauces for added variety. Ketchup, aioli, ranch dressing , or spicy mayo complement the flavors of the fries.
- Burgers - Classic pairing for a satisfying meal.
- Grilled Chicken - Light and flavorful option that balances the richness of the fries.
- Salads - Fresh salads provide a refreshing contrast to the crispy fries.
How Long Do They Last?
Cooked Homemade French Fries can be stored in the refrigerator in an airtight container for up to 2 to 3 days.
For the best bite, they are best enjoyed fresh, but you can reheat them in an oven or air fryer to regain some of their crispiness.
Can You Freeze Them?
Yes, you can freeze Homemade French Fries to extend their shelf life and enjoy them at a later time. Freezing is a great way to preserve the flavors and texture of the fries.
- Freeze Before Frying . After cutting and soaking the potatoes, pat them dry and freeze them on a baking sheet. Once frozen, transfer to a freezer-safe bag.
- Cook from Frozen . Fry the frozen fries directly in hot oil without thawing. Adjust cooking times as needed.
More Perfect Potato Recipes
- Cheesy Potatoes
- Instant Pot Mashed Potatoes
- Air Fryer Potatoes
- Smashed Potatoes
- Potato Casserole

Homemade French Fries | Perfectly Crispy Fries
Ingredients
- ▢ 4 Russett Potatoes , sliced into fries
- ▢ Oil , for Frying
- ▢ 1/2 tsp Kosher Salt
- ▢ 1/2 tsp Black Pepper
- ▢ 1/2 tsp Garlic Powder
- ▢ 1/2 tsp Paprika
Instructions
- Wash and Peel. Start by washing and peeling the potatoes. You can leave the skin on for extra texture if you prefer.
- Cut into Strips. Slice the potatoes into even strips. A fry cutter can be handy, but a sharp knife works just as well.
- Soak in Water. Place the potato strips in a bowl of cold water and let them soak for at least 30 minutes. This removes excess starch and helps the fries become crispy.
- Heat Oil. Preheat your deep fryer or a large pot with oil to 350°F.
- Dry the Potatoes . Drain the potato strips and pat them dry with paper towels. Dry potatoes will result in a crispier texture.
- First Fry. Fry the potatoes in batches for about 3-4 minutes until they are light golden and slightly soft. Remove and drain on paper towels.
- Second Fry. Increase the oil temperature to 375°F. Fry the potatoes again in batches for another 2-3 minutes until they are golden brown and crispy.
- Season. Immediately sprinkle the fries with salt and any other desired seasonings while they are hot.
- Serve Hot. Transfer the fries to a serving platter. Enjoy them fresh and hot, perfect with your favorite dipping sauces.
Get support & connect with our community on Facebook!
Nutrition

If you already signed up, you should have received an email with a password to give you unlimited access to our FREE Printable Library. The password is case sensitive. Enter it below and get printing!
Password:

Homemade French Fries | Perfectly Crispy Fries
Ingredients
- 4 Russett Potatoes sliced into fries
- Oil for Frying
- 1/2 tsp Kosher Salt
- 1/2 tsp Black Pepper
- 1/2 tsp Garlic Powder
- 1/2 tsp Paprika
Instructions
- Wash and Peel. Start by washing and peeling the potatoes. You can leave the skin on for extra texture if you prefer.
- Cut into Strips. Slice the potatoes into even strips. A fry cutter can be handy, but a sharp knife works just as well.
- Soak in Water. Place the potato strips in a bowl of cold water and let them soak for at least 30 minutes. This removes excess starch and helps the fries become crispy.
- Heat Oil. Preheat your deep fryer or a large pot with oil to 350°F.
- Dry the Potatoes . Drain the potato strips and pat them dry with paper towels. Dry potatoes will result in a crispier texture.
- First Fry. Fry the potatoes in batches for about 3-4 minutes until they are light golden and slightly soft. Remove and drain on paper towels.
- Second Fry. Increase the oil temperature to 375°F. Fry the potatoes again in batches for another 2-3 minutes until they are golden brown and crispy.
- Season. Immediately sprinkle the fries with salt and any other desired seasonings while they are hot.
- Serve Hot. Transfer the fries to a serving platter. Enjoy them fresh and hot, perfect with your favorite dipping sauces.
Homemade French Fries | Perfectly Crispy Fries https://twosleevers.com/homemade-french-fries/

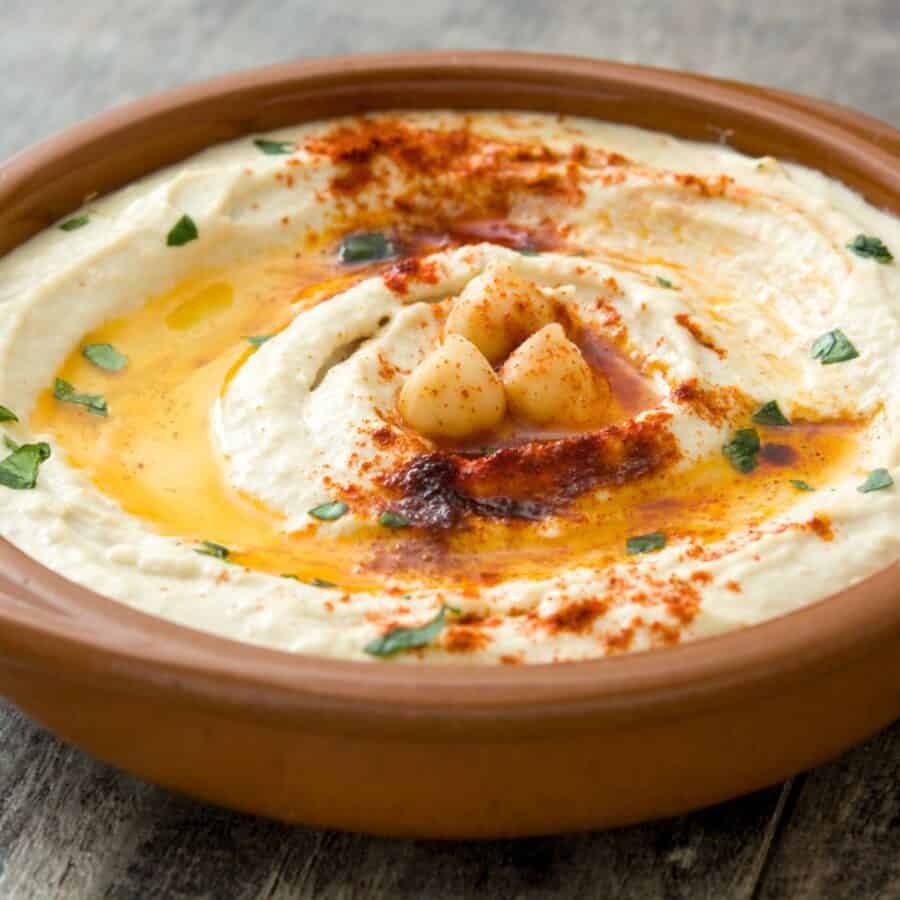
Spice up your snack game with this delicious and easy Garlic Spicy Hummus! This recipe turns simple ingredients into a flavorful dip with just the right amount of heat and a creamy texture. Dive into this healthy and tasty option that’s perfect for any occasion.

Why You’ll Love This Amazing Appetizer
- Quick. Ready in just 15 minutes from start to finish.
- Effortless. Minimal preparation for a no-fuss cooking experience.
- Incredibly Tasty. The blend of garlic and spices combined with the creamy texture is a match made in heaven.
- Healthy Option. Packed with protein and fiber, this hummus is a nutritious choice for snacking.
What Does Spicy Hummus Taste Like?
Spicy hummus combines the rich, creamy texture of traditional hummus with a kick of heat. Here’s what you can expect in terms of taste:
- Creamy Base . The chickpeas and tahini create a smooth, creamy foundation that’s nutty and slightly earthy.
- Garlic Flavor . The garlic adds a pungent, savory element that complements the creaminess of the chickpeas.
- Heat . The spice, often from ingredients like chili peppers, cayenne, or hot sauce, provides a warming sensation that can range from mild to intense, depending on the recipe.
- Citrusy Brightness . Lemon juice adds a bright, tangy note that balances the richness and heat.
- Savory Depth . Additional spices and seasonings like cumin and paprika can add complexity and depth to the flavor profile.
Overall, spicy hummus is a delicious combination of creamy, nutty, garlicky, and spicy flavors with a refreshing hint of citrus.
Is Spicy Hummus Healthy?
Spicy hummus is a nutritious and healthful addition to a balanced diet when consumed in moderation. It offers a variety of health benefits, making it a great choice for a snack or a component of meals.
Ingredients You’ll Need
- Chickpeas - The main ingredient, providing a creamy base.
- Tahini - Adds a rich, nutty flavor and smooth texture.
- Garlic - Adds a savory depth and bold flavor.
- Lemon Juice - Provides a tangy brightness.
- Olive Oil - Enhances the creamy texture and adds a rich flavor.
- Cumin - Adds warmth and earthiness.
- Paprika - Adds color and a subtle smokiness.
- Cayenne Pepper - For a touch of heat.
- Salt - Enhances all the flavors.
- Water - To adjust the consistency.
- Red Pepper Flakes - For an extra kick of heat.
- Olive Oil - A drizzle on top for added richness.
- Paprika - For garnish and color.
How To Make Spicy Hummus
- Prep the Ingredients. Drain and rinse the chickpeas. Peel the garlic cloves.
- Blend the Base. In a food processor, combine the chickpeas, tahini, garlic, lemon juice, olive oil, cumin, paprika, cayenne pepper, and salt. Blend until smooth.
- Adjust Consistency. Slowly add water, one tablespoon at a time, blending until you reach your desired consistency.
- Taste and Adjust. Taste the hummus and adjust the seasoning as needed.
- Serve. Transfer the hummus to a serving bowl, drizzle with olive oil, and sprinkle with paprika and red pepper flakes if desired. Serve with fresh vegetables, pita bread, or crackers.
Tips And Tricks
Making delicious Garlic Spicy Hummus involves more than just the right ingredients; it’s about technique and a few kitchen tricks to ensure it turns out flavorful and satisfying. Here’s how to perfect it:
- Use Fresh Garlic. Fresh garlic cloves provide the best flavor and punch.
- Peel the Chickpeas. For an extra smooth hummus, peel the chickpeas before blending. It’s a bit tedious but worth the effort.
- Adjust the Spice Level. Add more or less cayenne pepper and red pepper flakes to suit your heat preference.
- Chill Before Serving. Letting the hummus chill in the fridge for an hour enhances the flavors.
Variations
Garlic Spicy Hummus is a versatile dish that can be adapted to suit a variety of tastes and dietary needs. Here are some creative variations on the classic:
- Roasted Red Pepper- Add roasted red peppers for a sweet and smoky flavor.
- Herb - Blend in fresh herbs like parsley, cilantro, or dill for a herby twist.
- Sun-Dried Tomato- Add sun-dried tomatoes for a tangy and savory flavor.
- Avocado- Blend in a ripe avocado for a creamy and buttery texture.
What To Eat With Spicy Hummus
Garlic Spicy Hummus pairs wonderfully with various sides and snacks. Here are some great options:
- Fresh Vegetables - Carrot sticks, cucumber slices, bell pepper strips, and cherry tomatoes.
- Pita Bread - Warm pita bread or pita chips for a classic pairing.
- Crackers - A crunchy option for dipping.
- Sandwich Spread - Use it as a flavorful spread for sandwiches or wraps.
How Long Does It Last?
Spicy garlic hummus can last up to 5 days when stored properly in an airtight container in the refrigerator. For best results, make sure to keep it well-sealed to maintain its freshness and flavor. If you notice any changes in smell, texture, or appearance, it’s best to discard it.
Can You Freeze It?
Frozen hummus can be stored for up to 4 months. While the texture might be slightly affected, stirring it well after thawing can help restore its original consistency.
More Spectacular Snacks
- Pretzel Bites
- Whipped Feta Dip
- Dirt Cake
- Parmesan Crisps
- Cookie Dough Bites
- Red Pepper Hummus


Spicy Hummus Recipe | Spicy Garlic Hummus
Ingredients
- ▢ 15 oz Canned Chickpeas , drained
- ▢ 1/4 cup Tahini
- ▢ 2 cloves Garlic , minced
- ▢ 2 tbsp Lemon Juice
- ▢ 2 tbsp Olive Oil
- ▢ 1 tsp Ground Cumin
- ▢ 1 tsp Paprika
- ▢ 1/4 tsp Cayenne Pepper
- ▢ 1/2 tsp Kosher Salt
- ▢ 3 tbsp Water
Instructions
- Prep the Ingredients. Drain and rinse the chickpeas. Peel the garlic cloves.
- Blend the Base. In a food processor, combine the chickpeas, tahini, garlic, lemon juice, olive oil, cumin, paprika, cayenne pepper, and salt. Blend until smooth.
- Adjust Consistency. Slowly add water, one tablespoon at a time, blending until you reach your desired consistency.
- Taste and Adjust. Taste the hummus and adjust the seasoning as needed.
- Serve. Transfer the hummus to a serving bowl, drizzle with olive oil, and sprinkle with paprika and red pepper flakes if desired. Serve with fresh vegetables, pita bread, or crackers.
