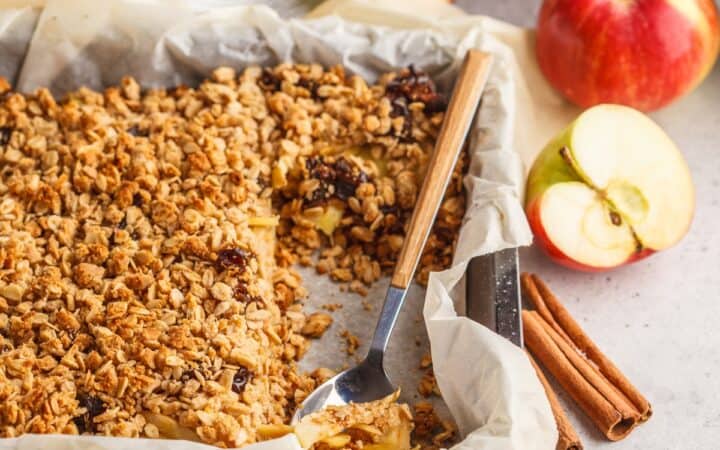
Warm, comforting, and oh-so-satisfying, this Healthy Apple Crisp is the perfect dessert to indulge in without the guilt. Made with juicy apples, warm spices, and a crunchy oat topping, this lighter version of the classic apple crisp will quickly become a favorite in your household.
Why You’ll Love This Amazing Apple Treat
- Nutrient-Dense. Packed with fiber-rich apples and oats, this dessert is as nourishing as it is delicious.
- Lower in Sugar. Sweetened naturally with a touch of maple syrup or honey, keeping the sugar content in check.
- Simple Ingredients. Made with pantry staples, this recipe is easy to whip up with ingredients you likely already have on hand.
- Versatile. Perfect for breakfast, dessert, or a snack—this apple crisp fits any occasion.
Whether you’re serving it at a family gathering or enjoying it as a weeknight treat, this recipe offers all the flavor and comfort you crave, with a healthy twist.
What Makes This Apple Crisp Healthy?
Traditional apple crisp recipes often include a lot of sugar and butter, which can make them quite indulgent. This healthier version uses less sugar, swaps out refined sugar for natural sweeteners like maple syrup, and incorporates heart-healthy oats in the topping.
The result is a dessert that satisfies your sweet tooth while providing more nutritional benefits.
What Is The Difference Between Apple Crumble And Apple Crisp?
The primary difference between apple crumble and apple crisp lies in the topping. While both desserts feature a base of baked apples, the toppings set them apart:
- Apple Crumble Topping: Apple crumble, on the other hand, has a simpler topping made from flour, butter, and sugar, without oats. The topping is more similar to a streusel and crumbles over the fruit. Texture: The crumble topping is softer and less crunchy than the crisp topping, providing a more delicate texture.
- Apple Crisp Topping: Apple crisp is typically topped with a mixture of oats, butter, sugar, and sometimes nuts. The oats create a crispy, crunchy texture when baked, hence the name “crisp.” Texture: The oats and nuts in the topping give it a distinct crunch, adding texture to the soft, baked apples underneath.
Ingredients You’ll Need
For The Filling
- Apples - Choose your favorite variety, such as Granny Smith for tartness or Honeycrisp for sweetness. Apples are the star of this dish, providing natural sweetness and a juicy texture.
- Lemon Juice - Helps prevent the apples from browning and adds a slight tang that enhances the flavor.
- Maple Syrup or Honey - A natural sweetener that adds just the right amount of sweetness without refined sugars.
- Cinnamon - Adds warmth and depth to the apple filling.
- Nutmeg- A hint of nutmeg complements the cinnamon, adding complexity to the flavor.
- Cornstarch - Helps thicken the apple juices, creating a luscious filling.
For The Topping
- Old-Fashioned Oats - Provides a hearty, crunchy topping that’s high in fiber.
- Almond Flour - Adds a nutty flavor and a light, tender texture to the topping.
- Coconut Oil or Butter - Binds the topping ingredients together and adds richness without the need for excessive amounts.
- Maple Syrup or Honey - Sweetens the topping naturally, keeping it lower in sugar.
- Raisins - Optional for additional sweetness and texture.
- Cinnamon - Infuses the topping with warm, comforting flavors.
- Salt - Enhances the overall flavor and balances the sweetness.
How To Make Healthy Apple Crisp
- Preheat the Oven. Preheat your oven to 350°F and lightly grease an 8x8-inch baking dish or a similar-sized oven-safe dish.
- Prepare the Apple Filling. Peel, core, and slice the apples into thin wedges. Place them in a large mixing bowl and toss with lemon juice, maple syrup, cinnamon, nutmeg, and cornstarch until evenly coated.
- Make the Topping. In a separate bowl, combine the oats, almond flour, melted coconut oil or butter, maple syrup, cinnamon, and a pinch of salt. Mix until the ingredients are well combined and crumbly.
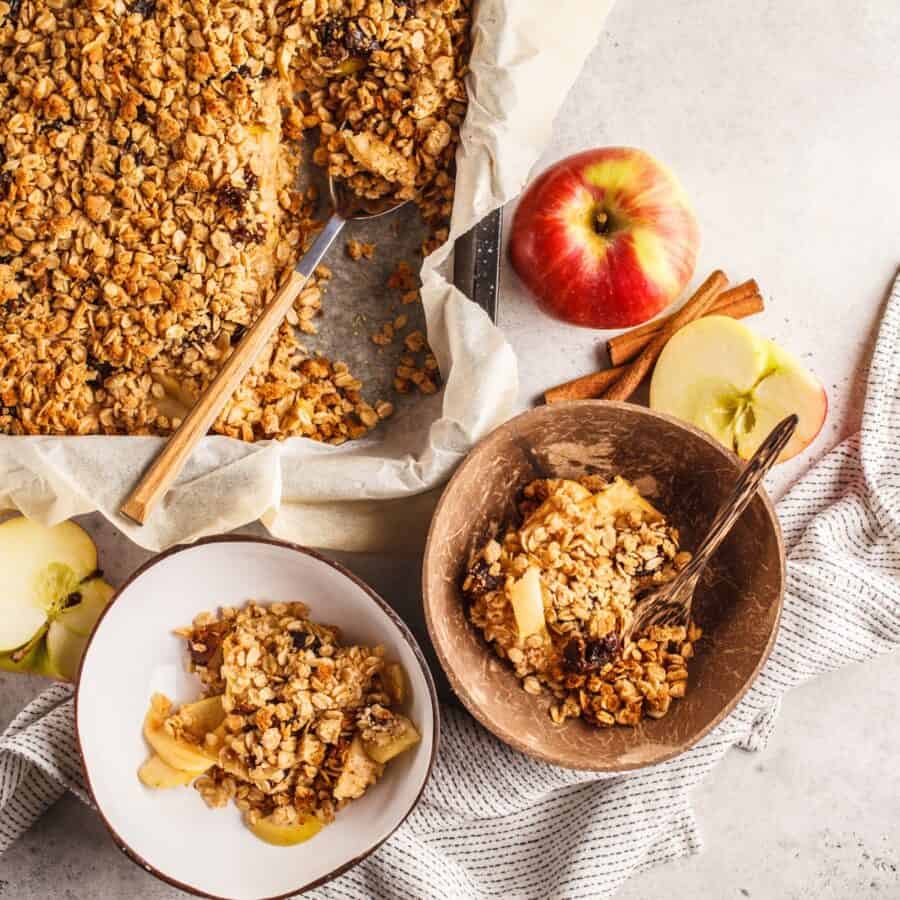
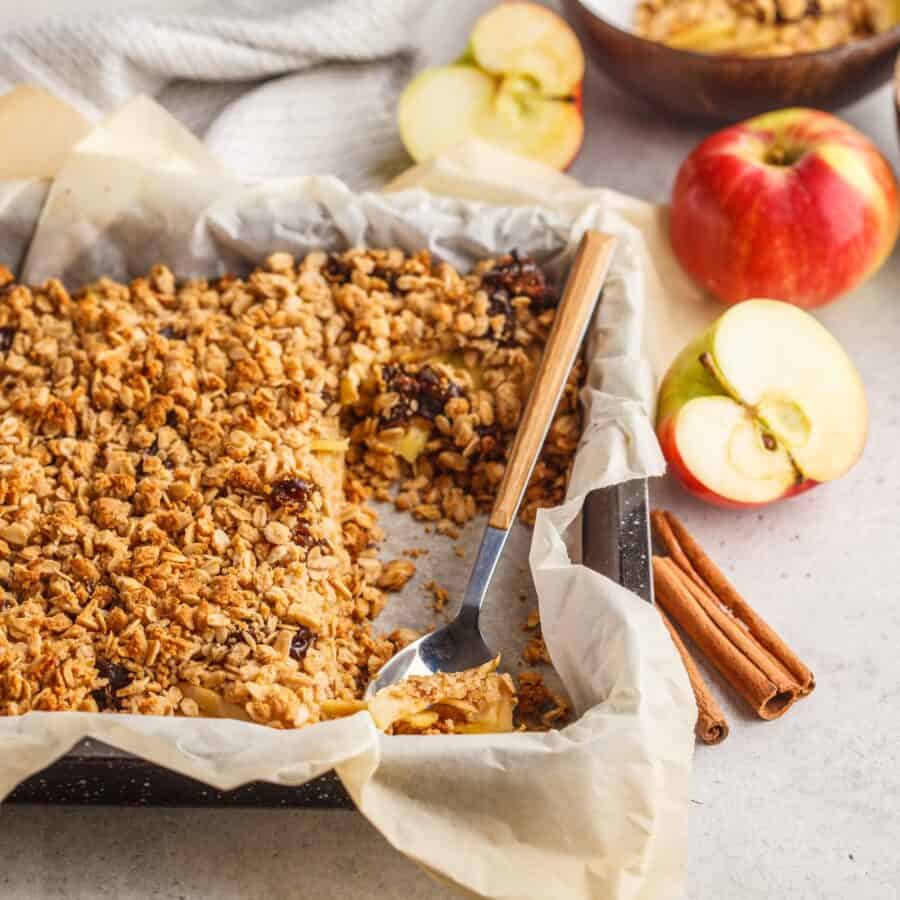
- Assemble the Crisp. Spread the apple mixture evenly in the prepared baking dish. Sprinkle the oat topping over the apples, covering them completely.
- Bake. Bake the apple crisp in the preheated oven for 35-40 minutes, or until the apples are tender and the topping is golden and crispy.
- Serve. Let the apple crisp cool for a few minutes before serving. Enjoy it warm, either on its own or with a scoop of vanilla ice cream or a dollop of Greek yogurt for an extra treat.
Tips And Tricks
Making a healthy apple crisp that’s just as satisfying as the traditional version is all about using the right techniques and ingredients. Here are some tips to ensure your apple crisp turns out perfectly every time:
- Use a Mix of Apples. For the best flavor and texture, use a combination of sweet and tart apples. This balance creates a more complex and delicious filling.
- Don’t Skip the Lemon Juice. Lemon juice not only prevents the apples from browning but also enhances their natural flavor, adding a touch of brightness to the dish.
- Adjust the Sweetness. Depending on the sweetness of your apples, you might want to adjust the amount of maple syrup or honey in the filling and topping. Taste the apples before assembling to ensure the sweetness level is just right for you.
- Keep an Eye on the Topping. If the topping starts to brown too quickly, cover the crisp loosely with aluminum foil for the remainder of the baking time to prevent it from burning.
- Make It Ahead. You can prepare the apple filling and topping separately and store them in the refrigerator for up to 24 hours before assembling and baking. This makes it easy to have a warm, fresh apple crisp ready in no time.
Variations
Healthy Apple Crisp is a versatile recipe that you can easily adapt to suit your preferences or dietary needs. Here are a few variations to try:
- Add Berries . Mix in fresh or frozen berries, such as blueberries or raspberries, with the apples for a burst of color and flavor.
- Go Nutty . Add chopped nuts, such as pecans or walnuts, to the topping for extra crunch and a boost of healthy fats.
- Spice It Up . Experiment with different spices, such as ginger or cardamom, to add a unique twist to the flavor profile.
What To Eat With Healthy Apple Crisp
This Healthy Apple Crisp is delicious on its own, but it pairs wonderfully with a few simple accompaniments:
- Greek Yogurt - A dollop of vanilla or plain Greek yogurt adds a creamy contrast and a bit of protein, making it a great option for breakfast or a snack.
- Ice Cream - For dessert, serve the warm apple crisp with a scoop of vanilla or cinnamon ice cream for a classic combination.
- Whipped Cream - A swirl of whipped cream (or coconut whipped cream for a dairy-free option) adds a light and fluffy touch to the crisp.
How Long Does It Last?
Store any leftover Healthy Apple Crisp in an airtight container in the refrigerator for up to 4 days. Reheat in the microwave or oven until warmed through before serving.
Can You Freeze It?
Yes! You can freeze the assembled, unbaked apple crisp. Wrap it tightly in plastic wrap and then aluminum foil. When ready to bake, thaw it in the refrigerator overnight and bake as directed, adding a few extra minutes if needed.
More Delicious Desserts
- Low Carb Chocolate Chip Cookies
- Keto Cheesecake Brownies
- Pumpkin Mousse
- Peach Galette
- Mango Cheesecake
Healthy Apple Crisp Recipe | Easy And Delicious
Ingredients
For The Apple Filling
- ▢ 4 Apples , peeled, cored, and sliced
- ▢ 1 tbsp Lime Juice
- ▢ 2 tbsp Maple Syrup
- ▢ 1 tsp Ground Cinnamon
- ▢ 1/4 tsp Ground Nutmeg
- ▢ 1 tbsp Cornstarch
For The Topping
- ▢ 1 cup Old Fashioned Oats
- ▢ 1/2 cup Almond Flour
- ▢ 1/4 cup Coconut Oil
- ▢ 2 tbsp Maple Syrup
- ▢ 1/4 cups Raisins
- ▢ 1 tsp Ground Cinnamon , optional
- ▢ 1/4 tsp Kosher Salt
Instructions
- Preheat the Oven. Preheat your oven to 350°F and lightly grease an 8x8-inch baking dish or a similar-sized oven-safe dish.
- Prepare the Apple Filling. Peel, core, and slice the apples into thin wedges. Place them in a large mixing bowl and toss with lemon juice, maple syrup, cinnamon, nutmeg, and cornstarch until evenly coated.
- Make the Topping. In a separate bowl, combine the oats, almond flour, melted coconut oil or butter, maple syrup, cinnamon, and a pinch of salt. Mix until the ingredients are well combined and crumbly.
- Assemble the Crisp. Spread the apple mixture evenly in the prepared baking dish. Sprinkle the oat topping over the apples, covering them completely.
- Bake. Bake the apple crisp in the preheated oven for 35-40 minutes, or until the apples are tender and the topping is golden and crispy.
- Serve. Let the apple crisp cool for a few minutes before serving. Enjoy it warm, either on its own or with a scoop of vanilla ice cream or a dollop of Greek yogurt for an extra treat.
Get support & connect with our community on Facebook!
Nutrition

If you already signed up, you should have received an email with a password to give you unlimited access to our FREE Printable Library. The password is case sensitive. Enter it below and get printing!
Password:

Healthy Apple Crisp Recipe | Easy And Delicious
Ingredients
For The Apple Filling
- 4 Apples peeled, cored, and sliced
- 1 tbsp Lime Juice
- 2 tbsp Maple Syrup
- 1 tsp Ground Cinnamon
- 1/4 tsp Ground Nutmeg
- 1 tbsp Cornstarch
For The Topping
- 1 cup Old Fashioned Oats
- 1/2 cup Almond Flour
- 1/4 cup Coconut Oil
- 2 tbsp Maple Syrup
- 1/4 cups Raisins
- 1 tsp Ground Cinnamon optional
- 1/4 tsp Kosher Salt
Instructions
- Preheat the Oven. Preheat your oven to 350°F and lightly grease an 8x8-inch baking dish or a similar-sized oven-safe dish.
- Prepare the Apple Filling. Peel, core, and slice the apples into thin wedges. Place them in a large mixing bowl and toss with lemon juice, maple syrup, cinnamon, nutmeg, and cornstarch until evenly coated.
- Make the Topping. In a separate bowl, combine the oats, almond flour, melted coconut oil or butter, maple syrup, cinnamon, and a pinch of salt. Mix until the ingredients are well combined and crumbly.
- Assemble the Crisp. Spread the apple mixture evenly in the prepared baking dish. Sprinkle the oat topping over the apples, covering them completely.
- Bake. Bake the apple crisp in the preheated oven for 35-40 minutes, or until the apples are tender and the topping is golden and crispy.
- Serve. Let the apple crisp cool for a few minutes before serving. Enjoy it warm, either on its own or with a scoop of vanilla ice cream or a dollop of Greek yogurt for an extra treat.
Healthy Apple Crisp Recipe | Easy And Delicious https://twosleevers.com/healthy-apple-crisp-recipe/

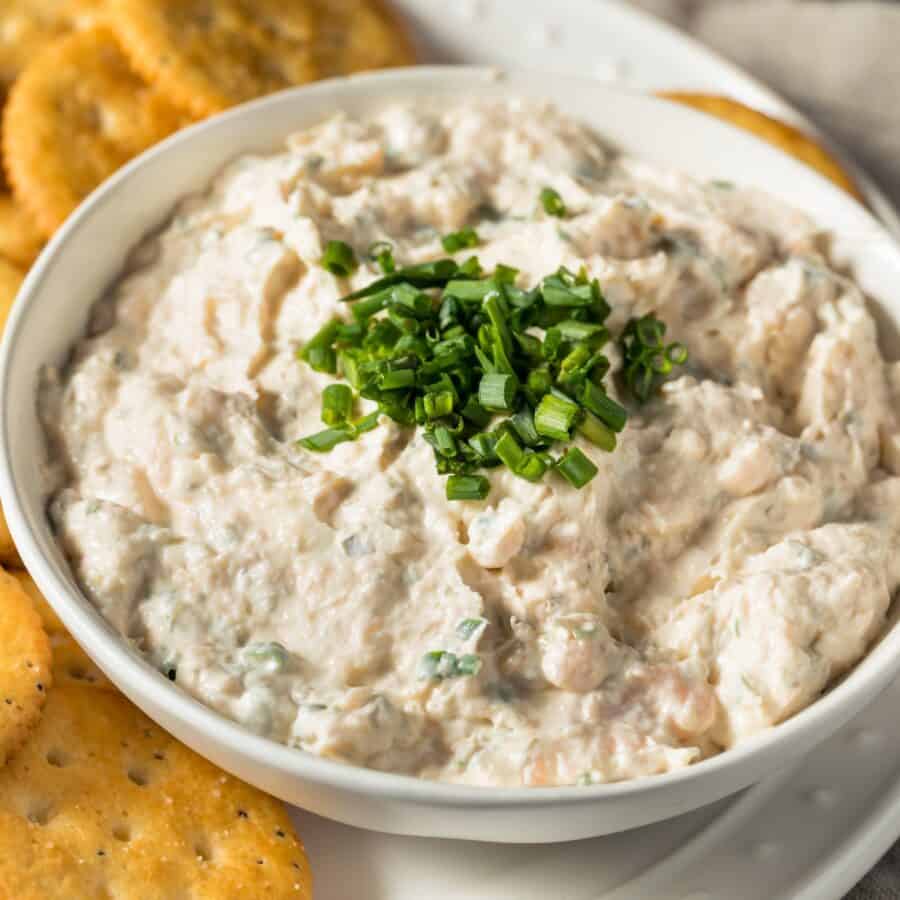
If you’re a fan of rich, smoky flavors combined with the savory taste of tuna, you’re in for a treat! Learn how to make the easiest Smoked Tuna Dip. You’ll achieve that perfect balance between creamy texture and smoky flavor while indulging in a delicious and irresistible appetizer.
Why You’ll Love This Amazing Appetizer
- Fast . Ready in under 20 minutes with minimal prep.
- Easy . Blend the ingredients and enjoy a delicious dip with minimal effort.
- Low Carb . Perfect for those watching their carb intake.
- Delicious . Packed with smoky flavor that is absolutely irresistible.
With the simplicity of this recipe, you can create a restaurant-quality dip that will leave your friends and family craving more. Whether you’re hosting a party or simply treating yourself to a tasty snack, this Smoked Tuna Dip is guaranteed to be a hit.
What Does Smoked Tuna Dip Taste Like?
Smoked Tuna Dip is absolutely delicious and highly popular among seafood enthusiasts. This dip offers a delectable combination of smoky and savory flavors that appeals to a wide range of palates.
The rich smokiness of the tuna, combined with creamy ingredients, creates a mouthwatering and satisfying eating experience.
Is Smoked Tuna Dip Healthy?
Smoked Tuna Dip can be a healthy snack or appetizer. Here are some factors to consider regarding its healthiness:
- High in Protein - Tuna is a great source of lean protein, which is essential for muscle repair and growth.
- Rich in Omega-3s - Tuna contains omega-3 fatty acids that are beneficial for heart health, reducing inflammation, and supporting brain function.
- Calories and Fat Content - The dip contains cream cheese, mayonnaise, and sour cream, which add creaminess but also increase the calorie and fat content. Opt for low-fat versions to make the dip healthier.
Ingredients You’ll Need
- Canned Smoked Tuna - The star of the dish. Look for high-quality smoked tuna for the best flavor.
- Cream Cheese - Provides a creamy base and rich texture.
- Mayonnaise - Adds creaminess and a slight tang.
- Sour Cream - Balances the richness with a bit of acidity.
- Lemon Juice - Adds freshness and a touch of acidity.
- Worcestershire Sauce - Enhances the savory depth of the dip.
- Smoked Paprika - Intensifies the smoky flavor.
- Garlic Powder - Adds a subtle garlic flavor.
- Green Onions - For a fresh, mild onion flavor.
- Salt and Pepper - To taste.
How To Make Smoked Tuna Dip
- Prepare the Ingredients. Start by gathering all your ingredients. Drain the smoked tuna and set it aside. Make sure the cream cheese is softened to room temperature for easier blending.
- Blend the Base. In a large mixing bowl, combine the cream cheese, mayonnaise, and sour cream. Use an electric mixer or a whisk to blend until smooth and creamy.
- Add the Flavor. Add the smoked tuna, lemon juice, Worcestershire sauce, smoked paprika, and garlic powder to the bowl. Mix until all the ingredients are well incorporated.
- Season to Taste. Stir in the chopped green onions and season with salt and pepper to taste. Adjust the seasoning as needed.
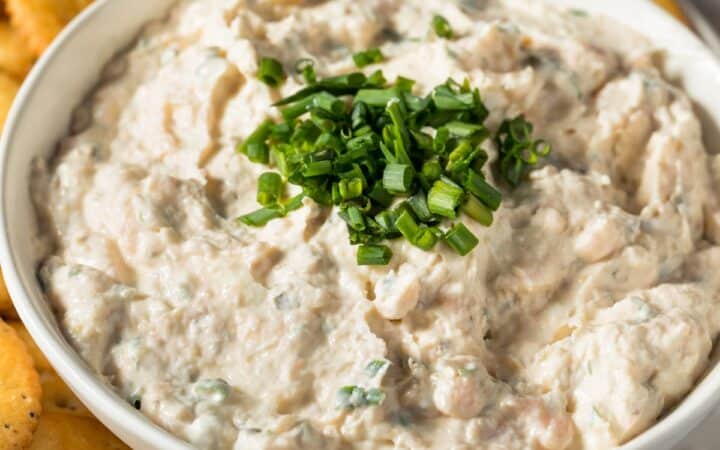
- Serve and Enjoy. Transfer the dip to a serving bowl and garnish with additional green onions if desired. Serve with crackers, chips, or vegetable sticks.

Tips And Tricks
Making Smoked Tuna Dip is a straightforward process, but a few tips and tricks can help you achieve the best possible results. Here are some pointers to ensure your dip turns out creamy, flavorful, and utterly irresistible:
- Soften the Cream Cheese . Make sure the cream cheese is softened to room temperature for a smooth, creamy consistency.
- Adjust Smokiness . If you prefer a stronger smoky flavor, add a bit more smoked paprika or use smoked salt.
- Chill for Flavor . Let the dip chill in the refrigerator for at least an hour before serving to allow the flavors to meld together.
Variations
If you’re a fan of Smoked Tuna Dip and want to try some creative variations, here are a few delicious ideas to explore:
- Spicy - Add a kick of heat by mixing in finely chopped jalapeños or a dash of hot sauce.
- Herbed - Enhance the flavor with fresh herbs like dill, parsley, or chives.
- Smoked Salmon Dip - Substitute smoked salmon for the tuna for a different but equally delicious dip.
What To Pair With Smoked Tuna Dip
Smoked Tuna Dip is a versatile appetizer that pairs well with a variety of sides and accompaniments. Here are some delicious options to consider serving alongside it:
- Crackers - Provide a crunchy contrast to the creamy dip.
- Vegetable Sticks - Serve a selection of fresh vegetable sticks, such as celery, carrot, and cucumber. The cool and crunchy veggies provide a refreshing contrast.
- Pita Chips - Offer a heartier option that complements the smoky flavor of the dip.
- Breadsticks - Add a crispy and satisfying element to the appetizer spread.
How Long Does It Last?
Smoked Tuna Dip can be stored in the refrigerator in an airtight container for up to 3 to 4 days. The flavors may intensify over time, so for the best bite, it is best enjoyed as soon as possible.
Can You Freeze It?
Yes, you can freeze Smoked Tuna Dip to extend its shelf life and enjoy it at a later time. Freezing is a great way to preserve the flavors and texture of the dip.
Place the dip in an airtight container or resealable freezer-safe bag. Remove as much air as possible from the container or bag to prevent freezer burn. Place the container or bag in the freezer.
Properly frozen Smoked Tuna Dip can last in the freezer for up to 2 to 3 months without significant loss of quality. However, for the best taste and texture, try to enjoy it within a few weeks of freezing.
More Spectacular Ways To Use Seafood
- Keto Sushi
- Parmesan Crusted Salmon
- Shrimp Tempura
- Air Fryer Tilapia
- Instant Pot Low Country Boil
- Tuna Melts

Smoked Tuna Dip Recipe | Easy Tuna Dip
Ingredients
- ▢ 12 oz Canned Smoked Tuna
- ▢ 8 oz Cream Cheese , softened
- ▢ 1/2 cup Mayonnaise
- ▢ 1/4 cup Sour Cream
- ▢ 1 tbsp Lemon Juice
- ▢ 1 tsp Worcestershire Sauce
- ▢ 1/2 tsp Smoked Paprika
- ▢ 1/2 tsp Garlic Powder
- ▢ 2 Green Onions , chopped
- ▢ 1/2 tsp Kosher Salt
- ▢ 1/4 tsp Ground Black Pepper
Instructions
- Prepare the Ingredients. Start by gathering all your ingredients. Drain the smoked tuna and set it aside. Make sure the cream cheese is softened to room temperature for easier blending.
- Blend the Base. In a large mixing bowl, combine the cream cheese, mayonnaise, and sour cream. Use an electric mixer or a whisk to blend until smooth and creamy.
- Add the Flavor. Add the smoked tuna, lemon juice, Worcestershire sauce, smoked paprika, and garlic powder to the bowl. Mix until all the ingredients are well incorporated.
- Season to Taste. Stir in the chopped green onions and season with salt and pepper to taste. Adjust the seasoning as needed.
- Serve and Enjoy. Transfer the dip to a serving bowl and garnish with additional green onions if desired. Serve with crackers, chips, or vegetable sticks.
