
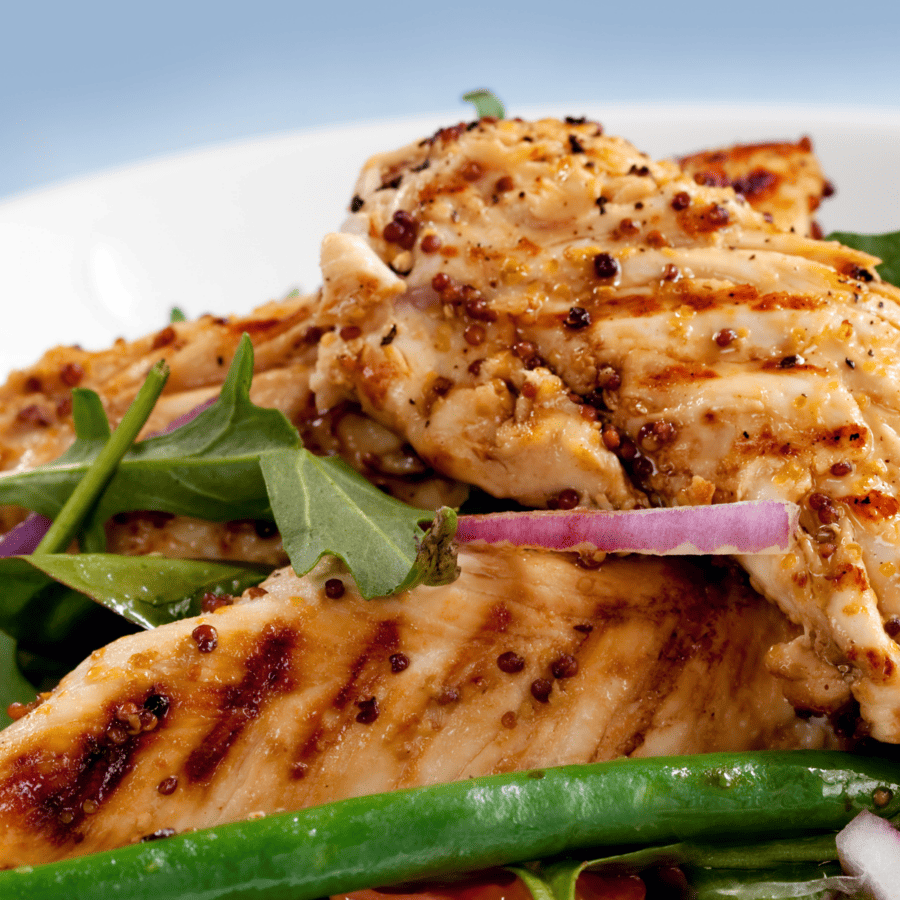
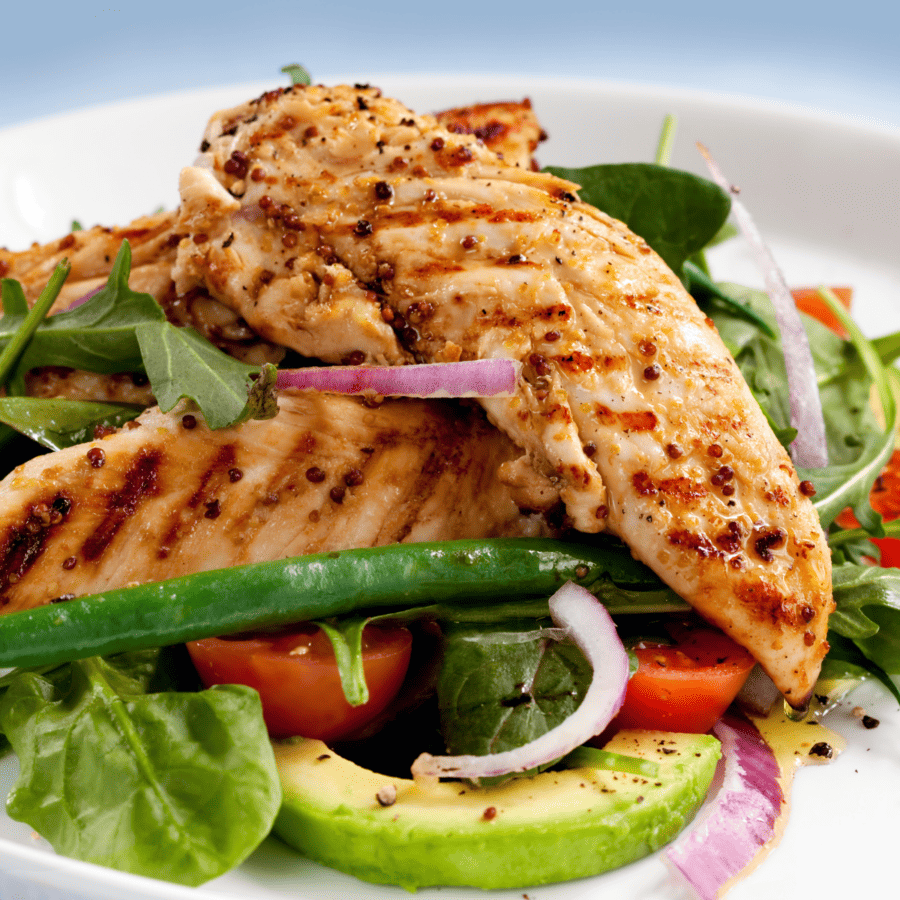
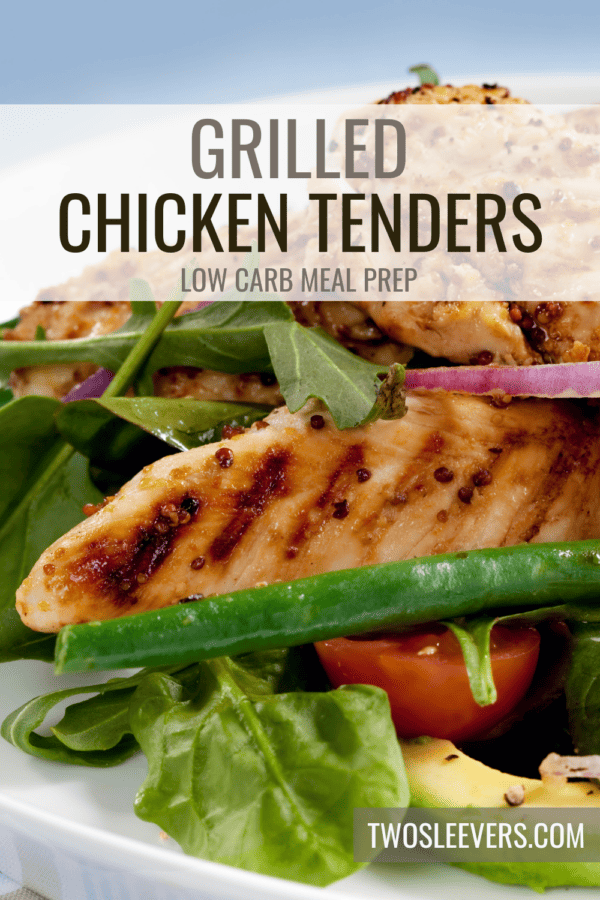
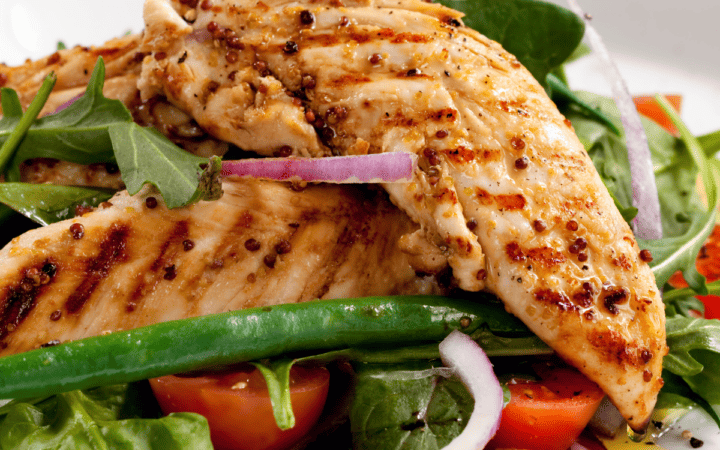
Grilled chicken tenders are a delectable and versatile dish that is perfect for any occasion, from weeknight dinners to backyard barbecues. Tender, juicy, and packed with savory goodness, these grilled chicken tenders are sure to delight your taste buds and leave your family and friends asking for more.
Why You’ll Love These On The Grill
Fast. Ready in under 30 minutes (excluding marinating time) with the help of your grill. Easy. Fire up your grill, season the chicken tenders, carefully cook until juicy and delicious. Low Carb. Only net carbs per serving! Gluten Free. A great main course option for anyone that has a gluten allergy.
Grilled chicken tenders are a delicious and satisfying dish that brings joy to any mealtime. With a flavorful marinade and the perfect grilling technique, you can create tender, juicy, and mouthwatering chicken tenders that will impress your family and friends.
Whether you’re hosting a barbecue or preparing a quick and wholesome dinner, these grilled chicken tenders are the perfect addition to your menu.
Are Grilled Chicken Tenders Healthy?
Grilled chicken tenders can be a healthy and nutritious option, depending on how they are prepared and the ingredients used. Chicken tenders are lean cuts of meat that are lower in fat compared to other parts of the chicken, such as the thighs or wings. Grilling is also considered a healthier cooking method because it allows excess fat to drip away, resulting in a lower calorie content.
As with any food, it’s essential to consider the overall context of your diet and lifestyle. Grilled chicken tenders can be part of a balanced and healthy diet when prepared with wholesome ingredients and served with nutrient-rich sides.
Should I Cover Chicken While Grilling?
For thin and small chicken pieces, like chicken tenders or thinly sliced chicken breasts, there is usually no need to cover them while grilling. These pieces cook relatively quickly and evenly over direct heat, and covering them is likely not necessary.
Always monitor the cooking process and use a meat thermometer to check for doneness to achieve perfectly grilled and safe-to-eat chicken.
Ingredients You’ll Need
- Chicken Tenders
- Olive Oil
- Lemon Juice
- Garlic
- Smoked Paprika
- Oregano
- Onion Powder
- Salt
- Black Pepper
How To Make Grilled Chicken Tenders
- Prepare the Marinade . In a large mixing bowl, combine the olive oil, lemon juice, minced garlic, smoked paprika, dried oregano, onion powder, salt, and black pepper. Whisk the ingredients together until they form a well-blended marinade.
- Marinate the Chicken . Place the chicken tenders in the marinade, ensuring they are evenly coated. Cover the bowl with plastic wrap or a lid and let the chicken marinate in the refrigerator for at least 30 minutes. For even more flavorful tenders, you can marinate them overnight.
- Preheat the Grill. Preheat your grill to medium-high heat. Make sure the grates are clean and lightly oiled to prevent sticking.
- Grill the Chicken Tenders . Remove the chicken tenders from the marinade, allowing any excess to drip off. Place the tenders on the preheated grill and cook for about 3-4 minutes on each side. The exact cooking time will depend on the thickness of the tenders. Ensure the internal temperature reaches 165°F for safe consumption.
- Rest and Garnish . Once the chicken tenders are cooked through, remove them from the grill and let them rest for a few minutes. This allows the juices to redistribute, ensuring each tender remains juicy and tender. If desired, garnish the grilled chicken tenders with fresh herbs like parsley or cilantro for an extra burst of freshness.
- Serve and Enjoy! Plate the grilled chicken tenders and serve them with your favorite side dishes, such as grilled vegetables, salads, or fluffy rice. These flavorful and succulent chicken tenders are sure to be a crowd-pleaser at any gathering.
Tips And Tricks
Making grilled chicken tenders can be a simple and enjoyable process with these helpful tips and tricks to ensure juicy, flavorful, and perfectly grilled results:
- Marinate for Flavor. Marinating the chicken tenders adds depth and complexity to their taste. Use a flavorful marinade with ingredients like olive oil, herbs, garlic, and citrus juices. Let the chicken marinate for at least 30 minutes, or longer for more intense flavor.
- Preheat the Grill. Make sure to preheat your grill to medium-high heat before placing the chicken on it. A properly heated grill ensures even cooking and beautiful grill marks.
- Even Thickness. If the chicken tenders vary in thickness, try pounding them gently with a meat mallet to achieve more even thickness. This ensures they cook at the same rate.
- Avoid Overcooking. Chicken tenders are lean and can quickly dry out if overcooked. Use an instant-read meat thermometer to check for doneness. The internal temperature should reach 165F.
Variations
Grilled chicken tenders are a versatile canvas that can be customized with various marinades, seasonings, and toppings to create delicious and unique flavor combinations. Here are some creative variations to try:
- Spicy BBQ Chicken Tenders- Marinate the chicken tenders in a spicy BBQ sauce, with a touch of cayenne pepper or hot sauce, for a fiery and smoky flavor.
- Honey Mustard Glazed Chicken Tenders- Coat the chicken tenders with a honey mustard glaze made from honey, Dijon mustard, and a splash of apple cider vinegar.
- Teriyaki Chicken Tenders- Infuse the chicken tenders with the sweet and savory flavors of teriyaki sauce, adding a hint of ginger and garlic.
- Lemon Herb Chicken Tenders- Marinate the chicken tenders in a blend of lemon juice, fresh herbs (such as thyme, rosemary, and basil), and minced garlic for a zesty and aromatic taste.
What To Serve With Them
Grilled chicken tenders are a versatile and delicious dish that pairs well with a wide range of side dishes. Here are some tasty and complementary options to serve with grilled chicken tenders:
- Grilled Vegetables- Serve your them with a colorful array of grilled vegetables, such as zucchini, bell peppers, asparagus, or eggplant. The smoky flavors of the grilled vegetables complement the chicken perfectly.
- Salads- Fresh salads make a refreshing side dish for grilled chicken tenders. Try a classic garden salad, Greek salad, or a tangy Caesar salad to balance the richness of the chicken.
- Coleslaw- Creamy coleslaw is a classic side dish that adds a delightful crunch and creaminess to the meal. It provides a nice contrast to the grilled chicken tenders.
- Rice or Quinoa- Serve the chicken tenders with fluffy white rice or nutty quinoa for a satisfying and filling meal.
- Potato Salad- A creamy and flavorful potato salad is a great choice to accompany the grilled chicken tenders. It’s a comforting and delicious combination.
- Corn on the Cob- Grilled corn on the cob is a summertime favorite that pairs wonderfully with grilled chicken tenders. Brush the corn with butter and sprinkle some herbs for added flavor.
Feel free to mix and match these side dishes based on your preferences and the season.
How Long Do They Last?
Grilled chicken tenders can be stored in the refrigerator in an airtight container or wrapped tightly in plastic wrap or aluminum foil. When refrigerated, they should be consumed within 3-4 days. Remember that the sooner you consume the chicken, the better the quality and taste.
Can You Freeze Them?
Yes, you can freeze grilled chicken tenders to extend their shelf life and enjoy them at a later time. Freezing grilled chicken tenders is a great way to preserve leftovers or prepare them in advance for quick and convenient meals. Properly frozen grilled chicken tenders can last in the freezer for up to 2-3 months.
When you’re ready to use the grilled chicken tenders, thaw them in the refrigerator overnight or use the defrost setting on your microwave. Once thawed, you can reheat the chicken tenders in the microwave, oven, or on the stovetop until warmed through.
More Low Carb Chicken Recipes
- Instant Pot Butter Chicken
- Air Fryer Chicken Tenders
- Chicken Korma
- Keto Tuscan Chicken
- Crock Pot Buffalo Chicken Dip
Grilled Chicken Tenders | Tips For Grilling Chicken Tenders
Ingredients
- ▢ 4 chicken tenderloins
- ▢ 4 tbsp olive oil
- ▢ 1 tbsp lemon juice
- ▢ 1 clove minced garlic
- ▢ 1 tsp smoked paprika
- ▢ 1 tsp oregano
- ▢ 1/2 tsp onion powder
- ▢ 1 tsp salt
- ▢ 1/2 tsp black pepper
Instructions
- Prepare the Marinade . In a large mixing bowl, combine the olive oil, lemon juice, minced garlic, smoked paprika, dried oregano, onion powder, salt, and black pepper. Whisk the ingredients together until they form a well-blended marinade.
- Marinate the Chicken . Place the chicken tenders in the marinade, ensuring they are evenly coated. Cover the bowl with plastic wrap or a lid and let the chicken marinate in the refrigerator for at least 30 minutes. For even more flavorful tenders, you can marinate them overnight.
- Preheat the Grill. Preheat your grill to medium-high heat. Make sure the grates are clean and lightly oiled to prevent sticking.
- Grill the Chicken Tenders . Remove the chicken tenders from the marinade, allowing any excess to drip off. Place the tenders on the preheated grill and cook for about 3-4 minutes on each side. The exact cooking time will depend on the thickness of the tenders. Ensure the internal temperature reaches 165°F for safe consumption.
- Rest and Garnish . Once the chicken tenders are cooked through, remove them from the grill and let them rest for a few minutes. This allows the juices to redistribute, ensuring each tender remains juicy and tender. If desired, garnish the grilled chicken tenders with fresh herbs like parsley or cilantro for an extra burst of freshness.
- Serve and Enjoy! Plate the grilled chicken tenders and serve them with your favorite side dishes, such as grilled vegetables, salads, or fluffy rice. These flavorful and succulent chicken tenders are sure to be a crowd-pleaser at any gathering.
Get support & connect with our community on Facebook!
Nutrition
Don’t forget to check out my other Ketocookbooks.
Keto Instant Pot, Keto Fat Bombs, Sweets, & Treats , and Easy keto in 30 minutes.


If you already signed up, you should have received an email with a password to give you unlimited access to our FREE Printable Library. The password is case sensitive. Enter it below and get printing!
Password:

Grilled Chicken Tenders | Tips For Grilling Chicken Tenders
Ingredients
- 4 chicken tenderloins
- 4 tbsp olive oil
- 1 tbsp lemon juice
- 1 clove minced garlic
- 1 tsp smoked paprika
- 1 tsp oregano
- 1/2 tsp onion powder
- 1 tsp salt
- 1/2 tsp black pepper
Instructions
- Prepare the Marinade . In a large mixing bowl, combine the olive oil, lemon juice, minced garlic, smoked paprika, dried oregano, onion powder, salt, and black pepper. Whisk the ingredients together until they form a well-blended marinade.
- Marinate the Chicken . Place the chicken tenders in the marinade, ensuring they are evenly coated. Cover the bowl with plastic wrap or a lid and let the chicken marinate in the refrigerator for at least 30 minutes. For even more flavorful tenders, you can marinate them overnight.
- Preheat the Grill. Preheat your grill to medium-high heat. Make sure the grates are clean and lightly oiled to prevent sticking.
- Grill the Chicken Tenders . Remove the chicken tenders from the marinade, allowing any excess to drip off. Place the tenders on the preheated grill and cook for about 3-4 minutes on each side. The exact cooking time will depend on the thickness of the tenders. Ensure the internal temperature reaches 165°F for safe consumption.
- Rest and Garnish . Once the chicken tenders are cooked through, remove them from the grill and let them rest for a few minutes. This allows the juices to redistribute, ensuring each tender remains juicy and tender. If desired, garnish the grilled chicken tenders with fresh herbs like parsley or cilantro for an extra burst of freshness.
- Serve and Enjoy! Plate the grilled chicken tenders and serve them with your favorite side dishes, such as grilled vegetables, salads, or fluffy rice. These flavorful and succulent chicken tenders are sure to be a crowd-pleaser at any gathering.
Grilled Chicken Tenders | Tips For Grilling Chicken Tenders https://twosleevers.com/grilled-chicken-tenders/
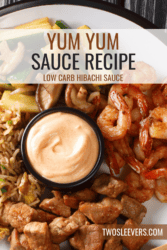
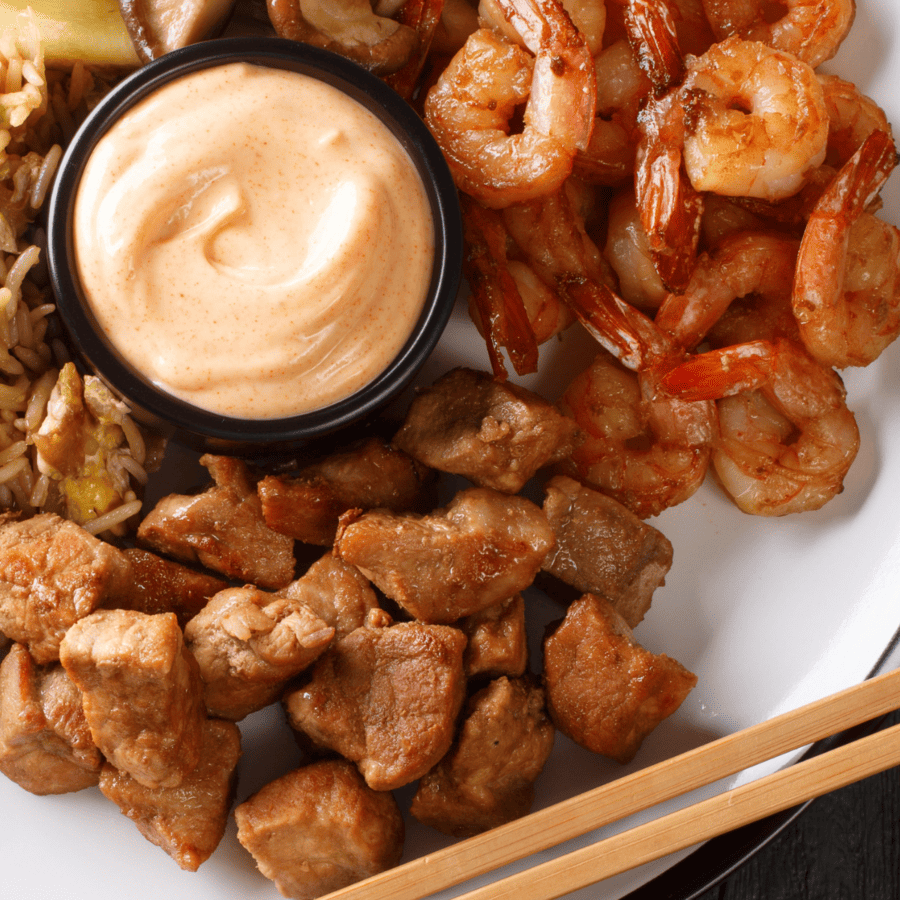
If you’ve ever dined at a Japanese hibachi restaurant or indulged in sushi rolls, you may have encountered that creamy and delightful pink sauce known as Yum Yum Sauce. This delectable condiment adds a burst of flavor to any dish, elevating the dining experience to a whole new level.
Why You’ll Want To Eat It On Everything
- Fast.
- Easy.
- Delicious.
- Low Carb.
With just a few simple ingredients and a little bit of whisking, you can create a mouthwatering homemade Yum Yum Sauce that will rival the flavors of your favorite Japanese restaurants.
This versatile and creamy condiment is the secret to unlocking a world of delightful flavors in your homemade Asian-inspired dishes.
Why Is It Called Yum Yum Sauce?
The name “Yum Yum Sauce” is attributed to its irresistibly delicious and satisfying taste. This creamy and pink-colored sauce is known for its ability to enhance the flavors of various dishes, making them more enjoyable and appetizing.
Is Yum Yum Sauce Just Sriracha Mayo?
While both Yum Yum Sauce and Sriracha Mayo are delicious and versatile condiments, they have different flavor profiles and ingredients. Yum Yum Sauce tends to be milder with a well-rounded flavor, while Sriracha Mayo is all about bold spiciness with a creamy texture.
Both sauces can be used to add a tasty kick to your favorite dishes, but they each bring their own unique characteristics to the table.
What Is Yum Yum Sauce Made Of?
To whip up a batch of this creamy goodness, gather the following ingredients before you get started:
- Mayonnaise
- Sugar Free Ketchup
- Sriracha
- Rice Vinegar
- Garlic Powder
- Onion Powder
- Sesame Oil
- Paprika
- Stevia
How To Make Yum Yum Sauce
- Prepare the Ingredients. First, gather all the ingredients on your kitchen counter. Having everything ready will make the process smoother and more enjoyable.
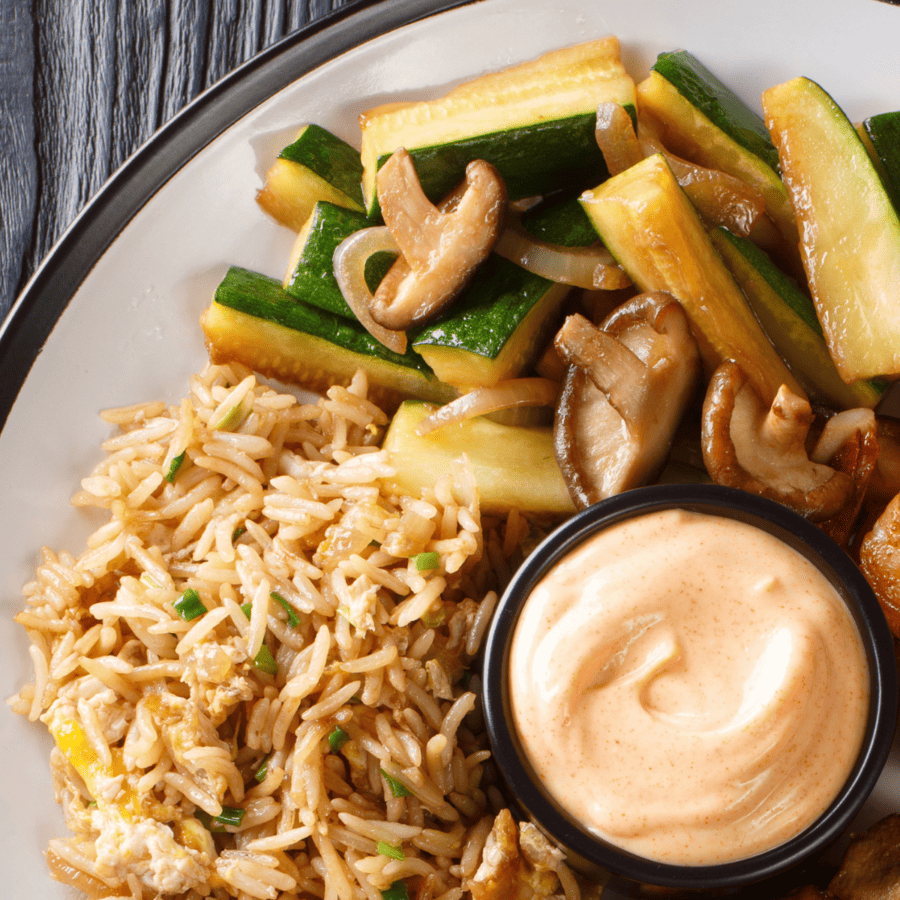
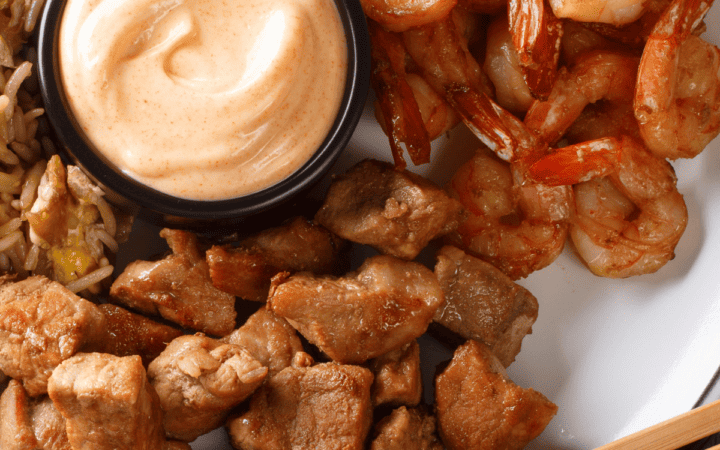
- Mix the Ingredients. Next, in a medium-sized bowl, combine the mayonnaise, ketchup, rice vinegar, sesame oil, garlic powder, onion powder, paprika, sriracha, and Stevia. Use a whisk or a spoon to mix the ingredients thoroughly until well combined. The result should be a smooth and creamy sauce with a beautiful pink hue.
- Taste and Adjust. Then, take a spoonful of the Yum Yum Sauce and give it a taste. Adjust the seasonings to suit your preference. If you prefer it tangier, add more vinegar. If you like it sweeter, increase the sugar substitute.
- Let it Rest. Next, cover the bowl with plastic wrap or transfer the sauce to an airtight container. Allow the flavors to meld by refrigerating the Yum Yum Sauce for at least 30 minutes. This resting time will intensify the flavors, giving you the best version of your homemade sauce.
- Serve and Savor. Finally, your homemade Yum Yum Sauce is ready to be savored!
Tips And Tricks
Making low carb yum yum sauce at home is easy and rewarding. So, here are some tips and tricks to help you create a delicious batch of this creamy and flavorful sauce:
- Adjust Consistency : If you prefer a thicker sauce, use full-fat mayonnaise. For a lighter and slightly tangier version, you can use reduced-fat mayonnaise or a combination of mayonnaise and Greek yogurt.
- Balance the Flavors : Tweak the ingredients to suit your taste preferences. For a sweeter sauce, add a bit more ketchup. If you prefer a tangier flavor, increase the amount of rice vinegar.
- Chill Before Serving : Allow the sauce to chill in the refrigerator for at least 30 minutes before serving. This resting time allows the flavors to meld, resulting in a more balanced and delicious sauce.
Variations
Yum Yum Sauce is a versatile condiment that can be customized with various ingredients and flavors to create exciting variations. Here are some delicious options to try:
- Citrusy Addition . Enhance the tangy flavors by adding a splash of freshly squeezed lemon or lime juice. The citrusy twist adds a refreshing and zesty dimension to the sauce.
- Family Friendly Flavor. Keep the flavor mild enough for people with spice sensitivity by omitting the sriracha completely.
- Ginger-Infused Style . Mix in freshly grated ginger or ginger paste for a hint of warm and aromatic spiciness that pairs perfectly with Asian-inspired dishes.
Feel free to experiment with these variations and mix and match ingredients to create your own signature Yum Yum Sauce. Each variation offers a new dimension of flavor that complements different dishes.
What To Enjoy It With
Yum Yum Sauce is a versatile and delicious condiment that pairs well with a wide range of dishes. Here are some mouthwatering options to serve with it:
- Sushi Rolls : It is most commonly known as a classic accompaniment to sushi rolls. Dip your sushi rolls in the sauce to add a creamy and flavorful element to each bite.
- Hibachi-Style Grilled Meats : It is often served with hibachi-style grilled meats, such as chicken, steak, or shrimp. Drizzle it over the grilled meats or use it as a dipping sauce.
- Seafood : It complements various seafood dishes, including grilled or fried shrimp, crab cakes, and fish fillets.
- Fried Appetizers : Serve hibachi sauce as a dipping sauce for fried appetizers like tempura vegetables, onion rings, or chicken nuggets.
- Rice and Noodles : Drizzle over rice bowls, stir-fried noodles, or noodle salads for an added burst of flavor.
How Long Does It Last?
After preparing the Low Carb Hibachi Sauce, transfer it to an airtight container and refrigerate it. For the best flavor and texture, use it within a week of preparing it.
Make sure you give it an additional stir before serving to ensure the ingredients haven’t separated.
Can You Freeze It?
Yes, you can freeze this hibachi sauce if you want to save it for later. Transfer the sauce to a freezer-safe container or ziplock bag, leaving some room for expansion.
Yum Yum Sauce can be frozen for up to 3 months. When ready to use, thaw it in the refrigerator overnight and give it a good stir before serving.
More Awesome Sauce Recipes
- Big Mac Sauce
- Baja Sauce
- Creamy Pesto Sauce
- Homemade Cocktail Sauce
- Bang Bang Sauce
- Homemade Buffalo Sauce

Yum Yum Sauce | Hibachi Sauce Recipe
Ingredients
- ▢ 1 cup Mayonnaise
- ▢ 2 tbsp sugar free ketchup
- ▢ 1 tbsp rice vinegar
- ▢ 1 tbsp soy sauce
- ▢ 1 tsp sesame oil
- ▢ 1 tsp garlic powder
- ▢ 1 tsp paprika
- ▢ 1/2 tsp Stevia
Instructions
- Prepare the Ingredients. First, gather all the ingredients on your kitchen counter. Having everything ready will make the process smoother and more enjoyable.
- Mix the Ingredients. Next, in a medium-sized bowl, combine the mayonnaise, ketchup, rice vinegar, sesame oil, garlic powder, onion powder, paprika, sriracha, and Stevia. Use a whisk or a spoon to mix the ingredients thoroughly until well combined. The result should be a smooth and creamy sauce with a beautiful pink hue.
- Taste and Adjust. Then, take a spoonful of the Yum Yum Sauce and give it a taste. Adjust the seasonings to suit your preference. If you prefer it tangier, add more vinegar. If you like it sweeter, increase the sugar substitute.
- Let it Rest. Next, cover the bowl with plastic wrap or transfer the sauce to an airtight container. Allow the flavors to meld by refrigerating the Yum Yum Sauce for at least 30 minutes. This resting time will intensify the flavors, giving you the best version of your homemade sauce.
- Serve and Savor. Finally, your homemade Yum Yum Sauce is ready to be savored!
Get support & connect with our community on Facebook!
Nutrition
Don’t forget to check out my other Ketocookbooks.
Keto Instant Pot, Keto Fat Bombs, Sweets, & Treats , and Easy keto in 30 minutes.
