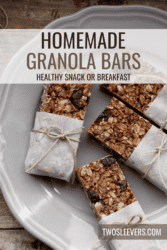
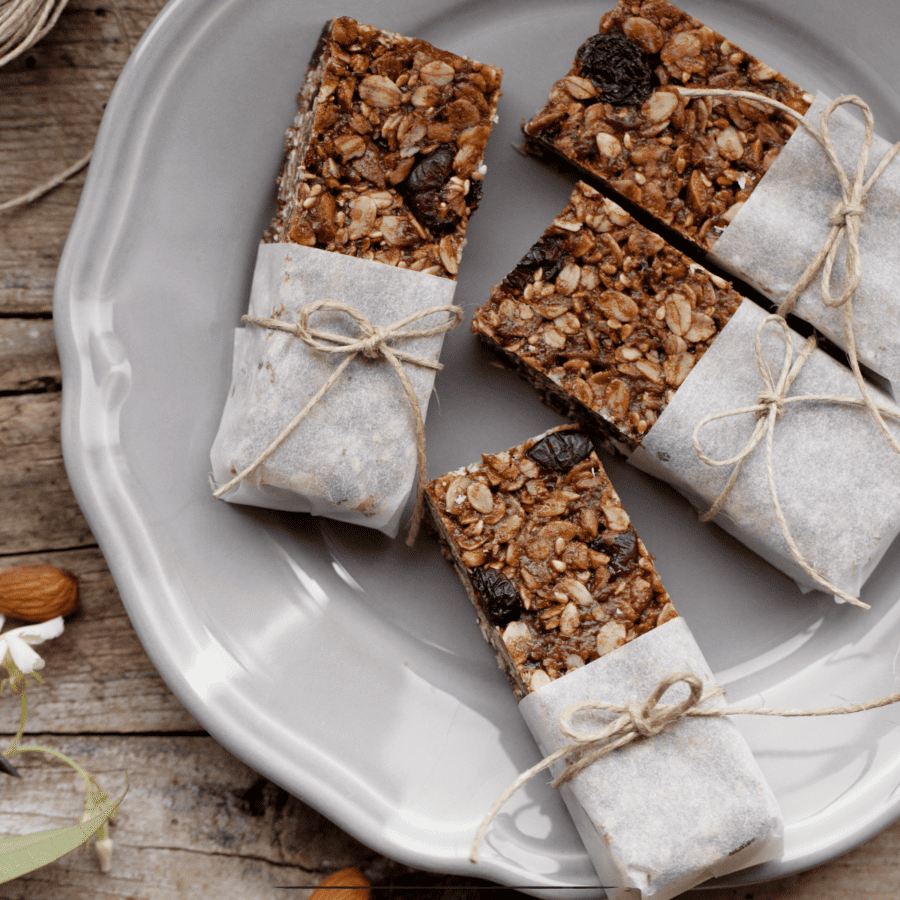
Indulge in the delightful taste and nutritious goodness of homemade granola bars! Perfect for a quick breakfast, a satisfying snack, or an on-the-go energy boost, these bars are a delicious and healthy treat for the whole family. With simple ingredients and easy steps, you’ll be whipping up batches of these scrumptious granola bars in no time.
Why You’ll Love This Homemade Snack
- Quick and Easy . Ready in just a few simple steps, these are perfect for busy mornings or last-minute snack cravings.
- Customizable. Adjust the ingredients to suit your taste preferences and dietary needs. Add nuts, seeds, dried fruits, or chocolate chips for extra flavor and texture.
- Healthy and Nutritious . Packed with wholesome ingredients like oats, honey, and nuts, these granola bars provide a satisfying dose of fiber, protein, and essential nutrients.
- Portable and Convenient . Perfect for on-the-go snacking, these granola treats are ideal for lunchboxes, picnics, hikes, or road trips.
With their irresistible taste, customizable flavors, and nutritional benefits, homemade granola bars are the perfect snack for any occasion. Whether you’re fueling up for a busy day or satisfying your sweet tooth, these delicious bars are sure to become a new favorite
Are Homemade Granola Bars Good?
Yes, homemade granola bars are incredibly delicious and nutritious! Unlike store-bought versions that may contain artificial additives and preservatives, these homemade bars are made with wholesome ingredients and customizable flavors. Plus, they’re a great way to control the amount of sugar and other additives in your snacks.
Are Granola Bars Healthy?
Granola bars can be a healthy snack option when chosen wisely and enjoyed in moderation as part of a balanced diet. Look for add-in options that are wholesome, lower in added sugars, and provide a good balance of protein, fiber, and nutrients.
Ingredients You’ll Need
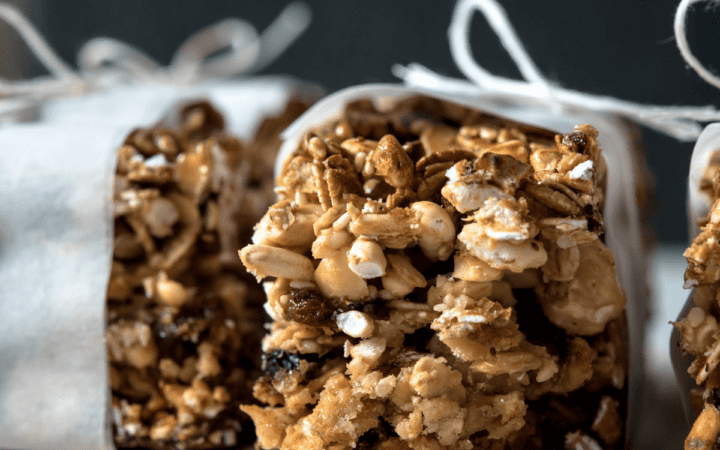
- Rolled Oats - The base ingredient for the granola bars, rolled oats provide a hearty texture and fiber-rich goodness.
- Honey or Maple Syrup - Natural sweeteners like honey or maple syrup add sweetness and help bind the ingredients together.
- Nut Butter - Choose your favorite nut butter, such as peanut butter, almond butter, or cashew butter, for added flavor and protein.
- Nuts and Seeds - Add a crunchy texture and nutritional boost with a mix of nuts and seeds like almonds, walnuts, sunflower seeds, or pumpkin seeds.
- Dried Fruit - For a touch of natural sweetness and chewiness, include dried fruits like raisins, cranberries, apricots, or chopped dates.
- Vanilla Extract - Enhance the flavor of the bars with a splash of pure vanilla extract.
- Salt - A pinch of salt helps balance the sweetness and enhances the overall flavor.
- Optional Add-Ins - Get creative and customize your granola bars with additional ingredients like chocolate chips, shredded coconut, cinnamon, or chia seeds.
How To Make Granola Bars
- Prepare the Base. In a large mixing bowl, combine the rolled oats, nuts, seeds, and any optional add-ins. Stir to combine.
- Make the Binder . In a small saucepan, heat the honey and nut butter over low heat until melted and smooth. Stir in the vanilla extract and salt.
- Combine Wet and Dry Ingredients . Pour the melted honey mixture over the dry ingredients and mix until everything is well-coated and evenly distributed.
- Press into Pan . Transfer the mixture to a lined baking dish or pan. Use a spatula or your hands to press the mixture firmly and evenly into the pan.
- Chill and Cut . Place the pan in the refrigerator for at least 2 hours to allow the granola bars to set. Once firm, remove from the pan and cut into bars or squares.
- Store and Enjoy . Store the granola bars in an airtight container or wrap them individually in plastic wrap for easy grab-and-go snacks. Enjoy at room temperature or chilled for an extra refreshing treat.

Tips And Tricks
Making homemade granola bars allows you to customize the ingredients to suit your taste preferences and dietary needs. Here are some tips and tricks for making them delicious and nutritious:
- Press Firmly into the Pan . Press the granola mixture firmly into the baking pan using a spatula or the back of a spoon. This helps compact the ingredients and prevents the granola bars from falling apart once they’re baked.
- Chill Before Cutting . After baking, allow the bars to cool completely in the pan before cutting them into bars. For best results, transfer the pan to the refrigerator and chill for at least 1 hour before slicing. This helps firm up the bars and makes them easier to cut into neat, uniform pieces.
Variations
Homemade granola bars are incredibly versatile, allowing you to customize them with a wide range of ingredients to suit your taste preferences and dietary needs. Here are some delicious variations to try:
- Nutty Delight - Add a variety of nuts such as almonds, walnuts, pecans, and cashews to your granola bar mixture for extra crunch and protein. You can also include nut butter for added richness and flavor.
- Fruity Bliss - Incorporate dried fruits like raisins, cranberries, apricots, cherries, or blueberries into your granola bars for natural sweetness and a burst of fruity flavor. You can also use fresh fruits like mashed banana or applesauce as a binder.
- Chocolate Lover’s Dream - Stir in chocolate chips, cocoa powder, or chocolate chunks to satisfy your chocolate cravings. You can also drizzle melted chocolate over the top of your granola bars for an extra decadent touch.
What To Enjoy With Granola Bars
Granola bars are a versatile and convenient snack that can be enjoyed in a variety of ways. Here are some delicious options to enjoy with them:
- Fresh Fruit - Pair your granola bars with slices of fresh fruit like apples, bananas, strawberries, or grapes for a refreshing and nutritious snack combination.
- Yogurt - Enjoy them with a side of yogurt, either on its own or as part of a yogurt parfait. The creamy texture of the yogurt complements the crunchy granola bars perfectly.
- Smoothies - Blend up a delicious smoothie using your favorite fruits, leafy greens, and a splash of milk or yogurt. Enjoy your smoothie alongside a granola bar for a balanced and satisfying snack.
How Long Do They Last?
Homemade granola bars can be stored in an airtight container at room temperature for up to one week. For longer shelf life, store them in the refrigerator for up to two weeks or freeze them for up to three months.
Can You Freeze Them?
Yes, you can freeze homemade granola bars for longer storage. Wrap them individually in plastic wrap or parchment paper and place them in a resealable freezer bag or container.
To enjoy, simply thaw the bars at room temperature or microwave them for a few seconds until warmed through.
More Healthy Treats
- Low Carb Jello Mousse
- Peanut Butter Balls
- Parmesan Crisps
- Chocolate Covered Pretzels
- Keto Gummies

Granola Bars Recipe | Homemade Granola Bars
Ingredients
- ▢ 2 cups Rolled Oats
- ▢ 1/2 cup Honey
- ▢ 1/2 cup Peanut Butter
- ▢ 1/2 cup Mixed Nuts
- ▢ 1/2 cup Raisins
- ▢ 1 tsp Vanilla Extract
- ▢ 1/4 tsp Kosher Salt
Instructions
- Prepare the Base. In a large mixing bowl, combine the rolled oats, nuts, seeds, and any optional add-ins. Stir to combine.
- Make the Binder . In a small saucepan, heat the honey and nut butter over low heat until melted and smooth. Stir in the vanilla extract and salt.
- Combine Wet and Dry Ingredients . Pour the melted honey mixture over the dry ingredients and mix until everything is well-coated and evenly distributed.
- Press into Pan . Transfer the mixture to a lined baking dish or pan. Use a spatula or your hands to press the mixture firmly and evenly into the pan.
- Chill and Cut . Place the pan in the refrigerator for at least 2 hours to allow the granola bars to set. Once firm, remove from the pan and cut into bars or squares.
- Store and Enjoy . Store the granola bars in an airtight container or wrap them individually in plastic wrap for easy grab-and-go snacks. Enjoy at room temperature or chilled for an extra refreshing treat.
Get support & connect with our community on Facebook!
Nutrition

If you already signed up, you should have received an email with a password to give you unlimited access to our FREE Printable Library. The password is case sensitive. Enter it below and get printing!
Password:
Granola Bars Recipe | Homemade Granola Bars
Ingredients
- 2 cups Rolled Oats
- 1/2 cup Honey
- 1/2 cup Peanut Butter
- 1/2 cup Mixed Nuts
- 1/2 cup Raisins
- 1 tsp Vanilla Extract
- 1/4 tsp Kosher Salt
Instructions
- Prepare the Base. In a large mixing bowl, combine the rolled oats, nuts, seeds, and any optional add-ins. Stir to combine.
- Make the Binder . In a small saucepan, heat the honey and nut butter over low heat until melted and smooth. Stir in the vanilla extract and salt.
- Combine Wet and Dry Ingredients . Pour the melted honey mixture over the dry ingredients and mix until everything is well-coated and evenly distributed.
- Press into Pan . Transfer the mixture to a lined baking dish or pan. Use a spatula or your hands to press the mixture firmly and evenly into the pan.
- Chill and Cut . Place the pan in the refrigerator for at least 2 hours to allow the granola bars to set. Once firm, remove from the pan and cut into bars or squares.
- Store and Enjoy . Store the granola bars in an airtight container or wrap them individually in plastic wrap for easy grab-and-go snacks. Enjoy at room temperature or chilled for an extra refreshing treat.
Granola Bars Recipe | Homemade Granola Bars https://twosleevers.com/granola-bars-recipe/
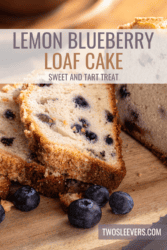
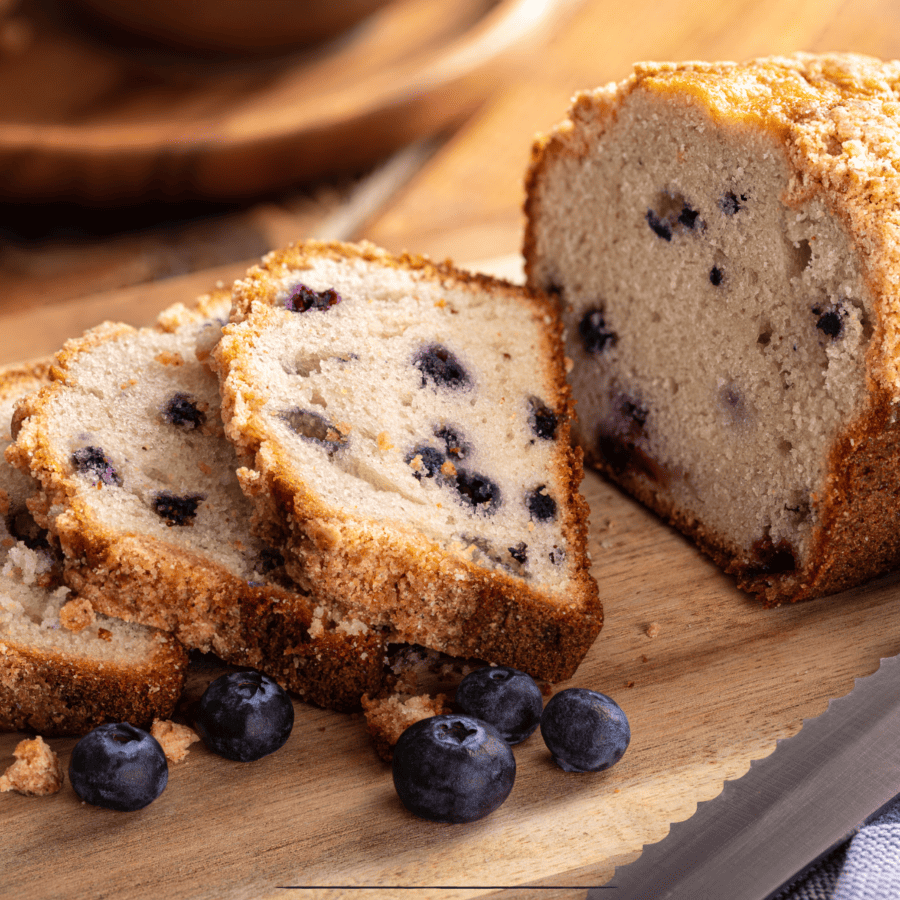
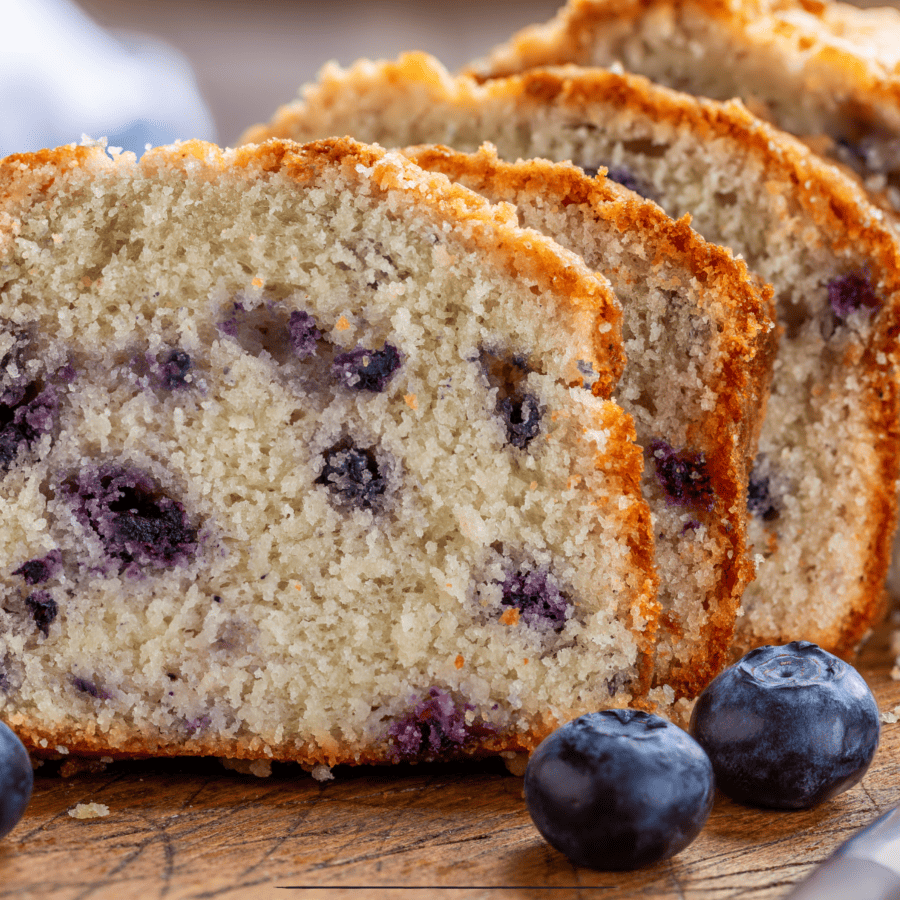
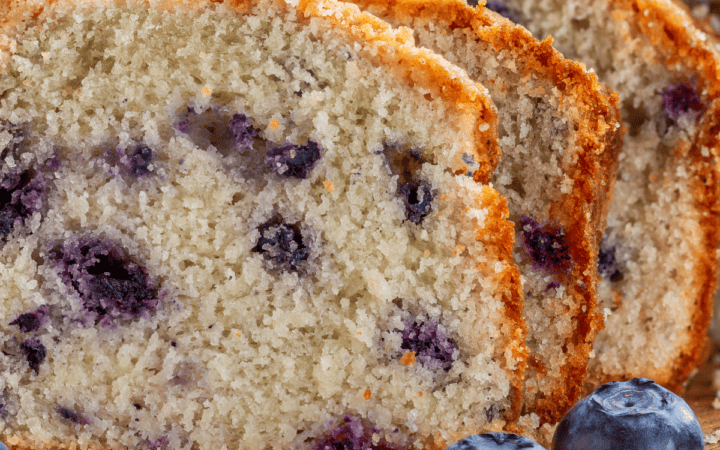
Dive into the enchanting world of sweet and tangy flavors with our Lemon Blueberry Loaf Cake recipe. Perfect for springtime brunches, afternoon teas, or a delightful dessert, this moist, flavorful loaf is a harmonious blend of zesty lemon and sweet, juicy blueberries.
Why You’ll Love This Blueberry Dessert
- Flavorful . The perfect balance of sweet and tart, this loaf is irresistibly delicious.
- Easy to Make . With straightforward instructions, it’s a breeze to bake.
- Crowd-Pleaser . Its universal appeal makes it perfect for any gathering.
- Versatile . Great for breakfast, a snack, or dessert.
Embrace the delightful combination of lemon and blueberry with this easy-to-make loaf cake. It’s guaranteed to become a new favorite in your baking repertoire!
What Is The Difference Between A Round Cake And Loaf Cake?
The main differences between a round cake and a loaf cake lie in their shapes, baking time, and presentation:
- Shape - The most obvious difference is the shape. Round cakes are typically baked in round pans and are often used for layered cakes and special occasions. Loaf cakes, on the other hand, are baked in rectangular loaf pans and are more commonly associated with bread-like textures and quick bread recipes, such as banana bread or pound cake.
- Baking Time and Texture - Due to their shape, loaf cakes often have a denser texture and may require a longer baking time compared to round cakes. The longer, narrower shape of a loaf pan means heat distribution is different than in a round pan, which can affect how evenly the cake cooks.
Ingredients You’ll Need
- Fresh Blueberries - Adds a burst of sweetness and a pop of color.
- Lemon Zest - Infuses the cake with vibrant citrus flavor.
- All-purpose Flour - Provides the perfect cake structure.
- Baking Powder - Helps the cake rise beautifully.
- Salt - Enhances the flavors.
- Unsalted Butter - Gives the cake a rich, tender texture.
- Granulated Sugar - Sweetens the cake just right.
- Eggs - Bind the ingredients and add moisture.
- Vanilla Extract - Adds a layer of flavor.
- Milk - Keeps the cake moist and soft.
- Lemon Juice - Adds a fresh, zesty kick.
How To Make Blueberry Loaf Cake
- Preheat & Prepare . Start by preheating your oven and greasing your loaf pan.
- Mix Dry Ingredients . Whisk together flour, baking powder, and salt.
- Cream Butter and Sugar . Beat the butter and sugar until fluffy.
- Add Eggs . Incorporate eggs one at a time, then mix in the vanilla extract and lemon zest.
- Combine . Alternately add dry ingredients and milk, starting and ending with the dry mixture.
- Fold in Blueberries . Gently fold in the fresh blueberries.
- Bake . Pour the batter into the prepared pan and bake until a toothpick comes out clean.
- Glaze . Mix lemon juice and powdered sugar for the glaze and drizzle over the cooled cake.
Tips And Tricks
Making a perfect blueberry loaf cake involves a blend of the right ingredients, techniques, and a little baking magic. Here are some tips and tricks to help you create a delicious and moist loaf every time:
- Room Temperature Ingredients . Bring ingredients like eggs, butter, and sour cream (if using) to room temperature before mixing. This helps to create a smoother batter and a more uniform texture in the finished cake.
- Coat the Blueberries . To prevent the blueberries from sinking to the bottom of the cake, lightly coat them in a small amount of flour before folding them into the batter.
- Do Not Overmix . When combining the wet and dry ingredients, mix just until they’re incorporated. Overmixing can lead to a dense, tough cake because it develops the gluten in the flour.
- Prevent Browning . If you notice the top of your loaf is browning too quickly in the oven, cover it loosely with aluminum foil partway through baking. This will prevent the top from burning while allowing the cake to bake thoroughly.
Variations
Experimenting with variations can turn your standard blueberry loaf cake into a new delight every time you bake. Here are some ideas to mix things up:
- Almond Blueberry- Add a teaspoon of almond extract to the batter and sprinkle sliced almonds on top before baking for a nutty flavor and crunchy texture.
- Streusel-Topped- Make a simple streusel topping with flour, brown sugar, cinnamon, and butter, then sprinkle it over the batter before baking for a crispy, sweet crust.
- Blueberry Cream Cheese- Swirl in a cream cheese mixture (cream cheese, sugar, and egg) into the blueberry cake batter for a creamy, tangy layer that complements the sweetness of the blueberries.
What To Enjoy With Blueberry Loaf Cake
Blueberry loaf cake is versatile and can be enjoyed with various accompaniments depending on the time of day or personal preference. Here are some delightful options to consider:
- Coffee or Tea - A classic pairing, enjoy a slice of blueberry loaf cake with your favorite coffee or tea. This combination is perfect for breakfast, afternoon tea, or a mid-morning snack.
- Fresh Fruit - Serve slices of blueberry loaf cake with a side of fresh fruit such as sliced strawberries, peaches, or a mixed berry salad to add a refreshing touch.
- Ice Cream - For a decadent treat, pair a warm slice of blueberry loaf cake with a scoop of vanilla ice cream. The contrast between the warm cake and the cold ice cream is delightful.
- Whipped Cream - A dollop of whipped cream on top of the cake can add a light, creamy texture that complements the moistness of the cake.
How Long Does It Last?
Store your Lemon Blueberry Loaf in an airtight container at room temperature for up to 3 days, or you can store it in a container in the refrigerator for up to 5 days.
Can You Freeze It?
You can freeze a blueberry loaf cake for up to 3 months. When stored properly in an airtight container or wrapped tightly in plastic wrap and then placed in a freezer bag, the cake will maintain its best quality during this time.
Remember to label the cake with the freezing date, so you know how long it has been stored. While the cake might remain safe to eat beyond three months, its quality, flavor, and texture may start to diminish.
More Brilliant Blueberry Recipes
- Lemon Blueberry Scones
- Blueberry Ice Cream
- Low Carb Blueberry Muffins
- Blueberry Baked Oatmeal
- Lemon Blueberry Muffins

Blueberry Loaf Cake Recipe | Lemon Blueberry Loaf Cake
Ingredients
- ▢ 1 1/2 cups Blueberries
- ▢ 1 3/4 cups All Purpose Flour
- ▢ 2 tsp Lemon Zest
- ▢ 2 tsp Baking Powder
- ▢ 1/2 tsp Kosher Salt
- ▢ 1/2 cup Unsalted Butter
- ▢ 1 cup Granulated Sugar
- ▢ 2 Eggs
- ▢ 1 tsp Vanilla Extract
- ▢ 1/2 cup Milk
- ▢ 2 tbsp Lemon Juice
Instructions
- Preheat & Prepare . Start by preheating your oven to 350F and greasing your loaf pan.
- Mix Dry Ingredients . Whisk together flour, baking powder, and salt.
- Cream Butter and Sugar . Beat the butter and sugar until fluffy.
- Add Eggs . Incorporate eggs one at a time, then mix in the vanilla extract and lemon zest.
- Combine . Alternately add dry ingredients and milk, starting and ending with the dry mixture.
- Fold in Blueberries . Gently fold in the fresh blueberries.
- Bake . Pour the batter into the prepared pan and bake for 55-65 minutes, or until a toothpick comes out clean. Allow to cool.
- Glaze . Mix lemon juice and powdered sugar for the glaze and drizzle over the cooled cake.
