
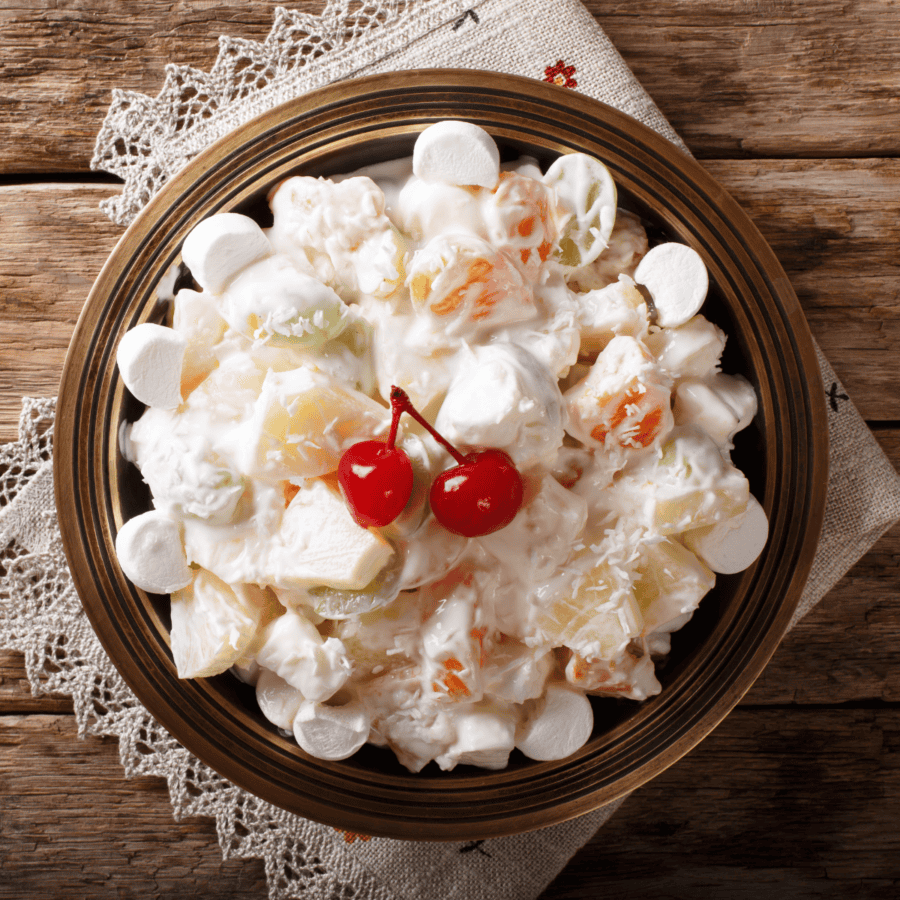
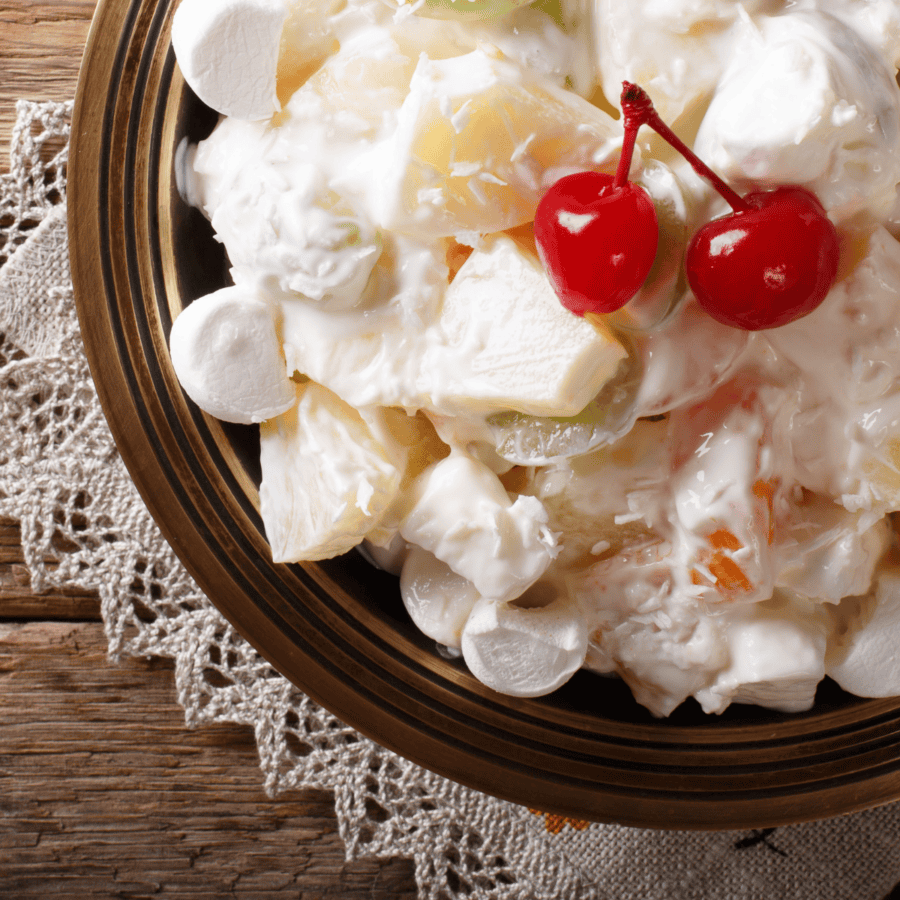
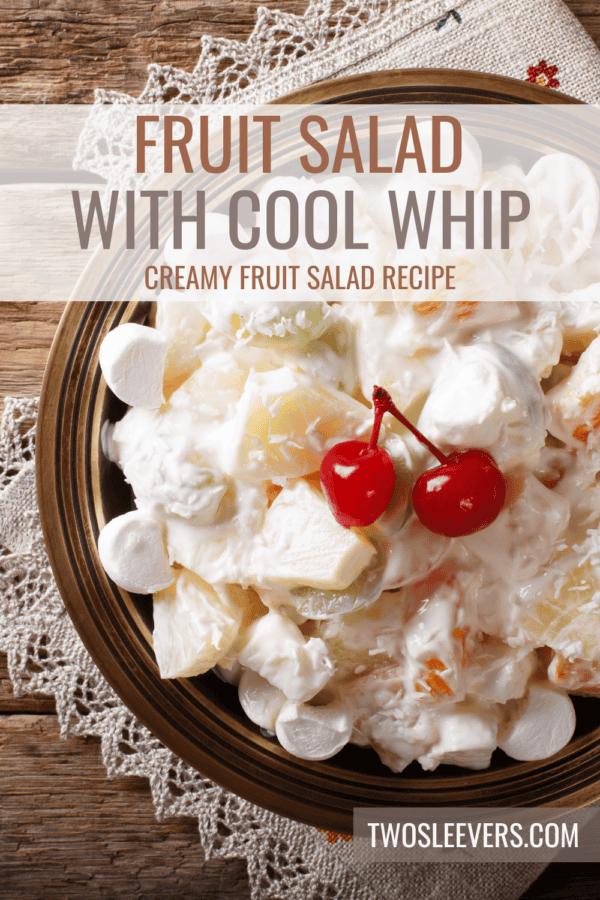
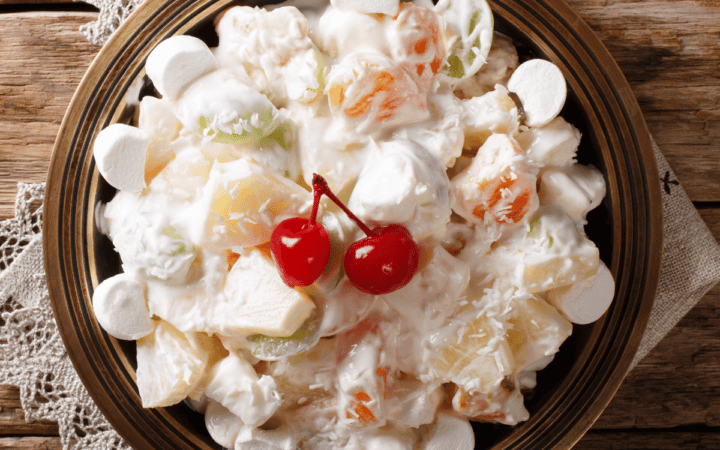
Looking for a light and refreshing dessert or side dish that’s as easy to make as it is delicious? Look no further than our Fruit Salad with Cool Whip recipe! This delightful concoction combines the natural sweetness of fresh fruit with the creamy goodness of Cool Whip, resulting in a dessert that’s perfect for any occasion.
Why You’ll Love This Simple Sweet Dish
- Fast and Easy . Ready in minutes, this fruit salad is perfect for those times when you need a quick and easy dish to satisfy your sweet tooth.
- Versatile . You can use any combination of fruits you like, making this recipe incredibly versatile and adaptable to whatever you have on hand.
- Kid-Friendly . Kids love the sweet taste of this fruit salad, making it a great way to encourage them to eat more fruit.
- Delicious . Packed with flavor and texture, this fruit salad is sure to be a hit with everyone at the table.
This delectable treat combines a variety of fresh fruits with the creamy goodness of Cool Whip for a dessert that’s as delicious as it is easy to make.
Is Fruit Salad With Cool Whip Healthy?
While fruit salad with Cool Whip can be a delicious addition to your diet, it’s essential to consume it in moderation and be mindful of overall ingredient choices and portion sizes to maintain a balanced diet.
What Is Creamy Fruit Salad Made Of?
- Assorted Fresh Fruit - Choose your favorites, such as strawberries, blueberries, grapes, pineapple, kiwi, and oranges.
- Cool Whip - This creamy topping adds sweetness and richness to the fruit.
- Optional - Chopped nuts, shredded coconut, or mini marshmallows for added texture and flavor.
How To Make Fruit Salad With Cool Whip
- Prepare the Fruits . Wash and thoroughly dry the fruits of your choice. Chop larger fruits like pineapple and kiwi into bite-sized pieces.
- Combine the Ingredients . In a large mixing bowl, gently fold together the chopped fruits and Cool Whip until well combined.
- Chill and Serve . Cover the bowl with plastic wrap and refrigerate the fruit salad for at least 30 minutes to allow the flavors to meld together. Serve chilled and enjoy!
Tips And Tricks
Here are some tips and tricks for making fruit salad with Cool Whip:
- Choose Fresh and Ripe Fruits . Select a variety of fresh and ripe fruits for your salad. Opt for fruits that are in season for the best flavor and texture. Some popular choices include strawberries, blueberries, grapes, pineapple, kiwi, oranges, and mangoes.
- Prepare Ingredients in Advance . Wash, peel, and chop the fruits ahead of time to streamline the salad-making process. Store the prepared fruits in the refrigerator until you’re ready to assemble the salad to keep them fresh.
- Use Cool Whip Sparingly . While Cool Whip adds creaminess and sweetness to the fruit salad, it’s high in sugar and calories. Use it sparingly or consider using a lighter version or alternative toppings such as Greek yogurt or whipped coconut cream for a healthier option.
Variations
Here are some variations to customize your fruit salad with Cool Whip:
- Tropical- Use a combination of tropical fruits such as pineapple chunks, mango slices, papaya cubes, and kiwi pieces. Top with toasted coconut flakes for an extra tropical flair.
- Berry Blast- Combine a variety of berries such as strawberries, raspberries, blueberries, and blackberries with Cool Whip. Add a drizzle of honey or maple syrup for sweetness and a sprinkle of chopped mint for freshness.
- Citrus- Mix together segments of oranges, grapefruits, and mandarins with Cool Whip. Add a splash of orange liqueur or orange juice for extra citrus flavor. Garnish with thinly sliced lemon or lime rounds.
- Peaches and Cream- Toss sliced peaches and nectarines with Cool Whip for a creamy and sweet salad. Add a pinch of cinnamon or nutmeg for warmth and depth of flavor. Top with crushed graham crackers for a peach cobbler-inspired twist.
What To Eat With Fruit Salad With Cool Whip
Fruit Salad with Cool Whip is a versatile dish that pairs well with a variety of foods, making it suitable for different occasions and meals throughout the day. Here are some delicious options to consider serving alongside it:
- Pancakes or Waffles - The combination of fluffy pancakes or crispy waffles with fresh fruit salad and a dollop of Cool Whip is simply irresistible.
- Cake - Whether it’s a classic vanilla cake or a rich chocolate dessert, this treat makes a refreshing accompaniment to sweet treats.
- Sandwiches - Pair fruit salad with a simple sandwich for a light and balanced lunch. Options like turkey and avocado or grilled cheese are excellent choices.
How Long Does It Last?
Fruit salad with Cool Whip will last for 2-3 days in the refrigerator when stored in an airtight container. However, it’s best enjoyed fresh, so try to eat it within a day or two for the best flavor and texture.
Can You Freeze It?
While you technically can freeze fruit salad with Cool Whip, the texture of the fruit may become mushy when thawed, so it’s not recommended.
More Fruit Forward Recipes
- Strawberry Pretzel Salad
- Avocado Grapefruit Salad
- Fruit Hand Pies
- Strawberry Danish Recipe
- Blueberry Loaf Cake
Fruit Salad With Cool Whip | Creamy Fruit Salad Recipe
Ingredients
- ▢ 1 cup Strawberries , hulled and chopped
- ▢ 1 cup Blueberries
- ▢ 1 cup Grapes , halved
- ▢ 1 cup Pineapple
- ▢ 2 Kiwi , peeled and chopped
- ▢ 2 Oranges , peeled and chopped
- ▢ 1 cup Cool Whip
- ▢ 1/2 cup Mini Marshmallows , optional
- ▢ 1/4 cup Shredded Coconut , optional
Instructions
- Prepare the Fruits . Wash and thoroughly dry the fruits of your choice. Chop larger fruits like pineapple and kiwi into bite-sized pieces.
- Combine the Ingredients . In a large mixing bowl, gently fold together the chopped fruits and Cool Whip until well combined.
- Chill and Serve . Cover the bowl with plastic wrap and refrigerate the fruit salad for at least 30 minutes to allow the flavors to meld together. Serve chilled and enjoy!
Get support & connect with our community on Facebook!
Nutrition

If you already signed up, you should have received an email with a password to give you unlimited access to our FREE Printable Library. The password is case sensitive. Enter it below and get printing!
Password:

Fruit Salad With Cool Whip | Creamy Fruit Salad Recipe
Ingredients
- 1 cup Strawberries hulled and chopped
- 1 cup Blueberries
- 1 cup Grapes halved
- 1 cup Pineapple
- 2 Kiwi peeled and chopped
- 2 Oranges peeled and chopped
- 1 cup Cool Whip
- 1/2 cup Mini Marshmallows optional
- 1/4 cup Shredded Coconut optional
Instructions
- Prepare the Fruits . Wash and thoroughly dry the fruits of your choice. Chop larger fruits like pineapple and kiwi into bite-sized pieces.
- Combine the Ingredients . In a large mixing bowl, gently fold together the chopped fruits and Cool Whip until well combined.
- Chill and Serve . Cover the bowl with plastic wrap and refrigerate the fruit salad for at least 30 minutes to allow the flavors to meld together. Serve chilled and enjoy!
Fruit Salad With Cool Whip | Creamy Fruit Salad Recipe https://twosleevers.com/fruit-salad-with-cool-whip/

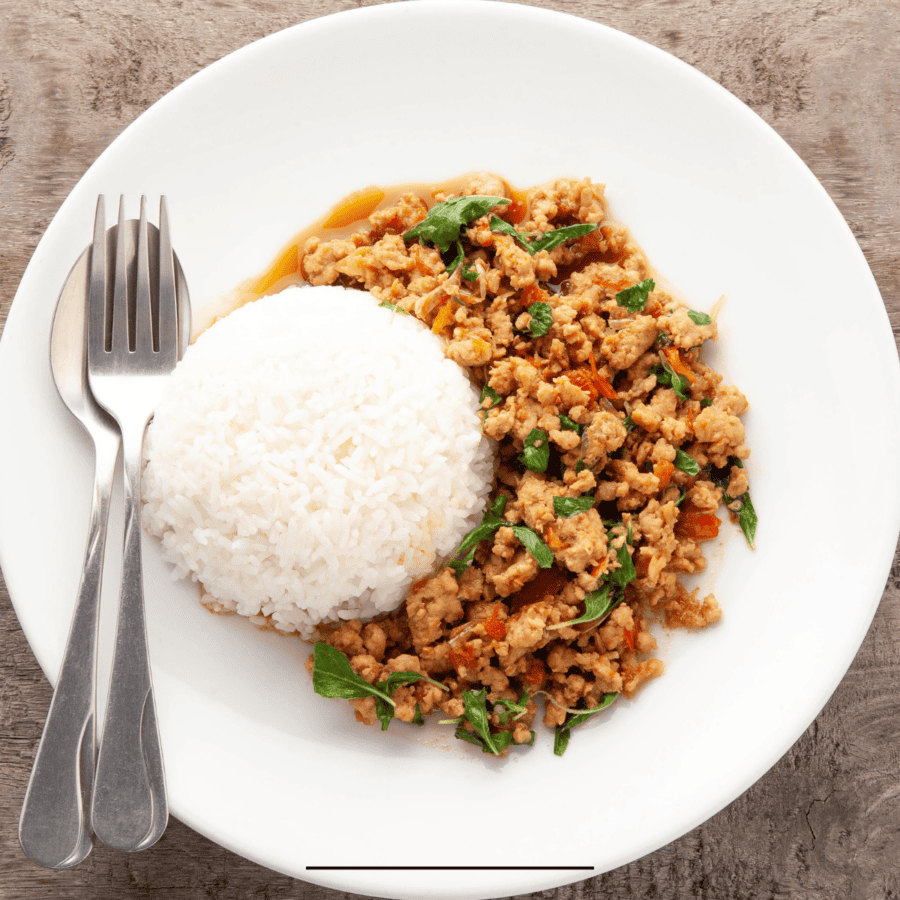
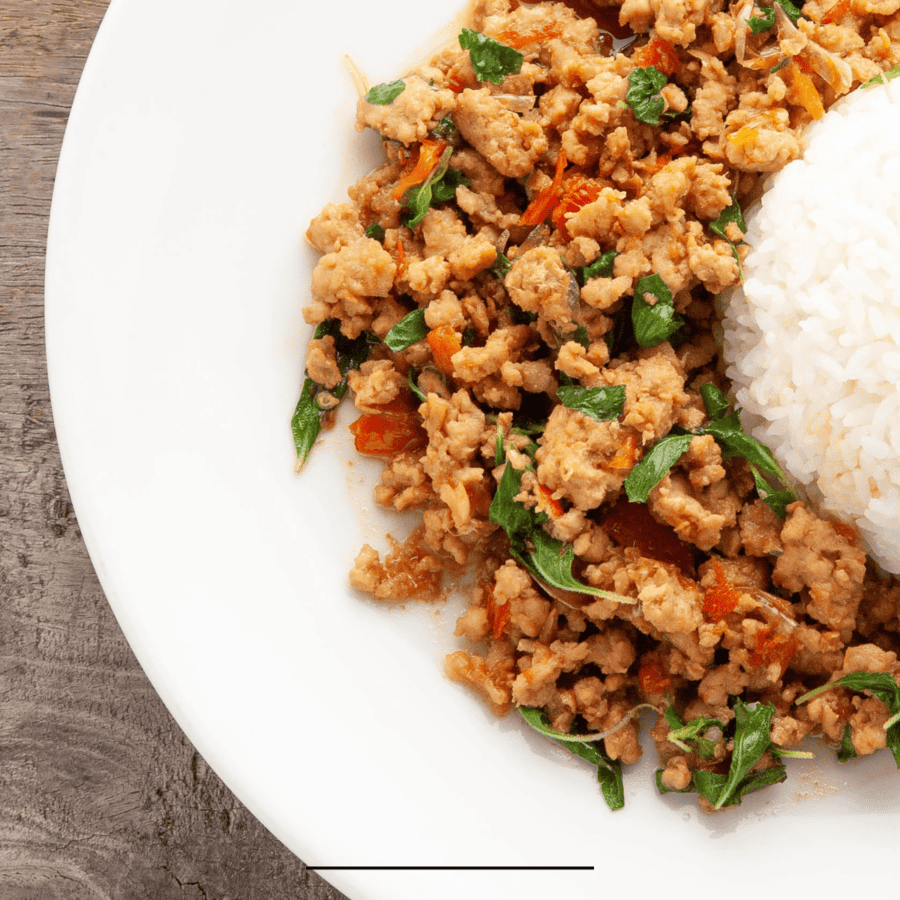
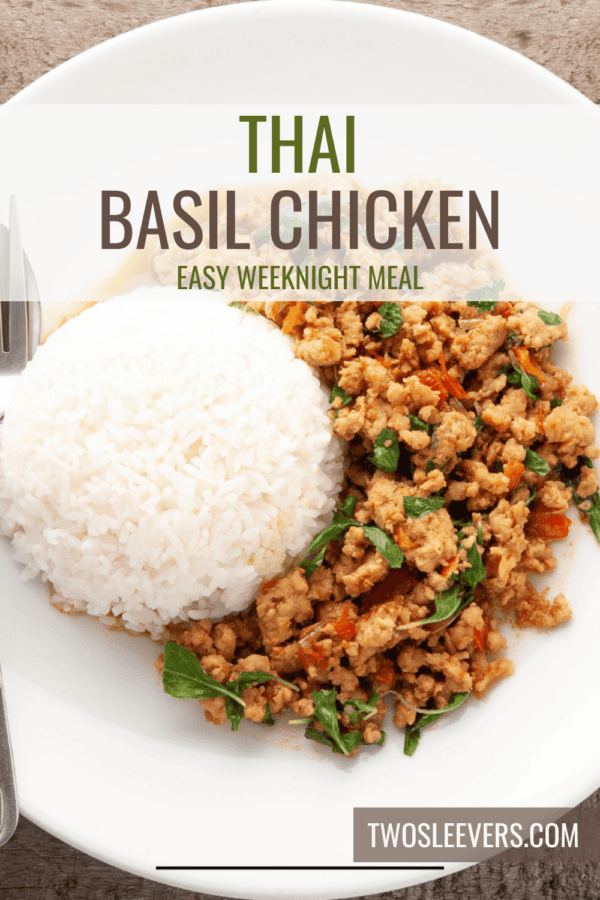
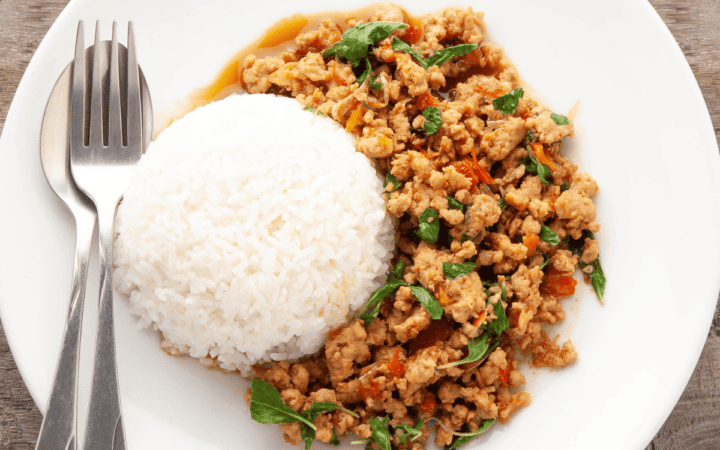
Thai Basil Chicken is a quick Thai stir-fry dish made with ground chicken, Thai basil, garlic, bird’s eye chilies, onion, and a savory sauce of soy sauce, fish sauce, oyster sauce, brown sugar, and water. It’s quick and works well for a weeknight dinner when you want bold, takeout-style flavor in about 30 minutes. Unlike restaurant-style Pad Kra Pao that can feel fussy or hard to balance at home, this version uses easy pantry sauces and ground chicken for fast cooking and super-adjustable heat, so you can dial the spice to your comfort level.
Why You’ll Love This Flavorful Dish
- Quick and Simple . Ready in just 30 minutes from start to finish.
- Effortless Preparation . Minimal chopping and cooking for a no-fuss experience.
- Incredibly Flavorful . The combination of fresh basil, garlic, and chilies creates an aromatic and delicious meal.
With the magic of stir-frying, you’ll achieve that desirable mix of tender chicken and crisp vegetables, making it a healthier option that doesn’t sacrifice taste.
What Is Thai Basil Chicken?
Thai Basil Chicken is a flavorful and aromatic dish that offers a delightful mix of savory, spicy, and fresh notes. It’s a well-balanced meal that excites the palate with its depth and complexity, making it a popular choice for those who enjoy bold and vibrant flavors.
Ingredients You’ll Need
- 1 Pound Ground Chicken - The main protein of the dish, ground chicken absorbs the flavors well.
- 1 Cup Thai Basil - Essential for its distinctive flavor and fragrance. Regular basil can be substituted if necessary.
- 4 Cloves Garlic - Adds a pungent, savory depth to the dish.
- 3 Bird’s Eye Chilies - Provide the spicy kick. Adjust the amount to your heat preference.
- 1 Onion - Adds sweetness and texture.
For the Sauce
- 2 TBSP Soy Sauce - Adds saltiness and umami.
- 1 TBSP Fish Sauce - Contributes a unique depth of flavor and authenticity.
- 1 TBSP Oyster Sauce - Adds a rich, savory sweetness.
- 1 TBSP Brown Sugar - Balances the saltiness and enhances the overall taste.
- 1/4 Cup Water - Helps blend the sauce ingredients together.
How To Make Thai Basil Chicken
- Prepare the Ingredients . Start by mincing the garlic and slicing the chilies and onion. Wash and pick the Thai basil leaves from the stems.
- Make the Sauce . In a small bowl, combine the soy sauce, fish sauce, oyster sauce, brown sugar, and water. Stir until the sugar is dissolved.
- Cook the Chicken . Heat a large pan or wok over medium-high heat. Add a bit of oil, then sauté the garlic and chilies until fragrant. Add the ground chicken and cook until it’s no longer pink, breaking it up with a spoon.
- Add Vegetables . Stir in the onion and bell pepper (if using) and cook for a few minutes until they start to soften.
- Combine and Stir-Fry . Pour the sauce over the chicken mixture and stir to coat evenly. Cook for another few minutes until the sauce is slightly reduced and the chicken is fully cooked.
- Add Basil . Remove the pan from the heat and stir in the fresh basil leaves. The residual heat will wilt the basil just right.
- Serve . Serve hot over a bed of steamed jasmine rice and top with a fried egg for an authentic touch.
Tips And Tricks
Perfecting Thai Basil Chicken is about technique and quality ingredients. Here are some tips to ensure your dish turns out flavorful and satisfying:
- Fresh Basil . Use fresh Thai basil for the best flavor. If you can’t find Thai basil, regular basil or holy basil can be used as substitutes.
- Control the Heat . Adjust the number of chilies according to your heat preference. Removing the seeds can also reduce spiciness.
- High Heat Cooking . Stir-frying over high heat ensures the chicken cooks quickly and remains tender.
Variations
Thai Basil Chicken can be adapted to suit different tastes and dietary needs. Here are some creative variations:
- Vegetarian - Substitute chicken with tofu or a mix of mushrooms.
- Low Carb - Serve over cauliflower rice instead of jasmine rice.
- Add More Vegetables - Include vegetables like zucchini, carrots, or green beans for extra nutrition and color.
What To Serve With Thai Basil Chicken
Thai Basil Chicken pairs wonderfully with various sides and accompaniments. Here are some great options:
- Jasmine Rice - The classic pairing that soaks up the delicious sauce.
- Fried Egg - Traditionally served on top, adding richness and texture.
- Cucumber Salad - A refreshing side that complements the spicy chicken.
How Long Does It Last?
Store any leftovers in an airtight container in the refrigerator for up to 3 days. Reheat in a pan over medium heat until warmed through before serving.
Can You Freeze It?
Yes, Thai Basil Chicken can be frozen. Allow it to cool completely, then transfer to a freezer-safe container or bag. Freeze for up to 2 months. Reheat from frozen in a pan over medium heat until hot.
Mostly. Thai basil chicken is often used as the English name for Pad Kra Pao (Pad Krapow Gai), a classic Thai stir-fry of chicken with lots of garlic and chilies in a savory sauce. It’s usually finished with basil and sometimes topped with a crispy fried egg. The small catch is basil. Traditional Pad Kra Pao is meant to use holy basil (krapow), while many “Thai basil chicken” recipes use Thai basil because it’s easier to find. So, the dish is very similar, but the aroma can be slightly different.
Yes, you can use regular basil if you can’t find Thai basil for Thai basil chicken / Pad Kra Pao, but expect a different aroma. Italian basil is sweeter and less peppery/anise-like, so the dish tastes a bit less “authentic” but still really good. To get closer to that classic Pad Kra Pao vibe, use more basil than you think you need and add it at the very end so it stays fragrant. A little extra garlic and a touch more chili can help make up for the flavor shift.
Thai basil chicken is usually spicy, since it’s made with plenty of garlic and bird’s eye chilies, but it’s very easy to control the heat. For a milder Thai basil chicken recipe, use fewer chilies (or swap in a milder pepper like jalapeño), remove the seeds, and keep the savory sauce the same so you don’t lose that classic flavor. You can always add extra chili at the table.
More Amazing Asian-Inspired Dishes
- Sesame Ginger Chicken
- Spicy Noodles
- Keto Tuna Salad
- Teriyaki Chicken
- Potstickers
Thai Basil Chicken Recipe | Easy And Perfectly Spicy
Ingredients
- ▢ 1 pound Ground Chicken
- ▢ 1 cup Thai Basil , chopped
- ▢ 4 cloves Garlic , minced
- ▢ 3 Bird’s Eye Chilies , sliced
- ▢ 1 onion , finely chopped
- ▢ 2 tbsp Soy Sauce
- ▢ 1 tbsp Fish Sauce
- ▢ 1 tbsp Oyster Sauce
- ▢ 1 tbsp Brown Sugar
- ▢ 1/4 cup Water
- ▢ 1 tbsp Olive Oil
Instructions
- Prepare the Ingredients . Start by mincing the garlic and slicing the chilies and onion. Wash and pick the Thai basil leaves from the stems.
- Make the Sauce . In a small bowl, combine the soy sauce, fish sauce, oyster sauce, brown sugar, and water. Stir until the sugar is dissolved.
- Cook the Chicken . Heat a large pan or wok over medium-high heat. Add a bit of oil, then sauté the garlic and chilies until fragrant. Add the ground chicken and cook until it’s no longer pink (5-7 minutes), breaking it up with a spoon.
- Combine and Stir-Fry . Pour the sauce over the chicken mixture and stir to coat evenly. Cook for another few minutes until the sauce is slightly reduced and the chicken is fully cooked.
- Add Basil . Remove the pan from heat and stir in the fresh basil leaves. The residual heat will wilt the basil just right.
- Serve . Serve hot over a bed of steamed jasmine rice and top with a fried egg for an authentic touch.
Get support & connect with our community on Facebook!
Nutrition
Don’t forget to check out my other Ketocookbooks.
Keto Instant Pot, Keto Fat Bombs, Sweets, & Treats , and Easy keto in 30 minutes.

