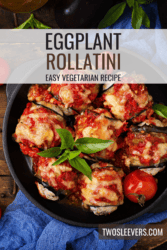
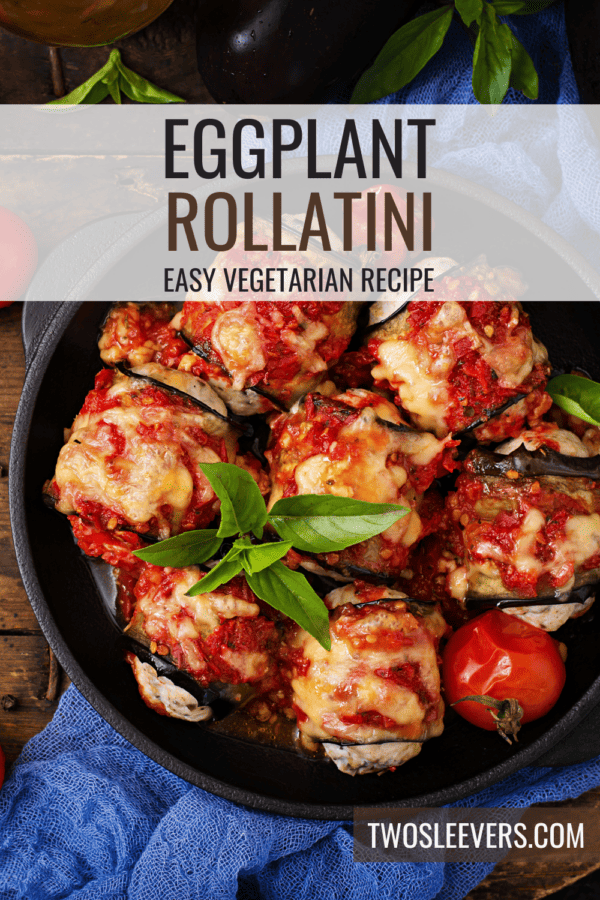
If you’re a fan of Italian cuisine and looking for a delicious vegetarian dish, then eggplant rollatini is an excellent choice. This classic Italian recipe features tender slices of eggplant rolled up with a flavorful filling, smothered in marinara sauce, and baked to perfection. With its rich flavors and satisfying texture, eggplant rollatini is sure to impress.

Why You’ll Love This Vegetarian Dish
- Gluten Free.
- Delicious.
- Vegetarian.
- Low Carb.
Eggplant rollatini is a fantastic vegetarian dish that captures the essence of Italian cuisine. The combination of tender eggplant, creamy cheese filling, and tangy marinara sauce creates a harmonious flavor profile that will satisfy your cravings.
What Is The Difference Between Eggplant Parmesan And Eggplant Rollatini?
Eggplant Parmesan emphasizes crispy fried eggplant rounds layered with sauce and cheese, while Eggplant Rollatini highlights tender eggplant slices rolled up with a filling and topped with sauce and cheese.
The former is served in a layered casserole style, while the latter is presented as individual rolled slices. The texture of Eggplant Parmesan leans towards crispy, while Eggplant Rollatini offers a softer and more moist experience.
Ultimately, both dishes celebrate the wonderful flavors and versatility of eggplant in Italian cuisine.
Is Eggplant Rollatini High In Carbs?
The carb content of Eggplant Rollatini can vary depending on the specific ingredients and preparation method used.
This recipe uses my homemade low carb marinara sauce. This is where a majority of the carbs in the traditional version of the dish come from, so it is a low carb dish.
What Is Eggplant Rollatini Made Of?
- Eggplant
- Olive oil
- Salt and pepper
- Ricotta cheese
- Mozzarella cheese
- Parmesan cheese
- Basil
- Egg
- Garlic
- Marinara sauce
How To Make Eggplant Rollatini
- Prepare the Eggplant Preheat your oven to 400F. Slice the eggplants lengthwise into thin, even slices, about 1/4-inch thick. Lay the eggplant slices on a baking sheet lined with parchment paper. Brush both sides of the eggplant slices with olive oil and sprinkle with salt and pepper. Bake in the preheated oven for about 10-15 minutes, or until the eggplant slices are tender and slightly golden. Set aside to cool.
- Make the Filling In a mixing bowl, combine the ricotta cheese, shredded mozzarella cheese, grated Parmesan cheese, chopped basil, minced garlic, and the egg. Season the mixture with salt and pepper, and stir until well combined.
- Assemble the Rollatini Spoon a generous amount of the cheese filling onto each eggplant slice. Roll up the slices tightly, starting from one end, to create neat and compact rolls. Place the eggplant rolls seam-side down in a baking dish.
- Bake the Rollatini Pour the marinara sauce evenly over the eggplant rolls in the baking dish. Cover the dish with foil and bake in the preheated oven for about 20-25 minutes, or until the sauce is bubbling and the cheese is melted and golden. Remove the foil and continue baking for an additional 5 minutes to allow the cheese to slightly brown.
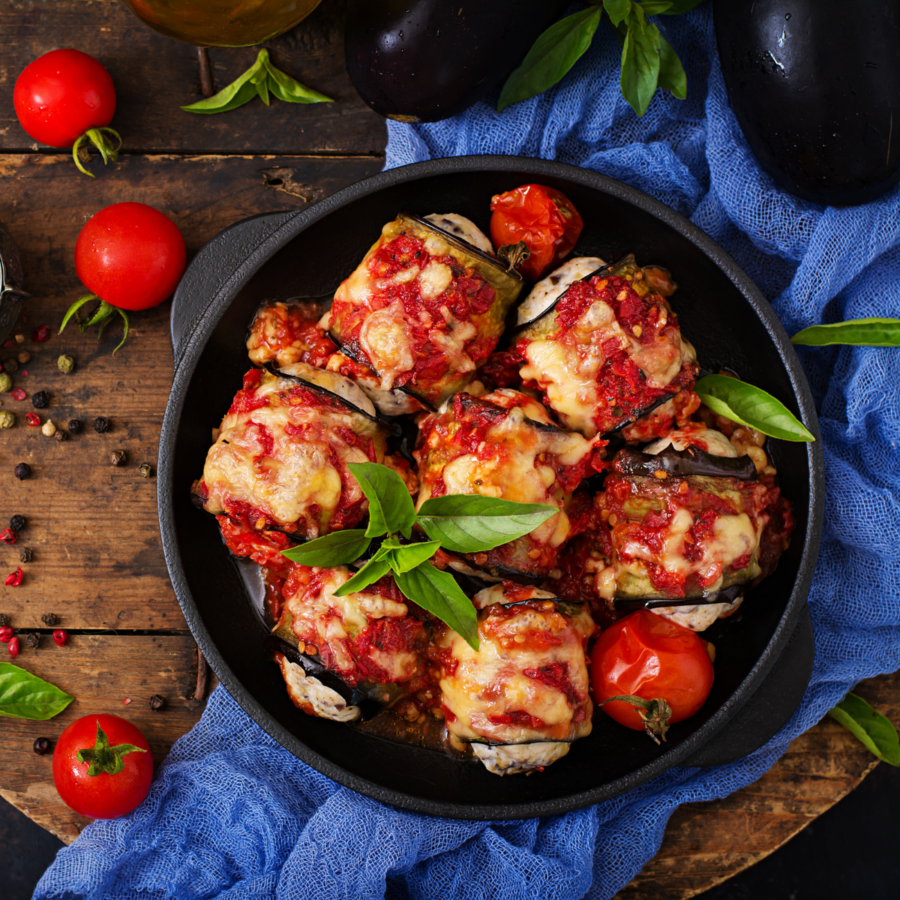
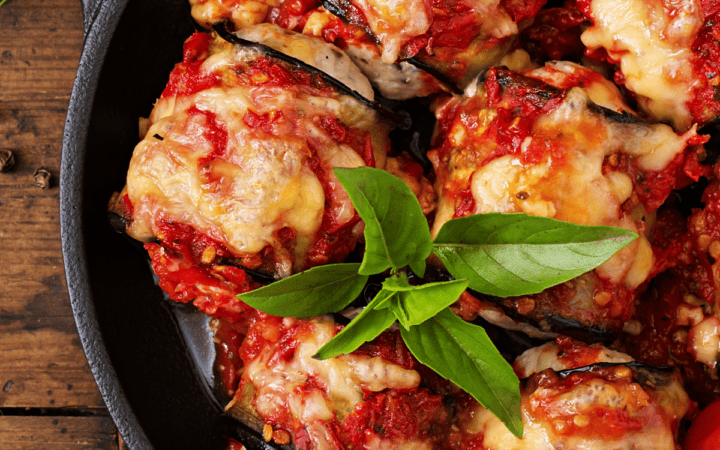
- Serve It Once cooked, remove the dish from the oven and let it cool for a few minutes. Garnish with fresh basil leaves for a vibrant touch. Serve the eggplant rollatini hot, accompanied by a side of crusty bread or a fresh green salad.
Tips And Tricks
Here are some tips and tricks to help you make the perfect Eggplant Rollatini every time:
- Choose the Right Eggplant - Look for firm, glossy eggplants with smooth skin. Avoid ones with bruises or blemishes. Younger eggplants tend to have fewer seeds and a milder flavor.
- Slice the Eggplant Uniformly - To ensure even cooking and easy rolling, slice the eggplant into thin, uniform strips. Aim for slices about ¼ inch thick. Using a mandoline slicer or a sharp knife can help achieve consistent thickness.
- Use Toothpicks Strategically - Insert toothpicks through the sides of the rolled eggplant slices to help them hold their shape during baking. Remember to remove the toothpicks before serving.
Variations
Love the flavors of this eggplant rollatini recipe but want to switch them up a little bit to fit your palate? Try one of these variations next time you whip up this dish:
- Mediterranean Style - Give your Eggplant Rollatini a Mediterranean flair by adding chopped sun-dried tomatoes, Kalamata olives, and crumbled feta cheese to the filling. The salty and tangy flavors work wonderfully with the eggplant.
- Meaty Filling - For meat lovers, incorporate cooked ground meat such as beef, sausage, or turkey into the filling. Brown the meat with onions and garlic, season it well, and mix it with the cheese and herbs.
- Caprese Rollatini - For a Caprese-inspired version, use slices of fresh mozzarella instead of the ricotta filling. Layer the mozzarella slices with tomato slices and fresh basil leaves, then roll them up in the eggplant. Top with marinara sauce and additional mozzarella before baking.
What To Serve With It
Eggplant Rollatini is a versatile dish that can be served as a main course or as part of a larger meal. Here are some ideas for what to serve with Eggplant Rollatini:
- Side Salad - A fresh green salad with a light vinaigrette dressing is a great accompaniment to this dish. It provides a refreshing contrast to the richness of the dish. Consider a salad with mixed greens, cherry tomatoes, cucumbers, and a sprinkle of Parmesan cheese.
- Garlic Bread - A side of warm, crusty garlic bread is a classic choice to serve with Eggplant Rollatini. The combination of the flavors and textures works well together. You can make homemade garlic bread or opt for store-bought varieties.
- Pasta - Serve it alongside a small portion of pasta for a more substantial meal. Choose your favorite type of pasta, such as spaghetti or penne, and toss it with a light marinara or olive oil-based sauce. This combination adds heartiness to the meal.
How Long Does It Last?
Eggplant Rollatini can typically be stored in an airtight container in the refrigerator for about 3 to 4 days.
Allow the Eggplant Rollatini to cool completely before transferring it to an airtight container or wrapping it tightly in plastic wrap. Refrigerate promptly and keep it stored in the coldest part of the refrigerator.
Can You Freeze It?
If you anticipate not consuming the Eggplant Rollatini within a few days, you can freeze it for longer-term storage. Wrap individual portions tightly in plastic wrap and place them in a freezer-safe container or freezer bag. It’s best to label the container with the date for easy reference.
When ready to eat, thaw the frozen Eggplant Rollatini in the refrigerator overnight and reheat as desired.
More Vegetarian Recipes
- Spaghetti Squash Casserole
- Palak Paneer
- Instant Pot Mushroom Stroganoff
- Eggplant Soup
- Vegetarian Enchiladas
Eggplant Rollatini | Easy Vegetarian Eggplant Bake
Ingredients
- ▢ 1 Eggplant
- ▢ 2 tbsp Olive Oil
- ▢ 1 1/2 cups Ricotta
- ▢ 1 cup Mozzarella Cheese
- ▢ 1/4 cup Parmesan Cheese
- ▢ 1 Egg
- ▢ 1 tbsp Minced Garlic
- ▢ 1 tsp Salt
- ▢ 1/2 tsp Pepper
- ▢ 1 tsp Basil
- ▢ 2 cups Low Sugar Marinara Sauce
Instructions
- Prepare the Eggplant. P reheat your oven to 400F. Slice the eggplants lengthwise into thin, even slices, about 1/4-inch thick. Lay the eggplant slices on a baking sheet lined with parchment paper. Brush both sides of the eggplant slices with olive oil and sprinkle with salt and pepper. Bake in the preheated oven for about 10-15 minutes, or until the eggplant slices are tender and slightly golden. Set aside to cool.
- Make the Filling. In a mixing bowl, combine the ricotta cheese, shredded mozzarella cheese, grated Parmesan cheese, chopped basil, minced garlic, and the egg.Season the mixture with salt and pepper, and stir until well combined.
- Assemble the Rollatini. Spoon a generous amount of the cheese filling onto each eggplant slice.Roll up the slices tightly, starting from one end, to create neat and compact rolls.Place the eggplant rolls seam-side down in a baking dish.
- Bake the Rollatini. Pour the marinara sauce evenly over the eggplant rolls in the baking dish.Cover the dish with foil and bake in the preheated oven for about 20-25 minutes, or until the sauce is bubbling and the cheese is melted and golden.Remove the foil and continue baking for an additional 5 minutes to allow the cheese to slightly brown.
- Serve It. Once cooked, remove the dish from the oven and let it cool for a few minutes.Garnish with fresh basil leaves for a vibrant touch.Serve the eggplant rollatini hot, accompanied by a side of crusty bread or a fresh green salad.
Get support & connect with our community on Facebook!
Nutrition
Don’t forget to check out my other Ketocookbooks.
Keto Instant Pot, Keto Fat Bombs, Sweets, & Treats , and Easy keto in 30 minutes.


If you already signed up, you should have received an email with a password to give you unlimited access to our FREE Printable Library. The password is case sensitive. Enter it below and get printing!
Password:

Eggplant Rollatini | Easy Vegetarian Eggplant Bake
Ingredients
- 1 Eggplant
- 2 tbsp Olive Oil
- 1 1/2 cups Ricotta
- 1 cup Mozzarella Cheese
- 1/4 cup Parmesan Cheese
- 1 Egg
- 1 tbsp Minced Garlic
- 1 tsp Salt
- 1/2 tsp Pepper
- 1 tsp Basil
- 2 cups Low Sugar Marinara Sauce
Instructions
- Prepare the Eggplant. P reheat your oven to 400F. Slice the eggplants lengthwise into thin, even slices, about 1/4-inch thick. Lay the eggplant slices on a baking sheet lined with parchment paper. Brush both sides of the eggplant slices with olive oil and sprinkle with salt and pepper. Bake in the preheated oven for about 10-15 minutes, or until the eggplant slices are tender and slightly golden. Set aside to cool.
- Make the Filling. In a mixing bowl, combine the ricotta cheese, shredded mozzarella cheese, grated Parmesan cheese, chopped basil, minced garlic, and the egg.Season the mixture with salt and pepper, and stir until well combined.
- Assemble the Rollatini. Spoon a generous amount of the cheese filling onto each eggplant slice.Roll up the slices tightly, starting from one end, to create neat and compact rolls.Place the eggplant rolls seam-side down in a baking dish.
- Bake the Rollatini. Pour the marinara sauce evenly over the eggplant rolls in the baking dish.Cover the dish with foil and bake in the preheated oven for about 20-25 minutes, or until the sauce is bubbling and the cheese is melted and golden.Remove the foil and continue baking for an additional 5 minutes to allow the cheese to slightly brown.
- Serve It. Once cooked, remove the dish from the oven and let it cool for a few minutes.Garnish with fresh basil leaves for a vibrant touch.Serve the eggplant rollatini hot, accompanied by a side of crusty bread or a fresh green salad.
Eggplant Rollatini | Easy Vegetarian Eggplant Bake https://twosleevers.com/eggplant-rollatini/
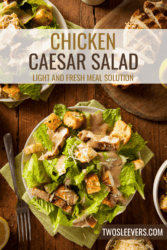
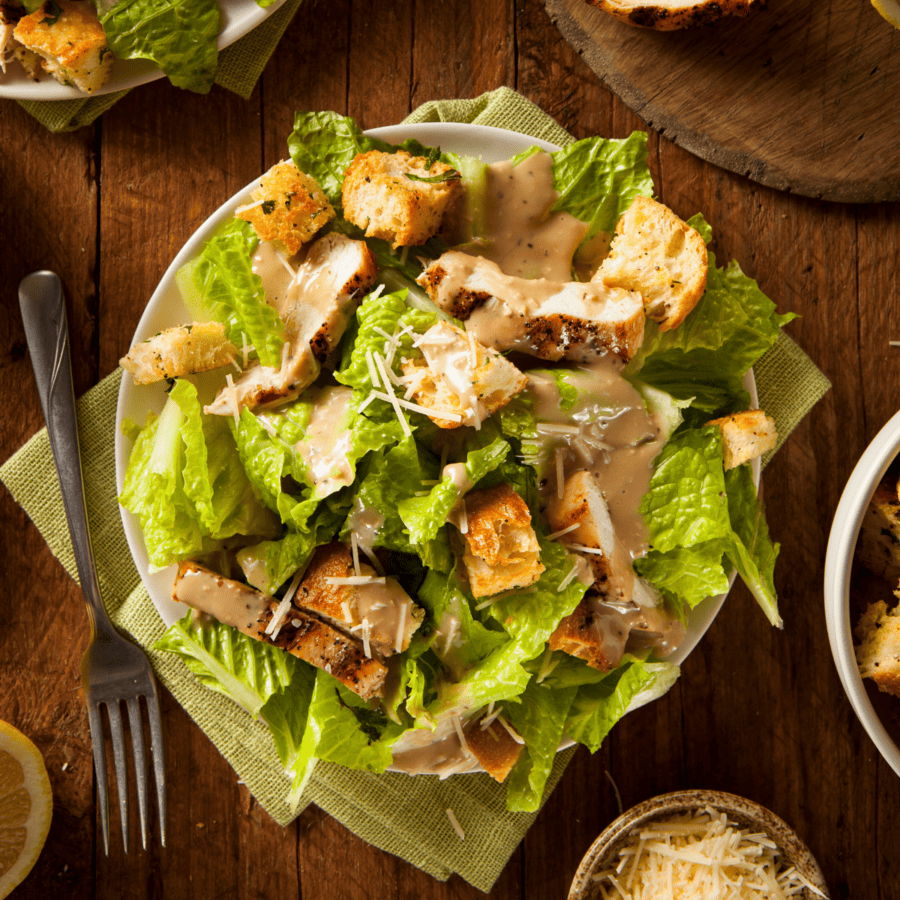
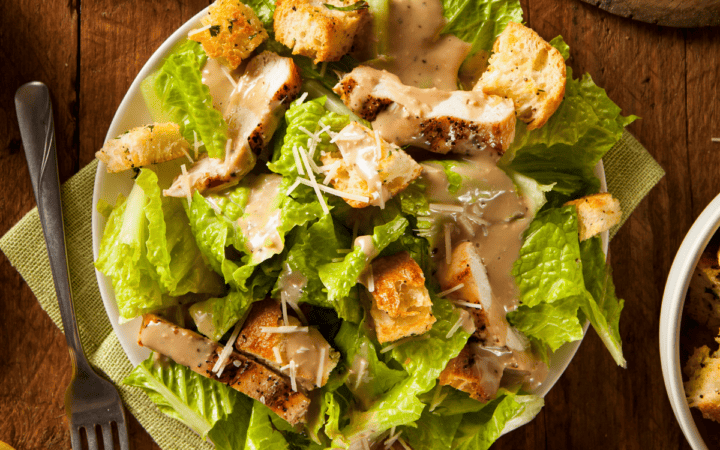
Chicken Caesar salad is a classic favorite that is both tasty and nutritious. It’s a perfect combination of crispy greens, tender chicken, and a tangy dressing that is sure to satisfy your cravings. The good news is, making a chicken Caesar salad with rotisserie chicken is easy, and can be prepared in no time.
Why This Will Be Your Favorite Salad
- Quick. A filling and nutritious meal made in under 30 minutes.
- Easy. Chop up some lettuce and rotisserie chicken, whip up a homemade dressing with a zing, and top with low carb croutons and cheese for a flavorful finish.
- Low Carb. Only net carbs per serving.
- High Protein. Packed with rotisserie chicken, you don’t have to worry about this chicken caesar salad not giving you the benefits of a full meal.
This recipe is easy, quick, and perfect for a healthy lunch or dinner. You can also make it ahead of time and store it in the fridge for later.
With rotisserie chicken, this classic dish becomes even easier to make and adds a delicious flavor to your meal. Give it a try and enjoy the mouthwatering taste of chicken Caesar salad at home!
Is Eating A Chicken Caesar Salad Healthy?
Eating a chicken Caesar salad can be a healthy choice, depending on the amount of each ingredient used and portion size. Here are some things to consider when you’re deciding if it is a healthy choice for you:
- Nutrition - Chicken is a good source of protein, and when combined with lettuce and other vegetables, a chicken Caesar salad can provide a good balance of macronutrients (carbohydrates, protein, and fat) and micronutrients (vitamins and minerals). However, the salad dressing, croutons, and cheese can add extra calories, sodium, and unhealthy fats.
- Sodium - The amount of sodium in a chicken Caesar salad can vary widely depending on the brand of dressing used. Many Caesar dressings are high in sodium, which can contribute to high blood pressure and other health issues if consumed in excess.
- Calories - The calorie content of a chicken Caesar salad can also vary depending on the portion size and ingredients used. Adding high-calorie toppings such as croutons, bacon, or avocado can increase the calorie content significantly.
Ingredients You’ll Need
- Rotisserie chicken
- Romaine lettuce
- Croutons
- Parmesan cheese
- Caesar dressing
- Lemon juice
- Garlic
- Salt and pepper
How Do You Make A Chicken Caesar Salad?
- Prepare the chicken - Shred or chop the meat into bite-size pieces. You can also use a mix of white and dark meat for added flavor and texture.
- Prepare the dressing - In a small bowl, whisk together the Caesar dressing, lemon juice, minced garlic, salt, and pepper until well combined. Taste and adjust seasoning as needed.
- Assemble the salad - In a large bowl, combine the chopped romaine lettuce, croutons, Parmesan cheese, and shredded chicken. Toss well to combine.
- Add the dressing - Pour the Caesar dressing over the salad and toss to evenly coat all ingredients.
- Serve and enjoy - Transfer the salad to a serving bowl or individual plates and enjoy immediately.

Variations
- Grilled Caesar Salad - Grilling the romaine lettuce and chicken can add a smoky flavor to the salad. Simply brush the lettuce and chicken with olive oil, season with salt and pepper, and grill until slightly charred.
- Kale Caesar Salad - Kale is a nutrient-dense and hearty green that can be a great substitute for romaine lettuce. Massage the kale with a bit of olive oil and lemon juice to soften it, and toss it with a homemade Caesar dressing and some shaved Parmesan cheese.
- Vegetarian Caesar Salad - Make a vegetarian version of the Caesar salad by using tofu, tempeh, or roasted chickpeas as a protein source.
What To Serve With It
Chicken Caesar salad can be a complete and satisfying meal on its own, but if you are looking to add some variety or serve it as part of a larger meal, there are a few delicious side dishes that pair well with it. Here are some ideas to try out:
- Garlic Bread - A classic garlic bread is a perfect accompaniment to a chicken Caesar salad. You can make your own garlic bread using whole-grain bread, olive oil, and minced garlic, and toast it until crispy.
- Soup - A warm bowl of soup can make a comforting and satisfying addition to a chicken Caesar salad. Choose a light and healthy soup such as tomato or vegetable soup, and serve it on the side.
- Keto Crackers - Flavorful, crisp, and backed with nutrients, you’ll love this hearty addition to your next bite.
You can mix and match these options to create a delicious and balanced meal that suits your taste and dietary preferences.
How Long Does It Last?
The shelf life of a Chicken Caesar salad depends on several factors, such as the freshness of the ingredients and the storage conditions. Here are some general guidelines for how long a chicken Caesar salad can last and how to keep it as fresh as possible:
- Freshly made Caesar salad should be consumed within 24 hours for optimal freshness and flavor.
- Since the salad contains cooked chicken, it can be stored in an airtight container in the refrigerator for up to 3-4 days.
- Romaine lettuce should be stored separately from the dressing and other ingredients to prevent wilting and sogginess. You can store the lettuce in a plastic bag or container lined with paper towels to absorb excess moisture.
More Delicious Salad Recipes
- Antipasto Salad
- Big Mac Salad
- Keto Broccoli Salad

Chicken Caesar Salad | Easy Chicken Caesar Salad Recipe
Ingredients
- ▢ 2 cups rotisserie chicken
- ▢ 8 cups Romaine Lettuce Leaves
- ▢ 1 cup Croutons
- ▢ 1/2 cup Parmesan Cheese
- ▢ 1 cup Caesar Dressing
- ▢ 2 tbsp Lemon Juice
- ▢ 1 tbsp Minced Garlic
- ▢ 1 tsp Salt
- ▢ 1/2 tsp Pepper
Instructions
- Prepare the chicken - Shred or chop the meat into bite-size pieces. You can also use a mix of white and dark meat for added flavor and texture.
- Prepare the dressing - In a small bowl, whisk together the Caesar dressing, lemon juice, minced garlic, salt, and pepper until well combined. Taste and adjust seasoning as needed.
- Assemble the salad - In a large bowl, combine the chopped romaine lettuce, croutons, Parmesan cheese, and shredded chicken. Toss well to combine.
- Add the dressing - Pour the Caesar dressing over the salad and toss to evenly coat all ingredients.
- Serve and enjoy - Transfer the salad to a serving bowl or individual plates and enjoy immediately.
Get support & connect with our community on Facebook!
Nutrition
Don’t forget to check out my other Ketocookbooks.
Keto Instant Pot, Keto Fat Bombs, Sweets, & Treats , and Easy keto in 30 minutes.
