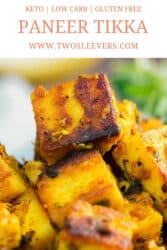

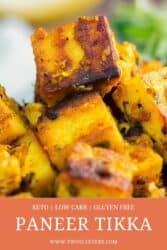
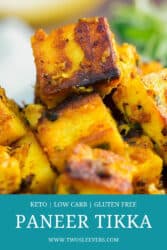

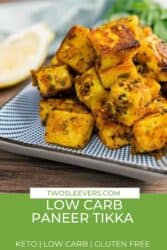
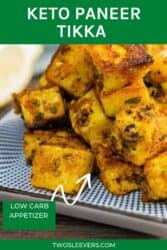
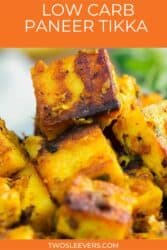
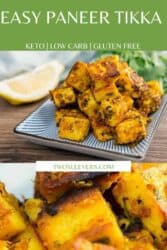
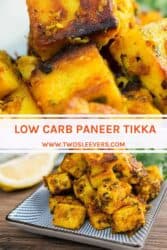
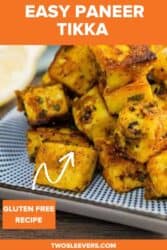
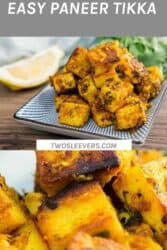
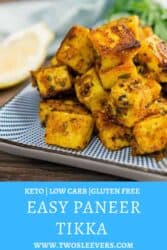
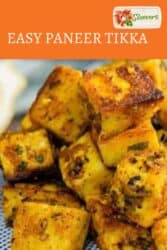
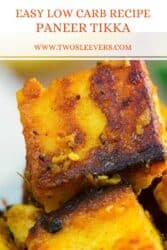
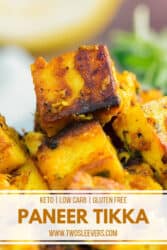
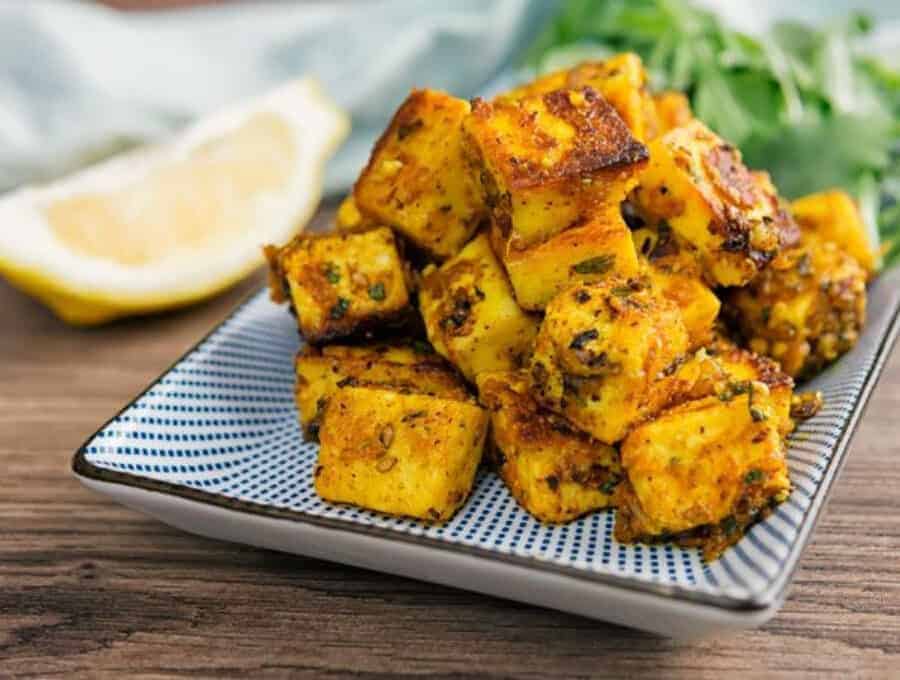
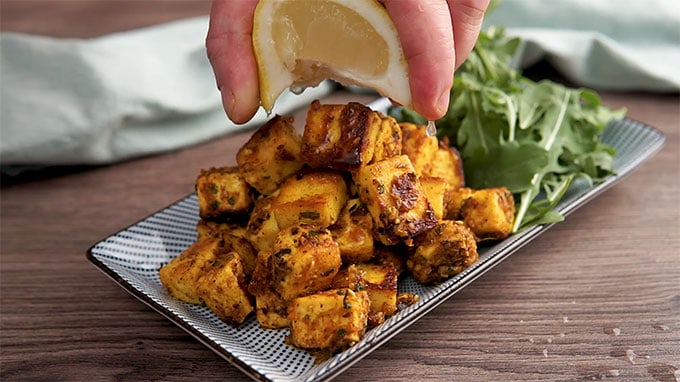
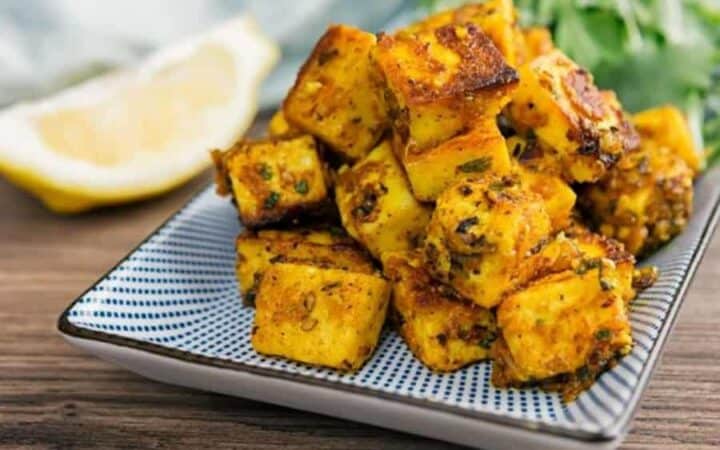
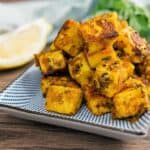
Paneer Tikka is a quick Indian paneer starter/appetizer made with paneer cubes tossed with garlic, ginger, cilantro, and warm spices (like garam masala, cumin, coriander, turmeric, paprika/cayenne) and finished with ghee and lemon juice. It’s quick and weeknight-friendly and works well for a low-carb, keto-friendly, gluten-free vegetarian appetizer or snack when you want big flavor fast. Unlike traditional paneer tikka that’s skewered and grilled in a tandoor, this version gets the same bold, spiced flavor by pan-frying quickly in ghee. No skewers, no grill, and done in under 30 minutes.
What Makes Paneer Tikka So Great?
- Low Carb - The perfect keto appetizer.
- Gluten Free - No worrying about food allergies.
- Vegetarian - A great meatless dish the whole family will love.
- Fast - Done in less than 30 minutes .
- Delicious - A fabulous Indian comfort food .
What Snacks Can Be Made From Paneer?
This Low-Carb Paneer Tikka makes either a simple paneer starter on its own or a welcome addition to other sauces and dips.
When I figured out how to make Paneer in an Instant Pot without having to babysit the process, I started to think of quick and easy things I could do with the paneer.
If you love appetizer parties, (and who doesn’t!) then I have a menu for you. You can serve, or have your guests each bring an app.
Serve this Paneer Tikka , with Tandoori Chicken , and Mint and Chili Kabobs dipped in Cilantro Pesto and served with a refreshing glass of Agua de Jamaica. Your friends will never leave.
What Kind Of Food Is Paneer?
Paneer is an Indian cheese that is creamy and salty. It is so versatile as it doesn’t melt, that the possibilities of cooking with Paneer are endless.
You can buy paneer ready-made at Indian grocery stores where it is typically in the frozen section. At the grocery store, they sell the paneer either plain or fried. You can also make it yourself using my very easy pressure cooker paneer recipe.
If you are looking for a substitute or can’t find Paneer , try queso fresco . It has a similar consistency and taste.
Is Paneer Tikka Healthy?
Many people have a different definition of what healthy means to them. So while this recipe may not seem like a healthy recipe at first glance, upon further inspection you will see it does have many healthy attributes.
This Paneer Tikka recipe is fairly high in fat, but they are healthy fats. If you’re eating a low carb diet , the healthy fats will keep you fuller longer and prevent you from snacking between meals.
On top of being a satisfying appetizer choice, it is also gluten-free , vegetarian , and high in protein .
Can You Eat Paneer By Itself?
Yes! Paneer is just a tasty bite of cheese, so don’t feel like you need to jump through hoops just to try out a new ingredient.
While I enjoy paneer most as an addition to another recipe, you can absolutely eat it alone.
Should Paneer Be Fried?
Paneer is delicious no matter the cooking method. However, for these yummy paneer snacks , you’ll want to get out your favorite frying pan with a little oil and enjoy it pan-fried.
Ingredients You’ll Need
- 1.5 cups Paneer - The star of the dish. Paneer provides a rich, creamy, and mildly sweet base that soaks up the spiced marinade beautifully. .
- 2 teaspoons Oil - Helps the spices and aromatics coat the paneer evenly and prevents sticking during cooking. It also contributes to a lightly crisp exterior when seared.
- 3–4 cloves Garlic - Adds a sharp, savory depth and enhances the overall aroma of the marinade.
- 2 teaspoons Minced Ginger - Brings a warm, slightly spicy brightness that balances the richness of the paneer and rounds out the garlic’s sharpness.
- ¼ cup Cilantro - Adds a fresh, herbal note and vibrant green color to the marinade. It also provides a touch of cooling contrast to the spices.
- 1 teaspoon Salt - Enhances all the other flavors and ensures the paneer and spices are well-seasoned throughout.
- 1 teaspoon Garam Masala - A fragrant Indian spice blend made with cardamom, cinnamon, cloves, and nutmeg. It adds warmth, complexity, and a signature tikka aroma.
- ½ teaspoon Turmeric - Provides earthy flavor and a beautiful golden hue to the paneer. It also adds a subtle bitterness that balances the other spices.
- ½ teaspoon Ground Cumin - Adds nutty, smoky depth and enhances the savory flavor of the dish.
- ½ teaspoon Ground Coriander - Contributes citrusy, slightly sweet undertones that brighten the flavor profile.
- ½ teaspoon Smoked Paprika - Gives a mild smokiness and enhances color, helping to mimic the traditional tandoor-cooked flavor.
- ¼ teaspoon Cayenne Pepper - Adds gentle heat and a spicy kick that balances the creaminess of the paneer. Adjust to taste for more or less heat.
- 1 tablespoon Ghee - Used for frying or brushing the paneer, ghee adds a rich, nutty flavor and helps achieve a golden, crisp finish while keeping the inside soft.
- 1 Lemon - Fresh lemon juice adds brightness and acidity, cutting through the richness of the paneer and spices.
Watch The Paneer Tikka Video
How To Make This Fried Paneer Recipe
- Place paneer into a bowl and add oil and all the spices.
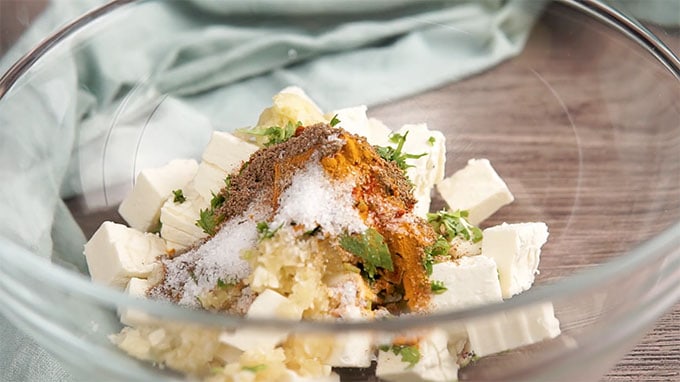
- Gently mix everything, taking care to not break the paneer . I found this easiest to do with my hands.
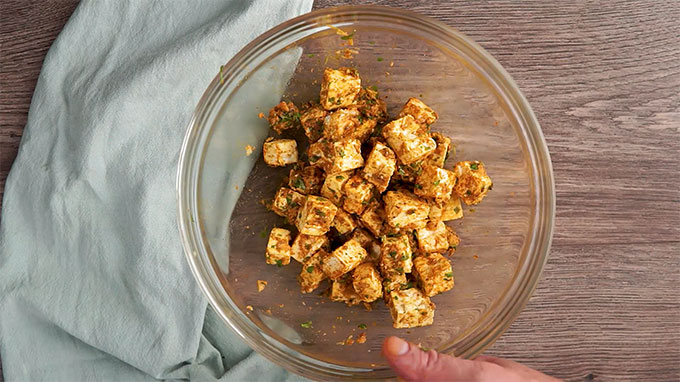
Allow this mixture to marinate for about 30 minutes.
Heat a skillet , and when it’s hot, add two tablespoons of ghee .
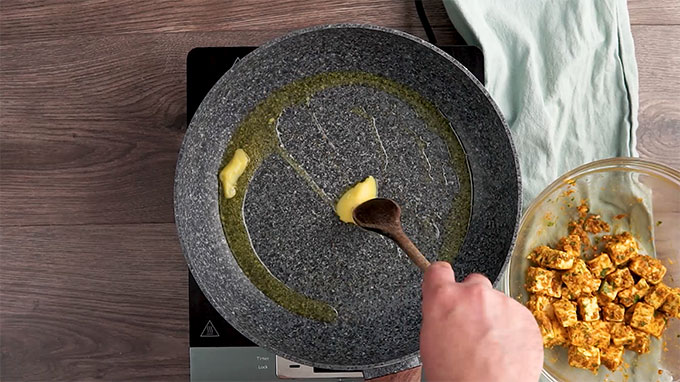
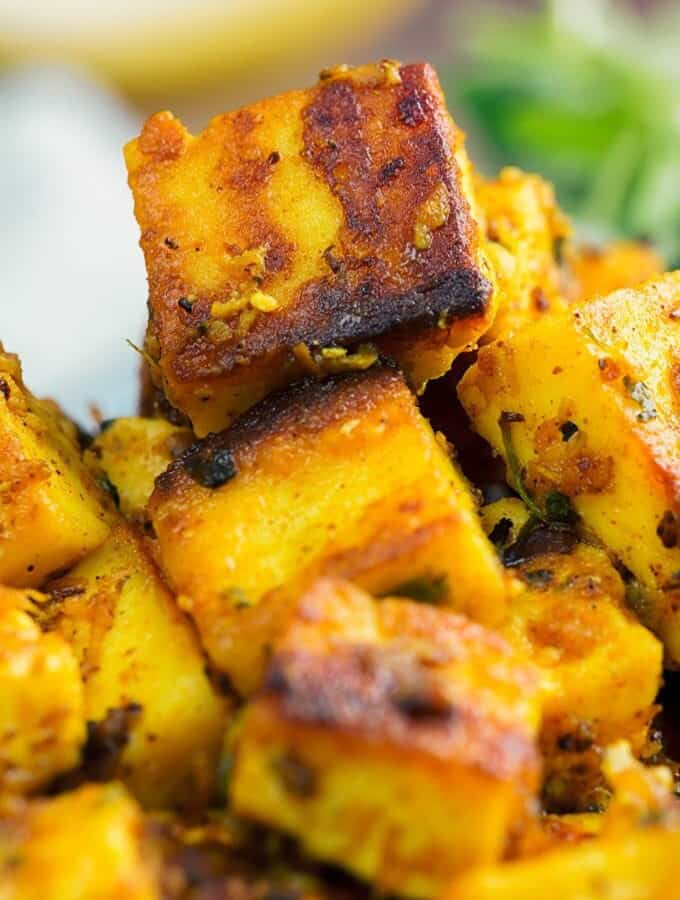
- Lay the paneer cubes in a single layer in the pan.
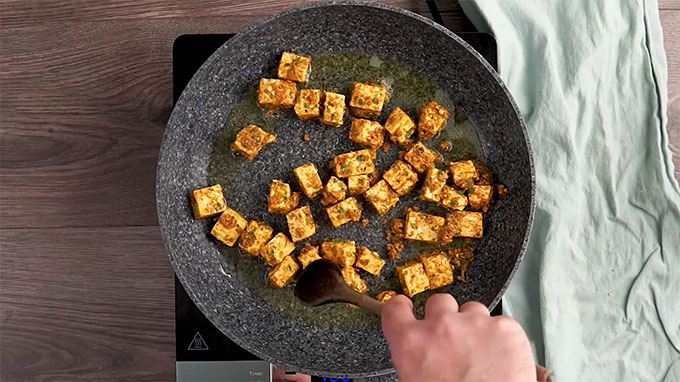
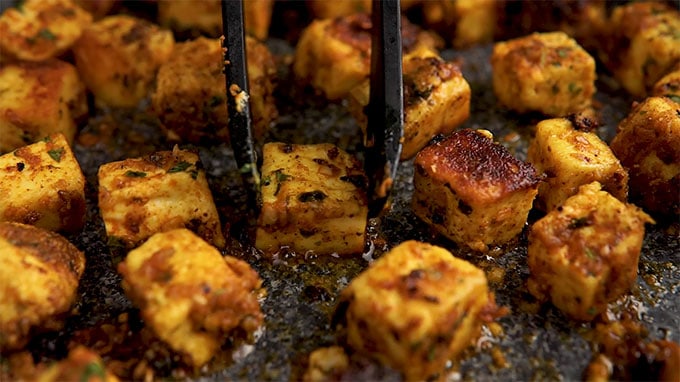
- Let it sear for 1-2 minutes, and then using tongs , turn the pieces to sear the other side. Once both sides are seared, you can reduce the heat a little to finish warming the paneer.
- Spritz the lemon juice right before serving.
Tips And Tricks
Making Paneer Tikka at home is a fun and flavorful way to enjoy one of India’s most popular appetizers. A few key techniques can help you achieve perfectly charred, tender paneer with vibrant flavor in every bite. Here are some helpful tips and tricks to make it perfect every time:
- Use Full-Fat Paneer . Full-fat or homemade paneer stays soft and creamy even after grilling or air frying. Low-fat paneer can become rubbery or dry.
- Cut Paneer into Even Cubes . Uniform pieces (about 1 to 1½ inches) ensure the paneer cooks evenly and gets golden edges without breaking apart.
- Marinate for at Least 30 Minutes . Letting the paneer soak in the yogurt-spice marinade helps it absorb all those bold tandoori flavors. For best results, marinate for 2–4 hours or overnight.
Variations
Here are some delicious and creative ways to customize your Paneer Tikka to suit different tastes, cooking methods, and dietary preferences without losing its irresistible smoky, spiced charm:
- Hariyali - Blend cilantro, mint, green chilies, and spinach into the marinade for a vibrant green color and refreshing herbal flavor.
- Achari - Add a spoonful of Indian pickle (achar) or pickle masala to the marinade for a tangy, spicy twist with bursts of mustard and fenugreek.
- Baked - Arrange marinated paneer and veggies on a parchment-lined baking sheet and bake at 425°F for 15–20 minutes, flipping halfway through for even browning.
How Long Does It Last?
Paneer Tikka can be stored in an airtight container in the refrigerator for up to 3 days. Allow it to cool completely before sealing to prevent condensation from making the paneer soggy.
When ready to eat, reheat it in an air fryer, oven, or skillet for a few minutes until warm and slightly crisp around the edges
Can You Freeze It?
For longer storage, you can freeze cooked paneer tikka for up to 2 months; just thaw it overnight in the refrigerator before reheating to enjoy those bold, smoky flavors again.
Paneer tikka can be spicy, but it’s very easy to control. The “heat” mainly comes from cayenne/chili powder, while the rest of the flavor is warm and aromatic from garam masala, cumin, coriander, turmeric, and paprika. If you want a mild Indian paneer appetizer, keep the cayenne low (or skip it) and lean on paprika for color. If you want a hotter tandoori paneer, bump up the chili and finish with lemon and a cooling side like mint chutney or raita. Because paneer is mild and creamy, even moderately spiced paneer tikka often tastes more flavorful than fiery.
Paneer usually turns rubbery because it’s overcooked. Paneer doesn’t “tenderize” like meat, so the longer it stays on the heat, the more it tightens up and gets chewy. Store-bought or frozen paneer can also start out firmer. A quick soak in warm water for 10–15 minutes helps soften it before making paneer tikka, then pat it dry so it sears instead of steaming. For tender pan-fried paneer tikka, use high heat, don’t crowd the pan, and cook just long enough to brown the edges.
To get tandoori-style char on paneer tikka without a tandoor, you need high heat and a relatively dry surface. Pat the paneer dry so it sears instead of steaming, then cook in a hot skillet with ghee (or oil) in a single layer until the edges brown. For extra “tandoori” flavor, finish under a hot broiler for 1–3 minutes or use an air fryer paneer tikka blast at high temp to add deeper browning. Char comes from intense heat at the surface, not longer cooking time (which just makes paneer rubbery).
What Are The Dishes Made From Paneer?
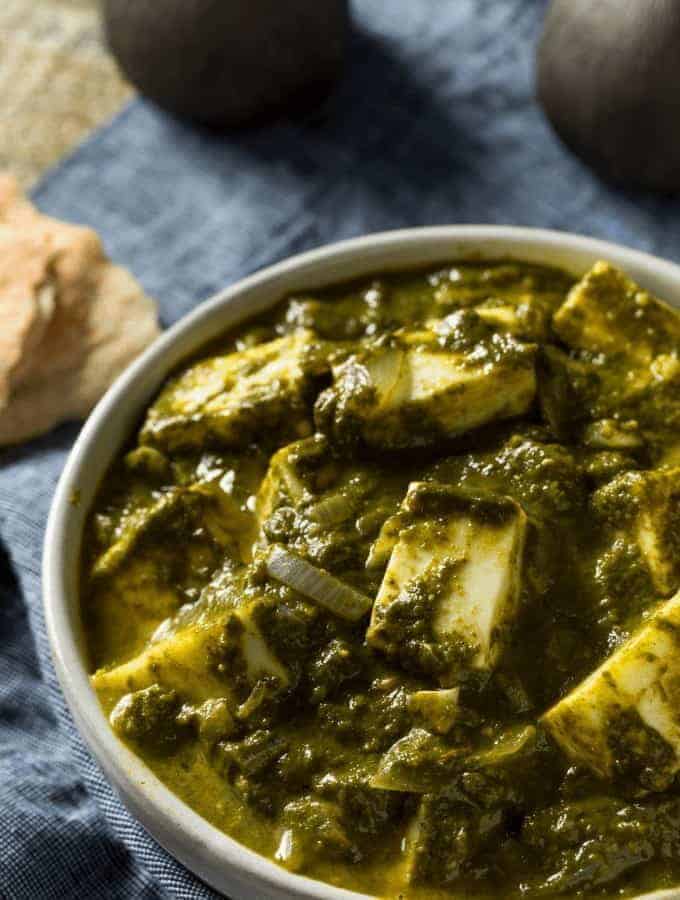
- If you ever thought making Indian Palak Paneer (or Spinach with Paneer) was complicated, here’s the recipe that will convince you otherwise. Delicious, nutritious, full-flavored, & super easy to make.
- Make restaurant-quality Indian Matar Paneer , or Indian Peas and Paneer, in your Instant Pot or pressure cooker. This is a classic Indian Vegetarian recipe you can make at home in minutes!
- Make this Vegetarian Paneer Biryani in your Instant Pot. Make an easy, authentic, kid-friendly, vegetarian/vegan dinner in under 30 minutes .
Paneer Tikka Recipe | Paneer Snacks
Equipment
- skillet
- Mixing Bowl
- Silicone Tongs
- Measuring Spoons
- Measuring Cups
Ingredients
- ▢ 1.5 cups ( 337.5 g ) paneer , cut into cubes
- ▢ 2 teaspoons ( 2 teaspoons ) Oil
- ▢ 3-4 cloves ( 3 cloves ) Garlic , minced
- ▢ 2 teaspoons ( 2 teaspoons ) Minced Ginger , minced
- ▢ ¼ cup ( 4 g ) Cilantro , chopped
- ▢ 1 teaspoon ( 1 teaspoon ) Kosher Salt
- ▢ 1 teaspoon ( 1 teaspoon ) Garam Masala
- ▢ ½ teaspoons ( 0.5 teaspoons ) Turmeric
- ▢ ½ teaspoons ( 0.5 teaspoons ) Ground Cumin
- ▢ ½ teaspoons ( 0.5 teaspoons ) Ground Coriander
- ▢ ½ teaspoons ( 0.5 teaspoons ) Smoked Paprika , for color and a slightly smoky taste
- ▢ ¼ teaspoons ( 0.25 teaspoons ) Cayenne Pepper
- ▢ 1 tablespoon ( 1 tablespoon ) Ghee , for cooking the paneer
- ▢ 1 ( 1 ) Lemon , Juice of 1 lemon for sprinkling before serving
Instructions
- Place paneer into a bowl and add oil and all the spices. Gently mix everything, taking care to not break the paneer . I found this easiest to do with my hands.
- Allow this mixture to marinate for about 30 minutes.
- Heat a skillet , and when it’s hot, add two tablespoons of ghee. Lay the paneer cubes in a single layer in the pan.
- Let it sear for 1-2 minutes, and then using tongs , turn the pieces to sear the other side. Once both sides are seared, you can reduce the heat a little to finish warming the paneer.
- Spritz the lemon juice right before serving.
Watch The Video
- You can buy paneer ready-made at Indian grocery stores where it is typically in the frozen section. At the grocery store, they sell the paneer either plain or fried. You can also make it yourself using my very easy pressure cooker paneer recipe.
- If you are looking for a substitute or can’t find Paneer, try queso fresco. It has a similar consistency and taste.
Get support & connect with our community on Facebook!
Nutrition
Don’t forget to check out my other Ketocookbooks.
Keto Instant Pot, Keto Fat Bombs, Sweets, & Treats , and Easy keto in 30 minutes.


If you already signed up, you should have received an email with a password to give you unlimited access to our FREE Printable Library. The password is case sensitive. Enter it below and get printing!
Password:
Paneer Tikka Recipe | Paneer Snacks
Ingredients
- 1.5 cups paneer cut into cubes
- 2 teaspoons Oil
- 3-4 cloves Garlic minced
- 2 teaspoons Minced Ginger minced
- ¼ cup Cilantro chopped
- 1 teaspoon Kosher Salt
- 1 teaspoon Garam Masala
- ½ teaspoons Turmeric
- ½ teaspoons Ground Cumin
- ½ teaspoons Ground Coriander
- ½ teaspoons Smoked Paprika for color and a slightly smoky taste
- ¼ teaspoons Cayenne Pepper
- 1 tablespoon Ghee for cooking the paneer
- 1 Lemon Juice of 1 lemon for sprinkling before serving
Instructions
Place paneer into a bowl and add oil and all the spices. Gently mix everything, taking care to not break the paneer . I found this easiest to do with my hands.
Allow this mixture to marinate for about 30 minutes.
Heat a skillet , and when it’s hot, add two tablespoons of ghee. Lay the paneer cubes in a single layer in the pan.
Let it sear for 1-2 minutes, and then using tongs , turn the pieces to sear the other side. Once both sides are seared, you can reduce the heat a little to finish warming the paneer.
Spritz the lemon juice right before serving.
You can buy paneer ready-made at Indian grocery stores where it is typically in the frozen section. At the grocery store, they sell the paneer either plain or fried. You can also make it yourself using my very easy pressure cooker paneer recipe.
If you are looking for a substitute or can’t find Paneer, try queso fresco. It has a similar consistency and taste.
Paneer Tikka Recipe | Paneer Snacks https://twosleevers.com/paneer-tikka/
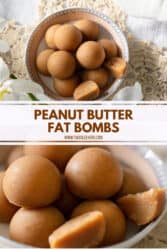
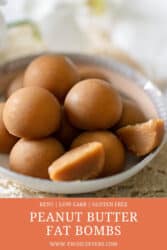
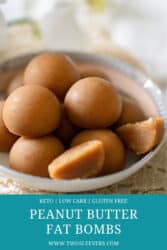
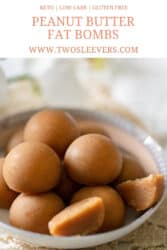
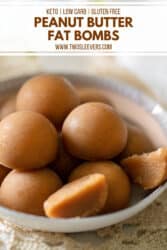
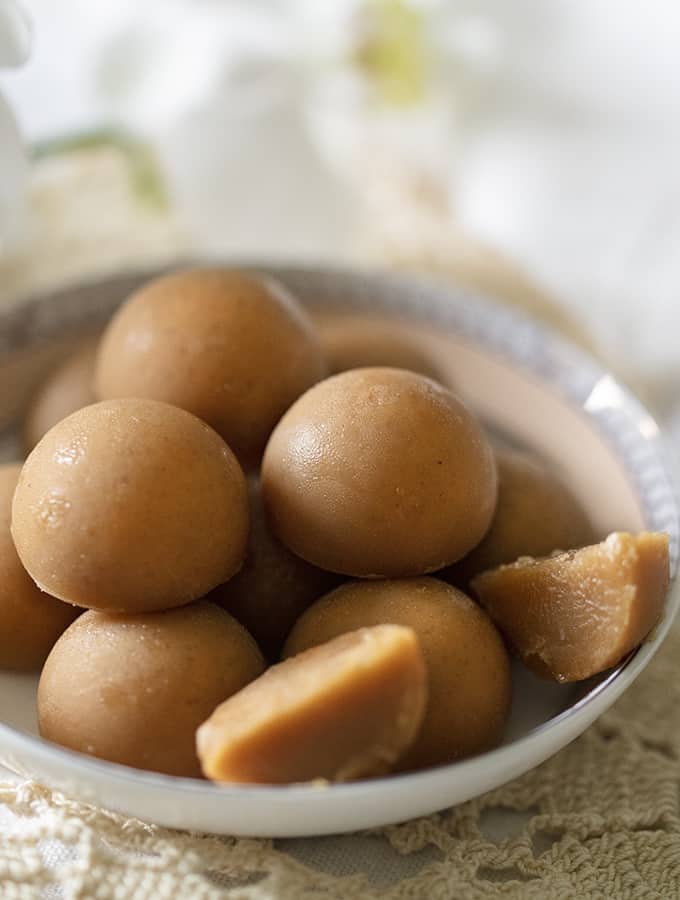
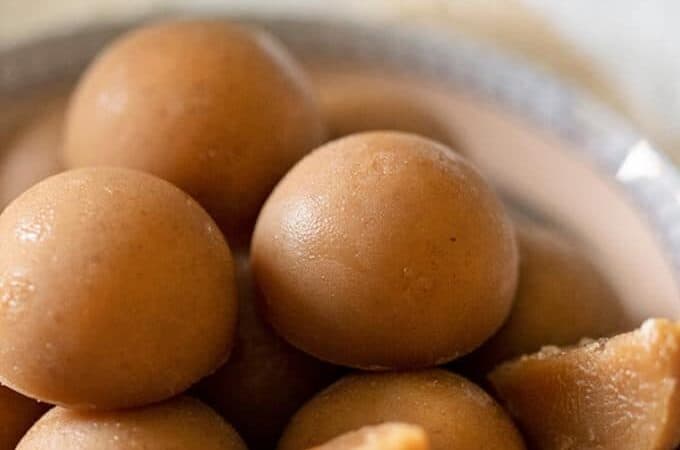
These Peanut Butter Fat Bombs are the perfect little treat to boost your fat intake while keeping it low carb. They’re so good that you’ll enjoy them even if you aren’t living a keto lifestyle!
What Makes Peanut Butter Fat Bombs The Perfect Snack?
- Keto . With only 1 net carb per serving, this makes the perfect low carb snack or dessert .
- Gluten-Free . Great for anyone with a gluten allergy that needs a sweet treat.
- Fast. Done in way less than 30 minutes . Only 8 minutes, to be exact.
- Easy. Just mix, pour, and freeze for an easy solution to your macros woes.
So you’re in your kitchen searching through your pantry for a little something to hold you over until your next meal.
Maybe you’re living a keto lifestyle and your trying to get some extra fat in your diet in order to help get into ketosis.
Maybe you’re trying to find a quick and delicious low carb snack .
Sometimes you just love peanut butter and couldn’t care less whether the treat is low carb or not as long as it satisfies your peanut butter cravings.
No matter what reason brings you to them, you’re going to absolutely love these Peanut Butter Fat Bombs. In fact, this is one of the best tasting keto fat bombs I’ve ever had.
Now don’t go clicking off of this post just because it says it’s a fat bomb ! These delectable morsels of peanut buttery goodness are definitely worth eating, even if you’re not on a low carb diet.
Not to mention these are so crazy easy to make you won’t believe it! It’s one of those keto treats that you’ll find yourself making over and over again because it’s such a wonderfully effortless recipe.
And if you’ve spent any amount of time here at TwoSleevers.com, you’ll know that effortless is kind of my bag.
What Are Keto Fat Bombs?
For those of you who aren’t living a keto lifestyle , you probably aren’t too familiar with what a fat bomb is.
Sure, you’ve probably heard the term used, but you probably aren’t clear one what it is or why it’s considered a good thing for a keto-er.
A fat bomb is quite simply a snack or dish made up of a combination of high-fat ingredients such as butter, coconut oil, seeds and nuts, and other keto-friendly ingredients.
They’re the quintessential snack for an LCHF (low carb, high fat) diet, and they’re often eaten as a way to help induce ketosis .
Is Peanut Butter Keto?
Technically speaking, most foods are ok on keto. Keto isn’t so much about what you eat, but more about hitting specific nutritional targets. And since you’re trying to hit a higher fat intake while keeping your carb count low, peanut butter is actually perfect for those of us living a keto lifestyle.
Are Keto Fat Bombs Healthy?
How healthy fat bombs are really depends on your current diet. Keto fat bombs are best for those of us on a keto diet, but are healthy for other diets as well.
If you aren’t super familiar with the keto diet, here’s a little breakdown of how it works. Those on a keto diet limit their carb intake and increase their fat intake in order to make their bodies burn fat instead of carbs for energy (which is known as ketosis).
So for those of us on a low carb/keto diet, keto fat bombs are the perfect way to increase fat intake while keeping your carb intake low. It’s also a great way to curve sweet cravings while still keeping things low carb.
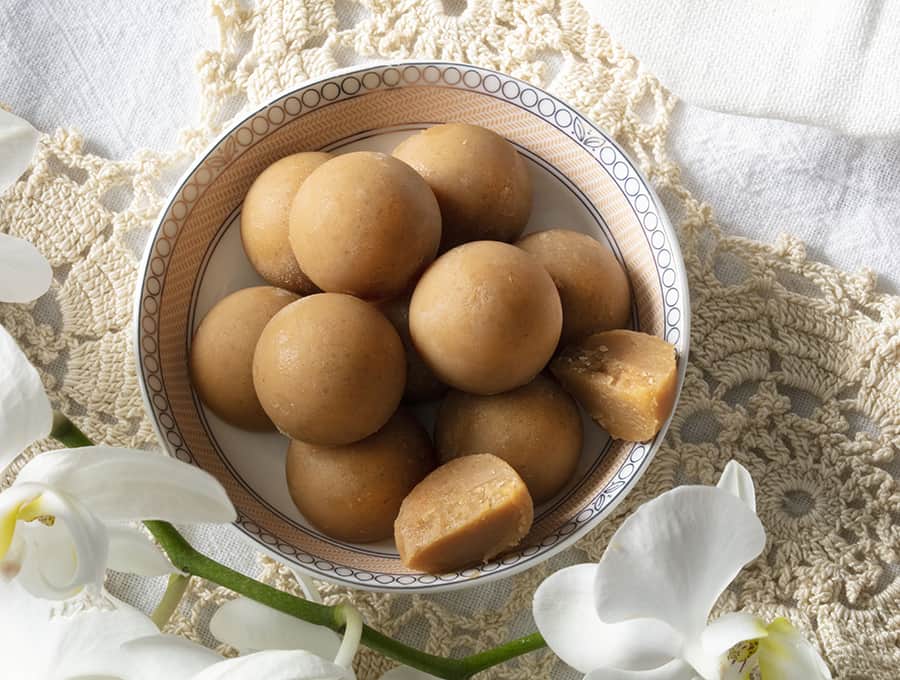
Ingredients You’ll Need
- 1/2 cup Creamy Peanut Butter - The star ingredient that gives the fat bombs their rich, nutty flavor and smooth texture while providing healthy fats and protein.
- 1/2 cup Butter - Adds creaminess, helps the fat bombs solidify when chilled, and creates a melt-in-your-mouth texture.
- 2 tablespoons Powdered Swerve - A keto-friendly sweetener that balances the savory richness of the peanut butter and butter without adding sugar.
- 1 teaspoon Vanilla Extract - Enhances the overall flavor, adding a warm, aromatic sweetness that complements the peanut butter perfectly.
How To Make Keto Fat Bombs
- Combine. In a microwave-safe bowl, combine peanut butter, butter, and Swerve.
- Microwave. Heat in 30 second increments, stirring frequently, until the mixture has melted. Stir well until all the Swerve if properly melted.
- Pour into a 24-cavity truffle mold or into the prepared baking pan. Place in the freezer for 2-4 hours until the truffles are set. At this point you can unmold the truffles, place them in a plastic bag and store in the freezer until you’re ready to eat them.
- Cut. If using a baking pan, cut into 24 squares and store the squares in the freezer until you are ready to eat them.
Tips and Tricks
Making Peanut Butter Fat Bombs is quick and easy, but a few smart tips can help you get the perfect texture and flavor every time. Here’s how to make them turn out smooth, creamy, and delicious:
- This recipe can be made in small truffle molds or as a fudge in an 8 x 8 baking pan .
- Use this truffle mold for perfectly round truffles.
- If you’re using silicone truffle molds, you do not need to prep them.
- If you’re using a baking pan, line the pan with parchment paper with enough paper to cover the bottom and sides of the pan.
- You may need to check how many carbs are in the peanut butter you’re using as it can very between brands.
- These fat bombs are meant to be kept frozen. Not only do they hold together better, but they also taste good this way—and they keep you from scarfing the whole lot down in one sitting. Or that’s the theory anyway.
- If you’re allergic to peanut butter, use almond butter. You can also try this same recipe with cashew butter, or sunflower seed butter if you prefer.
- Be sure to check out my maple peanut butter mousse and my peanut butter chocolate bars if you are a peanut butter fan.
- I also use peanut butter in my Kenyan Kunde recipe , as well as in my West African stew recipe .
Variations
Peanut Butter Fat Bombs are easy to customize, and with a few simple tweaks, you can create new flavor combinations to keep things exciting. Here are some tasty variations to try:
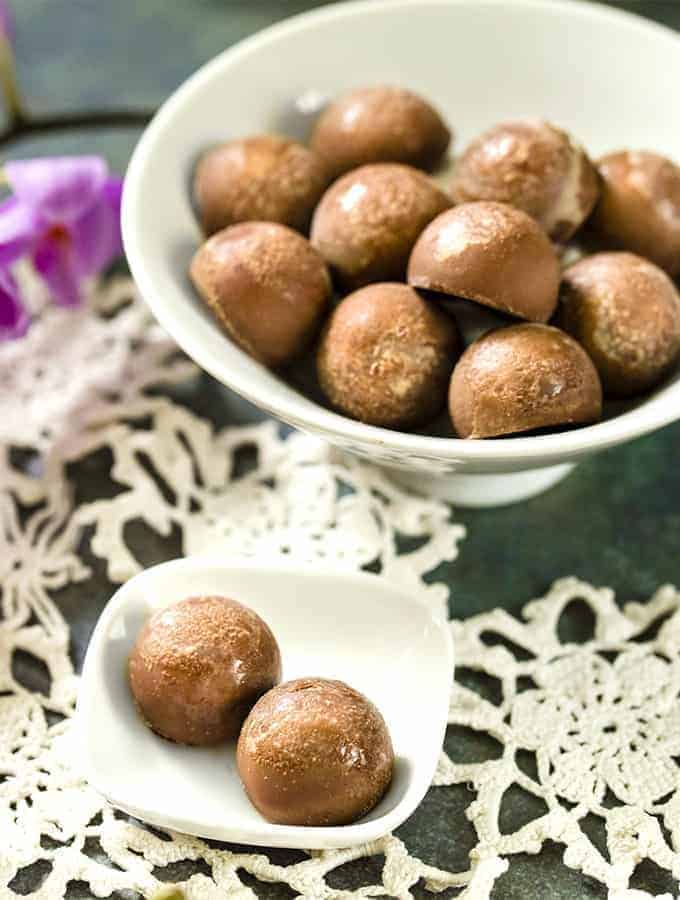
- Chocolate Peanut Butter- Add 1–2 tablespoons of unsweetened cocoa powder or drizzle melted dark chocolate over the top before chilling.
- Crunchy Nut- Stir in chopped almonds, pecans, or walnuts for extra texture and flavor.
- Coconut- Mix in shredded unsweetened coconut or a tablespoon of coconut oil for a tropical twist.
- Salted Caramel- Add a pinch of sea salt and a few drops of caramel extract for a sweet-and-salty flavor profile.
What To Enjoy With Keto Fat Bombs
Peanut Butter Fat Bombs are rich, satisfying, and versatile, making them the perfect low-carb treat to enjoy in a variety of ways. Here are some great ideas for pairing them:
- With Coffee or Tea - Their creamy texture and nutty flavor pair perfectly with a hot cup of coffee or herbal tea for a quick morning or afternoon pick-me-up.
- With Fresh Berries - Pair with raspberries, strawberries, or blueberries for a touch of natural sweetness and freshness.
- Alongside a Smoothie - Add one to a keto-friendly or protein smoothie for extra richness and staying power.
- As a Dessert Bite - Serve them after dinner for a light, guilt-free sweet treat that satisfies cravings without spiking blood sugar.
How Long Do They Last?
Peanut Butter Fat Bombs can last for about 1 to 2 weeks when stored properly in the refrigerator. Because they’re made with butter and peanut butter, they stay firm and fresh when kept chilled in an airtight container.
Can You Freeze Them?
For longer storage, you can freeze them for up to 3 months. Just place them in a single layer on a baking sheet to freeze, then transfer them to a freezer-safe bag or container once solid.
When you’re ready to enjoy one, simply let it sit at room temperature for a few minutes to soften slightly.
Looking for More Fat Bomb Recipes?
- Keto Truffles - Deliciously chocolate fat bombs that are perfect for chocolate lovers!
- Raspberry Cream Bombs - A great fruit-based fat bomb.
- Avocado Lime Popsicles - Delightfully light and refreshing.
- Keto Sweet Cream Truffles - A sweet delight to kill any sweet tooth craving.
- Chocolate Keto Pudding - Silky smooth, chocolatey, gluten-free,and low carb.
Peanut Butter Fat Bombs | Homemade Keto Fat Bombs
Equipment
- TRUFFLE MOLDS
Ingredients
- ▢ 1/2 cup Creamy Peanut Butter
- ▢ 1/2 cup Butter
- ▢ 2 tablespoons Powdered Swerve
- ▢ 1 teaspoon Vanilla extract
Instructions
- In a microwave-safe bowl, combine peanut butter, butter, and Swerve.
- Heat in 30 second increments, stirring frequently, until the mixture has melted. Stir well until all the Swerve if properly melted.
- Pour into a 24-cavity truffle mold or into the prepared baking pan. Place in the freezer for 2-4 hours until the truffles are set. At this point you can unmold the truffles, place them in a plastic bag and store in the freezer until you’re ready to eat them.
- If using a baking pan, cut into 24 squares and store the squares in the freezer until you are ready to eat them.
Tips and Tricks for Making Peanut Butter Fat Bombs
- This recipe can be made in small truffle molds or as a fudge in an 8 x 8 baking pan .
- Use this truffle mold for perfectly round truffles.
- If you’re using silicone truffle molds, you do not need to prep them.
- If you’re using a baking pan, line the pan with parchment paper with enough paper to cover the bottom and sides of the pan.
- You may need to check how many carbs are in the peanut butter you’re using as it can very between brands.
- These fat bombs are meant to be kept frozen. Not only do they hold together better, but they also taste good this way—and they keep you from scarfing the whole lot down in one sitting. Or that’s the theory anyway.
- If you’re allergic to peanut butter, use almond butter. You can also try this same recipe with cashew butter, or sunflower seed butter if you prefer.
- Be sure to check out my maple peanut butter mousse and my peanut butter chocolate bars if you are a peanut butter fan.
- I also use peanut butter in my Kenyan Kunde recipe , as well as in my West African stew recipe .
Get support & connect with our community on Facebook!
Nutrition
Don’t forget to check out my other Ketocookbooks.
Keto Instant Pot, Keto Fat Bombs, Sweets, & Treats , and Easy keto in 30 minutes.
