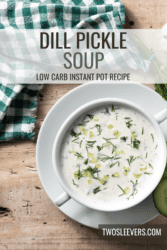
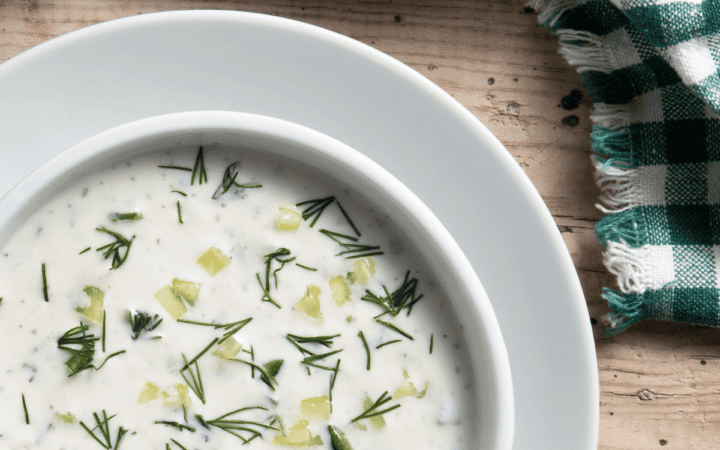
Are you ready to embark on a culinary adventure that combines the tangy zest of dill pickles with the comfort of a warm, creamy soup? Our Instant Pot Dill Pickle Soup recipe is here to tickle your taste buds in ways you never imagined.
Why You’ll Love This Unique Soup
- Irresistible Flavor . This soup boasts a delightful balance of flavors. The tanginess of dill pickles harmonizes with the creaminess of the soup base, creating an irresistible combination.
- Instant Pot Magic . Using the Instant Pot makes this soup incredibly quick and hassle-free. It’s perfect for busy weeknight dinners or cozy weekend lunches.
- Comfort Food Upgrade . Dill pickle soup is the ultimate comfort food. It’s like a warm hug for your taste buds, especially on chilly days.
Whether you’re a pickle lover or simply looking to try something uniquely delicious, this soup is sure to become a favorite in your household.
Where Does Dill Pickle Soup Come From?
Dill pickle soup is a comfort food in Poland and is especially popular during the colder months. It’s known for its unique flavor profile, combining the sourness of the pickles with the earthiness of potatoes and the aromatic quality of dill.
While it may seem unusual to those not familiar with Eastern European cuisine, it has a dedicated following among those who appreciate its distinctive taste.
Ingredients You’ll Need
- Vegetable Broth- This forms the flavorful liquid base of the soup, providing a savory foundation and depth of flavor.
- Celery- Imparts a mild, earthy flavor and adds a pleasant crunch to the soup.
- Onion- Bring a savory, aromatic quality to the soup and are a fundamental flavor base in many soups.
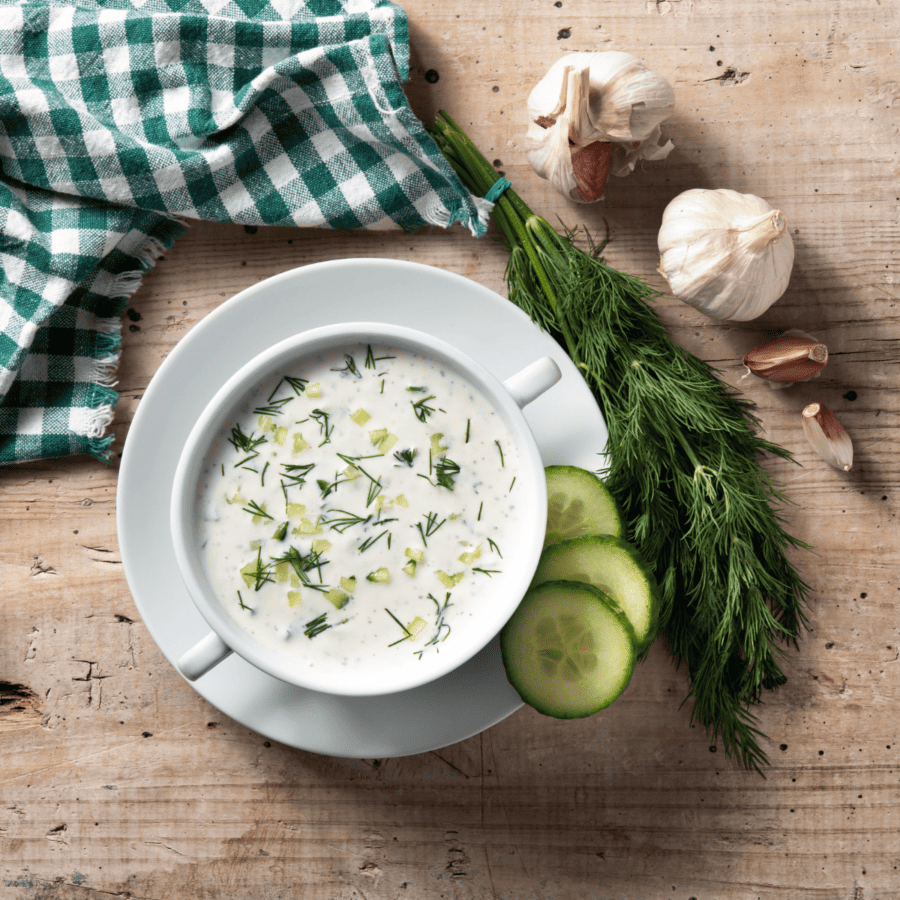
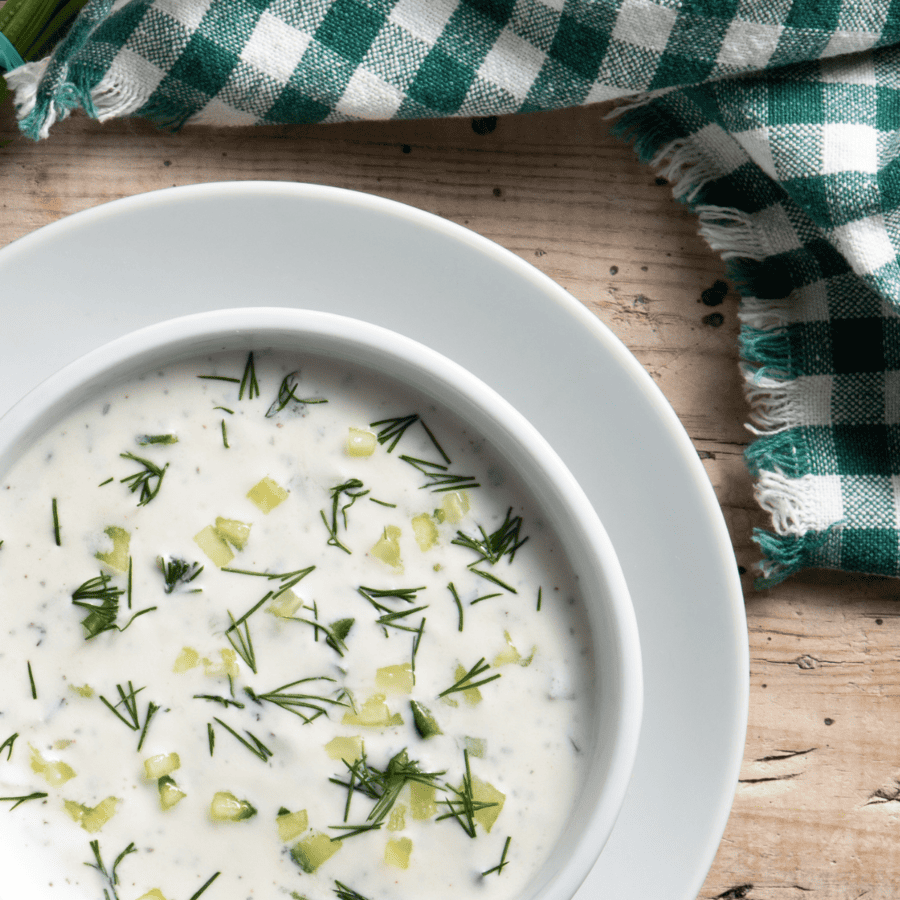
- Dill Pickles- The star of the show, providing the distinctive tangy flavor and texture that makes this soup unique.
- Unsalted Butter- Used for sautéing the vegetables at the beginning of the cooking process, adding richness and depth of flavor.
- Heavy Cream- It thickens the soup and helps achieve a creamy consistency.
- Dill Pickle Juice- A crucial ingredient that enhances the soup’s pickle flavor and tanginess. It also contributes to the soup’s overall liquid content.
- Sour Cream- Adds creaminess and a pleasant tang to the soup, enhancing the dill pickle flavor.
- Garlic- Infuse the soup with a delightful aromatic kick and add depth of flavor.
- Dried Dill Weed- Provides additional dill flavor and complements the natural flavors of the pickles.
- Salt and Pepper- Used to adjust the soup’s flavor to your preference, enhancing its overall taste.
- Fresh Dill- A garnish to add a burst of fresh dill flavor and a touch of elegance to each serving.
How To Make Dill Pickle Soup
- Prepare Your Ingredients . Start by gathering all the ingredients and preparing your vegetables. Chop the celery, onions, and dill pickles. Mince the garlic, and measure out the remaining ingredients.
- Sauté the Vegetables . Set your Instant Pot to the “Sauté” mode. Melt the butter and add the onions, celery, and garlic. Sauté for about 3-5 minutes until the vegetables start to soften.
- Add Pickles . Stir in the diced potatoes and chopped dill pickles. Continue sautéing for an additional 2 minutes.
- Pour in Broth and Pickle Juice . Gradually pour in the vegetable broth. Then, add the dill pickle juice. Mix everything together.
- Pressure Cook . Close the Instant Pot lid and set the valve to the “Sealing” position. Cancel the “Sauté” mode and select the “Pressure Cook” (or “Manual”) mode. Set the timer for 5 minutes on HIGH pressure.
- Quick Release . Once the cooking cycle is complete, perform a quick pressure release by carefully turning the valve to “Venting” to release the pressure.
- Add Creamy Goodness . Stir in the sour cream and heavy cream until well combined. This will make your soup extra creamy.
- Season and Serve . Season your dill pickle soup with dried dill weed, salt, and pepper to taste. Garnish with fresh dill if desired.
Tips And Tricks
Making dill pickle soup in an Instant Pot can be a convenient and time-saving way to prepare this delicious dish. Here are some tips and tricks to ensure it turns out perfectly:
- Choose the Right Pickles . Select high-quality dill pickles with a strong and tangy flavor. The pickles are a key ingredient, so their taste matters.
- Sauté the Aromatics . Sauté the onions and garlic in the Instant Pot using the sauté function before adding other ingredients. This helps enhance their flavors.
- Incorporate Sour Cream Carefully . Sour cream adds creaminess and tanginess to the soup. Mix it with a small amount of hot soup separately before adding it to the pot to prevent curdling.
Variations
Dill pickle soup is a delicious and unique dish, and there are several variations you can try to tailor it to your taste. Here are some variations and additions to consider when making Instant Pot dill pickle soup:
- Vegetarian or Vegan Option - Use vegetable broth instead of chicken broth to make the soup vegetarian. For a vegan version, replace the butter with a dairy-free alternative, like vegan butter or olive oil. Substitute dairy-free sour cream and milk as well.
- Smoked Meat or Bacon - If you enjoy smoky flavors, add some diced smoked sausage, ham, or bacon to the soup. Cook the meat first in the Instant Pot using the sauté function, then set it aside and proceed with the recipe. Add it back into the soup before serving.
- Potatoes Variations - Experiment with different types of potatoes, such as Yukon Gold or red potatoes, for slightly varied textures and flavors and a hearty meal.
What To Serve With Dill Pickle Soup
Dill pickle soup has a unique and tangy flavor that pairs well with a variety of accompaniments. Here are some delicious options to serve with it:
- Crusty Bread - A slice of crusty bread or a warm baguette is a classic choice. You can also toast the bread for extra crunch.
- Grilled Cheese Sandwich - The classic grilled cheese sandwich is a comforting choice to serve alongside dill pickle soup. The combination of creamy soup and gooey cheese is delightful.
- Yogurt - A dollop of sour cream or plain yogurt on top of the soup adds creaminess and balances the tanginess of the pickles.
- Fresh Dill - Garnish the soup with fresh dill sprigs or chopped dill for an extra burst of dill flavor and a touch of freshness.
- Latkes- Potato pancakes are a great choice, especially if you’re looking for a heartier accompaniment. They complement the soup’s potato and dill flavors.
How Long Does It Last?
Dill pickle soup, when stored properly, can last for a few days in the refrigerator.
Allow the soup to cool down to room temperature before refrigerating it. Transfer the soup to an airtight container or cover the pot with an airtight lid.
Store the soup in the refrigerator for up to 3-4 days.
Can You Freeze It?
If you have leftover soup that you won’t consume within a few days, consider freezing it.
Ladle the soup into airtight containers or heavy-duty freezer bags, leaving some space at the top for expansion. Seal the containers or bags tightly to prevent freezer burn. Label each container with the date to keep track of freshness.
Frozen dill pickle soup can typically be stored in the freezer for up to 2-3 months.
More Instant Pot Soup Recipes
- Sauerkraut Soup
- Chicken Fajita Soup
- Caldo de Pollo
- Instant Pot Taco Soup
- Buffalo Chicken Soup
- African Peanut Soup
- Sopa de Palmito
- Cioppino
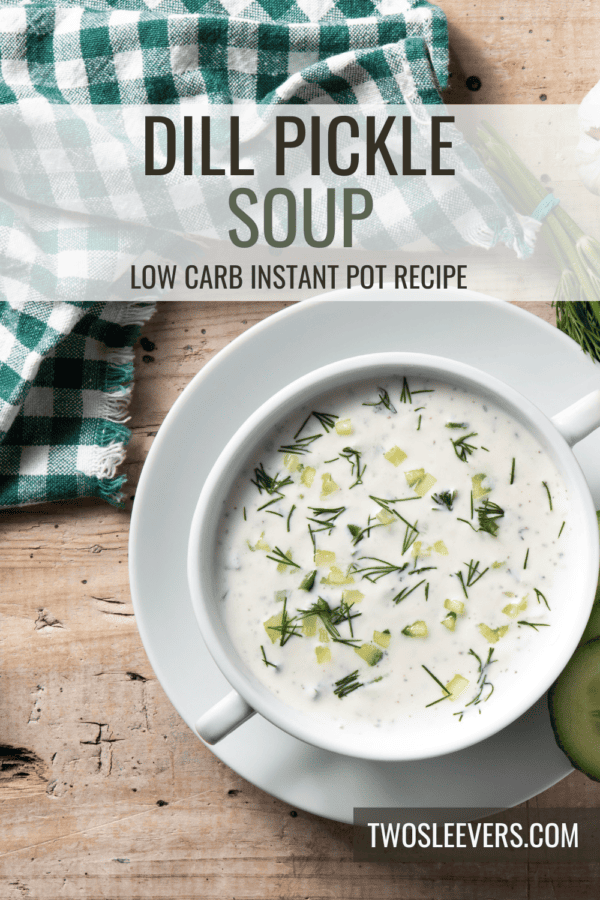
Dill Pickle Soup Recipe | Instant Pot Dill Pickle Soup
Ingredients
- ▢ 4 cups Vegetable Broth
- ▢ 2 stalks Celery , chopped
- ▢ 1 Onion , diced
- ▢ 1 1/2 cups Chopped Dill Pickles
- ▢ 3 tbsp Unsalted Butter
- ▢ 1 cup Heavy Cream
- ▢ 1/2 cup Dill Pickle Juice
- ▢ 1/2 cup Sour Cream
- ▢ 3 cloves Garlic , minced
- ▢ 1 tsp Dried Dill Weed
- ▢ 1/2 tsp Kosher Salt
- ▢ 1/4 tsp Black Pepper
- ▢ Fresh Dill , for garnish
Instructions
- Prepare Your Ingredients . Start by gathering all the ingredients and preparing your vegetables. Chop the celery, onions, and dill pickles. Mince the garlic, and measure out the remaining ingredients.
- Sauté the Vegetables . Set your Instant Pot to the “Sauté” mode. Melt the butter and add the onions, celery, and garlic. Sauté for about 3-5 minutes until the vegetables start to soften.
- Add Pickles . Stir in the diced potatoes and chopped dill pickles. Continue sautéing for an additional 2 minutes.
- Pour in Broth and Pickle Juice . Gradually pour in the vegetable broth. Then, add the dill pickle juice. Mix everything together.
- Pressure Cook . Close the Instant Pot lid and set the valve to the “Sealing” position. Cancel the “Sauté” mode and select the “Pressure Cook” (or “Manual”) mode. Set the timer for 5 minutes on HIGH pressure.
- Quick Release . Once the cooking cycle is complete, perform a quick pressure release by carefully turning the valve to “Venting” to release the pressure.
- Add Creamy Goodness . Stir in the sour cream and heavy cream until well combined. This will make your soup extra creamy.
- Season and Serve . Season your dill pickle soup with dried dill weed, salt, and pepper to taste. Garnish with fresh dill if desired.
Get support & connect with our community on Facebook!
Nutrition
Don’t forget to check out my otherBest-selling Instant Pot Cookbooks!
Indian Instant Pot , Keto Instant Pot, Instant Pot Fast and Easy , Healthy Instant Pot & Vegetarian Instant Pot .


If you already signed up, you should have received an email with a password to give you unlimited access to our FREE Printable Library. The password is case sensitive. Enter it below and get printing!
Password:
Dill Pickle Soup Recipe | Instant Pot Dill Pickle Soup
Ingredients
- 4 cups Vegetable Broth
- 2 stalks Celery chopped
- 1 Onion diced
- 1 1/2 cups Chopped Dill Pickles
- 3 tbsp Unsalted Butter
- 1 cup Heavy Cream
- 1/2 cup Dill Pickle Juice
- 1/2 cup Sour Cream
- 3 cloves Garlic minced
- 1 tsp Dried Dill Weed
- 1/2 tsp Kosher Salt
- 1/4 tsp Black Pepper
- Fresh Dill for garnish
Instructions
- Prepare Your Ingredients . Start by gathering all the ingredients and preparing your vegetables. Chop the celery, onions, and dill pickles. Mince the garlic, and measure out the remaining ingredients.
- Sauté the Vegetables . Set your Instant Pot to the “Sauté” mode. Melt the butter and add the onions, celery, and garlic. Sauté for about 3-5 minutes until the vegetables start to soften.
- Add Pickles . Stir in the diced potatoes and chopped dill pickles. Continue sautéing for an additional 2 minutes.
- Pour in Broth and Pickle Juice . Gradually pour in the vegetable broth. Then, add the dill pickle juice. Mix everything together.
- Pressure Cook . Close the Instant Pot lid and set the valve to the “Sealing” position. Cancel the “Sauté” mode and select the “Pressure Cook” (or “Manual”) mode. Set the timer for 5 minutes on HIGH pressure.
- Quick Release . Once the cooking cycle is complete, perform a quick pressure release by carefully turning the valve to “Venting” to release the pressure.
- Add Creamy Goodness . Stir in the sour cream and heavy cream until well combined. This will make your soup extra creamy.
- Season and Serve . Season your dill pickle soup with dried dill weed, salt, and pepper to taste. Garnish with fresh dill if desired.
Dill Pickle Soup Recipe | Instant Pot Dill Pickle Soup https://twosleevers.com/dill-pickle-soup-recipe/

Are you ready to satisfy your pizza cravings without the guilt of high-carb crusts? Our Fathead Keto Pizza Crust recipe is here to delight your taste buds while keeping your carb count low. This versatile crust is perfect for those following a ketogenic or low-carb lifestyle and offers a satisfying pizza experience without compromising on flavor.

Why You’ll Love This Low Carb Pizza Solution
- Low in Carbs . This Fathead Keto Pizza Crust is a game-changer for anyone watching their carb intake. With almond flour as the main ingredient, it’s significantly lower in carbs compared to traditional wheat-based pizza crusts.
- Delicious Flavor . Don’t think for a second that you’re sacrificing taste for a low-carb option. The crust has a rich, nutty flavor that pairs beautifully with your favorite pizza toppings.
- Easy to Make . Impress your friends and family with this easy-to-whip-up pizza crust. It’s perfect for a quick keto-friendly pizza night at home.
Whether you’re following a keto lifestyle or just looking for a delicious and low-carb pizza alternative, this Fathead Keto Pizza Crust won’t disappoint. Get creative with your toppings, and enjoy a satisfying pizza night while staying on track with your dietary goals.
What Kind Of Keto Pizza Crust Has The Lowest Carbs?
When selecting or making a keto pizza crust, it’s essential to check the ingredient list and nutrition facts to ensure that the crust aligns with your specific dietary goals. Keep in mind that the exact carb count may vary depending on the recipe and the portion size, so always be mindful of your serving sizes to stay within your daily carb limit while enjoying a delicious keto pizza.
Here are some popular options for a keto pizza crust, but keep in mind, that the lowest way to enjoy pizza is to skip the crust completely.
- Almond Flour- A popular choice for keto pizza crusts because it’s low in carbs and high in healthy fats. This type of crust tends to have one of the lowest carb counts among keto-friendly options.
- Coconut Flour- Another low-carb alternative for making keto pizza crust. It’s lower in net carbs compared to traditional wheat flour. It can also be a great option for those who prefer a slightly coconut flavor.
- Cauliflower - While cauliflower pizza crust is generally lower in carbs than traditional wheat crust, it may have slightly more carbs compared to almond or coconut flour-based crusts.
- Psyllium Husk- An excellent source of dietary fiber and can be used to create a low-carb pizza crust. Psyllium husk crusts are known for their excellent texture and minimal carb content.
- Flaxseed Meal- Is very low in net carbs and is rich in fiber and healthy fats. It can be used as a base for keto pizza crusts along with other keto-friendly ingredients. Flaxseed meal crusts have a slightly nutty flavor and are known for their low carb content.
What Is Keto Pizza Crust Made Of?
Wondering what makes this pizza crust keto-friendly? The secret lies in the choice of ingredients:
- Almond Flour - Almond flour is a staple in many keto recipes due to its low carb content. It’s the primary flour in this crust and provides a great texture and flavor.
- Mozzarella Cheese - Mozzarella cheese is a crucial ingredient in Fathead dough recipes. It melts beautifully and helps bind the dough together without the need for traditional flour.
- Cream Cheese - Cream cheese adds richness and helps create a dough-like consistency.
- Egg - The egg in this recipe acts as a binding agent, helping the ingredients come together into a cohesive dough.
- Seasonings - Seasonings like garlic powder and dried oregano enhance the flavor of the crust, making it taste like traditional pizza dough.
How To Make Keto Pizza Crust
- Preheat the Oven . Start by preheating your oven to 425°F.
- Melt Cheeses . In a microwave-safe bowl, combine the shredded mozzarella and cream cheese. Microwave in 30-second intervals, stirring in between, until the cheeses are melted and well combined.
- Form Dough . Stir the almond flour, egg, garlic powder, dried oregano, salt, and pepper into the melted cheese mixture. Mix until it forms a dough.
- Roll Out the Dough . Place the dough between two sheets of parchment paper and roll it out into your desired pizza crust shape.
- Pre-Bake the Crust . Transfer the crust (with the parchment paper) onto a baking sheet or pizza stone. Pre-bake the crust in the oven for 10-12 minutes or until it starts to turn golden brown.
- Add Toppings . Remove the crust from the oven and add your favorite keto-friendly pizza toppings.
- Bake Again . Return the pizza to the oven and bake for an additional 8-10 minutes, or until the cheese is melted and bubbly.
- Slice and Serve . Once the pizza is done, let it cool for a minute or two, then slice and serve.

Tips And Tricks
Creating the perfect Fathead Keto Pizza Crust is easy, but here are some tips to ensure your success:
- Use Parchment Paper . Rolling out the dough between parchment paper prevents sticking and makes it easier to transfer the crust to the oven.
- Don’t Skip Pre-Baking . Pre-baking the crust before adding toppings ensures a crisp and sturdy base.
- Experiment with Toppings . Customize your keto pizza with your favorite low-carb toppings like pepperoni, olives, mushrooms, and more.
- Slicing . For clean slices, use a sharp knife or a pizza cutter.
Variations
The Fathead keto pizza crust is a versatile base that can be customized in various ways to suit your preferences and dietary needs. Here are some delicious variations and ideas to change it up:
- Spicy Jalapeño Crust - Incorporate finely chopped jalapeños or red pepper flakes into the dough for a spicy kick.
- Everything Bagel Crust - Season the crust with “everything bagel” seasoning for a delightful blend of flavors.
- Spinach and Artichoke Crust - Mix chopped cooked spinach and artichoke hearts into the dough for a creamy and veggie-loaded crust.
- Mexican-Inspired Crust - Add taco seasoning or chili powder to the dough for a Mexican twist.
What To Serve On Keto Pizza Crust
Keto pizza crust provides a versatile base for various toppings and flavors while keeping your carbohydrate intake low. Here are some delicious keto-friendly toppings and ideas to serve on it:
- Low-Carb Tomato Sauce - Use a keto-friendly tomato sauce with no added sugars. Look for options with minimal carbs or make your own by blending tomatoes with herbs and spices.
- Cheese - Load up on keto-friendly cheeses like mozzarella, cheddar, provolone, or goat cheese. Cheese adds creaminess and flavor to your pizza.
- Meats - Add protein with keto-approved meat toppings such as pepperoni, sausage, bacon, ground beef, or grilled chicken. These options are low in carbs and high in flavor.
- Vegetables - Load your pizza with low-carb vegetables like bell peppers, spinach, mushrooms, onions (in moderation), cherry tomatoes, artichoke hearts, and olives. These veggies add texture and nutrition without many carbs.
How Long Does it Last?
If you have leftover pizza with a Fathead crust, it’s best to store it in the refrigerator. Place the pizza slices or the entire pizza in an airtight container or wrap it tightly with plastic wrap.
Refrigerated Fathead pizza crust can last for 3 to 4 days.
Can You Freeze Fat Head Pizza Dough?
If you want to extend the shelf life further, you can freeze the Fathead pizza crust. Place the wrapped or containerized pizza crust in the freezer. When stored properly, a Fathead pizza crust can last for up to 2-3 months in the freezer.
When you’re ready to use the frozen Fathead pizza crust, remove it from the freezer and allow it to thaw in the refrigerator for a few hours or overnight. Once it’s thawed, you can reheat it in the oven or on a stovetop skillet to restore its crispiness.
Best Pizza Recipes
- Low Carb Pizza
- Keto Pizza Casserole
- Buffalo Chicken Pizza
- Mexican Pizza
- French Bread Pizza


Keto Pizza Crust | Fat Head Pizza Dough
Ingredients
- ▢ 1 1/2 cups Almond Flour
- ▢ 2 1/2 cups Mozzarella Cheese , Shredded
- ▢ 2 tbsp Cream Cheese
- ▢ 1 Egg
- ▢ 1 tsp Garlic Powder
- ▢ 1 tsp Dried Oregano
Instructions
- Preheat the Oven . Start by preheating your oven to 425°F.
- Melt Cheeses . In a microwave-safe bowl, combine the shredded mozzarella and cream cheese. Microwave in 30-second intervals, stirring in between, until the cheeses are melted and well combined.
- Form Dough . Stir the almond flour, egg, garlic powder, dried oregano, salt, and pepper into the melted cheese mixture. Mix until it forms a dough.
- Roll Out the Dough . Place the dough between two sheets of parchment paper and roll it out into your desired pizza crust shape.
- Pre-Bake the Crust . Transfer the crust (with the parchment paper) onto a baking sheet or pizza stone. Pre-bake the crust in the oven for 10-12 minutes or until it starts to turn golden brown.
- Add Toppings . Remove the crust from the oven and add your favorite keto-friendly pizza toppings.
- Bake Again . Return the pizza to the oven and bake for an additional 8-10 minutes, or until the cheese is melted and bubbly.
- Slice and Serve . Once the pizza is done, let it cool for a minute or two, then slice and serve.
Get support & connect with our community on Facebook!
Nutrition
Don’t forget to check out my other Ketocookbooks.
Keto Instant Pot, Keto Fat Bombs, Sweets, & Treats , and Easy keto in 30 minutes.

